Medivisor India Treatment Logo
+91 83682 47758
info@medivisorhealth.com
  • Home
    • About Us
    • Our Services
    • Our Team
    • Our Safety Measures
    • Loading treatments...
    • Loading hospitals...
    • Loading doctors...
    • Treatment Cost
    • Treatment Process
    • Visa Process
    • Travel Guide
    • FAQs
    • Why Medivisor
    • Success Stories
    • Patient Activities
    • Social Activities
    • News Coverage
    • Blog
  • Become a Partner

Medivisor India Treatment is a trusted New Delhi–based medical travel company assisting international patients with advanced, affordable, and seamless treatment in India.

  • Medivisor House 359, Sector 1, Vaishali, Ghaziabad, (Delhi/NCR) India
  • +91 8368 247 758
  • info@medivisorhealth.com

About Us

  • About Us
  • Our Services
  • Our Team
  • Our Medical Advisors
  • Our Safety Measures
  • Join Our Network
  • Contact Us

India Treatment

  • Hospitals
  • Treatments
  • Treatment Cost
  • Treatment Process
  • Visa Process
  • Travel Guide
  • FAQs
  • Why Medivisor

Gallery

  • Patient Testimonials
  • Patient Activities
  • News Coverage
  • Blog

Get in Touch

© 2026 Medivisor India Treatment. All rights reserved.

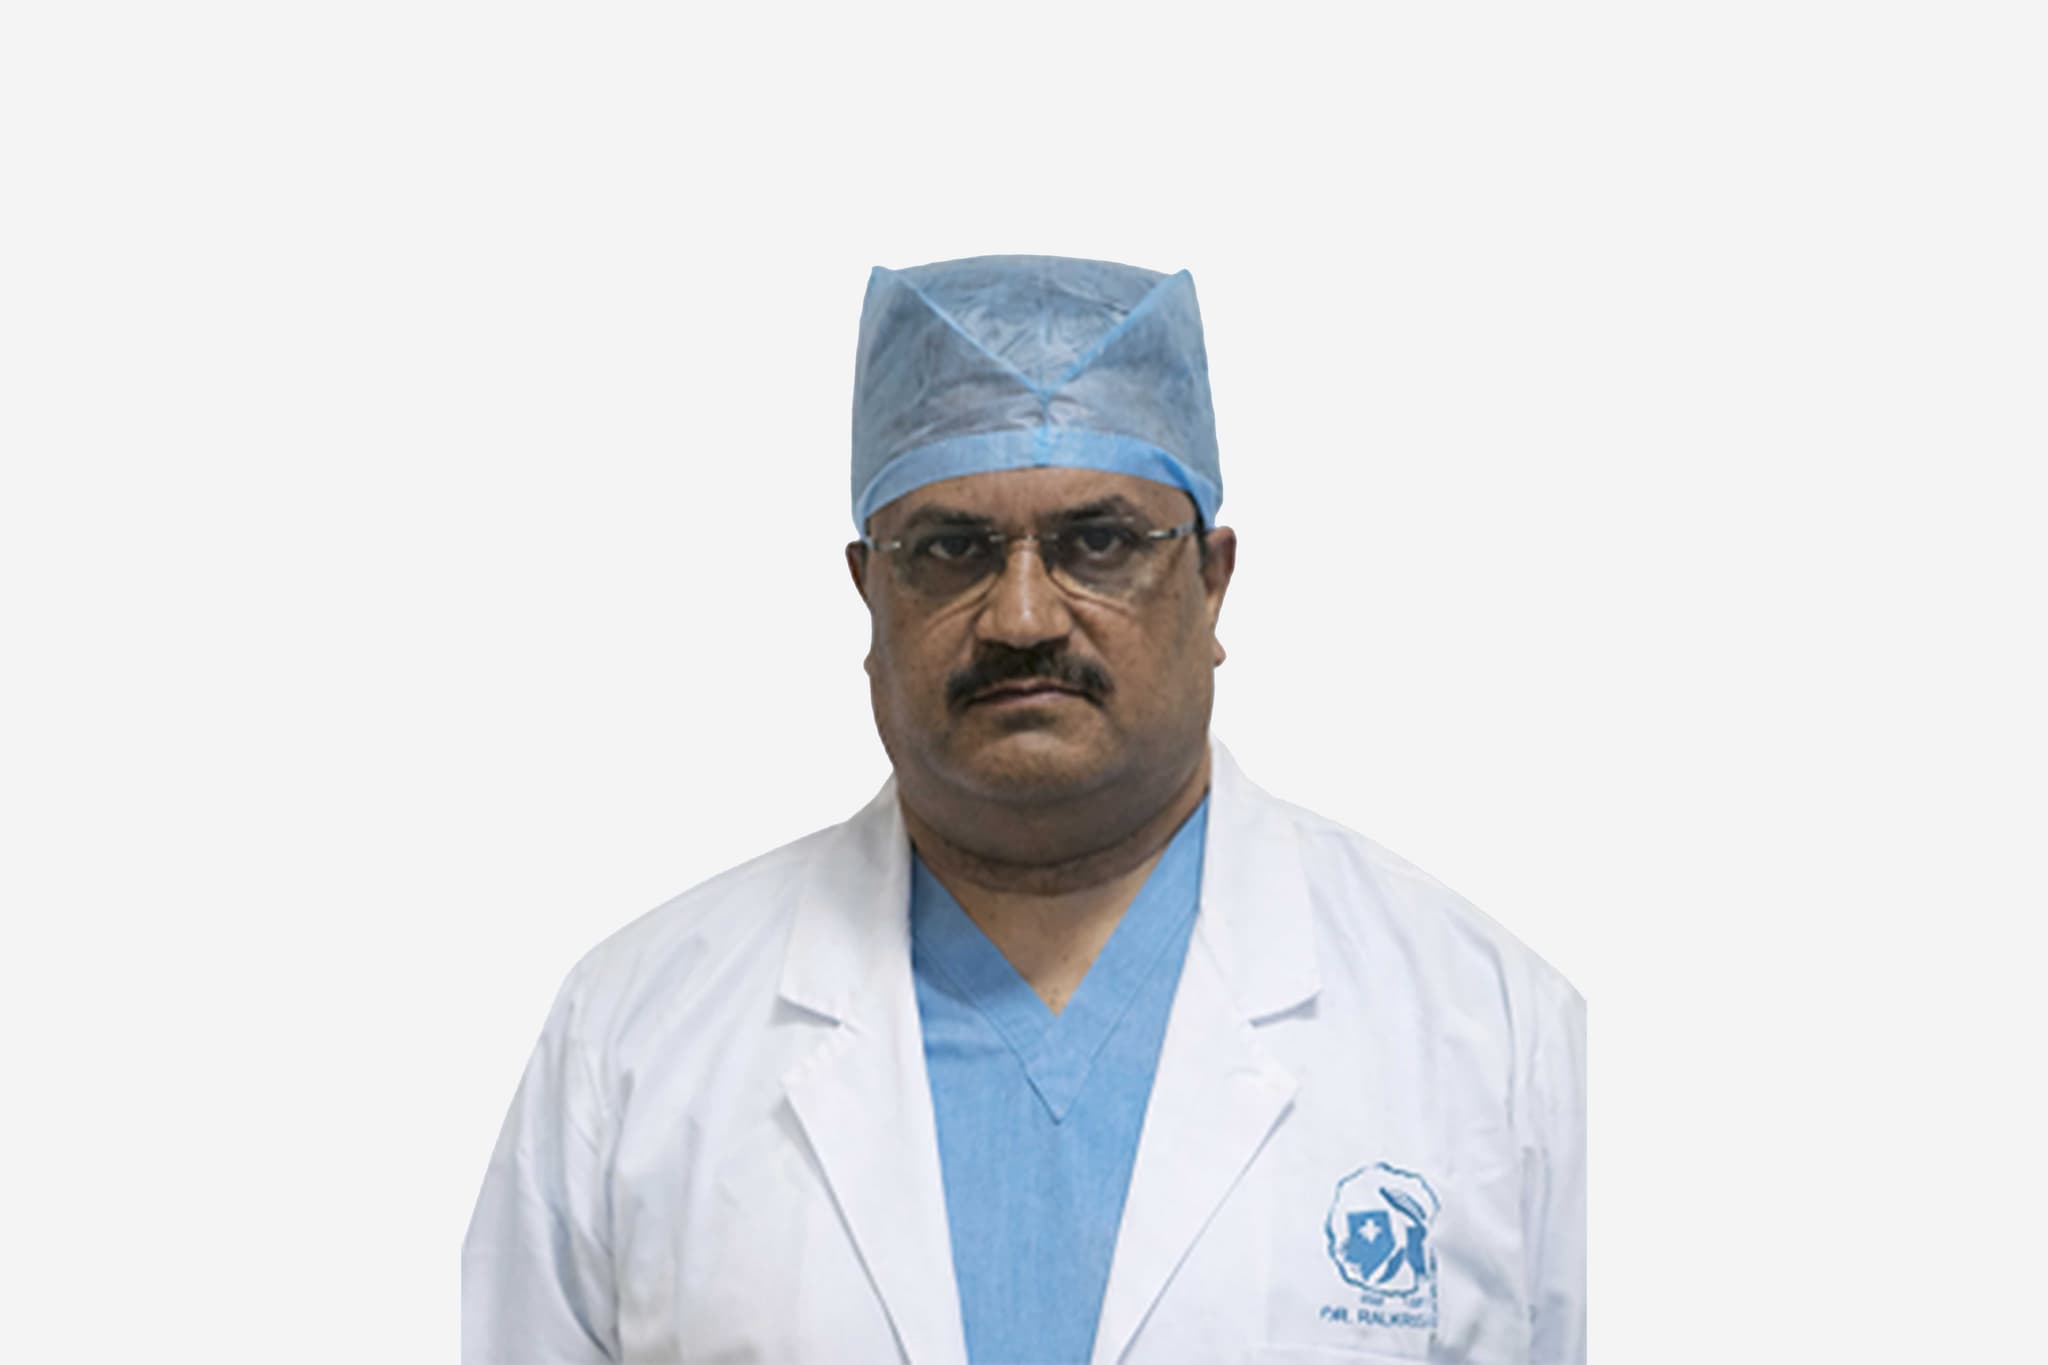
Dr Nitesh Jain

Urologist

Apollo Hospital, Greams Road, Chennai

Urologist

15+ years experience

Dr Nitesh Jain, Urologist at Apollo Hospital, Greams Road, Chennai - Apollo Hospitals
  1. Home
  2. Doctors
  3. Dr Nitesh Jain

About Dr Nitesh Jain

Dr. Jain is a highly distinguished specialist in urology and genitourinary surgery, recognized for his technical mastery in advanced medical and surgical interventions for the urinary tract and male reproductive system. He specializes in the comprehensive management of complex urological disorders, utilizing state-of-the-art diagnostic and surgical platforms to restore optimal physiological function and optimize patient outcomes.

Mastery in Advanced Urological and Genitourinary Surgery

He specializes in the advanced evaluation, diagnosis, and surgical treatment of a wide range of acute and chronic conditions affecting the genitourinary tract. His clinical practice leverages refined medical methodologies and exceptional surgical acumen to execute high-precision procedures, ensuring optimal structural alignment, restored physiological function, and long-term therapeutic success.

Precision Diagnostic Frameworks and Academic Excellence

Dr. Jain possesses profound expertise in identifying intricate structural, obstructive, and oncological pathologies within the urological system. His clinical methodology emphasizes a thorough, detail-driven assessment of each patient's unique anatomical profile, a precision-focused approach backed by a distinguished academic record of top-tier university recognition in urological surgery.

Innovation in Minimal Access and Endourological Interventions

His clinical focus incorporates the modern management of urological diseases through advanced minimal access and endourological pathways. By integrating specialized medical interventions with precise operative strategies, he targets complex internal pathologies to minimize structural tissue trauma, reduce post-operative discomfort, and facilitate accelerated recovery timelines.

Clinical Governance and Comprehensive Patient Care

Throughout his extensive career, Dr. Jain has combined modern urological innovations with rigorous clinical protocols to maintain the highest standards of safety. His evidence-based framework is tailored to deliver predictable, high-quality outcomes, establishing him as a trusted authority dedicated to providing comprehensive, patient-centric healthcare.

Dr. Nitesh Jain at a Glance

  • Specialist in Urology, Complex Genitourinary Surgery, and Minimal Access Interventions.

  • Extensive experience delivering dedicated specialist services within the field of urology.

  • Recognized for exceptional academic excellence and remarkable performance in surgical disciplines.

  • Expert in advanced urological diagnostic mapping and precision-guided treatment pathways.

  • Focused on utilizing modern clinical and operative methodologies to optimize patient recovery outcomes.

  • Dedicated to delivering comprehensive, evidence-based clinical governance and patient care.

MBBS
MS - General Surgery
M.Ch - Urology
Board Certified in Urologist

No awards & achievements available
Affiliated Hospitals

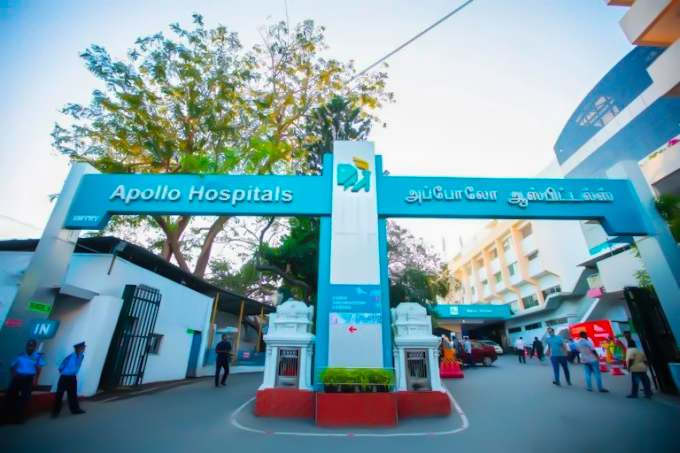
Apollo Hospital, Greams Road, Chennai

Multi Specialty

Chennai, Tamil Nadu

1983

Estd.

560+

Beds

300+

Doctors

May we help you?

Enter digits only (6-15 digits). We'll add your country code.

Related Treatments

URS (Ureteroscopy)
URS (Ureteroscopy)

URS (Ureteroscopy) is a minimally invasive surgical procedure used to diagnose and treat issues in the urinary tract, most commonly kidney stones located in the ureter or kidney. Because the procedure utilizes the body's natural openings, it requires no external incisions or surgical cuts. This advanced endoscopic approach allows urologists to reach and treat stones that are too large or too high to pass on their own, often providing immediate relief from renal colic.

When You Should Consider Ureteroscopy

  • Obstructing Ureteral Stones: When a stone is stuck in the ureter, causing severe pain, nausea, or potential kidney damage.

  • Large Kidney Stones: For stones located within the kidney that are unlikely to pass naturally or are causing chronic discomfort.

  • Failed Shockwave Therapy: If previous non-invasive treatments (like ESWL) have failed to break the stone into small enough pieces.

  • Diagnostic Necessity: To investigate the cause of blood in the urine (hematuria) or to biopsy suspicious lesions within the ureter or renal pelvis.

  • Bilateral Stones: When stones are present in both ureters, URS can sometimes address both sides in a single surgical session.

How It Is Performed

  • Access: A urologist inserts a thin, flexible, or rigid lighted telescope called a ureteroscope through the urethra and bladder, guiding it carefully up into the ureter or kidney.

  • Anesthesia: The surgery is typically performed under general anesthesia and usually takes between 30 minutes to 2 hours, depending on the size and number of stones.

  • Visualization: A sterile saline solution is used to gently expand the bladder and ureter, providing a clear 3D view of the stones and the urinary tract lining.

  • Treatment:
    Small Stones: These are captured and removed whole using a specialized tiny wire basket device.
    Larger Stones: These are fragmented into tiny, dust-like pieces using a high-precision Holmium laser beam.

  • Stone Extraction: Once fragmented, the pieces are either extracted with the basket or left to pass naturally and painlessly in the urine.

  • Stent Placement: Frequently, a small temporary tube called a ureteral stent (JJ stent) is placed in the ureter at the end of the procedure to ensure proper urine drainage and to manage internal swelling.

Pre-Procedure Preparation

  • Imaging (CT or KUB): High-resolution scans to determine the exact size, density, and location of the stones.

  • Urine Culture: To ensure there is no active urinary tract infection (UTI) before the instruments are introduced.

  • Medication Audit: You may be asked to stop taking blood thinners (like aspirin or warfarin) several days before the procedure to minimize bleeding.

  • Fasting: Following "nothing by mouth" instructions for 8 hours prior to your scheduled anesthesia.

  • Hydration: Your doctor may encourage increased fluid intake in the days leading up to the procedure to help flush the urinary system.

Tests Before Ureteroscopy

  • Urinalysis: To check for signs of infection, blood, or crystals in the urine.

  • Blood Panels: A routine check of your blood count, electrolytes, and kidney function (creatinine and BUN levels).

  • ECG: A standard heart check to confirm cardiovascular stability for the duration of the procedure.

  • Coagulation Profile: To ensure your blood clots normally, which is essential for a safe endoscopic procedure.

Life After Ureteroscopy

  • Recovery Timeline: URS is often an outpatient procedure, allowing most patients to go home the same day. Most can resume light activities within 2 to 3 days, with a full recovery typically taking one week.

  • Initial Symptoms: For the first 24–48 hours, it is normal to experience mild pelvic pain, pinkish or reddish blood in the urine, and a frequent urge to urinate.

  • Critical Hydration: It is essential to drink 2–3 liters of water daily to flush out any remaining stone fragments and residual blood.

  • Stent Removal: If a stent was placed, it is typically removed in a quick, separate outpatient procedure 4 to 14 days after the surgery.

  • Activity Restrictions: Avoid heavy lifting and strenuous exercise for at least one week to allow the ureter to heal and reduce the risk of bleeding.

Why Specialized Treatment Is Highly Effective

  • Immediate Stone Clearance: Unlike medications, URS offers the fastest way to physically remove an obstructing stone and stop the associated pain.

  • No Surgical Scars: By using the body's natural pathways, there is zero impact on your physical appearance and no wound care is required.

  • High Success Rate: Modern laser technology can break even the hardest stones (such as calcium oxalate monohydrate) that other treatments cannot touch.

  • Protects Kidney Function: Rapidly removing an obstruction prevents the backup of urine (hydronephrosis), which can lead to permanent kidney scarring or infection.

  • Precision Mapping: The high-definition cameras on modern ureteroscopes allow for a thorough inspection of the entire upper urinary tract, ensuring no small stones are left behind.

Percutaneous Nephrolithotomy (PCNL)

Percutaneous Nephrolithotomy (PCNL) is a minimally invasive "keyhole" surgery specifically used to remove large kidney stones—usually those over 2 cm—that cannot be passed naturally or treated effectively with standard shockwave therapy. This procedure allows surgeons to reach the kidney through a tiny incision in the back, providing a direct route to extract complex or "staghorn" stones that would otherwise require major open surgery.

When You Should Consider PCNL

  • Large Kidney Stones: Specifically those larger than 2 cm in diameter which are too substantial for laser ureteroscopy or shockwave lithotripsy.

  • Staghorn Calculi: Complex stones that branch out to fill the various drainage channels (calyces) of the kidney.

  • Failed Previous Treatments: When other non-invasive methods have failed to break or clear the stone.

  • Stones in Diverticula: When a stone is trapped in a small outpouching of the kidney that is difficult to access through the ureter.

  • Cystine or Stones of High Density: Very hard stones that are resistant to being broken by external sound waves.

How It Is Performed

  • Anesthesia: The surgery is performed under general anesthesia, ensuring you are completely asleep and comfortable throughout the procedure.

  • Positioning: You are typically placed in a prone (face-down) or supine (face-up) position to allow the surgeon precise access to the kidney through the flank.

  • The Incision: A small, "keyhole" incision (approximately 1 cm) is made in your flank area (the side of your back).

  • Access & Fragmentation:
    A protective sleeve is inserted through the incision directly into the kidney's collecting system.
    A nephroscope (a specialized thin camera) is passed through the sleeve to locate the stone under high magnification.
    If the stone is too large to remove whole, the surgeon uses a lithotripter (a laser, ultrasound, or pneumatic device) to fragment the stone into smaller, manageable pieces.

  • Extraction: The fragments are then physically removed from the kidney using specialized graspers or suction.

  • Drainage: To ensure the kidney heals properly, a nephrostomy tube (draining to an external bag) or an internal ureteral stent is often left in place temporarily.

Pre-Procedure Preparation

  • Medical Evaluation: Comprehensive blood and urine tests to rule out active infection and assess kidney function.


  • Advanced Mapping: A high-resolution CT scan or intravenous pyelogram (IVP) to map the exact 3D location of the stones and the surrounding anatomy.

  • Antibiotic Protocol: A preventative dose of antibiotics is administered to minimize the risk of post-surgical infection.

  • Fasting: Adhering to "nothing by mouth" instructions after midnight on the night before your surgery.

  • Medication Audit: You will be asked to stop taking blood thinners (like aspirin, warfarin, or clopidogrel) several days before the procedure to prevent bleeding.

Tests Before PCNL

  • Urine Culture: Essential to confirm the urine is sterile before entering the kidney with surgical instruments.

  • CT Stone Protocol: A specialized scan to determine the "Hounsfield units" (density) of the stone, which helps the surgeon choose the right fragmentation tool.

  • Complete Blood Count (CBC): To establish a baseline for your red and white blood cells.

  • ECG: A standard heart check to confirm cardiovascular stability for a procedure that typically lasts 1 to 4 hours.

Life After PCNL

  • Hospital Stay: Most patients stay in the hospital for 1 to 2 days for close monitoring of kidney drainage and comfort levels.

  • Tube Management: If a nephrostomy tube was used, it is typically removed before you leave the hospital or at a quick follow-up visit a few days later.

  • Initial Symptoms: It is normal to see small amounts of blood in your urine (hematuria) or feel moderate soreness at the incision site for 1–2 weeks.

  • Activity Restrictions: Avoid strenuous activity, heavy exercise, or lifting anything heavier than 4 kg (approx. 9 lbs) for at least 2 weeks.

  • Hydration: Drinking plenty of fluids is critical to help flush out any remaining tiny microscopic stone fragments.

  • Follow-Up: A check-up is scheduled for 4 to 6 weeks after surgery, often including an X-ray or ultrasound to confirm the kidney is stone-free and functioning correctly.

Why Specialized Treatment Is Highly Effective

  • Highest Clearance Rate: PCNL offers the highest "stone-free" rate for large and complex stones compared to any other surgical or non-surgical method.

  • Direct Extraction: Because stones are physically removed rather than just broken, there is a lower risk of fragments getting stuck in the ureter later.

  • Minimally Invasive: Despite treating large stones, the "keyhole" approach means less pain, smaller scars, and a much faster recovery than traditional open kidney surgery.

  • One-Step Solution: Even the largest staghorn stones can often be cleared in a single surgical session.

  • Protects Kidney Health: Rapidly clearing an obstructing stone prevents long-term pressure damage (hydronephrosis) and reduces the risk of recurrent kidney infections.

Extracorporeal Shockwave Lithotripsy – Non-Surgical

Extracorporeal Shock Wave Lithotripsy (ESWL) is a purely non-invasive medical procedure. It is the only treatment that can break kidney stones from outside the body, using high-energy acoustic pulses.

When You Should Consider ESWL

  • Stone Size: ESWL is most effective for kidney stones that are under 2 cm.

  • Stone Location: Ideal for stones located in the kidney or the upper part of the ureter.

  • Symptomatic Stones: When stones cause persistent pain, urinary tract infections, or localized blockage.

  • Patient Preference: For individuals seeking a treatment option that requires no incisions, no catheters, and no internal scopes.

  • Stone Composition: Best suited for stones that are not excessively hard, such as those primarily composed of uric acid or certain calcium clusters.

Pre-Procedure Preparation

  • Imaging & Mapping: The urologist uses Fluoroscopy (continuous X-ray) or Ultrasound to find the stone's exact 3D coordinates.

  • The "Coupling" Process: A water-filled cushion or a thick layer of conductive gel is placed against your back to transmit energy into the body.

  • Pain Management: While non-surgical, you are usually given sedation or a local anaesthetic block to keep you still and relaxed during the "thumping" sensation.

  • Medication Audit: Pausing blood thinners (like aspirin or warfarin) for several days prior to prevent bruising or bleeding around the kidney.

  • Fasting: Maintaining "nil per oral" (NPO) status for 6–8 hours before the procedure if sedation is being administered.

How ESWL Is Performed

  • Shockwave Generation: A machine called a Lithotripter creates thousands of targeted shockwaves (usually 2,000 to 3,000 pulses).

  • The "Ramping" Technique: The doctor starts at a low power level to "soften" the stone and slowly increases the intensity to protect kidney tissue.

  • Direct Stress: Physical pressure from the acoustic pulses travels through the liquid "bridge" to crack the stone.

  • Cavitation: Tiny bubbles form and collapse on the stone's surface, acting like "micro-hammers" to turn the stone into "sand" or "gravel."

  • Duration: The entire fragmentation process usually takes 45 to 60 minutes.

Pre-Surgery Tests

  • KUB X-ray: A standard X-ray of the Kidneys, Ureters, and Bladder to confirm the stone is "radio-opaque" (visible to X-rays).

  • Renal Ultrasound: To check for "hydronephrosis" (swelling of the kidney) caused by the stone.

  • Non-Contrast CT Scan: The gold standard for measuring the "Hounsfield Units" (hardness) of the stone to predict if it will break.

  • Urine Culture: To ensure there is no active infection, as breaking an infected stone can release bacteria into the bloodstream.

  • Coagulation Profile: Blood tests to ensure your blood clots normally before the high-energy pulses are applied.

Life After ESWL (Recovery & Fragment Passage)

  • Observation: You stay in a recovery room for 1–2 hours to monitor for any reaction to the sedation or severe internal bruising.

  • Hydration Therapy: You are instructed to drink 3 to 4 litres of water daily to "wash out" the stone dust.

  • Medical Expulsive Therapy (MET): You are often prescribed Alpha-blockers (like Tamsulosin) to relax the ureter so fragments can pass with less pain.

  • Straining Urine: You will be given a fine-mesh strainer to catch pieces for chemical analysis to determine the stone's mineral type.

  • Haematuria: It is normal to see blood in the urine for 24–48 hours as fragments move through the urinary tract.

  • Follow-up Imaging: An X-ray or Ultrasound is typically done 2 to 4 weeks later to ensure the kidney is "Stone-Free."

Why Specialized Treatment Is Highly Effective

  • Zero Incisions: As a completely extracorporeal treatment, there is a significantly lower risk of hospital-acquired infections compared to surgery.

  • Quick Recovery: Most patients return to work and normal activities within 24–48 hours after the procedure.

  • Precision Targeting: Advanced lithotripsy technology allows for real-time tracking, adjusting the focus even as the patient breathes.

  • Avoidance of General Anaesthesia: Many cases can be performed under light sedation, making it safer for elderly patients or those with heart conditions.

  • Repeatable Treatment: If a stone is particularly large, ESWL can be safely repeated or combined with other minor procedures to ensure total clearance.

Mini-PCNL / Micro-PCNL

Mini-PCNL is a "small-access" surgery used for stones between 1 cm and 2.5 cm. Micro-PCNL is an "all-in-one" needle surgery, usually reserved for stones around 1 cm to 1.5 cm.

When You Should Consider Mini-PCNL or Micro-PCNL

  • Stone Size: Ideal for stones between 1 cm and 2.5 cm that are too large for ESWL but don't require standard PCNL.

  • Stone Hardness: When stones are too dense to be broken from outside the body by shockwaves.

  • Lower Pole Stones: Particularly effective for stones located in the bottom part of the kidney which are difficult to clear otherwise.

  • Failed Previous Treatments: When non-invasive methods like ESWL have failed to fragment the stone.

  • Patient Preference: For those seeking a higher "stone-free rate" with minimal scarring and a faster return to daily activities.

Methods of Mini and Micro-PCNL

  • Mini-PCNL Access: A tiny incision (about 5 mm to 8 mm) is made in the flank area to allow for a thin telescope.

  • Micro-PCNL Access: Uses a specialized 1.5 mm needle—about the thickness of an injection needle—to enter the kidney without a traditional incision.

  • Laser Fragmentation: Utilization of high-power Holmium or Thulium Lasers to break stones into smaller pieces or fine dust.

  • Vortex Suction: A mechanism used in Mini-PCNL to automatically pull fragments out through the sheath using saline irrigation.

  • Dusting Technique: In Micro-PCNL, the laser turns the stone into a fine powder that washes out naturally through urine.

How the Procedure Is Performed

  • Anesthesia: Both procedures are performed under General Anesthesia to ensure the patient is completely asleep and still.

  • Imaging Guidance: Surgeons use Live X-ray (Fluoroscopy) and Ultrasound simultaneously to guide the needle or scope to the stone.

  • Nephroscopy: A thin Mini-Nephroscope or a tiny Micro-Lens camera is inserted directly into the kidney to visualize the stone.

  • Fragmentation: The laser fiber is passed through the scope or needle to precisely target and break the stone.

  • Stent Placement: In Mini-PCNL, a small internal JJ stent may be left for 1–2 weeks to ensure proper kidney drainage.

Pre-Procedure Preparation

  • Fasting: Maintaining a "nil per oral" status for at least 8 hours before the procedure for anesthesia safety.

  • Medication Review: Suspending blood thinners several days in advance to minimize the risk of bleeding during the kidney puncture.

  • Antibiotic Prophylaxis: Receiving a dose of intravenous antibiotics just before the procedure to prevent urinary tract infections.

  • Hydration: Ensuring adequate fluid intake in the days leading up to the surgery to maintain good kidney function.

  • Clearance: Obtaining medical clearance, especially for patients with pre-existing heart or lung conditions.

Pre-Surgery Tests

  • NCCT KUB: A non-contrast CT scan to determine the exact size, location, and hardness (Hounsfield units) of the stone.

  • Urine Culture: To confirm the urine is sterile; surgery is postponed if an active infection is detected.

  • Coagulation Profile: Blood tests (PT/INR) to ensure the blood clots normally before making the kidney access.

  • Renal Function Test: Checking Creatinine and Urea levels to assess how well the kidneys are functioning.

  • ECG and Chest X-ray: Standard pre-anesthetic tests to ensure heart and lung fitness for general anesthesia.

Life After Mini and Micro-PCNL

  • Hospital Stay: Typically 24 hours for Mini-PCNL, while Micro-PCNL is often performed as a daycare (same-day) procedure.

  • Hydration Therapy: Drinking 3–4 litres of water daily is essential to flush out laser-dusted particles and fragments.

  • Physical Activity: Most patients return to light desk work within 3–4 days but should avoid heavy lifting for 2 weeks.

  • Urine Appearance: Expect light-pink or blood-tinged urine for 1–2 days as the kidney heals.

  • Stent Removal: If a JJ stent was placed, a minor follow-up procedure is required to remove it after 7–14 days.

Benefits of Mini and Micro-PCNL

  • High Stone-Free Rate: Provides a much higher chance of complete stone removal in a single session compared to ESWL.

  • Minimal Pain: Small access points lead to significantly less post-operative pain and a reduced need for painkillers.

  • Cosmetic Results: The incisions are so small (or non-existent in Micro-PCNL) that they often require no stitches and leave no visible scars.

  • Safety: Lower risk of bleeding and kidney damage compared to traditional, large-tract PCNL.

  • Fast Recovery: Allows for a quicker discharge from the hospital and a rapid return to a normal lifestyle.

TURP (Transurethral Resection of Prostate)

Transurethral Resection of the Prostate (TURP) is a surgical treatment used to treat urinary problems caused by an enlarged prostate (Benign Prostatic Hyperplasia or BPH). It is often called the "Gold Standard" because it is highly effective and requires no external incisions.

When You Should Consider TURP

  • Moderate to Severe BPH Symptoms: When urinary frequency, urgency, or a weak stream significantly impact your quality of life.

  • Incomplete Bladder Emptying: If you consistently feel that your bladder is not empty after urinating, which can lead to infections.

  • Recurrent Urinary Tract Infections: When an enlarged prostate causes stagnant urine that leads to frequent UTIs.

  • Bladder Stones or Kidney Damage: When the obstruction is severe enough to cause secondary complications in the urinary system.

  • Failure of Medication: If alpha-blockers or 5-alpha reductase inhibitors are no longer providing sufficient relief.

Methods of TURP

  • Monopolar TURP: The traditional method using a wire loop and an electric current with glycine irrigation fluid.

  • Bipolar TURP: A modern advancement using saline irrigation, which significantly reduces the risk of "TURP Syndrome" and allows for safer treatment of larger prostates.

  • Resectoscope Access: A thin, lighted tube is inserted through the tip of the penis into the urethra, requiring no external cuts or stitches.

  • Wire Loop Resection: An electric current is passed through a loop to precisely "shave" away excess tissue blocking the urine flow.

  • Continuous Irrigation: Sterile fluid is pumped through the scope during surgery to wash away blood and tissue fragments.

How the Procedure Is Performed

  • Anesthesia: Performed under Spinal Anesthesia (numbing from the waist down) or General Anesthesia to ensure the patient is completely comfortable.

  • Insertion: The surgeon guides the resectoscope through the urethra until it reaches the prostate gland.

  • Tissue Removal: The obstructing lobes of the prostate are shaved into small chips using the electrified wire loop.

  • Fragment Flushing: The shaved tissue pieces are gathered and flushed out of the bladder at the conclusion of the surgery.

  • Catheterization: A three-way Foley catheter is inserted to allow for continuous bladder irrigation immediately following the procedure.

Pre-Procedure Preparation

  • Medical Evaluation: Includes a Uroflowmetry test to measure urine speed and an ultrasound to determine the exact prostate size.

  • Medication Adjustment: You must stop blood thinners (like aspirin or warfarin) 5–7 days before surgery to prevent internal bleeding.

  • Fasting: Maintaining a "nil per oral" status for 6–8 hours before the procedure for anesthesia safety.

  • Antibiotic Prophylaxis: A preventative dose of antibiotics is given intravenously just before surgery to minimize infection risks.

  • PSA Testing: A blood test to screen for prostate-specific antigen levels prior to surgical intervention.

Pre-Surgery Tests

  • Urine Routine & Culture: To ensure there is no active infection before entering the urinary tract.

  • Prostate Ultrasound (TRUS): To map the dimensions of the prostate and plan the volume of tissue to be resected.

  • Cystoscopy: Occasionally performed beforehand to visualize the narrowness of the urethra and the shape of the prostate.

  • Blood Coagulation Profile: Testing PT/INR and Platelet counts to ensure safe surgical healing.

  • Basic Metabolic Panel: Checking kidney function (Creatinine) and electrolytes, especially important for managing irrigation fluid balance.

Life After TURP (Recovery & Risks)

  • Hospital Stay: Most patients stay for 1 to 2 days until the urine is clear and the catheter can be safely removed.

  • Bladder Irrigation: While in the hospital, a sterile fluid "washes" the bladder through the catheter to prevent blood clots.

  • Hydration Therapy: Drinking at least 2–3 litres of water daily at home is essential to flush the healing surgical site.

  • Activity Restrictions: Avoid heavy lifting (over 5 kg) or vigorous exercise for 4–6 weeks to prevent secondary bleeding.

  • Sexual Activity: Avoid sexual intercourse for 4 weeks to allow the internal area to seal completely.

  • Urination Changes: It is normal to feel a temporary burning sensation or urgency for a few weeks as the raw prostatic bed heals.

Why Specialized Treatment Is Highly Effective

  • Immediate Symptom Relief: Most patients experience a significantly stronger urine stream and better bladder emptying almost immediately after recovery.

  • No External Scarring: Because the surgery is entirely internal, there are no visible scars or wound care requirements on the skin.

  • Long-Term Durability: TURP results typically last for 15 years or more, often providing a permanent solution for BPH symptoms.

  • Bipolar Safety: Modern Bipolar technology allows surgeons to treat patients with heart conditions or larger prostates more safely than ever before.

  • Diagnostic Benefit: The shaved tissue is always sent for biopsy to confirm the absence of any hidden cancerous cells.

Laser Prostate Surgery (HoLEP / ThuLEP)

Laser prostate surgery, specifically HoLEP (Holmium Laser Enucleation of the Prostate) and ThuLEP (Thulium Laser Enucleation of the Prostate), is a modern, bloodless alternative to traditional TURP. Instead of shaving the prostate in small pieces, the laser "peels" the obstructing tissue away as a whole, making it highly effective for even the largest prostate glands.

When You Should Consider Laser Prostate Surgery

  • Very Large Prostate: Especially effective for prostates over 80–100 grams that are too large for standard TURP.

  • High Risk of Bleeding: Ideal for patients who cannot safely stop blood thinners, due to the laser's superior vessel-sealing properties.

  • Severe Urinary Retention: When a patient is completely unable to pass urine and requires a catheter.

  • Recurrent Prostate Issues: For those who have had previous prostate surgery and are experiencing regrowth of obstructing tissue.

  • Desire for Fast Recovery: For patients who want a shorter hospital stay and quicker removal of the urinary catheter.

Methods of Laser Prostate Surgery

  • HoLEP (Holmium Laser): Uses a "pulsed" laser beam, which is excellent for "blunt dissection" (peeling) the prostate lobes away from the capsule.

  • ThuLEP (Thulium Laser): Uses a "continuous wave" laser that provides smoother cutting and even better blood vessel sealing (hemostasis).

  • Enucleation Technique: The surgeon uses the laser to peel away the entire obstructing lobe, similar to removing the flesh of an orange from its peel.

  • Morcellation: A specialized "blender-like" device is used to grind the large peeled-off lobes inside the bladder and vacuum them out.

  • Transurethral Access: The entire procedure is performed through the urethra using a laser-integrated scope, requiring no external incisions.

How the Procedure Is Performed

  • Anesthesia: Performed under General Anesthesia or Spinal Anesthesia to ensure the patient is completely still and pain-free.

  • Laser Dissection: The laser fiber is used to cut along the "capsule" of the prostate, separating the obstructing tissue from the healthy outer shell.

  • Simultaneous Cauterization: As the laser cuts, it seals every blood vessel it touches, resulting in minimal to no blood loss.

  • Intra-vesical Morcellation: Once the tissue is moved into the bladder, the morcellator sucks up and removes the fragments in a matter of minutes.

  • Final Inspection: The surgeon verifies that the bladder is clear of debris and that there is no active bleeding before finishing.

  • Catheter Placement: A Foley catheter is inserted at the end of the procedure, which is typically removed within 24 hours.

Pre-Procedure Preparation

  • Imaging & Size Check: An Ultrasound (TRUS) or MRI is performed to measure the exact prostate volume and map the anatomy.

  • Urine Culture: A sterile urine sample is mandatory; any active infection must be treated with antibiotics before the laser is used.

  • Medication Audit: Patients on Aspirin or Warfarin usually stop these 5–7 days prior, though some laser cases can proceed while on thinners if necessary.

  • Fasting: Maintaining a "nil per oral" (NPO) status for 6–8 hours before the operation for anesthesia safety.

  • Medical Clearance: Ensuring heart and lung fitness for the procedure, especially since it is often performed on older patients.

Pre-Surgery Tests

  • Uroflowmetry: To measure the baseline speed and force of the urine stream before surgery.

  • Post-Void Residual (PVR) Volume: An ultrasound test to see how much urine remains in the bladder after peeing.

  • PSA Blood Test: To screen for prostate-specific antigen levels and rule out other underlying conditions.

  • Basic Metabolic Panel: Checking kidney function (Creatinine) and electrolytes to ensure the body can handle the procedure.

  • Coagulation Profile: Testing the blood's ability to clot (PT/INR) to ensure a safe, bloodless surgical outcome.

Life After Laser Prostate Surgery (Recovery & Risks)

  • Hospital Stay: Usually a 24-hour stay; many patients are discharged the very next morning after the catheter is removed.

  • Immediate Results: Most patients notice an immediate, forceful urine stream once the initial catheter is taken out.

  • Hydration Therapy: Drinking 2.5–3 litres of water daily for the first week is essential to flush out any minor laser-charred debris.

  • Activity Rules: You can usually return to desk work within 3–5 days, but avoid heavy lifting (over 10 kg) for at least 2 weeks.

  • Retrograde Ejaculation: This is common (90% of cases), where semen travels into the bladder during orgasm; it is harmless but affects fertility.

  • Temporary Urgency: A frequent "urge" to pee or minor leaking may occur for the first few weeks as the internal capsule heals.

Why Specialized Treatment Is Highly Effective

  • Superior Hemostasis: The laser's ability to seal vessels as it cuts makes this the safest option for patients with bleeding disorders or heart issues.

  • Complete Tissue Removal: By following the natural "capsule," laser surgery removes more obstructing tissue than TURP, reducing the risk of regrowth.

  • Shorter Catheter Time: Most patients are catheter-free within 24 hours, significantly reducing the risk of catheter-associated infections.

  • Treatment of Any Size: Unlike other minimally invasive methods, HoLEP and ThuLEP can treat prostates of virtually any size (even over 200 grams).

  • Minimal Side Effects: Lower risk of "TURP Syndrome" and other fluid-balance complications due to the use of saline irrigation.

Transurethral Incision of the Prostate (TUIP

Transurethral Incision of the Prostate (TUIP) is a specialized surgical treatment for men with urinary symptoms caused by a moderately enlarged prostate (usually less than 30 grams) or a narrowing of the bladder neck. Unlike TURP or Laser surgery, no tissue is removed; instead, the "tight" area is widened to allow for better flow.

When You Should Consider TUIP

  • Small to Moderately Enlarged Prostate: Specifically indicated for prostates under 30 grams where the blockage is at the bladder neck.

  • Bladder Neck Obstruction: When the primary cause of urinary symptoms is a narrowing of the opening between the bladder and the urethra.

  • Preservation of Fertility: For men who wish to minimize the risk of retrograde ejaculation (dry orgasm) often associated with other prostate surgeries.

  • High-Risk Patients: For those who may not tolerate longer surgical procedures, as TUIP is significantly faster than TURP.

  • Failure of Medical Management: When medications like alpha-blockers are no longer providing sufficient relief for urinary flow.

Methods of TUIP

  • Cystoscope Access: A thin, lighted scope is inserted through the tip of the penis into the urethra, requiring no external incisions.

  • Electric Knife Incision: The use of a specialized wire or knife to make one or two small, deep cuts (grooves) in the bladder neck.

  • Laser Incision: A modern alternative using a laser fiber to precisely cut the prostate and bladder neck tissue.

  • Channel Widening: Unlike "shaving" tissue, the mechanism relies on making a structural cut that allows the bladder neck to "spring open."

  • Minimal Tissue Trauma: A technique that avoids the removal of prostate mass, leading to significantly less internal wounding.

How the Procedure Is Performed

  • Anesthesia: Performed under Spinal Anesthesia (numbing from the waist down) or General Anesthesia for patient comfort.

  • Insertion: The surgeon guides the cystoscope through the urethra until the junction of the bladder and prostate is visualized.

  • Creating Grooves: The surgeon makes precise incisions through the prostate and the muscle of the bladder neck.

  • Widening: By cutting the tight muscle ring, the urethral channel is widened, immediately reducing the resistance to urine flow.

  • Catheterization: A Foley catheter is placed at the end of the 20–30 minute procedure to assist with initial healing and drainage.

Pre-Procedure Preparation

  • Prostate Sizing: A Transrectal Ultrasound (TRUS) is essential to confirm the prostate is small enough (under 30g) for this technique.

  • Urodynamic Study: A test to confirm that the blockage is at the bladder neck and not caused by a weak bladder muscle.

  • Medication Review: You must stop blood thinners (like Aspirin or Warfarin) 5–7 days prior to surgery to prevent bleeding.

  • Fasting: Maintaining a "nil per oral" status for 6–8 hours before the procedure for anesthesia safety.

  • Antibiotic Prophylaxis: A dose of antibiotics is given intravenously just before surgery to prevent urinary tract infections.

Pre-Surgery Tests

  • Uroflowmetry: To measure the speed and force of the urine stream to establish a baseline for post-operative comparison.

  • Post-Void Residual (PVR): An ultrasound to measure how much urine is left in the bladder after peeing.

  • Urine Culture: To ensure the urinary tract is sterile before the procedure; any infection must be treated first.

  • Basic Metabolic Panel: Checking kidney function (Creatinine) and electrolytes to ensure surgical fitness.

  • Coagulation Profile: Testing the blood's ability to clot (PT/INR) to ensure safe healing of the internal incisions.

Life After TUIP (Recovery & Risks)

  • Hospital Stay: Often performed as a Daycare (Same-Day) procedure, or a maximum stay of 24 hours.

  • Catheter Removal: The Foley catheter is typically removed within 24 to 48 hours after the surgery.

  • Hydration Therapy: Drinking 2–3 litres of water daily is essential to flush the urinary tract as the "grooves" heal.

  • Activity Restrictions: Most patients can return to light work within 2–3 days but should avoid heavy lifting for 2 weeks.

  • Urinary Sensations: It is normal to feel a temporary urgency or stinging for the first few days post-surgery.

  • Fertility Preservation: Most men maintain normal ejaculation after TUIP, as the risk of retrograde ejaculation is much lower than with TURP.

Why Specialized Treatment Is Highly Effective

  • Rapid Recovery: Due to the minimal tissue trauma, patients experience a much faster return to normal activities than with traditional surgery.

  • High Safety Profile: With very little bleeding and a short operative time, TUIP is an excellent option for patients with minor health concerns.

  • Functional Success: Effectively treats the root cause of bladder neck obstruction, providing a forceful urine stream immediately.

  • No External Scars: The procedure is entirely internal, leaving no visible marks and requiring no wound care on the skin.

  • Preservation of Sexual Health: Offers the best chance of maintaining normal sexual function and fertility compared to other surgical BPH treatments.

Radical Prostatectomy (Open / Laparoscopic / Robotic)

Radical Prostatectomy is the surgical removal of the entire prostate gland and surrounding tissues, typically performed to treat Prostate Cancer. Unlike treatments for an enlarged prostate (BPH) which only remove the "core," this treatment removes the entire organ to ensure the cancer is fully eliminated.

When You Should Consider Radical Prostatectomy

  • Localized Prostate Cancer: When imaging confirms the cancer is confined within the prostate capsule (Stages T1 or T2).

  • Aggressive Disease: For patients with a higher Gleason Score who require definitive surgical removal rather than "active surveillance."

  • Long Life Expectancy: Typically recommended for patients expected to live 10+ years, where surgical removal offers the best long-term cure rate.

  • Failure of Radiation: As a "salvage" treatment if the cancer returns after previous radiation therapy.

  • Patient Preference: For individuals who prefer the psychological certainty of having the cancerous organ physically removed.

Methods of Radical Prostatectomy

  • Robotic-Assisted (Da Vinci): The modern gold standard. The surgeon sits at a console controlling robotic arms with 3D magnification and 360-degree "wristed" instruments for extreme precision.

  • Laparoscopic Surgery: A minimally invasive approach using 5–6 "keyhole" incisions, a camera, and long instruments to operate while viewing a 2D screen.

  • Open Surgery (Retropubic): The traditional method involving a single 4–5 inch incision in the lower abdomen to remove the gland.

  • Nerve-Sparing Technique: A meticulous process where the surgeon peels the delicate "neurovascular bundles" away from the prostate to preserve sexual function.

  • Vesicourethral Anastomosis: The reconstructive step where the bladder is stitched directly back to the urethra to restore the urinary path after the gland is removed.

How the Procedure Is Performed

  • Anesthesia: Performed under General Anesthesia to ensure the patient is completely asleep and the abdominal muscles are relaxed.

  • Dissection: The surgeon carefully separates the prostate from the bladder above it and the urethra below it.

  • Lymph Node Removal: Depending on the cancer's aggressiveness, nearby pelvic lymph nodes are often removed to check for microscopic spread.

  • Gland Extraction: The entire prostate and the attached seminal vesicles are removed as a single unit.

  • Catheterization: A Foley catheter is inserted through the penis into the bladder to act as a "splint" while the new connection (anastomosis) heals.

  • Drain Placement: A small suction tube may be left in the abdomen for 24–48 hours to remove excess surgical fluid.

Pre-Procedure Preparation

  • Cancer Staging: Includes a Multiparametric MRI (mpMRI) and often a PSMA PET-CT scan to ensure the cancer has not spread.

  • Biopsy Review: The surgical team reviews the Gleason Score and genomic markers to plan the extent of the surgery.

  • Pelvic Floor Training: Patients are taught Kegel exercises weeks before surgery to strengthen the muscles responsible for urinary control.

  • Medication Audit: Patients must stop blood thinners (like Aspirin or Warfarin) 7–10 days prior to the operation.

  • Fasting: Maintaining a "nil per oral" status for 8 hours before the procedure for anesthesia safety.

Pre-Surgery Tests

  • PSA Blood Test: To establish the final pre-operative baseline for monitoring future "undetectable" levels.

  • EKG and Chest X-ray: Standard tests to ensure heart and lung fitness for a multi-hour surgical procedure.

  • Basic Metabolic Panel: Checking kidney function (Creatinine) and electrolytes to manage IV fluids during surgery.

  • Coagulation Profile: Testing PT/INR and Platelet counts to ensure safe surgical healing and minimal blood loss.

  • Complete Blood Count (CBC): To check baseline hemoglobin levels in case a blood transfusion is required (rare in robotic cases).

Life After Radical Prostatectomy (Recovery & Risks)

  • Hospital Stay: Usually 1–2 days for Robotic/Laparoscopic surgery, or 3–4 days for the Open approach.

  • Catheter Management: The Foley catheter must remain in place for 7 to 14 days to allow the bladder-urethra connection to heal water-tight.

  • Trial of Void: After 1–2 weeks, the catheter is removed in the clinic to ensure the patient can urinate independently.

  • Activity Restrictions: No heavy lifting (over 5kg) or driving for 4 weeks; early walking is encouraged to prevent blood clots.

  • Urinary Incontinence: Most patients experience leaking initially; this typically improves over 3–6 months with consistent pelvic floor exercises.

  • Erectile Dysfunction (ED): It can take 6–18 months for erections to return; doctors often start "Penile Rehabilitation" medication shortly after surgery.

Why Specialized Treatment Is Highly Effective

  • Definitive Cure: Offers the highest probability of completely eliminating localized prostate cancer in a single treatment.

  • Pathological Certainty: Removing the gland allows for a total biopsy, giving the most accurate information on the cancer's stage and grade.

  • Robotic Precision: The 3D-high-definition view in 2026 allows surgeons to see nerves and vessels that are nearly invisible to the naked eye.

  • Predictable Monitoring: Post-surgery, the PSA level should drop to "undetectable," making it very easy to monitor for any future recurrence.

  • Limb-Sparing Mindset: Modern techniques focus heavily on "quality of life" preservation, aiming for the "Trifecta" of cancer control, continence, and potency.

Partial Nephrectomy (Kidney-Saving Surgery)

Partial Nephrectomy, also known as "Kidney-Sparing Surgery," is a complex procedure where only the diseased part of the kidney (usually a tumor) is removed, leaving the healthy, functioning kidney tissue intact. This is the preferred treatment for smaller kidney tumors to preserve as much renal function as possible.

When You Should Consider Partial Nephrectomy

  • Small Renal Masses: Typically the first choice for tumors less than 4 cm (Stage T1a) and many tumors up to 7 cm (Stage T1b).

  • Solitary Kidney: When a patient only has one functioning kidney, making it critical to avoid a total removal.

  • Bilateral Kidney Tumors: When tumors are present in both kidneys, requiring a sparing approach on one or both sides.

  • Pre-existing Kidney Disease: For patients with diabetes or hypertension who are at higher risk for future chronic kidney disease.

  • Genetic Predisposition: For patients with conditions like Von Hippel-Lindau (VHL) syndrome who may develop multiple tumors over their lifetime.

Methods of Partial Nephrectomy

  • Robotic-Assisted (Da Vinci): The modern standard for precision. It allows the surgeon to perform complex suturing within the tight "ischemia" time window using 3D magnification.

  • Laparoscopic Surgery: A minimally invasive approach using small incisions and specialized instruments to remove the tumor and repair the kidney.

  • Open Surgery: Often reserved for very large or centrally located tumors where the surgeon needs direct physical access to the kidney.

  • Nerve and Vessel Sparing: A technique focusing on identifying the specific arterial branches feeding the tumor to avoid clamping the entire renal blood supply.

  • Renorrhaphy (Repair): The reconstructive phase where the "hole" left in the kidney is stitched closed using specialized sutures and hemostatic agents.

How the Procedure Is Performed

  • Anesthesia: Performed under General Anesthesia to ensure total patient comfort and muscle relaxation.

  • The "Clamping" Phase: To prevent heavy bleeding, the surgeon temporarily clamps the Renal Artery. This must usually be completed in under 20–30 minutes to protect kidney health.

  • Tumor Excision: The surgeon cuts out the tumor along with a small "margin" of healthy tissue to ensure no cancer cells remain.

  • Hemostasis: Specialized "bolsters" or glues are often applied to the raw surface of the kidney to stop bleeding instantly.

  • Unclamping: The artery clamp is removed, and the surgeon verifies that the kidney regains its pink color and shows no signs of active bleeding.

  • Drain Placement: A small tube is left in the side for 24–48 hours to monitor for any internal fluid or blood collection.

Pre-Procedure Preparation

  • 3D Imaging: A high-resolution CT Scan or MRI with contrast is mandatory to map the "Renal Nephrometry Score" and tumor depth.

  • Kidney Function Test: A DTPA Scan or serum creatinine test is performed to establish a baseline for how well both kidneys are working.

  • Blood Prep: "Cross-matching" for blood units is done in advance due to the highly vascular nature of the kidney.

  • Medication Audit: You must stop all blood thinners (Aspirin, Warfarin, etc.) 7–10 days prior to the operation.

  • Fasting: Maintaining a "nil per oral" status for 8 hours before the procedure for anesthesia safety.

Pre-Surgery Tests

  • Complete Blood Count (CBC): To check baseline hemoglobin levels and ensure the body is ready for surgery.

  • Coagulation Profile: Testing PT/INR and Platelet counts to ensure the kidney repair will clot effectively.

  • Chest X-ray and EKG: Standard pre-operative checks to ensure heart and lung fitness for general anesthesia.

  • Urinalysis: To rule out any existing urinary tract infections before the procedure.

  • Electrolyte Panel: Checking sodium, potassium, and calcium levels to ensure the body’s chemistry is balanced.

Life After Partial Nephrectomy (Recovery & Risks)

  • Hospital Stay: Usually 2–3 days for Robotic/Laparoscopic surgery and 4–5 days for the Open approach.

  • Catheterization: A Foley catheter is placed in the bladder for 1–2 days to monitor urine output and filtration.

  • Activity Restrictions: No heavy lifting (over 5kg) or strenuous exercise for 6 weeks to prevent the repair from bleeding.

  • Hydration Therapy: Drinking 2–2.5 litres of water daily is recommended to keep the kidneys working at a steady, healthy pace.

  • Urine Leak Risk: If the repair isn't water-tight, a temporary JJ Stent may be placed to allow the kidney to heal.

  • Follow-Up Imaging: A CT scan is typically repeated at 3 or 6 months to monitor the surgical site and ensure no recurrence.

Why Specialized Treatment Is Highly Effective

  • Preservation of Function: By saving the healthy part of the kidney, patients have a much lower risk of requiring dialysis in the future.

  • Oncological Equivalent: Modern studies show that for appropriately selected tumors, a partial removal is just as effective as a total removal for cancer control.

  • Robotic Precision: 2026 robotic technology allows for "ultra-selective clamping," where only the tumor's blood supply is stopped, leaving the rest of the kidney "warm."

  • Faster Recovery: Minimally invasive techniques lead to less pain, smaller scars, and a quicker return to normal life compared to traditional surgery.

  • Lower Cardiovascular Risk: Maintaining two functioning kidneys is linked to better long-term heart health and blood pressure control.

Hypospadias Repair
Hypospadias Repair

Hypospadias repair is a specialized surgical procedure that repositions the urethral opening to the tip of the penis, straightens any curvature, and reconstructs the glans. This treatment is essential for ensuring normal urinary function and proper physical development.

When You Should Consider Hypospadias Repair

  • Displaced Urethral Opening: When the opening is located on the underside of the shaft rather than the tip.

  • Penile Curvature (Chordee): A downward bend of the penis that becomes more apparent during an erection.

  • Abnormal Spraying: Difficulty controlling the urinary stream, often requiring sitting to urinate.

  • Hooded Foreskin: When the foreskin only covers the top half of the penis, leaving the underside exposed.

  • Functional Concerns: To ensure future sexual function and to prevent psychological distress related to physical appearance.

How Is Performed

  • Anesthesia: The surgery is performed under general anesthesia and typically takes one to three hours depending on the complexity.

  • Penile Degloving: The skin is separated from the shaft to release tethering bands and accurately assess any curvature.

  • Orthoplasty (Straightening): If a curve is present, the surgeon straightens the shaft, which may involve tucking the topside or using ventral grafting.

  • Urethroplasty: A new urinary channel is created using the existing urethral plate, local skin flaps, or tissue grafts from the mouth (buccal mucosa).

  • Glanuloplasty: The new opening is positioned at the tip of the glans, which is then reshaped into a natural conical configuration.

  • Stent Placement: A temporary urinary catheter or stent is often inserted to keep the new urethra open while tissues heal.

Pre-Procedure Preparation

  • Medical Evaluation: A pediatric urologist evaluates general health, locates the urethral opening, and assesses the degree of curvature.

  • Hormonal Stimulation: In some cases, testosterone or HCG may be administered to increase penile size, which can improve surgical success rates.

  • Fasting: Patients must follow strict "nothing by mouth" (NPO) instructions for several hours before surgery to prevent complications during anesthesia.

  • Hygiene: Following specific bathing instructions with antiseptic soap as directed by the surgical team.

Tests Before Hypospadias Repair

  • Physical Examination: To grade the severity of the hypospadias (Glandular, Subglandular, Midshaft, or Penoscrotal).

  • Ultrasound: Occasionally used to check the rest of the urinary tract (kidneys and bladder) for associated anomalies.

  • Genetic Testing: May be recommended in very severe cases where the internal reproductive organs need evaluation.

  • Karyotyping: To confirm chromosomal sex if the physical appearance makes gender assignment unclear at birth.

Life After Hypospadias Repair

  • Immediate Care: Bandages and compression dressings are applied to minimize swelling; most patients go home the same day.

  • Catheter Management: The stent usually remains in place for 5 to 14 days. For infants, a "double-diapering" technique is used to keep the site clean.

  • Medication: Antibiotics are prescribed to prevent infection, and antispasmodics (like oxybutynin) help prevent painful bladder spasms.

  • Activity Restrictions: Straddle toys, bicycles, and swimming must be avoided for three to four weeks to allow for full healing.

  • Follow-up: The first appointment typically occurs within one week for dressing and catheter removal.

Why Specialized Treatment Is Highly Effective

  • Functional Restoration: Corrects the urinary stream to allow for normal standing urination.

  • Curvature Correction: Ensures the penis is straight, which is vital for comfort and function in adulthood.

  • High Success Rates: Modern techniques have significantly reduced the risk of complications like fistulas (leaks).

  • Aesthetic Improvement: Provides a natural appearance that helps prevent future body image concerns.

  • Minimally Invasive Focus: Most repairs are successfully completed in a single-stage outpatient procedure.

Undescended Testis Surgery

Orchidopexy (also known as orchiopexy) is a specialized surgical procedure used to move an undescended testicle from the abdomen or groin into the scrotum. This treatment is essential for preserving fertility, enabling early detection of potential health issues, and ensuring proper physical development.

When You Should Consider Orchidopexy

  • Non-Palpable Testis: When a testicle cannot be felt in the scrotum during a routine physical exam by a pediatrician.

  • Ectopic Testis: When the testicle has strayed from the normal path of descent and is located in an unusual position.

  • Retractile Testis (Persistent): When a testicle frequently moves out of the scrotum and stays in the groin, making it difficult to bring down.

  • Associated Hernia: When an undescended testicle is accompanied by an inguinal hernia that requires simultaneous repair.

  • Optimal Timing: To achieve the best long-term outcomes, surgery is typically recommended between 6 and 12 months of age.

How Is Performed

  • Anesthesia: The procedure is performed under general anesthesia and typically takes 45 to 90 minutes.

  • Inguinal Orchidopexy: For a palpable testis, an incision is made in the groin to identify the testis and the spermatic cord.

  • Mobilization: The surgeon carefully clears surrounding tissue or a hernia sac to ensure the cord is long enough to reach the scrotum without tension.

  • Scrotal Pouch (Dartos Pouch): A second small incision is made in the scrotum to create a pocket where the testis is securely positioned.

  • Laparoscopic Approach: For a testis high in the abdomen, a camera is inserted through the navel to guide the relocation.

  • Fowler-Stephens Procedure: In complex cases with short vessels, this may be done in stages to allow secondary blood vessels to provide enough length for the testis to reach the scrotum.

Pre-Procedure Preparation

  • Specialist Evaluation: A pediatric urologist performs a physical exam to determine if the testis is palpable or requires laparoscopic exploration.

  • Imaging Workup: While not always required, an ultrasound or MRI may be used to help locate a non-palpable testis.

  • Fasting: Patients must follow strict "nothing by mouth" (NPO) instructions for several hours before surgery to ensure safety during anesthesia.

  • Health Screen: Ensuring the child is free of respiratory infections or fever on the day of the procedure.

Tests Before Orchidopexy

  • Physical Assessment: The primary diagnostic tool used to grade the position and mobility of the testicle.

  • Diagnostic Laparoscopy: Often the most definitive way to locate a testis that cannot be felt during a physical exam.

  • Ultrasound: Used to visualize structures in the inguinal canal or abdomen if the diagnosis is unclear.

  • Hormonal Testing: Occasionally recommended if neither testicle can be felt, to confirm the presence of testicular tissue.

Life After Orchidopexy

  • Immediate Recovery: Most patients are able to go home the same day once they are awake and taking fluids.

  • Wound Care: Incisions are usually closed with absorbable sutures and covered with surgical glue; sponge baths are recommended for the first 2–3 days.

  • Pain Management: Discomfort is typically managed with paracetamol or ibuprofen; a local anesthetic block is often used during surgery for extended relief.

  • Activity Restrictions: Children must avoid "straddle" toys (bicycles, rocking horses) and contact sports for 2 to 4 weeks to prevent the testis from retracting.

  • Long-Term Monitoring: Follow-up visits at 6 weeks and 6–12 months ensure the testis remains in the correct position with healthy blood flow.

Why Specialized Treatment Is Highly Effective

  • Fertility Preservation: Moving the testis to the cooler environment of the scrotum is vital for future sperm production.

  • Hernia Repair: Allows for the simultaneous correction of any associated inguinal hernia.

  • Reduced Risk: Early surgery significantly lowers the long-term risk of testicular torsion or injury.

  • Improved Screening: Placing the testis in the scrotum allows for easy physical exams and early detection of any future irregularities.

  • High Success Rates: Modern techniques provide excellent functional and aesthetic results with minimal recovery time.

PUJ Obstruction Surgery

Pelviureteric Junction (PUJ) obstruction surgery, primarily known as Pyeloplasty, is a reconstructive procedure to remove a blockage at the junction where the kidney meets the ureter. The goal is to restore normal urine flow and prevent permanent kidney damage caused by fluid backup (hydronephrosis).

When You Should Consider Pyeloplasty

  • Persistent Flank Pain: A dull ache or sharp pain in the side or back, which may worsen after drinking large amounts of fluid.

  • Recurrent Kidney Infections: Frequent urinary tract infections (UTIs) associated with high fever or loin pain.

  • Hematuria: The presence of blood in the urine, often caused by stones or pressure within the renal pelvis.

  • Kidney Stones: Formation of stones in the kidney due to stagnant urine flow.

  • Declining Kidney Function: Evidence from scans showing that the affected kidney is struggling to drain or losing its functional capacity.

How Is Performed

  • Anesthesia: The surgery is performed under general anesthesia and typically takes two to four hours.

  • Approach: The "gold standard" is a minimally invasive laparoscopic or robotic approach using small "keyhole" incisions, though traditional open surgery via a flank incision is also used.

  • Excision: The surgeon identifies the narrow or blocked segment of the PUJ and carefully removes it.

  • Reconstruction: The healthy ureter is meticulously reconnected to the renal pelvis using fine, absorbable sutures to create a wide, funnel-shaped opening.

  • Stent Placement: A small, flexible tube called a DJ (Double-J) stent is inserted internally to bridge the new connection, allowing it to heal without irritation from urine flow.

Pre-Procedure Preparation

  • Imaging & Tests: Surgeons confirm the severity of the blockage using a DTPA or MAG-3 renal scan to measure individual kidney function and drainage time.

  • Medical Clearance: Routine blood work, urinalysis, and an ECG are required to ensure the patient is fit for anesthesia.

  • Fasting: Patients must follow strict "nothing by mouth" instructions for approximately eight hours before the scheduled surgery.

  • Hydration: Maintaining good fluid intake in the days leading up to the procedure as directed by the clinical team.

Tests Before Pyeloplasty

  • Renal Ultrasound: To measure the degree of swelling (hydronephrosis) and the thickness of the kidney tissue.

  • DTPA/MAG-3 Scan: The most important test to determine if the blockage is truly obstructing urine flow or just a physical widening.

  • CT Urogram: Provides a detailed anatomical map of the kidney's blood vessels to check for "crossing vessels" that might be compressing the ureter.

  • Urinalysis: To rule out any active infection before making surgical incisions.

Life After Pyeloplasty

  • Hospital Stay: Most patients stay in the hospital for one to three days for monitoring and pain management.

  • Tubes & Drains: A bladder catheter (Foley) is typically removed after 24–48 hours, and a small wound drain is removed before discharge.

  • Activity Levels: Walking is encouraged within 24 hours, but strenuous exercise and heavy lifting must be avoided for four to six weeks.

  • Stent Removal: The internal DJ stent is removed via a quick minor procedure (cystoscopy) usually four to six weeks after the surgery.

  • Long-Term Monitoring: A repeat renal scan is performed three to six months post-surgery to confirm the blockage has resolved and drainage has improved.

Why Specialized Treatment Is Highly Effective

  • High Success Rates: Pyeloplasty has a success rate exceeding 90–95% in permanently resolving the obstruction.

  • Kidney Preservation: By restoring flow, the procedure prevents the progressive loss of nephrons and potential kidney failure.

  • Minimally Invasive Recovery: Laparoscopic and robotic techniques allow for less pain, smaller scars, and a faster return to daily activities.

  • Precision Suturing: Using magnification or robotic assistance ensures a watertight connection that minimizes the risk of urine leaks.

  • Comprehensive Resolution: Addresses both intrinsic narrowing and external compression (like crossing blood vessels) in a single session.

Vesicoureteral Reflux Correction

Vesicoureteral reflux (VUR) correction refers to the medical and surgical procedures used to stop urine from flowing backward from the bladder into the ureters or kidneys. While mild cases often resolve on their own as a child grows, correction is typically recommended for moderate-to-severe reflux, recurrent infections, or signs of kidney damage. These interventions aim to protect the kidneys from scarring and long-term dysfunction.

When You Should Consider VUR Correction

  • High-Grade Reflux: Grades 4 and 5 are significantly less likely to resolve spontaneously as the child ages.

  • Breakthrough Infections: Frequent or severe urinary tract infections (UTIs) that occur despite the use of preventative antibiotics.

  • Kidney Damage: Clinical evidence of new or progressive kidney scarring or thinning of the kidney tissue.

  • Persistent Reflux: Cases that do not show signs of improvement beyond ages 3 to 5.

  • Bowel and Bladder Dysfunction (BBD): When chronic constipation or irregular voiding habits interfere with the natural resolution of the reflux.

How Is Performed

  • Endoscopic Injection: A urologist inserts a small telescope (cystoscope) into the bladder and injects a bulking agent (such as Deflux) around the ureteral opening to strengthen the natural valve.

  • Open Ureteral Reimplantation: Through a lower abdominal incision, the surgeon manually repositions the ureter into the bladder wall to restore the one-way flap-valve mechanism.

  • Robotic-Assisted Surgery: Using small incisions and robotic arms, surgeons perform the same reimplantation as open surgery with enhanced precision.

  • Cystoscopy: Real-time imaging of the bladder interior is used during minimally invasive procedures to ensure the bulking agent creates a proper "mound."

  • Ureteral Tailoring: In cases where the ureter is severely dilated (megaureter), the surgeon may narrow the tube before reattaching it to the bladder.

Pre-Procedure Preparation

  • Medical Evaluation: A pediatric urologist evaluates the child's history of infections and reviews previous imaging to determine the reflux grade.

  • Urinalysis: Ensuring the urine is sterile and free of infection before proceeding with any surgical or endoscopic intervention.

  • Bowel Management: Treating constipation before surgery is critical, as a full rectum can put pressure on the bladder and affect surgical outcomes.

  • Fasting: Following strict "nothing by mouth" (NPO) instructions for several hours before the procedure to ensure anesthesia safety.

Tests Before VUR Correction

  • Voiding Cystourethrogram (VCUG): The primary test used to diagnose and grade the severity of the reflux (Grades 1 through 5).

  • Renal Ultrasound: To monitor the size of the kidneys and check for signs of swelling (hydronephrosis) or scarring.

  • DMSA Scan: A specialized nuclear medicine scan used to detect permanent kidney scarring or determine how much each kidney is functioning.

  • Urodynamics: Occasionally performed if there is a suspicion that high bladder pressure is causing the reflux.

Life After VUR Correction

  • Recovery Time: Endoscopic injections are typically outpatient procedures; open or robotic surgery may require a 1 to 2-night hospital stay.

  • Hydration: Encouraging plenty of fluids to help flush the bladder and prevent post-operative discomfort.

  • Activity Restrictions: Most children can return to normal play within a few days after endoscopic treatment, or 2 to 3 weeks following major surgery.

  • Follow-up Imaging: A repeat VCUG or ultrasound is usually performed several months later to confirm the reflux has been successfully corrected.

  • Voiding Schedule: Maintaining a regular bathroom schedule (every 2–3 hours) helps maintain low bladder pressure and supports long-term success.

Why Specialized Treatment Is Highly Effective

  • Protects Kidney Health: Effectively stops the backflow of bacteria-laden urine, preventing life-long kidney scarring.

  • High Success Rates: Surgical reimplantation is the "gold standard" with success rates between 95% and 98%.

  • Minimally Invasive Options: Endoscopic injections offer a quick, incision-free alternative with a high success rate for moderate reflux.

  • Eliminates Antibiotic Dependence: Successful correction often allows children to stop daily preventative antibiotic therapy.

  • Functional Restoration: Rebuilds the natural flap-valve mechanism that should have developed at birth, providing a permanent solution.

Endovascular Coiling

Endovascular Coiling (also known as Endovascular Embolization) is a minimally invasive procedure used to treat a brain aneurysm—a weak, bulging spot in an artery wall. Instead of performing traditional open surgery (clipping), the surgeon reaches the brain through the network of blood vessels to "pack" the aneurysm with platinum coils, effectively sealing it off from blood flow and preventing a life-threatening rupture.

When You Should Consider Endovascular Coiling

  • Unruptured Aneurysms: Found incidentally during scans, these are treated to prevent a future "worst headache of your life" subarachnoid hemorrhage.

  • Ruptured Aneurysms: An emergency intervention to stop further bleeding and stabilize a patient who has suffered a brain bleed.

  • Surgical Risk Factors: When the aneurysm is located in a deep or difficult-to-reach area of the brain where open skull surgery would be too dangerous.

  • Patient Age and Health: Often preferred for older patients or those with medical conditions that make recovery from major open surgery difficult.

  • Specific Anatomy: Aneurysms with a narrow "neck" are ideal candidates for coiling, as the coils are more likely to stay securely inside the bulge.

Methods of Endovascular Embolization

  • Simple Coiling: Filling the aneurysm with soft platinum coils until blood can no longer enter.

  • Balloon-Assisted Coiling: A temporary balloon is inflated in the main artery to hold coils in place while they are being packed into a wide-necked aneurysm.

  • Stent-Assisted Coiling: A permanent mesh stent is placed across the neck of the aneurysm to act as a scaffold, preventing coils from falling back into the main bloodstream.

  • Flow Diversion: A specialized, high-density stent is placed in the main artery to redirect blood flow away from the aneurysm entirely, causing it to shrink over time without necessarily filling it with coils.

  • Liquid Embolics: In rare cases, a medical "glue" or liquid polymer is used instead of or alongside coils to seal the space.

How Endovascular Coiling Is Performed

  • Vascular Access: The surgeon makes a tiny incision in the groin (femoral artery) or wrist (radial artery) and inserts a sheath.

  • Catheter Navigation: A long, thin guide catheter is threaded through the body's main arteries up into the carotid or vertebral arteries in the neck.

  • Microcatheter Placement: Using real-time X-ray guidance (fluoroscopy), a much thinner microcatheter is maneuvered into the brain and directly into the opening of the aneurysm.

  • Coil Deployment: Soft platinum wires (coils) are pushed through the microcatheter. Once they enter the aneurysm, they curl into a mesh ball, filling the space.

  • Induced Thrombosis: The coils disrupt the blood flow, causing the blood inside the aneurysm to clot (thrombose), which creates a solid seal.

  • Final Angiogram: The surgeon performs a final dye test to confirm that blood is flowing normally through the healthy brain arteries and is no longer entering the aneurysm.

Pre-Procedure Preparation

  • Digital Subtraction Angiography (DSA): A specialized "map" of the brain's blood vessels is created to measure the aneurysm’s dimensions precisely.

  • Blood Thinner Regimen: For unruptured cases, patients start antiplatelet medications (like aspirin or clopidogrel) days in advance to prevent clots during the procedure.

  • Fasting (NPO): No food or drink for 8–12 hours prior, as the procedure is performed under general anesthesia to ensure total immobility.

  • Kidney Function Check: Blood tests are performed to ensure the kidneys can safely filter the contrast dye used during the X-ray imaging.

Tests Before Endovascular Coiling

  • CT Angiogram (CTA) or MRA: Non-invasive scans used to detect the presence and approximate size of the aneurysm.

  • Digital Subtraction Angiogram (DSA): The gold standard test to see the 3D architecture of the aneurysm neck and its relationship to nearby branches.

  • Platelet Function Test: To ensure that blood-thinning medications are working at the correct level to prevent procedural strokes.

  • Electrocardiogram (EKG): Routine heart monitoring to ensure the patient is fit for general anesthesia.

Life After Endovascular Coiling

  • Unruptured Recovery: Most patients stay 1 to 2 days for observation and can return to normal activities within 1 to 2 weeks.

  • Ruptured Recovery: Requires a lengthy stay (14–21 days) in a Neuro-ICU to manage complications like vasospasm (artery tightening).

  • Immediate Post-Op: Patients must lie flat for about 6 hours to ensure the artery access site in the groin or wrist heals properly without bleeding.

  • Medication Adherence: If a stent was used, taking dual blood thinners is mandatory for 6–12 months to keep the stent from clogging.

  • Long-Term Monitoring: Because coils can "compact" or settle, follow-up MRA or angiography scans are required at 6 and 12 months, and periodically thereafter.

Benefits of Endovascular Coiling

  • No Craniotomy: Eliminates the need to open the skull, resulting in significantly less physical trauma and a faster recovery.

  • Reduced Pain: Most patients experience only minor discomfort at the incision site rather than the headaches associated with open brain surgery.

  • Access to Deep Arteries: Allows surgeons to treat aneurysms that are located in areas of the brain that would be impossible or highly dangerous to reach with a scalpel.

  • Proven Efficacy: For many patients, coiling offers a safety profile and success rate comparable to or better than traditional surgical clipping.

Stent-Assisted Coiling

Stent-Assisted Coiling is an advanced endovascular procedure used to treat wide-necked brain aneurysms that cannot be safely packed with coils alone. In these cases, the opening of the aneurysm is too broad to hold coils in place; the stent acts as a "scaffold" or fence, keeping the coils securely inside the bulge while ensuring the main artery remains open for blood flow.

When You Should Consider Stent-Assisted Coiling

  • Wide-Necked Aneurysms: Aneurysms where the "neck" (opening) is wider than 4mm or the dome-to-neck ratio is less than 2.

  • Complex Aneurysm Shapes: Irregularly shaped bulges that would otherwise allow coils to "prolapse" or fall back into the parent artery.

  • Recurrent Aneurysms: Cases where previous coiling has settled or compacted, requiring a stent to provide a more permanent seal.

  • Unstable Aneurysms: When the structural integrity of the artery wall needs reinforcement alongside the coiling process.

  • Fusiform Aneurysms: Spindle-shaped bulges that involve a segment of the artery rather than a simple "berry" shape.

Methods of Stent-Assisted Coiling

  • Jailing Technique: A microcatheter is positioned inside the aneurysm before the stent is deployed. Once the stent is opened, it "jails" the catheter against the wall, allowing the surgeon to pack coils through the mesh.

  • Trans-Stent Technique: The stent is deployed first, and the surgeon then maneuvers a microcatheter through the tiny holes in the stent mesh to reach the aneurysm.

  • Y-Stenting: For aneurysms located at a "fork" in the artery, two stents are placed in a Y-configuration to protect both branching vessels.

  • Self-Expanding Stents: High-tech mesh tubes that automatically expand to the size of the artery when released from the catheter.

  • Balloon-Assisted Stenting: Using a temporary balloon to help position or expand the stent in complex vascular pathways.

How Stent-Assisted Coiling Is Performed

  • Vascular Navigation: Using fluoroscopy (real-time X-ray), a guide catheter is threaded from the groin or wrist up to the target artery in the brain.

  • Stent Deployment: The surgeon carefully positions and releases the cylindrical mesh stent across the neck of the aneurysm.

  • Coiling the "Bulge": Through a microcatheter, tiny platinum coils are pushed into the aneurysm. The stent mesh acts as a permanent barrier, preventing any part of the coils from entering the main bloodstream.

  • Flow Disruption: The presence of the stent across the neck helps slow down the blood entering the aneurysm, which aids in the clotting (thrombosis) process.

  • Occlusion Confirmation: Contrast dye is injected to verify that the aneurysm is completely blocked and that the parent artery remains perfectly clear.

  • Incision Closure: The access site in the groin or wrist is closed with a pressure device or a small collagen "plug."

Pre-Procedure Preparation

  • Dual Antiplatelet Therapy (DAPT): This is the most critical phase; patients must take Aspirin and Clopidogrel (Plavix) for at least 5–7 days before the procedure to prevent the body from treating the metal stent as a foreign object and forming a clot.

  • 3D Angiography: A high-resolution scan to measure the exact diameter of the parent artery to ensure the stent is sized perfectly.

  • Fasting (NPO): No food or drink for 8–12 hours prior to general anesthesia.

  • Kidney Function Assessment: Ensuring the patient can safely process the contrast dye used for the X-ray mapping.

Tests Before Stent-Assisted Coiling

  • Platelet Function Test (VerifyNow): A blood test to confirm the antiplatelet medications have effectively thinned the blood to the "therapeutic window" for a stent.

  • Digital Subtraction Angiography (DSA): The gold standard for mapping the complex 3D relationship between the aneurysm and nearby arterial branches.

  • CT or MRI Scan: To rule out any recent bleeding or other neurological conditions that might affect the surgical approach.

  • Physical Neurological Baseline: A detailed exam of motor and sensory function to serve as a comparison for post-operative monitoring.

Life After Stent-Assisted Coiling

  • Most patients spend 1 to 2 days in a Neuro-ICU for monitoring (unruptured) or 2 to 3 weeks if the aneurysm had previously bled.

  • Strict Medication Adherence: This is life-or-death; missing a single dose of blood thinners in the first 6–12 months can cause the stent to clog, leading to a stroke.

  • Over 6–12 months, the natural lining of the artery grows over the stent (endothelialization), making it a permanent, integrated part of the vessel wall.

  • Patients must follow a strict imaging schedule (MRA or Angiography) at 6, 12, and 24 months to ensure the stent remains open and the aneurysm closed.

  • Normal activity can typically be resumed in 1–2 weeks, though heavy lifting is restricted for the first few days while the incision site heals.

Benefits of Stent-Assisted Coiling

  • Allows for the safe and effective treatment of wide-necked aneurysms that were previously considered "uncoilable."

  • Provides a significantly lower recurrence rate compared to coiling alone, as the stent provides a more robust seal.

  • Offers a minimally invasive alternative to open skull surgery for complex or deep-seated brain aneurysms.

  • The presence of the stent can actually help remodel the artery wall, promoting long-term vascular health.

Balloon-Assisted Coiling

Balloon-Assisted Coiling (BAC), also known as the remodeling technique, is a minimally invasive endovascular procedure used to treat brain aneurysms, particularly those with a wide neck or complex shape. It utilizes a temporary balloon to provide a protective barrier while platinum coils are packed into the aneurysm, ensuring the main artery remains clear.

When You Should Consider Balloon-Assisted Coiling

  • Wide-Neck Aneurysms: Aneurysms where the opening is too wide to hold coils on their own (dome-to-neck ratio < 2), preventing them from falling into the bloodstream.

  • Acute Rupture: Often the preferred choice for recently ruptured aneurysms because, unlike stents, it does not require long-term dual antiplatelet therapy, which is dangerous during an active brain bleed.

  • Bifurcation Aneurysms: Useful for aneurysms located where blood vessels branch off, as the balloon helps keep those vital side branches open during the coiling process.

  • Emergency Salvage: When a sudden rupture occurs during a standard coiling procedure, the balloon can be instantly inflated to stop the bleeding.

  • Avoidance of Permanent Hardware: Ideal for patients who cannot tolerate or do not want a permanent metal stent left inside their artery.

Methods of Balloon-Assisted Coiling

  • Standard Remodeling: A single balloon is used to cover the neck of the aneurysm while a second microcatheter delivers the coils.

  • Double-Balloon Technique: Used for extremely complex or wide-base aneurysms, involving two balloons to protect multiple branching vessels simultaneously.

  • Dual-Lumen Ballooning: Utilizing a specialized catheter that can both inflate a balloon and deliver coils through the same device.

  • Temporary Stenting Effect: The balloon is used to "mold" the coil mass into a specific shape that conforms to the aneurysm wall before the balloon is removed.

How Balloon-Assisted Coiling Is Performed

  • Vascular Navigation: A catheter is inserted, usually through the femoral artery (groin) or radial artery (wrist), and guided to the brain using real-time X-ray imaging (fluoroscopy).

  • Balloon Placement: A specialized balloon microcatheter is positioned in the main artery, directly across the opening (neck) of the aneurysm.

  • Inflation and "Remodeling": The balloon is temporarily inflated with a mixture of saline and contrast dye to create a temporary wall across the aneurysm's neck.

  • Coil Packing: While the balloon is inflated, soft platinum coils are packed into the aneurysm sac. The balloon prevents the coils from protruding into the main artery.

  • Stability Verification: The balloon is periodically deflated to check if the coils remain stable and in place. If they shift, the balloon is reinflated for further packing.

  • Catheter Removal: Once the aneurysm is densely filled and the coils are stable without support, the balloon is deflated and all catheters are removed. No hardware is left in the artery.

Pre-Procedure Preparation

  • Diagnostic mapping via Digital Subtraction Angiography (DSA) to determine the exact width of the aneurysm neck.

  • Fasting (NPO) for 8–12 hours prior to the procedure.

  • Administration of heparin (a short-term blood thinner) during the procedure to prevent clots from forming while the balloon is inflated.

  • Baseline neurological assessment to monitor the patient's speech, motor, and sensory functions before and after the surgery.

Tests Before Balloon-Assisted Coiling

  • Digital Subtraction Angiography (DSA): The gold standard for measuring the "dome-to-neck" ratio to decide if a balloon is necessary.

  • CT or MRI Scan: To assess the brain for any signs of recent hemorrhage or structural abnormalities.

  • Kidney Function Tests: To ensure the patient's kidneys can safely filter the contrast dye used during the X-ray process.

  • Blood Coagulation Profile: Checking the patient's natural clotting ability before introducing surgical blood thinners.

Life After Balloon-Assisted Coiling

  • Hospital Stay: Patients are typically monitored for 1 to 2 days for unruptured aneurysms. For ruptured cases, the stay extends to 2 to 3 weeks in a Neuro-ICU.

  • Immediate Post-Op: Strict bed rest is required for 6 hours to prevent bleeding at the catheter insertion site (groin or wrist).

  • Medication: Most patients only require short-term aspirin (2–4 weeks), which is a significant benefit over the months of intense blood thinners required for stents.

  • Activity: Most patients return to normal light activities within 1 to 3 weeks.

  • Follow-up: Mandatory MRA or Angiography scans are performed at 6 and 12 months to ensure the coils haven't settled and the aneurysm remains sealed.

Benefits of Balloon-Assisted Coiling

  • No Permanent Implant: Unlike stent-assisted coiling, no metal is left in the main artery, reducing the long-term risk of blood clots or "clogging" (restenosis).

  • Superior Safety in Ruptures: Allows for the treatment of wide-necked aneurysms without the high risk of bleeding complications associated with long-term blood thinners.

  • Immediate Hemorrhage Control: Provides a "safety net" that can immediately stop internal bleeding if the aneurysm ruptures during the procedure.

  • Improved Packing Density: Allows the surgeon to pack more coils into the aneurysm than would be possible without the balloon's support, potentially reducing recurrence.

Vertebral Artery Stenting

Vertebral Artery Stenting (VAS) is a minimally invasive procedure used to open a narrowed vertebral artery—one of the two major blood vessels in the back of the neck that supply the brainstem and cerebellum (the "posterior circulation"). By placing a metal mesh stent to widen the artery, this procedure restores critical blood flow and is primarily used to prevent a posterior stroke and resolve symptoms like chronic vertigo or "drop attacks."

When You Should Consider Vertebral Artery Stenting

  • Vertebral Artery Stenosis: Blockage of more than 50% in patients who continue to experience symptoms despite taking maximum medical therapy.

  • Posterior Circulation Symptoms: Recurrent spells of dizziness (vertigo), double vision (diplopia), loss of balance, or sudden "drop attacks" where the legs give way.

  • Failed Medical Management: Patients who have suffered a mini-stroke (TIA) or minor stroke while already taking blood thinners and statins.

  • High-Risk Anatomy: When the narrowing is located at the "origin" (where the vertebral artery branches off the subclavian artery in the chest), making open surgery difficult.

  • Inadequate Collateral Flow: When the other vertebral artery is also narrow or missing, making the blocked artery the sole supply of blood to the brainstem.

Methods of Vertebral Artery Stenting

  • Balloon-Expandable Stenting: The stent is mounted on a balloon and expanded directly into the blockage, often used for narrowing at the artery's origin.

  • Drug-Eluting Stents (DES): The same type used in heart surgeries; these are coated with medication to prevent the growth of scar tissue (restenosis) inside the vessel.

  • Self-Expanding Stenting: A flexible stent released from a catheter that automatically expands to fit the artery, often used for narrowing higher up in the neck.

  • Pre-Dilation Angioplasty: Gently widening the blockage with a small balloon before the stent is placed to ensure a smooth fit.

  • Embolic Protection: In some cases, a tiny filter is used to catch any loose plaque fragments during the procedure to prevent them from reaching the brainstem.

How Vertebral Artery Stenting Is Performed

  • Vascular Access: A small puncture is made in the femoral artery (groin) or radial artery (wrist) to serve as the entry point for the surgical catheters.

  • Navigation: Using real-time X-ray (fluoroscopy), the surgeon guides a catheter through the aorta and into the origin of the vertebral artery in the chest or neck.

  • Angioplasty: A tiny, high-pressure balloon is guided to the site of the narrowing and inflated to "pre-dilate" the segment and prepare it for the stent.

  • Stent Deployment: The metal mesh stent is deployed across the blockage. It acts as a permanent internal scaffold, pressing the plaque against the artery walls to keep the vessel open.

  • Flow Verification: Contrast dye is injected to confirm that blood is flowing freely through the stent and reaching the brainstem and cerebellum.

  • Final Removal: Once the stent is secure and properly "apposed" (snug) against the wall, the balloon and delivery catheters are removed.

Pre-Procedure Preparation

  • Diagnostic Imaging: Confirmation of the degree of narrowing via CT Angiography (CTA), MR Angiography (MRA), or Digital Subtraction Angiography (DSA).

  • Dual Antiplatelet Therapy (DAPT): Taking Aspirin and Clopidogrel (Plavix) for 5–7 days prior is mandatory to prevent blood clots from forming on the new metal stent.

  • Fasting (NPO): No food or drink for 8–12 hours before the procedure, which is usually performed under local anesthesia with sedation.

  • Neurological Baseline: A thorough exam of speech, vision, and motor skills is performed so the surgical team can monitor for any changes in real-time.

Tests Before Vertebral Artery Stenting

  • CT Angiography (CTA): Provides a high-resolution 3D view of the calcium and plaque buildup to help the surgeon select the correct stent diameter.

  • Digital Subtraction Angiography (DSA): The gold standard for measuring the exact length of the blockage and the health of the surrounding vessels.

  • Doppler Ultrasound: A non-invasive test used to measure the speed of blood flow through the vertebral arteries in the neck.

  • Blood Panels: Routine screens to check kidney function (for processing the contrast dye) and ensure blood clotting levels are safe for surgery.

Life After Vertebral Artery Stenting

  • Hospital Stay: Typically 24 hours in a specialized unit for close monitoring of blood pressure and neurological status.

  • Immediate Recovery: Patients must remain on bed rest for about 6 hours post-op to ensure the access site in the groin or wrist heals properly.

  • Strict Medication Adherence: This is mandatory; missing a single dose of blood thinners in the first 6–12 months can cause the stent to clog (stent thrombosis).

  • Activity: Strenuous activity and heavy lifting are restricted for 1 week, though most patients experience immediate relief from dizzy spells.

  • Follow-up Schedule: Mandatory Doppler Ultrasound or CTA scans are performed at 1 month, 6 months, and then annually to monitor for re-narrowing (restenosis).

Benefits of Vertebral Artery Stenting

  • Immediate Symptom Relief: Most patients report a near-instant cessation of vertigo, "drop attacks," and double vision as blood flow is restored.

  • Minimally Invasive: Avoids a complex surgery in the deep neck or chest, significantly reducing recovery time and local trauma.

  • Real-time Monitoring: Since it is usually performed under sedation, the surgeon can talk to the patient throughout the procedure to ensure brainstem function is perfect.

  • Effective Stroke Prevention: Long-term results show that VAS is highly effective at keeping the vertebral artery open and preventing strokes in the posterior circulation of the brain.

Vertebral Artery Stenting

Vertebral artery stenting is a minimally invasive endovascular procedure used to open narrowed vertebral arteries, which provide critical blood supply to the brainstem and the back of the brain. It is primarily performed to reduce the risk of a vertebrobasilar stroke in patients who have already experienced symptoms like vertigo or minor strokes despite medical treatment. By placing a small mesh tube within the vessel, the procedure restores healthy blood flow to the brain.

When You Should Consider Vertebral Artery Stenting

  • Symptomatic Narrowing: If you have 50% or greater narrowing of the vertebral artery and continue to experience TIAs (mini-strokes) or minor strokes.

  • Persistent Vertigo: Recurrent dizziness or balance issues caused by "vertebrobasilar insufficiency" that does not improve with medication.

  • Failed Medical Therapy: For patients who have recurrent neurological symptoms despite taking blood thinners and high-dose cholesterol medications.

  • High-Risk Surgical Anatomy: Because traditional open surgery on these deep arteries is highly complex, stenting is the preferred surgical alternative for most patients.

  • Posterior Circulation Stroke: If a previous stroke has been traced back to a blockage in the vertebral artery system.

How Is Performed

  • Anaesthesia: The procedure is performed under local anaesthesia with conscious sedation or general anaesthesia, taking about 1 to 2 hours.

  • Access: A small incision is made in the groin (femoral artery) or the wrist (radial artery) to insert a thin, flexible catheter.

  • Guidance: Using real-time X-ray (fluoroscopy), the specialist guides a wire and catheter through the vascular system to the narrowed section of the vertebral artery.

  • Stent Placement: A small, specialized mesh tube (stent) is guided through the catheter and positioned exactly at the site of the blockage.

  • Expansion: The stent is expanded, pushing against the artery walls to flatten the plaque and keeping the vessel held open to restore full blood flow.

  • Completion: The catheter is removed, and the small access site in the groin or wrist is closed with a pressure device or a small stitch.

[Image showing a catheter-guided stent placement in the neck]

Pre-Procedure Preparation

  • Diagnostic Angiography: A detailed mapping of your arteries to determine the exact location and degree of the narrowing.

  • Blood Thinning Protocol: You will likely be started on aspirin and clopidogrel (Plavix) several days before the procedure to prevent clots.

  • Kidney Function Tests: To ensure your kidneys can safely process the contrast dye used during the X-ray guidance.

  • Fasting: Following "nothing by mouth" instructions for 6–8 hours prior to your scheduled procedure.

  • Medication Audit: Reviewing all current supplements and medications, especially any that affect blood clotting.

Tests Before Vertebral Artery Stenting

  • CT Angiogram (CTA) or MRA: High-resolution 3D imaging used to visualize the blood vessels in the neck and brain.

  • Doppler Ultrasound: A non-invasive test to measure the speed and direction of blood flow through the vertebral arteries.

  • Neurological Exam: A baseline assessment of your strength, balance, and coordination.

  • ECG: A routine heart check to confirm cardiovascular stability for the duration of the procedure.

Life After Vertebral Artery Stenting

  • Hospital Stay: Most patients stay in the hospital overnight for close neurological observation and are discharged the following day.

  • Antiplatelet Therapy: This is the most critical part of aftercare; you must take Dual Antiplatelet Therapy (DAPT), typically aspirin and clopidogrel, for 1 to 6 months to prevent clots.

  • Activity Restrictions: Avoid heavy lifting and strenuous exercise for about 5 to 7 days to allow the artery access site (groin or wrist) to heal.

  • Long-term Monitoring: Regular Doppler ultrasound or CT scans are performed at 3, 6, and 12 months to ensure the stent remains open and free of new plaque.

  • Lifestyle Management: Continued management of blood pressure and cholesterol is essential to prevent "restenosis" (narrowing again).

Why Specialized Treatment Is Highly Effective

  • Minimally Invasive: Avoids the need for large neck incisions, leading to less pain and a significantly faster recovery than open surgery.

  • Stroke Prevention: Successfully opening the artery provides a durable defense against life-threatening strokes in the back of the brain.

  • Immediate Flow Restoration: Patients often experience an immediate improvement in blood supply to the brainstem and cerebellum.

  • High Success in the Neck: Stenting the portion of the artery in the neck (extracranial) is considered very safe with low complication rates.

  • Advanced Imaging Guidance: The use of high-tech fluoroscopy allows for sub-millimeter precision when placing the stent within the vessel.

AVM Embolization
AVM Embolization

AVM (Arteriovenous Malformation) Embolization is a minimally invasive, catheter-based procedure used to block or reduce blood flow to an abnormal tangle of blood vessels. It is most commonly used to treat brain AVMs but can also address malformations in the spine or other parts of the body. By plugging the "feeding" arteries of the malformation, the procedure stabilizes the vascular structure and reduces the risk of life-threatening hemorrhages.

When You Should Consider AVM Embolization

  • Pre-Surgical Preparation: To shrink the AVM and block deep, hard-to-reach feeding vessels, making surgical removal (resection) safer by significantly reducing blood loss.

  • Pre-Radiosurgical Adjunct: To reduce the total volume of the AVM, making it a better candidate for targeted Stereotactic Radiosurgery (SRS).

  • Vascular Steal Syndrome: When the AVM "steals" blood from healthy brain tissue, causing chronic headaches, seizures, or progressive neurological deficits.

  • High Rupture Risk: If diagnostic imaging shows weakened vessel walls (aneurysms) within the AVM that are at high risk of bleeding.

  • Inoperable AVMs: For malformations located in "eloquent" or deep areas of the brain where traditional open surgery is too risky.

How It Is Performed

  • Access: A thin, flexible tube called a catheter is inserted into a major artery, usually in the groin (femoral) or the wrist (radial). No skull incisions are required.

  • Anesthesia: The procedure is typically performed by a neurointerventional specialist under general anesthesia and lasts between 2 to 3 hours.

  • Guidance: Using real-time X-ray imaging (fluoroscopy) and contrast dye, the surgeon threads the micro-catheter through the vascular system directly to the AVM's feeding vessels.

  • Blocking (Embolization): A specialized "embolic agent" is injected through the catheter to seal the vessels. Common agents include:
    Liquid Glues (Onyx or NBCA): Medical-grade substances that harden quickly to permanently seal the abnormal vessels.
    Microcoils: Tiny platinum or steel coils that trigger the body's natural clotting process.
    Particles: Small medical grains that physically plug the smaller, intricate vessels of the AVM.

  • Completion: Once the desired blood flow reduction is achieved, the catheter is removed, and the access site is closed with a pressure device.

[Image showing the "Onyx" embolic agent filling the AVM nest]

Pre-Procedure Preparation

  • Cerebral Angiography: A detailed "road map" of your brain's blood vessels to identify the exact feeders of the AVM.

  • Neurological Baseline: A comprehensive exam to document your current motor skills, speech, and vision before the procedure.

  • Kidney Function Tests: To ensure your body can safely clear the contrast dye used during the imaging process.

  • Fasting: Following "nothing by mouth" instructions for 8 hours prior to your scheduled anesthesia.

  • Medication Audit: You may be asked to stop taking blood thinners several days before the procedure to minimize the risk of bleeding at the access site.

Tests Before AVM Embolization

  • CT or MRI Scan: To visualize the relationship between the AVM and the surrounding healthy brain tissue.

  • Functional MRI (fMRI): Occasionally used to map critical areas of the brain (like speech or movement centers) near the AVM.

  • Blood Panels: A routine check of your blood count and coagulation profile to ensure a safe surgical experience.

  • ECG: A standard heart check to confirm you are healthy enough for the administration of anesthesia.

Life After AVM Embolization

  • Hospital Stay: Most patients stay at least one night for close observation. If the AVM has previously ruptured, a longer stay in a neuro-intensive care unit (ICU) may be required.

  • Immediate Symptoms: It is normal to experience mild headaches, nausea, or temporary fatigue for a few days following the procedure.

  • Activity Restrictions: Avoid heavy lifting and strenuous exercise for about 5 to 7 days to allow the artery access site (groin or wrist) to heal completely.

  • Follow-up Imaging: A repeat angiography is typically performed within 6 to 12 months to check for recanalization (vessels reopening) or new blood flow pathways.

  • Multidisciplinary Care: Embolization is often just one step; you will continue to be monitored by a team including neurosurgeons and radiation oncologists.

Why Specialized Treatment Is Highly Effective

  • Minimally Invasive Access: Treating complex brain vascular issues through a tiny puncture in the wrist or groin avoids the need for a craniotomy.

  • Enhanced Surgical Safety: By "turning off" the high-pressure blood flow to the AVM, surgeons can remove the remaining malformation with much higher precision and lower risk.

  • Immediate Pressure Reduction: Successfully blocking feeding vessels reduces the immediate strain on fragile AVM walls, lowering the risk of a sudden hemorrhage.

  • Precision Delivery: Modern micro-catheters can navigate deep into the brain's smallest vessels, allowing for highly targeted treatment of even the most complex malformations.

  • Symptom Resolution: Many patients find that redirected blood flow to healthy brain tissue alleviates chronic seizures and headaches.

Dural AV Fistula Embolization

Dural Arteriovenous Fistula (DAVF) Embolization is a specialized endovascular procedure used to close abnormal connections (fistulas) between the dural arteries and the venous system surrounding the brain or spinal cord. Unlike congenital malformations, DAVFs are typically acquired later in life due to factors such as trauma, blood clots (sinus thrombosis), or infections. The procedure uses a catheter-based approach to navigate the vascular system and "plug" the high-pressure leak into the veins.

When You Should Consider DAVF Embolization

  • Cortical Venous Reflux: A high-risk condition where blood flows backward into the brain's veins, significantly increasing the risk of a life-threatening hemorrhage or stroke.

  • Pulsatile Tinnitus: A debilitating "whooshing" or rhythmic thumping sound in the ear that matches your heartbeat, caused by high-pressure blood flow near the ear structures.

  • Increased Intracranial Pressure: When the fistula interferes with normal drainage, causing severe headaches, nausea, or progressive vision loss.

  • Neurological Deficits: Sudden or progressive weakness, numbness, or seizures caused by "venous congestion" in the brain or spinal cord.

  • Aggressive Lesion Grading: If diagnostic imaging (Borden or Cognard classification) identifies the fistula as high-grade with a significant risk of bleeding.

How It Is Performed

  • Access: A thin, flexible catheter is inserted into a blood vessel in the groin or wrist and threaded toward the brain using real-time X-ray guidance (fluoroscopy).

  • Anesthesia: The procedure is typically performed under general anesthesia to ensure the patient remains perfectly still, taking approximately 2 to 4 hours.

  • Transarterial Route: The most common approach, reaching the fistula through the feeding dural arteries (such as the middle meningeal artery).

  • Transvenous Route: An alternative or combined approach accessing the site through the venous sinuses, which is often highly effective for specific high-grade lesions.

  • Embolization: Once the catheter is at the target, "embolic agents" are injected to permanently seal the connection. Common agents include:
    Liquid Embolics (Onyx or PHIL): Non-adhesive liquids that harden upon contact with blood to fill the fistula "nest."
    Microcoils: Small platinum coils that trigger the body's natural clotting process.
    Medical Glue (NBCA): A fast-acting adhesive used to instantly seal high-flow connections.

Pre-Procedure Preparation

  • Digital Subtraction Angiography (DSA): The "gold standard" diagnostic test to map the complex architecture of the fistula and its feeding vessels.

  • Neurological Assessment: A detailed baseline exam of your vision, motor function, and cranial nerves.

  • Kidney Function Tests: To ensure your kidneys can safely process the contrast dye used during the X-ray guidance.

  • Fasting: Following "nothing by mouth" instructions for 8 hours prior to the administration of anesthesia.

  • Medication Audit: You may be asked to stop taking blood thinners several days before the procedure to minimize the risk of bleeding at the access site.

Tests Before DAVF Embolization

  • MRI or CT Angiography: To visualize the relationship between the fistula, the dural sinuses, and the surrounding brain tissue.

  • Formal Hearing Test: Often required for patients presenting with pulsatile tinnitus to establish a baseline.

  • Blood Panels: A routine check of your blood count and clotting factors to ensure a safe endovascular experience.

  • ECG: A standard heart check to confirm cardiovascular stability for the duration of the procedure.

Life After DAVF Embolization

  • Hospital Stay: Patients are typically monitored in the hospital for 1 to 2 days to ensure there are no changes in neurological status.

  • Immediate Symptoms: It is normal to experience mild headaches and soreness at the puncture site (groin or wrist) for 2–3 days.

  • Activity Restrictions: No heavy lifting (over 4.5 kg / 10 lbs) or strenuous exercise for 5 days following the procedure to allow the access site to heal.

  • Follow-up Imaging: A repeat angiography is usually performed at 6 and 12 months to ensure the fistula remains completely closed.

  • Symptom Resolution: Most patients notice an immediate disappearance of pulsatile tinnitus and a gradual reduction in headaches as the venous pressure normalizes.

Why Specialized Treatment Is Highly Effective

  • Minimally Invasive: Treating complex brain vascular connections through a tiny puncture in the wrist or groin avoids the risks and recovery time of a craniotomy.

  • High Success Rates: Modern embolic agents allow for complete occlusion of the fistula in 72% to 90% of cases in a single session.

  • Targeted Pressure Relief: By closing the fistula, the procedure immediately stops the dangerous backward flow of blood into the brain's delicate veins.

  • Preserves Normal Flow: Advanced micro-catheters allow specialists to seal the abnormal connection while carefully preserving the healthy blood flow necessary for brain function.

  • Prevents Future Stroke: Definitive closure of high-risk fistulas provides a durable defense against intracranial hemorrhage and long-term neurological damage.

Realted Specialist

Dr Sandeep Bafna
Dr Sandeep Bafna
Urologist
Apollo Hospital, Greams Road, Chennai
8+years experience
View Profile
Dr Anshuman Agarwal
Dr Anshuman Agarwal
Urologist
Indraprastha Apollo Hospital, Delhi
21+years experience
View Profile
Dr Harshit Garg
Dr Harshit Garg
Urologist, Uro-Oncologist
Apollo Athenaa Women's Cancer Centre
10+years experience
View Profile
Dr Ketan Vartak
Dr Ketan Vartak
Urologist
Apollo Hospital, Pune
28+years experience
View Profile
Dr Rajesh Taneja
Dr Rajesh Taneja
Urologist
Indraprastha Apollo Hospital, Delhi
38+years experience
View Profile
Dr A Navaladi Shankar
Orthopedic Surgeon
Apollo Hospital, Greams Road, Chennai
22+years experience
View Profile
Dr Anand Utture
Dr Anand Utture
Urologist
Fortis S L Raheja Hospital, Mumbai
24+years experience
View Profile
Dr Anil Kumar Varshney
Urologist
Max Super Specialty Hospital, Shalimar Bagh
44+years experience
View Profile
Dr Arun Kannan
Dr Arun Kannan
Orthopedic Surgeon, Joint Replacement Surgeon
Apollo Hospital, Greams Road, Chennai
16+years experience
View Profile
Dr Avanish Arora
Dr Avanish Arora
Urologist, Uro-Oncologist
Nanavati-Max Super Specialty Hospital, Mumbai
26+years experience
View Profile
Dr Babu Manohar
Dr Babu Manohar
ENT Specialist
Apollo Hospital, Greams Road, Chennai
38+years experience
View Profile
Dr Dillip Kumar Mishra
Cardiothoracic & Vascular Surgeon (CTVS)
Apollo Hospital, Greams Road, Chennai
33+years experience
View Profile
Dr Girinath M R
Dr Girinath M R
Cardiothoracic & Vascular Surgeon (CTVS)
Apollo Hospital, Greams Road, Chennai
45+years experience
View Profile
Dr Gopala Krishnan
Dr Gopala Krishnan
Orthopedic Surgeon
Apollo Hospital, Greams Road, Chennai
36+years experience
View Profile
Dr Hardev Singh Bhatyal
Urologist
BLK-Max Super Specialty Hospital, Delhi
42+years experience
View Profile
Dr Himesh Gandhi
Dr Himesh Gandhi
Urologist, Uro-Oncologist
Ruby Hall Clinic Hospital, Pune
12+years experience
View Profile
Dr Vijay Yewale
Dr Vijay Yewale
Pediatrician
Apollo Hospital, Navi Mumbai
31+years experience
View Profile
Dr Vinit Suri
Dr Vinit Suri
Neurologist
Indraprastha Apollo Hospital, Delhi
27+years experience
View Profile
Dr Vishal Soni
Dr Vishal Soni
Gastroenterologist
Apollo Hospital International Ltd, Ahmedabad
15+years experience
View Profile
Dr Yash Gulati
Dr Yash Gulati
Spine Surgeon, Orthopedic Surgeon, Joint Replacement Surgeon
Indraprastha Apollo Hospital, Delhi
35+years experience
View Profile

May we help you?

Enter digits only (6-15 digits). We'll add your country code.