+91 83682 47758
info@medivisorhealth.com
Medivisor India Treatment Logo
  • Home
    • About Us
    • Our Services
    • Our Team
    • Our Safety Measures
    • Loading treatments...
    • Loading hospitals...
    • Loading doctors...
    • Treatment Cost
    • Treatment Process
    • Visa Process
    • Travel Guide
    • FAQs
    • Why Medivisor
    • Success Stories
    • Patient Activities
    • Social Activities
    • News Coverage
    • Blog
  • Become a Partner

Medivisor India Treatment is a trusted New Delhi-based medical travel company assisting international patients with advanced, affordable, and seamless treatment in India.

  • Medivisor House 359, Sector 1, Vaishali, Ghaziabad, (Delhi/NCR) India
  • +91 8368 247 758
  • info@medivisorhealth.com

About Us

  • About Us
  • Our Services
  • Our Team
  • Our Medical Advisors
  • Our Safety Measures
  • Join Our Network
  • Contact Us

India Treatment

  • Hospitals
  • Treatments
  • Treatment Cost
  • Treatment Process
  • Visa Process
  • Travel Guide
  • FAQs
  • Why Medivisor

Gallery

  • Patient Testimonials
  • Patient Activities
  • News Coverage
  • Blog

Get in Touch

© 2026 Medivisor India Treatment. All rights reserved.

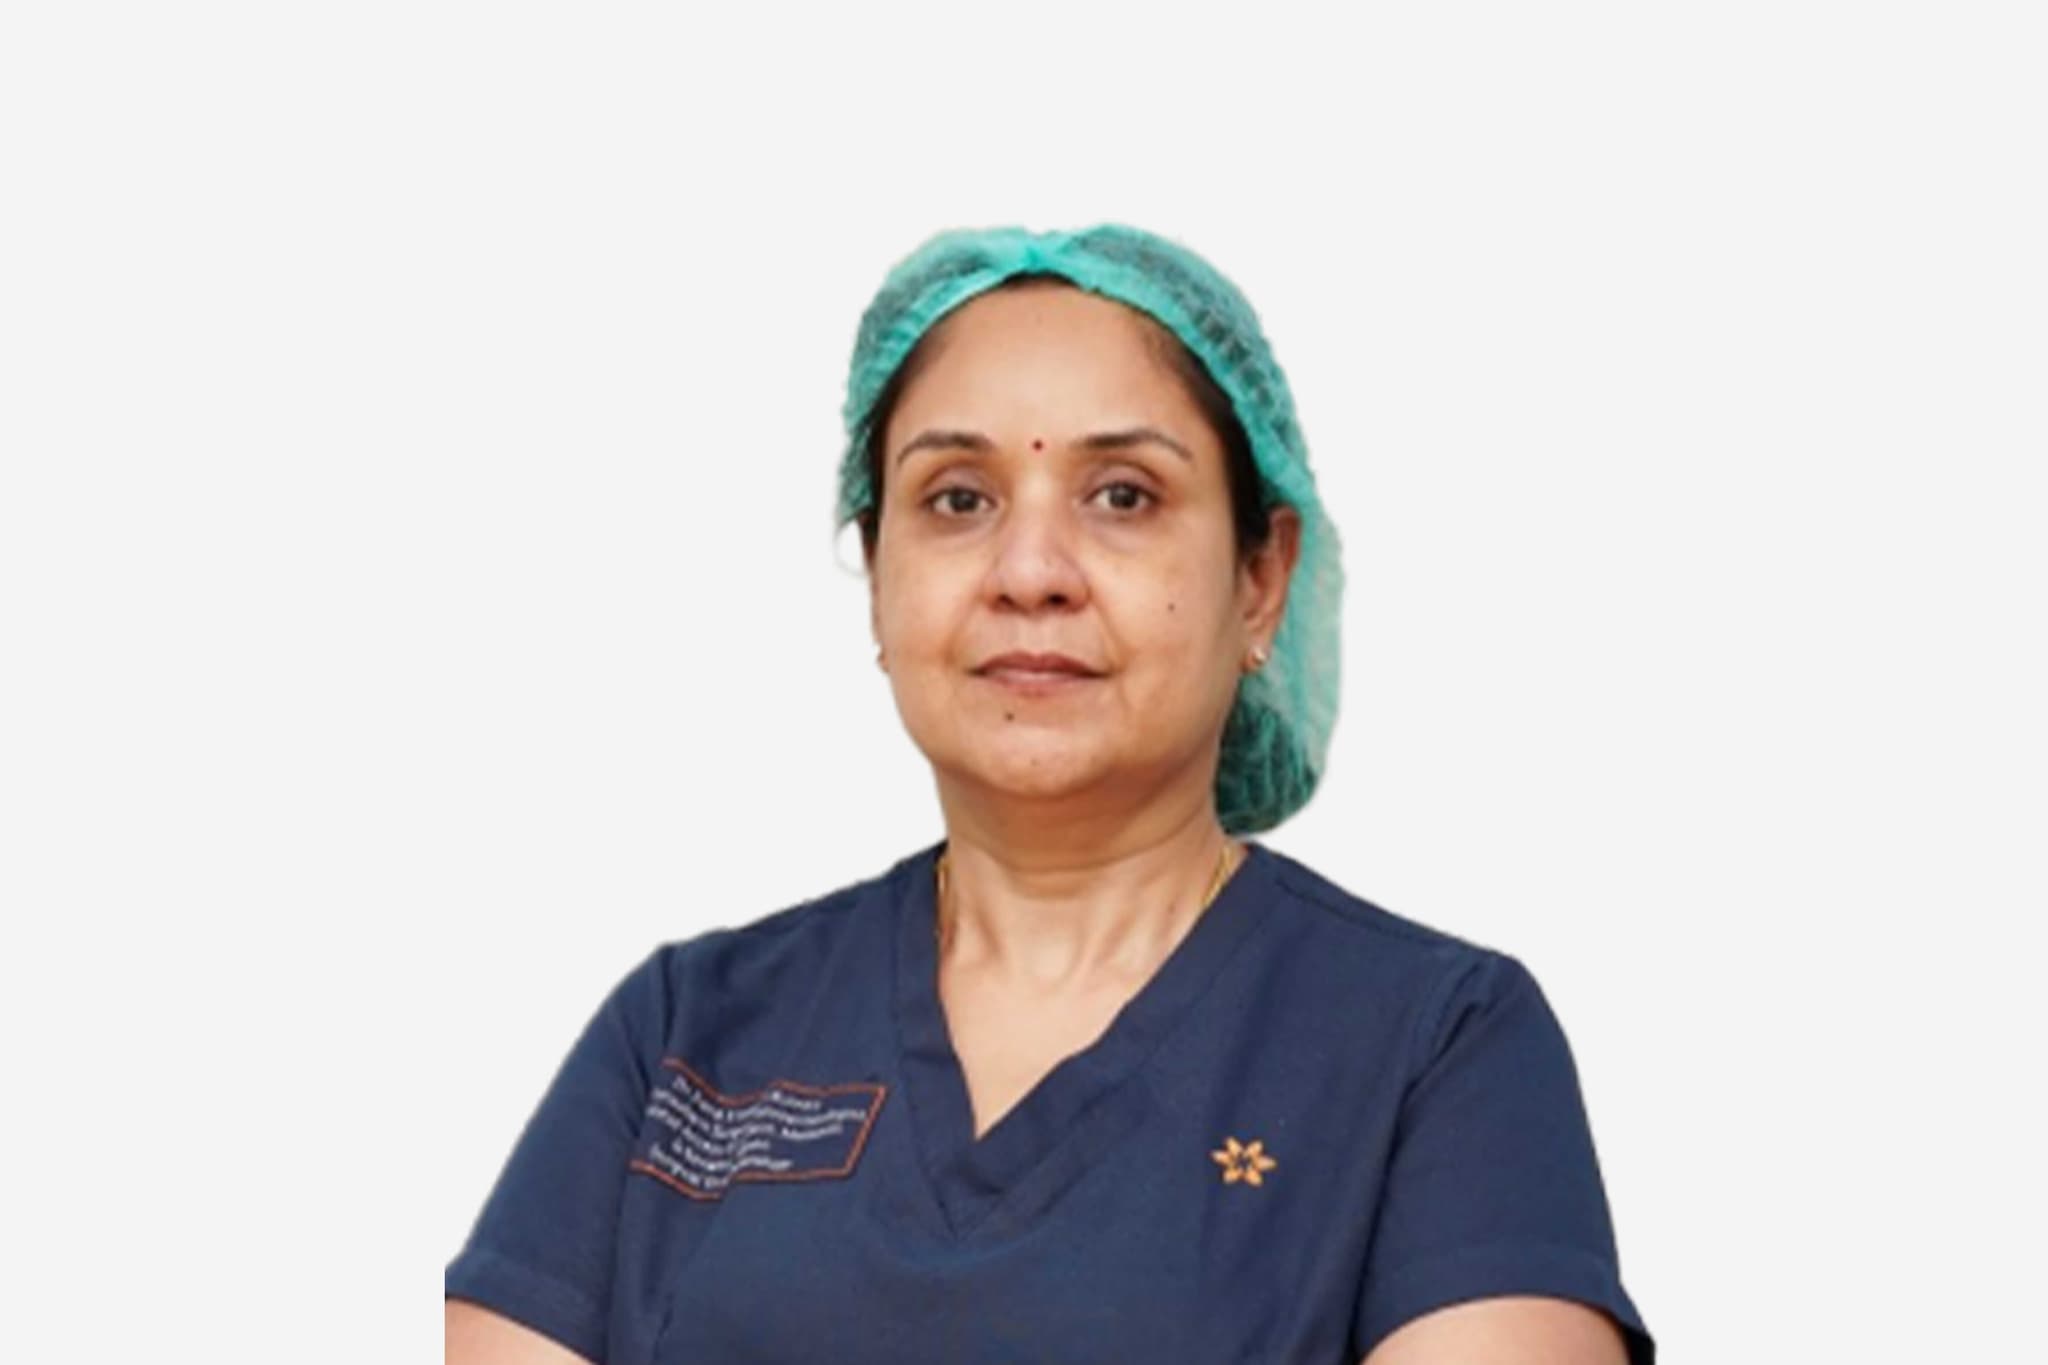
Dr Rajnesh Chander Reddy

Senior Consultant - General, Minimal Access & Bariatric Surgery

Apollo Health City, Jubilee Hills

GastroenterologistGeneral Surgeon

30+ years experience

Dr Rajnesh Chander Reddy, Senior Consultant - General, Minimal Access & Bariatric Surgery at Apollo Health City, Jubilee Hills - Apollo Hospitals
  1. Home
  2. Doctors
  3. Dr Rajnesh Chander Reddy

About Dr Rajnesh Chander Reddy

Dr. Rajnesh Chander Reddy is a highly distinguished specialist in general and bariatric surgery, recognized for his technical mastery in complex abdominal interventions, advanced minimal-access procedures, and metabolic corrections. He specializes in utilizing precision-guided surgical platforms to manage deep visceral pathologies, perform metabolic revisions, and optimize long-term therapeutic outcomes.

Mastery in Advanced General and Laparoscopic Surgery

He specializes in the advanced evaluation, diagnosis, and surgical management of a wide range of acute and chronic conditions affecting the abdominal cavity and soft tissues. His clinical practice leverages three decades of refined surgical acumen to execute high-precision operative interventions, ensuring optimal anatomical restoration and long-term therapeutic success for his patients.

Innovation in Minimal Access and Bariatric Pathways

Dr. Reddy possesses profound expertise in implementing state-of-the-art laparoscopic techniques within his operative framework. By completing a specialized fellowship in Laparoscopic Surgery and avoiding traditional open access methodologies, he targets complex structural gastrointestinal conditions with exceptional accuracy, significantly minimizing physical tissue trauma, reducing post-operative discomfort, and accelerating recovery timelines.

Specialized Metabolic and Patient-Centered Interventions

A primary focus of his practice involves the delivery of highly specialized bariatric interventions tailored to treat severe metabolic disorders and clinical obesity. His detail-driven clinical methodology ensures that advanced operative strategies are seamlessly aligned with comprehensive, patient-centered care pathways, facilitating safe and predictable physiological recovery.

Clinical Governance, Multi-Lingual Communication, and Excellence

Throughout his extensive career spanning 30 years, Dr. Reddy has combined modern surgical innovations with rigorous clinical protocols to maintain the highest standards of safety. Practicing within premier healthcare networks in Hyderabad, Telangana, his exceptional multi-lingual proficiency in English, Hindi, and Telugu enables him to connect seamlessly with a highly diverse patient base, ensuring precise diagnostic communication and enhanced patient trust.

Dr. Rajnesh Chander Reddy at a Glance

  • Specialist in General Surgery, Minimal Access Laparoscopy, and Bariatric Interventions.

  • Extensive clinical experience with 30 years of dedicated service in the medical and surgical field.

  • Completed a specialized advanced fellowship to deliver high-precision, minimal-access treatment options.

  • Expert in advanced diagnostic mapping and precision-guided treatment pathways for visceral conditions.

  • Highly proficient in multiple languages, including English, Hindi, and Telugu, to support a diverse patient base.

  • Prominent medical professional providing dedicated, evidence-based clinical governance in Hyderabad, Telangana.

MBBS
MS
DNB
FRCSEd
FRCS (Glasgow)
Board Certified in Gastroenterologist
Award for the Best Paper in Laparoscopic Surgery in 1992 First to do HALS (Hand Assisted Laparoscopic Surgery)

Affiliated Hospitals

Apollo Health City, Jubilee Hills

Multi Specialty

Hyderabad, Telangana

1988

Estd.

550+

Beds

200+

Doctors

May we help you?

Enter digits only (6-15 digits). We'll add your country code.

Related Treatments

Endoscopic Retrograde Cholangiopancreatography (ERCP)

Endoscopic Retrograde Cholangiopancreatography (ERCP) is a highly specialized procedure used primarily to treat disorders of the bile ducts and pancreatic ducts. It uniquely combines advanced endoscopy with real-time X-ray imaging (fluoroscopy). By 2026, ERCP has evolved from a diagnostic tool into a powerful therapeutic intervention, allowing physicians to clear obstructions, place stents, and repair leaks within the delicate ductal system of the liver and pancreas without the need for invasive abdominal surgery.

Why ERCP is Performed

  • Common Bile Duct Stones: Removing gallstones that have migrated out of the gallbladder and are blocking the main drainage duct.

  • Malignant Obstructions: Relieving blockages caused by tumors in the pancreas, bile ducts, or liver.

  • Biliary Strictures: Opening narrowed areas of the ducts caused by scar tissue or chronic inflammation.

  • Post-Surgical Bile Leaks: Sealing leaks that can occasionally occur following gallbladder or liver surgery.

  • Chronic Pancreatitis: Treating complications such as pancreatic stones or narrowings that cause severe, recurring pain.

  • Sphincter of Oddi Dysfunction: Managing issues with the muscular valve that controls the flow of digestive juices.

Conditions That Require Specialized Care

  • Massive Stone Burden: Cases with very large or numerous stones that may require advanced "fragmentation" techniques.

  • Anatomical Variations: Patients who have had previous gastric bypass or stomach surgery, requiring a modified "enteroscopy" approach.

  • Primary Sclerosing Cholangitis (PSC): A chronic condition requiring careful, repeated dilations of the bile ducts.

  • High-Risk Pancreatitis Patients: Individuals with a history of post-procedure inflammation who require preventative "stenting" of the pancreatic duct.

  • Pediatric ERCP: Rare cases in children involving congenital ductal abnormalities that require specialized pediatric endoscopes.

[Image showing the endoscope positioned in the duodenum with the catheter entering the bile duct]

How an ERCP Is Performed

  • Deep Sedation or Anesthesia: To ensure absolute stillness and comfort, the procedure is performed under deep sedation or general anesthesia.

  • Side-Viewing Endoscopy: A specialized duodenoscope is passed through the mouth and stomach to reach the "papilla"—the small opening where the ducts meet the intestine.

  • Cannulation: A tiny catheter is threaded into the papilla to gain access to the biliary or pancreatic tree.

  • Retrograde Contrast: A radio-opaque dye is injected "backward" into the ducts, highlighting the internal anatomy on a live X-ray monitor.

  • Sphincterotomy: Using a small electrified wire, the surgeon may make a tiny cut in the muscle valve (sphincter) to widen the opening for stone removal.

  • Mechanical Intervention: Tools such as baskets, balloons, or stents are passed through the scope to clear blockages or provide structural support.

Innovations in Duct Therapy

  • Disposable DuodenoscopesThe widespread adoption of single-use scopes to eliminate the risk of bacterial transmission and ensure the highest mechanical reliability for every patient.

  • SpyGlass™ CholangioscopyA "micro-scope" that is passed through the main endoscope, allowing the doctor to see directly inside the bile duct in high-definition to biopsy tumors or break up stones with lasers.

  • AI-Assisted FluoroscopyArtificial intelligence that enhances X-ray images in real-time, helping the doctor identify "shadows" or subtle strictures with greater clarity.

  • Biodegradable Biliary StentsNext-generation stents that provide support to a narrowed duct for several months and then dissolve, avoiding the need for a second procedure to remove them.

  • Laser Lithotripsy (EHL)Using targeted laser energy to "shatter" stubborn gallstones into tiny fragments that can be easily swept out of the duct.

  • Automated Risk-Prediction ModelsSoftware that analyzes a patient's health data before the procedure to suggest the exact dose of preventative medication needed to stop post-op inflammation.

Pre-Procedure Preparation

  • Fasting (NPO): A strictly empty stomach is required, usually meaning no food or drink for 8 to 12 hours prior to the procedure.

  • Antibiotic Prophylaxis: Certain patients may be given a dose of antibiotics before the start of the procedure to prevent ductal infection.

  • Blood Work: Checking coagulation (clotting) factors to ensure it is safe to perform a sphincterotomy or biopsy.

  • Medication Coordination: Careful management of blood thinners and diabetic medications is essential for a safe recovery.

  • Post-Op Plan: Because of the intensive nature of ERCP, patients must have a designated driver and a quiet place to recover for the first 24 hours.

Diagnostic and Safety Monitoring

  • Pancreatitis Prevention: Use of rectal medications or temporary "protective" pancreatic stents to lower the risk of post-ERCP inflammation.

  • Amylase/Lipase Checks: Blood tests performed if a patient experiences unusual pain after the procedure to check for pancreatic irritation.

  • Continuous Vital Monitoring: Specialized anesthesia teams monitor heart rhythm and oxygen levels throughout the entire intervention.

  • Radiation Safety: Using "low-dose" pulsed fluoroscopy to minimize X-ray exposure for both the patient and the medical team.

Why This Treatment Is Highly Effective

  • Avoids Major Surgery: ERCP provides a "keyhole" alternative to traditional open-belly surgery for clearing bile duct obstructions.

  • Immediate Obstruction Relief: Patients with jaundice (yellowing of the skin) often see a rapid improvement in symptoms once the duct is cleared or stented.

  • High Precision: The combination of live video and live X-ray ensures that the doctor knows exactly where the instruments are at all times.

  • Life-Saving for Sepsis: In cases of "cholangitis" (infected bile), ERCP provides urgent drainage that is critical for survival.

  • Dual Functionality: It allows for the immediate transition from identifying a problem to fixing it within the same 30-to-60-minute session.

Recovery and Aftercare

  • Immediate Observation: Most patients stay in a recovery unit for 1 to 2 hours to ensure the sedation has worn off and no immediate pain is present.

  • Sore Throat and Bloating: These are the most common minor side effects and typically resolve within 24 to 48 hours.

  • Dietary Progression: Patients usually start with clear liquids and move to a low-fat diet as tolerated by their digestive system.

  • Activity Limits: No driving or making major decisions for 24 hours. Most patients return to full activity within 2 to 3 days.

  • Follow-up Imaging: A simple ultrasound or blood test is often scheduled a few weeks later to confirm the ducts remain clear.

Life After ERCP

  • Rapid resolution of painful symptoms like biliary colic (gallstone pain) or chronic abdominal pressure.

  • Successful management of complex conditions like cancer-related blockages, allowing for a better quality of life.

  • Permanent removal of dangerous "trapped" stones that could otherwise lead to severe liver damage.

  • A return to a normal, healthy diet once the flow of digestive enzymes and bile has been restored.

  • Empowerment through the successful treatment of a condition that previously would have required a long, difficult surgical recovery.

₹From From 300

Laparoscopic Polypectomy

Laparoscopic Polypectomy generally refers to the minimally invasive removal of polyps from the gallbladder or, in specific gynecological cases, subserosal uterine polyps. While most uterine polyps are removed via hysteroscopy (through the cervix), the laparoscopic approach is reserved for polyps or small growths located on the outer surface of an organ or within the abdominal cavity.

When You Should Consider Laparoscopic Polypectomy

  • Symptomatic Polyps: Growths causing localized pain or persistent digestive issues.

  • Suspect Features: Polyps showing irregular shapes or rapid growth during an ultrasound.

  • Size-Dependent Risks: Gallbladder polyps exceeding 1 cm in size, which is a standard surgical indication in 2026 guidelines.

  • Outer Organ Growth: When a polypoid growth is located on the exterior of the uterus or attached to pelvic ligaments.

  • Cancer Mitigation: To prevent the risk of malignancy in polyps that show signs of growth.

Methods of Removal and Techniques

  • Laparoscopic Cholecystectomy: Removal of the entire gallbladder for polyps larger than 10mm, as they cannot be safely scraped off the wall.

  • Laparoscopic Excision: The use of precision shears or lasers to excise a growth at its base from the exterior of an organ.

  • High-Definition Visualization: Utilizing zoomed-in views to identify a polyp’s blood supply and seal vessels before cutting.

  • Oncological Safety Protocols: The use of specimen bags during removal to ensure tissue does not contact the abdominal wall.

  • Hysteroscopy (Alternative): The standard approach for internal uterine polyps, distinct from the laparoscopic method used for external growths.

How Laparoscopic Polypectomy Is Performed

  • Anesthesia: The surgery is performed under general anesthesia to ensure the patient is comfortable and still.

  • Access Incisions: The surgeon makes 1 to 3 tiny incisions, ranging from 5–10 mm, in the abdominal wall.

  • Instrument Insertion: A laparoscope and specialized micro-instruments are inserted through the small incisions.

  • Vessel Sealing: Surgeons use high-definition cameras to seal blood vessels before removal, resulting in near-zero blood loss.

  • Abdominal Inflation: Carbon dioxide gas is used to create space, though this can lead to temporary post-operative bloating.

Pre-Procedure Preparation

  • Fasting Requirements: Patients must fast for 8-12 hours before the surgery or catheterization.

  • Medical Assessments: Blood tests, ECG, and chest X-rays are conducted to assess overall health.

  • Medication Adjustments: Current medications must be adjusted as directed by the medical team.

  • Allergy Discussion: Patients must discuss any allergies, particularly to materials used in surgical devices or dyes.

  • Post-Op Planning: Arranging for post-operative care and a support person for the recovery period.

Tests Before Laparoscopic Polypectomy

  • Ultrasound Imaging: Used to monitor the size and shape of the polyp and detect rapid growth.

  • Blood Tests: To assess overall health and check for markers of inflammation or infection.

  • ECG: To monitor the heart's electrical rhythm and check for conduction issues.

  • Pulse Oximetry: Used to evaluate oxygen saturation levels in the blood before anesthesia.

  • CT Scan: For detailed mapping of the abdominal cavity and complex growths.

Life After Laparoscopic Polypectomy

  • Hospital Stay: Usually a same-day discharge or a short 23-hour observation stay.

  • Immediate Recovery: Walking is encouraged immediately to aid digestion and prevent blood clots.

  • Pain Management: Discomfort is typically managed with over-the-counter anti-inflammatories.

  • Return to Work: Patients can generally return to work within 5 to 7 days post-procedure.

  • Activity Restrictions: Heavy lifting must be avoided for approximately 4 weeks to ensure proper healing.

Benefits of Laparoscopic Polypectomy

  • Minimal Tissue Disruption: Rapid recovery due to the use of tiny incisions rather than large open cuts.

  • Precise Visualization: High-definition cameras allow for the zoom-in on blood supplies for safer removal.

  • Near-Zero Blood Loss: Advanced sealing techniques minimize bleeding during the excision.

  • Strict Safety: The use of specialized bags prevents tissue fragments from remaining in the pelvic cavity.

  • Long-Term Cure: Provides a definitive treatment with high technical success rates for symptomatic growths.

₹From From 300

Liver Biopsy
Liver Biopsy

A liver biopsy is a medical procedure used to remove a small piece of liver tissue for laboratory examination. It is considered the definitive "gold standard" for identifying the precise cause of liver disease and determining the extent of organ damage. By 2026, advances in real-time imaging and needle technology have made the procedure faster and safer, allowing clinicians to distinguish between various types of inflammation, scarring, and tumors that blood tests or standard scans might miss.

When You Should Consider a Liver Biopsy

  • Unexplained Liver Enzymes: When blood tests show persistent elevations in ALT or AST that cannot be explained by standard diagnostic sets.

  • Staging Fibrosis: To determine the exact degree of scarring (cirrhosis) in patients with chronic conditions like Fatty Liver Disease (NASH/MASH).

  • Hepatitis Monitoring: Evaluating the severity of chronic Hepatitis B or C to decide on the most effective antiviral therapy.

  • Autoimmune Disorders: Diagnosing conditions where the body's immune system attacks the liver, such as Primary Biliary Cholangitis (PBC).

  • Transplant Monitoring: Checking a transplanted liver for early signs of organ rejection or medication toxicity.

  • Lumps or Masses: Investigating a suspicious nodule found on an ultrasound or MRI to rule out malignancy.

Types of Liver Biopsy

  • Percutaneous Biopsy: The standard approach. Under the guidance of ultrasound or CT, a specialized needle is inserted through the skin between the ribs directly into the liver to collect a tissue core.

  • Transjugular Biopsy: A specialized technique for patients with blood clotting issues or excess abdominal fluid (ascites). A catheter is threaded through the jugular vein in the neck and guided down to the liver's internal veins.

  • Laparoscopic Biopsy: Tissue is collected during a minimally invasive surgical procedure, allowing the doctor to visually inspect the liver surface and sample specific, hard-to-reach areas.

  • Fine-Needle Aspiration (FNA): Often used for specific liver tumors to collect cells for cytology, though it provides less structural information than a core biopsy.

How a Liver Biopsy Is Performed

  • Positioning: The patient typically lies on their back with the right arm raised above the head to widen the space between the ribs.

  • Imaging Guidance: A physician uses an ultrasound probe to identify the safest "window" for the needle, avoiding the gallbladder and major blood vessels.

  • Local Anesthesia: The skin and the lining of the chest wall are numbed; most patients feel a sensation of pressure rather than sharp pain.

  • The "Click": Many modern biopsy needles use a spring-loaded mechanism that captures the tissue sample in a fraction of a second.

  • Breath-Hold: The patient is asked to hold their breath for a few seconds during the needle insertion to keep the liver perfectly still.

  • Sample Verification: The tissue core is immediately inspected to ensure it is of sufficient length (usually 1.5 to 2 cm) for an accurate diagnosis.

Innovations in Liver Diagnosis

  • AI-Enhanced HistopathologyArtificial Intelligence algorithms that analyze biopsy slides to provide a more objective "score" for inflammation and fat content, reducing human variability.

  • Molecular ProfilingUsing biopsy tissue for genetic sequencing to identify the exact subtype of liver cancer, allowing for highly targeted chemotherapy.

  • Digital "Tension" MeasurementNeedles equipped with sensors that can measure liver stiffness (elasticity) at the exact moment the biopsy is taken.

  • Multiparametric MRI-Guided BiopsyA high-tech approach that overlays MRI data onto ultrasound monitors, helping surgeons target "hot spots" of metabolic activity.

  • Micro-RNA AnalysisAnalyzing the sample for specific RNA markers that can predict how fast a patient's liver disease might progress over the next decade.

  • Transjugular Pressure MonitoringMeasuring the pressure within the liver veins (HVPG) during a transjugular biopsy to provide critical data on portal hypertension.

Pre-Procedure Preparation

  • Coagulation Testing: Essential blood tests (INR and Platelets) are performed to ensure the blood clots normally before the procedure.

  • Medication Adjustment: Patients must stop taking aspirin, ibuprofen, and other blood thinners for 5–7 days prior to the biopsy.

  • NPO Guidelines: Standard fasting (no food or drink) for 6–8 hours before the appointment is typically required.

  • Observation Planning: Arranging for someone to drive you home, as you will need to remain under observation for several hours post-procedure.

  • Ultrasound Mapping: A pre-procedure scan to confirm the liver size and the absence of fluid that might interfere with the needle path.

Diagnostic and Safety Monitoring

  • Post-Biopsy Recovery Position: Patients must lie on their right side for 2–4 hours immediately after the procedure. This uses the body's own weight to apply pressure to the biopsy site, preventing bleeding.

  • Vital Sign Checks: Nurses monitor blood pressure and heart rate every 15 minutes for the first hour to detect any signs of internal bleeding.

  • Pain Assessment: Monitoring for "referred pain" in the right shoulder, which is a common but harmless sign of diaphragm irritation.

  • Follow-up Ultrasound: In rare cases of suspected bleeding, a quick bedside scan can confirm the stability of the liver.

Why This Treatment Is Highly Effective

  • Definitive Accuracy: While scans show the "shape" of the liver, a biopsy shows the "activity" of the cells, providing an answer that imaging cannot.

  • Personalized Care: Knowing the exact stage of disease allows doctors to prescribe the correct dosage of medication and avoid unnecessary treatments.

  • Cures Through Discovery: Often identifies rare, treatable conditions like Wilson’s disease or Hemochromatosis that might otherwise go undetected.

  • Proven Safety Record: With modern imaging guidance, the risk of serious complications has dropped to less than 1% in most clinical centers.

  • Minimal Recovery: Most patients return to their daily routine within 48 hours, making it a low-impact procedure with high-impact results.

Recovery and Aftercare

  • Activity Limits: Avoid heavy lifting, intense exercise, or "straining" the abdominal muscles for at least one week following the procedure.

  • Wound Care: The small puncture site usually only requires a simple bandage; it should be kept dry for 24 hours.

  • Pain Management: Over-the-counter acetaminophen is usually sufficient for any lingering site soreness; aspirin and NSAIDs should still be avoided for a few days.

  • Signs to Watch For: Patients are instructed to contact their doctor immediately if they experience severe abdominal pain, fainting, or fever.

  • Results Timeline: A preliminary report may be available in 2–3 days, while complex stains and genetic markers typically take 7–10 business days.

Life After a Liver Biopsy

  • A clear, evidence-based diagnosis that ends the "diagnostic mystery" of elevated liver enzymes.

  • A personalized roadmap for health, including specific dietary, lifestyle, and medication recommendations.

  • Peace of mind for transplant recipients knowing their new organ is being monitored with the highest level of detail.

  • Improved long-term outcomes through the early detection of fibrosis before it progresses to irreversible cirrhosis.

  • The opportunity to participate in clinical trials for new liver therapies based on the specific tissue characteristics found.

₹From From 200

Appendectomy (Open/Laparoscopic)

An Appendectomy is the surgical removal of the appendix, a small, finger-shaped pouch attached to the large intestine. It is the standard treatment for appendicitis, an inflammation of the organ that can lead to a life-threatening rupture if left untreated.

When You Should Consider Appendectomy

  • Pain that starts near the belly button and moves to the lower right abdomen.

  • "Rebound tenderness" or sharp pain in the lower right abdomen when pressure is released.

  • Fever and chills accompanying abdominal discomfort.

  • Nausea, vomiting, or loss of appetite.

  • High white blood cell counts detected during blood testing.

Methods of Appendectomy

  • Laparoscopic Appendectomy: The modern minimally invasive standard using three small incisions and a camera (laparoscope).

  • Open Appendectomy: A traditional approach using a single 2- to 4-inch incision, typically reserved for ruptured cases.

  • Emergency Appendectomy: Immediate surgical intervention performed to prevent or treat an appendix rupture.

  • Interval Appendectomy: A delayed surgery performed after a severe infection has been initially managed with antibiotics.

How Appendectomy Is Performed

  • Insufflation: In laparoscopic cases, carbon dioxide gas is used to inflate the abdomen for better visibility.

  • Appendix Identification: The surgeon locates the appendix and carefully ties off its base to separate it from the large intestine.

  • Irrigation: If the appendix has ruptured, the abdominal cavity is washed with saline to remove bacteria and pus.

  • Drainage: A small tube may be placed in the incision site for a few days to allow excess fluid to escape in complex cases.

  • Closure: Incisions are secured using absorbable sutures, surgical glue, or sterile strips.

Pre-Procedure Preparation

  • Maintaining NPO (nothing by mouth) status for several hours prior to the operation.

  • Starting Intravenous (IV) fluids to ensure proper hydration.

  • Administration of prophylactic antibiotics to reduce the risk of surgical site infection.

  • Undergoing general anesthesia to remain completely unconscious throughout the procedure.

Tests Before Appendectomy

  • Physical Examination: To check for localized pain and abdominal wall tension.

  • Ultrasound or CT Scan: Imaging used to confirm the inflammation or see if the appendix has burst.

  • Complete Blood Count (CBC): To identify signs of infection through elevated white blood cell levels.

  • Urine Test: Often performed to rule out a urinary tract infection or kidney stones which can mimic appendicitis symptoms.

Life After Appendectomy

  • For uncomplicated cases, hospital discharge usually occurs within 24 hours.

  • Recovery for laparoscopic surgery includes avoiding heavy lifting (over 5kg) for 1–2 weeks.

  • Recovery for open surgery requires avoiding strenuous exercise for 4–6 weeks to prevent hernia.

  • Diet begins with clear liquids and progresses as bowel function returns to normal.

  • Patients should monitor for signs of abscess, such as new fevers or persistent bloating.

Benefits of Appendectomy

  • Provides a permanent cure for appendicitis by removing the source of inflammation.

  • Prevents life-threatening complications associated with an appendix rupture or peritonitis.

  • Minimal scarring and faster recovery times when performed using laparoscopic techniques.

  • Rapidly alleviates severe abdominal pain and restores normal digestive health.

₹From From 400

Cholecystectomy (Open/Laparoscopic)

A Cholecystectomy is the surgical removal of the gallbladder, a small organ located under the liver that stores bile. It is primarily performed to treat gallstones (cholelithiasis), gallbladder inflammation (cholecystitis), or biliary colic, which is intense pain caused by stones blocking the bile ducts.

When You Should Consider Cholecystectomy

  • Sudden and rapidly intensifying pain in the upper right portion of the abdomen.

  • Nausea or vomiting following high-fat meals.

  • Yellowing of the skin and the whites of the eyes (jaundice).

  • Fever or chills, which may indicate a gallbladder infection.

  • Confirmation of gallstones or a non-functional gallbladder through diagnostic testing.

Methods of Cholecystectomy

  • Laparoscopic Cholecystectomy: The modern "gold standard" minimally invasive approach used in over 90% of cases, involving four small incisions.

  • Open Cholecystectomy: A traditional surgical method using a larger incision, typically reserved for complex cases or severe scarring.

  • Emergency Cholecystectomy: Immediate removal performed when acute inflammation or infection poses a significant health risk.

  • Single-Incision Laparoscopic Surgery (SILS): A specialized technique where the gallbladder is removed through one small incision in the umbilicus.

How Cholecystectomy Is Performed

  • Pneumoperitoneum: During laparoscopic surgery, the abdomen is inflated with carbon dioxide gas to provide a clear workspace for the surgeon.

  • Duct and Artery Clipping: The surgeon identifies the cystic duct and cystic artery and secures them with permanent clips before separation.

  • Gallbladder Detachment: The organ is carefully separated from the liver bed using specialized surgical instruments.

  • Organ Extraction: The gallbladder is placed in a sterile bag and removed through one of the small abdominal incisions.

  • Drainage: In open or complex cases, a Jackson-Pratt (JP) drain may be placed temporarily to remove excess fluid or bile.

Pre-Procedure Preparation

  • Fasting (NPO) for at least 6 to 8 hours prior to the operation.

  • Discontinuing blood-thinning medications several days before surgery as directed by the surgical team.

  • Receiving general anesthesia and the placement of a breathing tube for the duration of the procedure.

  • Undergoing a pre-operative evaluation to check liver enzymes and white blood cell counts.

Tests Before Cholecystectomy

  • Abdominal Ultrasound: The "gold standard" imaging test used to identify gallstones and gallbladder wall thickening.

  • HIDA Scan: A specialized nuclear medicine test used to evaluate the functional emptying of the gallbladder.

  • Blood Panels: To check for elevated liver enzymes or signs of infection (leukocytosis).

  • MRCP or ERCP: Advanced imaging or endoscopic procedures used to check for stones that may have moved into the common bile duct.

Life After Cholecystectomy

  • Most laparoscopic patients return home the same day or after one overnight stay.

  • Recovery for open surgery involves a hospital stay of 3 to 5 days and restricted activity for 4 to 6 weeks.

  • A low-fat diet is recommended for the first few weeks as the body adjusts to bile flowing directly into the small intestine.

  • Patients may experience temporary shoulder pain or bloating due to the gas used during laparoscopic procedures.

  • Monitoring for Post-Cholecystectomy Syndrome (PCS), which affects 10–15% of patients and involves lingering indigestion or nausea.

Benefits of Cholecystectomy

  • Provides permanent relief from the recurring pain of biliary colic and gallstones.

  • Prevents serious complications such as gallbladder rupture, gangrene, or severe pancreatitis.

  • Minimally invasive techniques result in smaller scars, less post-operative pain, and a faster return to daily activities.

  • Eliminates the risk of future gallbladder infections and inflammation.

₹From From 400

Hernia Repair (Inguinal/Umbilical)

Hernia repair is a surgical procedure to correct protrusions of tissue or organs through weakened areas of the abdominal wall. An inguinal hernia occurs in the groin area (the inguinal canal), while an umbilical hernia occurs at or near the navel (belly button). By reinforcing these weak points, surgery prevents the risk of "incarceration" or "strangulation," where the blood supply to the trapped tissue is cut off, making it an essential intervention for both comfort and long-term health.

When You Should Consider Hernia Repair

  • Persistent pain or a "dragging" sensation in the groin or abdomen, especially when lifting or coughing.

  • A visible bulge that may disappear when lying down but protrudes during physical activity.

  • Umbilical protrusions that become larger, more painful, or aesthetically concerning.

  • Inguinal hernias that cause discomfort during daily movements or exercise.

  • As a preventive measure to avoid the emergency complications of a trapped (strangulated) intestine.

  • When a hernia interferes with professional duties that require physical labor or heavy lifting.

Conditions That Require Specialized Care

  • Incarcerated Hernia: Tissue that is trapped in the abdominal wall and cannot be pushed back in.

  • Strangulated Hernia: A medical emergency where the blood supply to the trapped tissue is restricted.

  • Recurrent Hernia: A hernia that has returned after a previous surgical repair.

  • Bilateral Inguinal Hernias: When hernias are present on both the left and right sides of the groin simultaneously.

  • Large Incisional Hernias: Weakness occurring at the site of a previous surgical scar.

How Hernia Repair Is Performed

  • The procedure begins with Reduction, where the protruding fat or intestine is gently pushed back into the abdominal cavity.

  • Open Surgery involves a single incision made directly over the bulge to access the muscle defect.

  • Laparoscopic Surgery utilizes three to four "keyhole" incisions and a camera to repair the wall from the inside.

  • Robotic-Assisted Surgery provides the surgeon with high-definition 3D visualization and robotic precision for complex cases.

  • In most adult cases, a Synthetic Mesh is placed over the weak spot to act as a permanent reinforcement.

  • The muscle layers are sutured, and the skin is closed with dissolvable stitches, surgical tape, or skin glue.

Innovations in Hernia Surgery

  • Bio-Absorbable MeshesAdvanced mesh materials that provide a scaffold for the body’s own tissue to grow into before eventually dissolving, reducing long-term foreign body sensation.

  • Self-Gripping (ProGrip) MeshSpecialized mesh with micro-hooks that eliminate the need for traditional tacks or sutures, significantly reducing post-operative nerve pain.

  • 3D-Mapped Mesh ContouringThe use of meshes designed to anatomically fit the specific curvature of the groin or abdominal wall for a more natural feel.

  • Single-Port Robotic RepairThe ability to perform complex hernia reconstructions through just one tiny incision, further minimizing scarring.

  • Advanced Nerve MappingIntraoperative tools that help surgeons identify and avoid sensory nerves, lowering the risk of chronic post-surgical pain.

  • Glue-Based FixationUsing medical-grade adhesives instead of mechanical tacks to secure the mesh, leading to a smoother recovery.

Pre-Procedure Preparation

  • Physical examination and medical history to determine the most effective surgical approach (Open vs. Laparoscopic).

  • Guidance on smoking cessation, as nicotine can significantly weaken tissue healing and increase recurrence risk.

  • Review of medications, particularly anticoagulants (blood thinners) that may need to be paused.

  • Fasting (NPO) instructions starting the night before surgery to ensure a safe anesthetic experience.

  • Coordination for a "day-case" discharge, as most patients return home within hours of the procedure.

Pre-Procedure Tests

  • Ultrasound or CT Scan: To determine the exact size of the hernia and identify if any vital organs are involved.

  • Routine Blood Work (CBC/Electrolytes): To ensure general health and proper clotting function.

  • Electrocardiogram (ECG): For patients over 40 or those with cardiac history to ensure fitness for anesthesia.

  • Cough Test: A physical assessment to judge the stability of the hernia under abdominal pressure.

  • Urinalysis: To rule out any underlying infections prior to the placement of surgical mesh.

Why This Treatment Is Highly Effective

  • Prevents Emergencies: Repairing a hernia electively removes the life-threatening risk of bowel strangulation.

  • Minimal Recurrence: The use of modern mesh technology has reduced the risk of a hernia returning to less than 5%.

  • Rapid Return to Activity: Laparoscopic and robotic techniques allow most patients to return to desk work within a week.

  • Restored Core Strength: Reinforcing the abdominal wall improves overall stability and comfort during physical movement.

  • Cosmetic Improvement: Corrects the visible bulge, restoring the natural contour of the navel or groin.

Recovery and Monitoring

  • Patients are encouraged to walk within a few hours of surgery to promote blood flow and lung function.

  • Pain management typically transitions from clinical care to over-the-counter medications within 48 hours.

  • Heavy lifting (typically over 10–20 lbs) is restricted for 4 to 6 weeks to allow the mesh to integrate fully.

  • Most patients can resume driving once they can perform an emergency stop without abdominal discomfort.

  • Follow-up visits are scheduled to monitor the incision sites and ensure there is no fluid buildup (seroma).

Life After Hernia Repair

  • Freedom from the chronic aching or "heaviness" associated with the hernia.

  • Ability to return to high-impact sports and strenuous gym activities once full clearance is granted.

  • Permanent structural support of the abdominal wall through the integrated mesh.

  • Significant reduction in the psychological stress associated with a visible or painful bulge.

  • Long-term protection against the risk of intestinal complications.

₹From From 400

Mesh Hernioplasty
Mesh Hernioplasty

Mesh Hernioplasty is the surgical repair of a hernia using a synthetic or biological flat sheet (mesh) to reinforce a weakened abdominal wall. Unlike a traditional herniorrhaphy, which simply stitches the muscle together, a hernioplasty is a tension-free repair. This approach is considered the global gold standard for significantly reducing the likelihood of a hernia returning.

When You Should Consider Mesh Hernioplasty

  • Presence of a visible bulge in the abdomen or groin that increases with physical strain.

  • Recurrent hernias where previous non-mesh (stitch-only) repairs have failed.

  • Large abdominal wall defects that cannot be closed securely with stitches alone.

  • Pain, pressure, or a pulling sensation at the site of a previous surgical scar or natural weakness.

  • Confirmation of a hernia defect through a physical exam or diagnostic imaging like a CT scan.

Methods of Mesh Hernioplasty

  • Open Hernioplasty: A traditional approach where a single incision is made directly over the hernia to place and secure the mesh.

  • Laparoscopic Hernioplasty: A minimally invasive "keyhole" technique using a camera and small ports to place mesh from the inside.

  • Robotic Hernioplasty: Utilizing robotic assistance for high-precision mesh placement and complex abdominal wall reconstruction.

  • Tension-Free Repair: A specialized technique where the mesh bridges the gap in the muscle without pulling the edges together, minimizing post-op pain.

How Mesh Hernioplasty Is Performed

  • Tissue Reduction: The bulging fat or intestine is gently returned to its proper position inside the abdominal cavity.

  • Mesh Customization: A mesh is selected and often trimmed to overlap the edges of the muscle defect by at least 3–5 cm.

  • Layered Placement: Depending on the technique, mesh is placed on top of the muscle (onlay), between muscle layers (sublay), or under the muscle (underlay).

  • Fixation: The mesh is secured using permanent sutures, specialized tacks, staples, or medical-grade surgical glue.

  • Integration: The surgeon ensures the mesh is flat and secure to allow natural fibrous tissue to grow into the mesh pores over time.

Pre-Procedure Preparation

  • Fasting (NPO) for 6–8 hours prior to the scheduled surgery.

  • Pausing blood-thinning medications to prevent the formation of hematomas around the mesh site.

  • Pre-operative evaluation to determine the most appropriate type of anesthesia (General, Spinal, or Local).

  • Measurement of the hernia defect via ultrasound or CT scan to ensure the correct mesh size is available.

Tests Before Mesh Hernioplasty

  • Physical Evaluation: To check the size of the bulge and determine if the tissue is "incarcerated" or trapped.

  • CT Scan or Ultrasound: Imaging used to measure the exact dimensions of the hole in the abdominal wall.

  • Blood Panels: Routine screens to ensure the patient is fit for the selected type of anesthesia.

  • Electrocardiogram (ECG): Often performed for older patients to assess heart health before the procedure.

Life After Mesh Hernioplasty

  • Most patients return home the same day, as the procedure is typically performed on a day-care basis.

  • Strict activity restrictions are required, including no heavy lifting (>5 kg) for at least 6 weeks.

  • Use of an abdominal binder or compression garment for approximately 4 weeks to support the repair.

  • Patients may feel "twinges" or minor soreness for a few months as the body integrates the mesh.

  • Return to light activities is encouraged early to promote circulation and healing.

Benefits of Mesh Hernioplasty

  • Significantly lowers the recurrence rate from up to 30% (with stitches alone) to less than 5%.

  • Provides a permanent, lifelong "scaffold" that reinforces the weakened abdominal wall.

  • The tension-free nature of the repair results in less post-operative pain compared to traditional methods.

  • High technical success rates and durability, as the mesh is designed to stay in the body indefinitely.

₹From From 500

Incisional Hernia Repair

An Incisional Hernia Repair is a surgical procedure to fix a protrusion of tissue or an organ (usually the intestine) through a previously made surgical scar. This occurs when the abdominal wall muscles fail to heal completely or weaken over time following an earlier surgery.

When You Should Consider Incisional Hernia Repair

  • A visible bulge or lump at the site of a previous surgical scar.

  • A bulge that becomes more prominent or painful when coughing, straining, or lifting.

  • Persistent aching or pressure at the previous incision site.

  • Nausea or vomiting if the protruding tissue becomes trapped (incarcerated).

  • Confirmation of a muscle "defect" via CT scan or physical examination.

Methods of Incisional Hernia Repair

  • Open Repair: A traditional approach involving an incision over the old scar, often used for very large hernias or complex cases.

  • Laparoscopic Repair: A minimally invasive method using small "keyhole" incisions, CO2 gas, and a camera to repair the defect from the inside.

  • Robotic-Assisted Repair: A modern variation of laparoscopic surgery offering enhanced precision for medium to large hernias.

  • Tension-Free Mesh Repair: The use of synthetic or biologic mesh to reinforce the abdominal wall, significantly reducing the risk of recurrence.

How Incisional Hernia Repair Is Performed

  • Sac Reduction: The surgeon identifies the hernia sac and carefully pushes the protruding tissue or intestine back into the abdominal cavity.

  • Adhesiolysis: Freeing the intestine from old scar tissue or adhesions that may have formed since the previous surgery.

  • Mesh Placement: A flexible, permanent screen (mesh) is secured over or under the muscle layer to act as a scaffold for new tissue growth.

  • Fixation: The mesh is secured using sutures, tacks, or specialized surgical staples to ensure it remains in a "tension-free" position.

  • Abdominal Wall Reconstruction: In complex cases, the surgeon may rearrange muscle layers to achieve a more natural and strong closure.

Pre-Procedure Preparation

  • Quitting smoking for several weeks to improve blood flow and tissue healing.

  • Weight management and stabilization of blood sugar levels to minimize the risk of repair failure.

  • Fasting (NPO) as directed before undergoing general anesthesia.

  • Evaluation of the old surgical site to plan the best approach (open vs. minimally invasive).

Tests Before Incisional Hernia Repair

  • Physical Exam: To feel for the bulge and assess the strength of the surrounding abdominal wall.

  • CT Scan: The primary imaging tool used to measure the exact size of the muscle defect and identify the contents of the hernia.

  • Blood Panels: To check for signs of infection or uncontrolled diabetes that could affect recovery.

  • Pre-Surgical Optimization Review: Assessment of lifestyle factors (BMI, smoking status) that impact surgical success.

Life After Incisional Hernia Repair

  • Hospital stays range from same-day discharge for laparoscopic cases to 3–5 days for large open repairs.

  • Use of an abdominal binder (elastic wrap) for 4–6 weeks to support the new repair.

  • Strict activity restrictions, including no heavy lifting (>5 kg) for 6–8 weeks.

  • Immediate encouragement of gentle walking to prevent blood clots during the early recovery phase.

  • Monitoring for seromas (fluid collection) or signs of mesh infection at the incision site.

Benefits of Incisional Hernia Repair

  • Significantly reduces the risk of hernia recurrence from 30–50% (without mesh) to below 10% (with mesh).

  • Restores the structural integrity and strength of the abdominal wall.

  • Eliminates the risk of life-threatening complications such as bowel obstruction or strangulation.

  • Relieves chronic pain and discomfort associated with the protruding tissue.

₹From From 500

Ventral Hernia Repair

A Ventral Hernia Repair is a surgical procedure to fix a hole or weakness in the abdominal wall muscles through which fat or organs (such as the intestine) bulge. A "ventral" hernia specifically refers to any hernia occurring on the front (anterior) of the abdomen, excluding the groin area.

When You Should Consider Ventral Hernia Repair

  • A visible bulge on the abdomen that may disappear when lying down or appear when straining.

  • Pain or discomfort at the hernia site, especially when lifting or coughing.

  • Nausea or vomiting, which may indicate that the bowel is trapped (incarcerated).

  • A bulge that becomes hard, red, or purple, signifying a potential medical emergency.

  • Significant epigastric or umbilical discomfort that interferes with daily physical activities.

Methods of Ventral Hernia Repair

  • Open Repair: A traditional method where an incision is made directly over the hernia to push the bulge back and close the muscle.

  • Laparoscopic Repair: A minimally invasive approach using "keyhole" incisions and CO2 gas to repair the defect from inside the abdominal cavity.

  • Robotic-Assisted Repair: Utilizing advanced technology to perform complex muscle rearrangements (like TAR) through small incisions.

  • Suture (Primary) Repair: Simply stitching the muscle together, typically reserved only for very small holes (less than 1–2 cm).

  • Mesh Reinforcement: Using a synthetic or biologic screen to provide a "tension-free" bridge across the weakened muscle wall.

How Ventral Hernia Repair Is Performed

  • Abdominal Contents Reduction: The surgeon carefully returns the protruding fat or organs to their proper place inside the abdomen.

  • Pneumoperitoneum: In laparoscopic or robotic cases, the abdomen is inflated with gas to provide a clear view and workspace.

  • Mesh Placement: A permanent synthetic mesh is secured on top of, between, or under the muscle layers to act as a scaffold.

  • TAR (Transversus Abdominis Release): A complex robotic or open technique used to close very large gaps by rearranging the abdominal muscle layers.

  • Closure: The incisions are closed with sutures or surgical glue, and the reinforced wall begins the process of growing into the mesh.

Pre-Procedure Preparation

  • Optimization of health factors, including quitting smoking and stabilizing blood sugar for diabetic patients.

  • Weight management, as a BMI over 35 can significantly increase the risk of the hernia returning.

  • Fasting (NPO) for a specified period before the administration of general anesthesia.

  • Discussion with the surgeon regarding the specific type of ventral hernia (epigastric, umbilical, or incisional).

Tests Before Ventral Hernia Repair

  • Physical Examination: To classify the hernia and check for "reducible" versus "incarcerated" tissue.

  • CT Scan: The primary diagnostic tool used to measure the exact size of the muscle defect and assess the involvement of bowel loops.

  • Blood Panels: To ensure the patient is fit for general anesthesia and to check for signs of inflammation.

  • Medical Clearance: Evaluation of heart and lung health, particularly for older patients or those undergoing complex robotic repairs.

Life After Ventral Hernia Repair

  • Small or simple repairs are often same-day procedures, while complex repairs may require a 3–5 day hospital stay.

  • Patients must wear an abdominal binder (compression belt) for 4–6 weeks to support the repair and reduce swelling.

  • Strict activity restrictions: no heavy lifting (>5 kg) for at least 6–8 weeks.

  • Avoidance of core-heavy exercises like planks or crunches until cleared by the surgical team.

  • Close monitoring for seromas (fluid pockets) or chronic pain at the mesh fixation site.

Benefits of Ventral Hernia Repair

  • Reduces the recurrence rate from approximately 30–40% (with stitches alone) down to 5–10% with mesh.

  • Prevents life-threatening emergencies such as bowel strangulation where blood supply is cut off.

  • Restores the strength and appearance of the abdominal wall.

  • Effectively relieves chronic pain and discomfort associated with the protrusion of abdominal contents.

₹From From 500

Laparoscopic Hernia Repair

Laparoscopic Hernia Repair, also known as minimally invasive or keyhole surgery, uses specialized tools and a camera to repair a weakness in the abdominal wall from the inside out. It is most commonly used for inguinal (groin), umbilical (navel), and ventral hernias.

When You Should Consider Laparoscopic Hernia Repair

  • A visible bulge in the groin or abdomen that may become more prominent when standing or coughing.

  • Pain or pressure at the hernia site during physical activity or lifting.

  • Inguinal hernias that occur on both sides (bilateral) of the groin.

  • Recurrent hernias where a previous open surgical repair has failed.

  • Desire for a faster return to work and daily activities with minimal scarring.

Methods of Laparoscopic Hernia Repair

  • TAPP (Transabdominal Preperitoneal): The surgeon enters the peritoneal cavity where the organs are located to reach and repair the hernia.

  • TEP (Totally Extraperitoneal): The surgeon operates in the space between the muscle and the abdominal lining, avoiding the organ cavity entirely.

  • IPOM (Intraperitoneal Onlay Mesh): Primarily used for ventral hernias, where a specialized mesh is placed on the inside of the abdominal wall.

  • Robotic-Assisted Laparoscopy: Using a robotic interface for enhanced precision and 3D visualization during the repair.

How Laparoscopic Hernia Repair Is Performed

  • Insufflation: The abdominal cavity is inflated with Carbon Dioxide (CO2) gas to create a dome-shaped workspace.

  • Port Insertion: Three to four small incisions (0.5–1 cm) are made to allow the insertion of a laparoscope and long, thin instruments.

  • Reduction: Protruding tissue, such as fat or a loop of intestine, is carefully pulled back into the abdominal cavity from the inside.

  • Mesh Reinforcement: A lightweight, flexible synthetic mesh is unfurled over the defect to reinforce the weakened wall.

  • Fixation: The mesh is secured in place using surgical tacks, staples, or specialized surgical glue to prevent shifting.

Pre-Procedure Preparation

  • Fasting (NPO) for 6–8 hours prior to the surgery to ensure safety during anesthesia.

  • Pausing blood-thinning medications several days in advance as coordinated with the surgical team.

  • Medical clearance to ensure the patient can tolerate general anesthesia and abdominal CO2 inflation.

  • Discussing the specific approach (TAPP vs. TEP) based on the hernia's location and surgical history.

Tests Before Laparoscopic Hernia Repair

  • Physical Examination: The primary method to determine if the hernia is "reducible" or "incarcerated."

  • Ultrasound or CT Scan: Imaging used to confirm the diagnosis and map the size of the abdominal wall defect.

  • Electrocardiogram (ECG): Often required for patients over a certain age to ensure heart health for general anesthesia.

  • Blood Panels: To check for infection markers and ensure proper kidney and liver function.

Life After Laparoscopic Hernia Repair

  • Most patients return home the same day as the procedure (day-care surgery).

  • Walking is encouraged immediately following surgery to prevent blood clots.

  • Desk-based work can typically be resumed within 3 to 7 days.

  • Strict lifting restrictions—usually no more than 5–10 kg—must be followed for 4–6 weeks.

  • Monitoring for temporary shoulder pain, which is a common side effect of the CO2 gas used during surgery.

Benefits of Laparoscopic Hernia Repair

  • Results in significantly smaller scars and a lower risk of wound infection compared to open surgery.

  • Offers a faster recovery timeline and a quicker return to professional and athletic activities.

  • Provides a superior view for the surgeon to identify and repair multiple hernia defects through the same incisions.

  • Utilizes a "tension-free" mesh technique that lowers the risk of the hernia returning.

₹From From 500

Colectomy (Bowel Resection Surgery

A Colectomy is a major surgical procedure performed to remove all or part of the colon (large intestine). As a critical intervention for both life-threatening emergencies and chronic conditions, it is used to treat colon cancer, severe inflammatory bowel diseases, and obstructive disorders. By 2026, advances in surgical technology have transformed the colectomy from a traditional open surgery into a high-precision procedure, often utilizing robotic assistance to improve patient recovery and preserve as much natural bowel function as possible.

When You Should Consider a Colectomy

  • Colorectal Cancer: To remove malignant tumors and the surrounding lymph nodes to prevent the spread of disease.

  • Inflammatory Bowel Disease (IBD): When Crohn’s disease or Ulcerative Colitis no longer responds to medication.

  • Severe Diverticulitis: To remove segments of the colon that have become chronically inflamed or have developed abscesses.

  • Bowel Obstruction: An emergency scenario where a blockage prevents the passage of waste and threatens blood flow to the tissue.

  • Gastrointestinal Bleeding: Uncontrolled bleeding in the large intestine that cannot be stopped via endoscopy.

  • Familial Adenomatous Polyposis (FAP): A preventive measure for patients with a genetic predisposition to developing hundreds of precancerous polyps.

Types of Colectomy

  • Partial Colectomy (Hemicolectomy): Removal of the diseased portion of the colon on either the right or left side.

  • Total Colectomy: Removal of the entire large intestine.

  • Proctocolectomy: Removal of both the colon and the rectum, often requiring a specialized internal reservoir or an ostomy.

  • Total Abdominal Colectomy: Removal of the colon while leaving the rectum intact, typically used in specific Crohn’s or FAP cases.

How a Colectomy Is Performed

  • Surgical Access: Depending on the case, the surgeon uses either a traditional open incision or several "keyhole" laparoscopic ports.

  • Resection: The diseased segment of the bowel is carefully detached from its blood supply and the surrounding supportive tissue (mesentery).

  • Lymph Node Mapping: In cancer cases, the surrounding lymph nodes are removed along with the colon segment for pathological testing.

  • Anastomosis (Reconnection): The healthy ends of the remaining intestine are sewn or stapled back together to allow for normal waste passage.

  • Stoma Creation (Optional): If a safe reconnection is not possible, the end of the intestine is brought through the abdominal wall (a colostomy or ileostomy).

  • Robotic Dexterity: Surgeons often utilize robotic platforms to perform delicate suturing in the deep pelvic cavity with 3D high-definition visualization.

Innovations in Bowel Surgery

  • Robotic-Assisted ResectionAdvanced platforms that provide 3D visualization and wristed instruments, allowing for more precise nerve preservation and faster suturing.

  • Fluorescence-Guided AngiographyThe use of an injectable dye that glows under infrared light, allowing the surgeon to ensure the new connection has a perfect blood supply.

  • ERAS (Enhanced Recovery After Surgery)A standardized pathway involving pre-operative "carb loading," non-opioid pain management, and early mobilization to speed up bowel recovery.

  • Stapling Technology with AISmart surgical staplers that measure tissue thickness and adjust the firing pressure to create more consistent, leak-resistant connections.

  • Intraoperative Pathological Margin AssessmentRapid testing techniques that ensure all cancer cells have been removed before the surgeon closes the incision.

  • Bio-Luminescent Nerve MarkingExperimental technology that makes autonomic nerves visible, helping the surgeon avoid damage that could impact bladder or sexual function.

Pre-Procedure Preparation

  • Bowel Prep: A strict regimen of clear liquids and laxatives to empty the colon, reducing the risk of infection.

  • Nutritional Optimization: Ensuring the patient has adequate protein and vitamin levels to support the complex healing of the intestinal wall.

  • Cardiac and Pulmonary Clearance: A thorough review to ensure the patient can safely undergo a lengthy surgical procedure.

  • Ostomy Education: Meeting with a Wound, Ostomy, and Continence (WOC) nurse to discuss the potential for a temporary or permanent stoma.

  • Medication Adjustment: Pausing certain blood thinners or immunosuppressants that could interfere with the healing of the reconnection site.

Diagnostic and Safety Monitoring

  • Anastomotic Leak Detection: Monitoring for signs of fever, abdominal rigidity, or elevated white blood cell counts following the reconnection.

  • Bowel Function Tracking: Watching for the return of "flatus" (gas) or bowel movements, which indicate the digestive system has restarted.

  • C-Reactive Protein (CRP) Trends: Tracking inflammatory markers to identify potential internal complications before they become symptomatic.

  • Electrolyte Surveillance: Monitoring sodium and potassium levels, which can fluctuate rapidly after bowel surgery.

Why This Treatment Is Highly Effective

  • Cancer Cure Potential: In many cases, a colectomy is the only way to achieve a complete cure for localized colon cancer.

  • Resolution of Chronic Pain: Removes the source of recurring, debilitating pain for patients with severe divertiverticulitis or IBD.

  • Emergency Stabilization: Provides a life-saving solution for bowel perforations or complete obstructions.

  • Improved Quality of Life: For many with Ulcerative Colitis, removing the diseased colon eliminates the daily burden of urgency and bleeding.

  • Precision and Safety: Modern minimally invasive techniques have significantly reduced the risk of large-scale infections and long-term scar tissue.

Recovery and Aftercare

  • The hospital stay typically ranges from 3 to 7 days, depending on whether the surgery was laparoscopic or open.

  • Early walking (within 24 hours) is essential to prevent blood clots and encourage the "waking up" of the digestive tract.

  • Patients transition from clear liquids to a "low-residue" (low-fiber) diet for several weeks to allow the internal staples to heal.

  • Heavy lifting and strenuous abdominal exercises are restricted for 6 to 8 weeks to prevent the formation of an incisional hernia.

  • If a stoma was created, specialized nursing care is provided to teach the patient how to manage their external pouching system.

Life After a Colectomy

  • Most patients return to a varied, healthy diet once the initial healing phase (about 6–8 weeks) is complete.

  • For many, the surgery results in a significant reduction in medication dependence and a return to active professional and social life.

  • Regular follow-up colonoscopies and imaging are scheduled to ensure continued health and monitor for any recurrence.

  • The body's digestive patterns may change, but most individuals adapt successfully to their "new normal" over time.

  • Empowerment through the resolution of a chronic or life-threatening gastrointestinal condition.

₹From From 1500

Debridement Surgery
Debridement Surgery

Debridement is a critical clinical and surgical intervention used to treat chronic wounds, severe infections, and deep burns. The procedure involves the precise removal of necrotic (dead), damaged, or infected tissue to expose the underlying healthy tissue. By clearing away this cellular debris, debridement eliminates a primary source of infection and "restarts" the body’s natural healing cascade. In the context of burn care, early and effective debridement is the most important factor in reducing scarring and improving long-term functional outcomes.

When You Should Consider Debridement

  • Severe Burn Injury: To remove charred or "eschar" tissue that prevents healing and harbors bacteria.

  • Diabetic Foot Ulcers: When chronic wounds fail to progress due to a buildup of non-viable tissue or biofilm.

  • Necrotizing Fasciitis: An emergency scenario where "flesh-eating" bacteria require rapid surgical removal to save life and limb.

  • Pressure Sores: Deep bedsores that have developed thick, leathery tissue (slough) that blocks new skin growth.

  • Contaminated Traumatic Wounds: Road rash or deep lacerations containing dirt, debris, or foreign objects.

  • Venous Stasis Ulcers: Chronic leg wounds that require "freshening" of the wound edges to stimulate closure.

Core Methods of Debridement

  • Surgical (Sharp) Debridement: The most rapid method, where a surgeon uses a scalpel or scissors to cut away dead tissue until a healthy, bleeding wound bed is reached.

  • Hydrosurgical Debridement: Utilizing high-pressure, razor-thin saline jets to selectively wash away necrotic tissue while preserving the delicate healthy dermis beneath.

  • Enzymatic Debridement: The application of specialized topical agents that chemically dissolve dead tissue without harming the living skin.

  • Biological Debridement: A highly selective method using sterile, medical-grade larvae (maggots) that ingest only necrotic tissue and release natural antibiotics.

  • Autolytic Debridement: A conservative approach using moisture-retentive dressings to trap the body's own natural enzymes, allowing the wound to "self-clean" over time.

[Image showing the visual difference between a necrotic wound bed and a healthy, granulated wound bed following debridement]

Burn-Specific Interventions

  • Early Excision: For deep burns, removing the damaged tissue within the first 24 to 72 hours is the standard for reducing the risk of sepsis.

  • Escharotomy: An emergency procedure for circumferential burns where stiff, dead skin acts like a tourniquet; incisions are made to release pressure and restore blood flow.

  • Skin Grafting (Autograft): Following debridement, a thin layer of the patient's own healthy skin is transplanted to cover the clean wound bed.

  • Skin Substitutes: The use of lab-grown or bio-engineered "scaffolds" that provide a temporary barrier and encourage the body to regenerate its own skin.

  • Fasciotomy: In cases of extreme swelling (compartment syndrome) following a burn or trauma, deep incisions are made into the muscle fascia to prevent tissue death.

Innovations in Wound and Burn Care

  • Bromelain-Based Enzymatic AgentsPlant-derived enzymes that can "melt" away burn eschar in as little as four hours, often eliminating the need for traditional surgery in partial-thickness burns.

  • Handheld Ultrasound DebridementDevices that use low-frequency ultrasonic mists to vibrate and dislodge bacteria and dead cells without the pain or trauma of a scalpel.

  • 3D-Printed Bio-MasksCustom-designed masks for facial burn victims that provide perfectly distributed pressure and healing agents to minimize contour scarring.

  • Cold Plasma TherapyA cutting-edge non-thermal gas used to instantly sterilize a wound bed and stimulate the microcirculation needed for tissue regrowth.

  • AI Wound DiagnosticsSmartphone-based apps that use hyperspectral imaging to analyze a wound and tell the clinician exactly which areas require debridement.

  • Smart Dressings with BiosensorsBandages that change color or send an alert to a doctor's tablet if they detect a change in pH or temperature indicating an early infection.

Pre-Procedure Preparation

  • Pain Management Planning: Ensuring adequate local anesthesia, regional nerve blocks, or general sedation depending on the wound's size.

  • Vascular Assessment: Using Doppler ultrasound to ensure there is enough blood flow to the area to support healing after the dead tissue is removed.

  • Nutritional Loading: Increasing protein and Vitamin C intake, as the body requires massive amounts of energy to "rebuild" skin after debridement.

  • Wound Photography: Taking high-resolution baseline images to track the surface area and depth of the wound throughout the treatment cycle.

  • Infection Screening: Taking a wound culture to identify specific bacteria and ensure the patient is on the most effective antibiotic.

Diagnostic and Safety Monitoring

  • Quantitative Tissue Cultures: Measuring the concentration of bacteria within the wound bed to ensure it is "clean" enough for a skin graft.

  • Granulation Tracking: Monitoring the appearance of "beefy red" tissue, which is a sign of healthy blood vessel formation and successful healing.

  • Perfusion Monitoring: Using near-infrared spectroscopy to check oxygen levels in the tissue surrounding the debridement site.

  • Electrolyte Management: Crucial for burn patients, as large debrided areas can lead to significant fluid and salt loss.

Why This Treatment Is Highly Effective

  • Eliminates Biofilms: Breaks down the "shield" that bacteria create, allowing antibiotics and the immune system to finally reach the infection.

  • Reduces Systemic Risk: Removing infected tissue prevents "sepsis," a life-threatening condition where the infection enters the bloodstream.

  • Shortens Healing Time: By removing the "dead weight" of necrotic tissue, the body can focus all its resources on closing the wound.

  • Improves Functional Range: Especially in burns, proper debridement prevents the formation of thick, restrictive scars (contractures) that limit movement.

  • Optimizes Graft Success: A skin graft will only "take" on a clean, debrided bed; without this step, reconstructive surgery would fail.

Recovery and Aftercare

  • Recovery is a journey; while the procedure may take minutes, the healing of a debrided wound typically spans 6 to 12 weeks.

  • Regular dressing changes using specialized foams or silver-impregnated bandages are required to keep the environment sterile.

  • High-protein medical nutrition is often prescribed to provide the building blocks (collagen) needed for new skin.

  • Compression therapy or physical therapy may be started early to ensure that the new skin remains flexible and doesn't "shrink" during healing.

  • Patients are monitored for any signs of "re-sloughing," which might require a minor follow-up debridement in the clinic.

Life After Debridement

  • Successful closure of chronic wounds that may have been present for months or years.

  • Significantly improved physical appearance and reduced scarring, particularly with modern enzymatic and hydrosurgical methods.

  • Restored mobility and the ability to return to work or exercise without the burden of a painful, non-healing wound.

  • Reduction in long-term medical costs by avoiding the complications of infection and amputation.

  • The psychological relief of seeing a "stagnant" wound finally move toward a healthy, healed state.

₹From From 300

Hemorrhoidectomy
Hemorrhoidectomy

A Hemorrhoidectomy is the definitive surgical removal of severe or complicated hemorrhoids (swollen veins in the lower rectum and anus). While many mild cases are managed with dietary changes or office-based procedures like rubber band ligation, surgery is considered the "gold standard" for Grade III and IV hemorrhoids that are persistently painful, bleeding, or prolapsed. By 2026, surgical approaches have shifted toward "vessel-sealing" and laser technologies that prioritize faster healing and significantly improved post-operative comfort.

When You Should Consider a Hemorrhoidectomy

  • Grade IV Prolapse: When hemorrhoidal tissue remains outside the body and cannot be manually pushed back in.

  • Persistent Bleeding: Chronic blood loss during bowel movements that leads to anemia or does not respond to non-surgical treatments.

  • Thrombosed External Hemorrhoids: When a blood clot forms in an external hemorrhoid, causing sudden, excruciating pain and swelling.

  • Failed Conservative Therapy: When high-fiber diets, topical creams, and minimally invasive procedures fail to provide long-term relief.

  • Strangulated Hemorrhoids: An emergency condition where the blood supply to a prolapsed hemorrhoid is cut off, causing tissue death.

  • Internal and External Combination: When a patient suffers from both types simultaneously, requiring a comprehensive surgical clearance.

Conditions That Require Specialized Care

  • Inflammatory Bowel Disease (IBD): Patients with Crohn’s disease require specialized evaluation, as traditional surgery may interfere with wound healing.

  • Anticoagulation Therapy: Patients on blood thinners who require precise "vessel-sealing" techniques to prevent post-operative bleeding.

  • Recurrent Hemorrhoids: Cases where previous surgeries or ligations have failed, necessitating a more advanced reconstructive approach.

  • Pregnancy-Related Hemorrhoids: While usually managed conservatively, severe cases following childbirth may require surgical intervention once hormones stabilize.

  • Anorectal Comorbidities: When hemorrhoids are accompanied by anal fissures or fistulas that must be treated during the same operative session.

[Image showing a comparison between healthy anal anatomy and the various grades (I-IV) of internal hemorrhoids]

How a Hemorrhoidectomy Is Performed

  • Excisional Surgery: The surgeon makes precise incisions to remove the excess hemorrhoidal tissue. This can be "closed" (sutured) or "open" to allow for natural drainage.

  • Stapled Hemorrhoidopexy (PPH): A specialized circular stapling device "lifts" the prolapsed tissue back into place and cuts off the blood supply to the swollen veins.

  • Laser Hemorrhoidoplasty (LHP): A laser fiber is inserted into the hemorrhoid to deliver controlled energy, causing the tissue to shrink from the inside without external cuts.

  • THD (Transanal Hemorrhoidal Dearterialization): Guided by ultrasound, the surgeon identifies and ties off the specific arteries feeding the hemorrhoid, causing it to wither.

  • Anesthesia: Performed under general anesthesia, spinal block, or local anesthesia with deep sedation for patient comfort.

  • Vessel Sealing: Advanced bipolar or ultrasonic energy devices are used to simultaneously cut and seal blood vessels, reducing blood loss and operative time.

Innovations in Hemorrhoid Surgery

  • Laser-Induced Thermotherapy (LITT)A non-excisional technique that uses heat to collapse the hemorrhoidal pile, resulting in almost no tissue trauma and a dramatically faster return to work.

  • Long-Acting Local Anesthetics (Exparel)A specialized numbing medication injected during surgery that slowly releases over 72 hours, covering the most painful window of early recovery.

  • Doppler-Guided LigationHighly sensitive ultrasound probes that allow surgeons to find the "feeder" vessels with 100% accuracy, ensuring the hemorrhoid shrinks without being cut out.

  • Radiofrequency Ablation (RFA)Utilizing high-frequency waves to treat the hemorrhoid, offering a middle ground between traditional surgery and office-based treatments.

  • Bio-Absorbable StaplesNext-generation stapling devices used in PPH that dissolve over time, reducing the long-term risk of internal irritation or "staple-line" sensitivity.

  • AI-Enhanced ProctoscopyDigital imaging systems that map the vascular pressure in the rectal area to help the surgeon decide exactly which tissue needs removal.

Pre-Procedure Preparation

  • Bowel Preparation: A mild laxative or enema is often used the evening before surgery to ensure a clean surgical field.

  • Medication Adjustment: Reviewing any supplements, such as Vitamin E or Garlic, and blood thinners that could increase the risk of bleeding.

  • Nutrition Planning: Starting a high-fiber diet and increasing water intake days before the surgery to prepare for the first post-op bowel movement.

  • NPO Guidelines: Standard fasting for 8–12 hours before the procedure to ensure safety during anesthesia.

  • Sitz Bath Setup: Having a small plastic tub or "sitz bath" ready at home for immediate post-operative hygiene and comfort.

Diagnostic and Safety Monitoring

  • Digital Rectal Exam (DRE): A final physical check to confirm the location and grade of all symptomatic hemorrhoids.

  • Anoscopy/Sigmoidoscopy: Ensuring there are no other issues, such as polyps or inflammatory disease, higher up in the rectum.

  • Urinary Retention Check: Monitoring the patient’s ability to urinate before discharge, as pelvic surgery can occasionally cause temporary bladder hesitation.

  • Post-Operative Hemorrhage Watch: Close observation during the first 24 hours for any signs of significant rectal bleeding.

Why This Treatment Is Highly Effective

  • Lowest Recurrence Rate: Excisional hemorrhoidectomy remains the most successful way to ensure hemorrhoids do not return.

  • Comprehensive Relief: Resolves all associated symptoms, including itching, leaking, pain, and the sensation of "fullness."

  • Vascular Correction: Procedures like THD and PPH address the underlying blood flow issues, not just the visible bulge.

  • Simultaneous Repair: Allows for the correction of other painful issues like anal tags or fissures in a single session.

  • Functional Restoration: Returns the anal canal to its natural anatomical state, improving hygiene and comfort.

Recovery and Aftercare

  • The First Week: The focus is on pain management and soft bowel movements; stool softeners and fiber supplements are mandatory.

  • Sitz Baths: Soaking in warm water for 10–15 minutes several times a day is the most effective way to soothe the area and keep it clean.

  • Pain Protocols: A combination of anti-inflammatories, local numbing creams, and occasionally mild narcotics are used to manage discomfort.

  • Activity Graduation: Light walking is encouraged immediately, but heavy lifting and "straining" must be avoided for at least 2 to 3 weeks.

  • Hydration: Drinking at least 2–3 liters of water daily is essential to prevent constipation during the healing phase.

Life After Hemorrhoidectomy

  • A dramatic improvement in daily quality of life, free from the constant discomfort and "accidents" caused by prolapse.

  • Confidence in physical activities, including exercise and heavy lifting, once the 6-week healing window is complete.

  • A return to normal hygiene and the elimination of chronic itching or skin irritation.

  • Long-term freedom from the need for topical creams, suppositories, or frequent medical visits for "flare-ups."

  • Empowerment through a permanent solution to a common but debilitating condition.

₹From From 300

Splenectomy (Spleen Removal)

A Splenectomy is a surgical procedure to partially or completely remove the spleen, a fist-sized organ located in the upper left abdomen. The spleen plays a vital role in the immune system by filtering blood and producing white blood cells to fight infection. While the liver and bone marrow can eventually take over many of these functions, the removal of the spleen requires lifelong medical vigilance. By 2026, surgical standards emphasize minimally invasive techniques to preserve as much healthy tissue as possible and ensure a rapid return to daily life.

When You Should Consider a Splenectomy

  • Splenic Rupture: An emergency situation, often caused by blunt force trauma (accidents or falls), leading to life-threatening internal bleeding.

  • Immune Thrombocytopenic Purpura (ITP): When the spleen prematurely destroys platelets, and the condition does not respond to medication.

  • Hereditary Spherocytosis: A genetic blood disorder where the spleen destroys abnormally shaped red blood cells, causing severe anemia.

  • Splenomegaly (Enlarged Spleen): When the organ grows so large it causes chronic pain, "early fullness" during meals, or traps too many blood cells (hypersplenism).

  • Hematologic Cancers: Treating certain types of lymphoma or leukemia, especially when the spleen becomes a reservoir for cancer cells.

  • Splenic Cysts or Abscesses: Non-cancerous but painful growths or infections that do not resolve with drainage or antibiotics.

Conditions That Require Specialized Care

  • Massive Splenomegaly: Cases where the spleen is significantly enlarged (often exceeding 20 cm), which may require a hybrid or open surgical approach.

  • Sickle Cell Disease: Patients who experience "splenic sequestration," where blood becomes trapped in the spleen, requiring surgical intervention.

  • Cirrhosis with Portal Hypertension: Requiring careful management of the surrounding blood vessels to prevent excessive bleeding during surgery.

  • Pediatric Splenectomy: Whenever possible, surgeons aim for a "partial splenectomy" in children to preserve some immune function.

  • Splenic Artery Aneurysm: A rare but dangerous weakening of the artery supplying the spleen, which may necessitate organ removal.

[Image showing the location of the spleen in the upper left quadrant of the abdomen, tucked under the rib cage]

How a Splenectomy Is Performed

  • Laparoscopic Approach: The standard for elective cases. The surgeon makes 3–4 tiny incisions and uses a camera (laparoscope) to detach the spleen from its ligaments and blood vessels.

  • Open Surgery: A larger incision is made in the center or left side of the abdomen. This is the primary choice for emergency trauma or extremely large spleens.

  • Vessel Ligation: Using advanced thermal energy tools or specialized clips, the surgeon seals the splenic artery and vein to prevent bleeding.

  • Specimen Removal: In laparoscopic cases, the spleen is placed in a sterile bag and sometimes "fragmented" internally so it can be removed through one of the small incisions.

  • Partial Splenectomy: In specific cases, only the diseased portion of the spleen is removed, leaving healthy tissue behind to maintain immune protection.

  • Robotic-Assisted Precision: Utilizing robotic platforms to provide 3D visualization and wristed instruments for delicate dissections near the pancreas.

Innovations in Splenic Surgery

  • Hand-Assisted Laparoscopic Surgery (HALS)A technique for moderately enlarged spleens where the surgeon uses a specialized "port" to place a hand inside the abdomen, combining the benefits of feel with the recovery of a small incision.

  • Pre-Operative Splenic Artery EmbolizationA procedure where interventional radiologists partially block the spleen's blood supply before surgery, making the operation safer and reducing blood loss.

  • Advanced Hemostatic Energy DevicesTools that use ultrasonic or bipolar energy to instantly seal large vessels, significantly shortening the duration of the surgery.

  • Indocyanine Green (ICG) ImagingInjectable dye that helps surgeons clearly distinguish the border between the spleen and the tail of the pancreas, preventing accidental injury.

  • Spleen-Preserving Distal PancreatectomyFor surgeries involving the pancreas, newer techniques allow surgeons to save the spleen and its blood supply, avoiding "asplenic" complications.

  • AI-Guided Vessel MappingSoftware that uses pre-operative CT scans to create a 3D "road map" for the surgeon, identifying unique vascular patterns before the first incision.

Pre-Procedure Preparation

  • Immunization Protocol: Ideally, patients receive vaccines for Pneumococcus, Meningococcus, and Hib at least 14 days before an elective surgery.

  • Blood Component Optimization: Administering platelets or blood transfusions if the patient’s counts are dangerously low due to splenic overactivity.

  • Imaging and Sizing: Using ultrasound or CT to measure the spleen's exact dimensions, which dictates the surgical approach (open vs. laparoscopic).

  • NPO Guidelines: Strict fasting for 8–12 hours before surgery to ensure safety during general anesthesia.

  • Medication Review: Coordination regarding anticoagulants (blood thinners) that must be paused to prevent intraoperative bleeding.

Diagnostic and Safety Monitoring

  • Complete Blood Count (CBC): Post-operative tracking of platelet and white blood cell levels, which often rise sharply after the spleen is removed.

  • Pancreatic Enzyme Monitoring: Checking levels to ensure the tail of the pancreas, which sits near the spleen, was not irritated during surgery.

  • Overwhelming Post-Splenectomy Infection (OPSI) Education: Training patients and families to recognize early signs of infection, such as sudden fever or chills.

  • Howell-Jolly Body Screening: A blood smear test to confirm the functional absence of the spleen by looking for specific remnants in red blood cells.

Why This Treatment Is Highly Effective

  • Immediate Stabilization: In trauma cases, removing a ruptured spleen is life-saving and instantly stops internal hemorrhage.

  • Correction of Blood Counts: For ITP and Spherocytosis, surgery provides a long-term or permanent solution to dangerously low platelet or red cell counts.

  • Pain Resolution: Removing an enlarged spleen provides immediate relief from the pressure and "early fullness" that restricts diet and movement.

  • Cancer Staging and Treatment: Provides essential tissue samples and removes a major site of disease for certain lymphomas.

  • High Success Rates: Modern minimally invasive techniques have made elective splenectomy a safe procedure with a short hospital stay.

Recovery and Aftercare

  • Laparoscopic Recovery: Patients often go home within 24 to 48 hours and return to light activity within two weeks.

  • Open Surgery Recovery: Requires a longer stay (3–6 days) and a 4-to-6-week period of restricted lifting to allow the abdominal wall to heal.

  • Lifelong Vaccination Schedule: Maintaining a strict schedule of "booster" shots to protect against specific bacterial infections.

  • Medical Alert Identification: Patients are advised to wear a medical alert bracelet to notify emergency responders that they do not have a spleen.

  • Emergency Antibiotics: Many patients are given a "standby" supply of antibiotics to take at the first sign of a fever while they seek medical attention.

Life Without a Spleen

  • Most individuals lead a completely normal, active life with no dietary or physical restrictions once healed.

  • Increased awareness of infection risk is the "new normal," requiring prompt attention to fevers or animal bites.

  • The liver and lymph nodes adapt over time to take over the role of filtering aged red blood cells.

  • A return to sports and professional work once the risk of internal bleeding is permanently removed.

  • Empowerment through a clear understanding of the necessary health precautions to maintain a strong immune system.

₹From From 1000

Related Specialists

Dr B M L Kapoor
Dr B M L Kapoor
General Surgeon
Indraprastha Apollo Hospital, Delhi
50+years experience
View Profile
Dr Jameel Akhter
Dr Jameel Akhter
General Surgeon
Apollo Hospital, Greams Road, Chennai
21+years experience
View Profile
Dr Neel Shah
Dr Neel Shah
General Surgeon
Indraprastha Apollo Hospital, Delhi
30+years experience
View Profile
Dr Sushil Kumar Jain
General Surgeon
Indraprastha Apollo Hospital, Delhi
39+years experience
View Profile
Dr Venkatasubramanian Rangarajan
General Surgeon
Apollo Hospital, Greams Road, Chennai
20+years experience
View Profile
Dr Vishal Soni
Dr Vishal Soni
Gastroenterologist
Apollo Hospital International Ltd, Ahmedabad
15+years experience
View Profile
Dr Alla Gopala Krishna Gokhale
Cardiothoracic & Vascular Surgeon
Apollo Health City, Jubilee Hills
30+years experience
View Profile
Dr Deepak Subramanian
Bariatric Surgeon, General Surgeon
MGM Healthcare, Chennai
15+years experience
View Profile
Dr Deepraj Bhandarkar
General Surgeon
P D Hinduja Hospital, Mahim
35+years experience
View Profile
Dr Girish Bapat
Dr Girish Bapat
Bariatric Surgeon, General Surgeon
Jehangir Hospital
33+years experience
View Profile
Dr Hemanth Kumar
Dr Hemanth Kumar
Bariatric Surgeon, General Surgeon
Fortis Flt. Lt. Rajan Dhall Hospital, Vasant Kunj
20+years experience
View Profile
Dr Jaswinder Singh Saluja
ENT Specialist
Apollo Health City, Jubilee Hills
25+years experience
View Profile
Dr K J Reddy
Dr K J Reddy
Orthopedic Surgeon
Apollo Health City, Jubilee Hills
34+years experience
View Profile
Dr Kaushik Reddy
Dr Kaushik Reddy
Orthopedic Surgeon
Apollo Health City, Jubilee Hills
16+years experience
View Profile
Dr Koka Ram Babu
Dr Koka Ram Babu
ENT Specialist
Apollo Health City, Jubilee Hills
36+years experience
View Profile
Dr Kona Lakshmi Kumari
Gastroenterologist, Bariatric Surgeon
Yashoda Hospital, Somajiguda
27+years experience
View Profile
Dr Vijay Yewale
Dr Vijay Yewale
Pediatrician
Apollo Hospital, Navi Mumbai
31+years experience
View Profile
Dr Vinit Suri
Dr Vinit Suri
Neurologist
Indraprastha Apollo Hospital, Delhi
27+years experience
View Profile
Dr Yash Gulati
Dr Yash Gulati
Spine Surgeon, Orthopedic Surgeon, Joint Replacement Surgeon
Indraprastha Apollo Hospital, Delhi
35+years experience
View Profile
Dr Yusuf M M
Dr Yusuf M M
Cardiothoracic & Vascular Surgeon
Apollo Hospital, Greams Road, Chennai
20+years experience
View Profile

May we help you?

Enter digits only (6-15 digits). We'll add your country code.