Medivisor India Treatment Logo
+91 83682 47758
info@medivisorhealth.com
  • Home
    • About Us
    • Our Services
    • Our Team
    • Our Safety Measures
    • Loading treatments...
    • Loading hospitals...
    • Loading doctors...
    • Treatment Cost
    • Treatment Process
    • Visa Process
    • Travel Guide
    • FAQs
    • Why Medivisor
    • Success Stories
    • Patient Activities
    • Social Activities
    • News Coverage
    • Blog
  • Become a Partner

Medivisor India Treatment is a trusted New Delhi–based medical travel company assisting international patients with advanced, affordable, and seamless treatment in India.

  • Medivisor House 359, Sector 1, Vaishali, Ghaziabad, (Delhi/NCR) India
  • +91 8368 247 758
  • info@medivisorhealth.com

About Us

  • About Us
  • Our Services
  • Our Team
  • Our Medical Advisors
  • Our Safety Measures
  • Join Our Network
  • Contact Us

India Treatment

  • Hospitals
  • Treatments
  • Treatment Cost
  • Treatment Process
  • Visa Process
  • Travel Guide
  • FAQs
  • Why Medivisor

Gallery

  • Patient Testimonials
  • Patient Activities
  • News Coverage
  • Blog

Get in Touch

© 2026 Medivisor India Treatment. All rights reserved.

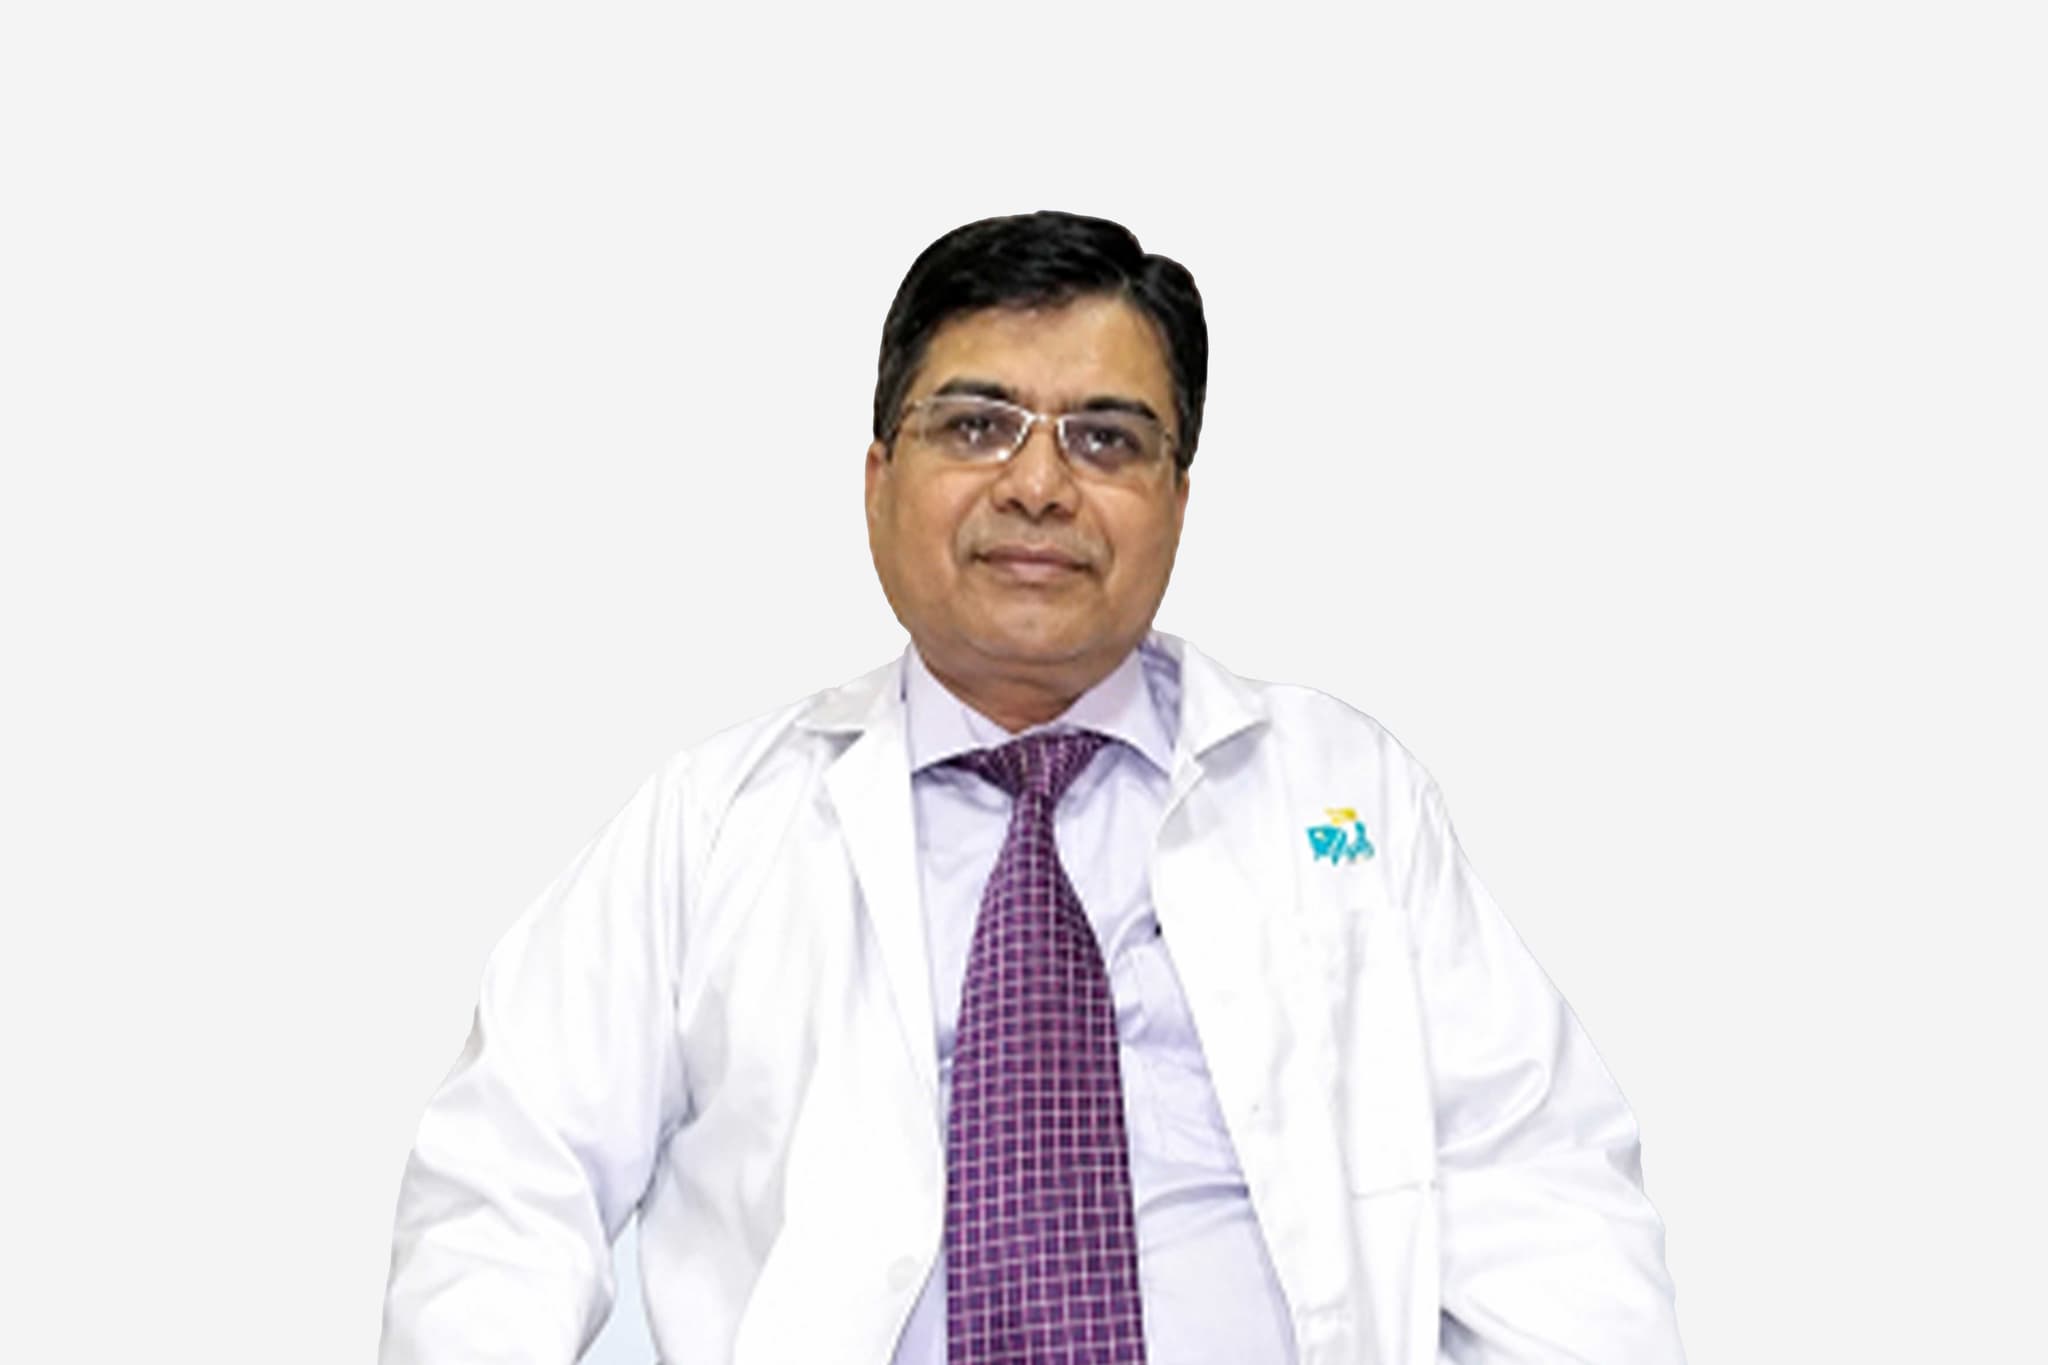
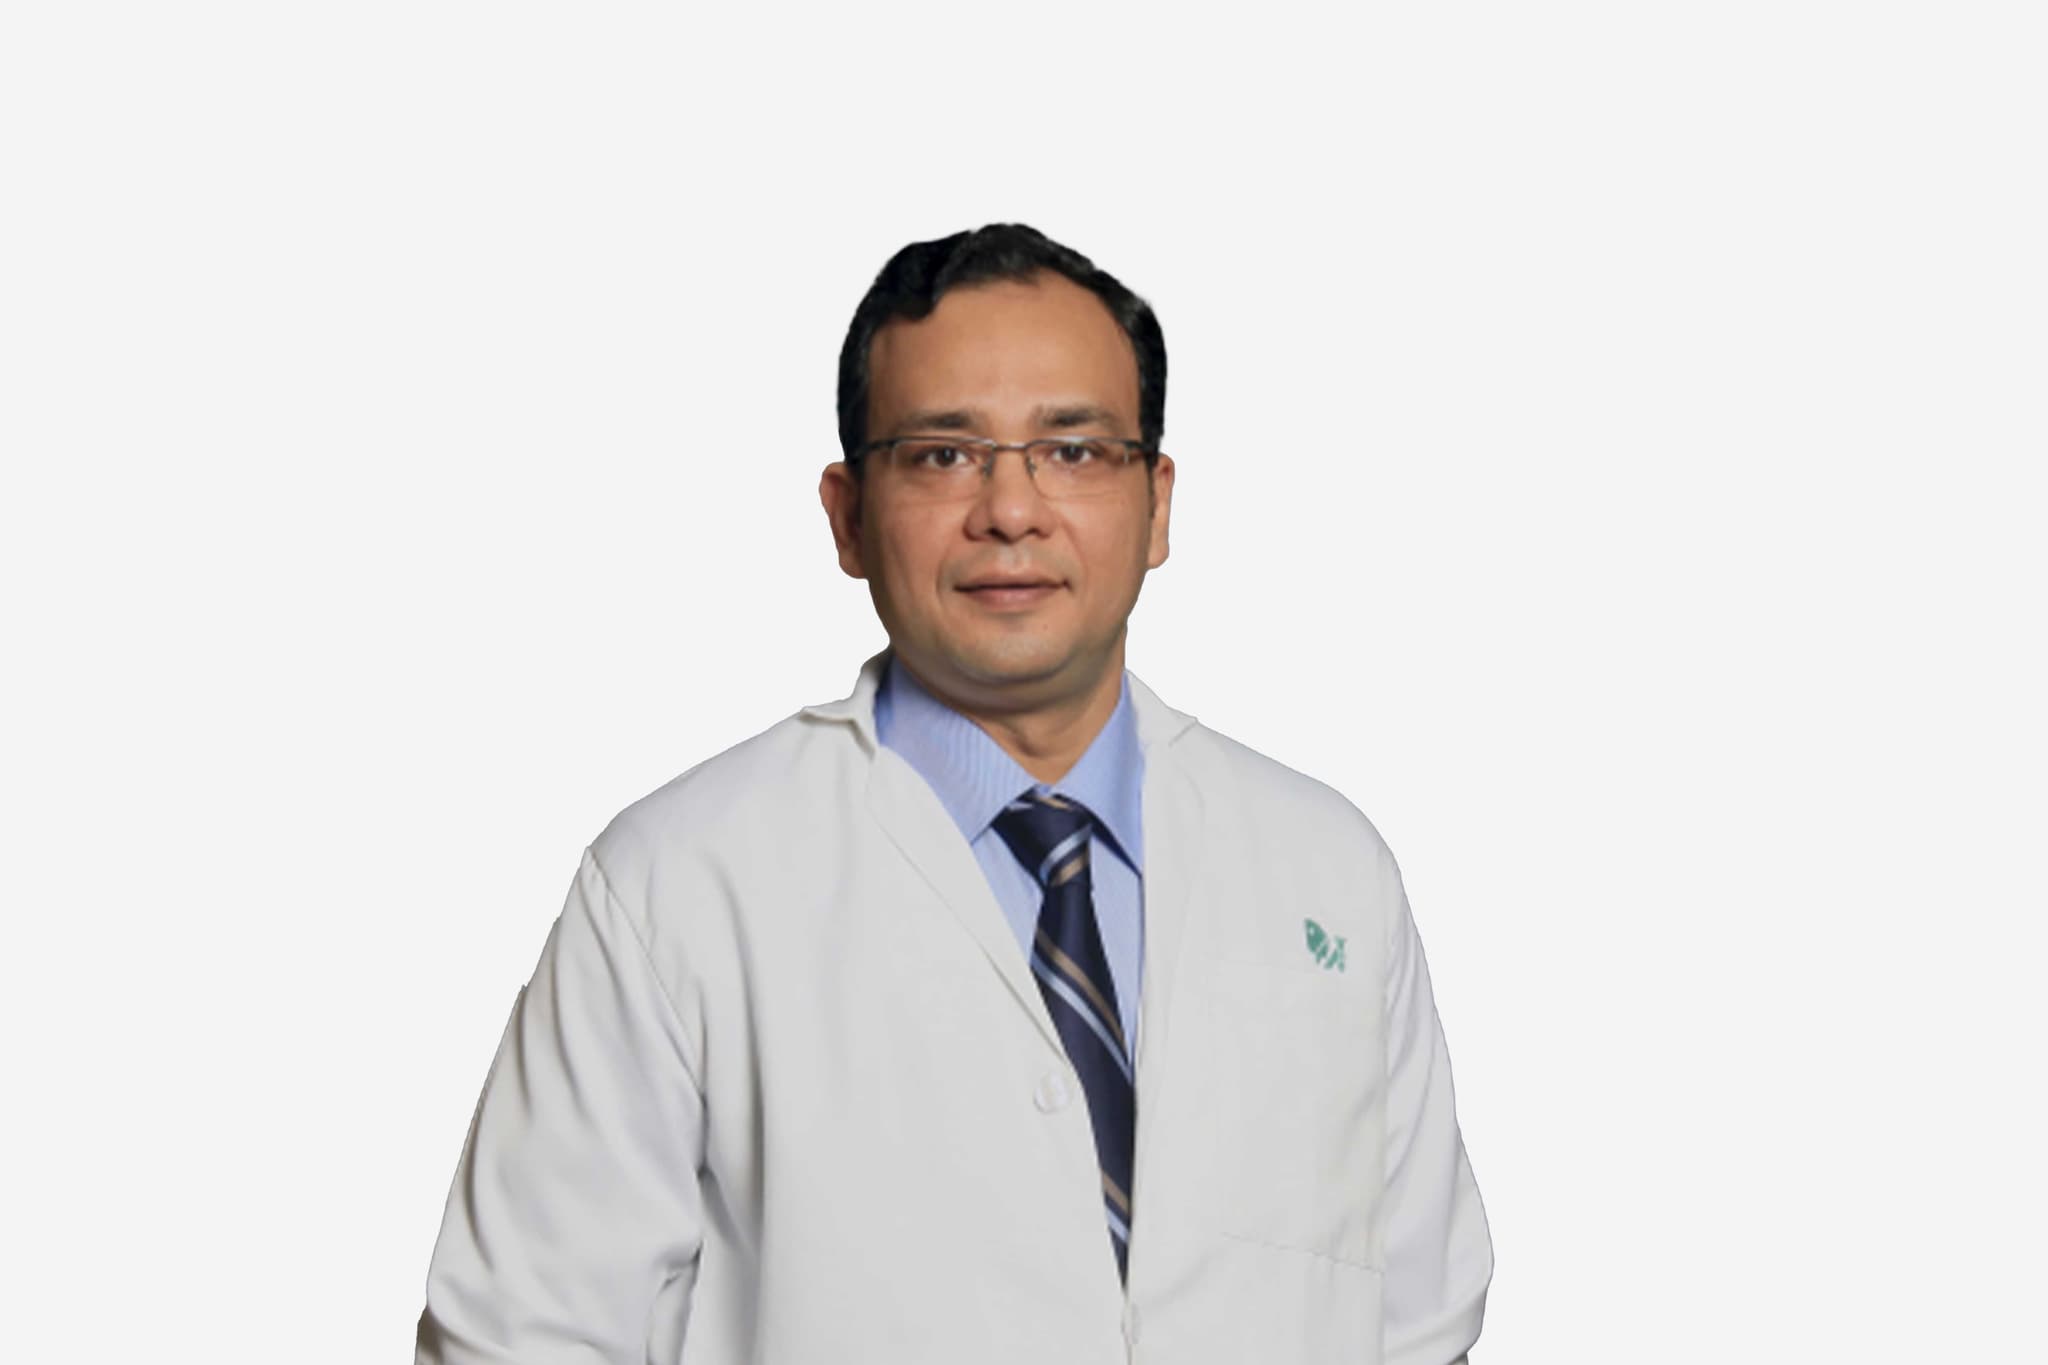
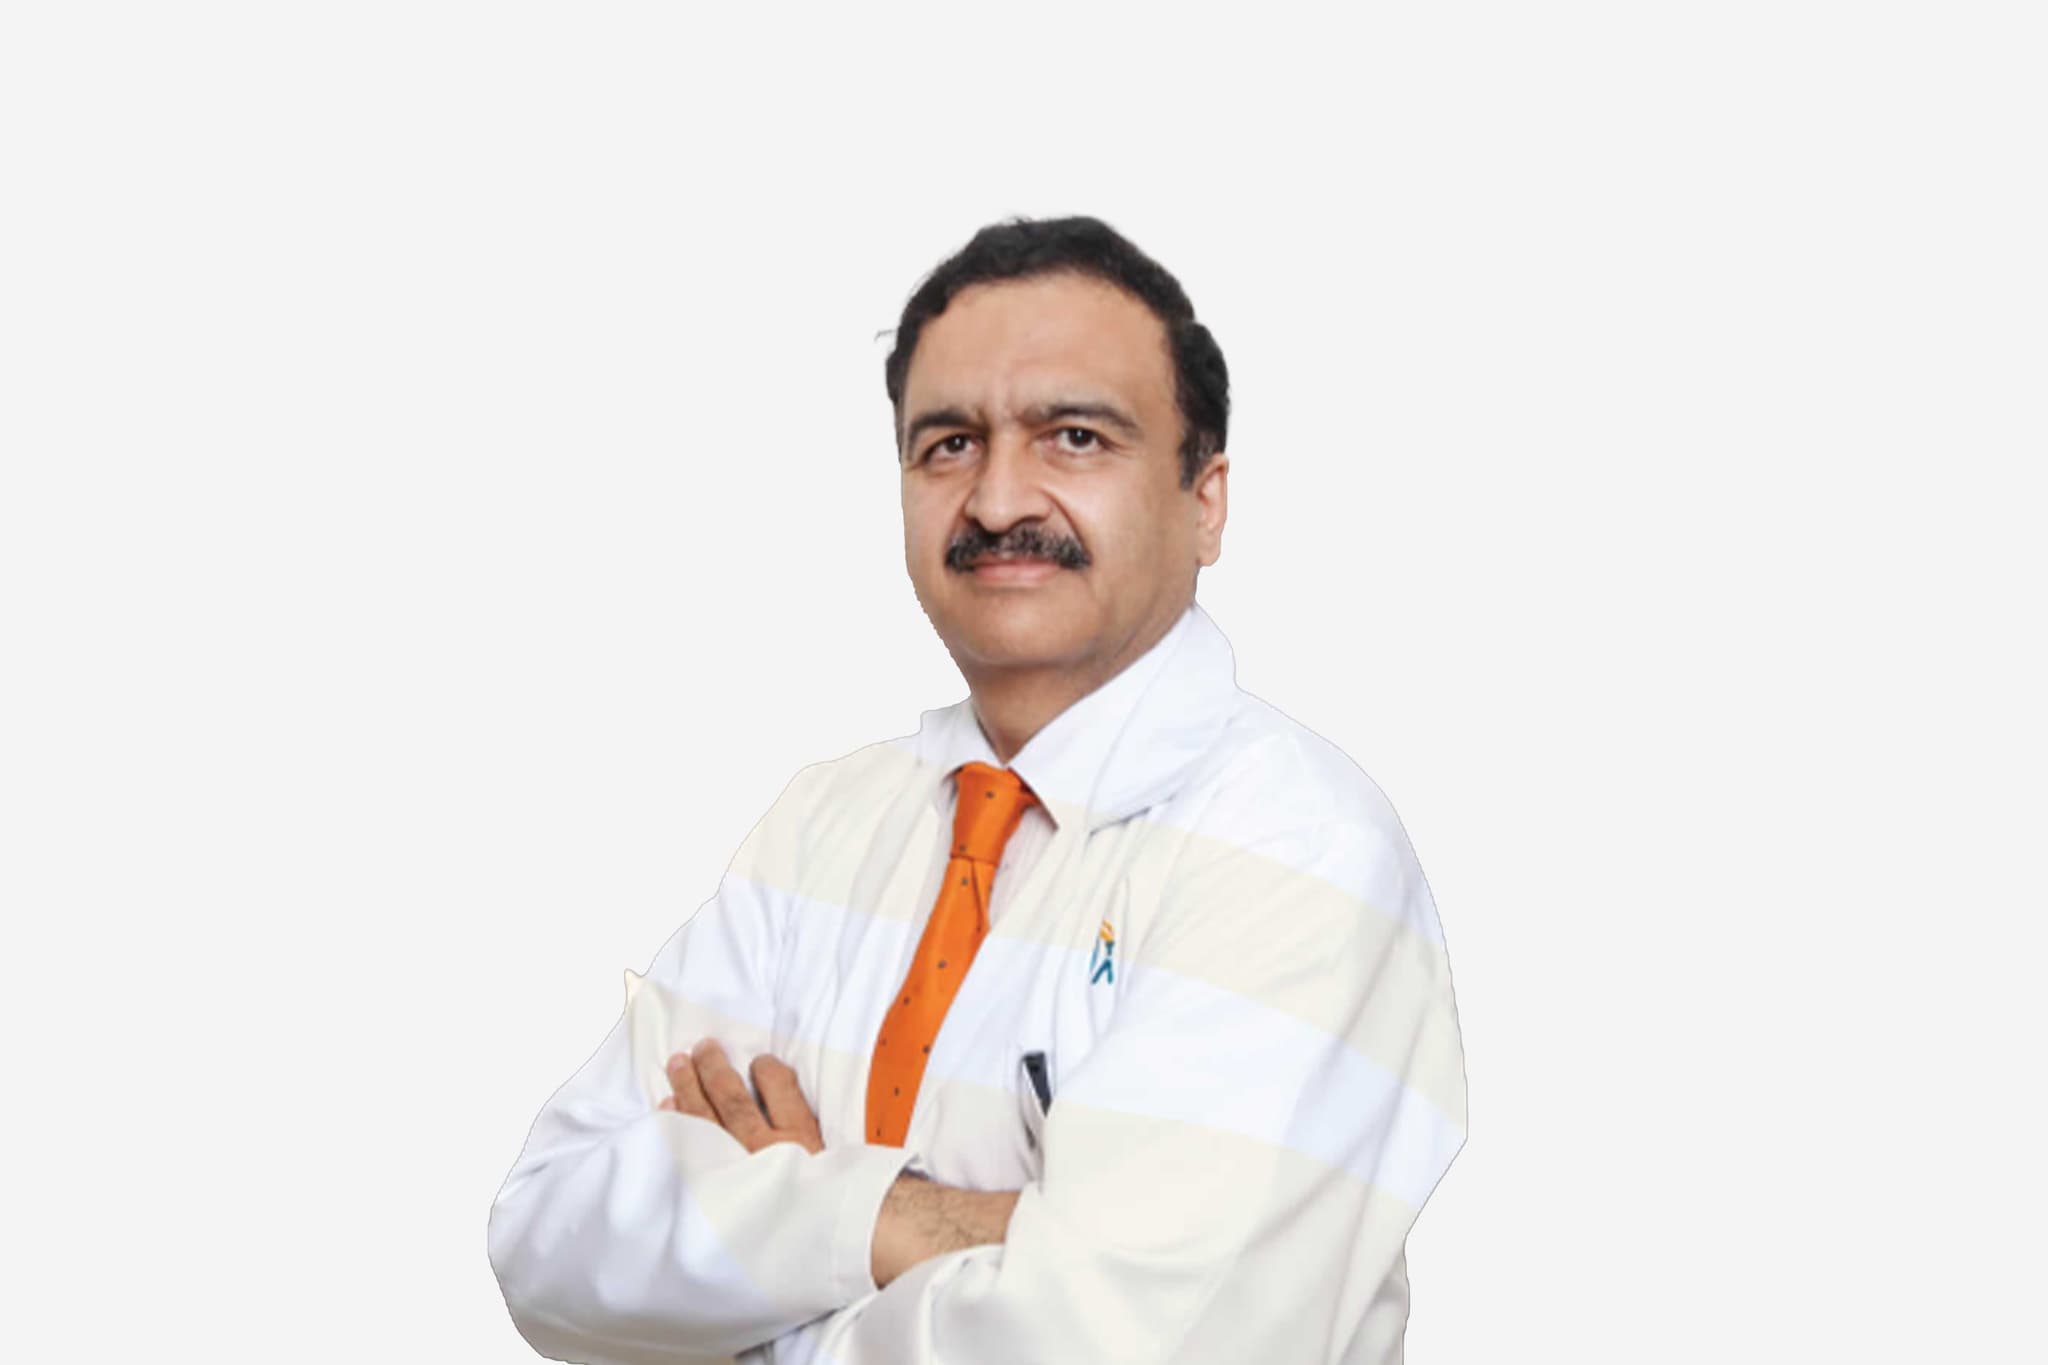
Dr Shiv Kumar J

Cardiologist

Apollo Hospital, Secunderabad

Cardiologist

20+ years experience

Dr Shiv Kumar J, Cardiologist at Apollo Hospital, Secunderabad - Apollo Hospitals
  1. Home
  2. Doctors
  3. Dr Shiv Kumar J

About Dr Shiv Kumar J

Dr. Shiv Kumar J is a highly distinguished specialist in cardiology, recognized for his technical mastery in advanced medical and interventional cardiovascular procedures. He specializes in the comprehensive management of complex cardiovascular disorders, utilizing state-of-the-art diagnostic and therapeutic platforms to restore optimal circulatory function and optimize patient outcomes.

Mastery in Advanced Cardiology and Clinical Interventions

He specializes in the advanced evaluation, diagnosis, and treatment of a wide range of acute and chronic conditions affecting the cardiovascular system. His clinical practice leverages over two decades of refined medical methodologies and specialized expertise to design and execute highly targeted therapeutic strategies, ensuring optimal cardiac function and long-term therapeutic success for his patients.

Precision Diagnostic Frameworks and Tailored Care

Dr. Shiv Kumar J possesses profound expertise in identifying intricate structural, vascular, and electrical pathologies within the heart. His clinical methodology emphasizes a thorough, detail-driven assessment of each patient's unique physiological profile, allowing him to establish highly customized treatment pathways that address the root causes of heart-related conditions.

Innovation in Preventive and Therapeutic Cardiovascular Management

His medical focus incorporates the modern management of complex cardiovascular diseases, emphasizing both advanced therapeutic interventions and critical risk-reduction strategies. By integrating specialized medical solutions with evidence-based protocols, he actively combats the progression of heart diseases to maximize overall circulatory efficiency and enhance long-term patient quality of life.

Clinical Governance and Dedicated Patient Care

Throughout his extensive career spanning more than twenty years, Dr. Shiv Kumar J has combined modern cardiovascular innovations with a strong passion for patient-centric care. Practicing within premier healthcare frameworks in Hyderabad, he remains a trusted authority dedicated to maintaining the highest standards of safety, clinical governance, and high-quality medical outcomes.

Dr. Shiv Kumar J at a Glance

  • Specialist in Cardiology, Advanced Cardiovascular Medicine, and Complex Heart Care.

  • Extensive clinical experience with over two decades of dedicated service in the medical field.

  • Expert in utilizing advanced diagnostic frameworks to design highly personalized patient care pathways.

  • Focused on combining modern clinical innovations with a deep passion for combating cardiovascular diseases.

  • Dedicated to delivering comprehensive, high-quality patient care and advancing heart-related treatments.

  • Prominent medical professional providing evidence-based clinical governance based in Hyderabad.

DM, MD, MBBS
Board Certified in Cardiologist

No awards & achievements available
Affiliated Hospitals

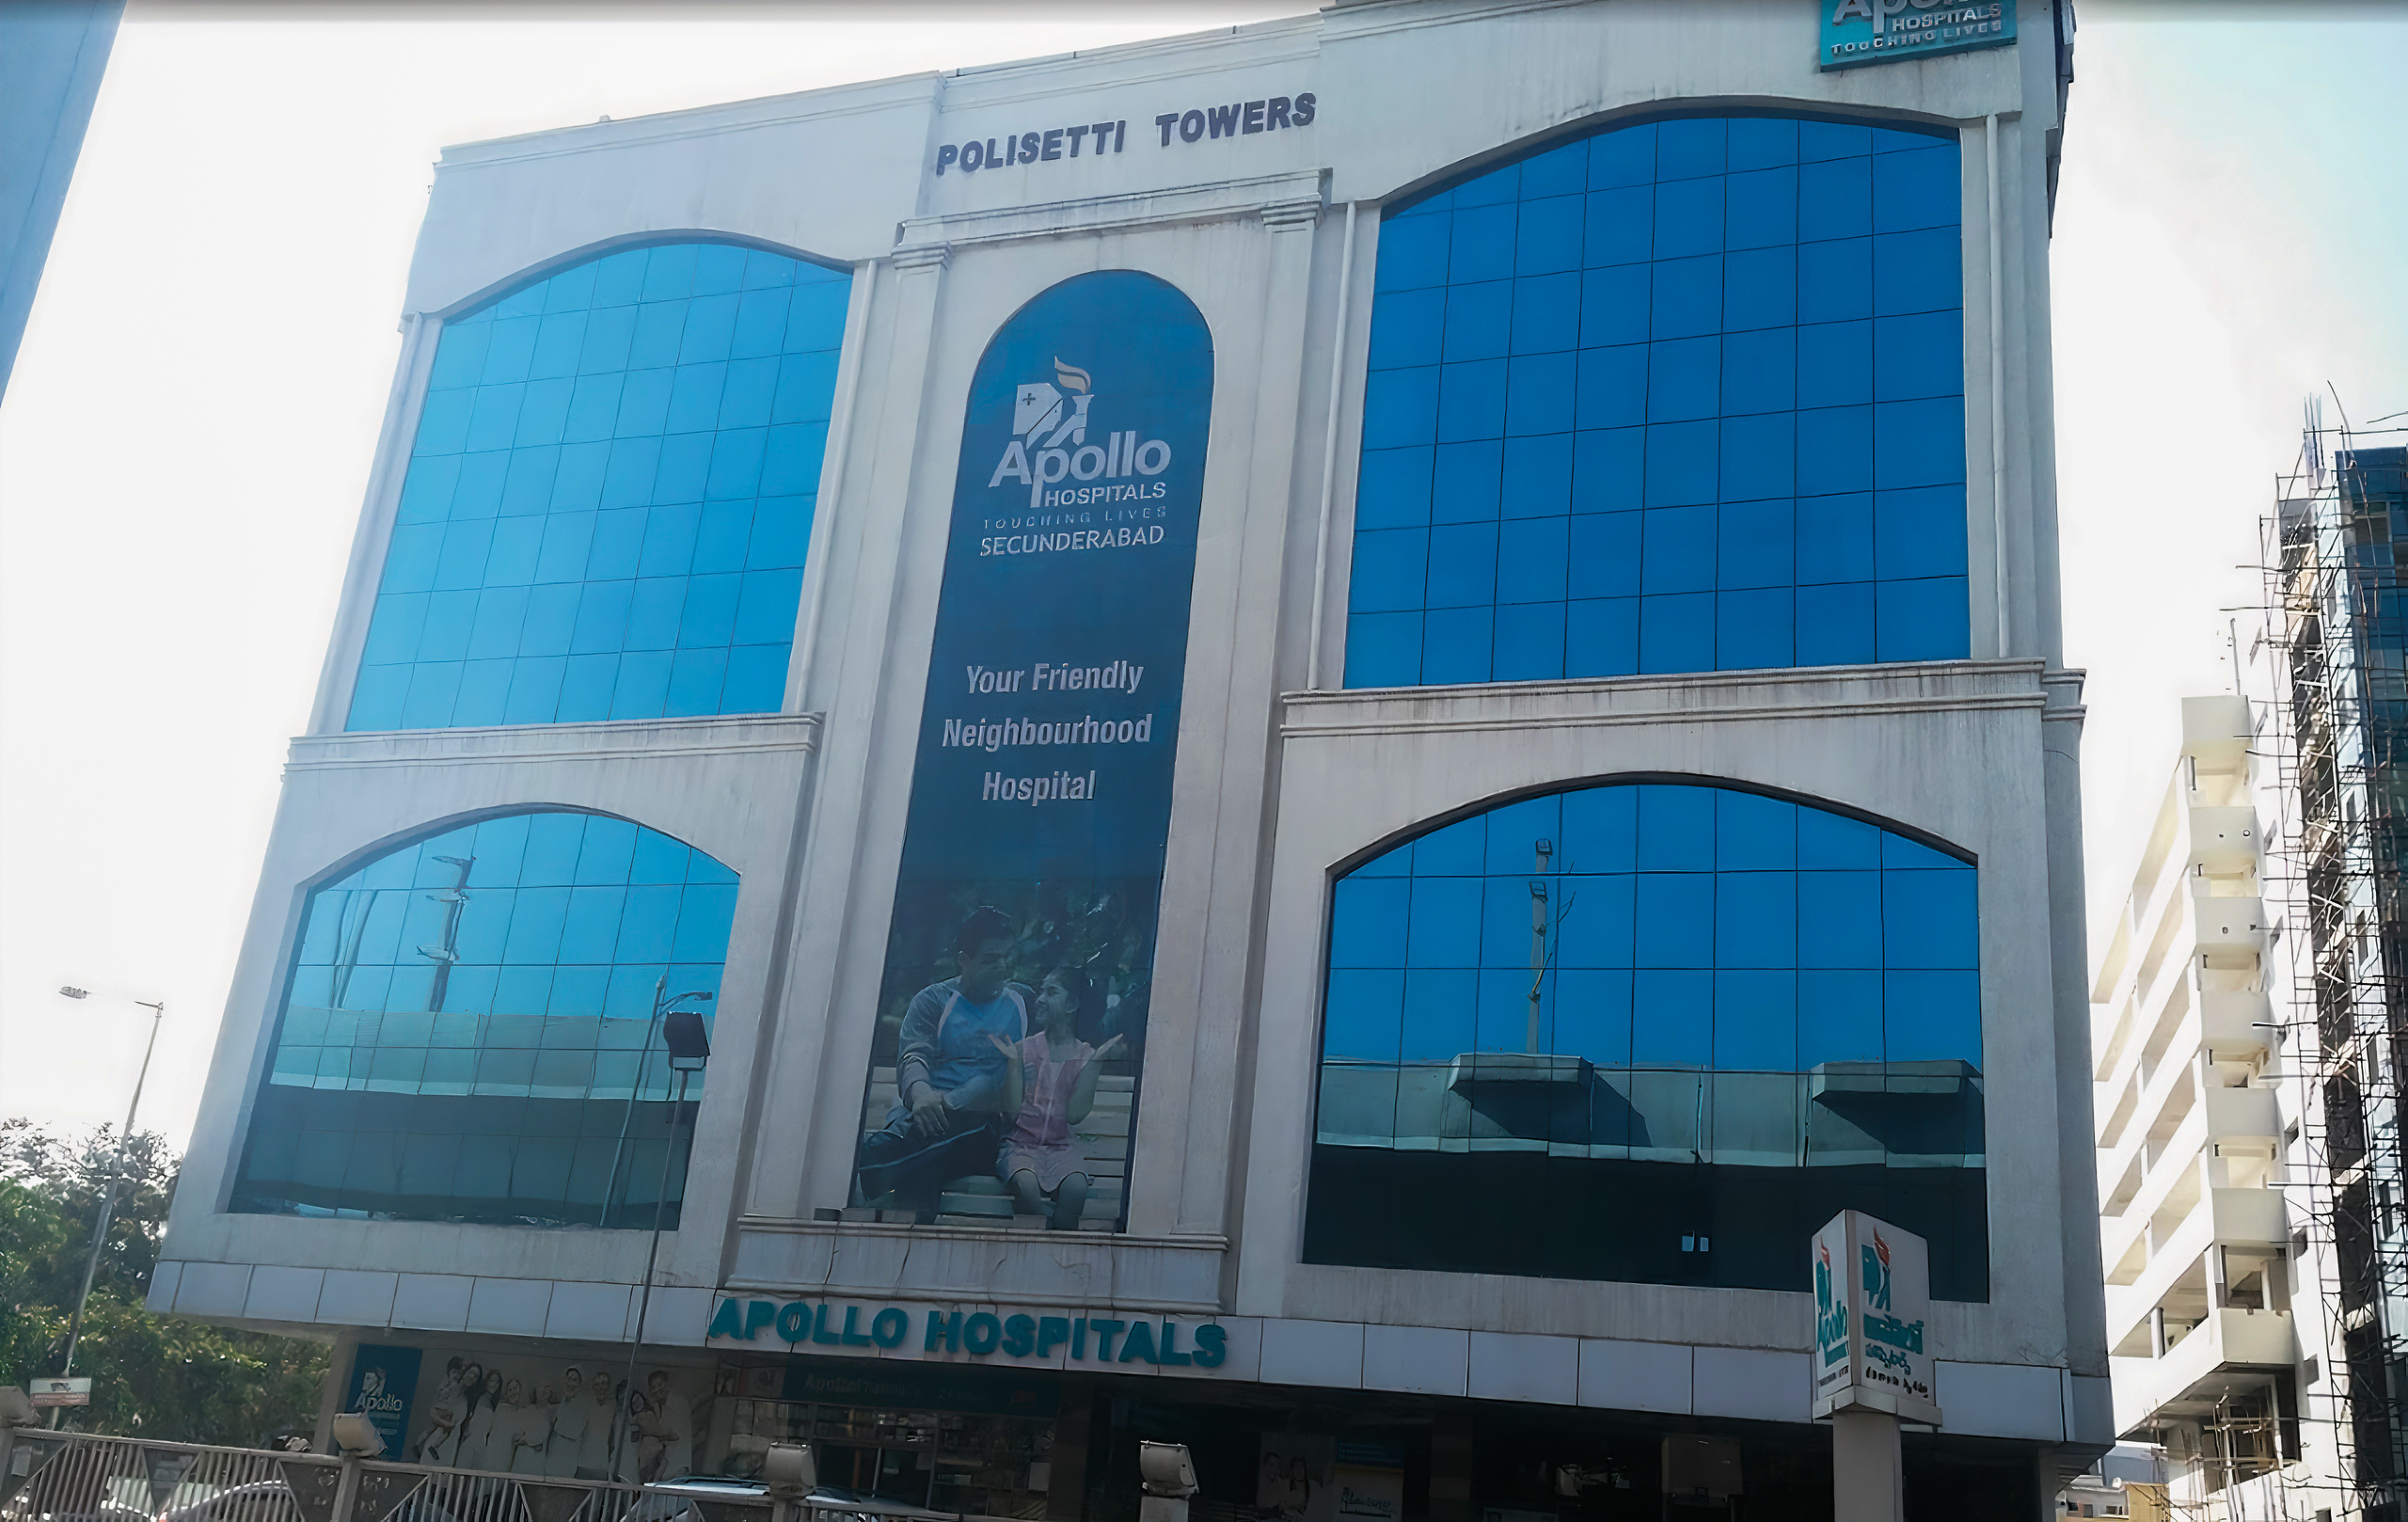
Apollo Hospital, Secunderabad

Multi Specialty

Secunderabad, Telangana

2010

Estd.

150+

Beds

40+

Doctors

May we help you?

Enter digits only (6-15 digits). We'll add your country code.

Related Treatments

Coronary Angioplasty (PTCA)

Coronary Angioplasty, also known as Percutaneous Transluminal Coronary Angioplasty (PTCA), is a minimally invasive procedure used to open clogged heart arteries. While surgical bypass remains an option for multi-vessel disease, transcatheter techniques using drug-eluting stents have expanded to treat even complex blockages, restoring vital blood flow to the heart muscle.

When You Should Consider PTCA

  • Refractory Angina: Chest pain that does not improve with standard medication.

  • Exertional Dyspnea: Shortness of breath during physical activity or exercise.

  • Positive Stress Test: Significant blockages identified during a cardiac stress test.

  • Emergency Intervention: Performed during a heart attack to rapidly restore flow and limit heart muscle damage.

  • Cardiac Strain: Evidence of reduced blood flow causing heart enlargement or visible strain on imaging.

Methods of Angioplasty

  • Balloon Angioplasty: A small, medical-grade balloon is inflated at the blockage site to push plaque against the artery walls.

  • Stent Placement: A tiny mesh tube is inserted and expanded to act as a permanent scaffold to keep the artery open.

  • Drug-Eluting Stents (DES): Stents coated with specialized medication that is slowly released to prevent the buildup of scar tissue (restenosis).

  • Rotational Atherectomy: Using a high-speed, diamond-tipped drill to break up heavily calcified or "hardened" plaque.

  • Laser Angioplasty: Utilizing precise laser energy to vaporize blockages within the coronary arteries.

How Is Performed

  • Catheter Access: Under local anesthesia and sedation, a thin, flexible tube is guided through the radial artery (wrist) or femoral artery (groin) to the heart.

  • Real-time Imaging: Contrast dye is injected, and X-ray imaging (fluoroscopy) is used to ensure tools are perfectly positioned at the blockage.

  • Balloon Expansion: The balloon is inflated at the site of the narrowing to widen the passage for blood flow.

  • Stent Deployment: The mesh stent is expanded against the artery wall; the balloon is then deflated and removed, leaving the stent in place.

  • Final Validation: Heart rhythm and blood flow are monitored via an angiogram to confirm the artery is fully open before removing the catheters.

Pre-Procedure Preparation

  • Fasting (NPO): No food or drink for 8–12 hours before the catheterization to ensure safety during sedation.

  • Baseline Diagnostics: Blood tests, ECG, and chest X-rays to assess overall cardiac health and kidney function.

  • Medication Adjustment: Reviewing all current prescriptions; blood thinners or certain diabetes medications may be adjusted by the clinical team.

  • Allergy Check: Discussing any known history of allergies, particularly to iodine-based contrast dye or metals like nickel.

  • Recovery Logistics: Arranging for a support person to drive you home and assist during the initial recovery period.

Tests Before PTCA

  • Echocardiogram (TTE): An ultrasound to determine the heart's pumping efficiency and valve function.

  • Cardiac Angiogram: The primary diagnostic mapping tool used to identify the exact location and severity of blockages.

  • Cardiac MRI or CT Scan: For detailed 3D mapping of the coronary anatomy in complex cases.

  • ECG: To monitor the heart's electrical rhythm and check for signs of current or past ischemia.

  • Pulse Oximetry: To evaluate baseline oxygen saturation levels in the blood.

Life After PTCA

  • Short Observation: Most patients require a short hospital stay, often 1–2 days, to monitor the access site and heart rhythm.

  • Activity Restrictions: Avoid strenuous activity, heavy lifting, or immersion in water (baths/pools) for several days post-procedure.

  • Medication Compliance: Strict adherence to prescribed antiplatelet medications (like Aspirin or Clopidogrel) is vital to prevent blood clots from forming on the new stent.

  • Follow-up Care: Regular visits with a cardiologist to monitor the treated site and manage underlying cardiovascular risk factors.

  • Symptom Relief: Most patients experience an immediate improvement in breathing, energy levels, and physical stamina.

Benefits of PTCA

  • Restored Perfusion: Immediately restores normal blood flow to the oxygen-starved heart muscle.

  • Muscle Preservation: Protects the heart from permanent damage or scarring caused by chronic ischemia.

  • Improved Mobility: Allows patients to return to physical activities and maintain an active, healthy lifestyle.

  • Risk Reduction: Significantly reduces the long-term risk of heart failure and enlargement of the heart's chambers.

  • High Success Rates: Provides a durable, long-term solution with exceptionally high technical success rates.

Drug-Eluting Stent (DES) Placement

A Drug-Eluting Stent (DES) is a small, metal mesh tube coated with specialized medication that is permanently placed in a narrowed heart artery. It is the most common type of stent used to treat Coronary Artery Disease (CAD). These devices are designed to provide both mechanical support and controlled drug release to ensure long-term arterial health.

When You Should Consider DES Placement

  • Chronic Chest Pain (Angina): Pain or pressure that limits physical activity.

  • Significant Blockages: Evidence of arterial narrowing found during an echocardiogram or stress test.

  • Heart Failure Risk: High risk of heart failure due to restricted blood flow to the heart muscle.

  • Emergency Treatment: Used during a heart attack to rapidly restore circulation.

  • Functional Improvement: Prevention of breathing difficulties caused by poor heart pump function.

Key Components of a DES

  • The Scaffold: A metal mesh structure, typically made of cobalt-chromium or platinum-chromium alloys, providing mechanical support to prevent the artery from recoiling.

  • The Polymer Coating: A thin layer that holds the medication and controls its release into the artery wall over several weeks or months.

  • The Therapeutic Agent: Specialized drugs (typically from the "limus" family) that inhibit the growth of scar tissue within the artery.

How Is Performed

  • Catheter Access: A thin tube is guided through the radial artery (wrist) or femoral artery (groin) to the heart.

  • Navigation: Real-time X-ray imaging and contrast dye ensure the catheter is perfectly positioned at the blockage.

  • Expansion: A tiny balloon at the catheter's tip is inflated to widen the blockage and expand the collapsed stent against the artery wall.

  • Device Deployment: The balloon is deflated and removed, leaving the low-profile stent to support the vessel permanently.

  • Monitoring: Imaging confirms the stent is perfectly positioned before finishing the procedure.

Pre-Procedure Preparation

  • Fasting: Required for 8–12 hours before the catheterization.

  • Baseline Screening: Blood tests, ECG, and chest X-rays to assess overall health and kidney function.

  • Medication Adjustment: Adjusting current medications as directed by the cardiology team.

  • Allergy Check: Discussing any allergies, particularly to nickel (used in some stents) or contrast dye.

  • Recovery Planning: Arranging for a support person for the post-operative period.

Tests Before DES Procedure

  • Echocardiogram (TTE or TEE): To determine the location and severity of arterial issues.

  • Cardiac Catheterization: To measure heart pressures and map the coronary anatomy.

  • Cardiac MRI or CT Scan: For detailed 3D mapping of complex blockages.

  • ECG: To monitor the heart's electrical rhythm.

  • Pulse Oximetry: To evaluate oxygen saturation levels in the blood.

Life After DES Placement

  • Hospital Stay: Usually 1–2 days for observation.

  • Activity Restrictions: Avoid strenuous activity and heavy lifting for a few weeks post-procedure.

  • Mandatory Medication: Patients must take dual antiplatelet therapy (DAPT), such as aspirin and a second blood thinner, for 6 to 12 months to prevent clots.

  • Long-term Follow-up: Regular visits with a cardiologist to monitor the stent site.

  • Functional Recovery: Immediate improvement in breathing, energy levels, and physical stamina.

Benefits of Drug-Eluting Stents

  • Reduced Restenosis: Significantly lowers the risk of the artery re-narrowing compared to older bare-metal stents.

  • Organ Protection: Protects the heart and lungs from damage caused by poor circulation.

  • Fewer Procedures: Patients are less likely to need repeat angioplasties or bypass surgery.

  • High Success Rate: Modern DES provide a long-term solution with technical success rates often exceeding 95%.

  • Efficient Circulation: Restores normal blood flow and ensures the heart muscle receives adequate oxygen.

Rotablation (for calcified arteries)

Rotablation, also known as Rotational Atherectomy, is a specialized cardiac procedure used to treat coronary arteries that have become "stone-hard" due to severe calcium buildup. When plaque is heavily calcified, standard balloon angioplasty may fail to expand the artery, potentially leading to balloon rupture or inadequate stent deployment. This high-speed drilling technique is essential for modifying plaque to make the artery flexible enough for a stent to be placed successfully.

When You Should Consider Rotablation

  • Severely Calcified Arteries: When imaging shows blockages that have hardened into "rock-like" structures that won't budge with standard tools.

  • Balloon-Uncrossable Lesions: When a blockage is so hard or narrow that a standard angioplasty balloon cannot pass through or expand.

  • Failed Prior Angioplasty: If previous attempts to open the artery failed because the plaque was too rigid or inelastic.

  • Preparation for Stenting: To ensure the vessel wall is soft enough for a stent to fully expand and stay open long-term.

  • Heart Overload: When restricted blood flow in hardened vessels causes significant strain or "overload" on the heart muscle.

Methods Of Rotablation

  • High-Speed Rotation: Utilizing a diamond-coated burr that spins at incredible speeds, typically between 140,000 and 200,000 RPM.

  • Differential Cutting: A unique mechanism where the burr selectively grinds hard, calcified plaque while deflecting off healthy, elastic vessel tissue.

  • Plaque Pulverization: The hardened calcium is ground into microscopic particles, much smaller than red blood cells, which can pass safely through the capillaries.

  • Mechanical Modification: Softening the internal vessel wall to transform a rigid "pipe" back into a flexible artery.

  • Combined Therapy: Almost always followed by traditional balloon angioplasty or the deployment of a drug-eluting stent.

How Is Performed

  • Catheter Access: Under local anesthesia and sedation, a thin tube is guided through the radial artery (wrist) or femoral artery (groin) to the heart.

  • Burr Navigation: A specialized diamond-tipped catheter is positioned precisely at the site of the calcified blockage using X-ray guidance.

  • Plaque Modification: The surgeon activates the burr in short "passes" to grind away the calcium, which is then safely cleared by the bloodstream.

  • Artery Preparation: Once the "stone" is modified, a balloon is used to further stretch the now-flexible artery.

  • Stent Deployment: A permanent metal mesh (stent) is expanded to seal the opening and keep the blood flowing freely.

  • Real-time Monitoring: Continuous imaging ensures the artery is sufficiently prepared and the stent is perfectly opposed to the vessel wall.

Pre-Procedure Preparation

  • Fasting (NPO): No food or drink for 8–12 hours before the cardiac catheterization to ensure safety during the procedure.

  • Baseline Diagnostics: Blood tests, ECG, and chest X-rays to assess overall health and ensure the kidneys can process the contrast dye.

  • Medication Adjustment: Reviewing all current medications; blood thinners may need to be paused or adjusted by the cardiology team.

  • Allergy Screening: Discussing any known allergies, particularly to iodine (contrast dye) or the materials used in the surgical tools.

  • Recovery Planning: Arranging for a support person to drive you home and assist during the initial 24-hour recovery period.

Tests Before Rotablation

  • Echocardiogram: An ultrasound of the heart (TTE or TEE) to determine the size and location of the calcified blockage and assess heart pump function.

  • Cardiac Catheterization: An initial "scout" procedure to measure internal pressures and map the exact location of the arterial "stones."

  • Cardiac CT or MRI: Advanced 3D mapping used to visualize the depth and complexity of the hardened plaque.

  • Electrocardiogram (ECG): To monitor the heart's electrical rhythm and check for any conduction issues before the procedure.

  • Pulse Oximetry: To evaluate oxygen saturation levels in the blood, ensuring the lungs and heart are working in sync.

Life After Rotablation

  • Hospital Stay: Usually requires 1–2 days of monitoring in the hospital to ensure the access site is healing and the heart rhythm is stable.

  • Immediate Post-Op Rest: A mandatory period of 6–8 hours of flat bed rest is required if the femoral artery was used for access.

  • Activity Restrictions: Patients should avoid strenuous activity and heavy lifting (usually over 10 lbs) for at least a few weeks.

  • Medication Adherence: Strict compliance with "dual antiplatelet therapy" (blood thinners) is vital to prevent blood clots from forming on the new stent.

  • Follow-Up Care: Regular visits with a cardiologist are essential to monitor the treated artery and ensure the stent remains open.

Benefits Of Rotablation

  • High Success Rate: Successfully modifies difficult, "uncrossable" lesions in over 95% of cases.

  • Enables Complex Stenting: Makes it possible to place stents in patients who were previously told their blockages were "untreatable" by standard means.

  • Protects Heart Muscle: By restoring flow, it prevents long-term damage caused by chronic, high-pressure blockages.

  • Restores Blood Flow: Effectively removes "stone-hard" obstructions that balloons simply cannot push aside.

  • Long-Term Durability: Provides a robust solution for complex coronary artery disease, significantly improving energy levels and physical stamina.

Intravascular Lithotripsy (IVL)

Intravascular Lithotripsy (IVL) is an advanced plaque modification technique that uses sonic shockwaves to break up severe coronary artery calcification. It is particularly effective for "stone-like" blockages that standard balloons cannot expand. This technology has expanded significantly for treating complex, hardened defects that were previously difficult to manage with traditional methods.

When You Should Consider IVL

  • Severely calcified "stone-like" blockages identified during imaging.

  • Evidence of significant heart overload or left-sided heart enlargement.

  • When standard balloon angioplasty fails to expand the artery due to rigidity.

  • Cases where deep-layer calcium fracturing is required for safe stent deployment.

  • Patients seeking a lower-risk alternative to rotational atherectomy for circumferential calcium.

Methods of IVL

  • Acoustic Wave Generation: Emitters on the catheter's balloon vaporize fluid to create rapidly expanding bubbles.

  • Selective Fracturing: Sonic pressure waves (approx. 50 atmospheres) fracture both superficial and deep calcium deposits.

  • Vessel Compliance Restoration: Creating micro-cracks in the calcium to restore elasticity to the artery wall.

  • Deep Plaque Modification: Targeting deep-layer calcium that traditional drilling techniques might miss.

  • Standard Balloon Delivery: Using a familiar delivery system to "plug" the resistance of the calcium without major surgery.

How IVL Is Performed

  • Catheter Access: A tube is guided through the femoral vein or radial artery to the heart.

  • Device Positioning: The specialized IVL balloon is perfectly positioned across the calcified hole or blockage.

  • Shockwave Deployment: The generator sends sonic waves through the balloon to fracture the hardened plaque.

  • Monitoring: Real-time imaging ensures the calcium is sufficiently cracked before finishing the expansion.

  • Stent Deployment: Once elasticity is restored, an occluder device or stent is expanded to seal the artery open.

Pre-Procedure Preparation

  • Fasting for 8-12 hours before the catheterization.

  • Blood tests, ECG, and chest X-rays to assess overall health.

  • Adjusting current medications as directed by the cardiology team.

  • Discussing any allergies, particularly to contrast dye or nickel.

  • Arranging for post-operative care and a support person for the recovery period.

Tests Before IVL Procedure

  • Echocardiogram (TTE or TEE) to determine the size and location of the calcification.

  • Cardiac Catheterization to measure lung pressures and arterial resistance.

  • Cardiac MRI or CT scan for detailed 3D mapping of the hardened defects.

  • ECG to monitor the heart's electrical rhythm and check for conduction issues.

  • Pulse oximetry to evaluate oxygen saturation levels in the blood.

Life After IVL

  • Short hospital stay, usually 1-2 days (24–48 hours) for monitoring.

  • Avoid strenuous activity and heavy exercise for the first 7 days post-procedure.

  • Immediate improvement in breathing, energy levels, and physical stamina.

  • Regular follow-up visits with a cardiologist to monitor the repair site.

  • Return to most daily activities within a few days to a week.

Benefits of IVL

  • Provides a high procedural success rate, often reported over 92%.

  • Significantly lower risk of arterial perforation compared to traditional drilling.

  • Restores normal blood flow by increasing vessel compliance and elasticity.

  • Reduces the risk of heart failure by allowing for full, safe stent expansion.

  • High technical success rates even for complex, deep-layer calcium.

Bifurcation Stenting

Bifurcation Stenting is a complex procedure used when a coronary artery blockage occurs at a branch point, where a main vessel divides into two. These cases account for approximately 15–20% of all angioplasties and are technically demanding due to the risk of closing the "side branch" while treating the main vessel. While surgical repair remains a "gold standard" for some cases, transcatheter techniques for complex branch points have expanded significantly.

When You Should Consider Bifurcation Stenting

  • Blockages located precisely where a main heart artery divides into two branches.

  • Shortness of breath or chest pain caused by multi-vessel narrowing.

  • Evidence of left-sided heart enlargement or significant heart overload.

  • High pressure in the lung arteries or decreased blood flow to the heart muscle.

  • Cases where a single stent may not adequately support both the main and side branches.

Primary Treatment Strategies

  • Provisional Stenting: A single stent is placed in the main vessel across the side branch as the default approach.

  • Side Branch Protection: The side branch is only stented if it remains significantly narrowed or blocked after the first stent.

  • Planned Two-Stent Strategy: Used for "true" bifurcation lesions where both branches have significant, long blockages (>10mm).

  • Full Vessel Coverage: A strategy that ensures both vessel openings are supported from the start of the procedure.

  • Simple Approach: Preferred for most cases as it is faster and has fewer long-term complications.

Common Specialized Techniques

  • DK-Crush (Double Kissing Crush): One of the most effective two-stent techniques, particularly for left main artery blockages.

  • Stent Crushing: Involves "crushing" part of the side branch stent against the wall to ensure the opening is perfectly scaffolded.

  • Culotte Technique: Best for cases where the two branches are nearly the same size, layering stents like "trouser legs".

  • TAP (T and Small Protrusion): A simpler method where the side branch stent protrudes slightly to ensure no gap at the fork.

  • Hybrid Approach: A combination of techniques used for complex, hard-to-reach branch defects.

Optimization Techniques

  • POT (Proximal Optimization Technique): A mandatory step using a high-pressure balloon to expand the stent to match the larger vessel diameter.

  • Kissing Balloon Inflation (KBI): Two balloons are inflated simultaneously in both branches to re-shape the fork.

  • Strut Clearing: KBI is used to clear any metal struts that might be blocking the side branch opening.

  • Real-time Imaging: Monitoring ensures the device or patch is perfectly positioned before finishing.

  • Device Deployment: Specialized occluder-like stents are expanded across the hole or blockage to seal it permanently.

Pre-Procedure Preparation

  • Fasting for 8-12 hours before the catheterization or surgery.

  • Blood tests, ECG, and chest X-rays to assess overall cardiac health.

  • Adjusting current medications, specifically blood thinners, as directed by the cardiology team.

  • Discussing any allergies, particularly to nickel used in some stents or contrast dye.

  • Arranging for post-operative care and a support person for the recovery period.

Tests Before Bifurcation Stenting

  • Echocardiogram (TTE or TEE) to determine the size and location of the branch blockages.

  • Cardiac Catheterization to measure lung pressures and map the arterial branches.

  • Cardiac MRI or CT scan for detailed 3D mapping of complex bifurcation defects.

  • ECG to monitor the heart's electrical rhythm and check for conduction issues.

  • Pulse oximetry to evaluate oxygen saturation levels in the blood.

Life After Bifurcation Stenting

  • Short hospital stay, usually 1-2 days for device closure or observation.

  • Avoid strenuous activity and heavy lifting for a few weeks post-procedure.

  • Take prescribed antiplatelet medications to prevent blood clots on the multiple layers of metal.

  • Regular follow-up visits with a cardiologist to monitor the repair site.

  • Immediate improvement in breathing, energy levels, and physical stamina.

Benefits of Bifurcation Stenting

  • Restores normal blood flow to both the main artery and its side branches.

  • Protects the heart from damage caused by complex branch-point blockages.

  • Reduces the risk of heart failure and enlargement of the heart's chambers.

  • Provides a long-term cure with high technical success rates in experienced hands.

  • Prevents oxygen-rich and poor blood from mixing inefficiently due to restricted flow.

CTO (Chronic Total Occlusion) Angioplasty

Chronic Total Occlusion (CTO) Angioplasty, also known as CTO PCI, is a specialized, minimally invasive procedure used to open a coronary artery that has been 100% blocked for three months or longer. Historically considered too complex for standard stenting, advances now allow interventional cardiologists to treat these "final frontier" blockages with high success rates. The procedure restores blood flow to heart muscle that is still viable but "starving" for oxygen.

When You Should Consider CTO Angioplasty

  • Lifestyle-limiting chest pain (angina) that persists despite taking heart medications.

  • Extreme fatigue or shortness of breath during daily activities.

  • Evidence from a Cardiac MRI or Stress Echo showing heart muscle behind the blockage is still alive.

  • Patients who are not ideal candidates for traditional open-heart bypass surgery.

  • Documented 100% blockage of a coronary artery for a duration of three months or more.

Methods of CTO Angioplasty

  • Antegrade Approach: Attempting to cross the blockage from the "front" in the direction of normal blood flow.

  • Retrograde Approach: Accessing the blockage from the "back" through small collateral vessels that have naturally grown around the occlusion.

  • Dual Access: Using both the radial (wrist) and femoral (groin) arteries simultaneously to navigate complex blockages.

  • Microcatheter Support: Using specialized, thin tubes to provide extra support for wires crossing "stone-hard" plaque.

  • Stent Placement: Deploying drug-eluting stents to keep the newly opened channel clear permanently.

How CTO Angioplasty Is Performed

  • Specialized Access: Procedures often require two access points (wrist and groin) to visualize the blockage from both sides.

  • Extended Navigation: Cardiologists use advanced wires to penetrate the solid cap of the occlusion.

  • Plaque Modification: Specialized balloons or drills may be used to create a path through the chronic blockage.

  • Device Deployment: Once a wire crosses the blockage, a stent is expanded to restore the artery's original diameter.

  • Real-time Monitoring: High-definition imaging ensures the stent is perfectly positioned and blood flow is fully restored.

Pre-Procedure Preparation

  • Fasting for 8-12 hours before the procedure due to its longer duration (3-5 hours).

  • Blood tests to assess kidney function, as more contrast dye is often required.

  • Adjusting current heart and blood-thinning medications as directed by the cardiology team.

  • Discussing any allergies to contrast dye or materials used in cardiac devices.

  • Arranging for an overnight hospital stay and a support person for the recovery period.

Tests Before CTO Angioplasty

  • Cardiac MRI or Stress Echo to confirm the heart muscle is viable and will benefit from the procedure.

  • Coronary Angiogram to map the "front" and "back" entry points of the blockage.

  • CT Scan (Cardiac) for 3D mapping of the calcium levels within the total occlusion.

  • ECG to monitor electrical rhythm and check for conduction issues caused by the blockage.

  • Blood tests to ensure the patient can tolerate the longer procedure time.

Life After CTO Angioplasty

  • Short hospital stay, typically involving one night of observation for safety.

  • Resume light activity within 24 to 48 hours, avoiding heavy lifting for one week.

  • Mandatory Medication: Patients must take blood thinners (DAPT) for 6 to 12 months to prevent stent clotting.

  • Regular follow-up visits with a cardiologist to monitor the success of the revascularization.

  • Significant improvement in energy levels, breathing, and physical stamina.

Benefits of CTO Angioplasty

  • Relief of chronic chest pain and shortness of breath that did not respond to medication.

  • Improved quality of life and the ability to return to physical activities.

  • Protects the heart muscle from permanent damage and reduces the risk of future heart failure.

  • High success rates (85% to 90%) at specialized centers using modern retrograde techniques.

  • Avoids the need for more invasive open-heart bypass surgery in eligible patients.

TAVI/TAVR (Transcatheter Aortic Valve Replacement)

Transcatheter Aortic Valve Implantation (TAVI), also known as TAVR, is a minimally invasive procedure used to treat severe aortic stenosis. As of 2026, it has become a standard of care for patients across all surgical risk categories—from high-risk to low-risk—offering an alternative to traditional open-heart surgery.

When You Should Consider TAVI/TAVR

  • Diagnosis of severe aortic stenosis causing restricted blood flow

  • Chest pain (angina) or tightness during physical activity

  • Frequent shortness of breath or feeling easily winded

  • Dizziness, lightheadedness, or fainting spells

  • Symptoms of heart failure, such as swelling in the ankles or feet

Key Benefits of TAVI/TAVR

  • Minimally invasive approach with no need for a large chest incision

  • Avoids the use of a heart-lung bypass machine in most cases

  • Significantly shorter recovery time compared to open-heart surgery

  • Faster improvement in breathing and energy levels

  • Lower risk of certain complications like major bleeding or infection

How the Procedure Is Performed

  • Access: Usually performed through a tiny incision in the groin (transfemoral approach).

  • Catheterization: A thin tube carries the collapsed replacement valve to the heart.

  • Deployment: The new valve is expanded, pushing the old valve leaflets aside.

  • Immediate Function: The new valve starts working instantly to restore blood flow.

  • Anesthesia: Most procedures use conscious sedation rather than general anesthesia.

2026 Innovations in TAVI Care

  • Universal Risk Application: Now available for low-risk patients as well as high-risk.

  • Advanced Valve Materials: 2026 bioprosthetic valves are designed for greater durability.

  • Conscious Sedation: Improved protocols allow for faster wake-up and recovery times.

  • Cerebral Protection: Specialized filters are used during deployment to reduce stroke risk.

  • Precision Imaging: 3D mapping ensures perfect valve placement and fit.

Recovery and Expectations

  • Hospital Stay: Most patients are ready to go home within 1 to 2 days.

  • Post-Op Activity: Walking is encouraged almost immediately after the procedure.

  • Incision Care: The small groin incision heals quickly with minimal scarring.

  • Follow-up: Regular check-ups include an echocardiogram to monitor valve function.

  • Return to Life: Most patients return to normal daily activities within a week.

Living with Your New Valve

  • Heart-Healthy Lifestyle: Balanced diet and light exercise support long-term success.

  • Medication Management: Patients typically take blood-thinning medications for a short period.

  • Infection Prevention: Always inform dentists and doctors about your valve before procedures.

  • Regular Monitoring: Periodic imaging ensures the valve remains seated and functional.

  • Immediate Relief: Most patients report a dramatic reduction in symptoms right away.

MitraClip (Mitral Regurgitation)

MitraClip therapy, also known as Transcatheter Edge-to-Edge Repair (TEER), is a minimally invasive, catheter-based procedure used to treat Mitral Regurgitation (MR). This is a condition where the heart's mitral valve does not close tightly, causing blood to leak backward into the heart. In 2026, this remains a vital option for patients who are at high risk for traditional open-heart surgery.

When You Should Consider MitraClip

  • Severe symptomatic mitral regurgitation that limits daily activity.

  • Heart failure symptoms like shortness of breath or fatigue that persist despite medication.

  • Primary (Degenerative) MR in patients at prohibitive risk for traditional surgery due to age or frailty.

  • Secondary (Functional) MR caused by an enlarged heart or heart muscle damage.

  • Evidence of left-sided heart enlargement or significant heart overload.

Methods of MitraClip Therapy

  • Transcatheter Edge-to-Edge Repair: A minimally invasive method using a groin catheter to "clip" the valve leaflets together.

  • Leaflet Approximation: The clip holds the flaps of the mitral valve to allow it to close more completely.

  • Beating Heart Procedure: Unlike traditional surgery, this is performed while the heart continues to beat without a heart-lung machine.

  • Real-time Guidance: Use of specialized imaging to ensure the clip is perfectly positioned to block the leak.

  • Device Occlusion: Deployment of a "soft" low-profile clip to reduce backward blood flow.

How MitraClip Is Performed

  • Catheter Access: A tube is guided through the femoral vein in the groin to reach the heart.

  • Navigation: The delivery system is steered into the left atrium and positioned above the mitral valve.

  • Clip Deployment: The MitraClip is expanded and used to grasp the valve leaflets, sealing the leak.

  • Monitoring: Real-time imaging (TEE) ensures the clip has significantly reduced the regurgitation before finishing.

  • Finalization: Once the position is verified, the clip is permanently detached and the catheter is removed.

Pre-Procedure Preparation

  • Fasting for 8-12 hours before the catheterization.

  • Blood tests, ECG, and chest X-rays to assess overall health and valve function.

  • Adjusting current medications as directed by the cardiology team.

  • Discussing any allergies, particularly to materials used in the device or contrast dye.

  • Arranging for post-operative care and a support person for the recovery period.

Tests Before MitraClip Therapy

  • Echocardiogram (TTE or TEE) to determine the severity and location of the valve leak.

  • Cardiac Catheterization to measure heart and lung pressures.

  • Cardiac MRI or CT scan for detailed 3D mapping of the valve anatomy.

  • ECG to monitor the heart's electrical rhythm and check for conduction issues.

  • Pulse oximetry to evaluate oxygen saturation levels in the blood.

Life After MitraClip

  • Short hospital stay, usually 1-3 days for monitoring.

  • Avoid strenuous activity and heavy lifting for about a month post-procedure.

  • Take prescribed medications, including blood thinners, as directed by the cardiologist.

  • Regular follow-up visits with a cardiologist to monitor the repair site.

  • Immediate improvement in breathing, energy levels, and physical stamina.

Benefits of MitraClip Therapy

  • Restores normal blood flow and prevents oxygen-rich blood from leaking backward.

  • Protects the lungs and heart from permanent damage caused by fluid backup.

  • High technical success rates, reported between 93% and 98%.

  • Significant reduction in heart failure-related hospitalizations.

  • Provides a long-term cure for symptoms with a much shorter recovery than surgery.

ASD Device Closure
ASD Device Closure

Atrial Septal Defect (ASD) closure is a specialized cardiac procedure performed to repair a hole in the septum, which is the wall separating the heart's upper chambers. This treatment is essential for restoring normal blood flow, preventing the heart from overworking, and reducing the risk of long term complications such as pulmonary hypertension or stroke.

When You Should Consider ASD Closure

  • Persistent shortness of breath, especially during exercise or physical activity.

  • Frequent respiratory infections or lung issues.

  • Chronic fatigue or low energy levels during simple daily tasks.

  • Heart palpitations or the sensation of a skipped heartbeat.

  • Swelling in the legs, feet, or abdomen caused by fluid buildup.

  • Detection of a heart murmur during a routine physical checkup.

Conditions That Require ASD Closure

  • Secundum ASD which is the most common form located in the middle of the atrial wall.

  • Primum ASD which occurs in the lower part of the septum and may affect heart valves.

  • Sinus Venosus ASD located near the entry points of the large veins into the right atrium.

  • Coronary Sinus ASD which involves a defect in the wall between the coronary sinus and the left atrium.

  • Large defects that cause significant blood shunting and heart chamber enlargement.

How ASD Closure Is Performed

  • General anesthesia is administered to ensure the patient is comfortable and pain free.

  • For transcatheter closure, a thin tube is guided through a vein in the groin to the heart.

  • For surgical repair, a chest incision is made to provide direct access to the heart wall.

  • A specialized mesh device or a surgical patch is placed to permanently seal the hole.

  • The heart function is tested using real time imaging to ensure the defect is fully closed.

  • Patients are moved to a specialized recovery unit for continuous monitoring.

Types of ASD Closure

  • Transcatheter Device Closure A minimally invasive method using a catheter to deliver a permanent sealing device to the heart.

  • Open Heart ASD Repair The traditional surgical approach used for very large or complex defects involving a chest incision.

  • Minimally Invasive ASD Surgery Performed through small incisions between the ribs to minimize scarring and speed up healing.

  • Robotic Assisted Repair Uses advanced robotic systems for high precision closure with the smallest possible incisions.

Pre Surgery Preparation

  • Stop smoking at least two to three weeks before the procedure for better lung recovery.

  • Ensure blood pressure and blood sugar levels are well controlled.

  • Follow specific fasting instructions provided by your Medivisor India Treatment coordinator.

  • Adjust or pause blood thinning medications only as advised by your cardiologist.

  • Complete all required cardiac imaging and blood work before the scheduled surgery date.

Pre Surgery Tests

  • ECG to monitor the electrical activity and rhythm of the heart.

  • 2D or 3D Echocardiography to visualize the size and location of the defect.

  • Transesophageal Echo (TEE) for a more detailed view of the heart structures.

  • Chest X ray to evaluate the size of the heart and the condition of the lungs.

  • Routine blood panels including CBC, liver function, and clotting profiles.

Why ASD Closure Is Highly Effective

  • Restores normal blood circulation and prevents oxygen rich blood from mixing with poor blood.

  • Eliminates symptoms like breathlessness and chronic fatigue within weeks.

  • Prevents the right side of the heart from becoming enlarged or failing.

  • Significantly improves daily stamina and long term quality of life.

  • Provides a permanent solution with high success rates in both children and adults.

Recovery After ASD Closure

  • ICU or recovery room stay for one to two days for close observation.

  • Early mobilization and walking are encouraged within twenty four hours.

  • For transcatheter patients, discharge is often possible within forty eight hours.
  • Surgical patients typically require four to seven days of hospital care.

  • Most patients return to school or work within one to four weeks depending on the method.

Life After ASD Closure

  • Exercise tolerance often improves significantly within two to three months of the repair.

  • Follow a heart healthy diet and stay hydrated to support the healing process.

  • Take daily aspirin or blood thinners for six months as prescribed to prevent clots.

  • Use antibiotics before dental procedures for six months to prevent heart infections.

  • Attend regular follow up appointments with a cardiologist to monitor heart health.

PDA Closure
PDA Closure

Patent Ductus Arteriosus (PDA) Closure is a procedure to seal an abnormal opening between the two major blood vessels leading from the heart: the aorta and the pulmonary artery. In a normal heart, this vessel (the ductus arteriosus) closes naturally shortly after birth; if it stays open, it can cause too much blood to flow to the lungs, straining the heart. While surgical ligation remains necessary for specific cases, transcatheter (minimally invasive) techniques have become the gold standard for most children and adults.

When You Should Consider PDA Closure

  • Heart failure symptoms such as fatigue or shortness of breath.

  • Poor weight gain or difficulty feeding in infants.

  • Evidence of left-sided heart enlargement or significant heart overload.

  • High pressure in the lung arteries (Pulmonary Hypertension).

  • High risk of endocarditis (infection of the heart lining) due to the defect.

Methods of PDA Closure

  • Transcatheter PDA Closure: A minimally invasive method using a groin catheter to "plug" the hole with a device.

  • Surgical Ligation: Traditional approach where a surgeon ties off the vessel with sutures or clips via a small incision.

  • Device Occlusion: Deployment of "soft" low-profile mesh devices (occluders) to block the abnormal flow.

  • Thoracotomy: A surgical technique used primarily for premature infants or complex PDA shapes.

  • Hybrid Approach: A combination of surgery and catheterization used for unique anatomical challenges.

How PDA Closure Is Performed

  • Catheter Access: A thin tube is guided through a vein in the groin (femoral vein) to reach the heart.

  • Device Positioning: Under X-ray guidance, a tiny mesh "plug" is moved into the ductus arteriosus.

  • Permanent Sealing: The device blocks the hole, and over time, heart tissue grows over the mesh.

  • Surgical Clipping: In surgical cases, the vessel is physically tied off to prevent blood from passing through.

  • Monitoring: Real-time imaging ensures the device is perfectly positioned before finishing the procedure.

Pre-Procedure Preparation

  • Fasting for 8-12 hours before the scheduled procedure.

  • Blood tests, ECG, and chest X-rays to assess overall cardiac health.

  • Adjusting current medications as directed by the medical team.

  • Discussing any allergies, particularly to nickel (used in some devices) or contrast dye.

  • Arranging for a hospital stay (ranging from a few hours to a few days depending on the method).

Tests Before PDA Closure

  • Echocardiogram (TTE) to determine the size and shape of the PDA.

  • Cardiac Catheterization to measure lung pressures and map the vessel anatomy.

  • Chest X-ray to check for heart enlargement or fluid in the lungs.

  • ECG to monitor the heart's electrical rhythm and check for strain.

  • Pulse oximetry to evaluate oxygen levels in the blood.

Life After PDA Closure

  • Short hospital stay, often allowing patients to go home the same day or after one night.

  • Resume normal activity usually within a week; avoid heavy lifting for a few days.

  • Regular follow-up visits with a cardiologist to ensure the device remains in place.

  • Significant improvement in feeding, growth milestones, and energy levels.

  • Once closed, it is considered a permanent cure with no further procedures typically required.

Benefits of PDA Closure

  • Restores normal blood flow and prevents oxygen-rich blood from flooding the lungs.

  • Protects the lungs from permanent damage caused by high blood pressure.

  • Allows infants to reach growth milestones and maintain healthy weight gain.

  • Reduces the risk of heart failure and enlargement of the heart's chambers.

  • Provides a long-term cure with extremely high technical success rates (98% to 99%).

Left Atrial Appendage (LAA) Closure

Left Atrial Appendage (LAA) Closure is a specialized procedure designed to reduce the risk of stroke in patients with atrial fibrillation (AFib). In AFib, the heart's upper chambers beat irregularly, which can cause blood to pool and form clots in a small, thumb-sized pouch called the left atrial appendage. This procedure serves as a primary alternative for patients who cannot tolerate long-term blood thinners.

When You Should Consider LAA Closure

  • Stroke Risk: Increased risk of stroke specifically due to non-valvular atrial fibrillation.

  • Bleeding History: A history of serious gastrointestinal bleeding or other major bleeding events that make anticoagulants dangerous.

  • Lifestyle Risks: A high risk of falls or an occupation/lifestyle that carries a significant risk of physical injury.

  • Medication Challenges: Difficulty maintaining therapeutic blood-clotting levels (INR) on traditional medications.

  • Long-term Preference: Preference for a one-time procedural solution over the requirement for lifelong daily anticoagulants.

Methods of LAA Closure

  • Transcatheter LAA Closure: A minimally invasive method using a catheter inserted through the groin to "plug" the appendage.

  • Watchman Device Implantation: The use of a permanent, parachute-shaped device to seal the opening of the LAA.

  • Amulet Occluder: A specialized dual-seal device designed to provide complete and secure closure of the pouch.

  • Tissue Overgrowth: A natural biological process where heart tissue covers the device surface over approximately 45 days.

  • Device Occlusion: Deployment of low-profile devices to block the opening and prevent clots from escaping into the bloodstream.

How Is Performed

  • Catheter Access: A small incision is made in the groin (femoral vein), and a thin tube is guided up to the heart.

  • Transseptal Puncture: The cardiologist carefully passes the catheter from the right atrium to the left atrium to reach the appendage.

  • Device Navigation: Under real-time imaging guidance, the permanent plug is guided precisely into the opening of the LAA.

  • Permanent Sealing: The device acts as a physical barrier; within weeks, heart tissue grows over it to create a permanent seal.

  • Positioning Verification: Real-time imaging (TEE) ensures the device is perfectly positioned and there are no leaks before the procedure is completed.

Pre-Procedure Preparation

  • Fasting (NPO): No food or drink for 8–12 hours before the scheduled catheterization.

  • Baseline Diagnostics: Blood tests, ECG, and chest X-rays to assess overall cardiac health and kidney function.

  • Medication Adjustment: Adjusting current blood-thinning medications as directed by the electrophysiology team.

  • Allergy Discussion: Discussing any known allergies, particularly to nickel or the contrast dye used during imaging.

  • Recovery Logistics: Arranging for an overnight hospital stay and a support person to assist during the initial recovery period.

Tests Before LAA Closure

  • Transesophageal Echocardiogram (TEE): An ultrasound through the esophagus to check for existing clots and measure the appendage size.

  • Cardiac Catheterization: To evaluate heart pressures and map the specific atrial anatomy.

  • Cardiac CT Scan: For detailed 3D mapping of the appendage shape to select the correct device size.

  • ECG: To monitor the heart's electrical rhythm and confirm the current status of the atrial fibrillation.

  • Pulse Oximetry: To evaluate baseline oxygen saturation levels in the blood.

Life After LAA Closure

  • Observation Stay: A short hospital stay, typically requiring only one night for observation of the access site.

  • Short-term Medication: Patients usually remain on blood thinners and aspirin for the first 45 days until the heart tissue has healed over the device.

  • Medication Cessation: Most patients can eventually stop taking potent blood thinners once the seal is confirmed by follow-up imaging.

  • Activity Restrictions: Avoid strenuous activity or heavy lifting for approximately one week post-procedure to allow the groin incision to heal.

  • Ongoing Monitoring: Regular follow-up visits with a cardiologist to monitor the device and overall heart health.

Benefits of LAA Closure

  • Stroke Protection: Provides stroke protection comparable to warfarin while significantly reducing the risk of major bleeding.

  • Injury Safety: Restores peace of mind for patients who are at high risk of injury, bruising, or falls.

  • Success Rates: Features high technical success rates, with successful device placement often exceeding 95%.

  • Embolism Prevention: Effectively protects the brain from potential clots escaping the heart's upper chambers.

  • Therapy Elimination: Provides a long-term solution that eliminates the need for lifelong anticoagulant (blood thinner) therapy.

Balloon Valvotomy (Mitral / Pulmonary)

Balloon Valvotomy, also known as balloon valvuloplasty, is a minimally invasive, non-surgical procedure used to widen a heart valve that has become narrowed or stiff (stenosis). This procedure remains the primary alternative to open-heart surgery for treating Mitral and Pulmonary valve obstructions. The technique involves using a specialized balloon catheter to stretch the valve leaflets apart, restoring efficient blood flow through the heart.

When You Should Consider Balloon Valvotomy

  • Severe Mitral Stenosis, often caused by rheumatic heart disease, limiting physical activity.

  • Congenital Pulmonary Stenosis identified in newborns, children, or adults.

  • Symptoms of heart failure such as shortness of breath, fatigue, or persistent coughing.

  • Evidence of high pressure in the lung arteries or right-sided heart strain.

  • Patients with pliable, non-calcified valves who are ideal candidates for non-surgical repair.

Methods of Balloon Valvotomy

  • Mitral Balloon Valvotomy (BMV/PTMC): The treatment of choice for narrowing of the mitral valve between the left chambers.

  • Pulmonary Balloon Valvotomy (BPV): A first-line procedure for opening the valve between the right ventricle and the pulmonary artery.

  • Transseptal Puncture: A specialized technique used in mitral cases to reach the left side of the heart through a tiny hole in the septum.

  • Percutaneous Transvenous Mitral Commissurotomy (PTMC): A specific approach using a groin catheter to treat rheumatic valve disease.

  • Balloon Dilation: The mechanical stretching of fused valve leaflets to increase the valve's opening area.

How Balloon Valvotomy Is Performed

  • Catheter Access: A thin tube is guided through a vein in the groin (femoral vein) or occasionally the arm.

  • Navigation: For Mitral valves, a needle creates a tiny septal hole; for Pulmonary valves, the catheter moves directly into the right side.

  • Balloon Inflation: Once positioned across the stiff valve, the balloon is inflated to split the fused "commissures" or flaps.

  • Real-time Monitoring: Imaging (Fluoroscopy and Echo) ensures the valve is sufficiently opened without causing excessive leaks.

  • Finalization: The balloon is deflated and removed, leaving the widened valve to function naturally without a permanent implant.

Pre-Procedure Preparation

  • Fasting for 8-12 hours before the scheduled cardiac catheterization.

  • Blood tests, ECG, and chest X-rays to assess overall cardiac health and clotting levels.

  • Adjusting current heart medications or blood thinners as directed by the cardiology team.

  • Discussing any allergies, particularly to contrast dye or sedation medications.

  • Arranging for an overnight hospital stay (for BMV) or a support person for same-day discharge (for BPV).

Tests Before Balloon Valvotomy

  • Echocardiogram (TTE or TEE) to evaluate the valve's pliability and check for blood clots in the heart.

  • Cardiac Catheterization to measure the pressure gradient across the narrowed valve.

  • Chest X-ray to look for signs of heart enlargement or fluid backup in the lungs.

  • ECG to monitor the heart's electrical rhythm and detect any atrial fibrillation.

  • Pulse oximetry to evaluate oxygen saturation levels during physical exertion.

Life After Balloon Valvotomy

  • Short hospital stay, typically ranging from same-day discharge to one night of observation.

  • Fast recovery, with most patients returning to their normal routine within one week.

  • Avoid strenuous activity and heavy lifting for the first few days post-procedure.

  • Regular follow-up visits with a cardiologist to monitor the valve's function over time.

  • Immediate improvement in breathing, stamina, and overall energy levels.

Benefits of Balloon Valvotomy

  • Avoids the need for open-heart surgery and the use of a heart-lung bypass machine.

  • High success rates, often exceeding 90% to 95% for achieving a wider valve opening.

  • Results are long-lasting, particularly in children, often spanning 10 to 20 years.

  • Requires only local anesthesia and sedation, leading to less pain and no major surgical scarring.

  • Protects the heart and lungs from permanent damage caused by chronic valve obstruction.

Peripheral Angioplasty (Leg Arteries)

Peripheral Angioplasty, also known as Peripheral Vascular Intervention, is a minimally invasive procedure used to open blocked or narrowed arteries in the legs. This is the primary treatment for Peripheral Artery Disease (PAD), where plaque buildup (atherosclerosis) restricts blood flow, causing leg pain, cramping, or "heavy legs." While bypass surgery remains an option for long-segment blockages, advanced drug-coated balloons and atherectomy devices have significantly improved non-surgical outcomes.

When You Should Consider Peripheral Angioplasty

  • Pain or cramping in the legs while walking (claudication) that stops with rest.

  • Critical Limb Ischemia (CLI), marked by leg pain even while resting.

  • Non-healing sores, ulcers, or gangrene on the feet or toes.

  • Lifestyle-limiting symptoms that do not improve with smoking cessation or walking programs.

  • Evidence of significant arterial narrowing found during a Doppler ultrasound or CT angiogram.

Methods of Peripheral Angioplasty

  • Plain Balloon Angioplasty: Standard inflation of a balloon to push plaque against the artery walls.

  • Drug-Coated Balloon (DCB): Using balloons coated with medication to prevent the artery from scarring or narrowing again.

  • Stent Placement: Inserting a small metal mesh tube to act as a permanent scaffold for the artery.

  • Atherectomy: Using a tiny rotating blade or laser to "shave" or break down hard, calcified plaque.

  • Hybrid Intervention: Combining minimally invasive angioplasty with minor surgical procedures for complex blockages.

How Peripheral Angioplasty Is Performed

  • Catheter Access: A tiny puncture is made in the groin (femoral artery), arm, or sometimes the ankle.

  • Navigation: Under X-ray guidance (fluoroscopy), a thin guide wire is threaded to the site of the blockage.

  • Dilation: The specialized balloon is inflated at the blockage site to widen the path for blood.

  • Optional Stenting: If the artery remains narrow, a stent is deployed and expanded into place.

  • Monitoring: Contrast dye is used to verify that strong blood flow has been restored to the lower leg and foot.

Pre-Procedure Preparation

  • Fasting for 6-8 hours before the procedure, especially if sedation is used.

  • Blood tests to assess kidney function and blood clotting levels.

  • Adjusting current medications, particularly for diabetes or blood-thinning, as directed.

  • Discussing any allergies to iodine, contrast dye, or specific metals like nickel.

  • Arranging for a support person to assist with transport after the outpatient procedure.

Tests Before Peripheral Angioplasty

  • Ankle-Brachial Index (ABI) to compare blood pressure in the arms and legs.

  • Doppler Ultrasound to visualize blood flow and identify the location of blockages.

  • CT Angiography (CTA) or MR Angiography (MRA) for detailed 3D mapping of the leg arteries.

  • Blood tests to check cholesterol levels and kidney health.

  • Physical examination to check for diminished pulses in the feet.

Life After Peripheral Angioplasty

  • Short recovery time; most patients go home the same day or after one night of observation.

  • Most patients can walk immediately, though heavy lifting is restricted for 5-7 days.

  • Strict adherence to antiplatelet medications (like aspirin) to keep the treated area open.

  • Significant improvement in walking distance and a reduction in leg pain.

  • Regular follow-up ultrasounds to ensure the artery remains open (patent).

Benefits of Peripheral Angioplasty

  • Restores efficient blood flow to the legs and feet, preventing tissue loss and amputation.

  • High technical success rates, often exceeding 90% in experienced hands.

  • Minimally invasive approach with no large surgical incisions or general anesthesia required.

  • Faster recovery and less pain compared to traditional peripheral bypass surgery.

  • Provides a long-term solution for maintaining mobility and an active lifestyle.

Renal Artery Stenting

Renal Artery Stenting is a minimally invasive procedure used to open blockages in the arteries that supply blood to your kidneys. It is primarily used to treat Renal Artery Stenosis (narrowing of the kidney arteries), which can lead to uncontrolled high blood pressure and kidney damage. This procedure remains a critical intervention for preserving kidney function and managing resistant hypertension when medication alone is insufficient.

When You Should Consider Renal Artery Stenting

  • High blood pressure that remains uncontrolled despite taking three or more medications (Resistant Hypertension).

  • Significant narrowing of 60% to 70% or greater in one or both renal arteries.

  • Unexplained or sudden worsening of kidney health (Rapidly Declining Kidney Function).

  • Flash pulmonary edema (sudden fluid buildup in the lungs) related to kidney artery issues.

  • Worsening heart failure that is exacerbated by renal artery stenosis.

Methods of Renal Artery Stenting

  • Balloon Angioplasty: A small balloon is inflated at the site of the blockage to widen the narrowed artery.

  • Metal Mesh Stenting: A tiny metal tube (stent) is permanently expanded to act as scaffolding, keeping the artery open.

  • Trans-femoral Access: Entering the arterial system through a small puncture in the groin.

  • Trans-radial Access: A modern approach entering through the wrist, often allowing for faster recovery.

  • Real-time Fluoroscopy: Using high-definition X-ray imaging and contrast dye to guide the precise placement of the stent.

How Renal Artery Stenting Is Performed

  • Access: A small incision, less than an eighth of an inch, is made in the groin or arm under local anesthesia.

  • Navigation: A thin catheter is threaded through the blood vessels to the site of the renal artery blockage.

  • Dilation: A specialized balloon at the tip of the catheter is inflated to push the plaque against the artery walls.

  • Stent Deployment: The stent is expanded and locked into place to provide structural support to the vessel.

  • Monitoring: The doctor verifies restored blood flow to the kidney before removing the delivery system.

Pre-Procedure Preparation

  • Fasting for 6-8 hours before the procedure to ensure safety during sedation.

  • Blood tests to evaluate current kidney function (Creatinine levels) and blood clotting.

  • Adjusting current blood pressure or diabetic medications as directed by the medical team.

  • Discussing any history of allergies to iodine or contrast dye used for imaging.

  • Arranging for a support person to assist with transportation and initial home recovery.

Tests Before Renal Artery Stenting

  • Renal Doppler Ultrasound to measure the velocity of blood flow to the kidneys.

  • CT Angiography (CTA) or MR Angiography (MRA) for detailed 3D mapping of the renal arteries.

  • Blood tests to check kidney health and electrolyte balance.

  • ECG to monitor heart rhythm and ensure cardiac stability during the procedure.

  • Physical examination to check for bruits (abnormal sounds) over the kidney area.

Life After Renal Artery Stenting

  • Short hospital stay, typically involving one night of observation or same-day discharge.

  • Avoid strenuous activity and heavy lifting for at least 24 to 72 hours post-procedure.

  • Mandatory Medication: Patients must take blood thinners (like Aspirin or Clopidogrel) for 1 to 12 months.

  • Most people return to work and their normal daily routines within one week.

  • Regular follow-up appointments to monitor blood pressure and kidney function improvements.

Benefits of Renal Artery Stenting

  • Helps lower and stabilize blood pressure in patients with resistant hypertension.

  • Preserves long-term kidney health and may prevent the need for dialysis or transplant.

  • Minimally invasive approach with a procedure time of only 30 to 90 minutes.

  • Reduces symptoms of fluid overload and improves overall cardiovascular stability.

  • High technical success rates for restoring blood flow to "starving" kidney tissue.

Endovascular Aneurysm Repair

Endovascular Aneurysm Repair (EVAR) is a minimally invasive surgical procedure used to treat aortic aneurysms, most commonly Abdominal Aortic Aneurysms (AAA). By placing a stent graft inside the weakened portion of the aorta, the procedure creates a new pathway for blood flow, effectively "re-lining" the vessel to prevent a life-threatening rupture. EVAR is the preferred treatment for patients with suitable anatomy, offering a safer alternative to traditional open surgery.

When You Should Consider EVAR

  • Aneurysm Size: When the diameter exceeds 5.5 cm in men or 5.0 cm in women, where rupture risk increases significantly.

  • Rapid Expansion: Growth of more than 0.5 cm within a 6-month period.

  • Symptomatic Presentation: Any aneurysm causing persistent abdominal, flank, or back pain.

  • High Surgical Risk: For patients whose age, heart disease, or lung complications make open surgery dangerous.

  • Suitable Anatomy: Presence of an infrarenal aneurysm with a healthy "landing zone" of non-dilated aorta for secure anchoring.

Methods of EVAR

  • Standard EVAR: Use of a bifurcated (Y-shaped) stent graft for typical abdominal aneurysms located below the kidney arteries.

  • TEVAR (Thoracic EVAR): A specialized version used for aneurysms located in the thoracic (chest) section of the aorta.

  • FEVAR (Fenestrated EVAR): Custom-made grafts with "windows" (fenestrations) to maintain blood flow to vital branching arteries, such as those leading to the kidneys.

  • Stent Grafting: Deployment of a fabric-covered metal frame (Nitinol or stainless steel) to seal the aneurysm sac.

  • Real-time Fluoroscopy: High-definition X-ray guidance used to ensure precise placement of the device through the femoral arteries.

How Is Performed

  • Access: Small incisions or needle punctures are made in both groins to reach the femoral arteries.

  • Navigation: A delivery catheter carrying the collapsed stent graft is guided to the aneurysm site under X-ray imaging.

  • Deployment: The graft is released and expands to seal against the healthy artery walls above and below the weakened bulge.

  • Verification: An intraoperative angiogram (contrast dye injection) confirms there are no leaks and blood is flowing correctly through the graft.

  • Finalization: The delivery tools are removed, and the small access sites in the groin are closed with sutures or collagen plugs.

Pre-Procedure Preparation

  • Fasting: Required for 8–12 hours before the procedure, as it may require general or regional anesthesia.

  • Lab Work: Blood tests to evaluate kidney function (crucial for processing contrast dye) and clotting status.

  • Medication Review: Adjusting current medications, particularly antiplatelet drugs or diabetic treatments.

  • Anatomical Mapping: Detailed measurement using high-resolution CT scans to select the correct graft size and shape.

  • Allergy Check: Discussing any sensitivities to iodine, contrast dye, or metals like Nitinol (nickel-titanium).

Tests Before EVAR

  • CT Angiography (CTA): The primary tool for measuring aneurysm size and planning the precise graft path.

  • Duplex Ultrasound: To assess blood flow velocity and provide initial sizing of the aneurysm.

  • Cardiac Clearance: ECG and stress tests to ensure the heart can handle the procedure.

  • Blood Panel: Comprehensive checks including Creatinine (kidney function) and Hemoglobin levels.

  • Ankle-Brachial Index (ABI): To check for peripheral artery disease that might complicate access through the leg arteries.

Life After EVAR

  • Hospital Stay: Typically 1–2 days, with most patients encouraged to walk within 24 hours.

  • Lifelong Monitoring: Regular imaging (CT or Ultrasound) is mandatory to ensure the graft hasn't moved or developed leaks (endoleaks).

  • Follow-up Schedule: Imaging typically occurs at 1 month, 6 months, 12 months, and annually thereafter.

  • Activity Restrictions: Avoid heavy lifting and strenuous physical activity for approximately 2–4 weeks post-surgery.

  • Rupture Prevention: While the graft provides immediate protection, strict blood pressure control remains vital for long-term health.

Benefits of EVAR

  • Lower Mortality: Significantly lower initial mortality rates compared to open surgical repair.

  • Less Invasive: Avoids large abdominal or chest incisions, which reduces blood loss and the risk of infection.

  • Rapid Recovery: Faster healing time, allowing a quicker return to work and daily activities.

  • Accessible for High-Risk Patients: Provides an option for those who would not survive traditional open vascular surgery.

  • Durable Solution: Offers a long-term mechanical barrier to prevent the aorta from bursting.

IVC Filter Placement

Inferior Vena Cava (IVC) Filter Placement is a minimally invasive procedure to insert a small, cage-like metal device into the body's largest vein (the IVC). Its purpose is to trap blood clots traveling from the legs or pelvis before they can reach the heart and lungs, thereby preventing a life-threatening Pulmonary Embolism (PE). While blood thinners remain the standard treatment, this transcatheter technique has expanded significantly for patients who cannot safely take anticoagulants.

When You Should Consider IVC Filter Placement

  • Active bleeding (e.g., gastrointestinal or brain bleed) that prevents the use of blood thinners.

  • New blood clots forming or traveling to the lungs despite proper blood-thinning medication.

  • Recent major surgery or massive trauma where anticoagulation is not an option.

  • High-risk prophylaxis for patients undergoing specialized high-risk surgeries.

  • Evidence of significant heart overload or potential for massive pulmonary embolism.

Methods of IVC Filter Placement

  • Transcatheter Placement: Minimally invasive method using a neck or groin catheter to "plug" the vein with a filter.

  • Retrievable (Optional) Filters: Devices designed to be removed once the immediate risk of blood clots has passed.

  • Permanent Filters: Intended for patients with a lifelong risk of clots who can never safely take blood thinners.

  • Below-Renal Deployment: Placing the filter just below the kidney veins to avoid interfering with renal blood flow.

  • Device Occlusion: Deployment of "soft" low-profile metal devices to block clots without major surgery.

How IVC Filter Placement Is Performed

  • Catheter Access: A thin tube is guided through the internal jugular vein (neck) or femoral vein (groin) to the heart.

  • Imaging Guidance: Real-time X-ray (fluoroscopy) and contrast dye ensure the filter is perfectly positioned before finishing.

  • Filter Deployment: A collapsed occluder-like device is expanded across the vein to trap clots permanently or temporarily.

  • Release: Once positioned, the filter attaches to the vein walls using small hooks or radial pressure.

  • Monitoring: Doctors verify the filter is securely anchored below the renal veins before removing the delivery system.

Pre-Procedure Preparation

  • Fasting for 8-12 hours before the catheterization procedure.

  • Blood tests, ECG, and chest X-rays to assess overall health and kidney function.

  • Adjusting current medications as directed by the cardiology or radiology team.

  • Discussing any allergies, particularly to the metal in the device or contrast dye.

  • Arranging for post-operative care and a support person for the recovery period.

Tests Before IVC Filter Placement

  • Duplex Ultrasound to determine the size and location of existing blood clots.

  • Cardiac Catheterization to measure lung pressures and map the venous anatomy.

  • Cardiac MRI or CT scan for detailed 3D mapping of the inferior vena cava.

  • ECG to monitor the heart's electrical rhythm and check for strain.

  • Pulse oximetry to evaluate oxygen saturation levels in the blood.

Life After IVC Filter Placement

  • Short hospital stay, usually 1-2 days for device closure, often as an outpatient procedure.

  • Avoid strenuous activity and heavy lifting for a few days post-procedure.

  • Most patients return to normal daily activities within 24 to 48 hours.

  • Regular follow-up visits with a cardiologist to monitor the repair site and discuss retrieval.

  • Immediate protection against life-threatening pulmonary embolism and improved peace of mind.

Benefits of IVC Filter Placement

  • Restores safety by trapping dangerous clots before they reach the heart and lungs.

  • Protects the lungs from permanent damage caused by massive pulmonary emboli.

  • Provides a vital alternative for patients who cannot tolerate traditional blood-thinning medications.

  • Reduces the risk of sudden cardiac events and enlargement of the heart's chambers.

  • Provides a long-term or temporary solution with very high technical success rates.

TMVI/TMVR (Transcatheter Mitral Valve Replacement)

TMVI (Transcatheter Mitral Valve Implantation) and TMVR (Transcatheter Mitral Valve Replacement) are minimally invasive procedures used to replace a diseased mitral valve without the need for traditional open-heart surgery. These procedures are typically reserved for high-risk patients with severe Mitral Regurgitation (a leaking valve) or Mitral Stenosis (a narrowed valve) who may not tolerate a standard sternotomy.

When You Should Consider TMVI / TMVR

  • Severe Mitral Regurgitation: When the mitral valve does not close tightly, causing blood to flow backward into the lungs.

  • Mitral Stenosis: When the valve leaflets become thick or stiff, restricting blood flow from the left atrium to the left ventricle.

  • High Surgical Risk: For patients whose age or underlying health conditions (like lung or kidney disease) make traditional surgery too dangerous.

  • Failed Previous Valve: A "Valve-in-Valve" procedure for patients whose previously implanted surgical biological valve has begun to wear out.

  • Functional Mitral Disease: When heart failure has caused the heart to enlarge, pulling the mitral valve leaflets apart and causing a massive leak.

How TMVI / TMVR Is Performed

  • 3D Guidance: The surgical team uses a combination of real-time X-ray (fluoroscopy) and Transesophageal Echocardiography (TEE) to see the heart in three dimensions.

  • Access Routes: * Transseptal: The most common approach; a catheter is guided from the groin vein, through the wall of the heart (septum), and into the mitral position.
    Transapical: A small incision is made between the ribs to access the valve directly through the tip (apex) of the heart.

  • Valve Positioning: A collapsed artificial valve—constructed from biological tissue on a metal frame—is steered precisely into the center of the diseased native valve.

  • Deployment: The new valve is expanded, either by a balloon or a self-expanding mechanism. This pushes the old valve leaflets aside and anchors the new valve firmly in place.

  • Leak Check: Before finalizing the placement, the team checks for "paravalvular leaks" to ensure blood cannot escape around the edges of the new device.

Pre-Procedure Preparation

  • Cardiac CT Scan: A specialized high-resolution scan is mandatory to measure the "neo-LVOT"—ensuring the new valve frame won't block the heart's main exit path.

  • Transesophageal Echocardiogram (TEE): An ultrasound probe passed down the esophagus to provide the clearest possible images of the valve structure.

  • Heart Team Evaluation: A collaborative review by interventional cardiologists and cardiac surgeons to confirm this is the safest treatment path.

  • Dental Clearance: To minimize the risk of bacteria entering the bloodstream and infecting the new heart valve (endocarditis).

  • Fasting (NPO): No food or drink for at least 8 hours prior to the procedure, as it is performed under general anesthesia.

Tests Before TMVI / TMVR

  • 3D Cardiac CT: Essential for sizing the valve and mapping the internal dimensions of the left ventricle.

  • Diagnostic Catheterization: To check for blockages in the coronary arteries that might need treatment at the same time.

  • Blood Panels: To assess kidney function and ensure the blood's clotting ability is within a safe range for the procedure.

  • Lung Function Tests: To evaluate the patient's overall respiratory health for anesthesia planning.

Life After TMVI / TMVR

  • Hospital Stay: Usually 2 to 5 days, which is significantly shorter than the recovery for open-heart surgery.

  • Medication Adherence: Patients must take anticoagulants (blood thinners) for at least 3 to 6 months—and often indefinitely—to prevent clots from forming on the metal frame.

  • Immediate Improvement: Most patients notice a dramatic reduction in shortness of breath and fatigue almost immediately after the procedure.

  • Activity Restrictions: Heavy lifting and strenuous exercise are restricted for 2 to 4 weeks while the access site in the groin or chest heals.

  • Long-Term Follow-up: Regular echocardiograms are required (at 30 days, 6 months, and annually) to ensure the valve remains functional and secure.

Benefits of TMVI / TMVR

  • No Sternotomy: Avoids the need to open the chest bone, resulting in significantly less pain and a lower risk of wound infection.

  • Faster Mobilization: Patients are usually up and walking within a day of the procedure.

  • Effective Symptom Relief: Successfully stops the "back-pressure" on the lungs, allowing for better breathing and increased energy levels.

  • High Success Rate: Modern devices are highly effective at reducing or eliminating mitral leaks, even in the most complex heart geometries.

Carotid Artery Stenting (stroke prevention)

Carotid Artery Stenting (CAS) is a minimally invasive procedure used to open a narrowed carotid artery—the primary blood vessel in the neck that supplies the brain. By using a metal mesh stent to widen the artery, this procedure restores healthy blood flow and significantly reduces the risk of a future stroke. It is often a preferred alternative to open surgery (endarterectomy) for patients with complex anatomy or high-risk medical conditions.

When You Should Consider Carotid Artery Stenting

  • Significant Stenosis: Blockage of more than 70% in patients without symptoms, or more than 50% in those with a history of mini-strokes (TIAs).

  • High Surgical Risk: Patients with severe heart or lung disease who may not tolerate the stress of traditional open neck surgery.

  • Difficult Anatomy: When the blockage is located too high or too low in the neck for a surgeon to reach safely with an incision.

  • Restenosis: For patients whose artery has narrowed again after a previous carotid endarterectomy.

  • Radiation-Induced Stenosis: When the narrowing is a result of prior radiation therapy to the neck, making the tissue difficult to operate on traditionally.

How Carotid Artery Stenting Is Performed

  • Vascular Access: A small puncture is made in the femoral artery (groin) or radial artery (wrist) to serve as the entry point for the catheters.

  • Embolic Protection Device (EPD): A tiny filter, shaped like an umbrella, is positioned past the blockage. This "safety net" catches any loose plaque fragments before they can travel to the brain.

  • Predilation (Angioplasty): A small balloon is guided to the site of the narrowing and inflated to prepare the area for the stent.

  • Stent Deployment: A self-expanding metal mesh tube is released across the blockage. It acts as a permanent scaffold, pressing the plaque against the artery walls to keep the vessel open.

  • Post-Dilation: The surgeon may inflate a balloon inside the newly placed stent to ensure it is fully expanded and snug against the artery wall.

  • Filter Removal: Once the stent is secure, the protection filter—along with any captured debris—is folded and removed from the body.

Pre-Procedure Preparation

  • Diagnostic Imaging: Confirmation of the blockage via Carotid Ultrasound, CT Angiogram (CTA), or MR Angiogram (MRA).

  • Dual Antiplatelet Therapy (DAPT): Taking Aspirin and Clopidogrel (Plavix) for 3–5 days prior is mandatory to prevent blood clots from forming on the new stent.

  • Fasting (NPO): No food or drink for 8–12 hours before the procedure.

  • Neurological Baseline: A thorough exam of speech, vision, and motor skills is conducted so the team can monitor for changes during the surgery.

Tests Before Carotid Artery Stenting

  • Carotid Duplex Ultrasound: A non-invasive test using sound waves to measure the speed of blood flow and the degree of narrowing.

  • CT Angiogram (CTA): Provides a detailed 3D view of the calcium and plaque buildup to help the surgeon select the correct stent size.

  • Electrocardiogram (EKG): To ensure the heart is stable, as manipulating the carotid artery can sometimes affect heart rate.

  • Blood Panels: Routine screens to check kidney function (for processing contrast dye) and blood clotting levels.

Life After Carotid Artery Stenting

  • Hospital Stay: Typically 24 hours for close monitoring of blood pressure and neurological status.

  • Immediate Recovery: Patients must remain on bed rest for about 6 hours post-op to ensure the access site in the groin or wrist heals without bleeding.

  • Medication Adherence: This is the most critical step; missing blood thinners in the first 3 to 6 months can cause the stent to clog (stent thrombosis). Lifetime aspirin is usually required.

  • Activity: Heavy lifting and strenuous exercise are restricted for 1 week, though most patients return to normal light activities within a few days.

  • Follow-up Schedule: Ultrasound scans are mandatory at 1 month, 6 months, and then annually to ensure the artery remains open.

Benefits of Carotid Artery Stenting

  • Minimally Invasive: Avoids a large incision in the neck, reducing the risk of local nerve damage and scarring.

  • Faster Recovery: Most patients return to their normal routine much sooner than those undergoing open surgery.

  • Real-time Monitoring: Since it is usually performed under local anesthesia, the medical team can communicate with the patient throughout the procedure to ensure brain function remains perfect.

  • Effective Stroke Prevention: Long-term studies show that CAS is highly effective at keeping the carotid artery open and preventing future strokes.

VSD Device Closure
VSD Device Closure

VSD (Ventricular Septal Defect) device closure is a minimally invasive, non-surgical procedure used to seal a "hole in the heart" between the two lower chambers (ventricles). Unlike traditional open-heart surgery, this procedure is performed entirely through a catheter, resulting in no chest scars and a significantly faster recovery. This advanced technique allows for the permanent repair of the heart's internal wall without the need for a heart-lung bypass machine.

When You Should Consider VSD Device Closure

  • Muscular VSDs: This is the primary treatment for holes located in the muscular portion of the ventricular septum.

  • Symptom Management: For children or adults experiencing poor weight gain, frequent lung infections, or persistent shortness of breath.

  • Heart Protection: To prevent the left side of the heart from overworking, which can lead to an enlarged heart (cardiomegaly).

  • Pulmonary Hypertension Prevention: To reduce the risk of developing dangerously high blood pressure in the lung arteries.

  • Heart Failure Prevention: Correcting the defect before it leads to more serious long-term cardiac complications.

How It Is Performed

  • Access: A small incision is made in the groin to access the femoral vein or artery. No large incisions are made on the chest.

  • Anesthesia: The procedure is performed in a specialized Cardiac Catheterization Lab (Cath Lab) under general anesthesia or heavy sedation, typically taking 1 to 2 hours.

  • Guidance: A thin, flexible tube (catheter) is threaded through the blood vessels into the heart, guided by real-time X-ray (Fluoroscopy) and detailed ultrasound (Transesophageal Echo).

  • Measurement: The specialist measures the exact size and location of the hole to select a custom-sized Nitinol mesh device.

  • Deployment: A folded, umbrella-like device is pushed through the catheter. Once it reaches the hole, it is carefully unfolded to "sandwich" the defect from both sides.

  • Verification: Once the device is securely in place and the hole is confirmed to be sealed, the catheter is removed and the small puncture in the groin is closed.

Pre-Procedure Preparation

  • Echocardiogram: A detailed ultrasound of the heart to map the VSD's size and its proximity to the heart's valves.

  • Transesophageal Echo (TEE): A specialized ultrasound performed through the esophagus for high-resolution images of the defect.

  • Dental Clearance: Ensuring there are no active dental infections, which could increase the risk of heart infection (endocarditis) after the device is placed.

  • Fasting: Following "nothing by mouth" instructions for 8 hours prior to the procedure.

  • Medication Audit: You may be asked to adjust or stop certain medications, particularly blood thinners, a few days before the procedure.

Tests Before VSD Device Closure

  • Chest X-ray: To evaluate the current size of the heart and check for any fluid in the lungs.

  • Electrocardiogram (ECG): A baseline check of the heart's electrical system to identify any pre-existing arrhythmias.

  • Blood Panels: A routine check of your blood count, electrolytes, and kidney function.

  • Cardiac MRI or CT: Occasionally used to provide a 3D model of the heart for complex or multiple VSDs.

Life After VSD Device Closure

  • Hospital Stay: Most patients stay for one night for observation and are discharged the next day.

  • Medication: You will typically take blood-thinning medication (usually Aspirin) for 6 months to prevent clots from forming on the device while the heart lining grows over it.

  • Activity Restrictions: Most patients can return to school or light work within 3 to 5 days. You should avoid strenuous exercise and heavy lifting for at least 2 weeks.

  • Dental Care Precautions: For the first 6 months post-procedure, you must take preventive antibiotics before any dental work to prevent heart infections.

  • Long-term Integration: Over 3–6 months, the heart's natural lining (endocardium) grows completely over the device, making it a permanent and seamless part of your heart.

Why Specialized Treatment Is Highly Effective

  • Scar-Free Recovery: By avoiding a sternotomy (opening the chest), patients experience much less pain and have no permanent surgical scars.

  • Rapid Return to Normalcy: Recovery is measured in days rather than the months required for open-heart surgery.

  • High Success Rates: Device closure is a highly reliable method for sealing muscular VSDs with a very low risk of the hole reopening.

  • Protects Electrical System: Advanced imaging ensures the device is positioned to minimize pressure on the heart's natural "wiring."

  • Permanent Solution: The Nitinol mesh is designed to last a lifetime, providing a durable repair that grows with the patient.

Realted Specialist

Dr C Raghu
Dr C Raghu
Cardiologist, Interventional Cardiologist
Yashoda Hospital, Somajiguda
28+years experience
View Profile
Dr Sumanta Chatterjee
Cardiologist
Manipal Hospital, Dhakuria, Kolkata
12+years experience
View Profile
Dr V Rajasekhar
Dr V Rajasekhar
Cardiologist, Electrophysiologist, Interventional Cardiologist
Yashoda Hospital, Hitec City
30+years experience
View Profile
Dr A Navaladi Shankar
Orthopedic Surgeon
Apollo Hospital, Greams Road, Chennai
22+years experience
View Profile
Dr Alla Gopala Krishna Gokhale
Cardiothoracic & Vascular Surgeon (CTVS)
Apollo Health City, Jubilee Hills
30+years experience
View Profile
Dr Amar Nath Ghosh
Dr Amar Nath Ghosh
Cardiothoracic & Vascular Surgeon (CTVS)
Apollo Multispecialty Hospital, Kolkata
39+years experience
View Profile
Dr Amitabha Ghosh
Dr Amitabha Ghosh
Neurologist
Apollo Multispecialty Hospital, Kolkata
28+years experience
View Profile
Dr Anshuman Agarwal
Dr Anshuman Agarwal
Urologist
Indraprastha Apollo Hospital, Delhi
21+years experience
View Profile
Dr Arun Kannan
Dr Arun Kannan
Orthopedic Surgeon, Joint Replacement Surgeon
Apollo Hospital, Greams Road, Chennai
16+years experience
View Profile
Dr Ashok Kumar Singhal
Neurologist
Apollo Hospital, Bannerghatta Road
20+years experience
View Profile
Dr B K Singhania
Dr B K Singhania
Spine Surgeon, Neurosurgeon
Apollo Multispecialty Hospital, Kolkata
35+years experience
View Profile
Dr B M L Kapoor
Dr B M L Kapoor
General Surgeon
Indraprastha Apollo Hospital, Delhi
50+years experience
View Profile
Dr Babu Manohar
Dr Babu Manohar
ENT Specialist
Apollo Hospital, Greams Road, Chennai
38+years experience
View Profile
Dr Bhaba Nanda Das
Dr Bhaba Nanda Das
Heart Transplant Surgeon, Cardiac Surgeon
Indraprastha Apollo Hospital, Delhi
37+years experience
View Profile
Dr Deepti Pai Dave
Dr Deepti Pai Dave
Pediatric Urologist
Apollo Hospital International Ltd, Ahmedabad
7+years experience
View Profile
Dr Dillip Kumar Mishra
Cardiothoracic & Vascular Surgeon (CTVS)
Apollo Hospital, Greams Road, Chennai
33+years experience
View Profile
Dr Vinit Suri
Dr Vinit Suri
Neurologist
Indraprastha Apollo Hospital, Delhi
27+years experience
View Profile
Dr Vishal Soni
Dr Vishal Soni
Gastroenterologist
Apollo Hospital International Ltd, Ahmedabad
15+years experience
View Profile
Dr Yash Gulati
Dr Yash Gulati
Spine Surgeon, Orthopedic Surgeon, Joint Replacement Surgeon
Indraprastha Apollo Hospital, Delhi
35+years experience
View Profile
Dr Yusuf M M
Dr Yusuf M M
Cardiothoracic & Vascular Surgeon (CTVS)
Apollo Hospital, Greams Road, Chennai
20+years experience
View Profile

May we help you?

Enter digits only (6-15 digits). We'll add your country code.