Medivisor India Treatment Logo
+91 83682 47758
info@medivisorhealth.com
  • Home
    • About Us
    • Our Services
    • Our Team
    • Our Safety Measures
    • Loading treatments...
    • Loading hospitals...
    • Loading doctors...
    • Treatment Cost
    • Treatment Process
    • Visa Process
    • Travel Guide
    • FAQs
    • Why Medivisor
    • Success Stories
    • Patient Activities
    • Social Activities
    • News Coverage
    • Blog
  • Become a Partner

Medivisor India Treatment is a trusted New Delhi–based medical travel company assisting international patients with advanced, affordable, and seamless treatment in India.

  • Medivisor House 359, Sector 1, Vaishali, Ghaziabad, (Delhi/NCR) India
  • +91 8368 247 758
  • info@medivisorhealth.com

About Us

  • About Us
  • Our Services
  • Our Team
  • Our Medical Advisors
  • Our Safety Measures
  • Join Our Network
  • Contact Us

India Treatment

  • Hospitals
  • Treatments
  • Treatment Cost
  • Treatment Process
  • Visa Process
  • Travel Guide
  • FAQs
  • Why Medivisor

Gallery

  • Patient Testimonials
  • Patient Activities
  • News Coverage
  • Blog

Get in Touch

© 2026 Medivisor India Treatment. All rights reserved.

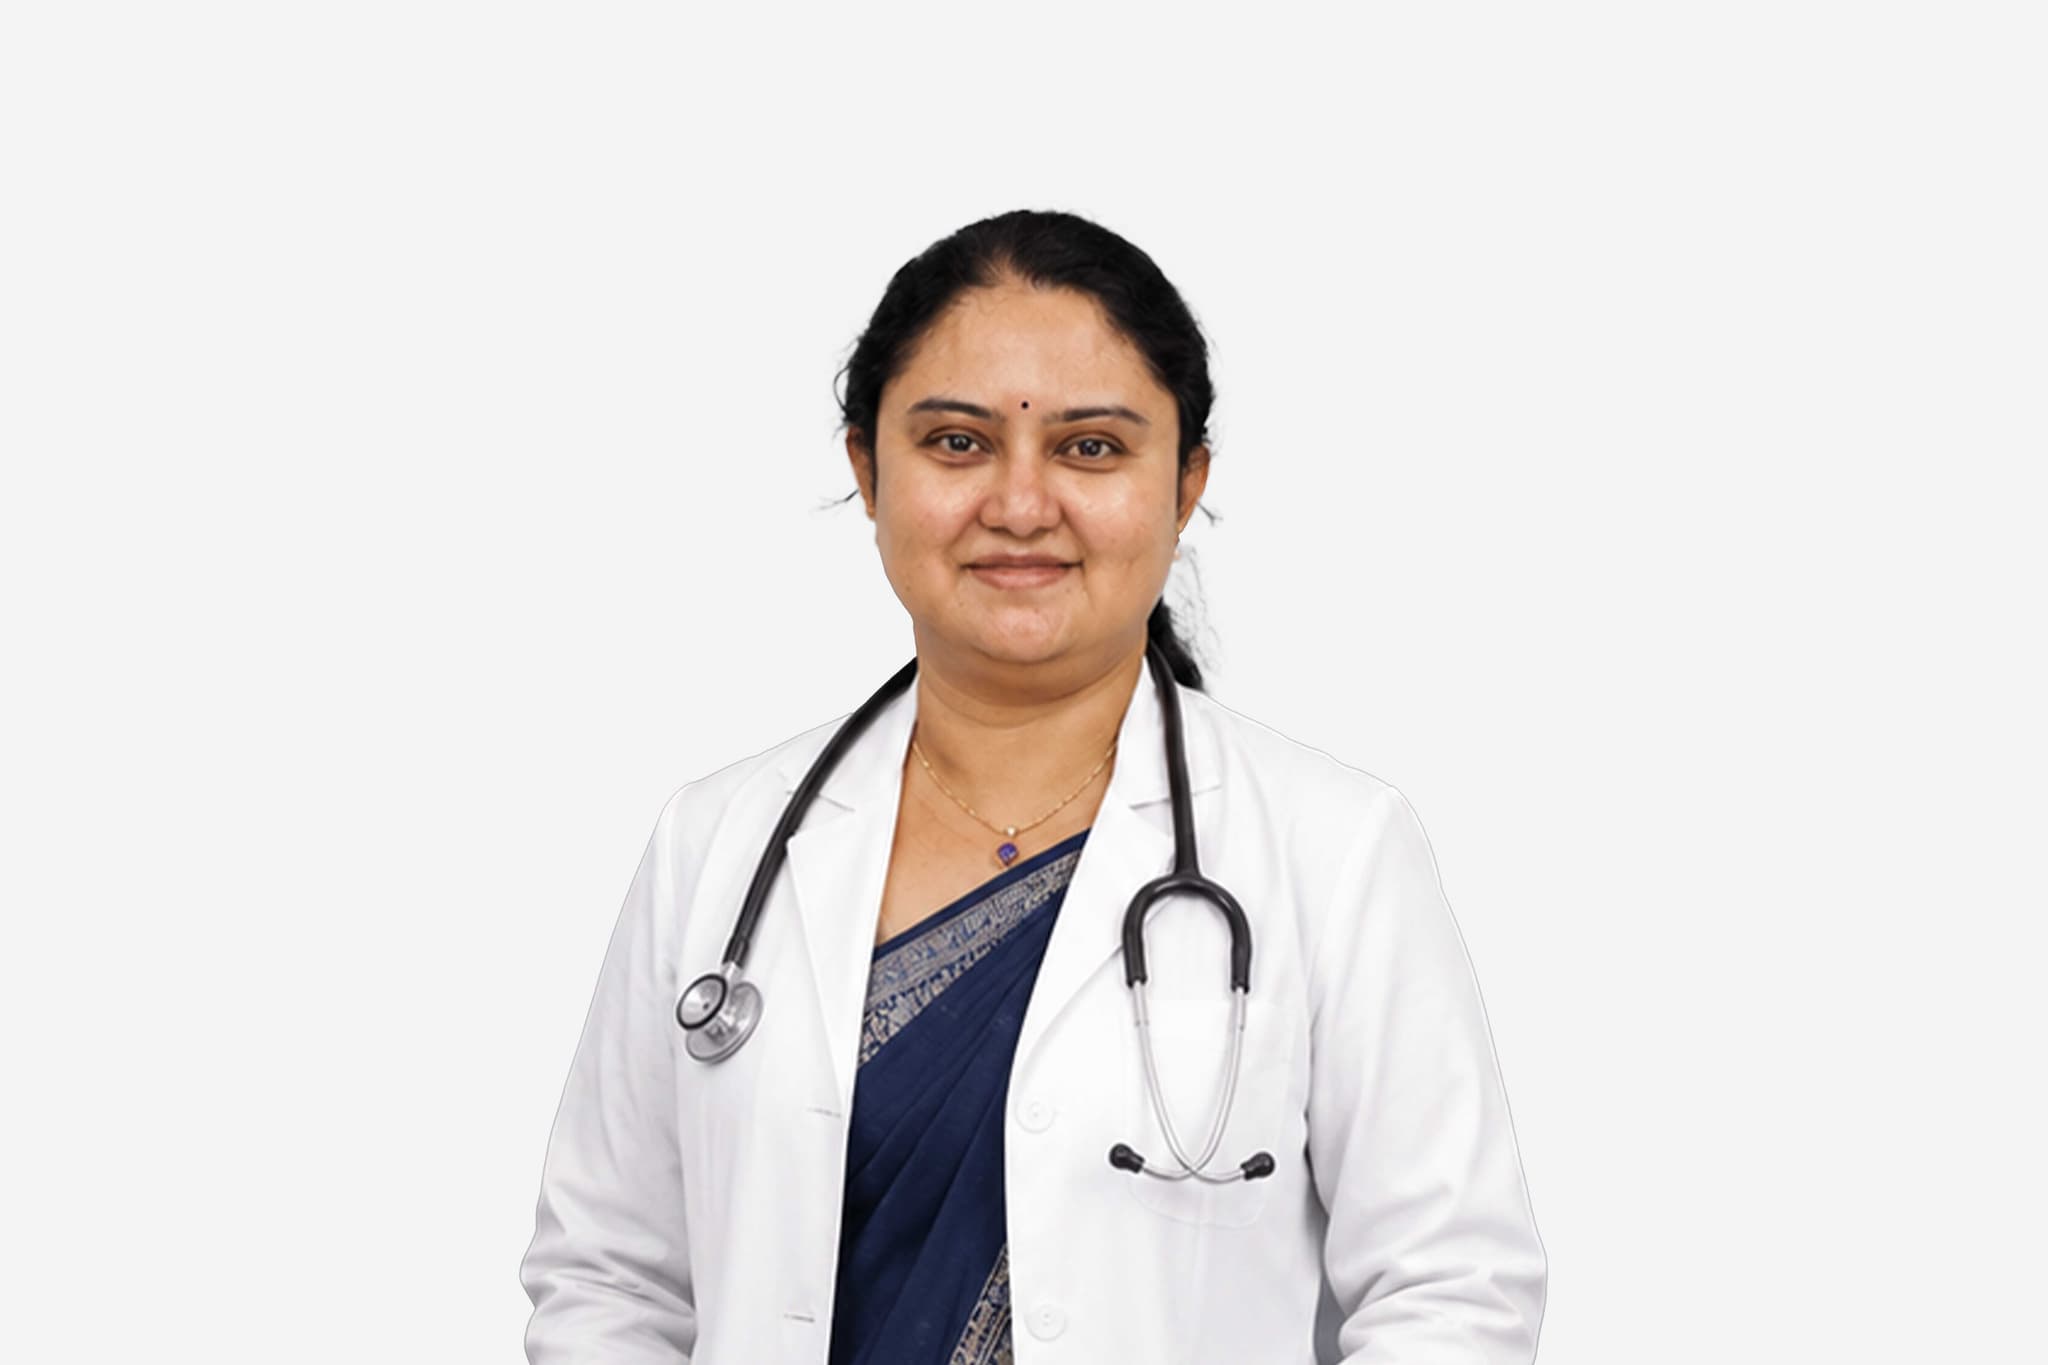
Dr V Rajasekhar

Senior Consultant - Interventional Cardiology & Electrophysiology, Certified Proctor For TAVR & Clinical Director

Yashoda Hospital, Hitec City

CardiologistElectrophysiologistInterventional Cardiologist

30+ years experience

Dr V Rajasekhar, Senior Consultant - Interventional Cardiology & Electrophysiology, Certified Proctor For TAVR & Clinical Director at Yashoda Hospital, Hitec City - Yashoda Hospitals
  1. Home
  2. Doctors
  3. Dr V Rajasekhar

About Dr V Rajasekhar

Dr. Rajasekhar is a highly distinguished specialist in interventional cardiology and electrophysiology, recognized for his technical mastery in complex cardiovascular interventions and structural heart procedures. He specializes in utilizing precision-guided surgical, catheter-based, and imaging platforms to treat advanced cardiac conditions, optimizing clinical outcomes and restoring optimal circulatory and rhythmic function.

Mastery in High-Volume Interventional Cardiology and Complex PCI

He specializes in high-precision coronary interventions, serving as a proctor for image-guided Percutaneous Coronary Intervention (PCI) and rotablation. As a high-volume operator who logs approximately 700 angioplasties annually, he possesses profound expertise in performing complex and assisted PCI under high-risk situations using advanced mechanical circulatory support, such as the Impella system, and executing Laser Coronary Angioplasty.

Advanced Transcatheter Valve Interventions

Dr. Rajasekhar has carved a niche for himself in the field of structural heart disease through advanced transcatheter therapies. He is a certified Transcatheter Aortic Valve Replacement (TAVR) operator and proctor, demonstrating exceptional proficiency in executing both TAVR and Transcatheter Mitral Valve Replacement (TMVR) procedures to correct severe valvular pathologies without open-heart surgery.

Innovation in Electrophysiology and Device Implantation

His structural and electrical expertise extends to cardiac electrophysiology, where he performs about 300 electrophysiology procedures each year. He acts as a specialized proctor for advanced cardiac device implantations, managing over a hundred cases annually that include leadless pacemakers, cardiac resynchronization therapy (CRT) devices, and implantable cardioverter-defibrillators (ICDs) to resolve severe rhythm disorders.

Clinical Governance and Institutional Leadership

Throughout his extensive career, Dr. Rajasekhar has integrated modern cardiovascular innovations with rigorous clinical protocols to maintain the highest standards of operative safety. Serving as a Clinical Director and Senior Interventional Cardiologist within a premier institutional framework at Yashoda Hospitals, Hitec City, he remains a trusted authority dedicated to delivering evidence-based, predictable, and high-quality patient care.

Dr. Rajasekhar at a Glance

  • Specialist in Interventional Cardiology, Cardiac Electrophysiology, and Structural Heart Interventions.

  • Certified TAVR operator and proctor proficient in transcatheter valve interventions including TMVR.

  • Proctor for image-guided PCI, rotablation, Laser Coronary Angioplasty, and high-risk Impella-assisted procedures.

  • Expert in cardiac electrophysiology and advanced device implantation, including leadless pacemakers and defibrillators.

  • High-volume operator executing approximately 700 angioplasties and 300 electrophysiology procedures annually.

  • Clinical Director and Senior Consultant providing dedicated, evidence-based clinical governance.

Certified Specialist for TAVR (Transcatheter Aortic Valve Implantation)
Fellowship in Electrophysiology
MD, DM (Cardiology)
Board Certified in Cardiologist
Times Group-Best Cardiologist Award 2017
ANBAI-Best DNB Teacher Award 2019

Affiliated Hospitals

Yashoda Hospital, Hitec City

Multi Specialty

Hyderabad, Telangana

2022

Estd.

2000+

Beds

800+

Doctors

May we help you?

Enter digits only (6-15 digits). We'll add your country code.

Related Treatments

Permanent Pacemaker Implantation

Permanent Pacemaker Implantation (PPI) is a routine, minimally invasive procedure to place a small electronic device in the chest to regulate a slow or irregular heartbeat (arrhythmia). The device monitors the heart's rhythm and sends electrical impulses to stimulate a contraction only when the heart's natural rate drops below a pre-set threshold. While traditional lead-based systems are common, newer leadless "capsule" devices have expanded treatment options by eliminating the need for chest incisions and wires.

When You Should Consider PPI

  • Chronic slow heart rate (bradycardia) causing fatigue or dizziness.

  • Irregular heart rhythms that do not respond to medication.

  • Evidence of heart block or significant heart overload detected during testing.

  • Heart failure symptoms where coordinated pumping is required (Biventricular pacing).

  • Risk of sudden fainting or cardiac events due to electrical conduction issues.

Core Components and Types

  • Pulse Generator: A small metal box containing a battery and a computer to monitor and pace the heart.

  • Leads (Electrodes): Thin, insulated wires that "sense" heart activity and "pace" the muscle by delivering signals.

  • Single-Chamber Pacemaker: Uses one lead in either the right atrium or right ventricle.

  • Dual-Chamber Pacemaker: Uses two leads to coordinate contractions between the upper and lower chambers.

  • Biventricular (CRT): Uses three leads to ensure the left and right ventricles pump in sync for heart failure patients.

How PPI Is Performed

  • Incision & Pocket Creation: A 2-inch incision is made below the collarbone to create a small "pocket" for the generator.

  • Vascular Access: A large vein is punctured to provide a path to the heart for the leads.

  • Lead Placement: Using real-time X-ray (fluoroscopy), leads are guided through the vein and secured to the heart wall.

  • Leadless Deployment: In leadless cases, a capsule device is implanted directly via a catheter in the groin.

  • Testing & Connection: The doctor verifies the leads trigger a heartbeat before plugging them into the generator and closing the site.

Pre-Procedure Preparation

  • Fasting for 8-12 hours before the surgery or catheterization.

  • Blood tests, ECG, and chest X-rays to assess overall cardiac health.

  • Adjusting current medications as directed by the cardiology team.

  • Discussing any allergies, particularly to materials in the device or contrast dye.

  • Arranging for post-operative care and a support person for the recovery period.

Tests Before PPI

  • Echocardiogram (TTE) to determine the heart's structure and pumping function.

  • Cardiac Catheterization to evaluate heart pressures if necessary.

  • ECG to monitor the heart's electrical rhythm and confirm the type of arrhythmia.

  • Pulse oximetry to evaluate oxygen saturation levels in the blood.

  • Chest X-ray to provide a baseline for the heart and lungs before implantation.

Life After PPI

  • Short hospital stay, usually involving one night for observation and a follow-up chest X-ray.

  • Avoid strenuous activity and lifting more than 4.5 kg for 4 to 6 weeks post-surgery.

  • Restrictions on raising the arm on the pacemaker side above shoulder level initially to prevent lead displacement.

  • Regular follow-up visits every 3 to 12 months to monitor the device and repair site.

  • Immediate improvement in heart rate regulation, breathing, and energy levels.

Benefits of PPI

  • Restores a normal heart rate and prevents symptoms of a slow or irregular heartbeat.

  • Protects the heart from long-term damage and enlargement caused by conduction issues.

  • Reduces the risk of fainting and other life-threatening cardiac events.

  • Provides a long-term solution with battery lives typically ranging from 5 to 15 years.

  • Allows for remote monitoring, ensuring constant cardiac safety and oversight.

ICD Implantation (Implantable Cardioverter Defibrillator)

An Implantable Cardioverter Defibrillator (ICD) is a sophisticated, battery-powered device placed under the skin to monitor heart rhythms and deliver life-saving electrical therapy. Unlike a standard pacemaker, which primarily treats a slow heart rate, an ICD is specifically designed to prevent sudden cardiac death by treating dangerously fast rhythms (tachycardia). These devices act as a "personal emergency room" inside the chest, providing constant monitoring and immediate intervention for life-threatening arrhythmias.

When You Should Consider an ICD

  • Primary Prevention: For patients with a very weak heart muscle and a low Ejection Fraction (typically <35%) despite optimal medical therapy.

  • Secondary Prevention: For those who have survived a previous cardiac arrest or have documented dangerous heart rhythms like Ventricular Fibrillation.

  • Heart Enlargement: Evidence of left-sided heart enlargement or significant heart "overload" that increases the risk of sudden death.

  • High-Risk Arrhythmias: Patients at high risk for unstable Ventricular Tachycardia or Ventricular Fibrillation.

  • Persistent Symptoms: When fainting (syncope) or rapid palpitations persist even with the use of anti-arrhythmic medications.

Methods Of ICD Therapy

  • Constant Monitoring: The device continuously "listens" to the heart's electrical signals to detect any sudden abnormalities.

  • Anti-Tachycardia Pacing (ATP): Small, painless pulses sent to "overdrive" a fast but stable heart rhythm back into a normal pace without a shock.

  • Cardioversion: A low-energy shock delivered to the heart to reset a fast, organized rhythm.

  • Defibrillation: A high-energy electric shock delivered to "reset" the heart during chaotic, life-threatening rhythms.

  • Subcutaneous ICD (S-ICD): A newer approach where the lead is placed just under the skin, avoiding the veins and heart chambers entirely.

  • CRT-D (Combo Device): A specialized system for heart failure patients that provides both defibrillation and biventricular resynchronization (biventricular pacing).

How Is Performed

  • Surgical Access: Under sedation or general anesthesia, a 2-to-3-inch incision is made just below the collarbone to create a small "pocket" for the generator.

  • Lead Placement: Using real-time X-ray guidance (fluoroscopy), insulated wires (leads) are threaded through a vein and into the heart's chambers.

  • Device Deployment: The leads are plugged into the generator—roughly the size of a pocket watch—which is then tucked into the skin pocket.

  • DFT Testing: The medical team may briefly induce a fast rhythm while the patient is sedated to ensure the device detects and shocks correctly.

  • Finalization: Real-time imaging ensures the leads and generator are perfectly positioned before the incision is closed with sutures.

Pre-Procedure Preparation

  • Fasting (NPO): No food or drink for 8–12 hours before the surgery to ensure safety during anesthesia.

  • Baseline Diagnostics: Blood tests, ECG, and chest X-rays to assess overall health, kidney function, and current cardiac status.

  • Medication Adjustment: Reviewing current medications; blood thinners or diabetes medications may need to be adjusted by the electrophysiology team.

  • Allergy Screening: Discussing any history of allergies, particularly to nickel (found in some devices), adhesives, or contrast dye.

  • Recovery Planning: Arranging for a support person to drive you home and assist during the initial post-operative period.

Tests Before ICD Implantation

  • Echocardiogram (TTE): To measure the Ejection Fraction (the percentage of blood leaving the heart with each contraction) and determine chamber size.

  • Cardiac Catheterization: Occasionally used to evaluate heart pressures and map the venous anatomy to plan the best path for the leads.

  • Cardiac MRI or CT Scan: For detailed 3D mapping of heart muscle scarring, which helps identify where dangerous rhythms may originate.

  • ECG and Holter Monitoring: To document the specific type and frequency of the dangerous heart rhythms requiring treatment.

  • Pulse Oximetry: To evaluate baseline oxygen saturation levels in the blood.

Life After ICD Implantation

  • Hospital Observation: Usually requires only one night in the hospital to monitor the device settings and ensure the incision is healing.

  • Arm Movement Restrictions: You must avoid lifting the arm on the device side above shoulder level for 4 to 6 weeks to allow the leads to anchor firmly.

  • Activity Limits: Avoid strenuous exercise, heavy lifting, or pushing/pulling for several weeks following the surgery.

  • Remote Monitoring: Most modern ICDs come with a home monitor that automatically sends data to your doctor, ensuring the device is working perfectly.

  • Electromagnetic Awareness: While most household appliances are safe, you will be taught to keep items like cell phones and magnets at least 6 inches away from the device.

Benefits Of ICD Therapy

  • 24/7 Safety Net: Provides a constant shield against sudden cardiac death from life-threatening arrhythmias, even when you are alone.

  • Immediate Response: Detects and treats a dangerous rhythm within seconds, far faster than emergency medical services can arrive.

  • Prevents Heart Damage: By managing fast rhythms before they cause a total collapse, it helps protect the heart from further strain.

  • High Technical Success: Implantation and shock delivery have extremely high success rates in clinical settings.

  • Long-Term Solution: Provides years of protection, with device batteries typically lasting between 5 and 10 years before requiring a simple generator change.

CRT (Cardiac Resynchronization Therapy)

Cardiac Resynchronization Therapy (CRT), also known as biventricular pacing, is a specialized treatment for heart failure patients whose heart's lower chambers (ventricles) do not beat in sync. In a healthy heart, both ventricles contract simultaneously; however, in many heart failure patients, a delay in the electrical system causes one ventricle to beat after the other, leading to poor blood flow. By using a sophisticated pacemaker to send timed electrical pulses to both ventricles, CRT restores their coordinated pumping action and improves overall efficiency.

When You Should Consider CRT

  • Moderate to severe heart failure symptoms (NYHA Class II, III, or ambulatory IV) that persist despite optimal medication.

  • Low Ejection Fraction, where the heart's pumping capacity is 35% or less.

  • Evidence of an electrical delay, such as a wide "QRS complex" on an ECG (usually >120–150ms).

  • Documented Left Bundle Branch Block (LBBB) indicating uncoordinated ventricular contractions.

  • Evidence of significant heart enlargement or heart overload caused by inefficient pumping.

Methods of CRT Therapy

  • Biventricular Pacing: The core mechanism of sending timed electrical signals to both ventricles to resynchronize their "closing fist" contraction.

  • CRT-P (Pacemaker): A device that focuses solely on resynchronization and treating slow heart rates.

  • CRT-D (Defibrillator): A combination device providing resynchronization plus the life-saving shock functions of an ICD to stop dangerously fast rhythms.

  • Coronary Sinus Lead Placement: A specialized technique to reach and pace the left ventricle's lateral wall through the heart's venous system.

  • Real-time Fluoroscopy: High-definition X-ray guidance used to navigate the complex placement of three separate heart leads.

How CRT Is Performed

  • Surgical Access: A small incision is made below the collarbone to create a "pocket" for the pulse generator.

  • Right-Side Lead Placement: Two leads are threaded through veins into the right atrium and right ventricle to monitor and pace those chambers.

  • Left-Side Lead Placement: A third lead is guided through the coronary sinus vein to reach the outside wall of the left ventricle.

  • Device Deployment: The three leads are plugged into the pulse generator, which is then tucked into the skin pocket.

  • Monitoring: Real-time imaging ensures all three leads are perfectly positioned to coordinate the heart's rhythm before finishing.

Pre-Procedure Preparation

  • Fasting for 8–12 hours before the surgery, which is performed under local anesthesia and sedation.

  • Blood tests, ECG, and chest X-rays to assess overall cardiac health and anatomy.

  • Adjusting current heart medications as directed by the electrophysiology team.

  • Discussing any allergies, particularly to nickel used in devices or the contrast dye used during navigation.

  • Arranging for post-operative care and a support person for the recovery period.

Tests Before CRT Implantation

  • Echocardiogram (TTE) to measure Ejection Fraction and determine the size and location of ventricular dyssyncrony.

  • Cardiac Catheterization to evaluate heart and lung pressures and map the coronary sinus anatomy.

  • ECG to document the wide QRS complex and identify Left Bundle Branch Block.

  • Cardiac MRI or CT scan for detailed 3D mapping of the heart muscle and venous structure.

  • Pulse oximetry to evaluate oxygen saturation levels in the blood.

Life After CRT Implantation

  • Short hospital stay, usually requiring one night for monitoring and device checks.

  • Avoid strenuous activity, driving, and heavy lifting for approximately one week to one month post-procedure.

  • Immediate improvement in breathing, energy levels, and physical stamina for approximately 70% of responders.

  • Regular follow-up visits with a cardiologist or electrophysiologist to monitor device function and battery life.

  • Long-term protection against heart failure-related hospitalizations.

Benefits of CRT Therapy

  • Restores normal, coordinated blood flow and prevents oxygen-rich blood from being pumped inefficiently.

  • Significantly improves exercise capacity and the ability to perform daily activities.

  • Protects the heart and lungs from further damage caused by chronic, uncoordinated pumping.

  • Reduces the risk of heart failure progression and enlargement of the heart's chambers.

  • Provides a durable, long-term solution that improves quality of life and survival rates.

Loop Recorder Implantation

An Implantable Loop Recorder (ILR) is a miniature heart-monitoring device, roughly the size of a small USB stick or a AAA battery, placed just under the skin of the chest. It acts as a continuous, long-term Electrocardiogram (ECG) that records the heart’s electrical activity 24/7 for up to three to five years. These devices are the gold standard for diagnosing infrequent symptoms that standard 24-hour monitors often miss.

When You Should Consider an ILR

  • Unexplained Fainting: To determine if a sudden heart rhythm drop or spike is the cause of syncope.

  • Infrequent Palpitations: For symptoms that occur too rarely (e.g., once a month or once a year) to be caught by short-term monitors.

  • Cryptogenic Stroke: To look for brief, "hidden" episodes of Atrial Fibrillation (AFib) in stroke survivors.

  • Post-Surgical Monitoring: For patients requiring long-term oversight after heart surgery or specialized cardiac interventions.

  • Diagnostic Failure: When standard Holter monitors or patch monitors fail to capture symptomatic events.

Methods of ILR Monitoring

  • Continuous 24/7 Recording: The device constantly monitors electrical signals for several years.

  • Automatic Triggering: Pre-set programming that saves data automatically if the heart rate becomes too fast, too slow, or irregular.

  • Patient-Activated Recording: The use of a handheld "activator" button or smartphone app to manually save a recording when symptoms are felt.

  • Remote Monitoring: Devices sync via Bluetooth to smartphone apps, sending data directly to the clinical team for review.

  • Subcutaneous Placement: A minimally invasive method that keeps the device entirely outside the heart and veins.

How Is Performed

  • Local Anesthesia: A small area on the left side of the chest is numbed; the patient remains fully awake during the process.

  • Incision: The doctor makes a tiny incision, typically less than 1 cm in length.

  • Insertion: Using a specialized "inserter" tool, the device is slid into a small pocket just under the skin.

  • Closure: The tiny cut is closed with adhesive strips (Steri-Strips) or a single stitch.

  • Testing: The clinical team verifies the device is communicating correctly with the remote monitoring system before you leave the clinic.

Pre-Procedure Preparation

  • No Fasting: Fasting is typically not required as the procedure uses only local anesthesia.

  • Minimal Testing: Blood tests are rarely needed unless there is a specific concern regarding skin infections.

  • Clothing Choice: Wear comfortable, loose-fitting clothing that allows easy access to the chest area.

  • Allergy Discussion: Discuss any allergies to local anesthetics (like Lidocaine) or adhesive bandages.

  • Timeline: The entire process usually takes only 10 to 15 minutes in a clinic or procedure room.

Tests Before ILR Implantation

  • Standard ECG: To provide a baseline reading of the heart's resting rhythm.

  • Physical Examination: To determine the best placement site on the chest for an optimal electrical signal.

  • Monitor Review: Review of previous Holter monitor or event recorder data to confirm the need for long-term monitoring.

  • Pulse Oximetry: To evaluate baseline oxygen levels in the blood.

  • History Review: Review of medical history to identify the frequency and nature of previous fainting episodes.

Life After ILR Implantation

  • Immediate Recovery: Most patients return to work and normal activities the same day.

  • Wound Care: Keep the small bandage dry for a few days until the tiny incision has fully healed.

  • Everyday Living: Living with the device is seamless; it is safe for MRI scans and typically does not trigger airport security.

  • Data Transmission: Use the provided smartphone app or bedside monitor to ensure data is transmitted to the doctor regularly.

  • Removal: Once a diagnosis is made or the battery reaches its limit (3–5 years), the device is removed in a similar 10-minute procedure.

Benefits of ILR Therapy

  • Superior Capture Rate: Provides a 100% "capture rate" for heart rhythm issues that happen very rarely.

  • Extremely Low Risk: Minimally invasive with a very low risk of infection or complications (less than 1%).

  • Non-Invasive Internally: No "leads" or wires are inserted into the heart, making it a very safe diagnostic tool.

  • Precise Diagnosis: Enables doctors to make definitive diagnoses for fainting, preventing unnecessary treatments or accidents.

  • Automated Oversight: Offers peace of mind through constant, automated cardiac oversight for several years.

Radiofrequency Ablation (RFA)

Radiofrequency Ablation (RFA) is a minimally invasive medical procedure that uses high-frequency electrical currents to generate thermal energy (heat) to destroy small, targeted areas of tissue. In cardiology, it is primarily used to treat heart rhythm disorders (arrhythmias) by neutralizing the specific heart tissue responsible for abnormal electrical signals. RFA remains a cornerstone of electrophysiology, often providing a permanent cure for conditions that previously required lifelong medication.

When You Should Consider Cardiac RFA

  • Symptomatic Atrial Fibrillation (AFib) or Atrial Flutter that does not respond to medication.

  • Supraventricular Tachycardia (SVT) or Wolff-Parkinson-White (WPW) syndrome.

  • Frequent premature ventricular contractions (PVCs) that weaken the heart muscle.

  • Palpitations, dizziness, or fainting caused by documented electrical "short circuits" in the heart.

  • Patients who wish to avoid the long-term side effects or costs of anti-arrhythmic drugs.

Methods of Cardiac RFA

  • Catheter Ablation: The standard approach using flexible tubes guided through the veins to the heart.

  • Cryoablation (Alternative): Using extreme cold instead of heat to freeze faulty heart tissue.

  • 3D Electroanatomical Mapping: Creating a high-definition digital map of the heart's electrical activity to pinpoint the arrhythmia source.

  • Point-by-Point Ablation: Precisely cauterizing tiny spots (about 1/5th of an inch) to create a protective scar.

  • Pulmonary Vein Isolation (PVI): A specialized RFA technique used specifically to treat Atrial Fibrillation.

How Cardiac RFA Is Performed

  • Access: Specialized electrode catheters are guided through the veins, usually starting from a small puncture in the groin.

  • EP Study: Doctors "map" the heart’s electrical system to identify exactly where the irregular rhythm begins.

  • Energy Delivery: The tip of the ablation catheter delivers radiofrequency energy to "cauterize" the target tissue, creating a small scar.

  • Signal Blocking: The resulting scar tissue acts as a permanent barrier that blocks faulty electrical signals from spreading.

  • Verification: The clinical team attempts to "re-trigger" the arrhythmia to ensure the treatment was successful before removing the catheters.

Pre-Procedure Preparation

  • Fasting for 6–8 hours before the procedure, as it is usually performed under sedation or general anesthesia.

  • Blood tests to check kidney function and blood clotting levels.

  • Adjusting current heart medications or blood thinners as directed by your Electrophysiologist (EP).

  • Discussing any history of allergies to contrast dye or local anesthetics.

  • Arranging for a hospital stay (usually one night) and a support person for the journey home.

Tests Before Cardiac RFA

  • Electrocardiogram (ECG): To record the baseline heart rhythm and identify the type of arrhythmia.

  • Holter Monitor: A portable device worn for 24–48 hours to capture infrequent rhythm disturbances.

  • Echocardiogram: To evaluate the heart's structure and ensure there are no blood clots in the chambers.

  • Transesophageal Echo (TEE): A more detailed ultrasound performed just before ablation to confirm the heart is clear of clots.

  • Electrophysiology (EP) Study: The definitive diagnostic test performed at the start of the ablation procedure.

Life After Cardiac RFA

  • Short recovery time; most patients stay one night for observation and return home the next day.

  • Resume light daily activities within 24 to 48 hours, avoiding strenuous exercise for 1–2 weeks.

  • Temporary "Post-ablation syndrome" (mild flu-like symptoms) may occur for a few days as the heart heals.

  • Continued heart monitoring for several months to ensure the rhythm remains stable.

  • Significant reduction or total elimination of heart palpitations and associated fatigue.

Benefits of Cardiac RFA

  • High success rates, ranging from 90% to 98% for common arrhythmias like SVT.

  • Offers a potential permanent cure, often allowing patients to stop taking heart rhythm medications.

  • Minimally invasive with a much faster recovery than traditional open-heart surgery.

  • Protects the heart from long-term damage and failure caused by chronic high heart rates.

  • Improves overall quality of life by removing the anxiety and physical limitations of arrhythmias.

Accessory Pathway Ablation (WPW)

Accessory pathway ablation is a definitive, minimally invasive procedure used to cure Wolff-Parkinson-White (WPW) syndrome and other forms of supraventricular tachycardia (SVT). The procedure targets a tiny, extra "electrical bridge"—known as an accessory pathway—that allows electrical signals to bypass the heart's normal routing system. This bypass creates a "short circuit," causing the heart to beat at abnormally fast rates, often between 150 and 250+ BPM. This procedure is considered the gold-standard cure, frequently eliminating the need for lifelong heart medication.

When You Should Consider Accessory Pathway Ablation

  • Wolff-Parkinson-White (WPW) Syndrome: For patients with a confirmed diagnosis who experience symptomatic fast heart rates (tachycardia).

  • Recurrent SVT Episodes: When episodes of supraventricular tachycardia do not respond well to medications or are frequent enough to disrupt daily life.

  • High-Risk ECG Features: The presence of a "Delta Wave" on a routine ECG, which indicates a bypass tract that could lead to dangerous heart rhythms.

  • Occupational Requirements: For individuals in high-risk professions, such as pilots, commercial drivers, or competitive athletes, where a fainting episode could be life-threatening.

  • Medication Avoidance: For patients who wish for a permanent cure to avoid the long-term side effects or the daily burden of anti-arrhythmic drugs.

Methods Of Accessory Pathway Ablation

  • Radiofrequency (RF) Ablation: The most common method, using high-frequency electrical currents to generate heat and cauterize the specific tissue forming the extra pathway.

  • Cryoablation: A technique using extreme cold (freezing) to destroy the pathway; this is often preferred if the pathway is located very close to the heart's natural "pacemaker" wiring to prevent accidental damage.

  • 3D Electroanatomical Mapping: Utilizing advanced software to create a digital 3D map of the heart’s electrical activity, allowing the specialist to pinpoint the "Bundle of Kent" with extreme precision.

  • Transseptal Puncture: A specialized maneuver used to reach pathways on the left side of the heart by crossing the thin wall (septum) between the right and left atria.

  • Electrophysiology (EP) Study: The initial diagnostic phase where catheters are used to "pace" the heart to intentionally trigger and locate the short circuit.

How Is Performed

  • Vascular Access: Under local anesthesia and sedation (or general anesthesia), three to four thin catheters are inserted through the femoral veins in the groin and threaded into the heart using X-ray guidance.

  • Electrical Mapping: The electrophysiologist uses the catheters to "pace" the heart, triggering the tachycardia to identify if the pathway is on the right, left, or septal side of the heart.

  • Targeted Ablation: Once the pathway is located, the ablation catheter delivers energy to a tiny area (2–4 mm), creating a small scar that permanently blocks the faulty electrical signal.

  • Wait and Validation: The medical team waits approximately 30 minutes and attempts to re-trigger the fast heart rate using various pacing techniques; if it cannot be restarted, the cure is confirmed.

  • Catheter Removal: The catheters are removed, and firm pressure is applied to the groin entry sites to ensure proper closure and healing of the vessels.

Pre-Procedure Preparation

  • Fasting (NPO): No food or drink for 8–12 hours prior to the procedure to ensure safety during sedation or anesthesia.

  • Blood Diagnostics: Standard blood tests to evaluate blood clotting factors (PT/INR) and kidney function (Creatinine) before using any contrast dye.

  • Medication Adjustment: Patients are often asked to stop anti-arrhythmic medications for several days before the procedure so the pathway is "active" and easy to map.

  • Allergy Check: Discussing any known history of allergies to local anesthetics, heparin, or the contrast dye used during imaging.

  • Recovery Planning: Arranging for an overnight hospital stay for observation and ensuring a support person is available to drive you home the following day.

Tests Before Accessory Pathway Ablation

  • Electrocardiogram (ECG): To identify the characteristic "Delta Wave" or other markers of pre-excitation that suggest an accessory pathway.

  • Holter or Event Monitor: To record the heart's rhythm over 24–48 hours (or longer) to capture spontaneous episodes of fast heart rates.

  • Echocardiogram: An ultrasound to ensure the heart's overall structure, valves, and pumping function are normal before the intervention.

  • Cardiac Stress Test: To observe how the accessory pathway behaves during physical exertion, which helps assess the risk of dangerous rhythms.

  • EP Study (Intra-operative): Performed as the very first step of the ablation procedure to confirm the exact coordinates of the short circuit.

Life After Accessory Pathway Ablation

  • Hospital Observation: Most patients stay 1 night; you must lie flat for 4–6 hours immediately post-procedure to prevent bleeding at the groin sites.

  • Rapid Recovery: Most patients feel back to normal quickly and can return to work, school, or light daily activities within 3 to 5 days.

  • Activity Restrictions: Avoid strenuous exercise, heavy lifting (over 10 lbs), or immersion in water (baths/pools) for at least one week to allow the puncture sites to heal.

  • Symptom Resolution: Patients typically experience an immediate improvement in quality of life, as the fear of sudden, racing heartbeats is removed.

  • Follow-Up ECG: A repeat ECG is usually performed at 3 months to confirm that the pathway has not "recovered" or reconnected.

Benefits Of Accessory Pathway Ablation

  • High Cure Rate: Provides a permanent cure for 95% to 98% of patients, typically requiring only a single procedure.

  • Medication Independence: Eliminates the need for long-term heart medications and prevents their potential side effects, such as fatigue or dizziness.

  • Reduces Cardiac Risk: Significantly lowers the risk of sudden cardiac events, fainting (syncope), or palpitations during exercise.

  • High Safety Profile: The procedure has a very low risk (less than 1%) of requiring a permanent pacemaker, even for pathways in complex locations.

  • Restores Full Activity: Allows patients to return to high-impact sports, demanding careers, and a normal life without physical restrictions.

Cryoablation
Cryoablation

Cryoablation is a minimally invasive treatment that uses extreme cold to destroy diseased or abnormal tissue. Unlike heat-based therapies like Radiofrequency Ablation (RFA), it works by rapidly freezing cells into "ice balls," causing them to burst and die upon thawing. This technique is highly valued for its precision, as the formation of the ice ball is clearly visible on real-time imaging (Ultrasound, CT, or MRI).

When You Should Consider Cryoablation

  • Atrial Fibrillation (AFib): Particularly paroxysmal AFib where "cryoballoon" therapy can block faulty electrical signals from the pulmonary veins.

  • Small Tumors (under 4 cm): Especially in the kidneys, liver, lungs, and prostate, for patients who are not ideal candidates for open surgery.

  • Chronic Pain Management: To freeze specific nerves (e.g., intercostal nerves) and block pain signals for several months.

  • Preservation of Tissue: When a tumor is located near vital blood vessels or structures that might be damaged by heat.

Common Methods of Cryoablation

  • Cryoballoon Ablation: A specialized balloon is guided to the heart and inflated at the opening of the pulmonary veins to create a circumferential freeze.

  • Percutaneous Cryoprobe: Needle-like probes are inserted through the skin directly into a tumor under CT or Ultrasound guidance.

  • Freeze-Thaw Cycles: The core mechanism where rapid freezing creates lethal ice crystals inside cells, and thawing causes the cell membranes to rupture.

  • Cryomapping (Cardiac): A safety feature where doctors briefly "cool" a spot to see if it fixes the rhythm before committing to a permanent freeze.

How Cryoablation Is Performed

  • Access: For cardiac cases, a catheter is threaded through the groin; for tumors, a needle-like probe is inserted through the skin.

  • Imaging Guidance: Real-time scans (CT/MRI) are used to monitor the growth of the "ice ball" to ensure it covers the target without harming healthy tissue.

  • Freezing Agent: Argon gas or liquid nitrogen is circulated through the probe, reaching temperatures as low as -40°C to -196°C.

  • Tissue Destruction: Multiple freeze-thaw cycles are performed to ensure complete cellular death within the target zone.

  • Completion: The probe or balloon is removed, and the small puncture site is closed with a simple bandage or a single stitch.

Pre-Procedure Preparation

  • Fasting for 6–8 hours is typically required for both cardiac and tumor-related cryoablation.

  • Blood tests to check kidney function and blood clotting levels (especially for liver/kidney tumors).

  • Adjusting current medications, such as blood thinners or heart-rate controllers, as directed by your physician.

  • Discussing any allergies to contrast dyes or local anesthetics.

  • Most procedures are performed under sedation or general anesthesia, depending on the complexity.

Success Rates and 2026 Cost Outlook

ApplicationSuccess Rate (Curative Intent)Estimated Cost in India (2026)Atrial Fibrillation80% - 85% (Paroxysmal)₹3,50,000 - ₹5,50,000Kidney Tumors90% - 95% (Small masses)₹2,50,000 - ₹4,00,000Liver Tumors85% - 90% (Early stage)₹3,00,000 - ₹4,50,000

Note: Costs vary by hospital (e.g., Medanta, Apollo, Nanavati-Max) and specific device requirements.

Life After Cryoablation

  • Fast Recovery: Most patients go home the same day or after one night's stay.

  • Minimal Pain: The cold has a natural numbing effect; any soreness is usually managed with simple pain relievers for 48 hours.

  • Quick Return: You can typically resume normal light activities within 24 to 48 hours, though strenuous exercise should be avoided for 1–2 weeks.

  • Follow-up Scans: For tumor treatments, a follow-up CT or MRI is usually scheduled at 1, 3, and 6 months to ensure the area is clear.

Benefits of Cryoablation

  • Superior Visibility: The "ice ball" is easier to see on imaging than the "heat zone" of RFA, leading to higher precision.

  • Better Safety: Less likely to cause inflammation or damage the "scaffold" of healthy tissue (like collagen) compared to heat.

  • Repeatable: If a tumor or arrhythmia returns, cryoablation can often be safely performed again in the same area.

  • Shorter Procedure Times: Particularly for AFib, cryoballoon therapy is often faster than point-by-point heat ablation.

AF Ablation (Pulmonary Vein Isolation)

Atrial Fibrillation (AF) Ablation, specifically Pulmonary Vein Isolation (PVI), is a minimally invasive procedure designed to stop irregular heart rhythms by targeting the area where they most often begin: the pulmonary veins. In AFib patients, extra electrical signals (ectopic beats) originate from the muscle sleeves within these veins. By creating a barrier of scar tissue—which does not conduct electricity—abnormal signals are blocked from reaching the rest of the heart.

When You Should Consider AF Ablation

  • Paroxysmal (occasional) AFib that is symptomatic and not well-controlled by medication.

  • Persistent (continuous) AFib where restoring a normal rhythm would improve heart function.

  • Intolerance to anti-arrhythmic drugs or a desire to avoid long-term medication side effects.

  • Heart failure patients where AFib is significantly reducing the heart's pumping efficiency.

  • High-risk features where uncontrolled AFib could lead to heart enlargement or tachycardia-induced cardiomyopathy.

Methods of AF Ablation

  • Radiofrequency (RF) Ablation: Using point-by-point heat energy to "cauterize" the tissue around the vein openings.

  • Cryoablation: A specialized balloon is inflated in the vein and uses extreme cold to freeze the tissue in a "single shot."

  • Pulsed Field Ablation (PFA): A newer, non-thermal method using ultra-rapid electrical fields to selectively target heart cells while sparing surrounding structures.

  • 3D Electro-anatomical Mapping: Creating a "GPS-like" digital view of the heart's unique anatomy and electrical activity.

  • Transseptal Puncture: A controlled technique to reach the left atrium by crossing the wall between the heart's upper chambers.

How AF Ablation Is Performed

  • Access: Catheters are inserted through the femoral vein in the groin and guided up to the heart under X-ray guidance.

  • Navigation: The doctor performs a transseptal puncture to move the catheters from the right atrium into the left atrium.

  • Mapping: A detailed 3D map identifies the pulmonary vein openings (ostia) and the source of triggers.

  • Ablation: Energy (Heat, Cold, or Electrical Fields) is applied to create a circumferential ring of scar tissue around each of the four pulmonary veins.

  • Verification: The clinical team checks that the veins are electrically disconnected ("acute isolation") before removing the catheters.

Pre-Procedure Preparation

  • Fasting for 8–12 hours is required as the procedure is usually performed under general anesthesia.

  • Blood tests to check kidney function and ensure blood clotting levels are within a safe range.

  • Continuous use (or brief adjustment) of blood thinners (anticoagulants) as directed by the electrophysiologist.

  • A Transesophageal Echo (TEE) or CT scan is often performed right before the procedure to ensure no blood clots are in the heart.

  • Arranging for an overnight hospital stay and a support person for the recovery period.

Tests Before AF Ablation

  • Echocardiogram (TTE): To measure the size of the left atrium and evaluate overall heart valve and muscle function.

  • CT or MRI of the Heart: To provide a detailed anatomical map of the pulmonary veins for the 3D navigation system.

  • ECG and Holter Monitoring: To document the frequency and duration of AFib episodes.

  • Blood Tests: Comprehensive metabolic panel including thyroid function, as thyroid issues can trigger AFib.

  • Pulse Oximetry: To assess baseline oxygen levels and lung health.

Life After AF Ablation

  • Hospital Stay: Most patients stay overnight for observation and are discharged the next morning.

  • Initial Recovery: You must lie flat for 4–6 hours post-procedure; avoid heavy lifting and strenuous exercise for 5–7 days.

  • "Blanking Period": For the first 3 months, minor irregular beats are common while the scars fully form and inflammation subsides.

  • Medication: Blood thinners are typically continued for at least 3–6 months, even if the rhythm feels normal.

  • Follow-up: Regular rhythm monitoring (ECG or mobile monitors) to confirm long-term freedom from AFib.

Benefits of AF Ablation

  • High initial success: Over 95% achieve electrical isolation of the veins during the procedure.

  • Significantly improves quality of life by reducing or eliminating palpitations, fatigue, and shortness of breath.

  • Reduces the long-term risk of heart failure and stroke associated with uncontrolled AFib.

  • Often allows patients to reduce or stop potent anti-arrhythmic medications.

  • High success rates for paroxysmal AFib (70%–80% at one year) with modern 2026 techniques.

SVT Ablation
SVT Ablation

SVT (Supraventricular Tachycardia) Ablation is a highly effective, minimally invasive procedure used to permanently cure episodes of abnormally fast heart rhythms originating above the heart's lower chambers. It is the preferred treatment over lifelong medication for most patients due to its curative nature. By neutralizing the electrical "short circuits" in the heart, this procedure restores a normal, stable rhythm.

When You Should Consider SVT Ablation

  • Recurrent episodes of abnormally fast heart rates (palpitations) that cause distress or anxiety.

  • SVT symptoms like dizziness, shortness of breath, or chest discomfort during episodes.

  • Ineffectiveness of anti-arrhythmic medications or a desire to stop daily heart drugs.

  • High-risk electrical pathways (like WPW) that could lead to more dangerous heart rhythms.

  • Frequent ER visits or hospitalizations due to the inability to stop a racing heart on your own.

Types of SVT Targeted

  • AVNRT (AV Nodal Re-entrant Tachycardia): The most common type, caused by an extra pathway within the heart's main power station (the AV node).

  • AVRT (including WPW Syndrome): Caused by an extra muscle bridge (Accessory Pathway) connecting the upper and lower chambers.

  • Atrial Tachycardia: A specific tiny spot in the upper chamber that "fires" too rapidly and takes over the heart's rhythm.

  • Atrial Flutter: A circuit typically in the right atrium that creates a "sawtooth" rhythm on an ECG.

How SVT Ablation Is Performed

  • Mapping (The EP Study): 3 to 5 thin, flexible catheters are inserted through the femoral vein in the groin and guided to the heart under X-ray.

  • Triggering: The doctor "paces" the heart to deliberately trigger the SVT, allowing them to pinpoint the exact location of the electrical "leak."

  • Ablation: Once found, an ablation catheter delivers Radiofrequency (RF) heat or Cryoenergy (cold) to a tiny area (2–4 mm).

  • Verification: The clinical team waits about 20–30 minutes and attempts to re-trigger the SVT using medication or rapid pacing.

  • Completion: If the rhythm remains normal and the pathway is neutralized, the catheters are removed and the procedure is finalized.

Pre-Procedure Preparation

  • Fasting for 8–12 hours is usually required; the procedure typically uses local anesthesia and deep sedation.

  • Blood tests to evaluate kidney function and blood clotting status (PT/INR).

  • Stopping anti-arrhythmic medications (like Beta-blockers) for 3–5 days prior to the test so the SVT can be induced.

  • Discussing any allergies to contrast dye, iodine, or local anesthetics.

  • Arranging for an overnight stay, though many 2026 cases are now "same-day" discharge.

Tests Before SVT Ablation

  • Electrocardiogram (ECG): To record the baseline heart rhythm and identify the specific type of SVT.

  • Holter Monitor or Event Recorder: To capture infrequent episodes of fast heart rates during daily activities.

  • Echocardiogram: To ensure the heart's structure and pumping function are normal before the intervention.

  • Cardiac Stress Test: To observe how the heart rhythm behaves during physical exertion.

  • Electrophysiology (EP) Study: Performed as the first step of the ablation procedure to map the arrhythmia.

Life After SVT Ablation

  • Post-Op Rest: You must lie flat for 4–6 hours immediately after the procedure to ensure the groin punctures seal properly.

  • Fast Recovery: Most patients return to work and light activity within 3 to 5 days.

  • Medication Cessation: Most patients can stop taking anti-arrhythmic drugs immediately after a successful procedure.

  • Short-term Restrictions: Avoid heavy lifting or intense gym workouts for at least one week.

  • Permanent Relief: For the vast majority, symptoms do not return, leading to a significant improvement in quality of life.

Benefits of SVT Ablation

  • Provides a permanent cure rather than just managing symptoms with daily medication.

  • Extremely safe cardiac procedure with a major complication rate of less than 1%.

  • Eliminates the risk of fainting or accidents caused by sudden, rapid heartbeats.

  • Highly successful even in elderly patients or children with symptomatic SVT.

  • Modern 3D mapping reduces radiation (X-ray) exposure compared to older techniques.

VT Ablation
VT Ablation

Ventricular Tachycardia (VT) Ablation is a specialized procedure used to treat life-threatening fast heartbeats originating in the heart's lower chambers (ventricles). The procedure aims to destroy specific heart tissue causing electrical "short circuits," which are often triggered by scar tissue from a previous heart attack or other structural heart diseases. It is frequently used to reduce the frequency of painful life-saving shocks in patients with an Implantable Cardioverter-Defibrillator (ICD).

When You Should Consider VT Ablation

  • Recurrent VT episodes that are not well-controlled by anti-arrhythmic medications.

  • Frequent ICD shocks, where ablation is needed to reduce the "burden" of the device firing.

  • "VT Storm," a life-threatening condition where multiple episodes of VT occur within a 24-hour period.

  • Structural heart disease, such as a history of heart attack (Ischemic Cardiomyopathy) or heart enlargement.

  • Patients who cannot tolerate the side effects of potent medications like Amiodarone.

Methods of VT Ablation

  • Endocardial Ablation: The standard approach where catheters are guided through the veins or arteries to the inside surface of the heart.

  • Epicardial Ablation: Used if the VT source is on the outside of the heart; a needle is inserted through the chest wall into the sac surrounding the heart (pericardium).

  • 3D Electroanatomical Mapping: Creating a high-resolution digital model of the heart to identify scar tissue and pinpoint the arrhythmia's origin.

  • Radiofrequency (RF) Energy: The most common tool, using high-frequency electrical current to heat and neutralize abnormal tissue.

  • Cryoablation: Using extreme cold to create the necessary scar tissue, occasionally preferred for specific anatomical locations.

How VT Ablation Is Performed

  • Access: Small, flexible catheters are inserted into blood vessels, usually in the groin, and guided to the heart using X-ray (fluoroscopy) and ultrasound.

  • Mapping: Doctors use a mapping system to create a digital model of the heart, identifying the exact origin of the arrhythmia or the boundaries of scar tissue.

  • Ablation: Once the target is identified, the doctor applies heat or cold energy to create a small, precise scar that blocks faulty electrical signals.

  • Epicardial Access (If Needed): If the circuit is on the heart's outer surface, a puncture is made beneath the breastbone to reach the pericardium.

  • Verification: The clinical team attempts to re-trigger the VT; if the rhythm remains stable, the pathways are successfully blocked.

Pre-Procedure Preparation

  • Fasting for at least 8 hours before the procedure, as it is performed under general anesthesia or deep sedation.

  • Blood tests to evaluate kidney function and blood clotting status (PT/INR).

  • Adjusting heart medications: Some drugs may be stopped a few days early to make the VT easier to "map" during the study.

  • Discussing any history of allergies to contrast dye, iodine, or local anesthetics.

  • Arranging for a hospital stay of 1 to 2 nights and a support person for the recovery period.

Tests Before VT Ablation

  • 12-Lead ECG: To record the baseline heart rhythm and identify the specific "morphology" of the VT.

  • Cardiac MRI or CT Scan: To visualize the exact location and depth of scar tissue from previous heart damage.

  • Echocardiogram: To evaluate the heart's pumping strength (Ejection Fraction) and check for blood clots in the chambers.

  • Electrophysiology (EP) Study: The diagnostic portion of the procedure used to induce and analyze the arrhythmia.

  • Intracardiac Echocardiography (ICE): Used during the procedure to provide real-time ultrasound imaging from inside the heart.

Life After VT Ablation

  • Immediate Care: You must lie flat for 6 hours immediately after the procedure to prevent bleeding at the groin puncture site.

  • Hospital Stay: Usually requires 1 to 2 nights for close monitoring of the heart rhythm and entry sites.

  • Healing Phase: It may take up to 3 months for the heart to fully heal and for the full benefits of the procedure to manifest.

  • Activity: Avoid heavy lifting (more than 4.5 kg) and strenuous exercise for at least one week.

  • Device Management: Patients with ICDs will continue to have their devices monitored to ensure the frequency of VT episodes has decreased.

Benefits of VT Ablation

  • Significantly reduces the frequency of painful ICD shocks, improving overall quality of life.

  • Can be a life-saving intervention for patients experiencing an "electrical storm."

  • Improves heart efficiency by maintaining a steady, normal rhythm (Sinus Rhythm).

  • Reduces the need for high-dose anti-arrhythmic medications and their associated side effects.

  • Decreases the number of emergency room visits and hospitalizations related to ventricular arrhythmias.

AV Node Ablation
AV Node Ablation

Atrioventricular (AV) Node Ablation is a "last-resort" procedure for patients with atrial fibrillation (AFib) or other supraventricular tachycardias whose heart rates cannot be controlled by medications or standard ablation. It involves intentionally destroying the heart's central electrical "bridge" (the AV node) to stop irregular signals from reaching the pumping chambers. Because the heart can no longer beat on its own at a functional rate, this is always paired with a permanent pacemaker.

When You Should Consider AV Node Ablation

  • Persistent or Permanent AFib: When the heart rate remains dangerously high despite multiple trials of medication.

  • Medication Intolerance: Patients who experience severe side effects from beta-blockers, calcium channel blockers, or amiodarone.

  • Failed Previous Ablations: When "rhythm-control" procedures like Pulmonary Vein Isolation (PVI) have not been successful.

  • Tachycardia-Induced Cardiomyopathy: When a chronic fast heart rate has begun to weaken the heart muscle, leading to heart failure.

  • Elderly Patients: Often preferred in older patients where the primary goal is symptom relief rather than a complex "cure" for AFib.

Methods of AV Node Ablation

  • Radiofrequency (RF) Ablation: The most common method, using heat energy to cauterize and permanently block the AV node.

  • Cryoablation: Using extreme cold to freeze the node, though less common for this specific "last-resort" procedure.

  • The "Ablate and Pace" Strategy: A two-part management plan where a pacemaker is implanted (either weeks before or during the same session) to ensure a steady heart rate once the node is destroyed.

  • Conduction System Pacing (2026 Standard): Modern pacing techniques like His-bundle pacing or Left Bundle Branch Area Pacing (LBBAP) are often used to mimic a more natural heartbeat than traditional pacemakers.

How AV Node Ablation Is Performed

  • Vascular Access: A catheter is inserted through the femoral vein in the groin under local anesthesia and sedation.

  • Mapping: Using electrical sensors, the electrophysiologist (EP) locates the AV node, the narrow tissue bridge between the upper (atria) and lower (ventricles) chambers.

  • Destruction: RF energy is applied for several seconds to destroy the node, creating a complete electrical disconnect.

  • Validation: The clinical team confirms that the ventricles are no longer responding to the chaotic atrial signals and are solely following the pacemaker's lead.

  • Final Checks: The pacemaker is programmed to a slightly higher rate (e.g., 80-90 BPM) initially to allow the heart to adjust to its new rhythm.

Pre-Procedure Preparation

  • Fasting for 8–12 hours before the procedure; most patients are given light sedation or general anesthesia.

  • Blood tests to check kidney function and electrolytes.

  • Pacemaker Check: If you already have a pacemaker, it will be checked to ensure the battery and wires (leads) are functioning perfectly.

  • Medication: Blood thinners (anticoagulants) are typically continued, but your doctor will advise on stopping other heart-rate medications.

  • Coordination: Confirming that a specialized technician is present to program the pacemaker during the ablation.

Tests Before AV Node Ablation

  • Echocardiogram: To assess the baseline pumping function and check for any existing heart failure.

  • Electrocardiogram (ECG): To record the current heart rhythm and ensure the patient is in the targeted arrhythmia.

  • Holter Monitoring: To document the "burden" of high heart rates during daily activities.

  • Device Interrogation: A detailed electronic check of any previously implanted pacemaker or ICD.

  • Blood Panels: Including thyroid function and coagulation profiles to ensure safe procedural conditions.

Life After AV Node Ablation

  • Hospital Stay: Usually one night for observation; some centers allow same-day discharge if the pacemaker is already well-established.

  • Pacemaker Dependency: You will be 100% dependent on the pacemaker for every heartbeat. Modern 2026 devices are extremely reliable with 10+ year battery lives.

  • Activity: Resume walking immediately; avoid heavy lifting (over 5 kg) for 1–2 weeks to allow the groin site to heal (and longer if the pacemaker was just implanted).

  • Symptom Improvement: Most patients feel an immediate relief from palpitations and "heart racing" sensations.

  • Ongoing Care: You must continue taking blood thinners for stroke prevention, as the upper chambers (atria) will still be in AFib.

Benefits of AV Node Ablation

  • Dramatic Symptom Relief: Effectively stops palpitations, dizziness, and fatigue caused by a racing heart.

  • High Success Rate: Nearly 100% successful at stopping irregular signals from reaching the ventricles.

  • Heart Protection: Prevents further weakening of the heart muscle, often allowing heart failure symptoms to reverse.

  • Simplified Medication: Many patients can stop taking complex heart-rate control drugs that have difficult side effects.

  • Predictable Rhythm: The heart rhythm becomes regular and synchronized, as dictated by the pacemaker's programming.

Coronary Angioplasty (PTCA)

Coronary Angioplasty, also known as Percutaneous Transluminal Coronary Angioplasty (PTCA), is a minimally invasive procedure used to open clogged heart arteries. While surgical bypass remains an option for multi-vessel disease, transcatheter techniques using drug-eluting stents have expanded to treat even complex blockages, restoring vital blood flow to the heart muscle.

When You Should Consider PTCA

  • Refractory Angina: Chest pain that does not improve with standard medication.

  • Exertional Dyspnea: Shortness of breath during physical activity or exercise.

  • Positive Stress Test: Significant blockages identified during a cardiac stress test.

  • Emergency Intervention: Performed during a heart attack to rapidly restore flow and limit heart muscle damage.

  • Cardiac Strain: Evidence of reduced blood flow causing heart enlargement or visible strain on imaging.

Methods of Angioplasty

  • Balloon Angioplasty: A small, medical-grade balloon is inflated at the blockage site to push plaque against the artery walls.

  • Stent Placement: A tiny mesh tube is inserted and expanded to act as a permanent scaffold to keep the artery open.

  • Drug-Eluting Stents (DES): Stents coated with specialized medication that is slowly released to prevent the buildup of scar tissue (restenosis).

  • Rotational Atherectomy: Using a high-speed, diamond-tipped drill to break up heavily calcified or "hardened" plaque.

  • Laser Angioplasty: Utilizing precise laser energy to vaporize blockages within the coronary arteries.

How Is Performed

  • Catheter Access: Under local anesthesia and sedation, a thin, flexible tube is guided through the radial artery (wrist) or femoral artery (groin) to the heart.

  • Real-time Imaging: Contrast dye is injected, and X-ray imaging (fluoroscopy) is used to ensure tools are perfectly positioned at the blockage.

  • Balloon Expansion: The balloon is inflated at the site of the narrowing to widen the passage for blood flow.

  • Stent Deployment: The mesh stent is expanded against the artery wall; the balloon is then deflated and removed, leaving the stent in place.

  • Final Validation: Heart rhythm and blood flow are monitored via an angiogram to confirm the artery is fully open before removing the catheters.

Pre-Procedure Preparation

  • Fasting (NPO): No food or drink for 8–12 hours before the catheterization to ensure safety during sedation.

  • Baseline Diagnostics: Blood tests, ECG, and chest X-rays to assess overall cardiac health and kidney function.

  • Medication Adjustment: Reviewing all current prescriptions; blood thinners or certain diabetes medications may be adjusted by the clinical team.

  • Allergy Check: Discussing any known history of allergies, particularly to iodine-based contrast dye or metals like nickel.

  • Recovery Logistics: Arranging for a support person to drive you home and assist during the initial recovery period.

Tests Before PTCA

  • Echocardiogram (TTE): An ultrasound to determine the heart's pumping efficiency and valve function.

  • Cardiac Angiogram: The primary diagnostic mapping tool used to identify the exact location and severity of blockages.

  • Cardiac MRI or CT Scan: For detailed 3D mapping of the coronary anatomy in complex cases.

  • ECG: To monitor the heart's electrical rhythm and check for signs of current or past ischemia.

  • Pulse Oximetry: To evaluate baseline oxygen saturation levels in the blood.

Life After PTCA

  • Short Observation: Most patients require a short hospital stay, often 1–2 days, to monitor the access site and heart rhythm.

  • Activity Restrictions: Avoid strenuous activity, heavy lifting, or immersion in water (baths/pools) for several days post-procedure.

  • Medication Compliance: Strict adherence to prescribed antiplatelet medications (like Aspirin or Clopidogrel) is vital to prevent blood clots from forming on the new stent.

  • Follow-up Care: Regular visits with a cardiologist to monitor the treated site and manage underlying cardiovascular risk factors.

  • Symptom Relief: Most patients experience an immediate improvement in breathing, energy levels, and physical stamina.

Benefits of PTCA

  • Restored Perfusion: Immediately restores normal blood flow to the oxygen-starved heart muscle.

  • Muscle Preservation: Protects the heart from permanent damage or scarring caused by chronic ischemia.

  • Improved Mobility: Allows patients to return to physical activities and maintain an active, healthy lifestyle.

  • Risk Reduction: Significantly reduces the long-term risk of heart failure and enlargement of the heart's chambers.

  • High Success Rates: Provides a durable, long-term solution with exceptionally high technical success rates.

Drug-Eluting Stent (DES) Placement

A Drug-Eluting Stent (DES) is a small, metal mesh tube coated with specialized medication that is permanently placed in a narrowed heart artery. It is the most common type of stent used to treat Coronary Artery Disease (CAD). These devices are designed to provide both mechanical support and controlled drug release to ensure long-term arterial health.

When You Should Consider DES Placement

  • Chronic Chest Pain (Angina): Pain or pressure that limits physical activity.

  • Significant Blockages: Evidence of arterial narrowing found during an echocardiogram or stress test.

  • Heart Failure Risk: High risk of heart failure due to restricted blood flow to the heart muscle.

  • Emergency Treatment: Used during a heart attack to rapidly restore circulation.

  • Functional Improvement: Prevention of breathing difficulties caused by poor heart pump function.

Key Components of a DES

  • The Scaffold: A metal mesh structure, typically made of cobalt-chromium or platinum-chromium alloys, providing mechanical support to prevent the artery from recoiling.

  • The Polymer Coating: A thin layer that holds the medication and controls its release into the artery wall over several weeks or months.

  • The Therapeutic Agent: Specialized drugs (typically from the "limus" family) that inhibit the growth of scar tissue within the artery.

How Is Performed

  • Catheter Access: A thin tube is guided through the radial artery (wrist) or femoral artery (groin) to the heart.

  • Navigation: Real-time X-ray imaging and contrast dye ensure the catheter is perfectly positioned at the blockage.

  • Expansion: A tiny balloon at the catheter's tip is inflated to widen the blockage and expand the collapsed stent against the artery wall.

  • Device Deployment: The balloon is deflated and removed, leaving the low-profile stent to support the vessel permanently.

  • Monitoring: Imaging confirms the stent is perfectly positioned before finishing the procedure.

Pre-Procedure Preparation

  • Fasting: Required for 8–12 hours before the catheterization.

  • Baseline Screening: Blood tests, ECG, and chest X-rays to assess overall health and kidney function.

  • Medication Adjustment: Adjusting current medications as directed by the cardiology team.

  • Allergy Check: Discussing any allergies, particularly to nickel (used in some stents) or contrast dye.

  • Recovery Planning: Arranging for a support person for the post-operative period.

Tests Before DES Procedure

  • Echocardiogram (TTE or TEE): To determine the location and severity of arterial issues.

  • Cardiac Catheterization: To measure heart pressures and map the coronary anatomy.

  • Cardiac MRI or CT Scan: For detailed 3D mapping of complex blockages.

  • ECG: To monitor the heart's electrical rhythm.

  • Pulse Oximetry: To evaluate oxygen saturation levels in the blood.

Life After DES Placement

  • Hospital Stay: Usually 1–2 days for observation.

  • Activity Restrictions: Avoid strenuous activity and heavy lifting for a few weeks post-procedure.

  • Mandatory Medication: Patients must take dual antiplatelet therapy (DAPT), such as aspirin and a second blood thinner, for 6 to 12 months to prevent clots.

  • Long-term Follow-up: Regular visits with a cardiologist to monitor the stent site.

  • Functional Recovery: Immediate improvement in breathing, energy levels, and physical stamina.

Benefits of Drug-Eluting Stents

  • Reduced Restenosis: Significantly lowers the risk of the artery re-narrowing compared to older bare-metal stents.

  • Organ Protection: Protects the heart and lungs from damage caused by poor circulation.

  • Fewer Procedures: Patients are less likely to need repeat angioplasties or bypass surgery.

  • High Success Rate: Modern DES provide a long-term solution with technical success rates often exceeding 95%.

  • Efficient Circulation: Restores normal blood flow and ensures the heart muscle receives adequate oxygen.

Rotablation (for calcified arteries)

Rotablation, also known as Rotational Atherectomy, is a specialized cardiac procedure used to treat coronary arteries that have become "stone-hard" due to severe calcium buildup. When plaque is heavily calcified, standard balloon angioplasty may fail to expand the artery, potentially leading to balloon rupture or inadequate stent deployment. This high-speed drilling technique is essential for modifying plaque to make the artery flexible enough for a stent to be placed successfully.

When You Should Consider Rotablation

  • Severely Calcified Arteries: When imaging shows blockages that have hardened into "rock-like" structures that won't budge with standard tools.

  • Balloon-Uncrossable Lesions: When a blockage is so hard or narrow that a standard angioplasty balloon cannot pass through or expand.

  • Failed Prior Angioplasty: If previous attempts to open the artery failed because the plaque was too rigid or inelastic.

  • Preparation for Stenting: To ensure the vessel wall is soft enough for a stent to fully expand and stay open long-term.

  • Heart Overload: When restricted blood flow in hardened vessels causes significant strain or "overload" on the heart muscle.

Methods Of Rotablation

  • High-Speed Rotation: Utilizing a diamond-coated burr that spins at incredible speeds, typically between 140,000 and 200,000 RPM.

  • Differential Cutting: A unique mechanism where the burr selectively grinds hard, calcified plaque while deflecting off healthy, elastic vessel tissue.

  • Plaque Pulverization: The hardened calcium is ground into microscopic particles, much smaller than red blood cells, which can pass safely through the capillaries.

  • Mechanical Modification: Softening the internal vessel wall to transform a rigid "pipe" back into a flexible artery.

  • Combined Therapy: Almost always followed by traditional balloon angioplasty or the deployment of a drug-eluting stent.

How Is Performed

  • Catheter Access: Under local anesthesia and sedation, a thin tube is guided through the radial artery (wrist) or femoral artery (groin) to the heart.

  • Burr Navigation: A specialized diamond-tipped catheter is positioned precisely at the site of the calcified blockage using X-ray guidance.

  • Plaque Modification: The surgeon activates the burr in short "passes" to grind away the calcium, which is then safely cleared by the bloodstream.

  • Artery Preparation: Once the "stone" is modified, a balloon is used to further stretch the now-flexible artery.

  • Stent Deployment: A permanent metal mesh (stent) is expanded to seal the opening and keep the blood flowing freely.

  • Real-time Monitoring: Continuous imaging ensures the artery is sufficiently prepared and the stent is perfectly opposed to the vessel wall.

Pre-Procedure Preparation

  • Fasting (NPO): No food or drink for 8–12 hours before the cardiac catheterization to ensure safety during the procedure.

  • Baseline Diagnostics: Blood tests, ECG, and chest X-rays to assess overall health and ensure the kidneys can process the contrast dye.

  • Medication Adjustment: Reviewing all current medications; blood thinners may need to be paused or adjusted by the cardiology team.

  • Allergy Screening: Discussing any known allergies, particularly to iodine (contrast dye) or the materials used in the surgical tools.

  • Recovery Planning: Arranging for a support person to drive you home and assist during the initial 24-hour recovery period.

Tests Before Rotablation

  • Echocardiogram: An ultrasound of the heart (TTE or TEE) to determine the size and location of the calcified blockage and assess heart pump function.

  • Cardiac Catheterization: An initial "scout" procedure to measure internal pressures and map the exact location of the arterial "stones."

  • Cardiac CT or MRI: Advanced 3D mapping used to visualize the depth and complexity of the hardened plaque.

  • Electrocardiogram (ECG): To monitor the heart's electrical rhythm and check for any conduction issues before the procedure.

  • Pulse Oximetry: To evaluate oxygen saturation levels in the blood, ensuring the lungs and heart are working in sync.

Life After Rotablation

  • Hospital Stay: Usually requires 1–2 days of monitoring in the hospital to ensure the access site is healing and the heart rhythm is stable.

  • Immediate Post-Op Rest: A mandatory period of 6–8 hours of flat bed rest is required if the femoral artery was used for access.

  • Activity Restrictions: Patients should avoid strenuous activity and heavy lifting (usually over 10 lbs) for at least a few weeks.

  • Medication Adherence: Strict compliance with "dual antiplatelet therapy" (blood thinners) is vital to prevent blood clots from forming on the new stent.

  • Follow-Up Care: Regular visits with a cardiologist are essential to monitor the treated artery and ensure the stent remains open.

Benefits Of Rotablation

  • High Success Rate: Successfully modifies difficult, "uncrossable" lesions in over 95% of cases.

  • Enables Complex Stenting: Makes it possible to place stents in patients who were previously told their blockages were "untreatable" by standard means.

  • Protects Heart Muscle: By restoring flow, it prevents long-term damage caused by chronic, high-pressure blockages.

  • Restores Blood Flow: Effectively removes "stone-hard" obstructions that balloons simply cannot push aside.

  • Long-Term Durability: Provides a robust solution for complex coronary artery disease, significantly improving energy levels and physical stamina.

Intravascular Lithotripsy (IVL)

Intravascular Lithotripsy (IVL) is an advanced plaque modification technique that uses sonic shockwaves to break up severe coronary artery calcification. It is particularly effective for "stone-like" blockages that standard balloons cannot expand. This technology has expanded significantly for treating complex, hardened defects that were previously difficult to manage with traditional methods.

When You Should Consider IVL

  • Severely calcified "stone-like" blockages identified during imaging.

  • Evidence of significant heart overload or left-sided heart enlargement.

  • When standard balloon angioplasty fails to expand the artery due to rigidity.

  • Cases where deep-layer calcium fracturing is required for safe stent deployment.

  • Patients seeking a lower-risk alternative to rotational atherectomy for circumferential calcium.

Methods of IVL

  • Acoustic Wave Generation: Emitters on the catheter's balloon vaporize fluid to create rapidly expanding bubbles.

  • Selective Fracturing: Sonic pressure waves (approx. 50 atmospheres) fracture both superficial and deep calcium deposits.

  • Vessel Compliance Restoration: Creating micro-cracks in the calcium to restore elasticity to the artery wall.

  • Deep Plaque Modification: Targeting deep-layer calcium that traditional drilling techniques might miss.

  • Standard Balloon Delivery: Using a familiar delivery system to "plug" the resistance of the calcium without major surgery.

How IVL Is Performed

  • Catheter Access: A tube is guided through the femoral vein or radial artery to the heart.

  • Device Positioning: The specialized IVL balloon is perfectly positioned across the calcified hole or blockage.

  • Shockwave Deployment: The generator sends sonic waves through the balloon to fracture the hardened plaque.

  • Monitoring: Real-time imaging ensures the calcium is sufficiently cracked before finishing the expansion.

  • Stent Deployment: Once elasticity is restored, an occluder device or stent is expanded to seal the artery open.

Pre-Procedure Preparation

  • Fasting for 8-12 hours before the catheterization.

  • Blood tests, ECG, and chest X-rays to assess overall health.

  • Adjusting current medications as directed by the cardiology team.

  • Discussing any allergies, particularly to contrast dye or nickel.

  • Arranging for post-operative care and a support person for the recovery period.

Tests Before IVL Procedure

  • Echocardiogram (TTE or TEE) to determine the size and location of the calcification.

  • Cardiac Catheterization to measure lung pressures and arterial resistance.

  • Cardiac MRI or CT scan for detailed 3D mapping of the hardened defects.

  • ECG to monitor the heart's electrical rhythm and check for conduction issues.

  • Pulse oximetry to evaluate oxygen saturation levels in the blood.

Life After IVL

  • Short hospital stay, usually 1-2 days (24–48 hours) for monitoring.

  • Avoid strenuous activity and heavy exercise for the first 7 days post-procedure.

  • Immediate improvement in breathing, energy levels, and physical stamina.

  • Regular follow-up visits with a cardiologist to monitor the repair site.

  • Return to most daily activities within a few days to a week.

Benefits of IVL

  • Provides a high procedural success rate, often reported over 92%.

  • Significantly lower risk of arterial perforation compared to traditional drilling.

  • Restores normal blood flow by increasing vessel compliance and elasticity.

  • Reduces the risk of heart failure by allowing for full, safe stent expansion.

  • High technical success rates even for complex, deep-layer calcium.

Bifurcation Stenting

Bifurcation Stenting is a complex procedure used when a coronary artery blockage occurs at a branch point, where a main vessel divides into two. These cases account for approximately 15–20% of all angioplasties and are technically demanding due to the risk of closing the "side branch" while treating the main vessel. While surgical repair remains a "gold standard" for some cases, transcatheter techniques for complex branch points have expanded significantly.

When You Should Consider Bifurcation Stenting

  • Blockages located precisely where a main heart artery divides into two branches.

  • Shortness of breath or chest pain caused by multi-vessel narrowing.

  • Evidence of left-sided heart enlargement or significant heart overload.

  • High pressure in the lung arteries or decreased blood flow to the heart muscle.

  • Cases where a single stent may not adequately support both the main and side branches.

Primary Treatment Strategies

  • Provisional Stenting: A single stent is placed in the main vessel across the side branch as the default approach.

  • Side Branch Protection: The side branch is only stented if it remains significantly narrowed or blocked after the first stent.

  • Planned Two-Stent Strategy: Used for "true" bifurcation lesions where both branches have significant, long blockages (>10mm).

  • Full Vessel Coverage: A strategy that ensures both vessel openings are supported from the start of the procedure.

  • Simple Approach: Preferred for most cases as it is faster and has fewer long-term complications.

Common Specialized Techniques

  • DK-Crush (Double Kissing Crush): One of the most effective two-stent techniques, particularly for left main artery blockages.

  • Stent Crushing: Involves "crushing" part of the side branch stent against the wall to ensure the opening is perfectly scaffolded.

  • Culotte Technique: Best for cases where the two branches are nearly the same size, layering stents like "trouser legs".

  • TAP (T and Small Protrusion): A simpler method where the side branch stent protrudes slightly to ensure no gap at the fork.

  • Hybrid Approach: A combination of techniques used for complex, hard-to-reach branch defects.

Optimization Techniques

  • POT (Proximal Optimization Technique): A mandatory step using a high-pressure balloon to expand the stent to match the larger vessel diameter.

  • Kissing Balloon Inflation (KBI): Two balloons are inflated simultaneously in both branches to re-shape the fork.

  • Strut Clearing: KBI is used to clear any metal struts that might be blocking the side branch opening.

  • Real-time Imaging: Monitoring ensures the device or patch is perfectly positioned before finishing.

  • Device Deployment: Specialized occluder-like stents are expanded across the hole or blockage to seal it permanently.

Pre-Procedure Preparation

  • Fasting for 8-12 hours before the catheterization or surgery.

  • Blood tests, ECG, and chest X-rays to assess overall cardiac health.

  • Adjusting current medications, specifically blood thinners, as directed by the cardiology team.

  • Discussing any allergies, particularly to nickel used in some stents or contrast dye.

  • Arranging for post-operative care and a support person for the recovery period.

Tests Before Bifurcation Stenting

  • Echocardiogram (TTE or TEE) to determine the size and location of the branch blockages.

  • Cardiac Catheterization to measure lung pressures and map the arterial branches.

  • Cardiac MRI or CT scan for detailed 3D mapping of complex bifurcation defects.

  • ECG to monitor the heart's electrical rhythm and check for conduction issues.

  • Pulse oximetry to evaluate oxygen saturation levels in the blood.

Life After Bifurcation Stenting

  • Short hospital stay, usually 1-2 days for device closure or observation.

  • Avoid strenuous activity and heavy lifting for a few weeks post-procedure.

  • Take prescribed antiplatelet medications to prevent blood clots on the multiple layers of metal.

  • Regular follow-up visits with a cardiologist to monitor the repair site.

  • Immediate improvement in breathing, energy levels, and physical stamina.

Benefits of Bifurcation Stenting

  • Restores normal blood flow to both the main artery and its side branches.

  • Protects the heart from damage caused by complex branch-point blockages.

  • Reduces the risk of heart failure and enlargement of the heart's chambers.

  • Provides a long-term cure with high technical success rates in experienced hands.

  • Prevents oxygen-rich and poor blood from mixing inefficiently due to restricted flow.

IVC Filter Placement

Inferior Vena Cava (IVC) Filter Placement is a minimally invasive procedure to insert a small, cage-like metal device into the body's largest vein (the IVC). Its purpose is to trap blood clots traveling from the legs or pelvis before they can reach the heart and lungs, thereby preventing a life-threatening Pulmonary Embolism (PE). While blood thinners remain the standard treatment, this transcatheter technique has expanded significantly for patients who cannot safely take anticoagulants.

When You Should Consider IVC Filter Placement

  • Active bleeding (e.g., gastrointestinal or brain bleed) that prevents the use of blood thinners.

  • New blood clots forming or traveling to the lungs despite proper blood-thinning medication.

  • Recent major surgery or massive trauma where anticoagulation is not an option.

  • High-risk prophylaxis for patients undergoing specialized high-risk surgeries.

  • Evidence of significant heart overload or potential for massive pulmonary embolism.

Methods of IVC Filter Placement

  • Transcatheter Placement: Minimally invasive method using a neck or groin catheter to "plug" the vein with a filter.

  • Retrievable (Optional) Filters: Devices designed to be removed once the immediate risk of blood clots has passed.

  • Permanent Filters: Intended for patients with a lifelong risk of clots who can never safely take blood thinners.

  • Below-Renal Deployment: Placing the filter just below the kidney veins to avoid interfering with renal blood flow.

  • Device Occlusion: Deployment of "soft" low-profile metal devices to block clots without major surgery.

How IVC Filter Placement Is Performed

  • Catheter Access: A thin tube is guided through the internal jugular vein (neck) or femoral vein (groin) to the heart.

  • Imaging Guidance: Real-time X-ray (fluoroscopy) and contrast dye ensure the filter is perfectly positioned before finishing.

  • Filter Deployment: A collapsed occluder-like device is expanded across the vein to trap clots permanently or temporarily.

  • Release: Once positioned, the filter attaches to the vein walls using small hooks or radial pressure.

  • Monitoring: Doctors verify the filter is securely anchored below the renal veins before removing the delivery system.

Pre-Procedure Preparation

  • Fasting for 8-12 hours before the catheterization procedure.

  • Blood tests, ECG, and chest X-rays to assess overall health and kidney function.

  • Adjusting current medications as directed by the cardiology or radiology team.

  • Discussing any allergies, particularly to the metal in the device or contrast dye.

  • Arranging for post-operative care and a support person for the recovery period.

Tests Before IVC Filter Placement

  • Duplex Ultrasound to determine the size and location of existing blood clots.

  • Cardiac Catheterization to measure lung pressures and map the venous anatomy.

  • Cardiac MRI or CT scan for detailed 3D mapping of the inferior vena cava.

  • ECG to monitor the heart's electrical rhythm and check for strain.

  • Pulse oximetry to evaluate oxygen saturation levels in the blood.

Life After IVC Filter Placement

  • Short hospital stay, usually 1-2 days for device closure, often as an outpatient procedure.

  • Avoid strenuous activity and heavy lifting for a few days post-procedure.

  • Most patients return to normal daily activities within 24 to 48 hours.

  • Regular follow-up visits with a cardiologist to monitor the repair site and discuss retrieval.

  • Immediate protection against life-threatening pulmonary embolism and improved peace of mind.

Benefits of IVC Filter Placement

  • Restores safety by trapping dangerous clots before they reach the heart and lungs.

  • Protects the lungs from permanent damage caused by massive pulmonary emboli.

  • Provides a vital alternative for patients who cannot tolerate traditional blood-thinning medications.

  • Reduces the risk of sudden cardiac events and enlargement of the heart's chambers.

  • Provides a long-term or temporary solution with very high technical success rates.

TMVI/TMVR (Transcatheter Mitral Valve Replacement)

TMVI (Transcatheter Mitral Valve Implantation) and TMVR (Transcatheter Mitral Valve Replacement) are minimally invasive procedures used to replace a diseased mitral valve without the need for traditional open-heart surgery. These procedures are typically reserved for high-risk patients with severe Mitral Regurgitation (a leaking valve) or Mitral Stenosis (a narrowed valve) who may not tolerate a standard sternotomy.

When You Should Consider TMVI / TMVR

  • Severe Mitral Regurgitation: When the mitral valve does not close tightly, causing blood to flow backward into the lungs.

  • Mitral Stenosis: When the valve leaflets become thick or stiff, restricting blood flow from the left atrium to the left ventricle.

  • High Surgical Risk: For patients whose age or underlying health conditions (like lung or kidney disease) make traditional surgery too dangerous.

  • Failed Previous Valve: A "Valve-in-Valve" procedure for patients whose previously implanted surgical biological valve has begun to wear out.

  • Functional Mitral Disease: When heart failure has caused the heart to enlarge, pulling the mitral valve leaflets apart and causing a massive leak.

How TMVI / TMVR Is Performed

  • 3D Guidance: The surgical team uses a combination of real-time X-ray (fluoroscopy) and Transesophageal Echocardiography (TEE) to see the heart in three dimensions.

  • Access Routes: * Transseptal: The most common approach; a catheter is guided from the groin vein, through the wall of the heart (septum), and into the mitral position.
    Transapical: A small incision is made between the ribs to access the valve directly through the tip (apex) of the heart.

  • Valve Positioning: A collapsed artificial valve—constructed from biological tissue on a metal frame—is steered precisely into the center of the diseased native valve.

  • Deployment: The new valve is expanded, either by a balloon or a self-expanding mechanism. This pushes the old valve leaflets aside and anchors the new valve firmly in place.

  • Leak Check: Before finalizing the placement, the team checks for "paravalvular leaks" to ensure blood cannot escape around the edges of the new device.

Pre-Procedure Preparation

  • Cardiac CT Scan: A specialized high-resolution scan is mandatory to measure the "neo-LVOT"—ensuring the new valve frame won't block the heart's main exit path.

  • Transesophageal Echocardiogram (TEE): An ultrasound probe passed down the esophagus to provide the clearest possible images of the valve structure.

  • Heart Team Evaluation: A collaborative review by interventional cardiologists and cardiac surgeons to confirm this is the safest treatment path.

  • Dental Clearance: To minimize the risk of bacteria entering the bloodstream and infecting the new heart valve (endocarditis).

  • Fasting (NPO): No food or drink for at least 8 hours prior to the procedure, as it is performed under general anesthesia.

Tests Before TMVI / TMVR

  • 3D Cardiac CT: Essential for sizing the valve and mapping the internal dimensions of the left ventricle.

  • Diagnostic Catheterization: To check for blockages in the coronary arteries that might need treatment at the same time.

  • Blood Panels: To assess kidney function and ensure the blood's clotting ability is within a safe range for the procedure.

  • Lung Function Tests: To evaluate the patient's overall respiratory health for anesthesia planning.

Life After TMVI / TMVR

  • Hospital Stay: Usually 2 to 5 days, which is significantly shorter than the recovery for open-heart surgery.

  • Medication Adherence: Patients must take anticoagulants (blood thinners) for at least 3 to 6 months—and often indefinitely—to prevent clots from forming on the metal frame.

  • Immediate Improvement: Most patients notice a dramatic reduction in shortness of breath and fatigue almost immediately after the procedure.

  • Activity Restrictions: Heavy lifting and strenuous exercise are restricted for 2 to 4 weeks while the access site in the groin or chest heals.

  • Long-Term Follow-up: Regular echocardiograms are required (at 30 days, 6 months, and annually) to ensure the valve remains functional and secure.

Benefits of TMVI / TMVR

  • No Sternotomy: Avoids the need to open the chest bone, resulting in significantly less pain and a lower risk of wound infection.

  • Faster Mobilization: Patients are usually up and walking within a day of the procedure.

  • Effective Symptom Relief: Successfully stops the "back-pressure" on the lungs, allowing for better breathing and increased energy levels.

  • High Success Rate: Modern devices are highly effective at reducing or eliminating mitral leaks, even in the most complex heart geometries.

Carotid Artery Stenting (stroke prevention)

Carotid Artery Stenting (CAS) is a minimally invasive procedure used to open a narrowed carotid artery—the primary blood vessel in the neck that supplies the brain. By using a metal mesh stent to widen the artery, this procedure restores healthy blood flow and significantly reduces the risk of a future stroke. It is often a preferred alternative to open surgery (endarterectomy) for patients with complex anatomy or high-risk medical conditions.

When You Should Consider Carotid Artery Stenting

  • Significant Stenosis: Blockage of more than 70% in patients without symptoms, or more than 50% in those with a history of mini-strokes (TIAs).

  • High Surgical Risk: Patients with severe heart or lung disease who may not tolerate the stress of traditional open neck surgery.

  • Difficult Anatomy: When the blockage is located too high or too low in the neck for a surgeon to reach safely with an incision.

  • Restenosis: For patients whose artery has narrowed again after a previous carotid endarterectomy.

  • Radiation-Induced Stenosis: When the narrowing is a result of prior radiation therapy to the neck, making the tissue difficult to operate on traditionally.

How Carotid Artery Stenting Is Performed

  • Vascular Access: A small puncture is made in the femoral artery (groin) or radial artery (wrist) to serve as the entry point for the catheters.

  • Embolic Protection Device (EPD): A tiny filter, shaped like an umbrella, is positioned past the blockage. This "safety net" catches any loose plaque fragments before they can travel to the brain.

  • Predilation (Angioplasty): A small balloon is guided to the site of the narrowing and inflated to prepare the area for the stent.

  • Stent Deployment: A self-expanding metal mesh tube is released across the blockage. It acts as a permanent scaffold, pressing the plaque against the artery walls to keep the vessel open.

  • Post-Dilation: The surgeon may inflate a balloon inside the newly placed stent to ensure it is fully expanded and snug against the artery wall.

  • Filter Removal: Once the stent is secure, the protection filter—along with any captured debris—is folded and removed from the body.

Pre-Procedure Preparation

  • Diagnostic Imaging: Confirmation of the blockage via Carotid Ultrasound, CT Angiogram (CTA), or MR Angiogram (MRA).

  • Dual Antiplatelet Therapy (DAPT): Taking Aspirin and Clopidogrel (Plavix) for 3–5 days prior is mandatory to prevent blood clots from forming on the new stent.

  • Fasting (NPO): No food or drink for 8–12 hours before the procedure.

  • Neurological Baseline: A thorough exam of speech, vision, and motor skills is conducted so the team can monitor for changes during the surgery.

Tests Before Carotid Artery Stenting

  • Carotid Duplex Ultrasound: A non-invasive test using sound waves to measure the speed of blood flow and the degree of narrowing.

  • CT Angiogram (CTA): Provides a detailed 3D view of the calcium and plaque buildup to help the surgeon select the correct stent size.

  • Electrocardiogram (EKG): To ensure the heart is stable, as manipulating the carotid artery can sometimes affect heart rate.

  • Blood Panels: Routine screens to check kidney function (for processing contrast dye) and blood clotting levels.

Life After Carotid Artery Stenting

  • Hospital Stay: Typically 24 hours for close monitoring of blood pressure and neurological status.

  • Immediate Recovery: Patients must remain on bed rest for about 6 hours post-op to ensure the access site in the groin or wrist heals without bleeding.

  • Medication Adherence: This is the most critical step; missing blood thinners in the first 3 to 6 months can cause the stent to clog (stent thrombosis). Lifetime aspirin is usually required.

  • Activity: Heavy lifting and strenuous exercise are restricted for 1 week, though most patients return to normal light activities within a few days.

  • Follow-up Schedule: Ultrasound scans are mandatory at 1 month, 6 months, and then annually to ensure the artery remains open.

Benefits of Carotid Artery Stenting

  • Minimally Invasive: Avoids a large incision in the neck, reducing the risk of local nerve damage and scarring.

  • Faster Recovery: Most patients return to their normal routine much sooner than those undergoing open surgery.

  • Real-time Monitoring: Since it is usually performed under local anesthesia, the medical team can communicate with the patient throughout the procedure to ensure brain function remains perfect.

  • Effective Stroke Prevention: Long-term studies show that CAS is highly effective at keeping the carotid artery open and preventing future strokes.

VSD Device Closure
VSD Device Closure

VSD (Ventricular Septal Defect) device closure is a minimally invasive, non-surgical procedure used to seal a "hole in the heart" between the two lower chambers (ventricles). Unlike traditional open-heart surgery, this procedure is performed entirely through a catheter, resulting in no chest scars and a significantly faster recovery. This advanced technique allows for the permanent repair of the heart's internal wall without the need for a heart-lung bypass machine.

When You Should Consider VSD Device Closure

  • Muscular VSDs: This is the primary treatment for holes located in the muscular portion of the ventricular septum.

  • Symptom Management: For children or adults experiencing poor weight gain, frequent lung infections, or persistent shortness of breath.

  • Heart Protection: To prevent the left side of the heart from overworking, which can lead to an enlarged heart (cardiomegaly).

  • Pulmonary Hypertension Prevention: To reduce the risk of developing dangerously high blood pressure in the lung arteries.

  • Heart Failure Prevention: Correcting the defect before it leads to more serious long-term cardiac complications.

How It Is Performed

  • Access: A small incision is made in the groin to access the femoral vein or artery. No large incisions are made on the chest.

  • Anesthesia: The procedure is performed in a specialized Cardiac Catheterization Lab (Cath Lab) under general anesthesia or heavy sedation, typically taking 1 to 2 hours.

  • Guidance: A thin, flexible tube (catheter) is threaded through the blood vessels into the heart, guided by real-time X-ray (Fluoroscopy) and detailed ultrasound (Transesophageal Echo).

  • Measurement: The specialist measures the exact size and location of the hole to select a custom-sized Nitinol mesh device.

  • Deployment: A folded, umbrella-like device is pushed through the catheter. Once it reaches the hole, it is carefully unfolded to "sandwich" the defect from both sides.

  • Verification: Once the device is securely in place and the hole is confirmed to be sealed, the catheter is removed and the small puncture in the groin is closed.

Pre-Procedure Preparation

  • Echocardiogram: A detailed ultrasound of the heart to map the VSD's size and its proximity to the heart's valves.

  • Transesophageal Echo (TEE): A specialized ultrasound performed through the esophagus for high-resolution images of the defect.

  • Dental Clearance: Ensuring there are no active dental infections, which could increase the risk of heart infection (endocarditis) after the device is placed.

  • Fasting: Following "nothing by mouth" instructions for 8 hours prior to the procedure.

  • Medication Audit: You may be asked to adjust or stop certain medications, particularly blood thinners, a few days before the procedure.

Tests Before VSD Device Closure

  • Chest X-ray: To evaluate the current size of the heart and check for any fluid in the lungs.

  • Electrocardiogram (ECG): A baseline check of the heart's electrical system to identify any pre-existing arrhythmias.

  • Blood Panels: A routine check of your blood count, electrolytes, and kidney function.

  • Cardiac MRI or CT: Occasionally used to provide a 3D model of the heart for complex or multiple VSDs.

Life After VSD Device Closure

  • Hospital Stay: Most patients stay for one night for observation and are discharged the next day.

  • Medication: You will typically take blood-thinning medication (usually Aspirin) for 6 months to prevent clots from forming on the device while the heart lining grows over it.

  • Activity Restrictions: Most patients can return to school or light work within 3 to 5 days. You should avoid strenuous exercise and heavy lifting for at least 2 weeks.

  • Dental Care Precautions: For the first 6 months post-procedure, you must take preventive antibiotics before any dental work to prevent heart infections.

  • Long-term Integration: Over 3–6 months, the heart's natural lining (endocardium) grows completely over the device, making it a permanent and seamless part of your heart.

Why Specialized Treatment Is Highly Effective

  • Scar-Free Recovery: By avoiding a sternotomy (opening the chest), patients experience much less pain and have no permanent surgical scars.

  • Rapid Return to Normalcy: Recovery is measured in days rather than the months required for open-heart surgery.

  • High Success Rates: Device closure is a highly reliable method for sealing muscular VSDs with a very low risk of the hole reopening.

  • Protects Electrical System: Advanced imaging ensures the device is positioned to minimize pressure on the heart's natural "wiring."

  • Permanent Solution: The Nitinol mesh is designed to last a lifetime, providing a durable repair that grows with the patient.

Realted Specialist

Dr C Raghu
Dr C Raghu
Cardiologist, Interventional Cardiologist
Yashoda Hospital, Somajiguda
28+years experience
View Profile
Dr A B Gopalamurugan
Electrophysiologist, Interventional Cardiologist
MGM Healthcare, Chennai
20+years experience
View Profile
Dr Balbir Singh
Dr Balbir Singh
Electrophysiologist, Interventional Cardiologist
Max Super Specialty Hospital, Saket
35+years experience
View Profile
Dr D K Jhamb
Dr D K Jhamb
Electrophysiologist, Interventional Cardiologist
Artemis Hospital, Gurugram
35+years experience
View Profile
Dr Maulik Parekh
Dr Maulik Parekh
Electrophysiologist, Interventional Cardiologist
Sir H. N. Reliance Foundation Hospital and Research Centre
16+years experience
View Profile
Dr Neeraj Bhalla
Dr Neeraj Bhalla
Electrophysiologist, Interventional Cardiologist
BLK-Max Super Specialty Hospital, Delhi
26+years experience
View Profile
Dr Subhash Chandra
Dr Subhash Chandra
Electrophysiologist, Interventional Cardiologist
BLK-Max Super Specialty Hospital, Delhi
39+years experience
View Profile
Dr T S Kler
Dr T S Kler
Electrophysiologist, Interventional Cardiologist
Max Super Specialty Hospital, Gurugram
37+years experience
View Profile
Dr Viveka Kumar
Dr Viveka Kumar
Electrophysiologist, Interventional Cardiologist
Max Super Specialty Hospital, Saket
27+years experience
View Profile
Dr Vishal Khante
Dr Vishal Khante
Cardiothoracic & Vascular Surgeon (CTVS), Heart Transplant Surgeon, Interventional Cardiologist
Yashoda Hospital, Secunderabad, Hyderabad
11+years experience
View Profile
Dr Ajit Menon
Dr Ajit Menon
Interventional Cardiologist
Sir H. N. Reliance Foundation Hospital and Research Centre
30+years experience
View Profile
Dr Aparna Jaswal
Dr Aparna Jaswal
Electrophysiologist
Fortis Escorts Heart Institute, New Delhi
19+years experience
View Profile
Dr Ashok Seth
Dr Ashok Seth
Interventional Cardiologist
Fortis Escorts Heart Institute, New Delhi
40+years experience
View Profile
Dr Ashwin B Mehta
Dr Ashwin B Mehta
Interventional Cardiologist
Sir H. N. Reliance Foundation Hospital and Research Centre
50+years experience
View Profile
Dr Atul Mathur
Dr Atul Mathur
Interventional Cardiologist
Fortis Escorts Heart Institute, New Delhi
34+years experience
View Profile
Dr Chinnababu Sunkavalli
Surgical Oncologist
Yashoda Hospital, Hitec City
23+years experience
View Profile
Dr Koushik Amancharla
Urologist
Yashoda Hospital, Somajiguda
14+years experience
View Profile
Dr Ravi Suman Reddy
Dr Ravi Suman Reddy
Spine Surgeon, Neurosurgeon
Yashoda Hospital, Somajiguda
21+years experience
View Profile
Dr Sarada Vani N
Dr Sarada Vani N
Gynecologist, Obstetrician
Yashoda Hospital, Somajiguda
23+years experience
View Profile
Dr Sunil Dachepalli
Dr Sunil Dachepalli
Orthopedic Surgeon
Yashoda Hospital, Somajiguda
28+years experience
View Profile

May we help you?

Enter digits only (6-15 digits). We'll add your country code.