+91 83682 47758
info@medivisorhealth.com
Medivisor India Treatment Logo
  • Home
    • About Us
    • Our Services
    • Our Team
    • Our Safety Measures
    • Loading treatments...
    • Loading hospitals...
    • Loading doctors...
    • Treatment Cost
    • Treatment Process
    • Visa Process
    • Travel Guide
    • FAQs
    • Why Medivisor
    • Success Stories
    • Patient Activities
    • Social Activities
    • News Coverage
    • Blog
  • Become a Partner

Medivisor India Treatment is a trusted New Delhi-based medical travel company assisting international patients with advanced, affordable, and seamless treatment in India.

  • Medivisor House 359, Sector 1, Vaishali, Ghaziabad, (Delhi/NCR) India
  • +91 8368 247 758
  • info@medivisorhealth.com

About Us

  • About Us
  • Our Services
  • Our Team
  • Our Medical Advisors
  • Our Safety Measures
  • Join Our Network
  • Contact Us

India Treatment

  • Hospitals
  • Treatments
  • Treatment Cost
  • Treatment Process
  • Visa Process
  • Travel Guide
  • FAQs
  • Why Medivisor

Gallery

  • Patient Testimonials
  • Patient Activities
  • News Coverage
  • Blog

Get in Touch

© 2026 Medivisor India Treatment. All rights reserved.

Lilavati Hospital & Research Centre

Lilavati Hospital & Research Centre

A-791, Bandra Reclamation, Bandra (W), Mumbai - 400050. India.

  1. Home
  2. Hospitals
  3. Lilavati Hospital & Research Centre

Quick Overview

1997

Established

Multi

Speciality

325

Beds

300

Doctors

Lilavati Hospital & Research Centre - Top Multispeciality Hospital in Mumbai, India

lilavati hospital & research centre is a premier multi-specialty tertiary care institution located in bandra, mumbai. founded by the lilavati kirtilal mehta medical trust, it has evolved from a modest facility into a globally recognized center of medical excellence. combining state-of-the-art technology with a core philosophy of seva (service), the hospital is guided by the principle of universal health and well-being, serving as a critical healthcare hub for both national and international patients.

Why Patients trust Lilavati Hospital

patients choose lilavati hospital for its unique "human touch" and its reputation for hosting some of the most distinguished medical consultants in india. situated strategically near the international airport, the hospital is a preferred destination for complex medical cases requiring quaternary-level intervention. its long-standing commitment to evidence-based medicine, coupled with a transparent and ethical approach to patient care, has made it one of the most trusted names in indian healthcare.

Centres of Clinical Excellence (Specialities)

The hospital operates specialized departments that serve as benchmarks for clinical outcomes across the country:

  • cardiac sciences: a leading center for interventional cardiology and cardiothoracic surgery, managing one of the highest volumes of cardiac procedures in the city.

  • neurosciences: specialized in intricate neuro-interventions, functional neurosurgery including deep brain stimulation (dbs), and comprehensive stroke management.

  • onco care: provides integrated cancer treatment involving robotic-assisted surgeries, advanced chemotherapy, and precision radiotherapy.

  • orthopaedics: renowned for high-precision robotic joint replacements, advanced sports medicine, and complex musculoskeletal trauma care.

  • nephrology and urology: a pioneer in renal transplantation and advanced dialysis services, supported by sophisticated endourology facilities.

  • fertility (ivf): recognized as a premier center for reproductive medicine, offering advanced assisted reproductive technologies with high success rates.

world-class facilities and technology

lilavati hospital integrates cutting-edge medical infrastructure designed to support high-risk surgeries and precision diagnostics:

  • surgical suites: features modular operation theatres equipped with the latest surgical platforms for minimally invasive and robotic procedures.

  • advanced diagnostics: equipped with high-resolution mri, pet-ct scanners, and nabl-standard pathology laboratories for accurate disease mapping.

  • digital health: utilizes e-icu technology for advanced remote monitoring of critically ill patients by expert intensivists.

  • intensive care network: houses one of the largest and most sophisticated icu setups in the region, specialized for medical, surgical, and neonatal care.

  • research and innovation: recognized as a scientific & industrial research organization (siro) dedicated to clinical trials and evidence-based studies.

24/7 critical care and emergency services

the hospital maintains a robust emergency response framework designed to handle life-threatening situations with immediate clinical intervention:

  • emergency and trauma centre: a round-the-clock high-response unit prepared for road trauma, cardiac crises, and neurological emergencies.

  • rapid response teams: specialized medical teams available 24/7 to provide immediate care during the critical golden hour.

  • ambulance services: a fleet of advanced life support (als) units equipped with mobile monitoring systems for safe patient transit.

  • 24/7 support services: fully operational blood bank, pharmacy, and diagnostic radiology services available at all times for emergency needs.

Lilavati Hospital at a Glance

lilavati hospital represents the intersection of philanthropic vision and futuristic medical science:

  • multi-specialty expertise serving as a primary referral hub for complex medical value travel.

  • academic excellence as an accredited teaching hospital offering postgraduate medical studies and dnb programs.

  • dedicated sewa department focused on rural upliftment, free health camps, and subsidized care for the underprivileged.

  • global recognition for clinical success in high-end surgeries and advanced reproductive medicine.
May we help you?

Enter digits only (6-15 digits). We'll add your country code.

Lilavati Hospital & Research Centre

Frozen Embryo Transfer (FET)

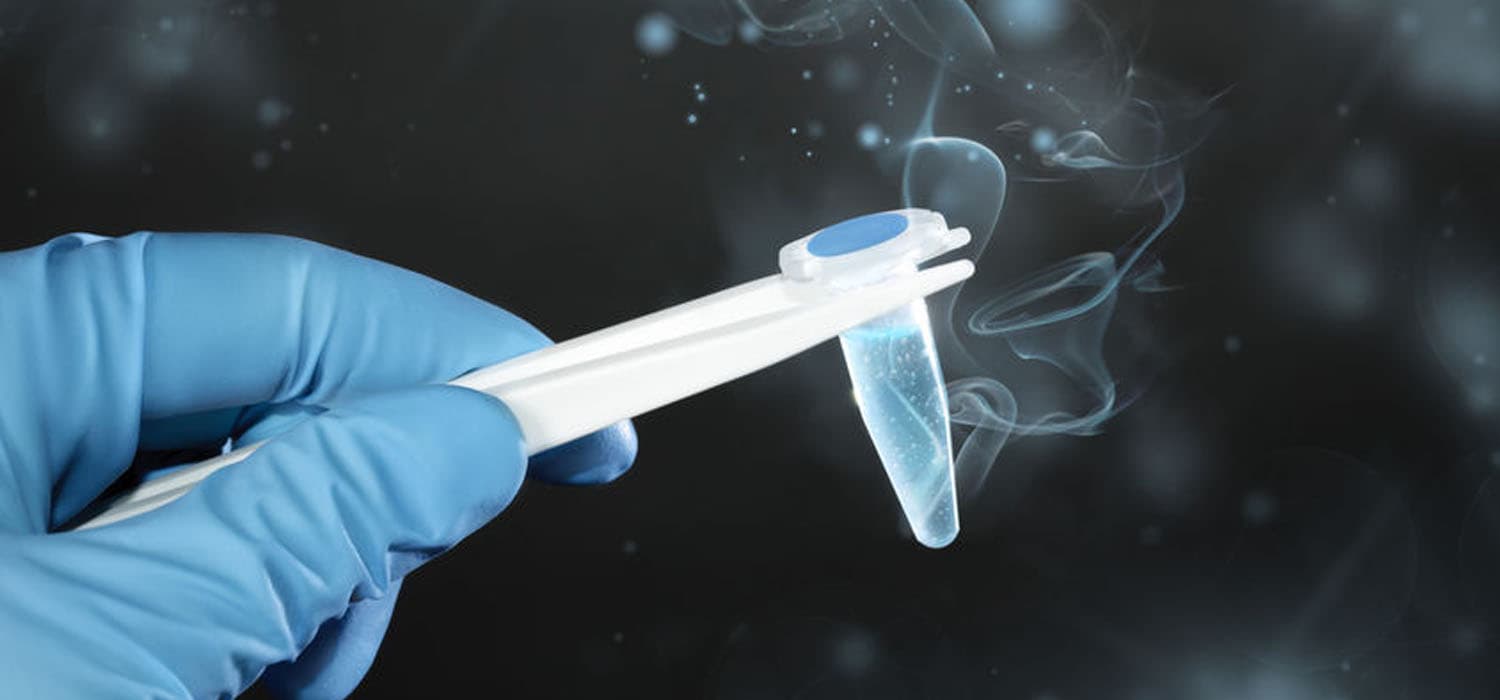
Frozen Embryo Transfer (FET) is a cornerstone of modern fertility treatment, consistently providing high success rates by utilizing cryopreserved embryos from previous cycles. This procedure allows for the transfer of a thawed embryo into a perfectly prepared uterine environment, bypassing the hormonal stress of immediate egg retrieval. Modern vitrification techniques and advanced endometrial monitoring ensure that embryos are preserved with nearly 100% viability, offering patients a safe and highly flexible path to pregnancy.

  • Presence of surplus high-quality embryos following a previous IVF or ICSI cycle.

  • Intention to undergo Preimplantation Genetic Testing (PGT-A) for chromosomal screening.

  • Risk of Ovarian Hyperstimulation Syndrome (OHSS) during a fresh stimulation cycle.

  • Desire to space out pregnancies and build a family over several years.

  • Recommended "freeze-all" strategy to allow the body to recover from hormonal medications.

  • Need for a donor embryo cycle to overcome age-related or genetic fertility challenges.

  • Recurrent Implantation Failure (RIF) where precise cycle timing is critical.

  • Thin endometrial lining requiring specialized medicated preparation protocols.

  • Hormone imbalances that make a fresh transfer medically inadvisable.

  • Polycystic Ovary Syndrome (PCOS), which increases the risk of complications during fresh cycles.

  • Advanced maternal age requiring the transfer of genetically screened euploid embryos.

  • The uterine lining is prepared through either a natural monitored cycle or a medicated hormonal protocol.

  • Regular ultrasound scans and blood tests track endometrial thickness to ensure it reaches the ideal 7mm–12mm range.

  • On the day of transfer, the selected embryo is thawed using high-precision vitrification technology.

  • The embryo’s viability and cell integrity are assessed by an embryologist post-thaw.

  • A thin, flexible catheter is used to gently place the embryo into the uterus under ultrasound guidance.

  • Progesterone support is administered following the procedure to maintain a receptive environment for implantation.

  • High-Survival VitrificationAn ultra-rapid freezing method that prevents ice crystal formation, ensuring maximum embryo integrity.

  • AI-Enhanced Implantation TimingSoftware that analyzes uterine data to identify the precise "window of implantation" for each patient.

  • Non-Invasive Genetic ScreeningAnalyzing chromosomal health without a biopsy, reducing the physical stress on the frozen embryo.

  • Endometrial Receptivity Analysis (ERA)A genetic test of the lining to customize the exact hour of the transfer for patients with prior failures.

  • Time-Lapse Thaw MonitoringConstant observation of the embryo during the thawing phase to ensure optimal metabolic recovery.

  • Platelet-Rich Plasma (PRP) TherapyAn advanced technique used to "prime" and thicken the uterine lining in patients with a history of thin endometrium.

  • Baseline pelvic scans to evaluate the current status of the uterus and ovaries.

  • Consultation to choose between a "Natural Cycle" or a "Medicated Cycle" based on your history.

  • Nutritional optimization, including a Mediterranean-style diet, to support uterine blood flow.

  • Screening for infectious diseases to ensure all safety and regulatory protocols are met.

  • Review of the "embryo freezing certificate" and signing of consent forms for thawing.

  • Transvaginal Ultrasound (TVS) to monitor the growth and texture of the endometrial lining.

  • Blood work to measure Estrogen, Progesterone, and TSH (Thyroid) levels.

  • Saline Infusion Sonogram (SIS) or Hysteroscopy to confirm the uterine cavity is clear.

  • Mock Transfer ("Trial Run") to map the cervical path and ensure a smooth procedure.

  • Repeat infectious disease screening as required by modern ART safety standards.

  • Boasts success rates that often surpass fresh transfers due to a more receptive, natural uterine state.

  • Virtually eliminates the risk of OHSS, making it the safest option for high-responder patients.

  • Allows for the use of PGT-A, ensuring only chromosomally normal (euploid) embryos are transferred.

  • Reduces the physiological and emotional stress of repeating egg retrieval for subsequent pregnancies.

  • Children born from FET cycles often show healthier birth weights and lower rates of preterm birth.

  • The transfer is a 10–15 minute outpatient procedure that requires no anesthesia or downtime.

  • Patients can usually return to light daily activities within 24 hours of the transfer.

  • Hormonal support (Progesterone and Estrogen) is continued until the first pregnancy milestone.

  • A blood pregnancy test (Beta-hCG) is performed 10–14 days after the transfer.

  • If successful, an early "heartbeat ultrasound" is scheduled around the 6-week mark.

  • Seamless transition to routine prenatal care for a healthy, full-term pregnancy.

  • Long-term storage options remain available for any additional cryopreserved embryos.

  • Significant reduction in the cost and physical burden of future family-building steps.

  • Ongoing gynecological monitoring to ensure continued reproductive and uterine health.

  • Confidence in having utilized the most advanced, personalized technology in modern fertility care.

Gamete Intrafallopian Transfer (GIFT)

Gamete Intrafallopian Transfer (GIFT) is a specialized assisted reproductive technology (ART) where fertilization occurs naturally inside the woman's body rather than in a laboratory. While modern IVF is more common, GIFT remains a unique option for patients who prefer in-vivo fertilization. This procedure mimics the natural conception process by placing a mixture of eggs and sperm directly into the fallopian tubes, allowing the body’s natural environment to facilitate the earliest stages of life.

  • Ethical or religious preferences that favor fertilization occurring inside the human body.

  • Presence of at least one healthy, functional, and unobstructed fallopian tube.

  • History of unexplained infertility where multiple cycles of IUI have been unsuccessful.

  • Desire to avoid the laboratory culture of embryos or the freezing of surplus embryos.

  • Cases where previous IVF attempts failed specifically during the laboratory fertilization stage.

  • Couples seeking a treatment that aligns with specific personal or philosophical beliefs regarding conception.

  • Cervical factor infertility where sperm cannot naturally pass into the uterus.

  • Minimal or mild endometriosis that has not compromised the fallopian tube structure.

  • Specific cases of mild male factor infertility where sperm quality is adequate for natural fertilization.

  • Healthy ovarian reserve requiring carefully monitored stimulation protocols.

  • Patients who are comfortable with a laparoscopic surgical approach for the transfer phase.

  • Ovarian stimulation is used to encourage the development of multiple mature follicles.

  • Egg maturity is monitored closely via ultrasound and hormonal blood panels.

  • Mature eggs are retrieved through a standard ultrasound-guided aspiration procedure.

  • A sperm sample is simultaneously prepared to isolate the most healthy and motile cells.

  • The eggs and sperm (gametes) are combined within a specialized transfer catheter.

  • Under general anesthesia, a laparoscopic procedure is performed to inject the gametes directly into the fallopian tube.

  • Fertilization occurs naturally within the tube, and the resulting embryo travels to the uterus for implantation.

  • Advanced Laparoscopic PrecisionThe use of high-definition 4K imaging during laparoscopy ensures the most accurate placement of gametes within the fallopian tube.

  • Micro-Volume Transfer CathetersSpecially designed soft-tip catheters that minimize tubal irritation and maximize the stability of the gamete mixture.

  • AI-Optimized StimulationAdvanced algorithms that predict the ideal egg retrieval window to ensure gametes are at peak viability for natural fertilization.

  • High-Gradient Sperm ProcessingRefined laboratory techniques that ensure only the highest-quality sperm are mixed with the eggs for transfer.

  • Minimally Invasive EntryModern surgical ports and techniques that reduce recovery time and post-operative discomfort following the laparoscopic phase.

  • Real-Time Hormonal MonitoringContinuous tracking of the luteal environment to ensure the uterus is perfectly primed for the naturally descending embryo.

  • Diagnostic Laparoscopy or HSG to confirm that the fallopian tubes are healthy and functional.

  • Coordination with an anesthesiology team to prepare for the surgical component of the procedure.

  • Lifestyle and nutritional optimization to support a healthy fallopian tube environment.

  • Discussion of the ethical and clinical differences between GIFT and standard IVF.

  • Scheduling of the procedure to ensure the surgical theater and embryology lab are perfectly synchronized.

  • Hysterosalpingogram (HSG) to ensure there are no blockages or scarring in the fallopian tubes.

  • Comprehensive ovarian reserve testing, including AMH and follicle counts.

  • Standard infectious disease screening for both partners as required by ART regulations.

  • Semen analysis to ensure the sperm sample is compatible with a natural fertilization process.

  • Cardiac and general health clearance for laparoscopic surgery under general anesthesia.

  • Maintains the biological integrity of the fertilization process by keeping it within the body.

  • Provides a successful alternative for couples who have failed traditional laboratory-based ART.

  • Utilizes the fallopian tube’s natural secretions, which may support embryo development better in certain patients.

  • Offers high success rates for patients with unexplained infertility and healthy tubal anatomy.

  • Bridges the gap between natural conception and advanced science for those with specific ethical requirements.

  • Patients typically remain in a recovery suite for several hours following the laparoscopic surgery.

  • Minor surgical discomfort or bloating may occur but usually subsides within 24 to 48 hours.

  • Progesterone support is provided to ensure the uterine lining remains receptive.

  • Pregnancy status is confirmed via a blood-based Beta-hCG test 14 days after the transfer.

  • If pregnancy occurs, early ultrasounds track the embryo's arrival and development in the uterus.

  • Transition to routine prenatal care following the confirmation of a healthy intrauterine pregnancy.

  • The psychological satisfaction of having conceived through a process that aligns with personal beliefs.

  • Ongoing monitoring of tubal health to maintain future reproductive potential.

  • Access to specialized fertility counseling to discuss the success and journey of the GIFT process.

  • Continued gynecological wellness checks to support long-term maternal health.

IVF with Donor Eggs
IVF with Donor Eggs

IVF with Donor Eggs is a premier fertility treatment for individuals facing age-related fertility decline, premature ovarian failure, or poor egg quality. This procedure utilizes mature eggs from a healthy, thoroughly screened donor, which are fertilized in a state-of-the-art laboratory before the resulting embryo is transferred to the recipient. By integrating advanced donor matching and non-invasive genetic screening, modern protocols ensure the highest possible success rates for intended parents.

  • Advanced maternal age where natural egg quality and quantity have declined.

  • Diagnosis of Premature Ovarian Insufficiency (POI) or early-onset menopause.

  • Repeated IVF failures using your own eggs due to poor embryo development.

  • History of multiple miscarriages linked to chromosomal abnormalities in the eggs.

  • Known genetic conditions or hereditary disorders you wish to avoid passing to offspring.

  • Diminished ovarian reserve where hormonal stimulation fails to produce viable eggs.

  • Severe Endometriosis affecting the quality of the primary ovarian environment.

  • Turner Syndrome or other chromosomal variations requiring donor gametes.

  • Previous cancer treatments (chemotherapy or radiation) that have impacted ovarian function.

  • Recurrent Implantation Failure (RIF) requiring specialized uterine lining synchronization.

  • Surgical removal of ovaries due to medical necessity or emergency.

[Image Placeholder: Healthy blastocyst-stage embryo developed from a donor egg]

  • Advanced digital platforms are used to match recipients with anonymous, altruistic donors.

  • Menstrual cycles are synchronized using hormonal monitoring to ensure optimal uterine receptivity.

  • Ovarian stimulation of the donor is monitored via high-precision automated follicle measurement.

  • Mature eggs are retrieved from the donor using a minimally invasive, ultrasound-guided procedure.

  • Fertilization is achieved using ICSI, where a single selected sperm is injected into each donor egg.

  • Resulting embryos are cultured in time-lapse incubators to monitor growth 24/7.

  • One healthy embryo is transferred into the recipient’s uterus using a high-precision catheter.

  • Advanced Donor MatchingAlgorithms that analyze medical, genetic, and phenotypic data to find the most compatible donor.

  • Vitrified Egg BankingAdvanced "flash-freezing" that allows for flexible timelines and immediate access to high-quality eggs.

  • Non-Invasive PGT-A (niPGT)Screening embryos for chromosomal health by analyzing culture fluid instead of performing a biopsy.

  • Real-Time SynchronizationPrecision hormone sensors that track the recipient's cycle for perfectly timed transfers.

  • Mitochondrial SupportEmerging techniques aimed at supporting recipient eggs using donor cellular components.

  • AI-Enhanced Embryo RankingDeep-learning models that predict the "live birth potential" of embryos with high clinical accuracy.

[Image Placeholder: High-tech IVF laboratory featuring integrated workstations and incubators]

  • Review of the legal framework under current ART Acts to ensure all altruistic guidelines are met.

  • Comprehensive psychological counseling to prepare for the emotional journey of donor conception.

  • Uterine preparation including a healthy diet and vitamins to support the endometrium.

  • Synchronization of hormonal protocols using estradiol and progesterone medications.

  • Financial planning and coordination for all donor-related medical steps.

  • Saline Infusion Sonogram (SIS) or Hysteroscopy to confirm a clear uterine cavity.

  • Endometrial Receptivity Analysis (ERA) to identify the optimal "window of implantation."

  • Standardized viral screening (HIV, Hepatitis, Syphilis) for both the donor and the recipient.

  • Detailed semen analysis for the male partner, including a DNA Fragmentation Index.

  • Mock embryo transfer to ensure a smooth and painless procedure on the actual day.

  • Delivers exceptional success rates, often reaching 60% to 80% per embryo transfer.

  • Utilizes younger, high-quality eggs which significantly reduces the risk of miscarriage.

  • Modern screening tools reduce "trial and error" by selecting the healthiest embryos.

  • Provides a high cumulative success rate within three cycles for most recipients.

  • Allows women in their late 40s and early 50s to experience a healthy pregnancy.

  • Recipients generally require only 24 hours of light activity following the embryo transfer.

  • Continued hormonal support (progesterone) for several weeks to maintain the early pregnancy.

  • A "Two-Week Wait" (2WW) period monitored via clinical health portals to track progress.

  • Blood-based pregnancy test (Beta-hCG) performed 10–14 days after the transfer.

  • Early ultrasound at 6–7 weeks to confirm the presence of a healthy fetal heartbeat.

  • Transition to routine obstetric care with a specialized focus on healthy prenatal development.

  • Options for cryopreservation of remaining donor-egg embryos for future family building.

  • Long-term follow-up to ensure both the mother and child are meeting health milestones.

  • Access to support groups for families who have successfully conceived via egg donation.

  • Empowerment through the successful resolution of long-term infertility struggles.

IVF with Donor Sperm

IVF with Donor Sperm is a highly effective fertility solution for couples facing severe male factor infertility, single women, and same-sex couples. This procedure involves fertilizing a recipient's eggs with high-quality sperm from a registered ART bank, ensuring the highest standards of safety and genetic screening. Modern protocols emphasize the use of high-magnification selection and AI-assisted embryo grading to provide the most reliable path to a successful pregnancy.

  • Diagnosis of Azoospermia (complete absence of sperm) where surgical retrieval is not an option.

  • Severe male factor infertility, including low count, poor motility, or abnormal morphology.

  • History of repeated IVF failures attributed specifically to sperm-related issues.

  • Known hereditary genetic conditions in the male partner that could be passed to offspring.

  • Single women or same-sex couples wishing to start a family.

  • Cases where prior miscarriages were linked to high sperm DNA fragmentation.

  • Non-obstructive Azoospermia where the testes are not producing viable sperm.

  • Severe Rh-isoimmunization where a donor with a compatible blood type is required.

  • Recurrent Implantation Failure (RIF) necessitating a change in the genetic component of the embryo.

  • High-risk genetic disorders requiring specific donor screening and selection.

  • Advanced maternal age requiring the most potent sperm to maximize egg fertilization potential.

  • Donor samples are sourced from registered ART banks, having undergone rigorous infectious disease and genetic screening.

  • The female recipient undergoes ovarian stimulation to produce multiple mature eggs.

  • Mature eggs are retrieved via a minor, ultrasound-guided surgical procedure under light sedation.

  • Selected donor sperm is prepared and "washed" to isolate the most motile and healthy cells.

  • Fertilization is typically achieved via ICSI, where a single sperm is injected directly into each egg.

  • Resulting embryos are cultured in high-tech incubators with constant environmental monitoring.

  • The highest-quality embryo is selected and transferred into the recipient's uterus via a fine catheter.

  • Microfluidic Sperm SelectionA gentle filtering technique that mimics the natural cervical path to select sperm with the lowest DNA damage.

  • AI-Based Embryo GradingSophisticated algorithms that analyze developmental patterns to identify embryos with the highest implantation potential.

  • Non-Invasive PGT-AGenetic screening performed by analyzing the culture media rather than biopsying the embryo itself.

  • High-Magnification Selection (IMSI)Using ultra-high-power microscopes (up to 6000x) to detect subtle defects in the donor sperm head.

  • Time-Lapse IncubationContinuous video monitoring (EmbryoScope) allows embryologists to observe growth without disturbing the embryos.

  • Advanced VitrificationAn ultra-rapid freezing method that ensures nearly 100% survival rates for frozen-thawed sperm and embryos.

  • Completion of a comprehensive recipient health panel, including uterine and hormonal assessments.

  • Formal selection of a donor profile from a registered ART bank based on physical and genetic traits.

  • Legal counseling and signing of consent forms under current ART (Regulation) Acts.

  • Ovarian "priming" with supplements or medications to optimize the response to stimulation.

  • Discussion of the ethical and emotional aspects of donor conception with a fertility counselor.

  • Transvaginal Ultrasound (TVS) to assess ovarian reserve and uterine health.

  • Blood panels for Antral Follicle Count (AFC) and Anti-Müllerian Hormone (AMH).

  • Screening for infectious diseases (HIV, Hepatitis B/C, Syphilis) as per mandatory clinical guidelines.

  • Uterine cavity check (Hysteroscopy or saline ultrasound) to ensure a healthy environment for transfer.

  • Compatibility testing to ensure the donor’s blood type and genetic markers align with the recipient's needs.

  • Boasts high success rates (typically 60%–80%) due to the use of pre-screened, high-potency sperm.

  • Eliminates the uncertainty of male factor infertility by using proven-fertile donor samples.

  • Modern AI-selection tools significantly reduce the "time to pregnancy" by choosing the best embryo first.

  • Rigorous screening processes virtually eliminate the risk of transmitting infectious or common genetic diseases.

  • Provides a predictable and scientifically optimized environment for fertilization and early growth.

  • Recovery from egg retrieval is rapid, usually requiring only a few hours of clinical observation.

  • The embryo transfer is a painless, 15-minute procedure that does not require anesthesia.

  • Follow-up blood tests (Beta-hCG) are conducted 10–14 days post-transfer to confirm pregnancy.

  • Progesterone support is administered for several weeks to ensure a receptive uterine lining.

  • Initial pregnancy ultrasounds are scheduled around 6 weeks to monitor the fetal heartbeat.

  • Transition to standard prenatal care following a confirmed and stable pregnancy.

  • Legal peace of mind, as the donor has no parental rights or claims under modern ART laws.

  • Option to cryopreserve additional embryos for future siblings from the same donor.

  • Access to specialized support networks for parents of donor-conceived children.

  • Ongoing gynecological follow-ups to maintain long-term reproductive and uterine health.

IVF with Intracytoplasmic Sperm Injection (ICSI)

In Vitro Fertilization (IVF) with Intracytoplasmic Sperm Injection (ICSI) is an advanced laboratory procedure designed to maximize the chances of fertilization by directly assisting the sperm's entry into the egg. In 2026, ICSI has become the gold standard for treating severe male factor infertility and overcoming barriers like hardened egg shells. By utilizing AI-driven sperm selection and microfluidic technology, this procedure ensures that a single, high-quality sperm is precisely injected into a mature egg to facilitate successful embryo development.

  • Diagnosis of low sperm count (oligospermia) or poor sperm motility (asthenozoospermia).

  • Presence of high numbers of abnormally shaped sperm (teratozoospermia).

  • History of failed or poor fertilization in previous traditional IVF cycles.

  • Use of eggs that have been previously frozen and thawed for a "delayed" cycle.

  • Requirement for sperm collected through surgical retrieval (TESE/TESA).

  • Couples undergoing Preimplantation Genetic Testing (PGT) who require precise fertilization data.

  • Severe Male Factor Infertility involving blockages or non-obstructive azoospermia.

  • Advanced Maternal Age where the egg's outer shell (zona pellucida) may be thicker or harder.

  • Unexplained Infertility where traditional fertilization methods have been unsuccessful.

  • Genetic conditions that require the selection of sperm with the highest DNA integrity.

  • Cryopreserved egg cycles where the freezing process has altered the egg's membrane.

  • Ovarian stimulation is used to produce multiple mature eggs, which are then surgically retrieved.

  • Microfluidic selection devices (Zymot) are utilized to isolate sperm with the highest DNA integrity.

  • AI-driven imaging analyzes sperm morphology and movement to select the optimal candidate.

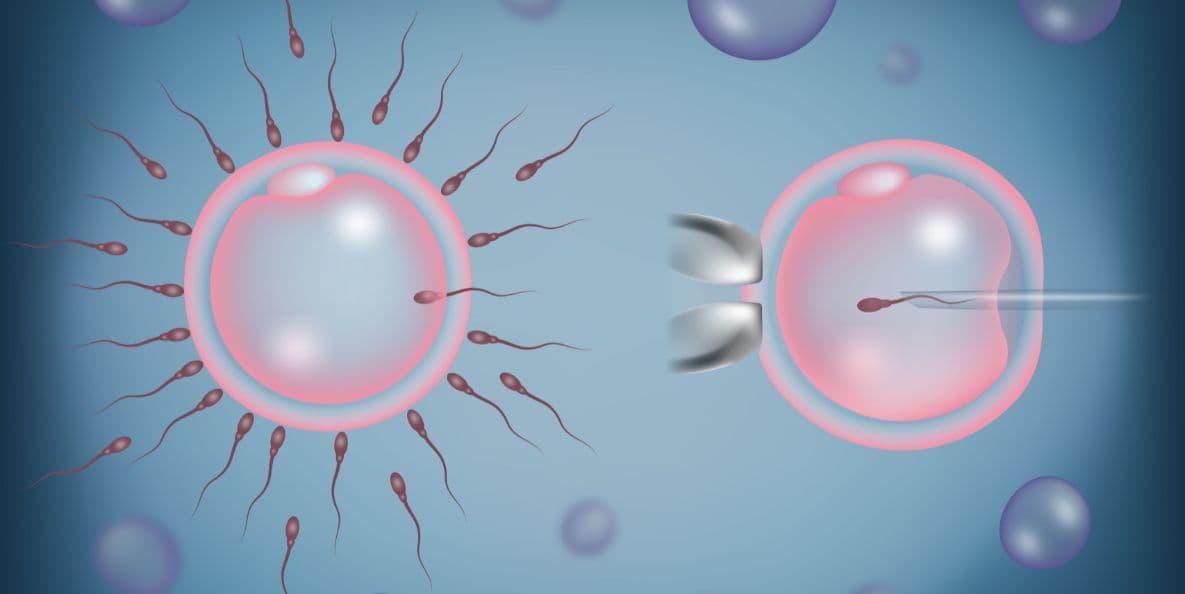
  • The egg is stabilized under a high-powered microscope using a specialized holding pipette.

  • A single sperm is carefully injected into the center of the egg using a microscopic glass needle.

  • Fertilized eggs are placed in time-lapse incubators (EmbryoScope) for undisturbed monitoring.

  • AI-Driven Sperm Selection Advanced software that identifies the sperm most likely to result in a healthy, viable embryo.

  • Microfluidic Sperm Sorting A gentle selection method that mimics the natural cervical tract to filter out sperm with DNA damage.

  • Time-Lapse Embryo Monitoring Continuous 24/7 video observation of the embryo, allowing for grading without removing it from the incubator.

  • AI Embryo Grading Algorithms that predict "live birth potential" by analyzing thousands of developmental data points.

  • Non-Invasive Genetic Testing (niPGT) Analyzing the liquid environment around the embryo for chromosomal health, avoiding the need for a biopsy.

  • Surgical Sperm Retrieval (TESA/TESE) Minor procedures to collect sperm directly from the reproductive tract when it is absent in the ejaculate.

  • Complete a comprehensive semen analysis, including DNA fragmentation testing.

  • Undergo a "mock transfer" to map the uterine path for the eventual embryo implantation.

  • Adhere to a specialized vitamin and antioxidant protocol to optimize egg and sperm quality.

  • Manage lifestyle factors such as smoking and alcohol use to improve cellular health.

  • Participate in a consultation with an embryologist to discuss the specific ICSI plan.

  • Anti-Müllerian Hormone (AMH) and antral follicle count to assess ovarian reserve.

  • Sperm DNA Fragmentation Index (DFI) to determine the need for microfluidic selection.

  • Infectious disease screening for both partners as required by 2026 regulatory standards.

  • Uterine cavity evaluation (Hysteroscopy or saline ultrasound) to ensure a receptive environment.

  • Genetic carrier screening to identify any potential risks of inherited conditions.

  • Achieves successful fertilization in 70% to 80% of mature eggs injected.

  • Overcomes severe male infertility barriers that previously made biological parenthood impossible.

  • Minimizes the risk of "total fertilization failure," providing more embryos for selection.

  • Utilizes 2026 AI technology to select sperm and embryos with the highest genetic potential.

  • Offers a standardized solution for patients using frozen-thawed eggs or donor tissue.

  • Minor recovery time following egg retrieval, usually requiring one day of rest.

  • Monitoring of embryo development via a digital portal provided by the embryology lab.

  • Administration of progesterone and other hormones to prepare the uterine lining for transfer.

  • Follow-up consultations to discuss the results of genetic testing or embryo grading.

  • Emotional support and counseling integrated throughout the waiting period before the pregnancy test.

  • Transition to prenatal care once a successful pregnancy is confirmed via blood test and ultrasound.

  • Options for cryopreservation of remaining high-quality embryos for future family building.

  • Long-term follow-up to monitor the health and development of children born via assisted technology.

  • Continued management of underlying fertility conditions for future reproductive health.

  • Engagement with support communities for families who have utilized assisted reproduction

Standard In Vitro Fertilization (IVF)

Standard In Vitro Fertilization (IVF) is the global gold standard for treating diverse fertility challenges, including tubal blockages, endometriosis, and unexplained infertility. This advanced procedure involves fertilizing a woman's eggs with sperm in a specialized laboratory environment to create viable embryos. By utilizing modern hormonal protocols and high-tech incubation, IVF offers a highly controlled and effective pathway to biological parenthood.

  • Blocked or damaged fallopian tubes that prevent natural egg and sperm interaction.

  • Moderate to advanced endometriosis affecting ovarian or tubal function.

  • Ovulation disorders where simpler treatments like IUI have been unsuccessful.

  • Unexplained infertility where no clear cause has been identified after extensive testing.

  • History of repeated miscarriages or genetic concerns requiring embryo screening.

  • Diminished ovarian reserve where a more controlled stimulation environment is needed.

  • Polycystic Ovary Syndrome (PCOS) requiring careful management of stimulation drugs.

  • Male factor infertility involving low sperm count or poor motility.

  • Advanced maternal age where egg quality and quantity are significantly reduced.

  • Previous tubal ligation (sterilization) where the patient wishes to conceive again.

  • Presence of uterine fibroids or polyps that may affect embryo implantation.

  • Ovarian stimulation is initiated using daily hormonal medications to encourage multiple egg growth.

  • Continuous monitoring via ultrasound and blood tests ensures follicles reach optimal maturity.

  • A "trigger injection" is administered to finalize the maturation of the eggs.

  • Egg retrieval is performed under light sedation using a fine, ultrasound-guided needle.

  • The retrieved eggs are combined with prepared sperm in a controlled culture dish.

  • Embryos are cultured for 3 to 5 days until they reach the robust blastocyst stage.

  • The highest-quality embryo is gently transferred into the uterus via a thin, flexible catheter.

  • Time-Lapse Embryo ImagingAdvanced incubators that capture continuous photos, allowing embryologists to monitor growth without disturbing the embryos.

  • AI-Assisted Embryo SelectionDeep-learning algorithms that analyze cell division patterns to identify the most viable embryo for transfer.

  • Blastocyst Culture OptimizationRefined nutrient media that supports embryo growth to day 5, increasing the likelihood of successful implantation.

  • Microfluidic Sperm SortingA gentle selection process that mimics natural biological barriers to isolate the healthiest sperm cells.

  • Vitrification TechnologyAn ultra-rapid freezing method that ensures nearly 100% survival rates for surplus embryos.

  • Laser-Assisted HatchingA precision technique that creates a small opening in the embryo’s outer shell to help it attach to the uterine wall.

  • Comprehensive fertility assessment for both partners to customize the stimulation protocol.

  • Lifestyle optimization, including specialized prenatal vitamins and a balanced diet.

  • Mandatory pre-treatment counseling and informed consent as per modern clinical regulations.

  • Financial and logistical planning to ensure a stress-free experience during the 4-to-6-week cycle.

  • Coordination with the nursing team to master the administration of hormonal medications.

  • Anti-Müllerian Hormone (AMH) and Antral Follicle Count (AFC) to predict ovarian response.

  • Transvaginal Ultrasound (TVS) to evaluate uterine health and ovarian accessibility.

  • Comprehensive semen analysis to determine if additional techniques like ICSI are needed.

  • Viral markers and infectious disease screening (HIV, Hepatitis, Syphilis) for both partners.

  • Hysterosalpingogram (HSG) or saline ultrasound to ensure a healthy path for embryo transfer.

  • Boasts significant success rates per cycle, particularly for patients under the age of 37.

  • Provides a controlled environment that bypasses damaged or blocked fallopian tubes entirely.

  • Allows for the selection of the strongest embryos, reducing the "time to pregnancy."

  • Offers the opportunity to freeze surplus embryos for future family-building steps.

  • Operates under strict regulatory frameworks to ensure patient safety and ethical standards.

  • Recovery from egg retrieval is typically swift, with most patients returning to light activity within 24 hours.

  • Luteal phase support (Progesterone) is prescribed immediately following retrieval to assist the uterine lining.

  • Frequent contact with the medical team to monitor any signs of Ovarian Hyperstimulation Syndrome (OHSS).

  • A blood pregnancy test (Beta-hCG) is performed approximately 10 to 14 days after the transfer.

  • Post-transfer instructions focus on maintaining a low-stress environment and light daily movement.

  • Transition to high-quality prenatal care once a healthy pregnancy is confirmed via ultrasound.

  • Significant improvement in long-term family-building options through embryo cryopreservation.

  • Resolution of chronic infertility struggles, providing a clear path to parenthood.

  • Access to supportive communities and professional guidance for life after successful conception.

  • Continued monitoring of reproductive health to plan for potential future cycles.

Vaginal Hysterectomy (Open/Laparoscopic/Robotic)

A vaginal hysterectomy is a surgical procedure to remove the uterus through the vaginal canal. Unlike an abdominal hysterectomy, this approach requires no external incisions on the abdomen, which typically results in a shorter hospital stay, lower costs, and a significantly faster recovery. It is a preferred method for treating various non-cancerous gynecological conditions.

  • Uterine Fibroids: Benign growths in the uterine wall that cause heavy menstrual bleeding, pelvic pressure, or persistent pain.

  • Uterine Prolapse: When the pelvic floor muscles and ligaments weaken, causing the uterus to slip down into or even out of the vaginal canal.

  • Adenomyosis: A condition where the uterine lining grows into the muscular wall of the uterus, causing severe cramping and heavy periods.

  • Endometriosis: When tissue similar to the uterine lining grows outside the uterus, leading to chronic pain and scarring.

  • Abnormal Uterine Bleeding: When heavy or irregular bleeding cannot be managed with medication or less invasive procedures.

  • Traditional Vaginal Hysterectomy: The entire procedure is performed through an incision inside the vagina. This is the least invasive method and leaves no visible scars.

  • Laparoscopically Assisted Vaginal Hysterectomy (LAVH): A thin camera (laparoscope) and micro-instruments are inserted through 3–4 tiny "keyhole" incisions in the belly to detach the upper uterus. The uterus is then removed through the vagina.

  • Robotic-Assisted Hysterectomy: Similar to the laparoscopic approach, but the surgeon uses a robotic console for superior 3D visualization and enhanced precision, which is ideal for complex cases like extensive endometriosis.

  • Vaginal Vault Creation: After the uterus is removed, the surgeon sews the top of the vagina closed, creating what is known as a "vaginal cuff."

  • Anesthesia: The surgery is performed under general anesthesia or regional anesthesia (spinal/epidural) and typically takes 1 to 2 hours.

  • Access: The surgeon makes an incision inside the vagina to reach the uterus.

  • Detachment: Using specialized tools, the surgeon clamps and cuts the blood vessels and ligaments that support the uterus.

  • Removal: The uterus (and sometimes the fallopian tubes or ovaries) is withdrawn through the vaginal opening.

  • Closure: The internal incisions are closed with dissolvable stitches. Because there are no abdominal cuts in the traditional approach, there is no external scarring.

  • Pelvic Examination: To assess the size of the uterus and ensure it can be safely removed through the vaginal canal.

  • Fasting: Adhering to strict "nothing by mouth" instructions for at least 8 hours prior to your general anesthesia.

  • Medication Audit: You may need to stop taking blood thinners, aspirin, or certain herbal supplements 7–10 days before the procedure.

  • Bowel Prep: In some cases, your surgeon may recommend a mild laxative or a specific diet the day before surgery.

  • Smoking Cessation: Stopping smoking at least 4 weeks before surgery is vital to promote healthy tissue healing and reduce the risk of infection.

  • Pelvic Ultrasound: To map the size and location of fibroids and check the health of the ovaries.

  • Endometrial Biopsy: To rule out any cancerous or precancerous cells within the uterine lining.

  • Pap Smear: To ensure there are no cervical abnormalities before the uterus and cervix are removed.

  • Blood Panels: Checking hemoglobin levels and blood type to prepare for the rare possibility of a transfusion.

  • ECG: A standard heart check to ensure you are healthy enough for the administration of anesthesia.

  • Hospital Stay: Most patients are discharged the same day or after one night of observation.

  • Physical Activity: Walking is encouraged immediately to prevent blood clots, but you must avoid heavy lifting (over 5 kg) and strenuous exercise for 4 to 6 weeks.

  • Vaginal Health: You must not use tampons or have sexual intercourse for 6 to 8 weeks to allow the vaginal cuff to heal completely.

  • Hormonal Changes: If the ovaries are left intact, you will not enter menopause prematurely, though you will no longer have periods. If ovaries are removed, menopause begins immediately.

  • Follow-up Care: A post-operative checkup is typically scheduled for 2 to 6 weeks after surgery to ensure the internal stitches are dissolving correctly.

  • Faster Recovery: Patients generally return to normal activities much sooner than those undergoing traditional abdominal surgery.

  • No Visible Scarring: Because the entry point is internal, there are no cosmetic changes to the abdomen.

  • Reduced Complication Rates: Vaginal approaches are associated with lower risks of wound infection and less post-operative pain.

  • Cost-Efficient: Shorter hospital stays and quicker operating times often result in lower overall medical costs.

  • High Patient Satisfaction: Most women report a significant improvement in quality of life once the symptoms of fibroids or prolapse are resolved.

Myomectomy (Open/Laparoscopic/Robotic)

A myomectomy is a surgical procedure to remove uterine fibroids (benign growths) while keeping the uterus intact. Unlike a hysterectomy, it preserves fertility and is the preferred option for women who wish to become pregnant or maintain their uterine health. This procedure specifically targets the fibroids while surgically repairing the uterine wall.

  • Fertility Preservation: For women who plan to have children in the future and need to keep the uterus functional.

  • Heavy Menstrual Bleeding: When fibroids cause anemia, flooding, or prolonged periods that disrupt daily life.

  • Pelvic Pain or Pressure: Large fibroids pressing on the bladder (causing frequent urination) or the rectum.

  • Infertility or Miscarriage: When fibroids distort the uterine cavity and interfere with embryo implantation or maintenance of pregnancy.

  • Rapid Growth: If ultrasound monitoring shows fibroids are growing quickly, even if they are currently asymptomatic.

  • Abdominal Myomectomy (Open): A traditional "bikini cut" horizontal incision is made in the lower abdomen. This is used for very large fibroids (typically over 10 cm), numerous growths, or those buried deep in the uterine wall.

  • Laparoscopic Myomectomy: Performed through 3–4 tiny "keyhole" incisions. The surgeon uses a camera and specialized tools to cut the fibroids into smaller pieces (morcellation) for removal through the small ports.

  • Robotic-Assisted Myomectomy: Similar to the laparoscopic approach, but the surgeon operates via a robotic console. This provides superior 3D visualization and greater precision, which is helpful for complex or hard-to-reach fibroids.

  • Hysteroscopic Myomectomy: No abdominal incisions are made. A specialized scope is inserted through the cervix to remove fibroids that are bulging into the uterine cavity (submucosal fibroids).

  • Anesthesia: The surgery is performed under general anesthesia and typically takes between 1 to 3 hours depending on the number of fibroids.

  • Incision and Access: Depending on the approach, the surgeon accesses the uterus either through the abdomen or the vaginal canal/cervix.

  • Fibroid Removal: Each fibroid is carefully "shelled out" from the surrounding healthy uterine muscle.

  • Uterine Reconstruction: The surgeon meticulously sutures the layers of the uterine muscle back together to ensure the wall is strong enough to support a future pregnancy.

  • Closure: Abdominal incisions are closed with stitches or surgical glue. For hysteroscopic cases, there are no external wounds to close.

  • Pelvic Imaging: An MRI or detailed ultrasound is mandatory to map the exact size, number, and depth of all fibroids.

  • Hormonal Therapy (Optional): In some cases, medication (like GnRH agonists) may be prescribed for 2–3 months before surgery to shrink the fibroids and reduce blood loss.

  • Iron Supplementation: If you are anemic due to heavy bleeding, you may need to take iron to build up your blood count before surgery.

  • Fasting: Adhering to strict "nothing by mouth" instructions for at least 8 hours prior to your general anesthesia.

  • Medication Audit: Stopping blood thinners, aspirin, or anti-inflammatory drugs 7–10 days before the procedure.

  • Saline Infusion Sonogram (SIS): Injecting sterile water into the uterus during an ultrasound to get a clear view of the uterine lining.

  • Hysteroscopy (Diagnostic): A quick office procedure to look inside the uterus and confirm if fibroids are affecting the cavity.

  • Blood Panels: Checking hemoglobin and hematocrit levels to assess for anemia.

  • ECG: A standard heart check to ensure you are healthy enough for the administration of anesthesia.

  • Hospital Stay: Usually 1–2 nights for open surgery; often same-day discharge or one night for laparoscopic and robotic approaches.

  • Physical Activity: Walking is encouraged immediately to prevent blood clots. Avoid heavy lifting and strenuous exercise for 4 weeks (laparoscopic) to 6 weeks (open).

  • Pregnancy Timing: Surgeons usually recommend waiting 3 to 6 months before trying to conceive to allow the uterine wall to heal completely.

  • Delivery Method: If the surgery involved deep incisions into the uterine wall, a C-section is often required for future deliveries to prevent uterine rupture during labor.

  • Follow-up Imaging: A repeat ultrasound is often done 3–6 months post-op to ensure the uterus has healed well and no small fibroids were left behind.

  • Preserves Reproductive Potential: Unlike a hysterectomy, this procedure keeps the option of biological motherhood open.

  • Targeted Symptom Relief: Successfully removing fibroids eliminates the source of heavy bleeding and pelvic pressure while keeping the organ intact.

  • High Success Rates: Modern robotic and laparoscopic techniques allow for the removal of complex fibroids with minimal blood loss and faster recovery.

  • Improved Fertility Outcomes: For many women, removing cavity-distorting fibroids significantly increases the chances of successful natural conception or IVF.

  • Maintains Pelvic Integrity: Keeping the uterus helps maintain the natural support of the pelvic floor and avoids the early onset of surgical menopause.

Endometrial Ablation

Endometrial ablation is a minimally invasive medical procedure used to treat heavy menstrual bleeding (menorrhagia). It works by destroying or removing the endometrium (the lining of the uterus) using various energy-based methods. Unlike a hysterectomy, this procedure leaves the uterus intact, providing a less invasive alternative for women seeking relief from debilitating cycles.

  • Heavy Menstrual Flow: If you find yourself soaking through a pad or tampon every hour for several consecutive hours.

  • Prolonged Bleeding: When your menstrual period consistently lasts longer than eight days.

  • Anemia: If chronic blood loss has led to iron deficiency or low hemoglobin levels, causing persistent fatigue.

  • Failed Medical Therapy: For premenopausal women who have not found relief from hormonal contraceptives or other medications.

  • Lifestyle Disruption: When your menstrual cycle significantly interferes with your ability to work, exercise, or maintain daily activities.

  • Radiofrequency Ablation: A flexible, specialized mesh device is used to deliver controlled electrical energy to the lining.

  • Cryoablation: A thin probe uses extreme cold to freeze and destroy the endometrial tissue.

  • Thermal Balloon: A small balloon is inserted into the uterus and filled with heated fluid to treat the lining.

  • Hydrothermal Ablation: Heated saline fluid is circulated directly within the uterine cavity to reach all areas of the lining.

  • Microwave Ablation: Precise microwave energy is applied through a specialized wand to treat the uterine wall.

  • Electrosurgery: A wire loop or rollerball uses an electric current to remove the lining, typically performed under general anesthesia.

  • Access: The procedure is performed entirely through the vagina and cervix, meaning there are no surgical incisions or external scars.

  • Anesthesia: Depending on the method, it can be performed under local, regional, or general anesthesia and typically takes 15 to 45 minutes.

  • Dilation: The cervix is gently and precisely opened (dilated) to allow the insertion of the ablation instruments.

  • Ablation: The chosen energy-based method is applied to the uterine lining to carefully remove or destroy the tissue.

  • Completion: Once the lining is treated, the instruments are removed, and the patient is moved to a recovery area for short-term observation.

  • Endometrial Biopsy: A mandatory sample of the lining is taken before the procedure to rule out any cancerous or precancerous cells.

  • Hysteroscopy: A quick visualization of the inside of the uterus to ensure there are no large fibroids or polyps that might interfere with the ablation.

  • Pregnancy Test: To confirm you are not pregnant, as the procedure is strictly contraindicated during pregnancy.

  • Hormonal Thinning (Optional): You may be prescribed medication for a few weeks prior to the procedure to thin the uterine lining, which can improve results.

  • Fasting: Following standard "nothing by mouth" instructions if your procedure involves sedation or general anesthesia.

  • Pelvic Ultrasound: To measure the thickness of the uterine lining and check the overall size and shape of the uterus.

  • Hemoglobin/Ferritin Levels: To assess the severity of anemia caused by heavy bleeding.

  • Cervical Screening (Pap Smear): To ensure there are no cervical abnormalities prior to instrument insertion.

  • ECG: A routine heart check to ensure you are healthy enough for the chosen level of anesthesia.

  • Hospital Stay: Most patients are discharged the same day and can return to their normal daily activities within a few days.

  • Short-term Side Effects: You may experience minor cramping (1–3 days), mild nausea, or frequent urination during the first 24 hours.

  • Vaginal Discharge: A watery discharge mixed with a small amount of blood is normal and may last for 2 to 4 weeks as the uterus heals.

  • Menstrual Changes: Periods usually become significantly lighter, and in many cases, stop entirely (amenorrhea) within a few months.

  • Birth Control Necessity: While the procedure makes pregnancy unlikely and dangerous, it is not a sterilization method; birth control is required until you reach menopause.

  • Incision-Free Recovery: Because no cuts are made to the body, the recovery time is exceptionally fast compared to traditional surgery.

  • Targeted Relief: Successfully destroys only the tissue responsible for heavy bleeding while preserving the rest of the reproductive anatomy.

  • High Success Rates: The majority of women report a dramatic reduction in menstrual flow and a significant improvement in their quality of life.

  • Versatile Options: With multiple energy-based methods available, the treatment can be tailored to the specific size and shape of your uterus.

  • Avoids Hysterectomy: Provides a effective, low-risk alternative for women who wish to avoid major organ removal and longer hospital stays.

Ovarian Cyst Removal (Laparoscopic Cystectomy)

Laparoscopic ovarian cystectomy is a minimally invasive surgery to remove an ovarian cyst while preserving the healthy part of the ovary and the fallopian tube. It is the preferred method for treating benign (non-cancerous) cysts that are causing pain, growing rapidly, or at risk of twisting (torsion). This technique allows for precise removal of the cyst wall with minimal impact on future fertility.

  • Persistent Cysts: Functional cysts that do not disappear naturally after several menstrual cycles.

  • Endometriomas: Also known as "chocolate cysts," these are caused by endometriosis and can significantly affect fertility if left untreated.

  • Dermoid Cysts: Complex cysts containing different types of tissue (such as skin or hair) that will not resolve on their own and carry a risk of rupture.

  • Chronic Pelvic Pain: Large cysts that create constant pressure on the bladder or rectum, or cause sharp pain during physical activity.

  • Rapid Growth: If ultrasound monitoring shows a cyst is increasing in size, even if it is currently asymptomatic.

  • Anesthesia: The surgery is performed under general anesthesia and typically takes between 45 to 90 minutes.

  • Incision: The surgeon makes 3–4 tiny "keyhole" incisions (5–10 mm) in the abdomen, including one inside the belly button for the camera (laparoscope).

  • Visualization: Carbon dioxide gas is used to gently inflate the abdomen, providing the surgical team with a clear, magnified view of the pelvic organs.

  • Cyst Removal: Using specialized micro-instruments, the surgeon carefully peels the cyst wall away from the healthy ovarian tissue, ensuring the ovary remains functional.

  • Extraction: The cyst is placed in a small surgical bag and removed through one of the incisions. Large cysts may be drained first to fit through the small opening.

  • Closure: The small incisions are closed with dissolvable stitches or surgical glue, resulting in minimal scarring.

  • Pelvic Ultrasound or MRI: To determine the exact size, location, and internal structure of the cyst before surgery.

  • Blood Testing: Checking "tumor markers" (such as CA-125) to confirm the cyst appears benign and to assess overall health.

  • Fasting: Adhering to strict "nothing by mouth" instructions for at least 8 hours prior to your general anesthesia.

  • Medication Audit: Stopping blood thinners, aspirin, or certain supplements 7–10 days before the procedure as directed.

  • Bowel Prep (Optional): In some cases, a mild laxative may be recommended the day before to clear the pelvic area for better visualization.

  • Transvaginal Ultrasound: The primary tool used to distinguish between fluid-filled simple cysts and complex solid masses.

  • Pregnancy Test: To rule out ectopic pregnancy or ensure the safety of the developing fetus if pregnancy is known.

  • Coagulation Profile: To ensure your blood's ability to clot is optimal for a safe, minimally invasive recovery.

  • ECG: A standard heart check to confirm you are healthy enough for the administration of anesthesia.

  • Hospital Stay: Most patients are discharged the same day or stay for one night of observation.

  • Shoulder Pain: It is common to feel temporary pain in the shoulders for 24–48 hours; this is caused by the gas used during surgery irritating the diaphragm.

  • Activity Restrictions: You can usually return to light daily activities within 3 to 5 days. However, avoid heavy lifting and strenuous exercise for 2 to 3 weeks.

  • Wound Care: Keep the small incisions clean and dry. Most stitches are internal and will dissolve on their own within 10–14 days.

  • Sexual Activity: Most doctors recommend waiting at least 2 weeks before resuming sexual intercourse to allow internal healing.

  • Preserves Fertility: By removing only the cyst wall and saving the healthy ovarian tissue, the "ovarian reserve" and hormone production are protected.

  • Minimal Scarring: The use of tiny incisions results in superior cosmetic outcomes compared to traditional open surgery.

  • Rapid Recovery: The minimally invasive approach allows patients to return to their jobs and families much faster than with a laparotomy.

  • High Precision: The magnified view provided by the laparoscope allows surgeons to identify and protect the delicate fallopian tubes and surrounding nerves.

  • Lower Complication Rates: Laparoscopy is associated with less post-operative pain, lower risk of infection, and a reduced chance of developing internal scar tissue (adhesions).

Oophorectomy (Ovary Removal)

An oophorectomy is the surgical removal of one or both ovaries. It is often performed in conjunction with other procedures, such as a hysterectomy or salpingectomy (removal of the fallopian tubes). This procedure is a critical intervention for managing ovarian diseases, reducing cancer risk, or addressing severe pelvic conditions.

  • Ovarian Cancer: As a primary treatment for a confirmed cancerous mass or a highly suspicious complex cyst.

  • Prophylactic (Risk-Reducing): For women with high-risk genetic mutations, such as BRCA1 or BRCA2, to prevent future cancer development.

  • Severe Endometriosis: When the ovaries are extensively damaged or causing chronic, debilitating pelvic pain that does not respond to medication.

  • Ovarian Torsion: An emergency situation where the ovary twists on its supporting ligaments, cutting off its own blood supply.

  • Chronic Pelvic Inflammatory Disease (PID): Persistent and severe infection that has caused irreversible damage to the ovarian tissue.

  • Unilateral Oophorectomy: Removal of only one ovary. In most cases, menstruation continues and natural pregnancy remains possible.

  • Bilateral Oophorectomy: Removal of both ovaries. This results in immediate "surgical menopause" if the patient has not yet reached natural menopause.

  • Salpingo-Oophorectomy: The surgical removal of an ovary along with its attached fallopian tube, often performed to reduce the risk of future tubal issues.

  • Prophylactic Bilateral Salpingo-Oophorectomy (RRBSO): A specific preventive surgery for high-risk patients to remove both sets of ovaries and tubes simultaneously.

  • Anesthesia: The procedure is performed under general anesthesia and typically takes between 45 to 90 minutes.

  • Laparoscopic/Robotic Approach: The most common method, involving 3–4 tiny "keyhole" incisions. The surgeon uses a camera to detach and remove the ovaries through these small openings.

  • Laparotomy (Open Surgery): A single, larger abdominal incision is used if the ovaries are very large, if there is extensive scar tissue, or if cancer is suspected.

  • Vaginal Approach: If performed alongside a vaginal hysterectomy, the ovaries may be detached and removed through the vaginal canal.

  • Closure: Small laparoscopic incisions are closed with dissolvable stitches or surgical glue, while open incisions may require staples or standard sutures.

  • Genetic Counseling: For patients undergoing prophylactic surgery, a review of genetic markers (BRCA) is essential.

  • Pelvic Imaging: A detailed ultrasound or MRI to map the size, location, and blood supply of the ovaries.

  • Fasting: Adhering to strict "nothing by mouth" instructions for at least 8 hours prior to your general anesthesia.

  • Hormone Consultation: Discussing a plan for Hormone Replacement Therapy (HRT) if a bilateral procedure is planned for a premenopausal patient.

  • Medication Audit: Stopping blood thinners or aspirin 7–10 days before the procedure to minimize the risk of internal bleeding.

  • Tumor Marker Tests (CA-125): Blood tests used to help evaluate the likelihood of malignancy in ovarian masses.

  • Transvaginal Ultrasound: To provide high-resolution images of the ovarian follicles and any abnormal growths.

  • CT Scan of the Abdomen/Pelvis: Often used if cancer is suspected to check for involvement of nearby lymph nodes or organs.

  • ECG: A standard heart check to ensure you are healthy enough for the duration of the surgical procedure.

  • Hospital Stay: Usually a same-day discharge for laparoscopic procedures; 1–2 nights of observation are typical for open surgery.

  • Surgical Menopause: If both ovaries are removed, the sudden drop in estrogen can lead to immediate hot flashes, night sweats, and vaginal dryness.

  • Long-term Health: Without estrogen, there is an increased risk of osteoporosis (bone thinning) and heart disease; HRT is often started immediately to mitigate these risks.

  • Activity Restrictions: Light walking is encouraged within 24 hours. Avoid heavy lifting and strenuous exercise for 2–4 weeks (laparoscopic) or 6 weeks (open).

  • Fertility Impact: If both ovaries are removed, natural conception is no longer possible. Patients wishing to preserve fertility should discuss egg freezing prior to surgery.

  • Prevents Life-Threatening Cancer: For high-risk genetic carriers, this surgery reduces the risk of ovarian cancer by up to 90%.

  • Immediate Pain Resolution: Provides definitive relief for patients suffering from chronic pain due to torsion or severe endometriosis.

  • Minimally Invasive Options: Modern laparoscopic and robotic techniques allow for precise removal with very short recovery times and minimal scarring.

  • Comprehensive Hormonal Care: Integrated treatment plans ensure that surgical menopause symptoms are managed effectively with modern HRT.

  • High Technical Success: When performed by specialists, the risks of injury to the bladder or ureters are exceptionally low, ensuring a safe return to health.

Salpingectomy (Fallopian Tube Removal)

Salpingectomy is the surgical removal of one or both fallopian tubes. Unlike a tubal ligation (where tubes are tied), a salpingectomy involves the complete physical removal of the tube. It is a highly effective permanent procedure often performed to treat medical emergencies or as a proactive measure against cancer while maintaining hormonal balance.

  • Ectopic Pregnancy: An emergency situation where a fertilized egg implants in the tube; removal is necessary if the tube has ruptured or is severely damaged.

  • Hydrosalpinx: When a tube becomes blocked and fills with fluid, causing chronic pain or interfering with the success of IVF treatments.

  • Permanent Birth Control: A preferred alternative to "tying tubes" for women seeking the most effective form of permanent sterilization.

  • Cancer Prevention: For women with high-risk genetic mutations (like BRCA1/2), as research suggests many "ovarian" cancers actually originate in the fallopian tubes.

  • Pelvic Inflammatory Disease (PID): When severe, chronic infection has caused irreversible damage or abscesses within the tubal structures.

  • Unilateral Salpingectomy: Removal of only one fallopian tube. If the other tube and both ovaries remain, natural pregnancy is still possible.

  • Bilateral Salpingectomy: Removal of both tubes. This results in permanent sterilization; future pregnancy would require In Vitro Fertilization (IVF).

  • Salpingo-oophorectomy: The surgical removal of the fallopian tube along with its attached ovary, often performed for localized disease or cancer risk reduction.

  • Anesthesia: The procedure is typically performed under general anesthesia and takes approximately 30 to 60 minutes.

  • Laparoscopic (Keyhole) Approach: The most common method, involving 2–3 tiny incisions (5–10 mm) in the abdomen for a camera and specialized micro-instruments.

  • Laparotomy (Open) Approach: A larger abdominal incision used in emergencies, such as a ruptured ectopic pregnancy with significant internal bleeding.

  • Detachment: The surgeon carefully seals the blood vessels and detaches the tube from the uterus and the ovary.

  • Extraction: The tube is removed through one of the small incisions, and the surgical sites are inspected for any signs of bleeding.

  • Closure: Small incisions are closed with dissolvable stitches or surgical glue, leaving minimal scarring.

  • Pelvic Ultrasound: To confirm the location of an ectopic pregnancy or to visualize the extent of tubal disease like hydrosalpinx.

  • Pregnancy Test: A mandatory check to confirm pregnancy status and determine the appropriate surgical urgency.

  • Fasting: Adhering to strict "nothing by mouth" instructions for at least 8 hours prior to your general anesthesia.

  • Medication Audit: You may be asked to stop taking aspirin or blood thinners 7–10 days before the procedure to minimize surgical risks.

  • Emergency Stabilization: In cases of rupture, intravenous fluids and blood type cross-matching are performed immediately.

  • Transvaginal Ultrasound: The primary imaging tool used to evaluate the health of the tubes and ovaries.

  • Beta-hCG Blood Test: Specifically used to monitor hormone levels in suspected ectopic pregnancies.

  • Complete Blood Count (CBC): To check for signs of infection or anemia caused by internal bleeding.

  • ECG: A standard heart check to ensure you are healthy enough for the administration of anesthesia.

  • Hospital Stay: Most patients are discharged the same day as the surgery following a laparoscopic procedure.

  • Shoulder Pain: It is common to feel referred pain in the shoulders for 24–48 hours; this is caused by the gas used to inflate the abdomen during surgery.

  • Activity Restrictions: You can usually return to work and light daily activities within 3 to 7 days. Avoid heavy lifting (over 5 kg) for 2 to 3 weeks.

  • Sexual Activity: Most doctors recommend waiting at least 2 weeks before resuming sexual intercourse to allow for proper internal healing.

  • Hormonal Balance: Because the ovaries are typically left intact, you will not enter menopause prematurely and your hormonal cycle will remain unchanged.

  • Definitive Cancer Protection: Removing the tubes significantly lowers the long-term risk of developing high-grade serous ovarian cancer.

  • Life-Saving in Emergencies: Provides immediate resolution for ruptured ectopic pregnancies, preventing life-threatening internal hemorrhage.

  • Improved IVF Success: Removing a fluid-filled tube (hydrosalpinx) increases the chances of a successful embryo implantation during fertility treatments.

  • Minimal Recovery Time: The laparoscopic approach ensures that patients can return to their normal lives within a week with very little post-operative pain.

  • Superior Birth Control: Offers a higher degree of protection against unintended pregnancy than traditional tubal ligation methods.

Ectopic Pregnancy Surgery

Surgery for an ectopic pregnancy is an emergency procedure performed when a fertilized egg implants outside the uterus, most commonly in a fallopian tube. Because an ectopic pregnancy cannot survive and poses a life-threatening risk of internal hemorrhage, surgical intervention is often necessary to protect the mother’s health and future fertility.

  • Confirmed Ectopic Pregnancy: When ultrasound and blood tests confirm the embryo has implanted outside the uterine cavity.

  • Severe Abdominal Pain: Sharp, stabbing pelvic pain, often on one side, that may come and go or vary in intensity.

  • Signs of Rupture: If you experience extreme lightheadedness, fainting, or shoulder tip pain, which indicates internal bleeding.

  • Failed Medical Management: When medication (such as methotrexate) has not successfully dissolved the pregnancy tissue.

  • High hCG Levels: If pregnancy hormone levels are too high for medical treatment to be effective or safe.

  • Unstable Vital Signs: An emergency situation where low blood pressure or a rapid heart rate suggests an active tubal rupture.

  • Laparoscopic Surgery (Keyhole): The most common and preferred approach. The surgeon makes 2–3 tiny incisions in the abdomen to insert a high-definition camera and specialized micro-instruments.

  • Salpingectomy: The complete removal of the fallopian tube containing the pregnancy. This is often the safest choice if the tube is severely damaged or if the other tube is healthy.

  • Salpingostomy: A small, precise slit is made in the fallopian tube to remove the pregnancy tissue while leaving the tube intact. This is typically considered if the other tube is already damaged or missing.

  • Laparotomy (Open Surgery): A larger abdominal incision used in critical emergencies where a tube has ruptured and severe internal bleeding requires immediate, direct control.

  • Anesthesia: The procedure is performed under general anesthesia and typically takes between 30 to 60 minutes, though emergency cases may require more time.

  • Access: Depending on the stability of the patient, the surgeon accesses the pelvic area through small laparoscopic ports or a traditional abdominal incision.

  • Tissue Removal: All pregnancy tissue is meticulously removed to prevent it from continuing to grow or causing further internal damage.

  • Hemostasis: The surgeon carefully seals all blood vessels to stop internal bleeding and ensure the pelvic cavity is clear of blood and debris.

  • Closure: Small laparoscopic incisions are closed with dissolvable stitches or surgical glue, while open incisions are secured with standard sutures or staples.

  • Emergency Ultrasound: A final scan to locate the pregnancy and assess whether the fallopian tube has already ruptured.

  • Serial hCG Testing: Monitoring the levels of the pregnancy hormone to determine the urgency and type of surgical approach needed.

  • Blood Type and Cross-match: Immediate testing to ensure compatible blood is available in the event a transfusion is necessary due to blood loss.

  • Intravenous Access: Starting IV fluids and potentially medications to stabilize blood pressure before entering the operating room.

  • Fasting: In non-emergency cases, following "nothing by mouth" instructions; however, in emergencies, the surgical team proceeds immediately for patient safety.

  • Transvaginal Ultrasound: The primary diagnostic tool used to visualize the empty uterus and the mass in the fallopian tube.

  • Quantitative Beta-hCG: A precise blood test to measure the exact amount of pregnancy hormone in the system.

  • Complete Blood Count (CBC): To check for signs of anemia or internal blood loss through hemoglobin and hematocrit levels.

  • Coagulation Profile: Ensuring the blood’s ability to clot is normal prior to making surgical incisions.

  • Hospital Stay: Most laparoscopic patients are discharged the same day or after one night. Laparotomy patients typically stay for 2–3 days for observation.

  • Immediate Recovery: It is normal to experience temporary shoulder pain (from the gas used in laparoscopy), abdominal soreness, and light vaginal bleeding for 1–2 weeks.

  • Activity Restrictions: Avoid heavy lifting and strenuous exercise for 2 to 4 weeks (laparoscopic) or 6 weeks (open surgery) to allow internal healing.

  • Hormone Monitoring: Weekly blood tests to monitor hCG levels are often required until they reach zero to ensure no pregnancy tissue remains.

  • Future Pregnancy: If one healthy tube remains, the chances of a successful future pregnancy remain high. Most doctors recommend waiting at least two menstrual cycles before trying to conceive again.

  • Life-Saving Intervention: Rapidly stops internal bleeding and removes the risk of a life-threatening tubal rupture.

  • Preserves Future Fertility: Specialized techniques like salpingostomy or careful laparoscopic salpingectomy protect the remaining reproductive anatomy.

  • Minimally Invasive Success: Laparoscopic methods result in less post-operative pain, smaller scars, and a much faster return to normal life.

  • Definitive Resolution: Unlike medical management, surgery provides an immediate solution for cases where the pregnancy tissue is large or the tube is compromised.

  • Comprehensive Emergency Care: Operating in a specialized surgical environment ensures that advanced monitoring and blood replacement are available if complications arise.

Tubal Recanalization

Tubal recanalization is a medical procedure used to reopen or reconnect the fallopian tubes to restore fertility. It is most commonly performed to reverse a previous tubal ligation (sterilization) or to clear blockages caused by infection, scarring, or debris. This procedure offers a path to natural conception by restoring the continuous pathway required for an egg to meet sperm.

  • Reversal of Tubal Ligation: If you previously had your "tubes tied" and now wish to restore natural fertility.

  • Proximal Tubal Occlusion: When the portion of the tube closest to the uterus is blocked by mucus plugs or minor scarring.

  • Secondary Infertility: If you have successfully conceived in the past but now face blockages due to pelvic inflammatory disease (PID) or endometriosis.

  • Desire for Natural Conception: For patients who prefer natural pregnancy over assisted reproductive technologies like IVF.

  • Post-Infection Blockage: When a previous pelvic infection has left debris or light adhesions within the tubal canal.

  • Non-Surgical (Fluoroscopic) Recanalization: An interventional radiologist uses X-ray guidance to pass a fine catheter through the cervix into the tubes to clear "plugs" without incisions.

  • Laparoscopic Tubal Anastomosis: A minimally invasive "keyhole" surgery where a surgeon uses micro-instruments to reconnect the severed ends of the tubes.

  • Hysteroscopic Cannulation: A small camera is inserted through the vagina and cervix to clear blockages specifically located at the opening of the tubes.

  • Open Microsurgical Repair: Performed through a traditional "bikini cut" incision, typically reserved for complex cases where laparoscopy is not feasible.

  • Anesthesia: Depending on the method, the procedure can be performed under local anesthesia (non-surgical), regional, or general anesthesia (surgical).

  • Duration: Non-surgical methods typically take about 30 minutes, while surgical reconnection can take between 1 to 3 hours.

  • Access: The surgeon or radiologist accesses the tubes either through the natural opening of the cervix or via small abdominal incisions.

  • Clearing or Joining: The blockage is either physically cleared with a catheter or the scarred ends of the tube are trimmed and precisely sutured together.

  • Dye Test (Chromotubation): A colored dye is often injected through the tubes during the procedure to confirm they are completely open and functional.

  • Closure: For surgical cases, small incisions are closed with dissolvable stitches or surgical glue.

  • Hysterosalpingogram (HSG): A specialized X-ray used to map the exact location of the blockage and assess the health of the remaining tubal segments.

  • Semen Analysis: It is often mandatory for the partner to undergo testing to ensure there are no male fertility factors before proceeding with surgery.

  • Laparoscopic Review: In some cases, a diagnostic laparoscopy is done first to ensure there is enough healthy tube (at least 4–5 cm) for a successful repair.

  • Fasting: Following "nothing by mouth" instructions for 8 hours if the procedure involves sedation or general anesthesia.

  • Medication Audit: Stopping blood thinners or aspirin 7–10 days prior to the procedure to minimize surgical risks.

  • Pelvic Ultrasound: To check for other fertility-related issues such as fibroids or ovarian cysts.

  • Ovarian Reserve Testing: Blood tests (such as AMH) to ensure the patient has a healthy egg supply, particularly for those over age 35.

  • Infection Screening: Testing for Chlamydia or Gonorrhea to ensure no active infection is present that could cause immediate re-scarring.

  • ECG: A standard heart check to confirm safety for the chosen level of anesthesia.

  • Hospital Stay: Most procedures are performed on an outpatient basis, allowing you to return home the same day.

  • Immediate Recovery: Most women can resume light daily activities within a few days to two weeks, depending on the surgical approach.

  • Conception Timeline: It may take several months to a year to conceive naturally; doctors often recommend waiting one to two menstrual cycles before trying.

  • Monitoring for Ectopic Pregnancy: Because there is a higher risk (5% to 15%) of a tubal pregnancy after repair, any positive pregnancy test must be followed by an early ultrasound.

  • Follow-up Imaging: A repeat HSG may be performed 3–6 months later to confirm the tubes remain open (patent).

  • Restores Natural Fertility: Allows for multiple future pregnancies without the need for repeated medical interventions or hormonal stimulation.

  • Technically Advanced Microsurgery: The use of high-magnification laparoscopy or robotic platforms ensures the most precise reconnection of delicate tissues.

  • Non-Invasive Options: Fluoroscopic techniques offer a highly effective way to clear blockages without the need for surgery or general anesthesia.

  • High Success Rates: For ideal candidates (under 35 with sufficient tubal length), the chances of successful pregnancy are significantly improved.

  • Cost-Effective Long Term: For many couples, a one-time successful recanalization is more affordable than multiple rounds of IVF.

Diagnostic Hysteroscopy

Diagnostic hysteroscopy is a minimally invasive procedure used to look inside the uterus to diagnose the cause of abnormal bleeding, infertility, or repeated miscarriages. It involves inserting a thin, lighted tube with a camera (hysteroscope) through the vagina and cervix, requiring no surgical incisions. This procedure allows for direct visualization of the uterine cavity, providing more accuracy than an ultrasound alone for certain conditions.

  • Abnormal Uterine Bleeding: To investigate heavy, prolonged, or unexpected post-menopausal bleeding.

  • Infertility Evaluation: To check for structural abnormalities, such as polyps or a uterine septum, that might prevent an embryo from implanting.

  • Recurrent Miscarriage: Looking for internal scarring (Asherman’s Syndrome) or congenital uterine defects that could affect a pregnancy.

  • Displaced IUD: To locate and potentially retrieve an intrauterine device that has moved out of its proper position.

  • Abnormal Imaging Results: If a prior ultrasound or saline sonogram showed a suspicious shadow or growth within the uterine lining.

  • Anesthesia: Depending on your comfort level and the doctor's preference, it can be done with no anesthesia, local anesthesia (numbing the cervix), or light sedation.

  • Duration: The procedure is typically performed in an outpatient setting or doctor’s office and takes only 5 to 15 minutes.

  • Preparation: You are positioned similarly to a routine pelvic exam. No abdominal cuts are required as the hysteroscope uses the natural opening of the cervix.

  • Expansion: A saline liquid or carbon dioxide gas is gently introduced to expand the uterus, providing the doctor with a clear, panoramic view of the uterine walls and the openings of the fallopian tubes.

  • Inspection: The doctor moves the camera to examine the lining for fibroids, polyps, or structural defects.

  • Biopsy/Sampling: If a suspicious area is identified, a small tissue sample (biopsy) can be taken at the same time for laboratory testing.

  • Timing Your Cycle: The procedure is best performed during the first week after your period ends, when the uterine lining is at its thinnest.

  • Pregnancy Test: A mandatory check to ensure you are not pregnant, as the procedure cannot be performed during pregnancy.

  • Medication Audit: You may be advised to take an over-the-counter pain reliever, like ibuprofen, about an hour before the procedure to minimize cramping.

  • Cervical Ripening (Optional): In some cases, medication may be inserted vaginally a few hours prior to help soften and slightly open the cervix.

  • Fasting: If you are receiving light sedation, you must follow "nothing by mouth" instructions for 6–8 hours before the appointment.

  • Pelvic Ultrasound: To provide a baseline view of the uterus and ovaries and to identify the location of any known fibroids.

  • Infection Screening: Testing for active pelvic infections or STIs to ensure it is safe to pass instruments into the uterus.

  • Blood Panels: A routine check of your blood count, especially if you have been experiencing heavy bleeding and anemia.

  • Hysterogram (HSG): Sometimes performed prior to hysteroscopy to check the patency of the fallopian tubes.

  • Recovery Time: Most patients can return to work and normal daily activities the same day or the following morning.

  • Short-term Symptoms: It is normal to experience mild cramping and light vaginal spotting for 1 to 2 days.

  • Gas/Shoulder Pain: If carbon dioxide was used for expansion, you may feel temporary referred pain in your shoulder for 24 hours.

  • Activity Restrictions: Most doctors recommend avoiding sexual intercourse and the use of tampons for a few days to allow the cervix to close and reduce the risk of infection.

  • Follow-up: Your doctor will discuss the visual findings immediately, though biopsy results typically take 5–7 days.

  • Direct Visualization: Provides a "real-time" view that is often more definitive than X-rays or ultrasounds for identifying small polyps or adhesions.

  • Incision-Free: The lack of surgical cuts means there is no external scarring and a near-instantaneous recovery period.

  • Immediate Transition: If a problem is found, it can often be treated during the same session by switching to an operative hysteroscopy to remove the growth.

  • High Safety Profile: Complications like uterine perforation or infection are extremely rare when performed by experienced specialists.

  • Fertility Friendly: It is the "gold standard" for evaluating the uterine environment before proceeding with expensive fertility treatments like IVF.

Polypectomy (Uterine Polyp Removal)

A uterine polypectomy is a minimally invasive surgical procedure to remove polyps—small, usually benign (non-cancerous) growths—from the lining of the uterus (endometrium). It is the most effective way to stop abnormal bleeding and improve fertility related to polyps. This procedure targets the growths directly, providing immediate diagnostic and therapeutic results.

  • Abnormal Uterine Bleeding: If you experience heavy periods, bleeding between your cycles, or any bleeding after menopause.

  • Infertility: Polyps can interfere with the uterine environment, sometimes acting like a natural "IUD" and preventing an embryo from implanting.

  • Recurrent Miscarriage: When polyps distort the uterine cavity or interfere with the blood supply to a developing fetus.

  • Irregular Cycles: Persistent spotting or unpredictable cycles that are not resolved by hormonal medications.

  • Post-Menopausal Spotting: Any amount of bleeding after menopause should be investigated, as polyps are a common cause.

  • Access: This is a "scarless" surgery. The surgeon inserts a hysteroscope (a thin telescope with a camera) through the vagina and cervix into the uterus. No abdominal incisions are made.

  • Anesthesia: The procedure is typically performed in an outpatient setting under local anesthesia, light sedation, or general anesthesia, taking 15 to 45 minutes.

  • Expansion: The uterus is filled with a saline solution or gas to expand the cavity, providing the surgeon with a high-definition, panoramic view of the polyps.

  • Removal: The surgeon uses specialized micro-instruments—such as a small wire loop (resectoscope), tiny scissors, or a mechanical morcellator—to snip or shave the polyp off at its base.

  • Biopsy: The removed polyps are almost always sent to a laboratory for pathology testing to confirm they are benign and rule out any cellular abnormalities.

  • Timing Your Procedure: Ideally performed during the first week after your period ends, when the uterine lining is at its thinnest and polyps are easiest to see.

  • Pregnancy Test: A mandatory check to ensure you are not pregnant before any instruments are introduced into the uterus.

  • Pelvic Imaging: A recent ultrasound or saline sonogram is required to map the location and size of the polyps.

  • Fasting: Following "nothing by mouth" instructions for 6–8 hours if your procedure involves sedation or general anesthesia.

  • Medication Audit: You may be advised to take an anti-inflammatory pain reliever an hour before the procedure to minimize post-operative cramping.

  • Saline Infusion Sonogram (SIS): A specialized ultrasound that uses fluid to outline the uterine cavity and highlight the polyps.

  • Diagnostic Hysteroscopy: Often performed just prior to the removal to confirm the surgical plan.

  • Cervical Screening: To ensure there are no active infections or cervical issues that could complicate the entry of the hysteroscope.

  • ECG: A routine heart check for patients undergoing sedation or general anesthesia.

  • Recovery Time: Most patients are able to return to their normal daily routine within 1 to 2 days.

  • Immediate Symptoms: It is normal to experience mild cramping and light vaginal spotting or a "watery" discharge for 3 to 7 days.

  • Pain Management: Over-the-counter pain relief (like ibuprofen) is usually sufficient to manage any temporary discomfort.

  • Activity Restrictions: You should avoid sexual intercourse, tampons, and douching for 1 to 2 weeks to prevent infection and allow the uterine lining to heal.

  • Cycle Regulation: Most women see an immediate improvement in their menstrual regularity and a significant reduction in heavy bleeding.

  • Incision-Free Procedure: The lack of external cuts means no visible scarring and a near-instantaneous recovery compared to traditional surgery.

  • Fertility Boost: Removing polyps significantly increases the success rates of both natural conception and assisted reproductive treatments like IVF.

  • Definitive Results: Provides both a cure for the bleeding and a tissue sample for biopsy in a single, short session.

  • High Precision: Specialized mechanical morcellators allow for the rapid removal of multiple polyps with minimal trauma to the surrounding healthy endometrium.

  • Immediate Symptom Relief: Most patients notice a dramatic difference in their very next menstrual cycle following the procedure.

Hysteroscopic Adhesiolysis (Asherman Syndrome)

Hysteroscopic Adhesiolysis is a specialized surgical procedure used to treat Asherman Syndrome, a condition where scar tissue (adhesions) forms inside the uterus. This scar tissue can cause the uterine walls to stick together, distorting the cavity. The goal of the surgery is to precisely remove these "bands" of scar tissue to restore the shape of the uterine cavity, allowing for normal menstruation and the restoration of fertility.

  • Asherman Syndrome: When intrauterine scarring is confirmed via imaging or a prior diagnostic procedure.

  • Amenorrhea or Hypomenorrhea: If your periods have stopped entirely or become extremely light following a uterine procedure (like a D&C).

  • Infertility: When scar tissue physically blocks the fallopian tubes or creates an environment where an embryo cannot implant.

  • Recurrent Miscarriage: If a distorted or constricted uterine cavity prevents a pregnancy from growing safely.

  • Cyclical Pelvic Pain: Monthly pain that occurs without visible bleeding, often caused by menstrual blood being trapped behind scar tissue.

  • Access: This is a "scarless" surgery performed entirely through the vagina and cervix using a hysteroscope (a thin camera). No abdominal incisions are required.

  • Anesthesia: The procedure is typically performed in an outpatient setting under general or spinal anesthesia and takes about 30 to 60 minutes.

  • Visualization: The uterus is expanded with a saline solution to provide the surgeon with a clear, high-definition view of the internal scarring.

  • Adhesiolysis: The surgeon uses micro-scissors, a laser, or a specialized electrosurgical loop to precisely cut through the adhesions. In severe cases, heat-based tools are often avoided to prevent further scarring of the delicate lining.

  • Guided Navigation: In complex cases where the cavity is completely closed, a second surgeon may use abdominal ultrasound or a laparoscope to guide the hysteroscopic surgeon and prevent puncturing the uterine wall.

  • Saline Infusion Sonogram (SIS): A specialized ultrasound used to map the extent of the adhesions before surgery.

  • Hysterosalpingogram (HSG): An X-ray that uses dye to identify the exact locations where the uterine walls are stuck together.

  • Pregnancy Test: A mandatory check to ensure the procedure is safe to perform.

  • Cervical Ripening: You may be given medication to take a few hours before surgery to help soften the cervix for easier instrument entry.

  • Fasting: Adhering to "nothing by mouth" instructions for 6–8 hours prior to your anesthesia.

  • Diagnostic Hysteroscopy: Often the final step to confirm the severity of Asherman Syndrome before the surgical repair begins.

  • Pelvic MRI: Occasionally used in very severe cases to determine if there is any healthy endometrial tissue remaining behind the scars.

  • Blood Panels: A routine check of your blood count and coagulation profile to ensure a safe surgical experience.

  • ECG: A standard heart check to confirm you are healthy enough for the administration of anesthesia.

  • Immediate Recovery: Most patients return home the same day and experience only mild cramping and light spotting for 2 to 5 days.

  • Adhesion Prevention (Crucial): Because the uterus "wants" to scar again, a specialized balloon or stent is often placed inside the uterus for 3 to 7 days to keep the walls apart.

  • Hormone Therapy: High-dose estrogen is typically prescribed for 30 to 60 days to stimulate the rapid growth of a healthy uterine lining over the surgical areas.

  • Follow-up Imaging: A "second-look" diagnostic hysteroscopy is usually performed 4 to 6 weeks later to ensure the cavity has remained open and healthy.

  • Success Rates: While restoration is highly successful in mild cases, severe Asherman’s may require multiple surgeries to fully restore the uterine lining.

  • Restores Reproductive Health: This is the primary treatment for returning a scarred uterus to a functional state for pregnancy and menstruation.

  • Incision-Free Technology: Using the natural opening of the cervix means no external scarring and a rapid return to daily activities.

  • Micro-Precision Tools: The use of cold-blade micro-scissors prevents thermal damage to the remaining healthy uterine lining (endometrium).

  • Comprehensive Post-Op Protocol: The combination of stents and hormone therapy significantly reduces the risk of the scar tissue growing back.

  • Advanced Guidance: The use of simultaneous ultrasound or laparoscopy provides an extra layer of safety when navigating a distorted uterine cavity.

Septum Resection
Septum Resection

Hysteroscopic Septum Resection, or Septoplasty, is a specialized surgical procedure used to correct a uterine septum—a congenital condition where a wedge-shaped longitudinal wall of tissue divides the uterine cavity. This tissue is typically fibrous and has a poor blood supply, which can interfere with the healthy development of a pregnancy. The procedure aims to unify the cavity into a single, functional space.

  • Recurrent Miscarriage: A uterine septum is one of the most common correctable causes of repeated pregnancy loss, as an embryo may implant on the septum where there is insufficient blood flow to support growth.

  • Infertility: While a septum does not always prevent conception, it can interfere with the proper implantation of a fertilized egg into a healthy part of the uterine lining.

  • Risk of Preterm Labor: A divided cavity limits the physical space available for a growing fetus, significantly increasing the risk of early delivery or malpresentation (such as a breech position).

  • Congenital Abnormality: When a 3D ultrasound or MRI confirms the presence of a partial or complete septum that distorts the internal triangular shape of the uterus.

  • Access: This is a "scarless" outpatient procedure performed entirely through the vagina and cervix using a hysteroscope (a thin camera). No abdominal incisions are required.

  • Anesthesia: The surgery is typically performed under general or spinal anesthesia and takes approximately 20 to 45 minutes.

  • Distension: The uterus is expanded with a saline solution to provide the surgeon with a clear, magnified view of the dividing septum and the surrounding cavity walls.

  • Resection: The surgeon uses micro-scissors, a laser, or a specialized electrosurgical loop (resectoscope) to precisely cut through the midline of the fibrous tissue. Because the septum lacks major blood vessels, there is usually very little bleeding during the procedure.

  • Completion: The resection continues until the uterine cavity reaches a normal, unified triangular shape, ensuring there is no obstruction between the two sides of the uterus.

  • Advanced Imaging: A 3D ultrasound or pelvic MRI is essential to differentiate a septate uterus from a bicornuate (heart-shaped) uterus, which requires a different surgical approach.

  • Timing Your Procedure: Ideally scheduled during the first week after your period ends, when the uterine lining is at its thinnest for the best surgical visualization.

  • Pregnancy Test: A mandatory check to ensure the procedure is safe to perform.

  • Cervical Ripening: You may be given medication to take a few hours before surgery to help soften the cervix, allowing the hysteroscope to pass more easily.

  • Fasting: Following "nothing by mouth" instructions for 6–8 hours prior to your scheduled anesthesia.

  • 3D Pelvic Ultrasound: The gold standard for measuring the depth and thickness of the septum and the outer contour of the uterus.

  • Hysterosalpingogram (HSG): An X-ray that uses dye to show the internal "V" or "Y" shape of the divided cavity.

  • Diagnostic Hysteroscopy: Often performed just before the resection to confirm the surgical plan and check the health of the fallopian tube openings.

  • ECG: A standard heart check to ensure you are healthy enough for the administration of anesthesia.

  • Recovery Time: Most patients return to their normal daily routine within 1 to 2 days.

  • Immediate Symptoms: Mild cramping and light vaginal spotting or a "watery" discharge are normal for 2 to 5 days as the uterus heals.

  • Hormonal Support: Some surgeons prescribe estrogen therapy for a few weeks post-op to encourage the healthy uterine lining to grow over the area where the septum was removed.

  • Follow-up Imaging: A "second-look" diagnostic hysteroscopy or a follow-up 3D ultrasound is often performed 4 to 8 weeks later to confirm the cavity is fully open.

  • Pregnancy Timing: Most doctors recommend waiting 2 to 3 menstrual cycles before attempting to conceive to ensure the uterine lining has completely regenerated and is ready for implantation.

  • Significant Improvement in Outcomes: Successful resection can reduce miscarriage rates from as high as 80–90% down to 10–15% in women with this condition.

  • Incision-Free Recovery: Using the natural opening of the cervix means no external scars and a much faster return to work and family life.

  • Micro-Precision Tools: The use of specialized micro-scissors or lasers allows for the removal of the septum without damaging the sensitive, vascular parts of the uterine wall.

  • Unified Uterine Space: Restoring the natural triangular shape of the cavity provides the maximum possible space for a baby to grow to full term.

  • Definitive Correction: Unlike many other fertility issues, a uterine septum is a structural problem that can be permanently corrected with a single, short surgical procedure.

Prolapse Surgery (Uterine / Vaginal Prolapse)

Prolapse surgery is performed to restore the pelvic organs—such as the bladder, uterus, or rectum—to their original positions when the muscles and ligaments supporting them have weakened. The goal is to relieve the sensation of a "bulge" and restore normal bowel, bladder, and sexual function by reinforcing the pelvic floor.

  • Sensation of a "Bulge": Feeling or seeing a protrusion of tissue coming out of the vaginal opening.

  • Pelvic Pressure: A constant heavy or "dragging" sensation in the pelvis that worsens after standing for long periods.

  • Urinary Issues: Difficulty starting urination, a feeling of incomplete emptying, or the need to "push" the bulge back in to urinate.

  • Bowel Dysfunction: Difficulty passing stool or chronic constipation specifically related to a bulging rectum (rectocele).

  • Pain During Intercourse: Discomfort or a lack of sensation caused by the shifting of the vaginal walls and pelvic organs.

  • Anterior Repair (Cystocele): Fixes a prolapsed bladder by tightening and reinforcing the front wall of the vagina.

  • Posterior Repair (Rectocele): Fixes a prolapsed rectum by tightening and reinforcing the back wall of the vagina.

  • Uterine Suspension (Hysteropexy): If the uterus is falling, it is "lifted" and anchored to pelvic ligaments or bone using stitches or mesh, allowing the uterus to be preserved.

  • Vaginal Hysterectomy: In many cases of uterine prolapse, the uterus is removed entirely through the vagina to provide a permanent solution for the descent.

  • Sacrocolpopexy: An advanced "keyhole" (laparoscopic or robotic) surgery where the top of the vagina is attached to the sacrum (base of the spine) using a synthetic mesh strip for maximum support.

  • Vaginal Approach: The most common method. All incisions are made inside the vagina, leaving no external scars and requiring a shorter recovery time.

  • Laparoscopic/Robotic Approach: Performed through 4–5 tiny "keyhole" incisions in the abdomen. This is often used for complex "suspension" surgeries to provide superior visualization and precision.

  • Colpocleisis: A specialized "obliterative" surgery for older patients who are no longer sexually active. The vaginal canal is shortened and sewn shut to provide a permanent "shelf" of support for the organs.

  • Anesthesia: Depending on the approach, the procedure is performed under general or spinal anesthesia and typically takes 1 to 3 hours.

  • Urodynamic Testing: Specialized bladder tests to see if repositioning the organs will cause or fix urinary leaking (incontinence).

  • Pelvic Floor Assessment: A detailed examination to identify which "compartments" (front, back, or top) of the vagina need the most support.

  • Weight Management: Patients are often encouraged to reach a healthy weight before surgery to reduce pressure on the new surgical repairs.

  • Smoking Cessation: Stopping smoking 6 weeks before surgery is critical, as chronic coughing and poor tissue healing significantly increase the risk of the prolapse returning.

  • Fasting: Adhering to "nothing by mouth" instructions for 8 hours prior to your anesthesia.

  • Pelvic Ultrasound: To check the size of the uterus and ensure there are no hidden fibroids or ovarian cysts.

  • Cystoscopy: A quick look inside the bladder with a tiny camera to ensure there are no other causes for urinary symptoms.

  • Post-Void Residual (PVR): A simple ultrasound scan after you urinate to see how much fluid remains in the bladder.

  • ECG: A standard heart check to ensure you are healthy enough for the duration of the procedure.

  • Hospital Stay: Typically involves 1 to 2 nights for monitoring and ensuring you can urinate comfortably before going home.

  • The "6-Week Rules": To prevent the repair from failing or stitches from tearing, you must strictly avoid:
    Heavy Lifting: Nothing heavier than 2kg (roughly the weight of a full kettle).
    Straining: Stool softeners are usually prescribed to prevent constipation and straining during bowel movements.
    High-Impact Exercise: No running, jumping, or heavy core workouts.
    Sexual Activity: Avoid intercourse and the use of tampons to allow the vaginal incisions to heal.

  • Immediate Symptoms: Expect mild vaginal bleeding and a "watery" discharge for 2 to 4 weeks as the internal stitches dissolve.

  • Definitive Symptom Relief: Successfully removes the physical bulge and the associated dragging sensation, often after years of discomfort.

  • Restores Organ Function: Many patients find that their bladder and bowel movements become significantly easier and more predictable after surgery.

  • Advanced "Keyhole" Options: Laparoscopic and robotic platforms offer the most durable repairs with the smallest incisions and fastest recovery.

  • No Visible Scarring: Traditional vaginal repairs leave no external marks, providing a discreet and effective solution.

  • Tailored Anatomy Repair: Every surgery is customized to the patient’s specific anatomy, ensuring the correct balance of support for all pelvic organs.

Vaginal Repair Surgery

Vaginal repair surgery, clinically known as Colporrhaphy, is a procedure used to reinforce and strengthen the vaginal walls when they have become weakened or stretched. This is most commonly performed to treat pelvic organ prolapse, such as a Cystocele (bladder bulging into the vagina) or a Rectocele (rectum bulging into the vagina), restoring the pelvic organs to their correct anatomical positions.

  • Physical Bulge: Feeling or seeing a lump at or poking out of the vaginal opening, especially after long periods of standing or straining.

  • Pelvic Pressure: A constant "heavy" or dragging sensation in the lower pelvis that may improve when lying down.

  • Bladder Dysfunction: Difficulty emptying the bladder completely, a frequent urge to urinate, or recurrent urinary tract infections (UTIs).

  • Bowel Issues: Difficulty having a bowel movement or the need to "splint" (pressing on the vaginal wall with a finger) to assist a bowel movement.

  • Childbirth Injury: If the perineum (the area between the vagina and anus) was severely torn or stretched during delivery, causing functional or cosmetic concerns.

  • Anterior Repair: Focuses on the front wall of the vagina to support and lift a prolapsed bladder.

  • Posterior Repair: Focuses on the back wall of the vagina to support a prolapsed rectum.

  • Perineorrhaphy: Often performed alongside a posterior repair to strengthen the perineum and the muscles around the vaginal opening.

  • Enterocele Repair: A specialized repair for the top of the vaginal wall if the small intestine is bulging into the vaginal space.

  • Access: This is a "scarless" surgery performed entirely through the vaginal opening. There are no abdominal incisions or external scars.

  • Anesthesia: The surgery is typically performed under general or spinal anesthesia and takes about 30 to 60 minutes.

  • The Procedure: The surgeon makes a precise incision in the vaginal lining to reach the underlying supportive tissue (fascia).

  • Reinforcement: The shifted organ (bladder or rectum) is moved back into its proper place, and the surgeon uses permanent or long-lasting dissolvable stitches to tighten and "pleat" the weakened fascia.

  • Trimming: Any excess or overstretched vaginal skin is trimmed away to ensure a firm, supportive wall before the incision is closed with dissolvable sutures.

  • Pelvic Floor Exam: A detailed assessment to determine which compartments of the vagina require reinforcement.

  • Urodynamic Studies: To check how well the bladder is functioning and ensure the repair won't cause new urinary leakage.

  • Bowel Management: Starting a high-fiber diet or mild stool softeners a few days before surgery to ensure a "soft" first bowel movement post-op.

  • Smoking Cessation: Stopping smoking at least 6 weeks prior is vital, as chronic coughing puts immense pressure on the new stitches and can cause the repair to fail.

  • Fasting: Following "nothing by mouth" instructions for 8 hours prior to your scheduled anesthesia.

  • Post-Void Residual (PVR) Scan: A simple ultrasound to measure how much urine stays in the bladder after you try to empty it.

  • Pelvic Ultrasound: To rule out other issues like uterine fibroids or ovarian cysts that might be contributing to pelvic pressure.

  • Cystoscopy: A quick look inside the bladder to ensure the lining is healthy before the anterior wall is repaired.

  • ECG: A routine heart check to confirm you are healthy enough for the duration of the surgery.

  • Hospital Stay: Most patients stay in the hospital for one night to ensure they can urinate comfortably and that pain is well-controlled.

  • Immediate Symptoms: It is normal to experience mild vaginal bleeding and a "watery" discharge for 2 to 4 weeks as the internal stitches dissolve.

  • The "6-Week Rules": To prevent the stitches from tearing and ensure the repair holds for the long term, you must strictly avoid:
    Heavy Lifting: Nothing heavier than 2kg (roughly a bag of sugar).
    Straining: Stool softeners are essential to prevent constipation and abdominal pressure.
    Sexual Activity: No intercourse or use of tampons while the vaginal lining heals.
    High-Impact Exercise: No running, jumping, or heavy core training.

  • Pelvic Floor Physiotherapy: Many patients are referred to a specialist therapist after 6 weeks to learn how to properly strengthen the muscles that support the new repair.

  • Restores Quality of Life: Eliminates the physical discomfort and the "bulge" sensation, allowing for a more active and comfortable lifestyle.

  • Incision-Free Technology: Performing the surgery through the vagina avoids the risks and recovery time associated with abdominal surgery.

  • Functional Restoration: Significantly improves bladder and bowel control by returning the organs to their natural anatomical positions.

  • Long-Lasting Support: The use of specialized, high-strength sutures ensures the internal "scaffolding" of the vagina is rebuilt to last.

  • Combined Approaches: Surgeons can often address multiple types of prolapse (bladder, rectum, and perineum) in a single, short surgical session.

Sling Surgery (Urinary Incontinence)

Sling surgery is the most common surgical treatment for Stress Urinary Incontinence (SUI)—the leaking of urine during physical activities like coughing, sneezing, laughing, or exercising. The procedure involves placing a narrow strip of material under the urethra (the tube that carries urine out of the body) to act like a hammock, providing the necessary support to prevent accidental leaks.

  • Stress Urinary Incontinence: If you experience frequent leaking when you cough, sneeze, laugh, or lift heavy objects.

  • Activity-Induced Leaks: When physical exercise or sudden movements result in the involuntary loss of urine.

  • Failed Conservative Therapy: If pelvic floor exercises (Kegels) or lifestyle changes have not sufficiently controlled your symptoms.

  • Impact on Quality of Life: When you find yourself avoiding social situations, exercise, or specific clothing due to the fear of a leak.

  • Post-Prolapse Repair: Sometimes performed alongside prolapse surgery to ensure the bladder remains supported once it is repositioned.

  • Mid-Urethral Slings (MUS): The most common "tension-free" method. A thin strip of synthetic mesh is placed under the middle of the urethra through small, discreet incisions.

  • Retropubic (TVT): The sling is passed behind the pubic bone and exits through two tiny incisions in the lower abdomen.

  • Transobturator (TOT): The sling is passed through the groin muscles and exits through small incisions in the creases of the thigh.

  • Traditional Autologous Sling: Instead of synthetic mesh, the surgeon uses a strip of the patient's own tissue (fascia), harvested from the abdominal wall or thigh. This is often preferred for complex cases or those wishing to avoid synthetic materials.

  • Access: A small incision (about 1–2 cm) is made inside the vagina, directly under the urethra. No large abdominal cuts are required for most types.

  • Anesthesia: The surgery is typically an outpatient procedure performed under general or spinal anesthesia and takes about 30 to 45 minutes.

  • Placement: The sling material is threaded through the vaginal incision and carefully positioned to provide a "backstop" for the urethra.

  • Tensioning: The surgeon ensures the sling is "tension-free," meaning it only supports the urethra when there is downward pressure (like a cough), without blocking normal urination.

  • Closure: The vaginal and small skin incisions are closed with dissolvable stitches, leaving no permanent external marks.

  • Urodynamic Testing: Specialized bladder function tests to confirm that your leakage is caused by stress incontinence and not an overactive bladder.

  • Cystoscopy: A quick look inside the bladder to ensure the anatomy is healthy before the sling is positioned.

  • Urinalysis: To rule out a urinary tract infection (UTI), as any active infection must be treated before surgery.

  • Fasting: Following "nothing by mouth" instructions for 8 hours prior to your scheduled anesthesia.

  • Medication Audit: You may be asked to stop taking blood thinners or aspirin 7–10 days before the procedure.

  • Stress Test: Your doctor may ask you to cough with a full bladder to observe the nature of the leakage.

  • Post-Void Residual (PVR) Scan: An ultrasound to measure how well your bladder empties before the sling is added.

  • Pelvic Exam: To check for any co-existing pelvic organ prolapse that might need to be addressed at the same time.

  • ECG: A standard heart check to ensure you are healthy enough for the duration of the procedure.

  • Hospital Stay: Most patients go home the same day once they are able to empty their bladder normally after the anesthesia wears off.

  • Immediate Symptoms: Mild vaginal spotting and soreness in the groin or lower abdomen are normal for 1 to 2 weeks.

  • The "6-Week Rules": To ensure the sling "grows" into the tissue and stays perfectly in place, you must strictly avoid:
    Heavy Lifting: Nothing heavier than 4–5 kg (about the weight of a heavy grocery bag).
    Sexual Activity: No intercourse or use of tampons while the vaginal incision heals.
    High-Impact Exercise: No running, jumping, or heavy core workouts.

  • Voiding Changes: It is normal for the stream of urine to be slightly slower than before surgery; this usually settles as the initial swelling goes down.

  • Immediate Results: Most women report significant improvement or complete dryness immediately following the procedure.

  • High Success Rates: Between 80% to 90% of patients experience long-term relief from stress urinary incontinence.

  • Minimally Invasive Technology: Small incisions and short operating times mean a rapid return to daily life and very little post-operative pain.

  • Proven Durability: Modern sling materials and techniques are designed to provide a permanent solution for bladder support.

  • Tailored Material Choice: Whether using advanced synthetic mesh or your own natural tissue, the procedure is customized to your specific medical history and goals.

Intrauterine Insemination (IUI)

Intrauterine Insemination (IUI) is a widely used, non-invasive first-line fertility treatment designed to bridge the gap between natural conception and more complex assisted reproductive technologies. This procedure involves placing specially washed and concentrated sperm directly into the uterus around the time of ovulation. By bypassing the cervix and reducing the distance sperm must travel to reach the egg, IUI significantly increases the chances of fertilization for many couples.

  • Unexplained infertility where no clear biological barrier has been identified.

  • Mild male factor infertility, including slightly lower sperm count or motility.

  • Cervical mucus issues that may prevent sperm from entering the uterus naturally.

  • Use of donor sperm for single women or same-sex couples.

  • Semen allergy (rare cases) where proteins in the seminal fluid cause a reaction.

  • Ejaculatory dysfunction or physical barriers to natural intercourse.

  • Polycystic Ovary Syndrome (PCOS) requiring carefully monitored ovulation induction.

  • Endometriosis (Stage I or II) where pelvic anatomy remains relatively undisturbed.

  • Minor hormonal imbalances that interfere with regular ovulation cycles.

  • Vaginismus or other conditions that make traditional intercourse difficult.

  • Cases requiring "washed" sperm to remove prostaglandins that cause uterine cramping.

  • Ovulation is tracked through at-home monitoring kits or clinical ultrasound scans.

  • Ovarian stimulation may be used to encourage the development of one to three mature follicles.

  • A sperm sample is collected and "washed" in a specialized lab to isolate highly motile sperm.

  • The concentrated sperm sample is loaded into a thin, flexible, high-precision catheter.

  • The physician gently inserts the catheter through the cervix and into the uterine cavity.

  • The sperm is injected directly into the uterus, a process that takes only a few minutes and requires no anesthesia.

  • Advanced Sperm Washing (Density Gradient)A refined laboratory technique that separates the healthiest, most motile sperm from debris and immotile cells.

  • AI-Powered Follicle TrackingAutomated ultrasound software that precisely predicts the peak window of ovulation for optimal timing.

  • Microfluidic Sperm SelectionA gentle, chemical-free sorting method that selects sperm with the highest DNA integrity.

  • High-Definition Insemination CathetersUltra-thin, soft-tip catheters designed to minimize uterine irritation and maximize patient comfort.

  • Hormonal Trigger OptimizationThe use of precision medications to ensure the egg is released exactly when the sperm is introduced.

  • Digital Cycle MonitoringIntegrated health apps that allow patients to sync their monitoring data directly with the clinic’s laboratory.

  • Comprehensive fertility screening to ensure the fallopian tubes are open and functional.

  • Lifestyle adjustments, including a balanced diet and moderate exercise, to support egg and sperm quality.

  • Coordination of a monitoring schedule to identify the exact 24-48 hour window of ovulation.

  • Abstinence for 2-5 days for the male partner prior to the procedure to optimize the sperm sample.

  • Discussion of the potential for multiple pregnancies if using ovulation-stimulating medications.

  • Hysterosalpingogram (HSG) to confirm that at least one fallopian tube is clear.

  • Semen analysis to ensure the processed sample will meet the minimum motile sperm count.

  • Anti-Müllerian Hormone (AMH) and FSH testing to assess ovarian reserve.

  • Transvaginal Ultrasound to measure the thickness of the endometrial lining.

  • Standard infectious disease screening for both partners as required by medical protocols.

  • Acts as a successful, low-cost entry point for couples with mild fertility hurdles.

  • Bypasses "cervical factor" infertility, where the cervix may be hostile to sperm.

  • Delivers a high concentration of motile sperm directly to the site of fertilization.

  • Allows for a more natural conception process compared to IVF, as fertilization still occurs within the body.

  • Provides high cumulative success rates, with many couples achieving pregnancy within three to six cycles.

  • Patients can return to all normal daily activities immediately following the procedure.

  • Minor spotting or light cramping may occur but typically resolves within a few hours.

  • A "Two-Week Wait" (2WW) period begins, during which the patient monitors for early signs of pregnancy.

  • A follow-up pregnancy test (urine or blood-based Beta-hCG) is performed 14 days post-IUI.

  • If successful, a confirmatory ultrasound is scheduled to monitor early fetal development.

  • Transition to routine obstetric care for a healthy, natural-term pregnancy.

  • Resolution of infertility through a less invasive and more affordable medical pathway.

  • Opportunity to move toward more advanced treatments (like IVF) if IUI does not result in pregnancy after several attempts.

  • Ongoing reproductive health monitoring to prepare for future family-building goals.

  • Peace of mind from having utilized a scientifically proven, time-tested fertility method.

Cervical Cerclage
Cervical Cerclage

In 2026, Cervical Cerclage—often called a "cervical stitch"—is a critical preventative procedure used during pregnancy to treat cervical insufficiency (an incompetent cervix). This condition occurs when the cervical tissue weakens and begins to open (dilate) too early, which can lead to late-term miscarriage or premature birth.

  • Prophylactic (History-Based): For women with a history of previous second-trimester losses or preterm births, usually performed between 12 and 14 weeks.

  • Therapeutic (Ultrasound-Based): When an ultrasound identifies a significantly shortening cervix (typically less than 25mm) in high-risk patients.

  • Emergency (Rescue): When the cervix has already begun to dilate and fetal membranes are visible, serving as a high-stakes intervention to save the pregnancy.

  • Cervical Insufficiency: Diagnosed weakness in the cervical tissue that cannot support the weight of a growing pregnancy.

  • Failed Progesterone Therapy: When hormonal treatments are insufficient to prevent cervical shortening.

  • McDonald Technique: The most common vaginal approach where a permanent stitch is placed around the mid-portion of the cervix.

  • Shirodkar Technique: A slightly more complex vaginal method where the stitch is placed higher up, closer to the internal opening of the cervix.

  • Transabdominal Cerclage (TAC): Performed via laparoscopy or robotic surgery at the very top of the cervix; usually reserved for cases where vaginal stitches have failed.

  • Robot-Assisted Cerclage: Utilizing advanced robotic systems for high-precision placement in complex anatomical cases.

  • Emergency Stitching: Specialized "rescue" techniques used to carefully reposition membranes before sealing the cervix.

  • Anesthesia: The procedure is typically performed under regional anesthesia (spinal or epidural) to ensure the patient is pain-free.

  • Positioning: The surgeon accesses the cervix through the vaginal canal while the patient is in a relaxed state.

  • Drawstring Suture: A strong, synthetic thread is woven around the cervical tissue and pulled tight, similar to a drawstring bag.

  • Monitoring: The surgical team monitors for uterine contractions or signs of preterm labor immediately following the stitch placement.

  • Duration: The vaginal procedure is relatively quick, often taking between 20 to 45 minutes to complete.

  • Fasting: Patients must fast for 8–12 hours before the surgery to ensure safety during anesthesia.

  • Fetal Assessment: An ultrasound is performed immediately before the procedure to confirm the baby's health and position.

  • Infection Screening: Swabs and blood tests are taken to rule out any active vaginal or pelvic infections.

  • Medication Review: Discussing any history of uterine contractions or sensitivity to anesthesia.

  • Recovery Planning: Arranging for a support person to assist with transport and initial home monitoring.

  • Transvaginal Ultrasound: To measure the length and shape (funneling) of the cervix.

  • Blood Tests (CBC): To check for signs of infection or inflammation that could complicate the surgery.

  • Urinalysis: To ensure there is no urinary tract infection (UTI) present.

  • Fetal Heart Rate Monitoring: To establish a baseline of the baby's well-being.

  • Amniotic Fluid Assessment: In emergency cases, checking for the presence of the amniotic sac in the vaginal canal.

  • Hospital Stay: Most patients go home the same day or after one night of observation for contractions.

  • Immediate Symptoms: Mild cramping and light spotting are considered normal for 48–72 hours post-op.

  • Pelvic Rest: Strict avoidance of intercourse, tampons, and douching for the remainder of the pregnancy.

  • Stitch Removal: The suture is typically removed in-office at 36 or 37 weeks to allow for a normal vaginal delivery.

  • Activity Management: While strict bed rest is rarely mandated in 2026, patients are advised to avoid heavy lifting and high-impact exercise.

  • Pregnancy Prolongation: Highly effective at extending gestation, with success rates between 70% and 90%.

  • Reduced Prematurity Risk: Lowers the likelihood of extremely early preterm birth (before 28 weeks).

  • Life-Saving Intervention: Acts as a critical "rescue" for pregnancies where the cervix begins to open prematurely.

  • Future Planning: Transabdominal options provide a long-term solution for women with recurring cervical issues.

  • Minimally Invasive: Most techniques involve no external incisions and allow for a quick physical recovery.

Colposcopy and Biopsy

A colposcopy is a standard diagnostic procedure used to closely examine the cervix, vagina, and vulva for signs of disease. It is most commonly performed as a follow-up after an abnormal Pap smear or a positive HPV test to provide a more detailed assessment of cellular health.

  • Abnormal Pap Smear: Following results that indicate atypical or precancerous cells.

  • Positive HPV Test: When high-risk strains of Human Papillomavirus are detected.

  • Unexplained Bleeding: To investigate bleeding after intercourse or between periods.

  • Visible Abnormalities: When a physician notices unusual growths or lesions during a pelvic exam.

  • Monitoring CIN: To follow up on previously diagnosed low-grade cervical changes (CIN 1).

  • Visual Examination: Using a colposcope—a magnifying instrument that remains outside the body—to view the tissue in high detail.

  • Acetic Acid Swabbing: Applying a mild vinegar solution to highlight abnormal areas by turning them white.

  • Iodine Solution (Schiller’s Test): An alternative staining method used to further identify suspicious cell clusters.

  • Targeted Biopsy: The removal of a tiny tissue sample from suspicious areas for laboratory analysis.

  • Cervical Mapping: A systematic check of the cervix, vagina, and vulva to identify the extent of any abnormalities.

  • Positioning: The patient lies on an exam table with feet in stirrups, similar to a standard pelvic exam.

  • Magnification: The doctor positions the colposcope at the opening of the vagina to light and magnify the view.

  • Solution Application: A mild solution is swabbed onto the cervix, which may cause a slight stinging or burning sensation.

  • Tissue Sampling: If needed, a biopsy is taken, during which the patient may feel a sharp pinch or mild cramping.

  • Duration: The entire procedure is relatively quick, typically taking between 10 to 20 minutes in a clinical setting.

  • Timing: Schedule the exam for a time when you are not having your period for the clearest view.

  • Pelvic Rest: Avoid sexual intercourse, tampons, and vaginal medications for 24 to 48 hours before the test.

  • Pain Management: Discuss taking an over-the-counter pain reliever shortly before the appointment to minimize cramping.

  • Medical History: Inform the doctor if you are pregnant, as this may affect the decision to perform a biopsy.

  • Support: While the procedure is minor, some patients prefer to have a support person accompany them.

  • Pap Smear: The initial screening test that often leads to the recommendation of a colposcopy.

  • HPV Typing: To identify the specific strain of the virus present.

  • Biopsy Analysis: Laboratory testing of tissue samples to determine the grade of cellular changes.

  • Endocervical Curettage (ECC): A specialized sample taken from the cervical canal if the transformation zone is not fully visible.

  • Follow-up Imaging: In rare cases, further imaging may be required if abnormalities extend beyond the cervix.

  • Immediate Activity: Most women can return to work or normal routines immediately following the procedure.

  • Recovery Timeline: Light spotting or a dark, grainy discharge is normal for 2 to 5 days.

  • Exercise Restrictions: It is often recommended to avoid heavy or strenuous exercise for 24–48 hours.

  • Pelvic Rest: If a biopsy was taken, avoid tampons, douching, and sexual intercourse for at least one week to allow healing.

  • Results Waiting Period: Final biopsy results typically take 1 to 2 weeks to be finalized by the laboratory.

  • Early Detection: Identifies precancerous changes long before they develop into cervical cancer.

  • Accuracy: Provides a far more detailed view of the cervix than a standard pelvic exam.

  • Targeted Treatment: Allows the doctor to identify the exact location for a biopsy, ensuring more accurate results.

  • Minimally Invasive: Performed in-office without the need for general anesthesia or significant downtime.

  • Clear Guidance: Provides a definitive roadmap for whether further treatment (like a LEEP) or simple monitoring is required.

Dilation and Curettage (D&C)

Dilation and Curettage (D&C) is a minor surgical procedure used to diagnose or treat various uterine conditions by removing tissue from the lining of the uterus. This procedure remains a fundamental intervention for managing endometrial health and addressing reproductive complications.

  • Abnormal Uterine Bleeding: Investigation of heavy periods, bleeding between cycles, or post-menopausal bleeding.

  • Retained Tissue Management: Clearing the uterus of tissue following a miscarriage or abortion to prevent infection.

  • Postpartum Complications: Removing fragments of the placenta that remain in the uterus after childbirth.

  • Detection of Anomalies: Identifying uterine polyps, endometrial hyperplasia, or potential uterine cancer.

  • Pregnancy Complications: Treatment of molar pregnancies where abnormal tissue growth occurs.

  • Diagnostic Investigation: Collecting tissue samples to determine the cause of unexplained pelvic symptoms.

  • Dilation: The process of widening the cervix using specialized rods called dilators or medication to soften the cervical canal.

  • Curettage: Use of a spoon-shaped instrument known as a curette to gently scrape tissue from the uterine lining.

  • Suction Curettage: A minimally invasive vacuum method used to remove uterine contents efficiently.

  • Diagnostic Sampling: Extraction of endometrial tissue for laboratory analysis and histopathology.

  • Specialized Access: The healthcare provider widens the cervix to allow instruments to enter the uterine cavity safely.

  • Tissue Removal: A curette or suction device is inserted to clear or sample the endometrium.

  • Anesthesia Integration: Patients receive general, regional, or local anesthesia with sedation to ensure complete comfort.

  • Real-Time Precision: The procedure typically takes 10 to 15 minutes and is conducted in a controlled clinical environment.

  • Outpatient Protocol: Performed as a day-care surgery, allowing for same-day discharge.

  • Softening Agents: Advanced pharmacological options to dilate the cervix more naturally and with less trauma.

  • Precision Curettes: Modern, low-profile instruments designed for high-accuracy tissue collection.

  • Suction Technology: Specialized vacuum devices that provide a gentler alternative to traditional scraping.

  • Enhanced Imaging: Integration of real-time monitoring to ensure the total removal of targeted tissue.

  • Pelvic Ultrasound: To visualize the uterine lining and identify areas of thickening or retained tissue.

  • Blood Tests: Assessment of overall health and screening for pregnancy or infection markers.

  • Physical Examination: A comprehensive pelvic exam to evaluate the cervix and uterine position.

  • ECG and Chest X-ray: Standard pre-operative checks to ensure safety under anesthesia.

  • Accurate Diagnosis: Provides clear evidence for treating conditions like polyps or precancerous thickening.

  • Infection Prevention: Eliminates retained tissue that could lead to severe pelvic inflammatory issues.

  • Hemorrhage Control: Effectively stops excessive bleeding caused by incomplete miscarriages or thick linings.

  • Rapid Results: Offers immediate therapeutic relief for many patients suffering from acute uterine issues.

  • High Success Rates: A well-established procedure with high technical success and low complication rates.

  • Rapid Recovery: Most individuals can return to their home within a few hours of the procedure.

  • Short Downtime: Regular activities can typically be resumed within one to two days.

  • Post-Operative Monitoring: Mild cramping and light spotting are monitored for up to two weeks as part of normal healing.

  • Restored Health: Immediate improvement in symptoms such as heavy bleeding or pelvic discomfort.

Hormone Replacement Therapy (HRT)

Hormone Replacement Therapy (HRT) is a medical treatment used to augment or replace the body’s natural hormones when levels decline or become imbalanced. In 2026, HRT remains a cornerstone of care for managing menopausal symptoms in women, age-related androgen decline in men, and gender-affirming transitions.

  • To relieve menopausal symptoms such as hot flashes, night sweats, and vaginal dryness.

  • If you are experiencing bone density loss (osteoporosis) related to hormonal decline.

  • For men with clinical hypogonadism seeking to improve energy, libido, muscle mass, and mood.

  • When seeking gender-affirming care to align physical characteristics with gender identity.

  • If started within the "window of opportunity"—typically within 10 years of menopause onset or before age 60.

  • Systemic Therapy: Hormones that circulate through the entire bloodstream via oral tablets, transdermal patches, or topical gels.

  • Localized Therapy: Targeted relief for vaginal symptoms using creams or rings with minimal systemic absorption.

  • Injections: Long-acting delivery where hormones are injected directly into the muscle.
  • Pellet Implantation: Small pellets implanted under the skin that release a steady dose over several months.

  • Bioidentical Hormones: Use of substances chemically identical to those naturally produced by the human body.

  • Individualized Dosing: Protocols are tailored based on the specific hormone deficiencies and patient goals.

  • Application: Depending on the method, patients may take a daily pill, apply a gel, or change a patch every few days.

  • Combination Therapy: For women with a uterus, progesterone is administered alongside estrogen to protect the uterine lining.

  • Estrogen-Only Therapy: Reserved typically for patients who have undergone a hysterectomy.

  • Surgical Implantation: For pellets, a small incision is made (usually in the hip area) to place the hormone pellets under the skin.

  • Undergo a comprehensive "risk-benefit" analysis based on age and health history.

  • Discuss family history of blood clots, stroke, or hormone-sensitive cancers.

  • Identify the most suitable delivery method (oral vs. transdermal) to minimize specific risks like thrombosis.

  • Establish baseline symptom tracking to measure the effectiveness of the treatment.

  • Ensure no undiagnosed vaginal bleeding or active liver disease is present.

  • Blood Hormone Panels: To measure current levels of estrogen, progesterone, or testosterone.

  • Bone Density Scan (DEXA): To assess the baseline health of the skeletal system.

  • Mammogram/Pelvic Exam: To rule out pre-existing hormone-sensitive conditions.

  • Liver Function Tests: To ensure the body can safely process systemic hormones.

  • Blood Pressure and Lipid Profile: To evaluate cardiovascular baseline before starting therapy.

  • Experience a significant reduction in vasomotor symptoms and improved sleep quality.

  • Attend regular clinical follow-ups and blood tests to ensure dosage remains effective and safe.

  • Monitor for common adjustment effects such as breast tenderness, bloating, or headaches.

  • Maintain regular screenings for breast and endometrial health as recommended by your provider.

  • Benefit from long-term protective effects against bone fractures.

  • Effectively manages the physical and emotional transitions associated with hormonal shifts.

  • Reduces the long-term risk of osteoporosis and associated bone fractures.

  • Enhances quality of life by restoring libido, energy levels, and mood stability.

  • Offers protective cardiovascular and cognitive benefits for specific patient populations.

  • Provides highly customizable delivery options to fit different lifestyles and risk profiles.

Normal Delivery
Normal Delivery

Revisional bariatric surgery is a specialized procedure performed on patients who have already undergone a primary weight-loss surgery but require a second operation. This may be due to medical complications, insufficient weight loss, or significant weight regain. Because of existing scar tissue and altered anatomy, these procedures are more complex and carry higher risks than initial weight-loss surgeries.

  • Inadequate Weight Loss or Regain: If the initial stomach pouch has stretched over time or the body has adapted to the metabolic changes of the first surgery.

  • Severe Acid Reflux (GERD): Persistent or worsening reflux that does not respond to medication, frequently occurring after a gastric sleeve procedure.

  • Mechanical Complications: Issues such as a "slipped" gastric band, a staple line leak, or a narrowing (stricture) of a previous surgical connection.

  • Chronic Ulcers or "Dumping Syndrome": Persistent digestive issues following a bypass that cannot be managed through dietary changes alone.

  • Nutritional Malabsorption: Severe deficiencies in vitamins or protein that remain uncontrolled despite high-dose supplementation.

  • Sleeve to Bypass Conversion: Converting a gastric sleeve into a Roux-en-Y gastric bypass. This is highly effective for treating severe reflux and triggering further weight loss.

  • Gastric Band Conversion: Removing a "Lap-Band" and converting the anatomy into either a sleeve or a bypass, often performed in a single or two-stage process.

  • Bypass Revision (Stoma Tightening): For a stretched gastric bypass, a surgeon may "re-tighten" the connection (stoma) to restore the feeling of fullness.

  • Intestinal Lengthening: Adjusting the "Roux" limb to increase the bypassed section of the intestine, thereby increasing calorie malabsorption.

  • Sleeve Re-Sleeving: Trimming a previously stretched gastric sleeve to restore its original narrow, restrictive shape.

  • Anesthesia: The surgery is performed under general anesthesia and typically takes between 2 to 4 hours due to the precision required.

  • Surgical Approach: Almost always performed laparoscopically or robotically to navigate through previous scar tissue with high-definition visualization and accuracy.

  • Managing Adhesions: The surgeon must carefully separate internal scarring (adhesions) from previous operations before the new revision can begin.

  • Stapling and Joins: New surgical joins are created using specialized stapling instruments designed for thicker or scarred tissue.

  • Leak Testing: Extensive intra-operative testing is performed to ensure all new connections are watertight and airtight before finishing.

  • Anatomy Mapping: Extensive imaging is required to visualize the current state of the stomach and intestines before entering the operating room.

  • Nutritional Optimization: Correcting any existing vitamin deficiencies through intensive supplementation prior to surgery.

  • Psychological Assessment: A thorough review to ensure the patient is prepared for the "reset" in dietary habits and lifestyle expectations.

  • Smoking Cessation: Patients must stop smoking at least 6 to 8 weeks before surgery, as nicotine significantly increases the risk of staple line leaks in scarred tissue.

  • Weight Management: Following a specific pre-operative diet to reduce liver size and improve surgical access.

  • Upper Endoscopy (EGD): Inserting a camera into the stomach to inspect the pouch and check for ulcers, inflammation, or stretching.

  • Barium Swallow (UGI Series): A specialized X-ray where the patient swallows contrast liquid to show the exact size and flow of the current anatomy.

  • Abdominal CT Scan: To provide a 3D view of the internal organs and identify any hidden hernias or mechanical issues.

  • Comprehensive Blood Panels: Detailed analysis of iron, B12, Vitamin D, and protein levels to establish a baseline.

  • Hospital Stay: Usually involves 2 to 3 nights of close monitoring to ensure the new surgical joins are healing correctly.

  • Dietary Reset: Patients must return to a "Phase 1" clear liquid diet and progress slowly through pureed and soft foods over a 4–6 week period.

  • Slower Weight Loss: It is important to note that weight loss after a revision is typically slower and less dramatic than after the first surgery.

  • Lifelong Monitoring: Regular follow-up appointments and blood tests are essential to monitor for malabsorption and nutritional health.

  • Activity Restrictions: Light walking is encouraged immediately, but heavy lifting and core-straining exercises are restricted for 6 weeks.

  • Resolves Chronic Pain and Reflux: Provides immediate relief for patients suffering from the mechanical failures or side effects of a primary surgery.

  • Second Chance for Health: Allows patients who did not reach their goals to restart their weight-loss journey with a more powerful metabolic tool.

  • Precision Technology: The use of robotic platforms allows surgeons to operate safely in "hostile" abdomens filled with previous scar tissue.

  • Customized Anatomy: Every revision is tailored specifically to the patient’s existing anatomy, ensuring the most effective solution for their unique situation.

  • Prevents Long-Term Damage: Addressing issues like chronic ulcers or severe reflux prevents permanent damage to the esophagus and digestive tract.

Surgical Delivery
Surgical Delivery

A surgical delivery, commonly known as a C-section (Caesarean Section), is the delivery of a baby through surgical incisions made in the mother's abdomen and uterus. This procedure is performed when a vaginal delivery is considered unsafe or impossible for the mother or the baby, ensuring a controlled and secure birth environment.

  • Labor Dystocia: When labor fails to progress because the cervix stops dilating or the baby stops moving down the birth canal.

  • Fetal Distress: If the baby’s heart rate indicates they are not tolerating the stress of labor contractions well.

  • Abnormal Positioning: When the baby is in a breech (feet or bottom first) or transverse (sideways) position.

  • Placental Issues: Conditions such as Placenta Previa (where the placenta covers the cervix) or placental abruption.

  • Multiple Gestation: In the case of twins or triplets, particularly if the first baby is not in a head-down position.

  • Previous C-section: While many are candidates for a VBAC (Vaginal Birth After Caesarean), a repeat surgical delivery is often planned for safety.

  • Anesthesia: The procedure is typically performed under regional anesthesia (spinal or epidural), which numbs the mother from the waist down while allowing her to remain awake.

  • Duration: The total surgery usually takes 45 to 60 minutes, though the baby is typically delivered within the first 10–15 minutes.

  • Abdominal Incision: The surgeon makes a horizontal incision (often called a "bikini cut") just above the pubic hairline to minimize visible scarring.

  • Uterine Opening: A second incision is made in the lower segment of the uterus to reach the baby.

  • Delivery and Placenta: The surgeon manually eases the baby out, suctions the nose and mouth, and cuts the umbilical cord. The placenta is then removed and the uterus is inspected.

  • Closure: The uterus is closed with dissolvable stitches, while the abdominal layers and skin are secured with stitches, staples, or surgical glue.

  • Blood Testing: To determine blood type and hemoglobin levels in case a transfusion is required during the procedure.

  • Fasting: If the C-section is planned, you must follow strict "nothing by mouth" instructions for 8 hours prior to surgery.

  • Fetal Monitoring: Continuous monitoring of the baby's heart rate leading up to the start of the procedure.

  • Abdominal Prep: The surgical site is cleaned and sometimes clipped of hair to reduce the risk of infection.

  • IV Fluids and Catheterization: An intravenous line is started for fluids and medication, and a bladder catheter is inserted to keep the bladder empty and protected during surgery.

  • Ultrasound: To confirm the baby's position, placental location, and estimated fetal weight.

  • Biophysical Profile (BPP): A test that combines fetal heart rate monitoring and ultrasound to check the baby's well-being.

  • Coagulation Profile: To ensure the mother’s blood clots normally before making surgical incisions.

  • Non-Stress Test (NST): To measure the baby's heart rate in response to its own movements.

  • Hospital Stay: The typical stay is 2 to 4 days for monitoring and initial recovery.

  • Pain Management: Incision site pain is managed with prescribed oral medications. Early walking (within 24 hours) is highly encouraged to prevent blood clots.

  • Incision Care: The wound must be kept clean and dry. Any staples or non-dissolvable stitches are usually removed by a healthcare provider after one week.

  • Physical Restrictions: You must avoid heavy lifting (nothing heavier than the baby) and strenuous exercise for at least 6 weeks.

  • Vaginal Bleeding: It is normal to experience vaginal discharge (lochia) for 4–6 weeks as the uterus heals and returns to its original size.

  • Life-Saving Intervention: Provides a rapid and safe alternative when vaginal delivery poses a risk to the life of the mother or child.

  • Controlled Environment: Allows for a scheduled, calm delivery in cases where medical complications are known in advance.

  • Advanced Surgical Techniques: Modern horizontal incisions and suturing methods result in stronger uterine healing and more discreet cosmetic outcomes.

  • Immediate Pediatric Access: Being in an operating room ensures that specialized pediatric teams are immediately available to care for the newborn if needed.

  • Predictable Outcomes: For high-risk pregnancies involving placental issues or multiples, a surgical delivery offers the most predictable path to a healthy birth.

Appendectomy (Open/Laparoscopic)

An Appendectomy is the surgical removal of the appendix, a small, finger-shaped pouch attached to the large intestine. It is the standard treatment for appendicitis, an inflammation of the organ that can lead to a life-threatening rupture if left untreated.

  • Pain that starts near the belly button and moves to the lower right abdomen.

  • "Rebound tenderness" or sharp pain in the lower right abdomen when pressure is released.

  • Fever and chills accompanying abdominal discomfort.

  • Nausea, vomiting, or loss of appetite.

  • High white blood cell counts detected during blood testing.

  • Laparoscopic Appendectomy: The modern minimally invasive standard using three small incisions and a camera (laparoscope).

  • Open Appendectomy: A traditional approach using a single 2- to 4-inch incision, typically reserved for ruptured cases.

  • Emergency Appendectomy: Immediate surgical intervention performed to prevent or treat an appendix rupture.

  • Interval Appendectomy: A delayed surgery performed after a severe infection has been initially managed with antibiotics.

  • Insufflation: In laparoscopic cases, carbon dioxide gas is used to inflate the abdomen for better visibility.

  • Appendix Identification: The surgeon locates the appendix and carefully ties off its base to separate it from the large intestine.

  • Irrigation: If the appendix has ruptured, the abdominal cavity is washed with saline to remove bacteria and pus.

  • Drainage: A small tube may be placed in the incision site for a few days to allow excess fluid to escape in complex cases.

  • Closure: Incisions are secured using absorbable sutures, surgical glue, or sterile strips.

  • Maintaining NPO (nothing by mouth) status for several hours prior to the operation.

  • Starting Intravenous (IV) fluids to ensure proper hydration.

  • Administration of prophylactic antibiotics to reduce the risk of surgical site infection.

  • Undergoing general anesthesia to remain completely unconscious throughout the procedure.

  • Physical Examination: To check for localized pain and abdominal wall tension.

  • Ultrasound or CT Scan: Imaging used to confirm the inflammation or see if the appendix has burst.

  • Complete Blood Count (CBC): To identify signs of infection through elevated white blood cell levels.

  • Urine Test: Often performed to rule out a urinary tract infection or kidney stones which can mimic appendicitis symptoms.

  • For uncomplicated cases, hospital discharge usually occurs within 24 hours.

  • Recovery for laparoscopic surgery includes avoiding heavy lifting (over 5kg) for 1–2 weeks.

  • Recovery for open surgery requires avoiding strenuous exercise for 4–6 weeks to prevent hernia.

  • Diet begins with clear liquids and progresses as bowel function returns to normal.

  • Patients should monitor for signs of abscess, such as new fevers or persistent bloating.

  • Provides a permanent cure for appendicitis by removing the source of inflammation.

  • Prevents life-threatening complications associated with an appendix rupture or peritonitis.

  • Minimal scarring and faster recovery times when performed using laparoscopic techniques.

  • Rapidly alleviates severe abdominal pain and restores normal digestive health.

Cholecystectomy (Open/Laparoscopic)

A Cholecystectomy is the surgical removal of the gallbladder, a small organ located under the liver that stores bile. It is primarily performed to treat gallstones (cholelithiasis), gallbladder inflammation (cholecystitis), or biliary colic, which is intense pain caused by stones blocking the bile ducts.

  • Sudden and rapidly intensifying pain in the upper right portion of the abdomen.

  • Nausea or vomiting following high-fat meals.

  • Yellowing of the skin and the whites of the eyes (jaundice).

  • Fever or chills, which may indicate a gallbladder infection.

  • Confirmation of gallstones or a non-functional gallbladder through diagnostic testing.

  • Laparoscopic Cholecystectomy: The modern "gold standard" minimally invasive approach used in over 90% of cases, involving four small incisions.

  • Open Cholecystectomy: A traditional surgical method using a larger incision, typically reserved for complex cases or severe scarring.

  • Emergency Cholecystectomy: Immediate removal performed when acute inflammation or infection poses a significant health risk.

  • Single-Incision Laparoscopic Surgery (SILS): A specialized technique where the gallbladder is removed through one small incision in the umbilicus.

  • Pneumoperitoneum: During laparoscopic surgery, the abdomen is inflated with carbon dioxide gas to provide a clear workspace for the surgeon.

  • Duct and Artery Clipping: The surgeon identifies the cystic duct and cystic artery and secures them with permanent clips before separation.

  • Gallbladder Detachment: The organ is carefully separated from the liver bed using specialized surgical instruments.

  • Organ Extraction: The gallbladder is placed in a sterile bag and removed through one of the small abdominal incisions.

  • Drainage: In open or complex cases, a Jackson-Pratt (JP) drain may be placed temporarily to remove excess fluid or bile.

  • Fasting (NPO) for at least 6 to 8 hours prior to the operation.

  • Discontinuing blood-thinning medications several days before surgery as directed by the surgical team.

  • Receiving general anesthesia and the placement of a breathing tube for the duration of the procedure.

  • Undergoing a pre-operative evaluation to check liver enzymes and white blood cell counts.

  • Abdominal Ultrasound: The "gold standard" imaging test used to identify gallstones and gallbladder wall thickening.

  • HIDA Scan: A specialized nuclear medicine test used to evaluate the functional emptying of the gallbladder.

  • Blood Panels: To check for elevated liver enzymes or signs of infection (leukocytosis).

  • MRCP or ERCP: Advanced imaging or endoscopic procedures used to check for stones that may have moved into the common bile duct.

  • Most laparoscopic patients return home the same day or after one overnight stay.

  • Recovery for open surgery involves a hospital stay of 3 to 5 days and restricted activity for 4 to 6 weeks.

  • A low-fat diet is recommended for the first few weeks as the body adjusts to bile flowing directly into the small intestine.

  • Patients may experience temporary shoulder pain or bloating due to the gas used during laparoscopic procedures.

  • Monitoring for Post-Cholecystectomy Syndrome (PCS), which affects 10–15% of patients and involves lingering indigestion or nausea.

  • Provides permanent relief from the recurring pain of biliary colic and gallstones.

  • Prevents serious complications such as gallbladder rupture, gangrene, or severe pancreatitis.

  • Minimally invasive techniques result in smaller scars, less post-operative pain, and a faster return to daily activities.

  • Eliminates the risk of future gallbladder infections and inflammation.

Hernia Repair (Inguinal/Umbilical)

Hernia repair is a surgical procedure to correct protrusions of tissue or organs through weakened areas of the abdominal wall. An inguinal hernia occurs in the groin area (the inguinal canal), while an umbilical hernia occurs at or near the navel (belly button). By reinforcing these weak points, surgery prevents the risk of "incarceration" or "strangulation," where the blood supply to the trapped tissue is cut off, making it an essential intervention for both comfort and long-term health.

  • Persistent pain or a "dragging" sensation in the groin or abdomen, especially when lifting or coughing.

  • A visible bulge that may disappear when lying down but protrudes during physical activity.

  • Umbilical protrusions that become larger, more painful, or aesthetically concerning.

  • Inguinal hernias that cause discomfort during daily movements or exercise.

  • As a preventive measure to avoid the emergency complications of a trapped (strangulated) intestine.

  • When a hernia interferes with professional duties that require physical labor or heavy lifting.

  • Incarcerated Hernia: Tissue that is trapped in the abdominal wall and cannot be pushed back in.

  • Strangulated Hernia: A medical emergency where the blood supply to the trapped tissue is restricted.

  • Recurrent Hernia: A hernia that has returned after a previous surgical repair.

  • Bilateral Inguinal Hernias: When hernias are present on both the left and right sides of the groin simultaneously.

  • Large Incisional Hernias: Weakness occurring at the site of a previous surgical scar.

  • The procedure begins with Reduction, where the protruding fat or intestine is gently pushed back into the abdominal cavity.

  • Open Surgery involves a single incision made directly over the bulge to access the muscle defect.

  • Laparoscopic Surgery utilizes three to four "keyhole" incisions and a camera to repair the wall from the inside.

  • Robotic-Assisted Surgery provides the surgeon with high-definition 3D visualization and robotic precision for complex cases.

  • In most adult cases, a Synthetic Mesh is placed over the weak spot to act as a permanent reinforcement.

  • The muscle layers are sutured, and the skin is closed with dissolvable stitches, surgical tape, or skin glue.

  • Bio-Absorbable MeshesAdvanced mesh materials that provide a scaffold for the body’s own tissue to grow into before eventually dissolving, reducing long-term foreign body sensation.

  • Self-Gripping (ProGrip) MeshSpecialized mesh with micro-hooks that eliminate the need for traditional tacks or sutures, significantly reducing post-operative nerve pain.

  • 3D-Mapped Mesh ContouringThe use of meshes designed to anatomically fit the specific curvature of the groin or abdominal wall for a more natural feel.

  • Single-Port Robotic RepairThe ability to perform complex hernia reconstructions through just one tiny incision, further minimizing scarring.

  • Advanced Nerve MappingIntraoperative tools that help surgeons identify and avoid sensory nerves, lowering the risk of chronic post-surgical pain.

  • Glue-Based FixationUsing medical-grade adhesives instead of mechanical tacks to secure the mesh, leading to a smoother recovery.

  • Physical examination and medical history to determine the most effective surgical approach (Open vs. Laparoscopic).

  • Guidance on smoking cessation, as nicotine can significantly weaken tissue healing and increase recurrence risk.

  • Review of medications, particularly anticoagulants (blood thinners) that may need to be paused.

  • Fasting (NPO) instructions starting the night before surgery to ensure a safe anesthetic experience.

  • Coordination for a "day-case" discharge, as most patients return home within hours of the procedure.

  • Ultrasound or CT Scan: To determine the exact size of the hernia and identify if any vital organs are involved.

  • Routine Blood Work (CBC/Electrolytes): To ensure general health and proper clotting function.

  • Electrocardiogram (ECG): For patients over 40 or those with cardiac history to ensure fitness for anesthesia.

  • Cough Test: A physical assessment to judge the stability of the hernia under abdominal pressure.

  • Urinalysis: To rule out any underlying infections prior to the placement of surgical mesh.

  • Prevents Emergencies: Repairing a hernia electively removes the life-threatening risk of bowel strangulation.

  • Minimal Recurrence: The use of modern mesh technology has reduced the risk of a hernia returning to less than 5%.

  • Rapid Return to Activity: Laparoscopic and robotic techniques allow most patients to return to desk work within a week.

  • Restored Core Strength: Reinforcing the abdominal wall improves overall stability and comfort during physical movement.

  • Cosmetic Improvement: Corrects the visible bulge, restoring the natural contour of the navel or groin.

  • Patients are encouraged to walk within a few hours of surgery to promote blood flow and lung function.

  • Pain management typically transitions from clinical care to over-the-counter medications within 48 hours.

  • Heavy lifting (typically over 10–20 lbs) is restricted for 4 to 6 weeks to allow the mesh to integrate fully.

  • Most patients can resume driving once they can perform an emergency stop without abdominal discomfort.

  • Follow-up visits are scheduled to monitor the incision sites and ensure there is no fluid buildup (seroma).

  • Freedom from the chronic aching or "heaviness" associated with the hernia.

  • Ability to return to high-impact sports and strenuous gym activities once full clearance is granted.

  • Permanent structural support of the abdominal wall through the integrated mesh.

  • Significant reduction in the psychological stress associated with a visible or painful bulge.

  • Long-term protection against the risk of intestinal complications.

Mesh Hernioplasty
Mesh Hernioplasty

Mesh Hernioplasty is the surgical repair of a hernia using a synthetic or biological flat sheet (mesh) to reinforce a weakened abdominal wall. Unlike a traditional herniorrhaphy, which simply stitches the muscle together, a hernioplasty is a tension-free repair. This approach is considered the global gold standard for significantly reducing the likelihood of a hernia returning.

  • Presence of a visible bulge in the abdomen or groin that increases with physical strain.

  • Recurrent hernias where previous non-mesh (stitch-only) repairs have failed.

  • Large abdominal wall defects that cannot be closed securely with stitches alone.

  • Pain, pressure, or a pulling sensation at the site of a previous surgical scar or natural weakness.

  • Confirmation of a hernia defect through a physical exam or diagnostic imaging like a CT scan.

  • Open Hernioplasty: A traditional approach where a single incision is made directly over the hernia to place and secure the mesh.

  • Laparoscopic Hernioplasty: A minimally invasive "keyhole" technique using a camera and small ports to place mesh from the inside.

  • Robotic Hernioplasty: Utilizing robotic assistance for high-precision mesh placement and complex abdominal wall reconstruction.

  • Tension-Free Repair: A specialized technique where the mesh bridges the gap in the muscle without pulling the edges together, minimizing post-op pain.

  • Tissue Reduction: The bulging fat or intestine is gently returned to its proper position inside the abdominal cavity.

  • Mesh Customization: A mesh is selected and often trimmed to overlap the edges of the muscle defect by at least 3–5 cm.

  • Layered Placement: Depending on the technique, mesh is placed on top of the muscle (onlay), between muscle layers (sublay), or under the muscle (underlay).

  • Fixation: The mesh is secured using permanent sutures, specialized tacks, staples, or medical-grade surgical glue.

  • Integration: The surgeon ensures the mesh is flat and secure to allow natural fibrous tissue to grow into the mesh pores over time.

  • Fasting (NPO) for 6–8 hours prior to the scheduled surgery.

  • Pausing blood-thinning medications to prevent the formation of hematomas around the mesh site.

  • Pre-operative evaluation to determine the most appropriate type of anesthesia (General, Spinal, or Local).

  • Measurement of the hernia defect via ultrasound or CT scan to ensure the correct mesh size is available.

  • Physical Evaluation: To check the size of the bulge and determine if the tissue is "incarcerated" or trapped.

  • CT Scan or Ultrasound: Imaging used to measure the exact dimensions of the hole in the abdominal wall.

  • Blood Panels: Routine screens to ensure the patient is fit for the selected type of anesthesia.

  • Electrocardiogram (ECG): Often performed for older patients to assess heart health before the procedure.

  • Most patients return home the same day, as the procedure is typically performed on a day-care basis.

  • Strict activity restrictions are required, including no heavy lifting (>5 kg) for at least 6 weeks.

  • Use of an abdominal binder or compression garment for approximately 4 weeks to support the repair.

  • Patients may feel "twinges" or minor soreness for a few months as the body integrates the mesh.

  • Return to light activities is encouraged early to promote circulation and healing.

  • Significantly lowers the recurrence rate from up to 30% (with stitches alone) to less than 5%.

  • Provides a permanent, lifelong "scaffold" that reinforces the weakened abdominal wall.

  • The tension-free nature of the repair results in less post-operative pain compared to traditional methods.

  • High technical success rates and durability, as the mesh is designed to stay in the body indefinitely.

Incisional Hernia Repair

An Incisional Hernia Repair is a surgical procedure to fix a protrusion of tissue or an organ (usually the intestine) through a previously made surgical scar. This occurs when the abdominal wall muscles fail to heal completely or weaken over time following an earlier surgery.

  • A visible bulge or lump at the site of a previous surgical scar.

  • A bulge that becomes more prominent or painful when coughing, straining, or lifting.

  • Persistent aching or pressure at the previous incision site.

  • Nausea or vomiting if the protruding tissue becomes trapped (incarcerated).

  • Confirmation of a muscle "defect" via CT scan or physical examination.

  • Open Repair: A traditional approach involving an incision over the old scar, often used for very large hernias or complex cases.

  • Laparoscopic Repair: A minimally invasive method using small "keyhole" incisions, CO2 gas, and a camera to repair the defect from the inside.

  • Robotic-Assisted Repair: A modern variation of laparoscopic surgery offering enhanced precision for medium to large hernias.

  • Tension-Free Mesh Repair: The use of synthetic or biologic mesh to reinforce the abdominal wall, significantly reducing the risk of recurrence.

  • Sac Reduction: The surgeon identifies the hernia sac and carefully pushes the protruding tissue or intestine back into the abdominal cavity.

  • Adhesiolysis: Freeing the intestine from old scar tissue or adhesions that may have formed since the previous surgery.

  • Mesh Placement: A flexible, permanent screen (mesh) is secured over or under the muscle layer to act as a scaffold for new tissue growth.

  • Fixation: The mesh is secured using sutures, tacks, or specialized surgical staples to ensure it remains in a "tension-free" position.

  • Abdominal Wall Reconstruction: In complex cases, the surgeon may rearrange muscle layers to achieve a more natural and strong closure.

  • Quitting smoking for several weeks to improve blood flow and tissue healing.

  • Weight management and stabilization of blood sugar levels to minimize the risk of repair failure.

  • Fasting (NPO) as directed before undergoing general anesthesia.

  • Evaluation of the old surgical site to plan the best approach (open vs. minimally invasive).

  • Physical Exam: To feel for the bulge and assess the strength of the surrounding abdominal wall.

  • CT Scan: The primary imaging tool used to measure the exact size of the muscle defect and identify the contents of the hernia.

  • Blood Panels: To check for signs of infection or uncontrolled diabetes that could affect recovery.

  • Pre-Surgical Optimization Review: Assessment of lifestyle factors (BMI, smoking status) that impact surgical success.

  • Hospital stays range from same-day discharge for laparoscopic cases to 3–5 days for large open repairs.

  • Use of an abdominal binder (elastic wrap) for 4–6 weeks to support the new repair.

  • Strict activity restrictions, including no heavy lifting (>5 kg) for 6–8 weeks.

  • Immediate encouragement of gentle walking to prevent blood clots during the early recovery phase.

  • Monitoring for seromas (fluid collection) or signs of mesh infection at the incision site.

  • Significantly reduces the risk of hernia recurrence from 30–50% (without mesh) to below 10% (with mesh).

  • Restores the structural integrity and strength of the abdominal wall.

  • Eliminates the risk of life-threatening complications such as bowel obstruction or strangulation.

  • Relieves chronic pain and discomfort associated with the protruding tissue.

Ventral Hernia Repair

A Ventral Hernia Repair is a surgical procedure to fix a hole or weakness in the abdominal wall muscles through which fat or organs (such as the intestine) bulge. A "ventral" hernia specifically refers to any hernia occurring on the front (anterior) of the abdomen, excluding the groin area.

  • A visible bulge on the abdomen that may disappear when lying down or appear when straining.

  • Pain or discomfort at the hernia site, especially when lifting or coughing.

  • Nausea or vomiting, which may indicate that the bowel is trapped (incarcerated).

  • A bulge that becomes hard, red, or purple, signifying a potential medical emergency.

  • Significant epigastric or umbilical discomfort that interferes with daily physical activities.

  • Open Repair: A traditional method where an incision is made directly over the hernia to push the bulge back and close the muscle.

  • Laparoscopic Repair: A minimally invasive approach using "keyhole" incisions and CO2 gas to repair the defect from inside the abdominal cavity.

  • Robotic-Assisted Repair: Utilizing advanced technology to perform complex muscle rearrangements (like TAR) through small incisions.

  • Suture (Primary) Repair: Simply stitching the muscle together, typically reserved only for very small holes (less than 1–2 cm).

  • Mesh Reinforcement: Using a synthetic or biologic screen to provide a "tension-free" bridge across the weakened muscle wall.

  • Abdominal Contents Reduction: The surgeon carefully returns the protruding fat or organs to their proper place inside the abdomen.

  • Pneumoperitoneum: In laparoscopic or robotic cases, the abdomen is inflated with gas to provide a clear view and workspace.

  • Mesh Placement: A permanent synthetic mesh is secured on top of, between, or under the muscle layers to act as a scaffold.

  • TAR (Transversus Abdominis Release): A complex robotic or open technique used to close very large gaps by rearranging the abdominal muscle layers.

  • Closure: The incisions are closed with sutures or surgical glue, and the reinforced wall begins the process of growing into the mesh.

  • Optimization of health factors, including quitting smoking and stabilizing blood sugar for diabetic patients.

  • Weight management, as a BMI over 35 can significantly increase the risk of the hernia returning.

  • Fasting (NPO) for a specified period before the administration of general anesthesia.

  • Discussion with the surgeon regarding the specific type of ventral hernia (epigastric, umbilical, or incisional).

  • Physical Examination: To classify the hernia and check for "reducible" versus "incarcerated" tissue.

  • CT Scan: The primary diagnostic tool used to measure the exact size of the muscle defect and assess the involvement of bowel loops.

  • Blood Panels: To ensure the patient is fit for general anesthesia and to check for signs of inflammation.

  • Medical Clearance: Evaluation of heart and lung health, particularly for older patients or those undergoing complex robotic repairs.

  • Small or simple repairs are often same-day procedures, while complex repairs may require a 3–5 day hospital stay.

  • Patients must wear an abdominal binder (compression belt) for 4–6 weeks to support the repair and reduce swelling.

  • Strict activity restrictions: no heavy lifting (>5 kg) for at least 6–8 weeks.

  • Avoidance of core-heavy exercises like planks or crunches until cleared by the surgical team.

  • Close monitoring for seromas (fluid pockets) or chronic pain at the mesh fixation site.

  • Reduces the recurrence rate from approximately 30–40% (with stitches alone) down to 5–10% with mesh.

  • Prevents life-threatening emergencies such as bowel strangulation where blood supply is cut off.

  • Restores the strength and appearance of the abdominal wall.

  • Effectively relieves chronic pain and discomfort associated with the protrusion of abdominal contents.

Laparoscopic Hernia Repair

Laparoscopic Hernia Repair, also known as minimally invasive or keyhole surgery, uses specialized tools and a camera to repair a weakness in the abdominal wall from the inside out. It is most commonly used for inguinal (groin), umbilical (navel), and ventral hernias.

  • A visible bulge in the groin or abdomen that may become more prominent when standing or coughing.

  • Pain or pressure at the hernia site during physical activity or lifting.

  • Inguinal hernias that occur on both sides (bilateral) of the groin.

  • Recurrent hernias where a previous open surgical repair has failed.

  • Desire for a faster return to work and daily activities with minimal scarring.

  • TAPP (Transabdominal Preperitoneal): The surgeon enters the peritoneal cavity where the organs are located to reach and repair the hernia.

  • TEP (Totally Extraperitoneal): The surgeon operates in the space between the muscle and the abdominal lining, avoiding the organ cavity entirely.

  • IPOM (Intraperitoneal Onlay Mesh): Primarily used for ventral hernias, where a specialized mesh is placed on the inside of the abdominal wall.

  • Robotic-Assisted Laparoscopy: Using a robotic interface for enhanced precision and 3D visualization during the repair.

  • Insufflation: The abdominal cavity is inflated with Carbon Dioxide (CO2) gas to create a dome-shaped workspace.

  • Port Insertion: Three to four small incisions (0.5–1 cm) are made to allow the insertion of a laparoscope and long, thin instruments.

  • Reduction: Protruding tissue, such as fat or a loop of intestine, is carefully pulled back into the abdominal cavity from the inside.

  • Mesh Reinforcement: A lightweight, flexible synthetic mesh is unfurled over the defect to reinforce the weakened wall.

  • Fixation: The mesh is secured in place using surgical tacks, staples, or specialized surgical glue to prevent shifting.

  • Fasting (NPO) for 6–8 hours prior to the surgery to ensure safety during anesthesia.

  • Pausing blood-thinning medications several days in advance as coordinated with the surgical team.

  • Medical clearance to ensure the patient can tolerate general anesthesia and abdominal CO2 inflation.

  • Discussing the specific approach (TAPP vs. TEP) based on the hernia's location and surgical history.

  • Physical Examination: The primary method to determine if the hernia is "reducible" or "incarcerated."

  • Ultrasound or CT Scan: Imaging used to confirm the diagnosis and map the size of the abdominal wall defect.

  • Electrocardiogram (ECG): Often required for patients over a certain age to ensure heart health for general anesthesia.

  • Blood Panels: To check for infection markers and ensure proper kidney and liver function.

  • Most patients return home the same day as the procedure (day-care surgery).

  • Walking is encouraged immediately following surgery to prevent blood clots.

  • Desk-based work can typically be resumed within 3 to 7 days.

  • Strict lifting restrictions—usually no more than 5–10 kg—must be followed for 4–6 weeks.

  • Monitoring for temporary shoulder pain, which is a common side effect of the CO2 gas used during surgery.

  • Results in significantly smaller scars and a lower risk of wound infection compared to open surgery.

  • Offers a faster recovery timeline and a quicker return to professional and athletic activities.

  • Provides a superior view for the surgeon to identify and repair multiple hernia defects through the same incisions.

  • Utilizes a "tension-free" mesh technique that lowers the risk of the hernia returning.

Colectomy (Bowel Resection Surgery

A Colectomy is a major surgical procedure performed to remove all or part of the colon (large intestine). As a critical intervention for both life-threatening emergencies and chronic conditions, it is used to treat colon cancer, severe inflammatory bowel diseases, and obstructive disorders. By 2026, advances in surgical technology have transformed the colectomy from a traditional open surgery into a high-precision procedure, often utilizing robotic assistance to improve patient recovery and preserve as much natural bowel function as possible.

  • Colorectal Cancer: To remove malignant tumors and the surrounding lymph nodes to prevent the spread of disease.

  • Inflammatory Bowel Disease (IBD): When Crohn’s disease or Ulcerative Colitis no longer responds to medication.

  • Severe Diverticulitis: To remove segments of the colon that have become chronically inflamed or have developed abscesses.

  • Bowel Obstruction: An emergency scenario where a blockage prevents the passage of waste and threatens blood flow to the tissue.

  • Gastrointestinal Bleeding: Uncontrolled bleeding in the large intestine that cannot be stopped via endoscopy.

  • Familial Adenomatous Polyposis (FAP): A preventive measure for patients with a genetic predisposition to developing hundreds of precancerous polyps.

  • Partial Colectomy (Hemicolectomy): Removal of the diseased portion of the colon on either the right or left side.

  • Total Colectomy: Removal of the entire large intestine.

  • Proctocolectomy: Removal of both the colon and the rectum, often requiring a specialized internal reservoir or an ostomy.

  • Total Abdominal Colectomy: Removal of the colon while leaving the rectum intact, typically used in specific Crohn’s or FAP cases.

  • Surgical Access: Depending on the case, the surgeon uses either a traditional open incision or several "keyhole" laparoscopic ports.

  • Resection: The diseased segment of the bowel is carefully detached from its blood supply and the surrounding supportive tissue (mesentery).

  • Lymph Node Mapping: In cancer cases, the surrounding lymph nodes are removed along with the colon segment for pathological testing.

  • Anastomosis (Reconnection): The healthy ends of the remaining intestine are sewn or stapled back together to allow for normal waste passage.

  • Stoma Creation (Optional): If a safe reconnection is not possible, the end of the intestine is brought through the abdominal wall (a colostomy or ileostomy).

  • Robotic Dexterity: Surgeons often utilize robotic platforms to perform delicate suturing in the deep pelvic cavity with 3D high-definition visualization.

  • Robotic-Assisted ResectionAdvanced platforms that provide 3D visualization and wristed instruments, allowing for more precise nerve preservation and faster suturing.

  • Fluorescence-Guided AngiographyThe use of an injectable dye that glows under infrared light, allowing the surgeon to ensure the new connection has a perfect blood supply.

  • ERAS (Enhanced Recovery After Surgery)A standardized pathway involving pre-operative "carb loading," non-opioid pain management, and early mobilization to speed up bowel recovery.

  • Stapling Technology with AISmart surgical staplers that measure tissue thickness and adjust the firing pressure to create more consistent, leak-resistant connections.

  • Intraoperative Pathological Margin AssessmentRapid testing techniques that ensure all cancer cells have been removed before the surgeon closes the incision.

  • Bio-Luminescent Nerve MarkingExperimental technology that makes autonomic nerves visible, helping the surgeon avoid damage that could impact bladder or sexual function.

  • Bowel Prep: A strict regimen of clear liquids and laxatives to empty the colon, reducing the risk of infection.

  • Nutritional Optimization: Ensuring the patient has adequate protein and vitamin levels to support the complex healing of the intestinal wall.

  • Cardiac and Pulmonary Clearance: A thorough review to ensure the patient can safely undergo a lengthy surgical procedure.

  • Ostomy Education: Meeting with a Wound, Ostomy, and Continence (WOC) nurse to discuss the potential for a temporary or permanent stoma.

  • Medication Adjustment: Pausing certain blood thinners or immunosuppressants that could interfere with the healing of the reconnection site.

  • Anastomotic Leak Detection: Monitoring for signs of fever, abdominal rigidity, or elevated white blood cell counts following the reconnection.

  • Bowel Function Tracking: Watching for the return of "flatus" (gas) or bowel movements, which indicate the digestive system has restarted.

  • C-Reactive Protein (CRP) Trends: Tracking inflammatory markers to identify potential internal complications before they become symptomatic.

  • Electrolyte Surveillance: Monitoring sodium and potassium levels, which can fluctuate rapidly after bowel surgery.

  • Cancer Cure Potential: In many cases, a colectomy is the only way to achieve a complete cure for localized colon cancer.

  • Resolution of Chronic Pain: Removes the source of recurring, debilitating pain for patients with severe divertiverticulitis or IBD.

  • Emergency Stabilization: Provides a life-saving solution for bowel perforations or complete obstructions.

  • Improved Quality of Life: For many with Ulcerative Colitis, removing the diseased colon eliminates the daily burden of urgency and bleeding.

  • Precision and Safety: Modern minimally invasive techniques have significantly reduced the risk of large-scale infections and long-term scar tissue.

  • The hospital stay typically ranges from 3 to 7 days, depending on whether the surgery was laparoscopic or open.

  • Early walking (within 24 hours) is essential to prevent blood clots and encourage the "waking up" of the digestive tract.

  • Patients transition from clear liquids to a "low-residue" (low-fiber) diet for several weeks to allow the internal staples to heal.

  • Heavy lifting and strenuous abdominal exercises are restricted for 6 to 8 weeks to prevent the formation of an incisional hernia.

  • If a stoma was created, specialized nursing care is provided to teach the patient how to manage their external pouching system.

  • Most patients return to a varied, healthy diet once the initial healing phase (about 6–8 weeks) is complete.

  • For many, the surgery results in a significant reduction in medication dependence and a return to active professional and social life.

  • Regular follow-up colonoscopies and imaging are scheduled to ensure continued health and monitor for any recurrence.

  • The body's digestive patterns may change, but most individuals adapt successfully to their "new normal" over time.

  • Empowerment through the resolution of a chronic or life-threatening gastrointestinal condition.

Debridement Surgery
Debridement Surgery

Debridement is a critical clinical and surgical intervention used to treat chronic wounds, severe infections, and deep burns. The procedure involves the precise removal of necrotic (dead), damaged, or infected tissue to expose the underlying healthy tissue. By clearing away this cellular debris, debridement eliminates a primary source of infection and "restarts" the body’s natural healing cascade. In the context of burn care, early and effective debridement is the most important factor in reducing scarring and improving long-term functional outcomes.

  • Severe Burn Injury: To remove charred or "eschar" tissue that prevents healing and harbors bacteria.

  • Diabetic Foot Ulcers: When chronic wounds fail to progress due to a buildup of non-viable tissue or biofilm.

  • Necrotizing Fasciitis: An emergency scenario where "flesh-eating" bacteria require rapid surgical removal to save life and limb.

  • Pressure Sores: Deep bedsores that have developed thick, leathery tissue (slough) that blocks new skin growth.

  • Contaminated Traumatic Wounds: Road rash or deep lacerations containing dirt, debris, or foreign objects.

  • Venous Stasis Ulcers: Chronic leg wounds that require "freshening" of the wound edges to stimulate closure.

  • Surgical (Sharp) Debridement: The most rapid method, where a surgeon uses a scalpel or scissors to cut away dead tissue until a healthy, bleeding wound bed is reached.

  • Hydrosurgical Debridement: Utilizing high-pressure, razor-thin saline jets to selectively wash away necrotic tissue while preserving the delicate healthy dermis beneath.

  • Enzymatic Debridement: The application of specialized topical agents that chemically dissolve dead tissue without harming the living skin.

  • Biological Debridement: A highly selective method using sterile, medical-grade larvae (maggots) that ingest only necrotic tissue and release natural antibiotics.

  • Autolytic Debridement: A conservative approach using moisture-retentive dressings to trap the body's own natural enzymes, allowing the wound to "self-clean" over time.

[Image showing the visual difference between a necrotic wound bed and a healthy, granulated wound bed following debridement]

  • Early Excision: For deep burns, removing the damaged tissue within the first 24 to 72 hours is the standard for reducing the risk of sepsis.

  • Escharotomy: An emergency procedure for circumferential burns where stiff, dead skin acts like a tourniquet; incisions are made to release pressure and restore blood flow.

  • Skin Grafting (Autograft): Following debridement, a thin layer of the patient's own healthy skin is transplanted to cover the clean wound bed.

  • Skin Substitutes: The use of lab-grown or bio-engineered "scaffolds" that provide a temporary barrier and encourage the body to regenerate its own skin.

  • Fasciotomy: In cases of extreme swelling (compartment syndrome) following a burn or trauma, deep incisions are made into the muscle fascia to prevent tissue death.

  • Bromelain-Based Enzymatic AgentsPlant-derived enzymes that can "melt" away burn eschar in as little as four hours, often eliminating the need for traditional surgery in partial-thickness burns.

  • Handheld Ultrasound DebridementDevices that use low-frequency ultrasonic mists to vibrate and dislodge bacteria and dead cells without the pain or trauma of a scalpel.

  • 3D-Printed Bio-MasksCustom-designed masks for facial burn victims that provide perfectly distributed pressure and healing agents to minimize contour scarring.

  • Cold Plasma TherapyA cutting-edge non-thermal gas used to instantly sterilize a wound bed and stimulate the microcirculation needed for tissue regrowth.

  • AI Wound DiagnosticsSmartphone-based apps that use hyperspectral imaging to analyze a wound and tell the clinician exactly which areas require debridement.

  • Smart Dressings with BiosensorsBandages that change color or send an alert to a doctor's tablet if they detect a change in pH or temperature indicating an early infection.

  • Pain Management Planning: Ensuring adequate local anesthesia, regional nerve blocks, or general sedation depending on the wound's size.

  • Vascular Assessment: Using Doppler ultrasound to ensure there is enough blood flow to the area to support healing after the dead tissue is removed.

  • Nutritional Loading: Increasing protein and Vitamin C intake, as the body requires massive amounts of energy to "rebuild" skin after debridement.

  • Wound Photography: Taking high-resolution baseline images to track the surface area and depth of the wound throughout the treatment cycle.

  • Infection Screening: Taking a wound culture to identify specific bacteria and ensure the patient is on the most effective antibiotic.

  • Quantitative Tissue Cultures: Measuring the concentration of bacteria within the wound bed to ensure it is "clean" enough for a skin graft.

  • Granulation Tracking: Monitoring the appearance of "beefy red" tissue, which is a sign of healthy blood vessel formation and successful healing.

  • Perfusion Monitoring: Using near-infrared spectroscopy to check oxygen levels in the tissue surrounding the debridement site.

  • Electrolyte Management: Crucial for burn patients, as large debrided areas can lead to significant fluid and salt loss.

  • Eliminates Biofilms: Breaks down the "shield" that bacteria create, allowing antibiotics and the immune system to finally reach the infection.

  • Reduces Systemic Risk: Removing infected tissue prevents "sepsis," a life-threatening condition where the infection enters the bloodstream.

  • Shortens Healing Time: By removing the "dead weight" of necrotic tissue, the body can focus all its resources on closing the wound.

  • Improves Functional Range: Especially in burns, proper debridement prevents the formation of thick, restrictive scars (contractures) that limit movement.

  • Optimizes Graft Success: A skin graft will only "take" on a clean, debrided bed; without this step, reconstructive surgery would fail.

  • Recovery is a journey; while the procedure may take minutes, the healing of a debrided wound typically spans 6 to 12 weeks.

  • Regular dressing changes using specialized foams or silver-impregnated bandages are required to keep the environment sterile.

  • High-protein medical nutrition is often prescribed to provide the building blocks (collagen) needed for new skin.

  • Compression therapy or physical therapy may be started early to ensure that the new skin remains flexible and doesn't "shrink" during healing.

  • Patients are monitored for any signs of "re-sloughing," which might require a minor follow-up debridement in the clinic.

  • Successful closure of chronic wounds that may have been present for months or years.

  • Significantly improved physical appearance and reduced scarring, particularly with modern enzymatic and hydrosurgical methods.

  • Restored mobility and the ability to return to work or exercise without the burden of a painful, non-healing wound.

  • Reduction in long-term medical costs by avoiding the complications of infection and amputation.

  • The psychological relief of seeing a "stagnant" wound finally move toward a healthy, healed state.

Hemorrhoidectomy
Hemorrhoidectomy

A Hemorrhoidectomy is the definitive surgical removal of severe or complicated hemorrhoids (swollen veins in the lower rectum and anus). While many mild cases are managed with dietary changes or office-based procedures like rubber band ligation, surgery is considered the "gold standard" for Grade III and IV hemorrhoids that are persistently painful, bleeding, or prolapsed. By 2026, surgical approaches have shifted toward "vessel-sealing" and laser technologies that prioritize faster healing and significantly improved post-operative comfort.

  • Grade IV Prolapse: When hemorrhoidal tissue remains outside the body and cannot be manually pushed back in.

  • Persistent Bleeding: Chronic blood loss during bowel movements that leads to anemia or does not respond to non-surgical treatments.

  • Thrombosed External Hemorrhoids: When a blood clot forms in an external hemorrhoid, causing sudden, excruciating pain and swelling.

  • Failed Conservative Therapy: When high-fiber diets, topical creams, and minimally invasive procedures fail to provide long-term relief.

  • Strangulated Hemorrhoids: An emergency condition where the blood supply to a prolapsed hemorrhoid is cut off, causing tissue death.

  • Internal and External Combination: When a patient suffers from both types simultaneously, requiring a comprehensive surgical clearance.

  • Inflammatory Bowel Disease (IBD): Patients with Crohn’s disease require specialized evaluation, as traditional surgery may interfere with wound healing.

  • Anticoagulation Therapy: Patients on blood thinners who require precise "vessel-sealing" techniques to prevent post-operative bleeding.

  • Recurrent Hemorrhoids: Cases where previous surgeries or ligations have failed, necessitating a more advanced reconstructive approach.

  • Pregnancy-Related Hemorrhoids: While usually managed conservatively, severe cases following childbirth may require surgical intervention once hormones stabilize.

  • Anorectal Comorbidities: When hemorrhoids are accompanied by anal fissures or fistulas that must be treated during the same operative session.

[Image showing a comparison between healthy anal anatomy and the various grades (I-IV) of internal hemorrhoids]

  • Excisional Surgery: The surgeon makes precise incisions to remove the excess hemorrhoidal tissue. This can be "closed" (sutured) or "open" to allow for natural drainage.

  • Stapled Hemorrhoidopexy (PPH): A specialized circular stapling device "lifts" the prolapsed tissue back into place and cuts off the blood supply to the swollen veins.

  • Laser Hemorrhoidoplasty (LHP): A laser fiber is inserted into the hemorrhoid to deliver controlled energy, causing the tissue to shrink from the inside without external cuts.

  • THD (Transanal Hemorrhoidal Dearterialization): Guided by ultrasound, the surgeon identifies and ties off the specific arteries feeding the hemorrhoid, causing it to wither.

  • Anesthesia: Performed under general anesthesia, spinal block, or local anesthesia with deep sedation for patient comfort.

  • Vessel Sealing: Advanced bipolar or ultrasonic energy devices are used to simultaneously cut and seal blood vessels, reducing blood loss and operative time.

  • Laser-Induced Thermotherapy (LITT)A non-excisional technique that uses heat to collapse the hemorrhoidal pile, resulting in almost no tissue trauma and a dramatically faster return to work.

  • Long-Acting Local Anesthetics (Exparel)A specialized numbing medication injected during surgery that slowly releases over 72 hours, covering the most painful window of early recovery.

  • Doppler-Guided LigationHighly sensitive ultrasound probes that allow surgeons to find the "feeder" vessels with 100% accuracy, ensuring the hemorrhoid shrinks without being cut out.

  • Radiofrequency Ablation (RFA)Utilizing high-frequency waves to treat the hemorrhoid, offering a middle ground between traditional surgery and office-based treatments.

  • Bio-Absorbable StaplesNext-generation stapling devices used in PPH that dissolve over time, reducing the long-term risk of internal irritation or "staple-line" sensitivity.

  • AI-Enhanced ProctoscopyDigital imaging systems that map the vascular pressure in the rectal area to help the surgeon decide exactly which tissue needs removal.

  • Bowel Preparation: A mild laxative or enema is often used the evening before surgery to ensure a clean surgical field.

  • Medication Adjustment: Reviewing any supplements, such as Vitamin E or Garlic, and blood thinners that could increase the risk of bleeding.

  • Nutrition Planning: Starting a high-fiber diet and increasing water intake days before the surgery to prepare for the first post-op bowel movement.

  • NPO Guidelines: Standard fasting for 8–12 hours before the procedure to ensure safety during anesthesia.

  • Sitz Bath Setup: Having a small plastic tub or "sitz bath" ready at home for immediate post-operative hygiene and comfort.

  • Digital Rectal Exam (DRE): A final physical check to confirm the location and grade of all symptomatic hemorrhoids.

  • Anoscopy/Sigmoidoscopy: Ensuring there are no other issues, such as polyps or inflammatory disease, higher up in the rectum.

  • Urinary Retention Check: Monitoring the patient’s ability to urinate before discharge, as pelvic surgery can occasionally cause temporary bladder hesitation.

  • Post-Operative Hemorrhage Watch: Close observation during the first 24 hours for any signs of significant rectal bleeding.

  • Lowest Recurrence Rate: Excisional hemorrhoidectomy remains the most successful way to ensure hemorrhoids do not return.

  • Comprehensive Relief: Resolves all associated symptoms, including itching, leaking, pain, and the sensation of "fullness."

  • Vascular Correction: Procedures like THD and PPH address the underlying blood flow issues, not just the visible bulge.

  • Simultaneous Repair: Allows for the correction of other painful issues like anal tags or fissures in a single session.

  • Functional Restoration: Returns the anal canal to its natural anatomical state, improving hygiene and comfort.

  • The First Week: The focus is on pain management and soft bowel movements; stool softeners and fiber supplements are mandatory.

  • Sitz Baths: Soaking in warm water for 10–15 minutes several times a day is the most effective way to soothe the area and keep it clean.

  • Pain Protocols: A combination of anti-inflammatories, local numbing creams, and occasionally mild narcotics are used to manage discomfort.

  • Activity Graduation: Light walking is encouraged immediately, but heavy lifting and "straining" must be avoided for at least 2 to 3 weeks.

  • Hydration: Drinking at least 2–3 liters of water daily is essential to prevent constipation during the healing phase.

  • A dramatic improvement in daily quality of life, free from the constant discomfort and "accidents" caused by prolapse.

  • Confidence in physical activities, including exercise and heavy lifting, once the 6-week healing window is complete.

  • A return to normal hygiene and the elimination of chronic itching or skin irritation.

  • Long-term freedom from the need for topical creams, suppositories, or frequent medical visits for "flare-ups."

  • Empowerment through a permanent solution to a common but debilitating condition.

Laparoscopic Polypectomy

Laparoscopic Polypectomy generally refers to the minimally invasive removal of polyps from the gallbladder or, in specific gynecological cases, subserosal uterine polyps. While most uterine polyps are removed via hysteroscopy (through the cervix), the laparoscopic approach is reserved for polyps or small growths located on the outer surface of an organ or within the abdominal cavity.

  • Symptomatic Polyps: Growths causing localized pain or persistent digestive issues.

  • Suspect Features: Polyps showing irregular shapes or rapid growth during an ultrasound.

  • Size-Dependent Risks: Gallbladder polyps exceeding 1 cm in size, which is a standard surgical indication in 2026 guidelines.

  • Outer Organ Growth: When a polypoid growth is located on the exterior of the uterus or attached to pelvic ligaments.

  • Cancer Mitigation: To prevent the risk of malignancy in polyps that show signs of growth.

  • Laparoscopic Cholecystectomy: Removal of the entire gallbladder for polyps larger than 10mm, as they cannot be safely scraped off the wall.

  • Laparoscopic Excision: The use of precision shears or lasers to excise a growth at its base from the exterior of an organ.

  • High-Definition Visualization: Utilizing zoomed-in views to identify a polyp’s blood supply and seal vessels before cutting.

  • Oncological Safety Protocols: The use of specimen bags during removal to ensure tissue does not contact the abdominal wall.

  • Hysteroscopy (Alternative): The standard approach for internal uterine polyps, distinct from the laparoscopic method used for external growths.

  • Anesthesia: The surgery is performed under general anesthesia to ensure the patient is comfortable and still.

  • Access Incisions: The surgeon makes 1 to 3 tiny incisions, ranging from 5–10 mm, in the abdominal wall.

  • Instrument Insertion: A laparoscope and specialized micro-instruments are inserted through the small incisions.

  • Vessel Sealing: Surgeons use high-definition cameras to seal blood vessels before removal, resulting in near-zero blood loss.

  • Abdominal Inflation: Carbon dioxide gas is used to create space, though this can lead to temporary post-operative bloating.

  • Fasting Requirements: Patients must fast for 8-12 hours before the surgery or catheterization.

  • Medical Assessments: Blood tests, ECG, and chest X-rays are conducted to assess overall health.

  • Medication Adjustments: Current medications must be adjusted as directed by the medical team.

  • Allergy Discussion: Patients must discuss any allergies, particularly to materials used in surgical devices or dyes.

  • Post-Op Planning: Arranging for post-operative care and a support person for the recovery period.

  • Ultrasound Imaging: Used to monitor the size and shape of the polyp and detect rapid growth.

  • Blood Tests: To assess overall health and check for markers of inflammation or infection.

  • ECG: To monitor the heart's electrical rhythm and check for conduction issues.

  • Pulse Oximetry: Used to evaluate oxygen saturation levels in the blood before anesthesia.

  • CT Scan: For detailed mapping of the abdominal cavity and complex growths.

  • Hospital Stay: Usually a same-day discharge or a short 23-hour observation stay.

  • Immediate Recovery: Walking is encouraged immediately to aid digestion and prevent blood clots.

  • Pain Management: Discomfort is typically managed with over-the-counter anti-inflammatories.

  • Return to Work: Patients can generally return to work within 5 to 7 days post-procedure.

  • Activity Restrictions: Heavy lifting must be avoided for approximately 4 weeks to ensure proper healing.

  • Minimal Tissue Disruption: Rapid recovery due to the use of tiny incisions rather than large open cuts.

  • Precise Visualization: High-definition cameras allow for the zoom-in on blood supplies for safer removal.

  • Near-Zero Blood Loss: Advanced sealing techniques minimize bleeding during the excision.

  • Strict Safety: The use of specialized bags prevents tissue fragments from remaining in the pelvic cavity.

  • Long-Term Cure: Provides a definitive treatment with high technical success rates for symptomatic growths.

Splenectomy (Spleen Removal)

A Splenectomy is a surgical procedure to partially or completely remove the spleen, a fist-sized organ located in the upper left abdomen. The spleen plays a vital role in the immune system by filtering blood and producing white blood cells to fight infection. While the liver and bone marrow can eventually take over many of these functions, the removal of the spleen requires lifelong medical vigilance. By 2026, surgical standards emphasize minimally invasive techniques to preserve as much healthy tissue as possible and ensure a rapid return to daily life.

  • Splenic Rupture: An emergency situation, often caused by blunt force trauma (accidents or falls), leading to life-threatening internal bleeding.

  • Immune Thrombocytopenic Purpura (ITP): When the spleen prematurely destroys platelets, and the condition does not respond to medication.

  • Hereditary Spherocytosis: A genetic blood disorder where the spleen destroys abnormally shaped red blood cells, causing severe anemia.

  • Splenomegaly (Enlarged Spleen): When the organ grows so large it causes chronic pain, "early fullness" during meals, or traps too many blood cells (hypersplenism).

  • Hematologic Cancers: Treating certain types of lymphoma or leukemia, especially when the spleen becomes a reservoir for cancer cells.

  • Splenic Cysts or Abscesses: Non-cancerous but painful growths or infections that do not resolve with drainage or antibiotics.

  • Massive Splenomegaly: Cases where the spleen is significantly enlarged (often exceeding 20 cm), which may require a hybrid or open surgical approach.

  • Sickle Cell Disease: Patients who experience "splenic sequestration," where blood becomes trapped in the spleen, requiring surgical intervention.

  • Cirrhosis with Portal Hypertension: Requiring careful management of the surrounding blood vessels to prevent excessive bleeding during surgery.

  • Pediatric Splenectomy: Whenever possible, surgeons aim for a "partial splenectomy" in children to preserve some immune function.

  • Splenic Artery Aneurysm: A rare but dangerous weakening of the artery supplying the spleen, which may necessitate organ removal.

[Image showing the location of the spleen in the upper left quadrant of the abdomen, tucked under the rib cage]

  • Laparoscopic Approach: The standard for elective cases. The surgeon makes 3–4 tiny incisions and uses a camera (laparoscope) to detach the spleen from its ligaments and blood vessels.

  • Open Surgery: A larger incision is made in the center or left side of the abdomen. This is the primary choice for emergency trauma or extremely large spleens.

  • Vessel Ligation: Using advanced thermal energy tools or specialized clips, the surgeon seals the splenic artery and vein to prevent bleeding.

  • Specimen Removal: In laparoscopic cases, the spleen is placed in a sterile bag and sometimes "fragmented" internally so it can be removed through one of the small incisions.

  • Partial Splenectomy: In specific cases, only the diseased portion of the spleen is removed, leaving healthy tissue behind to maintain immune protection.

  • Robotic-Assisted Precision: Utilizing robotic platforms to provide 3D visualization and wristed instruments for delicate dissections near the pancreas.

  • Hand-Assisted Laparoscopic Surgery (HALS)A technique for moderately enlarged spleens where the surgeon uses a specialized "port" to place a hand inside the abdomen, combining the benefits of feel with the recovery of a small incision.

  • Pre-Operative Splenic Artery EmbolizationA procedure where interventional radiologists partially block the spleen's blood supply before surgery, making the operation safer and reducing blood loss.

  • Advanced Hemostatic Energy DevicesTools that use ultrasonic or bipolar energy to instantly seal large vessels, significantly shortening the duration of the surgery.

  • Indocyanine Green (ICG) ImagingInjectable dye that helps surgeons clearly distinguish the border between the spleen and the tail of the pancreas, preventing accidental injury.

  • Spleen-Preserving Distal PancreatectomyFor surgeries involving the pancreas, newer techniques allow surgeons to save the spleen and its blood supply, avoiding "asplenic" complications.

  • AI-Guided Vessel MappingSoftware that uses pre-operative CT scans to create a 3D "road map" for the surgeon, identifying unique vascular patterns before the first incision.

  • Immunization Protocol: Ideally, patients receive vaccines for Pneumococcus, Meningococcus, and Hib at least 14 days before an elective surgery.

  • Blood Component Optimization: Administering platelets or blood transfusions if the patient’s counts are dangerously low due to splenic overactivity.

  • Imaging and Sizing: Using ultrasound or CT to measure the spleen's exact dimensions, which dictates the surgical approach (open vs. laparoscopic).

  • NPO Guidelines: Strict fasting for 8–12 hours before surgery to ensure safety during general anesthesia.

  • Medication Review: Coordination regarding anticoagulants (blood thinners) that must be paused to prevent intraoperative bleeding.

  • Complete Blood Count (CBC): Post-operative tracking of platelet and white blood cell levels, which often rise sharply after the spleen is removed.

  • Pancreatic Enzyme Monitoring: Checking levels to ensure the tail of the pancreas, which sits near the spleen, was not irritated during surgery.

  • Overwhelming Post-Splenectomy Infection (OPSI) Education: Training patients and families to recognize early signs of infection, such as sudden fever or chills.

  • Howell-Jolly Body Screening: A blood smear test to confirm the functional absence of the spleen by looking for specific remnants in red blood cells.

  • Immediate Stabilization: In trauma cases, removing a ruptured spleen is life-saving and instantly stops internal hemorrhage.

  • Correction of Blood Counts: For ITP and Spherocytosis, surgery provides a long-term or permanent solution to dangerously low platelet or red cell counts.

  • Pain Resolution: Removing an enlarged spleen provides immediate relief from the pressure and "early fullness" that restricts diet and movement.

  • Cancer Staging and Treatment: Provides essential tissue samples and removes a major site of disease for certain lymphomas.

  • High Success Rates: Modern minimally invasive techniques have made elective splenectomy a safe procedure with a short hospital stay.

  • Laparoscopic Recovery: Patients often go home within 24 to 48 hours and return to light activity within two weeks.

  • Open Surgery Recovery: Requires a longer stay (3–6 days) and a 4-to-6-week period of restricted lifting to allow the abdominal wall to heal.

  • Lifelong Vaccination Schedule: Maintaining a strict schedule of "booster" shots to protect against specific bacterial infections.

  • Medical Alert Identification: Patients are advised to wear a medical alert bracelet to notify emergency responders that they do not have a spleen.

  • Emergency Antibiotics: Many patients are given a "standby" supply of antibiotics to take at the first sign of a fever while they seek medical attention.

  • Most individuals lead a completely normal, active life with no dietary or physical restrictions once healed.

  • Increased awareness of infection risk is the "new normal," requiring prompt attention to fevers or animal bites.

  • The liver and lymph nodes adapt over time to take over the role of filtering aged red blood cells.

  • A return to sports and professional work once the risk of internal bleeding is permanently removed.

  • Empowerment through a clear understanding of the necessary health precautions to maintain a strong immune system.

Aortic Valve Replacement (AVR)

Aortic Valve Replacement (AVR) is an advanced cardiac procedure that replaces a damaged, stiff, or leaking aortic valve with a new mechanical or tissue valve. This restores healthy blood flow, improves heart pumping capacity, reduces symptoms, and prevents long-term heart failure or life-threatening complications.

  • Severe or persistent shortness of breath that limits walking, climbing stairs, or daily activity.

  • Chest pain, pressure, or heaviness due to the heart struggling to push blood through a narrowed valve.

  • Extreme tiredness or low energy even during simple tasks.

  • Dizziness or fainting episodes, especially during exertion.

  • Irregular heartbeat or noticeable palpitations, indicating the heart is under stress.

  • Swelling in the feet, legs, or ankles, a sign of poor blood circulation or early heart failure.

  • Severe Aortic Stenosis – the valve becomes narrowed and heavily calcified, restricting blood flow.

  • Severe Aortic Regurgitation – the valve leaks and allows blood to flow backward into the heart.

  • Congenital valve abnormalities, including bicuspid valves.

  • Infection-related valve damage (endocarditis) that weakens or destroys the valve.

  • Aged, stiff, or heavily calcified aortic valve due to long-term wear and tear.

  • General anesthesia is given to ensure a pain-free and comfortable procedure.

  • The surgeon makes either a full chest incision or a minimally invasive cut depending on your case.

  • The damaged aortic valve is carefully removed.

  • A new mechanical or biological valve is implanted to restore proper blood flow.

  • The heart is restarted, and valve function is tested to ensure smooth operation.

  • You are shifted to the ICU for continuous monitoring and early recovery.

  • Mechanical Valve Replacement
    Long-lasting artificial valve; ideal for younger patients. Requires lifelong blood thinners to prevent clots.

  • Biological (Tissue) Valve Replacement
    Made from natural tissue. Offers natural blood flow and usually requires minimal blood thinner use.

  • Minimally Invasive AVR
    Smaller incisions, less pain, reduced blood loss, and faster healing.

  • Robotic AVR
    Performed using robotic precision tools for high accuracy, minimal scars, and quicker recovery.

  • TAVR (Transcatheter Aortic Valve Replacement)
    A non-surgical, catheter-based procedure performed through the groin. Ideal for elderly or high-risk patients.

  • Quit smoking at least 2–3 weeks before surgery for better lung function.

  • Keep blood pressure, diabetes, and heart rate well controlled.

  • Follow fasting instructions before the procedure.

  • Stop blood thinners only if your cardiologist advises.

  • Complete all required heart and blood tests before the surgery date.

  • ECG to check heart rhythm.

  • 2D Echocardiography to evaluate valve structure and pumping strength.

  • CT scan or MRI for detailed imaging when needed.

  • Coronary Angiography to detect any artery blockages.

  • Chest X-ray to assess lung health.

  • Routine blood tests including CBC, kidney/liver function, and clotting profile.

  • Restores normal forward blood flow from the heart.

  • Reduces breathlessness and chest discomfort.

  • Prevents the heart from becoming enlarged or weak.

  • Improves daily stamina, energy levels, and activity tolerance.

  • Provides long-lasting results with modern valve technology.

  • ICU stay: Usually 1–2 days for close monitoring.

  • Early walking begins within 24 hours.

  • Tubes and drains are removed in 48–72 hours.

  • Home recovery: Typically 4–8 weeks depending on the surgery type.

  • Return to work: Usually within 6–10 weeks.

  • Avoid smoking permanently to protect the new valve.

  • Follow a heart-healthy, low-salt diet for lifelong cardiac wellness.

  • Exercise daily with light walking, avoid heavy lifting initially.

  • Take medications regularly, especially blood thinners if you have a mechanical valve.

  • Join a cardiac rehabilitation program for guided recovery and long-term heart strength.

Mitral Valve Replacement (MVR)

Mitral Valve Replacement (MVR) is a specialized heart procedure that restores healthy blood flow by replacing a diseased mitral valve with a mechanical or biological valve. This improves heart efficiency, reduces symptoms like breathlessness and fatigue, and prevents long-term complications such as heart failure.

  • Shortness of breath during daily activities or while lying down.

  • Chest discomfort or pressure caused by poor blood flow through the heart.

  • Fatigue or low energy during simple tasks.

  • Irregular heartbeat or palpitations due to valve dysfunction.

  • Swelling in feet, legs, or ankles from fluid retention.

  • Fainting or dizziness, especially during physical activity.

  • Severe Mitral Stenosis – narrowing of the mitral valve restricting blood flow.

  • Severe Mitral Regurgitation – leaking mitral valve causing backward blood flow.

  • Congenital mitral valve defects present from birth.

  • Valve damage from infection (endocarditis).

  • Calcified or thickened mitral valve leading to poor heart function.

  • General anesthesia is administered for a safe, painless procedure.

  • A chest or minimally invasive incision is made based on patient suitability.

  • The damaged mitral valve is carefully removed.

  • A mechanical or biological replacement valve is implanted.

  • Heart function is tested before closing the incision.

  • Patient is moved to the ICU for monitored recovery.

  • Mechanical Valve Replacement
    Long-lasting artificial valve; requires lifelong blood thinners.

  • Biological (Tissue) Valve Replacement
    Natural tissue valve; usually requires minimal blood thinner use.

  • Minimally Invasive MVR
    Smaller incisions, less pain, quicker healing, and reduced scarring.

  • Robotic MVR
    Uses robotic precision for high accuracy, minimal scarring, and faster recovery.

  • Transcatheter Mitral Valve Replacement (TMVR)
    Non-surgical, catheter-based procedure for high-risk or elderly patients.

  • Stop smoking 2–3 weeks before surgery.

  • Maintain blood pressure, diabetes, and heart rate within target range.

  • Follow fasting instructions as advised.

  • Pause blood thinners only if instructed by your cardiologist.

  • Complete all cardiac and routine blood tests prior to surgery.

  • ECG to check heart rhythm.

  • Echocardiography (2D/3D) to evaluate mitral valve function.

  • CT or MRI scans for detailed imaging if required.

  • Coronary angiography to detect any blocked arteries.

  • Chest X-ray to assess lung and heart health.

  • Routine blood tests including CBC, kidney/liver function, and clotting profile.

  • Restores normal blood flow through the heart.

  • Reduces shortness of breath, fatigue, and chest discomfort.

  • Prevents heart enlargement and failure.

  • Improves daily activity tolerance and quality of life.

  • Provides long-lasting results with modern valve options.

  • ICU stay: 1–2 days for close monitoring.

  • Walking usually begins within 24 hours.

  • Tubes and drains are removed in 48–72 hours.

  • Home recovery: 4–8 weeks depending on the procedure type.

  • Return to work: Typically 6–10 weeks, gradually increasing activity.

  • Avoid smoking permanently.

  • Follow a heart-healthy, low-salt diet.

  • Engage in daily light exercise; avoid heavy lifting initially.

  • Take prescribed medications regularly, especially blood thinners for mechanical valves.

  • Join a cardiac rehabilitation program for optimal long-term recovery.

Heart Bypass Surgery (CABG)

Coronary Artery Bypass Grafting (CABG), commonly called "heart bypass surgery," is a major surgical procedure used to treat severe coronary artery disease. It creates new pathways for blood to flow to the heart muscle by bypassing clogged or narrowed sections of the coronary arteries. By using healthy blood vessels from elsewhere in the body to "reroute" blood, CABG restores vital oxygen supply to the heart muscle and reduces the risk of a heart attack.

  • Left Main Disease: A severe blockage in the main artery supplying the left side of the heart, which is considered high-risk.

  • Triple Vessel Disease: Significant blockages in all three major coronary arteries.

  • Diabetes: Patients with diabetes and multi-vessel disease often have better long-term outcomes with surgery than with stenting.

  • Complex Anatomy: Blockages that are too long, heavily calcified (hardened), or located in areas where a stent cannot be safely placed.

  • Failed Angioplasty: When previous attempts to open arteries with balloons or stents have not been successful or the artery has narrowed again.

  • On-Pump CABG: The traditional method where a heart-lung bypass machine takes over the work of the heart and lungs, allowing the surgeon to operate on a still, non-beating heart.

  • Off-Pump (Beating Heart) CABG: The surgeon uses specialized stabilizers to operate while the heart continues to beat, avoiding the bypass machine. This is often preferred for patients at high risk for stroke.

  • Minimally Invasive (MIDCAB): Small incisions are made between the ribs rather than through the breastbone. This is typically used for bypassing one or two arteries on the front of the heart.

  • Endoscopic Vessel Harvesting (EVH): A 2026 standard where grafts from the leg or arm are removed through tiny incisions using a camera, reducing scarring and pain.

  • Incision: A midline incision is made, and the breastbone (sternum) is divided to access the heart.

  • Harvesting: Simultaneously, healthy vessels are harvested: the Internal Mammary Artery (chest), Saphenous Vein (leg), or Radial Artery (arm).

  • Bypass: One end of the graft is attached to the aorta (the main artery) and the other end below the blockage, creating a permanent "detour."

  • Restarting: Once the connections are tested for leaks, the heart is restarted (if it was stopped), and the bypass machine is disconnected.

  • Closing: The sternum is secured with permanent stainless steel wires, and the skin is closed with stitches or staples.

  • Fasting for at least 8–12 hours before surgery, as it is performed under general anesthesia.

  • Extensive blood work, chest X-rays, and an ECG to ensure you are fit for major surgery.

  • Dental clearance is often required to ensure no hidden infections could travel to the heart.

  • Stopping or adjusting certain medications, especially blood thinners like Clopidogrel or Aspirin, as directed.

  • Shaving and surgical scrubbing of the chest, legs, and arms to prevent infection.

  • Coronary Angiogram: The "roadmap" that shows exactly where the blockages are located.

  • Echocardiogram: To assess the heart's pumping strength (Ejection Fraction) and valve function.

  • Carotid Doppler: To check for blockages in the neck arteries that might increase the risk of stroke during surgery.

  • Pulmonary Function Test (PFT): To ensure the lungs are strong enough to handle anesthesia and recovery.

  • Vein Mapping: Ultrasound of the legs or arms to ensure the vessels are healthy enough to be used as grafts.

  • ICU Stay: Expect to spend the first 24 hours in the Intensive Care Unit for close monitoring of heart rhythm and blood pressure.

  • Hospital Stay: Total recovery in the hospital usually lasts 5 to 7 days.

  • Sternal Precautions: For the first 6 weeks, you must avoid lifting anything heavier than 2–3 kg to allow the breastbone to heal properly.

  • Cardiac Rehabilitation: Starting around week 6, supervised exercise programs are highly recommended to rebuild strength.

  • Long-term Meds: You will likely remain on Aspirin and cholesterol-lowering medications (statins) indefinitely to keep the new grafts clear.

  • Superior Longevity: Provides a long-term solution for complex multi-vessel disease, often outlasting stents.

  • Symptom Relief: Significant reduction or total elimination of chest pain (angina) and shortness of breath.

  • Reduced Heart Attack Risk: By restoring blood flow to large areas of the heart, the risk of a future major cardiac event is lowered.

  • Improved Quality of Life: Most patients return to an active lifestyle and can exercise more effectively than before surgery.

  • 2026 Success Rates: Elective CABG has a high survival rate (approx. 98–99%) due to advanced surgical and anesthesia protocols.

Off-Pump Bypass (Beating Heart Surgery)

Off-Pump Coronary Artery Bypass (OPCAB), also known as "Beating Heart Surgery," is a specialized technique where the surgeon performs the bypass while the heart continues to beat. Unlike traditional CABG, it does not use a heart-lung bypass machine to stop the heart and take over its function. This approach is highly valued for reducing systemic inflammation and protecting vital organs, particularly in high-risk patients.

  • Elderly Patients (70+ years): Those who may be more vulnerable to the systemic physiological stress of a heart-lung machine.

  • History of Stroke: Patients with a "porcelain" (heavily calcified) aorta where clamping the vessel during traditional surgery increases the risk of a stroke.

  • Chronic Kidney Disease: Maintaining natural blood pressure and pulsatile flow during surgery is generally safer for renal function.

  • Liver Disease or Blood Disorders: Patients who may face higher complications from the intense blood-thinning required for "on-pump" machines.

  • Lung Issues: Those with respiratory compromise who benefit from being taken off a ventilator as quickly as possible following the procedure.

  • Suction Stabilizers: Small, mechanical arms that "grip" a tiny area (1–2 cm) of the heart surface, keeping that specific spot perfectly still while the rest of the heart continues to pump.

  • Intracoronary Shunts: Tiny plastic tubes inserted into the artery during the stitching process to ensure blood continues to flow to the heart muscle while the surgeon sews the graft.

  • Heart Positioners: Suction devices used to gently lift and rotate the beating heart, allowing the surgeon to reach blockages on the side or back walls.

  • Transit Time Flow Measurement (TTFM): A clinical standard used during surgery to verify that blood flow through the new graft is perfect before closing the chest.

  • Deep Pericardial Stay Sutures: Specialized internal stitches that allow the surgeon to maneuver the heart safely into the necessary positions without stopping it.

  • Surgical Access: Under general anesthesia, a standard midline incision is made through the breastbone (sternotomy) to reach the heart.

  • Graft Harvesting: Healthy vessels are prepared from the chest (internal mammary artery), leg (saphenous vein), or arm (radial artery) to be used as the new bypass routes.

  • Heart Positioning: The surgeon carefully maneuvers the beating heart using positioners to expose the specific blocked coronary arteries.

  • The Bypass: The stabilizer is applied to the target site, and the surgeon meticulously sews the graft onto the artery using ultra-fine sutures.

  • Verification & Closing: After confirming flow with TTFM, the stabilizer is removed, and the breastbone is secured with permanent stainless steel wires.

  • Fasting (NPO): No food or drink for at least 8–12 hours before surgery to ensure safety during general anesthesia.

  • Baseline Diagnostics: Extensive blood tests, chest X-rays, and an ECG to assess overall surgical readiness and organ function.

  • Dental Clearance: A check to rule out any active oral infections that could travel through the bloodstream and compromise the heart surgery.

  • Medication Adjustment: Reviewing all prescriptions; anti-platelet drugs or blood thinners may need to be paused or adjusted several days prior.

  • Surgical Scrub: Shaving and antiseptic scrubbing of the chest and any potential graft harvest sites on the legs or arms.

  • Coronary Angiogram: The essential "roadmap" that identifies the exact location and severity of blockages for the surgical team.

  • Echocardiogram: An ultrasound to evaluate the heart's pumping strength and identify any underlying valve issues.

  • Carotid Ultrasound: To assess stroke risk by checking the health of the arteries supplying blood to the brain.

  • CT Scan of the Aorta: Specifically used to check for heavy calcification (porcelain aorta) that would favor an off-pump approach.

  • Vein/Artery Mapping: Ultrasound imaging to ensure the quality and size of the blood vessels intended for use as bypass grafts.

  • ICU Recovery: Patients typically spend the first 12 to 24 hours in the Intensive Care Unit for close hemodynamic monitoring.

  • Hospital Discharge: The total stay is usually 4 to 5 days, which is often 1–2 days shorter than traditional "on-pump" bypass surgery.

  • Sternal Precautions: To allow the breastbone to heal, patients must avoid lifting anything heavier than 2–3 kg (about 5 lbs) for 6 to 8 weeks.

  • Gradual Recovery: Most patients return to light daily activity quickly but require 2 to 3 months for a full return to strenuous levels.

  • Cardiac Rehab: Participating in a supervised exercise and education program starting around week 6 is vital for long-term cardiovascular health.

  • Reduced Stroke Risk: Avoiding the clamping of a calcified aorta minimizes the chance of dislodging plaque that could travel to the brain.

  • Organ Protection: Shorter ventilator times and more natural, pulsatile blood flow help protect the sensitive kidney and lung systems.

  • Less Bleeding: Beating heart surgery generally requires fewer blood transfusions than procedures involving a bypass machine.

  • Lower Inflammatory Response: Avoiding the heart-lung machine reduces the "whole-body" inflammation often seen after major cardiac surgery.

  • Faster Return to Normalcy: Many patients experience shorter hospital stays and a quicker initial recovery phase compared to traditional methods.

Redo Bypass Surgery
Redo Bypass Surgery

Redo Coronary Artery Bypass Grafting (Redo CABG) is a secondary heart bypass surgery performed on a patient who has already undergone at least one previous bypass. It is technically more demanding than the first surgery because the heart often develops scar tissue (adhesions) that causes it to stick to the underside of the breastbone. In 2026, while complex stenting is often the first choice for failed grafts, Redo CABG remains the definitive solution for patients with extensive new blockages or anatomical challenges that stents cannot fix.

  • Graft Attrition: When original vein grafts (typically used 10–15 years ago) have become diseased or completely blocked.

  • Native Disease Progression: New, severe blockages in the heart's original arteries that weren't bypassed during the first surgery.

  • Failed Complex Stenting: When attempts to open old grafts or native arteries with multiple stents have not been successful.

  • Ischemic Heart Failure: When poor blood flow is weakening the heart muscle, and a "complete revascularization" is needed to restore pumping strength.

  • LIMA Failure: In rare cases where the Left Internal Mammary Artery (the "gold standard" graft) has narrowed or failed.

  • The "Re-Entry" Problem: Surgeons use an oscillating saw and extreme caution to open the chest without damaging the heart or old, functioning grafts that may be stuck to the sternum.

  • New Graft Harvesting: Since the best vessels were likely used in the first surgery, surgeons may harvest the Right Internal Mammary Artery, Radial Artery (arm), or additional Leg Veins.

  • Embolic Protection: Old vein grafts are often "crumbly" and can release debris (emboli) if touched; surgeons usually tie these off and replace them to prevent a heart attack during surgery.

  • Retrograde Cooling: A specialized 2026 technique where cooling fluid is pumped backward through the heart's veins (coronary sinus) to protect the muscle while it is stopped.

  • Off-Pump (Beating Heart) Redo: Frequently chosen if the aorta is too calcified to be clamped, reducing the risk of stroke.

  • Access: The old chest scar is reopened with precision instruments to carefully separate the heart from the surrounding scar tissue.

  • Cannulation: The patient is connected to the heart-lung machine, often through the groin (femoral) vessels for extra safety before the chest is fully opened.

  • Dissection: The surgeon meticulously clears away adhesions to expose the target arteries and the old grafts.

  • Grafting: New bypasses are sewn into place, often using arterial grafts from the arm or chest to ensure better long-term durability.

  • Verification: Transit Time Flow Measurement (TTFM) is used to ensure the new grafts are providing high volumes of blood to the heart muscle.

  • Multi-Slice CT Scan: A 2026 requirement to map the distance between the heart and the breastbone to plan a safe entry.

  • Fasting: Standard 8–12 hour fast before the surgery, which is always performed under general anesthesia.

  • Blood Cross-Matching: Redo surgeries have a higher chance of needing a blood transfusion, so multiple units of blood are held in reserve.

  • Review of Previous Records: The original "operative note" from the first bypass is essential for the surgeon to know exactly where the old grafts are located.

  • Anticoagulant Adjustment: Blood thinners are carefully managed and often stopped 3–5 days prior to minimize bleeding.

  • Cardiac CT Angiography (CCTA): To visualize the location of old grafts and their proximity to the chest wall.

  • Coronary Angiogram: The essential "roadmap" to identify which old grafts have failed and where new blockages exist.

  • Echocardiogram: To assess current heart function and check for any valve issues that might need fixing at the same time.

  • Carotid Doppler: To ensure there are no blockages in the neck arteries that could increase stroke risk.

  • Viability Study (PET or MRI): To confirm that the heart muscle in the blocked area is still "alive" and will benefit from a new blood supply.

  • Extended ICU Stay: Patients usually spend 24 to 48 hours in the ICU for closer monitoring of bleeding and heart rhythm.

  • Hospital Stay: Total recovery in the hospital typically lasts 7 to 10 days, slightly longer than the first bypass.

  • Healing Phase: Full recovery can take 8 to 12 weeks. Skin healing may be slower because of the old scar tissue.

  • Cardiac Rehabilitation: Supervised exercise is non-negotiable for redo patients to ensure the new grafts remain open.

  • Aggressive Medical Therapy: High-dose statins and blood thinners are crucial to stop the progression of disease in the new grafts.

  • Complete Revascularization: Unlike stents, which may only fix one spot, a redo bypass can treat all major blockages in one go.

  • Long-Term Durability: Modern arterial grafts used in redos have much higher 10-year success rates than repeat stenting.

  • Symptom Resolution: Provides definitive relief for patients who have "refractory angina" (chest pain that doesn't respond to meds).

  • Improved Life Expectancy: For patients with left main disease or triple vessel disease, surgery offers better survival than medicine alone.

  • 2026 Success Rates: In specialized Indian centers, the success rate for redo CABG now exceeds 93–95% due to better imaging and surgical tech.

Tricuspid Valve Repair

Tricuspid Valve Repair is a surgical or minimally invasive procedure to fix a leaking (regurgitation) or narrowed (stenosis) tricuspid valve, which sits between the right atrium and right ventricle. Repair is increasingly preferred over valve replacement because it preserves the heart's natural anatomy and avoids the need for lifelong, heavy-duty blood thinners. It is a vital intervention for maintaining proper blood flow from the body into the lungs.

  • Secondary (Functional) Regurgitation: When the valve leaks because the right side of the heart has stretched (common in patients with left-sided heart disease).

  • Concomitant Repair: When you are already undergoing surgery for a mitral or aortic valve; repairing the tricuspid valve at the same time prevents future heart failure.

  • Severe Right-Sided Symptoms: Such as significant swelling in the legs, abdominal bloating, or unexplained fatigue.

  • Direct Valve Damage: Caused by infection (endocarditis), rheumatic fever, or blunt chest trauma.

  • Pulmonary Hypertension: When high pressure in the lungs forces the tricuspid valve to leak, requiring a surgical "tightening" of the valve base.

  • Annuloplasty (The Ring): The "gold standard" where a cloth-covered medical ring is sewn around the base of the valve to pull the leaflets together for a tight seal.

  • Leaflet Repair: Techniques like "bicuspidization" (tucking a leaflet) or patching holes with a piece of the heart's own sac (pericardium).

  • Neochords: Attaching artificial GORE-TEX strings to support drooping or "flail" leaflets that no longer close properly.

  • Edge-to-Edge Repair (TriClip): A leading-edge, minimally invasive option where a clip is guided through a leg vein to "pin" leaking leaflets together.

  • Minimally Invasive Surgery: Performing the repair through a small incision between the ribs (thoracotomy) rather than opening the breastbone.

  • Access: Performed via a midline incision (sternotomy) or a minimally invasive side incision.

  • Bypass: The patient is connected to a heart-lung machine, which takes over the work of the heart and lungs during the repair.

  • Inspection: The surgeon opens the right atrium to inspect the valve leaflets and the supporting "annulus" ring.

  • Implantation: The annuloplasty ring or neochords are meticulously sewn into place to restore the valve's shape.

  • Testing: Saline is injected into the ventricle to confirm the valve is leak-proof before the heart is closed and restarted.

  • Fasting: Required for 8–12 hours before surgery, as it is performed under general anesthesia.

  • Extensive Blood Tests: Including liver and kidney function panels, as these organs are often affected by tricuspid issues.

  • Dental Check-up: To ensure no oral bacteria could cause a post-surgical heart infection.

  • Medication Adjustment: Specifically regarding blood thinners, as directed by your surgical team.

  • Sanitization: Shaving and antiseptic cleaning of the chest and any potential graft sites.

  • Echocardiogram (TTE/TEE): The primary tool used to grade the severity of the leak and measure the size of the heart chambers.

  • Cardiac Catheterization: To check the pressures in the heart and lungs (pulmonary hypertension) and look for coronary artery blockages.

  • Cardiac MRI: To get a high-definition 3D view of the right ventricle's function and volume.

  • Liver Function Tests: To see if the "back-pressure" from the leaky valve has caused liver congestion.

  • Chest X-ray: To evaluate the size of the heart silhouette and the condition of the lungs.

  • Hospital Stay: Usually lasts 5 to 7 days, with the first 24–48 hours spent in the ICU for close monitoring.

  • Initial Recovery: Most patients are encouraged to sit up and begin walking within 24 hours of surgery.

  • Sternal Precautions: If a sternotomy was performed, no lifting over 3 kg for 6 to 8 weeks to allow the bone to heal.

  • Medication: Most patients take a mild blood thinner (like aspirin) for 3–6 months; lifelong Warfarin is typically not required for a repair.

  • Follow-up: Regular echocardiograms will be scheduled to ensure the repair remains stable and the heart size is shrinking back to normal.

  • High Durability: Over 90% of repairs are successful and significantly reduce leakage for many years.

  • Prevents Heart Failure: Directly reduces the risk of right-sided heart failure and associated liver congestion.

  • Improved Energy: Patients often notice a dramatic reduction in swelling and a significant increase in exercise capacity.

  • Preserves Heart Function: Keeping your natural valve (rather than a replacement) helps the right ventricle maintain its strength.

  • High Success Rates: Elective repairs in specialized centers have low complication rates (1% to 3%) and excellent long-term survival.

Double Valve Replacement (DVR)

Double Valve Replacement (DVR) is a major cardiac surgery where two of the heart's four valves—most commonly the Mitral and Aortic valves—are replaced during a single operation. This is typically required when both valves are severely diseased (stenosed or leaking) and cannot be effectively repaired. DVR remains a life-saving intervention for advanced multi-valve disease, often restoring normal life expectancy for patients with severe heart failure.

  • Rheumatic Heart Disease: The leading cause of multi-valve damage, where chronic inflammation scars both the mitral and aortic valves.

  • Calcific Degeneration: Age-related buildup of calcium that stiffens both heart structures simultaneously.

  • Endocarditis: A severe bacterial infection that has spread from one valve to another, causing structural destruction.

  • Left Ventricular Strain: When the failure of one valve causes a "domino effect," putting pressure on the second valve until it also fails.

  • Symptomatic Heart Failure: When symptoms like severe breathlessness, chest pain, and fainting can no longer be managed with medication.

  • Mechanical Valves: Made of carbon and metal. They are extremely durable and rarely need replacing, but require lifelong blood thinners (Warfarin).

  • Bioprosthetic (Tissue) Valves: Made from pig (porcine) or cow (bovine) tissue. They do not require long-term heavy blood thinners but usually wear out in 10–15 years.

  • On-X Mechanical Valves: A newer generation of mechanical valves that may allow for lower doses of blood thinners.

  • Ross Procedure (Specialized): Using the patient's own pulmonary valve to replace the aortic valve, though less common in a double-replacement scenario.

[Image comparing a mechanical heart valve and a bioprosthetic tissue valve]

  • Access: A midline incision is made through the breastbone (sternotomy) to provide the surgeon full access to the heart.

  • Cardiopulmonary Bypass: The patient is connected to a heart-lung machine; the heart is temporarily stopped to allow for precise surgery.

  • Valve Removal: The surgeon opens the aorta and the left atrium to meticulously excise the diseased aortic and mitral valves.

  • Implantation: Two new valves are sewn into the heart’s natural rings (annulus) using high-strength sutures.

  • De-airing & Restarting: Air is removed from the heart chambers, blood flow is restored, and the heart is restarted.

  • Fasting: Required for at least 8–12 hours before surgery, as it is performed under general anesthesia.

  • Blood Prep: Extensive blood work, including cross-matching for several units of blood in case a transfusion is needed.

  • Dental Clearance: Mandatory to ensure no oral bacteria could infect the new prosthetic valves.

  • Medication Adjustment: Adjusting current medications, especially blood thinners and anti-platelet drugs, as directed by the surgeon.

  • System Check: Pulmonary function tests and chest X-rays to ensure the lungs are prepared for recovery.

  • Echocardiogram (TTE/TEE): The primary imaging tool to grade the severity of both valve diseases and measure heart chamber size.

  • Coronary Angiogram: To check for blockages in the heart arteries that might need to be bypassed during the same surgery.

  • Cardiac CT or MRI: To provide 3D anatomical detail of the valves and the surrounding heart structures.

  • Carotid Doppler: To evaluate the risk of stroke by checking the arteries supplying the brain.

  • Organ Function Panels: Including kidney and liver function tests, as these organs are vital for a successful recovery.

  • ICU Stay: Patients spend 24 to 48 hours in the ICU for intensive monitoring of heart rhythm and blood pressure.

  • Hospital Stay: Total recovery in the hospital usually lasts 7 to 10 days.

  • Anticoagulation: If mechanical valves are used, strict monitoring of blood clotting levels (INR) begins immediately and continues for life.

  • Sternal Precautions: No lifting anything heavier than 3 kg for 8 to 12 weeks to allow the breastbone to heal.

  • Cardiac Rehabilitation: Supervised exercise is critical starting at week 6 to help the heart adjust to the new valves.

  • Corrects Circulation: Immediately corrects the "back-pressure" on the lungs and the rest of the body.

  • Symptom Relief: Drastically reduces shortness of breath, fatigue, and swelling in the legs.

  • Stops Progression: Prevents the progressive stretching and weakening of the heart muscle.

  • Long-Term Durability: Modern prosthetic options allow many patients to experience decades of improved health.

  • Single-Stage Correction: Treating both valves in one surgery avoids the high risk of a "redo" operation later in life.

Cardiac Tumor Removal Surgery

Cardiac Tumour Removal Surgery is a specialized procedure to excise abnormal growths from within or on the heart. While the majority of primary heart tumours (75–80%) are benign (non-cancerous), such as myxomas, they can still be life-threatening. These growths can obstruct blood flow, damage heart valves, or lead to strokes if pieces of the tumour break off and travel to the brain. Advanced imaging and robotic techniques allow for highly precise removal of these rare growths.

  • Benign Myxomas: The most common heart tumour, typically found in the left atrium, which requires removal to prevent blood flow obstruction.

  • Papillary Fibroelastomas: Small growths on heart valves that carry a high risk of causing a stroke or heart attack.

  • Symptoms of Obstruction: If a tumour causes dizziness, fainting, or sudden shortness of breath by blocking a heart valve.

  • Embolic Events: If pieces of a suspected tumour have already broken off and caused "mini-strokes" (TIAs) or blood clots in the limbs.

  • Malignant Sarcomas: Rare, aggressive cancers that require surgery to relieve symptoms or as part of a multi-stage treatment plan involving chemotherapy.

  • Open-Heart Surgery (Median Sternotomy): The traditional approach providing the most direct view, necessary for large, complex, or malignant tumours.

  • Minimally Invasive Surgery: Uses small incisions (3–5 cm) between the ribs, often assisted by a 3D endoscope to reduce pain and scarring.

  • Robotically Assisted Surgery: A standard for precision, where surgeons use robotic arms to remove tumours in tight spaces within the heart.

  • Cardiopulmonary Bypass (CPB): Using a heart-lung machine to maintain circulation while the heart is stopped for the safe excision of the growth.

  • Reconstructive Surgery: Using a patch (synthetic or from the patient’s own pericardium) to repair any holes left in the heart wall after the tumour is removed.

  • Access: The surgeon reaches the heart via a sternotomy or a minimally invasive port-access between the ribs.

  • Bypass: The patient is connected to the heart-lung machine, allowing the surgeon to open the heart chambers in a bloodless environment.

  • Excision: The tumour is meticulously removed, usually along with a small "margin" of healthy tissue to ensure no cells are left behind to regrow.

  • Repair: If the tumour was attached to a valve, the surgeon performs a valve repair or replacement during the same session.

  • Verification: The heart is closed and restarted, and an intraoperative echocardiogram is performed to ensure the tumour is gone and the valves are functioning perfectly.

  • Fasting: Required for at least 8–12 hours before surgery, as the procedure is performed under general anesthesia.

  • Blood Work: Extensive blood work and cross-matching for blood transfusions, which are common in complex cardiac resections.

  • Dental Clearance: To ensure no bacteria from the mouth could infect the surgical site or any repair patches.

  • Medication Adjustment: Stopping certain medications, particularly blood thinners, several days before the operation.

  • Logistics: Arranging for a hospital stay of roughly one week and a support person for the multi-week recovery at home.

  • Echocardiogram (TTE/TEE): The primary tool used to identify the tumour's size, mobility, and attachment point.

  • Cardiac MRI: Provides high-definition 3D tissue characterization to help distinguish between benign and malignant growths.

  • Cardiac CT Scan: Used to evaluate the tumour’s relationship with the coronary arteries and the chest wall.

  • Coronary Angiogram: Performed in older patients to check for blockages that may need to be bypassed during the same surgery.

  • PET Scan: Occasionally used if a malignant tumour is suspected, to check if the cancer has spread elsewhere in the body.

  • ICU Stay: Patients spend 1–2 days in the Intensive Care Unit for constant monitoring of heart rhythm and oxygen levels.

  • Hospital Discharge: Most patients go home after 5 to 10 days, depending on whether the approach was open or minimally invasive.

  • Activity Restrictions: No heavy lifting (over 4 kg) for 6 to 12 weeks to allow the breastbone or rib incisions to heal fully.

  • Cardiac Rehabilitation: Supervised exercise is strongly recommended to rebuild physical strength and cardiovascular endurance.

  • Long-term Monitoring: Annual echocardiograms are usually required for several years to ensure the tumour does not recur.

  • Cure for Benign Growths: For tumours like myxomas, surgery is often completely curative with excellent long-term results.

  • Stroke Prevention: Removing highly mobile tumours significantly reduces the risk of life-altering strokes or organ damage.

  • Restores Blood Flow: Eliminates heart failure symptoms caused by tumours obstructing the heart valves.

  • Specialized Outcomes: In-hospital mortality is relatively low (approximately 3%) for such a specialized and complex procedure.

  • Symptom Relief: Most patients experience an immediate improvement in energy levels and a reduction in fainting or palpitations.

Left Ventricular Aneurysm Repair

Left Ventricular (LV) Aneurysm Repair, often called an "Aneurysmectomy" or the "Dor Procedure," is a major surgical operation to correct a "bulge" in the heart's main pumping chamber. This bulge is typically a patch of thin, scarred, non-functioning muscle that forms after a massive heart attack. The focus of this surgery is "Ventricular Restoration"—reshaping the heart from a balloon-like state back into its natural, efficient oval shape to restore pumping power.

  • Congestive Heart Failure: When the scarred area "balloons" outward, wasting the heart's energy and causing severe breathlessness and fatigue.

  • Recurrent Blood Clots: When blood pools and stagnates inside the bulge, creating clots that carry a high risk of stroke.

  • Refractory Arrhythmias: Life-threatening fast heartbeats (Ventricular Tachycardia) triggered by the border between healthy muscle and scar tissue.

  • Large Aneurysm Size: Even if symptoms are mild, a very large or expanding aneurysm may require repair to prevent progressive heart stretching.

  • Concomitant Surgery: Often performed if you already need a heart bypass (CABG) or mitral valve repair to fully restore heart efficiency.

  • Linear Repair: For smaller aneurysms, the surgeon removes the scarred tissue and sews the healthy muscle edges back together.

  • The Dor Procedure (Endoventricular Circular Patch Plasty): The modern "gold standard" where a synthetic or tissue patch is placed inside the ventricle to rebuild its internal structure.

  • Hybrid LV Restoration: A 2026 approach combining surgical repair with catheter-based techniques for patients who are too high-risk for traditional surgery.

  • Extracellular Matrix (ECM) Patches: A newer option using biological "scaffolding" that may help the heart tissue integrate better than traditional synthetic materials.

  • Ventricular Reconstruction: Using internal sutures to "exclude" the dead tissue from the pumping chamber without actually cutting it out.

[Image showing a synthetic patch being sutured inside the left ventricle during a Dor Procedure]

  • Access: A midline incision is made through the breastbone (sternotomy) to reach the heart.

  • Bypass: The patient is connected to a heart-lung machine; the heart is stopped to allow the surgeon to safely open the ventricle.

  • Clot Removal: Any old blood clots (thrombi) trapped within the aneurysm are carefully removed to prevent future strokes.

  • Reshaping: The surgeon identifies the "border zone" of healthy muscle and secures the patch or sutures to create a new, smaller, and stronger pumping chamber.

  • Verification: An intraoperative ultrasound (TEE) is performed to ensure the heart's "Stroke Volume" (the amount of blood pumped per beat) has significantly improved.

  • Fasting for at least 8–12 hours before the surgery, which is performed under general anesthesia.

  • Extensive blood work, including kidney function tests and cross-matching for potential blood transfusions.

  • Dental clearance to eliminate any hidden infections that could compromise the surgical site or the patch.

  • Adjusting medications, specifically heart failure drugs like ACE inhibitors and blood thinners, as directed by the surgeon.

  • Review of a "Viability Study" to confirm that the remaining heart muscle is strong enough to support the repair.

  • Cardiac MRI: The best tool for mapping the exact size of the aneurysm and distinguishing between scar tissue and healthy muscle.

  • Echocardiogram (TEE): To measure the Ejection Fraction and check if the mitral valve is leaking due to the aneurysm.

  • Coronary Angiogram: To identify blockages in the arteries that will likely be bypassed during the same operation.

  • Cardiac CT Scan: To assess the proximity of the aneurysm to the chest wall, especially important for "redo" surgeries.

  • EP Study (Electrophysiology): Occasionally done if the patient has had life-threatening arrhythmias to locate the "trigger" points.

  • ICU Stay: Usually 2 to 3 days for intensive monitoring of blood pressure, heart rhythm, and fluid levels.

  • Hospital Stay: Total stay typically ranges from 7 to 12 days, depending on the speed of recovery.

  • Mechanical Support: Some patients may briefly require a temporary pump (like an IABP) to help the reshaped heart work in the first 48 hours.

  • Sternal Precautions: No lifting anything heavier than 3 kg for 8 to 12 weeks to ensure the breastbone heals.

  • Long-term Meds: Lifelong use of beta-blockers and blood thinners is often necessary to protect the repair and prevent new clots.

  • Improved Pumping Efficiency: Reshaping the heart significantly increases the Ejection Fraction and overall cardiac output.

  • Dramatic Symptom Relief: Most patients report a major decrease in shortness of breath and a return of energy within 4–8 weeks.

  • Reduced Stroke Risk: By removing the "pocket" where blood stagnates, the primary source of heart-related strokes is eliminated.

  • Rhythm Stability: Repairing the "border zone" often resolves or simplifies the management of dangerous heart arrhythmias.

  • 2026 Success Rates: In specialized Indian centers, the success rate for the Dor Procedure is approximately 90–95% for elective cases.

Ventricular Septal Rupture Repair

Ventricular Septal Rupture (VSR) Repair is a high-stakes, emergency surgical procedure to fix a hole in the septum (the wall dividing the left and right ventricles). This rupture is a rare but catastrophic complication of a massive heart attack, occurring when a lack of blood flow causes heart muscle to die and physically tear. Surgical intervention remains the "gold standard," as the condition is almost always fatal without mechanical closure.

  • Acute Heart Failure: When the septum tears, oxygen-rich blood surges into the right side of the heart, causing the heart to lose its ability to pump to the rest of the body.

  • Pulmonary Flooding: Sudden, excessive blood flow into the lungs leads to rapid fluid buildup (edema) and severe breathing difficulty.

  • Cardiogenic Shock: If blood pressure drops dangerously low and organs begin to fail due to the massive "shunt" of blood within the heart.

  • Post-Infarction Complication: Typically occurs within the first 24 hours or 3–5 days following a major heart attack.

  • High-Risk Stabilization: If a patient is currently on life support (ECMO) or a balloon pump (IABP) specifically to bridge them to a definitive surgical repair.

  • Infarct Exclusion: The modern standard where a large synthetic patch is "wallpapered" over the hole and anchored to healthy, firm heart muscle away from the fragile tear.

  • Triple Patch Technique: A newer method using three layers of bovine pericardium and surgical glue to ensure a leak-proof seal and minimize the risk of the hole reopening.

  • Extended Sandwich Patch: Using two large Dacron patches to "sandwich" the septum from both the left and right sides, often used for complex or posterior ruptures.

  • Hybrid Repair: A two-stage approach where surgery is followed by a transcatheter "plug" if a small residual leak (shunt) remains after the initial operation.

  • Concomitant CABG: Since a blocked artery caused the rupture, surgeons almost always perform a heart bypass during the same procedure to protect the remaining muscle.

  • Access: A midline incision is made through the breastbone (sternotomy) for the most direct access to the complex rupture site.

  • Bypass: The patient is connected to a heart-lung machine; the heart is stopped to allow the surgeon to operate on the delicate, damaged tissue.

  • Ventriculotomy: The surgeon opens the scarred area of the left ventricle (the chamber with the highest pressure) to inspect the tear.

  • Debridement: Any "mushy" or dead tissue at the edges of the hole is cleared away to reach firmer muscle that can hold sutures.

  • Patching & Gluing: The synthetic or tissue patch is meticulously secured. Specialized surgical glues are often used to reinforce the suture lines on fragile tissue.

  • Restarting: The heart is carefully restarted, and a transesophageal echo (TEE) is performed immediately to check for any residual leaks.

[Image showing a synthetic patch being sutured over a ventricular septal defect]

  • Emergency Stabilization: Hemodynamic stabilization is the priority; many patients receive an Intra-aortic Balloon Pump (IABP) to reduce the heart's workload.

  • Fasting: Required, though most patients are already under emergency care and receiving fluids intravenously.

  • Blood Cross-matching: Extensive cross-matching is performed, as these surgeries carry a high risk of bleeding and often require blood transfusions.

  • Tissue Friability Review: Surgeons may delay surgery for 3–7 days if the patient is stable enough to let the heart muscle toughen, which increases suture success.

  • Emergency Consent: Consent is often obtained from family members, as the patient is typically too ill or sedated to provide it themselves.

  • Echocardiogram (TTE/TEE): The essential test to confirm the location and size of the rupture and quantify the "shunt" volume.

  • Coronary Angiogram: Necessary to identify the blocked artery that caused the heart attack and plan the necessary bypass grafts.

  • Cardiac CT Scan: Sometimes used to assess the anatomy of the rupture, especially if it is in a difficult-to-reach posterior location.

  • Swan-Ganz Catheterization: To measure the pressures in the lungs and the degree of oxygen-rich blood mixing in the right side of the heart.

  • Blood Gas Analysis: To monitor how well the lungs are coping with the sudden influx of extra blood.

  • ICU Stay: Patients typically require 3 to 7 days in the ICU on a ventilator with multiple medications to support blood pressure.

  • Hospital Stay: Total recovery in the hospital usually lasts 2 to 3 weeks due to the severity of the initial heart attack.

  • Long-term Management: Lifelong heart failure medications (such as Beta-blockers and ARNI therapy) are essential to help the heart recover.

  • Residual Shunt Monitoring: 10–20% of cases may have a tiny remaining leak; these are monitored via regular echocardiograms and only repaired if they cause symptoms.

  • Rehabilitation: A slow, medically supervised cardiac rehab program is vital to rebuild strength after such a massive physiological trauma.

  • Life-Saving Intervention: Without surgery, the mortality rate is nearly 90% within weeks; repair offers the only realistic chance for survival.

  • Stops Pulmonary Flooding: Immediately halts the surge of blood into the lungs, allowing for easier breathing and recovery from edema.

  • Restores Systemic Pressure: By closing the hole, the heart can once again send oxygenated blood to the brain, kidneys, and liver.

  • Improved Outcomes: While high-risk, 30-day survival rates in specialized cardiac centers have improved significantly for stable patients.

  • Future Heart Health: For those who survive the initial recovery, long-term heart function can improve significantly with proper care.

Left Ventricular Assist Device (LVAD) Implantation

Left Ventricular Assist Device (LVAD) Implantation is a major surgical procedure to install a mechanical pump that assists a weakened heart in circulating blood throughout the body. Unlike a total artificial heart, an LVAD works with your existing heart to take over the pumping work of the left ventricle—the heart's main pumping chamber. These devices are increasingly used as "Destination Therapy" for those who may not be eligible for a heart transplant, serving as a long-term life-support system.

  • End-Stage Heart Failure: When medications and other treatments no longer help and the heart is too weak to support the body's metabolic needs.

  • Bridge to Transplant (BTT): To keep a patient stable and healthy enough to undergo a heart transplant while waiting for a suitable donor organ.

  • Destination Therapy (DT): As a permanent solution to improve quality of life for patients ineligible for a transplant due to age or other medical conditions.

  • Bridge to Recovery (BTR): In cases where heart failure is expected to be temporary (such as viral myocarditis), supporting the heart until it can pump on its own.

  • Severe Symptom Burden: When life is severely limited by extreme fatigue, shortness of breath even at rest, and frequent emergency hospitalizations.

  • The Internal Pump: Surgically implanted at the apex (tip) of the left ventricle to pull blood out and push it directly into the aorta.

  • The Driveline: A thin, reinforced cable that passes from the internal pump through the skin of the abdomen to connect to the external computer.

  • External Controller: A small computer worn on a belt or harness that monitors the pump's function and provides vital alerts or alarms.

  • Power Source: Uses rechargeable lithium-ion batteries for mobile use or a power cord that plugs into a standard electrical outlet while sleeping.

  • Mobile Monitoring: Modern controllers often sync with smartphone apps to allow caregivers and medical teams to monitor pump flow and battery life remotely.

  • Surgical Access: The surgeon makes an incision down the center of the chest and separates the breastbone (sternotomy) to reach the heart.

  • Heart-Lung Bypass: A bypass machine takes over heart and lung functions so the surgeon can safely work on a still heart.

  • Implantation: The inflow end of the pump is sewn into the left ventricle, and the outflow graft is meticulously attached to the aorta.

  • Driveline Tunneling: The power cable is carefully tunneled through the abdominal wall to exit the skin at a specific "exit site" on the abdomen.

  • Activation: Once the device is tested and circulating blood, the bypass machine is disconnected and the chest is secured with surgical wires.

  • Fasting (NPO): No food or drink for 8–12 hours before surgery, as the procedure is performed under general anesthesia.

  • Multidisciplinary Evaluation: Extensive review by a "Heart Failure Team," including cardiologists, surgeons, social workers, and nutritionists.

  • Organ Function Screens: Blood tests to ensure the liver and kidneys are healthy enough to withstand the surgery and the new circulatory demands.

  • Caregiver Training: Both the patient and a designated "caregiver" must learn how to manage the device, change batteries, and handle emergency alarms.

  • Infection Prevention: Dental clearance is required to ensure no oral bacteria could lead to an infection of the mechanical pump components.

  • Echocardiogram: To assess the strength of the right ventricle; if the right side of the heart is too weak, a standard LVAD may not be effective.

  • Right Heart Catheterization: To measure the pressures in the heart and lungs to ensure the body can handle the pump's mechanical flow.

  • Cardiac CT Scan: To map the anatomy of the chest and identify the best surgical placement for the pump and the outflow graft.

  • Pulmonary Function Tests: To ensure the lungs are strong enough for the patient to be successfully taken off a ventilator after the procedure.

  • Psychosocial Assessment: To ensure the patient has the necessary support system and cognitive ability to manage the device daily.

  • ICU Recovery: Patients spend the first few days in the Intensive Care Unit for close monitoring of the pump's speeds and blood flow parameters.

  • Hospital Education: Total recovery in the hospital typically lasts 2 to 3 weeks as the patient and family learn to live with the device.

  • Anticoagulation Therapy: Lifelong use of blood thinners (typically Warfarin) is required to prevent blood from clotting inside the mechanical pump.

  • Daily Maintenance: The driveline exit site requires meticulous daily cleaning and sterile dressing changes to prevent serious infections.

  • Activity Restrictions: While most return to an active life, swimming and soaking in baths are prohibited to keep the exit site completely dry.

  • Significant Longevity: One-year survival is approximately 80% to 85%, offering years of life to those with otherwise terminal heart failure.

  • Improved Quality of Life: Most patients see a dramatic reduction in shortness of breath and can return to activities like walking, gardening, and traveling.

  • Organ Protection: By improving systemic blood flow, the LVAD helps protect the kidneys and liver from damage caused by chronic congestion.

  • Advanced Technology: Newer "fully levitated" centrifugal pumps have significantly reduced the risk of stroke and mechanical pump malfunctions.

  • Bridge to Transplant: Successfully keeps patients in peak physical condition so they are ready when a donor heart becomes available.

ECMO Cannulation
ECMO Cannulation

ECMO (Extracorporeal Membrane Oxygenation) Cannulation is a critical surgical or percutaneous procedure where large-bore tubes (cannulas) are inserted into major blood vessels to connect a patient to an ECMO machine. This "heart-lung" bypass technology acts as a temporary life-support system by taking over the work of the heart and/or lungs, allowing these organs to rest and heal. Advances in portable platforms and AI-driven monitoring have expanded the use of this therapy from the ICU to emergency field transport.

  • Severe ARDS: When the lungs are so damaged (e.g., from pneumonia) that a ventilator can no longer maintain oxygen levels.

  • Cardiogenic Shock: When the heart is unable to pump enough blood to support the body’s vital organs, often after a massive heart attack.

  • Bridge to Transplant: To keep patients alive and stable while they wait for a donor heart or lung.

  • E-CPR (Extracorporeal CPR): Used during active cardiac arrest in specialized trauma centers to restore circulation when traditional CPR fails.

  • Post-Surgical Recovery: When a patient’s heart or lungs are "stunned" and unable to function independently after complex cardiac surgery.

  • Veno-Venous (VV) ECMO (Lung Support): Blood is drained from a large vein, oxygenated by the machine, and returned to the venous system. It supports the lungs only.

  • Veno-Arterial (VA) ECMO (Heart & Lung Support): Blood is drained from a vein and returned to an artery, bypassing both the heart and lungs to provide full circulatory support.

  • Veno-Arterio-Venous (VAV) ECMO: A hybrid configuration used when a patient needs both the cardiac support of VA and additional oxygenation for the lungs.

  • Dual-Lumen Cannulation: Using a single, specialized tube inserted in the neck that both drains and returns blood, allowing for earlier patient movement.

  • Distal Perfusion Cannula: In leg-based VA ECMO, a smaller third cannula is often added to ensure blood flow reaches the lower leg and prevent limb injury.

  • Preparation: The procedure is done in an emergency setting or OR; the patient is heavily sedated and given blood thinners (Heparin) to prevent clots in the machine.

  • Percutaneous Access: Using the "Seldinger Technique" where needles and wires guide the cannulas through the skin into the femoral (groin) or jugular (neck) vessels.

  • Surgical Cut-down: If vessels are too small or damaged, a surgeon makes an incision to directly see and enter the artery or vein.

  • Imaging Guidance: Real-time Ultrasound and Transesophageal Echo (TEE) are used to ensure the cannula tips are perfectly positioned near the heart.

  • Connection: Once the tubes are secured, they are connected to the "primed" ECMO circuit, and the machine gradually takes over organ function.

  • Emergency Nature: As an emergency life-support measure, formal preparation time is often zero; the medical team acts immediately once the decision is made.

  • Hemodynamic Stabilization: Medications (vasopressors) are used to keep blood pressure high enough to allow for safe cannula insertion.

  • Rapid Blood Cross-matching: The procedure involves moving large volumes of blood outside the body, so blood products must be ready.

  • Anticoagulation Baseline: Checking the patient's clotting status to calibrate the blood-thinning medication required for the ECMO circuit.

  • Consent: If the patient is unconscious, emergency consent is obtained from the next of kin.

  • Point-of-Care Ultrasound (POCUS): To check the size and health of the femoral and jugular vessels for the largest possible cannula fit.

  • Arterial Blood Gas (ABG): To confirm that oxygen levels are critically low despite maximum ventilator support.

  • Echocardiogram: To evaluate right and left heart function, which determines whether VV or VA ECMO is needed.

  • Chest X-ray: To assess the severity of lung "white-out" or damage before the procedure begins.

  • Coagulation Profile: Testing PT/INR and platelet counts to assess the risk of bleeding during the invasive insertion.

  • ICU Monitoring: Patients are usually kept in a medically induced coma initially, though modern protocols emphasize "Awake ECMO" where possible to keep muscles strong.

  • Decannulation: Once the heart or lungs show signs of healing (verified by "trialing off" the machine), the cannulas are surgically removed.

  • Physical Rehabilitation: Because patients are bedbound for days or weeks, intensive physical therapy is required to regain the ability to walk.

  • Long-term Follow-up: Survivors may experience "Post-ICU Syndrome," requiring respiratory therapy and psychological support.

  • Organ Monitoring: Regular checks on kidney and liver function are necessary, as these organs can be stressed during the period of support.

  • The "Ultimate" Life Support: Provides a critical window of time—days to weeks—for the heart and lungs to heal from otherwise fatal injuries.

  • Restores Oxygen Levels: Immediately corrects life-threatening hypoxia that would otherwise lead to brain death.

  • Reduces Ventilator Injury: Allows doctors to turn down the pressure on ventilators, preventing further scarring of the lungs (barotrauma).

  • High Survival Rates: Modern survival rates for neonatal respiratory failure on ECMO are as high as 75%.

  • Bridge to Permanent Solutions: Acts as a vital safety net for patients waiting for a heart transplant or a long-term LVAD pump.

Top Doctors at Lilavati Hospital & Research Centre in India

Dr Kiran Coelho
Dr Kiran Coelho
Gynecologist, Obstetrician
Lilavati Hospital & Research Centre, Mumbai
32+years experience
Dr Nandita Palshetkar
Fertility & IVF Specialist, Gynecologist
Lilavati Hospital & Research Centre, Mumbai
25+years experience
Dr Narendra Nikam
Dr Narendra Nikam
General Surgeon
Lilavati Hospital & Research Centre, Mumbai
15+years experience
Dr Rishma Dhillon Pai
Fertility & IVF Specialist, Gynecologist, Obstetrician
Lilavati Hospital & Research Centre, Mumbai
32+years experience
Dr Sudhansu Bhattacharyya
Cardiac Surgeon
Fortis Hiranandani Hospital, Vashi, Navi Mumbai
50+years experience

May we help you?

Enter digits only (6-15 digits). We'll add your country code.