
+91 83682 47758
info@medivisorhealth.com
Medivisor India Treatment Logo
  • Home
    • About Us
    • Our Services
    • Our Team
    • Our Safety Measures
    • Loading treatments...
    • Loading hospitals...
    • Loading doctors...
    • Treatment Cost
    • Treatment Process
    • Visa Process
    • Travel Guide
    • FAQs
    • Why Medivisor
    • Success Stories
    • Patient Activities
    • Social Activities
    • News Coverage
    • Blog
  • Become a Partner

Medivisor India Treatment is a trusted New Delhi-based medical travel company assisting international patients with advanced, affordable, and seamless treatment in India.

  • Medivisor House 359, Sector 1, Vaishali, Ghaziabad, (Delhi/NCR) India
  • +91 8368 247 758
  • info@medivisorhealth.com

About Us

  • About Us
  • Our Services
  • Our Team
  • Our Medical Advisors
  • Our Safety Measures
  • Join Our Network
  • Contact Us

India Treatment

  • Hospitals
  • Treatments
  • Treatment Cost
  • Treatment Process
  • Visa Process
  • Travel Guide
  • FAQs
  • Why Medivisor

Gallery

  • Patient Testimonials
  • Patient Activities
  • News Coverage
  • Blog

Get in Touch

© 2026 Medivisor India Treatment. All rights reserved.

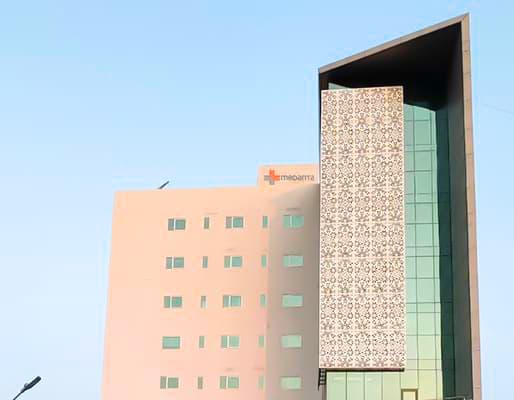
Medanta Hospital, Ranchi
Medanta Hospitals

Medanta Hospital, Ranchi

NH 33, P.O. Irba, P.S. Ormanjhi, Ranchi – 835219, Jharkhand

  1. Home
  2. Hospitals
  3. Medanta Hospital, Ranchi

Quick Overview

2025

Established

Super

Speciality

150

Beds

50

Doctors

Medanta Hospital, Ranchi - Best Hospital in Ranchi, India

Medanta Hospital, Ranchi, serves as a premier super-specialty healthcare destination situated in the heart of Jharkhand. As a modern addition to the Medanta network, this facility features newly constructed infrastructure designed to deliver the highest standards of tertiary care. The hospital is dedicated to fostering a healing environment where sophisticated medical protocols are accessible to the local community.

Why Patients Trust Medanta Ranchi

Occupying a contemporary 1.5-acre campus, the hospital is recognized as one of the newest and most advanced multi-super-specialty centers in the region. Patients rely on this institution because it is powered by a team of full-time, highly experienced consultants who strictly follow Medanta’s Clinical Standard Operating Procedures (SOPs). This rigorous adherence to protocol ensures that every patient receives safe, reliable, and high-quality care consistent with global benchmarks.

Excellence in Advanced Care

The hospital provides an extensive range of specialized medical services, focusing on complex disciplines to ensure comprehensive treatment:

  • Cardiac Sciences: Advanced heart care including interventional cardiology and specialized surgical expertise.

  • Neurosciences: Expert management for stroke recovery, neuro-surgeries, and complex neurological disorders.

  • Orthopaedics and Joint Replacement: Sophisticated treatments for bone health, trauma recovery, and sports-related injuries.

  • Internal Medicine and Critical Care: Expert management of chronic illnesses and life-threatening medical emergencies.

World-Class Facilities and Technology

The technical infrastructure at Medanta Ranchi is engineered to prioritize diagnostic precision and patient safety:

  • Advanced Imaging Services: Integration of high-end MRI and CT scan technology for rapid and accurate diagnosis.

  • Modular Operation Theatres: Technology-driven surgical environments optimized for minimally invasive and complex procedures.

  • Intensive Care Units (ICU): Specialized monitoring zones staffed by expert intensivists to provide round-the-clock support.

  • Emergency and Trauma Center: A fully equipped unit prepared to manage acute crises and trauma at any hour.

Easy Access for Patients

The hospital is strategically positioned for easy accessibility, serving as a vital link for patients across Jharkhand and surrounding districts. The facility is designed for a seamless patient journey, offering various inpatient room categories, 24/7 pharmacy access, and a streamlined registration process intended to reduce stress for families and caregivers.

Medanta Ranchi at a Glance

  • Modern medical campus featuring purpose-built infrastructure for tertiary healthcare.

  • Staffed by a full-time multidisciplinary team of internationally trained medical professionals.

  • Integration of the latest medical technology across all diagnostic and surgical departments.

  • Dedicated to clinical excellence through strict adherence to evidence-based medical SOPs.
Read about Medanta Hospitals

May we help you?

Enter digits only (6-15 digits). We'll add your country code.

Related treatments

VSD Device Closure
VSD Device Closure

VSD (Ventricular Septal Defect) device closure is a minimally invasive, non-surgical procedure used to seal a "hole in the heart" between the two lower chambers (ventricles). Unlike traditional open-heart surgery, this procedure is performed entirely through a catheter, resulting in no chest scars and a significantly faster recovery. This advanced technique allows for the permanent repair of the heart's internal wall without the need for a heart-lung bypass machine.

  • Muscular VSDs: This is the primary treatment for holes located in the muscular portion of the ventricular septum.

  • Symptom Management: For children or adults experiencing poor weight gain, frequent lung infections, or persistent shortness of breath.

  • Heart Protection: To prevent the left side of the heart from overworking, which can lead to an enlarged heart (cardiomegaly).

  • Pulmonary Hypertension Prevention: To reduce the risk of developing dangerously high blood pressure in the lung arteries.

  • Heart Failure Prevention: Correcting the defect before it leads to more serious long-term cardiac complications.

  • Access: A small incision is made in the groin to access the femoral vein or artery. No large incisions are made on the chest.

  • Anesthesia: The procedure is performed in a specialized Cardiac Catheterization Lab (Cath Lab) under general anesthesia or heavy sedation, typically taking 1 to 2 hours.

  • Guidance: A thin, flexible tube (catheter) is threaded through the blood vessels into the heart, guided by real-time X-ray (Fluoroscopy) and detailed ultrasound (Transesophageal Echo).

  • Measurement: The specialist measures the exact size and location of the hole to select a custom-sized Nitinol mesh device.

  • Deployment: A folded, umbrella-like device is pushed through the catheter. Once it reaches the hole, it is carefully unfolded to "sandwich" the defect from both sides.

  • Verification: Once the device is securely in place and the hole is confirmed to be sealed, the catheter is removed and the small puncture in the groin is closed.

  • Echocardiogram: A detailed ultrasound of the heart to map the VSD's size and its proximity to the heart's valves.

  • Transesophageal Echo (TEE): A specialized ultrasound performed through the esophagus for high-resolution images of the defect.

  • Dental Clearance: Ensuring there are no active dental infections, which could increase the risk of heart infection (endocarditis) after the device is placed.

  • Fasting: Following "nothing by mouth" instructions for 8 hours prior to the procedure.

  • Medication Audit: You may be asked to adjust or stop certain medications, particularly blood thinners, a few days before the procedure.

  • Chest X-ray: To evaluate the current size of the heart and check for any fluid in the lungs.

  • Electrocardiogram (ECG): A baseline check of the heart's electrical system to identify any pre-existing arrhythmias.

  • Blood Panels: A routine check of your blood count, electrolytes, and kidney function.

  • Cardiac MRI or CT: Occasionally used to provide a 3D model of the heart for complex or multiple VSDs.

  • Hospital Stay: Most patients stay for one night for observation and are discharged the next day.

  • Medication: You will typically take blood-thinning medication (usually Aspirin) for 6 months to prevent clots from forming on the device while the heart lining grows over it.

  • Activity Restrictions: Most patients can return to school or light work within 3 to 5 days. You should avoid strenuous exercise and heavy lifting for at least 2 weeks.

  • Dental Care Precautions: For the first 6 months post-procedure, you must take preventive antibiotics before any dental work to prevent heart infections.

  • Long-term Integration: Over 3–6 months, the heart's natural lining (endocardium) grows completely over the device, making it a permanent and seamless part of your heart.

  • Scar-Free Recovery: By avoiding a sternotomy (opening the chest), patients experience much less pain and have no permanent surgical scars.

  • Rapid Return to Normalcy: Recovery is measured in days rather than the months required for open-heart surgery.

  • High Success Rates: Device closure is a highly reliable method for sealing muscular VSDs with a very low risk of the hole reopening.

  • Protects Electrical System: Advanced imaging ensures the device is positioned to minimize pressure on the heart's natural "wiring."

  • Permanent Solution: The Nitinol mesh is designed to last a lifetime, providing a durable repair that grows with the patient.

Carotid Artery Stenting (Stroke Prevention)

Carotid Artery Stenting (CAS) is a minimally invasive procedure used to open a narrowed carotid artery—the primary blood vessel in the neck that supplies the brain. By using a metal mesh stent to widen the artery, this procedure restores healthy blood flow and significantly reduces the risk of a future stroke. It is often a preferred alternative to open surgery (endarterectomy) for patients with complex anatomy or high-risk medical conditions.

  • Significant Stenosis: Blockage of more than 70% in patients without symptoms, or more than 50% in those with a history of mini-strokes (TIAs).

  • High Surgical Risk: Patients with severe heart or lung disease who may not tolerate the stress of traditional open neck surgery.

  • Difficult Anatomy: When the blockage is located too high or too low in the neck for a surgeon to reach safely with an incision.

  • Restenosis: For patients whose artery has narrowed again after a previous carotid endarterectomy.

  • Radiation-Induced Stenosis: When the narrowing is a result of prior radiation therapy to the neck, making the tissue difficult to operate on traditionally.

  • Vascular Access: A small puncture is made in the femoral artery (groin) or radial artery (wrist) to serve as the entry point for the catheters.

  • Embolic Protection Device (EPD): A tiny filter, shaped like an umbrella, is positioned past the blockage. This "safety net" catches any loose plaque fragments before they can travel to the brain.

  • Predilation (Angioplasty): A small balloon is guided to the site of the narrowing and inflated to prepare the area for the stent.

  • Stent Deployment: A self-expanding metal mesh tube is released across the blockage. It acts as a permanent scaffold, pressing the plaque against the artery walls to keep the vessel open.

  • Post-Dilation: The surgeon may inflate a balloon inside the newly placed stent to ensure it is fully expanded and snug against the artery wall.

  • Filter Removal: Once the stent is secure, the protection filter—along with any captured debris—is folded and removed from the body.

  • Diagnostic Imaging: Confirmation of the blockage via Carotid Ultrasound, CT Angiogram (CTA), or MR Angiogram (MRA).

  • Dual Antiplatelet Therapy (DAPT): Taking Aspirin and Clopidogrel (Plavix) for 3–5 days prior is mandatory to prevent blood clots from forming on the new stent.

  • Fasting (NPO): No food or drink for 8–12 hours before the procedure.

  • Neurological Baseline: A thorough exam of speech, vision, and motor skills is conducted so the team can monitor for changes during the surgery.

  • Carotid Duplex Ultrasound: A non-invasive test using sound waves to measure the speed of blood flow and the degree of narrowing.

  • CT Angiogram (CTA): Provides a detailed 3D view of the calcium and plaque buildup to help the surgeon select the correct stent size.

  • Electrocardiogram (EKG): To ensure the heart is stable, as manipulating the carotid artery can sometimes affect heart rate.

  • Blood Panels: Routine screens to check kidney function (for processing contrast dye) and blood clotting levels.

  • Hospital Stay: Typically 24 hours for close monitoring of blood pressure and neurological status.

  • Immediate Recovery: Patients must remain on bed rest for about 6 hours post-op to ensure the access site in the groin or wrist heals without bleeding.

  • Medication Adherence: This is the most critical step; missing blood thinners in the first 3 to 6 months can cause the stent to clog (stent thrombosis). Lifetime aspirin is usually required.

  • Activity: Heavy lifting and strenuous exercise are restricted for 1 week, though most patients return to normal light activities within a few days.

  • Follow-up Schedule: Ultrasound scans are mandatory at 1 month, 6 months, and then annually to ensure the artery remains open.

  • Minimally Invasive: Avoids a large incision in the neck, reducing the risk of local nerve damage and scarring.

  • Faster Recovery: Most patients return to their normal routine much sooner than those undergoing open surgery.

  • Real-time Monitoring: Since it is usually performed under local anesthesia, the medical team can communicate with the patient throughout the procedure to ensure brain function remains perfect.

  • Effective Stroke Prevention: Long-term studies show that CAS is highly effective at keeping the carotid artery open and preventing future strokes.

IVC Filter Placement

Inferior Vena Cava (IVC) Filter Placement is a minimally invasive procedure to insert a small, cage-like metal device into the body's largest vein (the IVC). Its purpose is to trap blood clots traveling from the legs or pelvis before they can reach the heart and lungs, thereby preventing a life-threatening Pulmonary Embolism (PE). While blood thinners remain the standard treatment, this transcatheter technique has expanded significantly for patients who cannot safely take anticoagulants.

  • Active bleeding (e.g., gastrointestinal or brain bleed) that prevents the use of blood thinners.

  • New blood clots forming or traveling to the lungs despite proper blood-thinning medication.

  • Recent major surgery or massive trauma where anticoagulation is not an option.

  • High-risk prophylaxis for patients undergoing specialized high-risk surgeries.

  • Evidence of significant heart overload or potential for massive pulmonary embolism.

  • Transcatheter Placement: Minimally invasive method using a neck or groin catheter to "plug" the vein with a filter.

  • Retrievable (Optional) Filters: Devices designed to be removed once the immediate risk of blood clots has passed.

  • Permanent Filters: Intended for patients with a lifelong risk of clots who can never safely take blood thinners.

  • Below-Renal Deployment: Placing the filter just below the kidney veins to avoid interfering with renal blood flow.

  • Device Occlusion: Deployment of "soft" low-profile metal devices to block clots without major surgery.

  • Catheter Access: A thin tube is guided through the internal jugular vein (neck) or femoral vein (groin) to the heart.

  • Imaging Guidance: Real-time X-ray (fluoroscopy) and contrast dye ensure the filter is perfectly positioned before finishing.

  • Filter Deployment: A collapsed occluder-like device is expanded across the vein to trap clots permanently or temporarily.

  • Release: Once positioned, the filter attaches to the vein walls using small hooks or radial pressure.

  • Monitoring: Doctors verify the filter is securely anchored below the renal veins before removing the delivery system.

  • Fasting for 8-12 hours before the catheterization procedure.

  • Blood tests, ECG, and chest X-rays to assess overall health and kidney function.

  • Adjusting current medications as directed by the cardiology or radiology team.

  • Discussing any allergies, particularly to the metal in the device or contrast dye.

  • Arranging for post-operative care and a support person for the recovery period.

  • Duplex Ultrasound to determine the size and location of existing blood clots.

  • Cardiac Catheterization to measure lung pressures and map the venous anatomy.

  • Cardiac MRI or CT scan for detailed 3D mapping of the inferior vena cava.

  • ECG to monitor the heart's electrical rhythm and check for strain.

  • Pulse oximetry to evaluate oxygen saturation levels in the blood.

  • Short hospital stay, usually 1-2 days for device closure, often as an outpatient procedure.

  • Avoid strenuous activity and heavy lifting for a few days post-procedure.

  • Most patients return to normal daily activities within 24 to 48 hours.

  • Regular follow-up visits with a cardiologist to monitor the repair site and discuss retrieval.

  • Immediate protection against life-threatening pulmonary embolism and improved peace of mind.

  • Restores safety by trapping dangerous clots before they reach the heart and lungs.

  • Protects the lungs from permanent damage caused by massive pulmonary emboli.

  • Provides a vital alternative for patients who cannot tolerate traditional blood-thinning medications.

  • Reduces the risk of sudden cardiac events and enlargement of the heart's chambers.

  • Provides a long-term or temporary solution with very high technical success rates.

Endovascular Aneurysm Repair

Endovascular Aneurysm Repair (EVAR) is a minimally invasive surgical procedure used to treat aortic aneurysms, most commonly Abdominal Aortic Aneurysms (AAA). By placing a stent graft inside the weakened portion of the aorta, the procedure creates a new pathway for blood flow, effectively "re-lining" the vessel to prevent a life-threatening rupture. EVAR is the preferred treatment for patients with suitable anatomy, offering a safer alternative to traditional open surgery.

  • Aneurysm Size: When the diameter exceeds 5.5 cm in men or 5.0 cm in women, where rupture risk increases significantly.

  • Rapid Expansion: Growth of more than 0.5 cm within a 6-month period.

  • Symptomatic Presentation: Any aneurysm causing persistent abdominal, flank, or back pain.

  • High Surgical Risk: For patients whose age, heart disease, or lung complications make open surgery dangerous.

  • Suitable Anatomy: Presence of an infrarenal aneurysm with a healthy "landing zone" of non-dilated aorta for secure anchoring.

  • Standard EVAR: Use of a bifurcated (Y-shaped) stent graft for typical abdominal aneurysms located below the kidney arteries.

  • TEVAR (Thoracic EVAR): A specialized version used for aneurysms located in the thoracic (chest) section of the aorta.

  • FEVAR (Fenestrated EVAR): Custom-made grafts with "windows" (fenestrations) to maintain blood flow to vital branching arteries, such as those leading to the kidneys.

  • Stent Grafting: Deployment of a fabric-covered metal frame (Nitinol or stainless steel) to seal the aneurysm sac.

  • Real-time Fluoroscopy: High-definition X-ray guidance used to ensure precise placement of the device through the femoral arteries.

  • Access: Small incisions or needle punctures are made in both groins to reach the femoral arteries.

  • Navigation: A delivery catheter carrying the collapsed stent graft is guided to the aneurysm site under X-ray imaging.

  • Deployment: The graft is released and expands to seal against the healthy artery walls above and below the weakened bulge.

  • Verification: An intraoperative angiogram (contrast dye injection) confirms there are no leaks and blood is flowing correctly through the graft.

  • Finalization: The delivery tools are removed, and the small access sites in the groin are closed with sutures or collagen plugs.

  • Fasting: Required for 8–12 hours before the procedure, as it may require general or regional anesthesia.

  • Lab Work: Blood tests to evaluate kidney function (crucial for processing contrast dye) and clotting status.

  • Medication Review: Adjusting current medications, particularly antiplatelet drugs or diabetic treatments.

  • Anatomical Mapping: Detailed measurement using high-resolution CT scans to select the correct graft size and shape.

  • Allergy Check: Discussing any sensitivities to iodine, contrast dye, or metals like Nitinol (nickel-titanium).

  • CT Angiography (CTA): The primary tool for measuring aneurysm size and planning the precise graft path.

  • Duplex Ultrasound: To assess blood flow velocity and provide initial sizing of the aneurysm.

  • Cardiac Clearance: ECG and stress tests to ensure the heart can handle the procedure.

  • Blood Panel: Comprehensive checks including Creatinine (kidney function) and Hemoglobin levels.

  • Ankle-Brachial Index (ABI): To check for peripheral artery disease that might complicate access through the leg arteries.

  • Hospital Stay: Typically 1–2 days, with most patients encouraged to walk within 24 hours.

  • Lifelong Monitoring: Regular imaging (CT or Ultrasound) is mandatory to ensure the graft hasn't moved or developed leaks (endoleaks).

  • Follow-up Schedule: Imaging typically occurs at 1 month, 6 months, 12 months, and annually thereafter.

  • Activity Restrictions: Avoid heavy lifting and strenuous physical activity for approximately 2–4 weeks post-surgery.

  • Rupture Prevention: While the graft provides immediate protection, strict blood pressure control remains vital for long-term health.

  • Lower Mortality: Significantly lower initial mortality rates compared to open surgical repair.

  • Less Invasive: Avoids large abdominal or chest incisions, which reduces blood loss and the risk of infection.

  • Rapid Recovery: Faster healing time, allowing a quicker return to work and daily activities.

  • Accessible for High-Risk Patients: Provides an option for those who would not survive traditional open vascular surgery.

  • Durable Solution: Offers a long-term mechanical barrier to prevent the aorta from bursting.

Renal Artery Stenting

Renal Artery Stenting is a minimally invasive procedure used to open blockages in the arteries that supply blood to your kidneys. It is primarily used to treat Renal Artery Stenosis (narrowing of the kidney arteries), which can lead to uncontrolled high blood pressure and kidney damage. This procedure remains a critical intervention for preserving kidney function and managing resistant hypertension when medication alone is insufficient.

  • High blood pressure that remains uncontrolled despite taking three or more medications (Resistant Hypertension).

  • Significant narrowing of 60% to 70% or greater in one or both renal arteries.

  • Unexplained or sudden worsening of kidney health (Rapidly Declining Kidney Function).

  • Flash pulmonary edema (sudden fluid buildup in the lungs) related to kidney artery issues.

  • Worsening heart failure that is exacerbated by renal artery stenosis.

  • Balloon Angioplasty: A small balloon is inflated at the site of the blockage to widen the narrowed artery.

  • Metal Mesh Stenting: A tiny metal tube (stent) is permanently expanded to act as scaffolding, keeping the artery open.

  • Trans-femoral Access: Entering the arterial system through a small puncture in the groin.

  • Trans-radial Access: A modern approach entering through the wrist, often allowing for faster recovery.

  • Real-time Fluoroscopy: Using high-definition X-ray imaging and contrast dye to guide the precise placement of the stent.

  • Access: A small incision, less than an eighth of an inch, is made in the groin or arm under local anesthesia.

  • Navigation: A thin catheter is threaded through the blood vessels to the site of the renal artery blockage.

  • Dilation: A specialized balloon at the tip of the catheter is inflated to push the plaque against the artery walls.

  • Stent Deployment: The stent is expanded and locked into place to provide structural support to the vessel.

  • Monitoring: The doctor verifies restored blood flow to the kidney before removing the delivery system.

  • Fasting for 6-8 hours before the procedure to ensure safety during sedation.

  • Blood tests to evaluate current kidney function (Creatinine levels) and blood clotting.

  • Adjusting current blood pressure or diabetic medications as directed by the medical team.

  • Discussing any history of allergies to iodine or contrast dye used for imaging.

  • Arranging for a support person to assist with transportation and initial home recovery.

  • Renal Doppler Ultrasound to measure the velocity of blood flow to the kidneys.

  • CT Angiography (CTA) or MR Angiography (MRA) for detailed 3D mapping of the renal arteries.

  • Blood tests to check kidney health and electrolyte balance.

  • ECG to monitor heart rhythm and ensure cardiac stability during the procedure.

  • Physical examination to check for bruits (abnormal sounds) over the kidney area.

  • Short hospital stay, typically involving one night of observation or same-day discharge.

  • Avoid strenuous activity and heavy lifting for at least 24 to 72 hours post-procedure.

  • Mandatory Medication: Patients must take blood thinners (like Aspirin or Clopidogrel) for 1 to 12 months.

  • Most people return to work and their normal daily routines within one week.

  • Regular follow-up appointments to monitor blood pressure and kidney function improvements.

  • Helps lower and stabilize blood pressure in patients with resistant hypertension.

  • Preserves long-term kidney health and may prevent the need for dialysis or transplant.

  • Minimally invasive approach with a procedure time of only 30 to 90 minutes.

  • Reduces symptoms of fluid overload and improves overall cardiovascular stability.

  • High technical success rates for restoring blood flow to "starving" kidney tissue.

Peripheral Angioplasty (Leg Arteries)

Peripheral Angioplasty, also known as Peripheral Vascular Intervention, is a minimally invasive procedure used to open blocked or narrowed arteries in the legs. This is the primary treatment for Peripheral Artery Disease (PAD), where plaque buildup (atherosclerosis) restricts blood flow, causing leg pain, cramping, or "heavy legs." While bypass surgery remains an option for long-segment blockages, advanced drug-coated balloons and atherectomy devices have significantly improved non-surgical outcomes.

  • Pain or cramping in the legs while walking (claudication) that stops with rest.

  • Critical Limb Ischemia (CLI), marked by leg pain even while resting.

  • Non-healing sores, ulcers, or gangrene on the feet or toes.

  • Lifestyle-limiting symptoms that do not improve with smoking cessation or walking programs.

  • Evidence of significant arterial narrowing found during a Doppler ultrasound or CT angiogram.

  • Plain Balloon Angioplasty: Standard inflation of a balloon to push plaque against the artery walls.

  • Drug-Coated Balloon (DCB): Using balloons coated with medication to prevent the artery from scarring or narrowing again.

  • Stent Placement: Inserting a small metal mesh tube to act as a permanent scaffold for the artery.

  • Atherectomy: Using a tiny rotating blade or laser to "shave" or break down hard, calcified plaque.

  • Hybrid Intervention: Combining minimally invasive angioplasty with minor surgical procedures for complex blockages.

  • Catheter Access: A tiny puncture is made in the groin (femoral artery), arm, or sometimes the ankle.

  • Navigation: Under X-ray guidance (fluoroscopy), a thin guide wire is threaded to the site of the blockage.

  • Dilation: The specialized balloon is inflated at the blockage site to widen the path for blood.

  • Optional Stenting: If the artery remains narrow, a stent is deployed and expanded into place.

  • Monitoring: Contrast dye is used to verify that strong blood flow has been restored to the lower leg and foot.

  • Fasting for 6-8 hours before the procedure, especially if sedation is used.

  • Blood tests to assess kidney function and blood clotting levels.

  • Adjusting current medications, particularly for diabetes or blood-thinning, as directed.

  • Discussing any allergies to iodine, contrast dye, or specific metals like nickel.

  • Arranging for a support person to assist with transport after the outpatient procedure.

  • Ankle-Brachial Index (ABI) to compare blood pressure in the arms and legs.

  • Doppler Ultrasound to visualize blood flow and identify the location of blockages.

  • CT Angiography (CTA) or MR Angiography (MRA) for detailed 3D mapping of the leg arteries.

  • Blood tests to check cholesterol levels and kidney health.

  • Physical examination to check for diminished pulses in the feet.

  • Short recovery time; most patients go home the same day or after one night of observation.

  • Most patients can walk immediately, though heavy lifting is restricted for 5-7 days.

  • Strict adherence to antiplatelet medications (like aspirin) to keep the treated area open.

  • Significant improvement in walking distance and a reduction in leg pain.

  • Regular follow-up ultrasounds to ensure the artery remains open (patent).

  • Restores efficient blood flow to the legs and feet, preventing tissue loss and amputation.

  • High technical success rates, often exceeding 90% in experienced hands.

  • Minimally invasive approach with no large surgical incisions or general anesthesia required.

  • Faster recovery and less pain compared to traditional peripheral bypass surgery.

  • Provides a long-term solution for maintaining mobility and an active lifestyle.

Balloon Valvotomy (Mitral/Pulmonary)

Balloon Valvotomy, also known as balloon valvuloplasty, is a minimally invasive, non-surgical procedure used to widen a heart valve that has become narrowed or stiff (stenosis). This procedure remains the primary alternative to open-heart surgery for treating Mitral and Pulmonary valve obstructions. The technique involves using a specialized balloon catheter to stretch the valve leaflets apart, restoring efficient blood flow through the heart.

  • Severe Mitral Stenosis, often caused by rheumatic heart disease, limiting physical activity.

  • Congenital Pulmonary Stenosis identified in newborns, children, or adults.

  • Symptoms of heart failure such as shortness of breath, fatigue, or persistent coughing.

  • Evidence of high pressure in the lung arteries or right-sided heart strain.

  • Patients with pliable, non-calcified valves who are ideal candidates for non-surgical repair.

  • Mitral Balloon Valvotomy (BMV/PTMC): The treatment of choice for narrowing of the mitral valve between the left chambers.

  • Pulmonary Balloon Valvotomy (BPV): A first-line procedure for opening the valve between the right ventricle and the pulmonary artery.

  • Transseptal Puncture: A specialized technique used in mitral cases to reach the left side of the heart through a tiny hole in the septum.

  • Percutaneous Transvenous Mitral Commissurotomy (PTMC): A specific approach using a groin catheter to treat rheumatic valve disease.

  • Balloon Dilation: The mechanical stretching of fused valve leaflets to increase the valve's opening area.

  • Catheter Access: A thin tube is guided through a vein in the groin (femoral vein) or occasionally the arm.

  • Navigation: For Mitral valves, a needle creates a tiny septal hole; for Pulmonary valves, the catheter moves directly into the right side.

  • Balloon Inflation: Once positioned across the stiff valve, the balloon is inflated to split the fused "commissures" or flaps.

  • Real-time Monitoring: Imaging (Fluoroscopy and Echo) ensures the valve is sufficiently opened without causing excessive leaks.

  • Finalization: The balloon is deflated and removed, leaving the widened valve to function naturally without a permanent implant.

  • Fasting for 8-12 hours before the scheduled cardiac catheterization.

  • Blood tests, ECG, and chest X-rays to assess overall cardiac health and clotting levels.

  • Adjusting current heart medications or blood thinners as directed by the cardiology team.

  • Discussing any allergies, particularly to contrast dye or sedation medications.

  • Arranging for an overnight hospital stay (for BMV) or a support person for same-day discharge (for BPV).

  • Echocardiogram (TTE or TEE) to evaluate the valve's pliability and check for blood clots in the heart.

  • Cardiac Catheterization to measure the pressure gradient across the narrowed valve.

  • Chest X-ray to look for signs of heart enlargement or fluid backup in the lungs.

  • ECG to monitor the heart's electrical rhythm and detect any atrial fibrillation.

  • Pulse oximetry to evaluate oxygen saturation levels during physical exertion.

  • Short hospital stay, typically ranging from same-day discharge to one night of observation.

  • Fast recovery, with most patients returning to their normal routine within one week.

  • Avoid strenuous activity and heavy lifting for the first few days post-procedure.

  • Regular follow-up visits with a cardiologist to monitor the valve's function over time.

  • Immediate improvement in breathing, stamina, and overall energy levels.

  • Avoids the need for open-heart surgery and the use of a heart-lung bypass machine.

  • High success rates, often exceeding 90% to 95% for achieving a wider valve opening.

  • Results are long-lasting, particularly in children, often spanning 10 to 20 years.

  • Requires only local anesthesia and sedation, leading to less pain and no major surgical scarring.

  • Protects the heart and lungs from permanent damage caused by chronic valve obstruction.

Left Atrial Appendage (LAA) Closure

Left Atrial Appendage (LAA) Closure is a specialized procedure designed to reduce the risk of stroke in patients with atrial fibrillation (AFib). In AFib, the heart's upper chambers beat irregularly, which can cause blood to pool and form clots in a small, thumb-sized pouch called the left atrial appendage. This procedure serves as a primary alternative for patients who cannot tolerate long-term blood thinners.

  • Stroke Risk: Increased risk of stroke specifically due to non-valvular atrial fibrillation.

  • Bleeding History: A history of serious gastrointestinal bleeding or other major bleeding events that make anticoagulants dangerous.

  • Lifestyle Risks: A high risk of falls or an occupation/lifestyle that carries a significant risk of physical injury.

  • Medication Challenges: Difficulty maintaining therapeutic blood-clotting levels (INR) on traditional medications.

  • Long-term Preference: Preference for a one-time procedural solution over the requirement for lifelong daily anticoagulants.

  • Transcatheter LAA Closure: A minimally invasive method using a catheter inserted through the groin to "plug" the appendage.

  • Watchman Device Implantation: The use of a permanent, parachute-shaped device to seal the opening of the LAA.

  • Amulet Occluder: A specialized dual-seal device designed to provide complete and secure closure of the pouch.

  • Tissue Overgrowth: A natural biological process where heart tissue covers the device surface over approximately 45 days.

  • Device Occlusion: Deployment of low-profile devices to block the opening and prevent clots from escaping into the bloodstream.

  • Catheter Access: A small incision is made in the groin (femoral vein), and a thin tube is guided up to the heart.

  • Transseptal Puncture: The cardiologist carefully passes the catheter from the right atrium to the left atrium to reach the appendage.

  • Device Navigation: Under real-time imaging guidance, the permanent plug is guided precisely into the opening of the LAA.

  • Permanent Sealing: The device acts as a physical barrier; within weeks, heart tissue grows over it to create a permanent seal.

  • Positioning Verification: Real-time imaging (TEE) ensures the device is perfectly positioned and there are no leaks before the procedure is completed.

  • Fasting (NPO): No food or drink for 8–12 hours before the scheduled catheterization.

  • Baseline Diagnostics: Blood tests, ECG, and chest X-rays to assess overall cardiac health and kidney function.

  • Medication Adjustment: Adjusting current blood-thinning medications as directed by the electrophysiology team.

  • Allergy Discussion: Discussing any known allergies, particularly to nickel or the contrast dye used during imaging.

  • Recovery Logistics: Arranging for an overnight hospital stay and a support person to assist during the initial recovery period.

  • Transesophageal Echocardiogram (TEE): An ultrasound through the esophagus to check for existing clots and measure the appendage size.

  • Cardiac Catheterization: To evaluate heart pressures and map the specific atrial anatomy.

  • Cardiac CT Scan: For detailed 3D mapping of the appendage shape to select the correct device size.

  • ECG: To monitor the heart's electrical rhythm and confirm the current status of the atrial fibrillation.

  • Pulse Oximetry: To evaluate baseline oxygen saturation levels in the blood.

  • Observation Stay: A short hospital stay, typically requiring only one night for observation of the access site.

  • Short-term Medication: Patients usually remain on blood thinners and aspirin for the first 45 days until the heart tissue has healed over the device.

  • Medication Cessation: Most patients can eventually stop taking potent blood thinners once the seal is confirmed by follow-up imaging.

  • Activity Restrictions: Avoid strenuous activity or heavy lifting for approximately one week post-procedure to allow the groin incision to heal.

  • Ongoing Monitoring: Regular follow-up visits with a cardiologist to monitor the device and overall heart health.

  • Stroke Protection: Provides stroke protection comparable to warfarin while significantly reducing the risk of major bleeding.

  • Injury Safety: Restores peace of mind for patients who are at high risk of injury, bruising, or falls.

  • Success Rates: Features high technical success rates, with successful device placement often exceeding 95%.

  • Embolism Prevention: Effectively protects the brain from potential clots escaping the heart's upper chambers.

  • Therapy Elimination: Provides a long-term solution that eliminates the need for lifelong anticoagulant (blood thinner) therapy.

PDA Closure
PDA Closure

Patent Ductus Arteriosus (PDA) Closure is a procedure to seal an abnormal opening between the two major blood vessels leading from the heart: the aorta and the pulmonary artery. In a normal heart, this vessel (the ductus arteriosus) closes naturally shortly after birth; if it stays open, it can cause too much blood to flow to the lungs, straining the heart. While surgical ligation remains necessary for specific cases, transcatheter (minimally invasive) techniques have become the gold standard for most children and adults.

  • Heart failure symptoms such as fatigue or shortness of breath.

  • Poor weight gain or difficulty feeding in infants.

  • Evidence of left-sided heart enlargement or significant heart overload.

  • High pressure in the lung arteries (Pulmonary Hypertension).

  • High risk of endocarditis (infection of the heart lining) due to the defect.

  • Transcatheter PDA Closure: A minimally invasive method using a groin catheter to "plug" the hole with a device.

  • Surgical Ligation: Traditional approach where a surgeon ties off the vessel with sutures or clips via a small incision.

  • Device Occlusion: Deployment of "soft" low-profile mesh devices (occluders) to block the abnormal flow.

  • Thoracotomy: A surgical technique used primarily for premature infants or complex PDA shapes.

  • Hybrid Approach: A combination of surgery and catheterization used for unique anatomical challenges.

  • Catheter Access: A thin tube is guided through a vein in the groin (femoral vein) to reach the heart.

  • Device Positioning: Under X-ray guidance, a tiny mesh "plug" is moved into the ductus arteriosus.

  • Permanent Sealing: The device blocks the hole, and over time, heart tissue grows over the mesh.

  • Surgical Clipping: In surgical cases, the vessel is physically tied off to prevent blood from passing through.

  • Monitoring: Real-time imaging ensures the device is perfectly positioned before finishing the procedure.

  • Fasting for 8-12 hours before the scheduled procedure.

  • Blood tests, ECG, and chest X-rays to assess overall cardiac health.

  • Adjusting current medications as directed by the medical team.

  • Discussing any allergies, particularly to nickel (used in some devices) or contrast dye.

  • Arranging for a hospital stay (ranging from a few hours to a few days depending on the method).

  • Echocardiogram (TTE) to determine the size and shape of the PDA.

  • Cardiac Catheterization to measure lung pressures and map the vessel anatomy.

  • Chest X-ray to check for heart enlargement or fluid in the lungs.

  • ECG to monitor the heart's electrical rhythm and check for strain.

  • Pulse oximetry to evaluate oxygen levels in the blood.

  • Short hospital stay, often allowing patients to go home the same day or after one night.

  • Resume normal activity usually within a week; avoid heavy lifting for a few days.

  • Regular follow-up visits with a cardiologist to ensure the device remains in place.

  • Significant improvement in feeding, growth milestones, and energy levels.

  • Once closed, it is considered a permanent cure with no further procedures typically required.

  • Restores normal blood flow and prevents oxygen-rich blood from flooding the lungs.

  • Protects the lungs from permanent damage caused by high blood pressure.

  • Allows infants to reach growth milestones and maintain healthy weight gain.

  • Reduces the risk of heart failure and enlargement of the heart's chambers.

  • Provides a long-term cure with extremely high technical success rates (98% to 99%).

MitraClip (Mitral Regurgitation)

MitraClip therapy, also known as Transcatheter Edge-to-Edge Repair (TEER), is a minimally invasive, catheter-based procedure used to treat Mitral Regurgitation (MR). This is a condition where the heart's mitral valve does not close tightly, causing blood to leak backward into the heart. In 2026, this remains a vital option for patients who are at high risk for traditional open-heart surgery.

  • Severe symptomatic mitral regurgitation that limits daily activity.

  • Heart failure symptoms like shortness of breath or fatigue that persist despite medication.

  • Primary (Degenerative) MR in patients at prohibitive risk for traditional surgery due to age or frailty.

  • Secondary (Functional) MR caused by an enlarged heart or heart muscle damage.

  • Evidence of left-sided heart enlargement or significant heart overload.

  • Transcatheter Edge-to-Edge Repair: A minimally invasive method using a groin catheter to "clip" the valve leaflets together.

  • Leaflet Approximation: The clip holds the flaps of the mitral valve to allow it to close more completely.

  • Beating Heart Procedure: Unlike traditional surgery, this is performed while the heart continues to beat without a heart-lung machine.

  • Real-time Guidance: Use of specialized imaging to ensure the clip is perfectly positioned to block the leak.

  • Device Occlusion: Deployment of a "soft" low-profile clip to reduce backward blood flow.

  • Catheter Access: A tube is guided through the femoral vein in the groin to reach the heart.

  • Navigation: The delivery system is steered into the left atrium and positioned above the mitral valve.

  • Clip Deployment: The MitraClip is expanded and used to grasp the valve leaflets, sealing the leak.

  • Monitoring: Real-time imaging (TEE) ensures the clip has significantly reduced the regurgitation before finishing.

  • Finalization: Once the position is verified, the clip is permanently detached and the catheter is removed.

  • Fasting for 8-12 hours before the catheterization.

  • Blood tests, ECG, and chest X-rays to assess overall health and valve function.

  • Adjusting current medications as directed by the cardiology team.

  • Discussing any allergies, particularly to materials used in the device or contrast dye.

  • Arranging for post-operative care and a support person for the recovery period.

  • Echocardiogram (TTE or TEE) to determine the severity and location of the valve leak.

  • Cardiac Catheterization to measure heart and lung pressures.

  • Cardiac MRI or CT scan for detailed 3D mapping of the valve anatomy.

  • ECG to monitor the heart's electrical rhythm and check for conduction issues.

  • Pulse oximetry to evaluate oxygen saturation levels in the blood.

  • Short hospital stay, usually 1-3 days for monitoring.

  • Avoid strenuous activity and heavy lifting for about a month post-procedure.

  • Take prescribed medications, including blood thinners, as directed by the cardiologist.

  • Regular follow-up visits with a cardiologist to monitor the repair site.

  • Immediate improvement in breathing, energy levels, and physical stamina.

  • Restores normal blood flow and prevents oxygen-rich blood from leaking backward.

  • Protects the lungs and heart from permanent damage caused by fluid backup.

  • High technical success rates, reported between 93% and 98%.

  • Significant reduction in heart failure-related hospitalizations.

  • Provides a long-term cure for symptoms with a much shorter recovery than surgery.

Chronic Total Occlusion (CTO) Angioplasty

Chronic Total Occlusion (CTO) Angioplasty, also known as CTO PCI, is a specialized, minimally invasive procedure used to open a coronary artery that has been 100% blocked for three months or longer. Historically considered too complex for standard stenting, advances now allow interventional cardiologists to treat these "final frontier" blockages with high success rates. The procedure restores blood flow to heart muscle that is still viable but "starving" for oxygen.

  • Lifestyle-limiting chest pain (angina) that persists despite taking heart medications.

  • Extreme fatigue or shortness of breath during daily activities.

  • Evidence from a Cardiac MRI or Stress Echo showing heart muscle behind the blockage is still alive.

  • Patients who are not ideal candidates for traditional open-heart bypass surgery.

  • Documented 100% blockage of a coronary artery for a duration of three months or more.

  • Antegrade Approach: Attempting to cross the blockage from the "front" in the direction of normal blood flow.

  • Retrograde Approach: Accessing the blockage from the "back" through small collateral vessels that have naturally grown around the occlusion.

  • Dual Access: Using both the radial (wrist) and femoral (groin) arteries simultaneously to navigate complex blockages.

  • Microcatheter Support: Using specialized, thin tubes to provide extra support for wires crossing "stone-hard" plaque.

  • Stent Placement: Deploying drug-eluting stents to keep the newly opened channel clear permanently.

  • Specialized Access: Procedures often require two access points (wrist and groin) to visualize the blockage from both sides.

  • Extended Navigation: Cardiologists use advanced wires to penetrate the solid cap of the occlusion.

  • Plaque Modification: Specialized balloons or drills may be used to create a path through the chronic blockage.

  • Device Deployment: Once a wire crosses the blockage, a stent is expanded to restore the artery's original diameter.

  • Real-time Monitoring: High-definition imaging ensures the stent is perfectly positioned and blood flow is fully restored.

  • Fasting for 8-12 hours before the procedure due to its longer duration (3-5 hours).

  • Blood tests to assess kidney function, as more contrast dye is often required.

  • Adjusting current heart and blood-thinning medications as directed by the cardiology team.

  • Discussing any allergies to contrast dye or materials used in cardiac devices.

  • Arranging for an overnight hospital stay and a support person for the recovery period.

  • Cardiac MRI or Stress Echo to confirm the heart muscle is viable and will benefit from the procedure.

  • Coronary Angiogram to map the "front" and "back" entry points of the blockage.

  • CT Scan (Cardiac) for 3D mapping of the calcium levels within the total occlusion.

  • ECG to monitor electrical rhythm and check for conduction issues caused by the blockage.

  • Blood tests to ensure the patient can tolerate the longer procedure time.

  • Short hospital stay, typically involving one night of observation for safety.

  • Resume light activity within 24 to 48 hours, avoiding heavy lifting for one week.

  • Mandatory Medication: Patients must take blood thinners (DAPT) for 6 to 12 months to prevent stent clotting.

  • Regular follow-up visits with a cardiologist to monitor the success of the revascularization.

  • Significant improvement in energy levels, breathing, and physical stamina.

  • Relief of chronic chest pain and shortness of breath that did not respond to medication.

  • Improved quality of life and the ability to return to physical activities.

  • Protects the heart muscle from permanent damage and reduces the risk of future heart failure.

  • High success rates (85% to 90%) at specialized centers using modern retrograde techniques.

  • Avoids the need for more invasive open-heart bypass surgery in eligible patients.

Bifurcation Stenting

Bifurcation Stenting is a complex procedure used when a coronary artery blockage occurs at a branch point, where a main vessel divides into two. These cases account for approximately 15–20% of all angioplasties and are technically demanding due to the risk of closing the "side branch" while treating the main vessel. While surgical repair remains a "gold standard" for some cases, transcatheter techniques for complex branch points have expanded significantly.

  • Blockages located precisely where a main heart artery divides into two branches.

  • Shortness of breath or chest pain caused by multi-vessel narrowing.

  • Evidence of left-sided heart enlargement or significant heart overload.

  • High pressure in the lung arteries or decreased blood flow to the heart muscle.

  • Cases where a single stent may not adequately support both the main and side branches.

  • Provisional Stenting: A single stent is placed in the main vessel across the side branch as the default approach.

  • Side Branch Protection: The side branch is only stented if it remains significantly narrowed or blocked after the first stent.

  • Planned Two-Stent Strategy: Used for "true" bifurcation lesions where both branches have significant, long blockages (>10mm).

  • Full Vessel Coverage: A strategy that ensures both vessel openings are supported from the start of the procedure.

  • Simple Approach: Preferred for most cases as it is faster and has fewer long-term complications.

  • DK-Crush (Double Kissing Crush): One of the most effective two-stent techniques, particularly for left main artery blockages.

  • Stent Crushing: Involves "crushing" part of the side branch stent against the wall to ensure the opening is perfectly scaffolded.

  • Culotte Technique: Best for cases where the two branches are nearly the same size, layering stents like "trouser legs".

  • TAP (T and Small Protrusion): A simpler method where the side branch stent protrudes slightly to ensure no gap at the fork.

  • Hybrid Approach: A combination of techniques used for complex, hard-to-reach branch defects.

  • POT (Proximal Optimization Technique): A mandatory step using a high-pressure balloon to expand the stent to match the larger vessel diameter.

  • Kissing Balloon Inflation (KBI): Two balloons are inflated simultaneously in both branches to re-shape the fork.

  • Strut Clearing: KBI is used to clear any metal struts that might be blocking the side branch opening.

  • Real-time Imaging: Monitoring ensures the device or patch is perfectly positioned before finishing.

  • Device Deployment: Specialized occluder-like stents are expanded across the hole or blockage to seal it permanently.

  • Fasting for 8-12 hours before the catheterization or surgery.

  • Blood tests, ECG, and chest X-rays to assess overall cardiac health.

  • Adjusting current medications, specifically blood thinners, as directed by the cardiology team.

  • Discussing any allergies, particularly to nickel used in some stents or contrast dye.

  • Arranging for post-operative care and a support person for the recovery period.

  • Echocardiogram (TTE or TEE) to determine the size and location of the branch blockages.

  • Cardiac Catheterization to measure lung pressures and map the arterial branches.

  • Cardiac MRI or CT scan for detailed 3D mapping of complex bifurcation defects.

  • ECG to monitor the heart's electrical rhythm and check for conduction issues.

  • Pulse oximetry to evaluate oxygen saturation levels in the blood.

  • Short hospital stay, usually 1-2 days for device closure or observation.

  • Avoid strenuous activity and heavy lifting for a few weeks post-procedure.

  • Take prescribed antiplatelet medications to prevent blood clots on the multiple layers of metal.

  • Regular follow-up visits with a cardiologist to monitor the repair site.

  • Immediate improvement in breathing, energy levels, and physical stamina.

  • Restores normal blood flow to both the main artery and its side branches.

  • Protects the heart from damage caused by complex branch-point blockages.

  • Reduces the risk of heart failure and enlargement of the heart's chambers.

  • Provides a long-term cure with high technical success rates in experienced hands.

  • Prevents oxygen-rich and poor blood from mixing inefficiently due to restricted flow.

Intravascular Lithotripsy (IVL)

Intravascular Lithotripsy (IVL) is an advanced plaque modification technique that uses sonic shockwaves to break up severe coronary artery calcification. It is particularly effective for "stone-like" blockages that standard balloons cannot expand. This technology has expanded significantly for treating complex, hardened defects that were previously difficult to manage with traditional methods.

  • Severely calcified "stone-like" blockages identified during imaging.

  • Evidence of significant heart overload or left-sided heart enlargement.

  • When standard balloon angioplasty fails to expand the artery due to rigidity.

  • Cases where deep-layer calcium fracturing is required for safe stent deployment.

  • Patients seeking a lower-risk alternative to rotational atherectomy for circumferential calcium.

  • Acoustic Wave Generation: Emitters on the catheter's balloon vaporize fluid to create rapidly expanding bubbles.

  • Selective Fracturing: Sonic pressure waves (approx. 50 atmospheres) fracture both superficial and deep calcium deposits.

  • Vessel Compliance Restoration: Creating micro-cracks in the calcium to restore elasticity to the artery wall.

  • Deep Plaque Modification: Targeting deep-layer calcium that traditional drilling techniques might miss.

  • Standard Balloon Delivery: Using a familiar delivery system to "plug" the resistance of the calcium without major surgery.

  • Catheter Access: A tube is guided through the femoral vein or radial artery to the heart.

  • Device Positioning: The specialized IVL balloon is perfectly positioned across the calcified hole or blockage.

  • Shockwave Deployment: The generator sends sonic waves through the balloon to fracture the hardened plaque.

  • Monitoring: Real-time imaging ensures the calcium is sufficiently cracked before finishing the expansion.

  • Stent Deployment: Once elasticity is restored, an occluder device or stent is expanded to seal the artery open.

  • Fasting for 8-12 hours before the catheterization.

  • Blood tests, ECG, and chest X-rays to assess overall health.

  • Adjusting current medications as directed by the cardiology team.

  • Discussing any allergies, particularly to contrast dye or nickel.

  • Arranging for post-operative care and a support person for the recovery period.

  • Echocardiogram (TTE or TEE) to determine the size and location of the calcification.

  • Cardiac Catheterization to measure lung pressures and arterial resistance.

  • Cardiac MRI or CT scan for detailed 3D mapping of the hardened defects.

  • ECG to monitor the heart's electrical rhythm and check for conduction issues.

  • Pulse oximetry to evaluate oxygen saturation levels in the blood.

  • Short hospital stay, usually 1-2 days (24–48 hours) for monitoring.

  • Avoid strenuous activity and heavy exercise for the first 7 days post-procedure.

  • Immediate improvement in breathing, energy levels, and physical stamina.

  • Regular follow-up visits with a cardiologist to monitor the repair site.

  • Return to most daily activities within a few days to a week.

  • Provides a high procedural success rate, often reported over 92%.

  • Significantly lower risk of arterial perforation compared to traditional drilling.

  • Restores normal blood flow by increasing vessel compliance and elasticity.

  • Reduces the risk of heart failure by allowing for full, safe stent expansion.

  • High technical success rates even for complex, deep-layer calcium.

Rotablation (Calcified Arteries)

Rotablation, also known as Rotational Atherectomy, is a specialized cardiac procedure used to treat coronary arteries that have become "stone-hard" due to severe calcium buildup. When plaque is heavily calcified, standard balloon angioplasty may fail to expand the artery, potentially leading to balloon rupture or inadequate stent deployment. This high-speed drilling technique is essential for modifying plaque to make the artery flexible enough for a stent to be placed successfully.

  • Severely Calcified Arteries: When imaging shows blockages that have hardened into "rock-like" structures that won't budge with standard tools.

  • Balloon-Uncrossable Lesions: When a blockage is so hard or narrow that a standard angioplasty balloon cannot pass through or expand.

  • Failed Prior Angioplasty: If previous attempts to open the artery failed because the plaque was too rigid or inelastic.

  • Preparation for Stenting: To ensure the vessel wall is soft enough for a stent to fully expand and stay open long-term.

  • Heart Overload: When restricted blood flow in hardened vessels causes significant strain or "overload" on the heart muscle.

  • High-Speed Rotation: Utilizing a diamond-coated burr that spins at incredible speeds, typically between 140,000 and 200,000 RPM.

  • Differential Cutting: A unique mechanism where the burr selectively grinds hard, calcified plaque while deflecting off healthy, elastic vessel tissue.

  • Plaque Pulverization: The hardened calcium is ground into microscopic particles, much smaller than red blood cells, which can pass safely through the capillaries.

  • Mechanical Modification: Softening the internal vessel wall to transform a rigid "pipe" back into a flexible artery.

  • Combined Therapy: Almost always followed by traditional balloon angioplasty or the deployment of a drug-eluting stent.

  • Catheter Access: Under local anesthesia and sedation, a thin tube is guided through the radial artery (wrist) or femoral artery (groin) to the heart.

  • Burr Navigation: A specialized diamond-tipped catheter is positioned precisely at the site of the calcified blockage using X-ray guidance.

  • Plaque Modification: The surgeon activates the burr in short "passes" to grind away the calcium, which is then safely cleared by the bloodstream.

  • Artery Preparation: Once the "stone" is modified, a balloon is used to further stretch the now-flexible artery.

  • Stent Deployment: A permanent metal mesh (stent) is expanded to seal the opening and keep the blood flowing freely.

  • Real-time Monitoring: Continuous imaging ensures the artery is sufficiently prepared and the stent is perfectly opposed to the vessel wall.

  • Fasting (NPO): No food or drink for 8–12 hours before the cardiac catheterization to ensure safety during the procedure.

  • Baseline Diagnostics: Blood tests, ECG, and chest X-rays to assess overall health and ensure the kidneys can process the contrast dye.

  • Medication Adjustment: Reviewing all current medications; blood thinners may need to be paused or adjusted by the cardiology team.

  • Allergy Screening: Discussing any known allergies, particularly to iodine (contrast dye) or the materials used in the surgical tools.

  • Recovery Planning: Arranging for a support person to drive you home and assist during the initial 24-hour recovery period.

  • Echocardiogram: An ultrasound of the heart (TTE or TEE) to determine the size and location of the calcified blockage and assess heart pump function.

  • Cardiac Catheterization: An initial "scout" procedure to measure internal pressures and map the exact location of the arterial "stones."

  • Cardiac CT or MRI: Advanced 3D mapping used to visualize the depth and complexity of the hardened plaque.

  • Electrocardiogram (ECG): To monitor the heart's electrical rhythm and check for any conduction issues before the procedure.

  • Pulse Oximetry: To evaluate oxygen saturation levels in the blood, ensuring the lungs and heart are working in sync.

  • Hospital Stay: Usually requires 1–2 days of monitoring in the hospital to ensure the access site is healing and the heart rhythm is stable.

  • Immediate Post-Op Rest: A mandatory period of 6–8 hours of flat bed rest is required if the femoral artery was used for access.

  • Activity Restrictions: Patients should avoid strenuous activity and heavy lifting (usually over 10 lbs) for at least a few weeks.

  • Medication Adherence: Strict compliance with "dual antiplatelet therapy" (blood thinners) is vital to prevent blood clots from forming on the new stent.

  • Follow-Up Care: Regular visits with a cardiologist are essential to monitor the treated artery and ensure the stent remains open.

  • High Success Rate: Successfully modifies difficult, "uncrossable" lesions in over 95% of cases.

  • Enables Complex Stenting: Makes it possible to place stents in patients who were previously told their blockages were "untreatable" by standard means.

  • Protects Heart Muscle: By restoring flow, it prevents long-term damage caused by chronic, high-pressure blockages.

  • Restores Blood Flow: Effectively removes "stone-hard" obstructions that balloons simply cannot push aside.

  • Long-Term Durability: Provides a robust solution for complex coronary artery disease, significantly improving energy levels and physical stamina.

Drug-Eluting Stent (DES) Placement

A Drug-Eluting Stent (DES) is a small, metal mesh tube coated with specialized medication that is permanently placed in a narrowed heart artery. It is the most common type of stent used to treat Coronary Artery Disease (CAD). These devices are designed to provide both mechanical support and controlled drug release to ensure long-term arterial health.

  • Chronic Chest Pain (Angina): Pain or pressure that limits physical activity.

  • Significant Blockages: Evidence of arterial narrowing found during an echocardiogram or stress test.

  • Heart Failure Risk: High risk of heart failure due to restricted blood flow to the heart muscle.

  • Emergency Treatment: Used during a heart attack to rapidly restore circulation.

  • Functional Improvement: Prevention of breathing difficulties caused by poor heart pump function.

  • The Scaffold: A metal mesh structure, typically made of cobalt-chromium or platinum-chromium alloys, providing mechanical support to prevent the artery from recoiling.

  • The Polymer Coating: A thin layer that holds the medication and controls its release into the artery wall over several weeks or months.

  • The Therapeutic Agent: Specialized drugs (typically from the "limus" family) that inhibit the growth of scar tissue within the artery.

  • Catheter Access: A thin tube is guided through the radial artery (wrist) or femoral artery (groin) to the heart.

  • Navigation: Real-time X-ray imaging and contrast dye ensure the catheter is perfectly positioned at the blockage.

  • Expansion: A tiny balloon at the catheter's tip is inflated to widen the blockage and expand the collapsed stent against the artery wall.

  • Device Deployment: The balloon is deflated and removed, leaving the low-profile stent to support the vessel permanently.

  • Monitoring: Imaging confirms the stent is perfectly positioned before finishing the procedure.

  • Fasting: Required for 8–12 hours before the catheterization.

  • Baseline Screening: Blood tests, ECG, and chest X-rays to assess overall health and kidney function.

  • Medication Adjustment: Adjusting current medications as directed by the cardiology team.

  • Allergy Check: Discussing any allergies, particularly to nickel (used in some stents) or contrast dye.

  • Recovery Planning: Arranging for a support person for the post-operative period.

  • Echocardiogram (TTE or TEE): To determine the location and severity of arterial issues.

  • Cardiac Catheterization: To measure heart pressures and map the coronary anatomy.

  • Cardiac MRI or CT Scan: For detailed 3D mapping of complex blockages.

  • ECG: To monitor the heart's electrical rhythm.

  • Pulse Oximetry: To evaluate oxygen saturation levels in the blood.

  • Hospital Stay: Usually 1–2 days for observation.

  • Activity Restrictions: Avoid strenuous activity and heavy lifting for a few weeks post-procedure.

  • Mandatory Medication: Patients must take dual antiplatelet therapy (DAPT), such as aspirin and a second blood thinner, for 6 to 12 months to prevent clots.

  • Long-term Follow-up: Regular visits with a cardiologist to monitor the stent site.

  • Functional Recovery: Immediate improvement in breathing, energy levels, and physical stamina.

  • Reduced Restenosis: Significantly lowers the risk of the artery re-narrowing compared to older bare-metal stents.

  • Organ Protection: Protects the heart and lungs from damage caused by poor circulation.

  • Fewer Procedures: Patients are less likely to need repeat angioplasties or bypass surgery.

  • High Success Rate: Modern DES provide a long-term solution with technical success rates often exceeding 95%.

  • Efficient Circulation: Restores normal blood flow and ensures the heart muscle receives adequate oxygen.

Echocardiography & Cardiac Catheterization

Echocardiography and Cardiac Catheterization are the two primary diagnostic pillars used to evaluate heart health. While both provide essential data on how the heart is functioning, they differ significantly in their approach: one uses sound waves to "see" the heart from the outside, while the other involves navigating a thin tube through the blood vessels to examine the heart from the inside. Together, these tools allow cardiologists to diagnose everything from valve issues to complex arterial blockages with extreme precision.

  • Echocardiography: Recommended for initial screenings, unexplained shortness of breath, or monitoring known heart valve conditions.

  • Cardiac Catheterization: Advised when a patient has symptoms of a blockage, such as chest pain (angina), or after an abnormal stress test.

  • Functional Assessment: When a doctor needs to measure your "ejection fraction" to see how well the heart pumps blood.

  • Structural Review: To detect congenital heart defects, blood clots, or fluid around the heart.

  • Pre-Surgical Planning: Before major heart surgery, to map the coronary arteries and ensure surgical accuracy.

  • Emergency Intervention: During a suspected heart attack, a catheterization is often used to locate and clear a blockage immediately.

  • Coronary Artery Disease: Requiring an angiogram to identify specific narrowings in the heart's vessels.

  • Valvular Heart Disease: Where a Transesophageal Echo (TEE) provides high-resolution views of the heart valves.

  • Heart Failure: Requiring regular monitoring of heart chamber size and pumping efficiency.

  • Hypertrophic Cardiomyopathy: A condition involving thickened heart muscle that is best visualized via 3D ultrasound.

  • Pulmonary Hypertension: Where catheterization can directly measure the blood pressure within the heart and lung arteries.

  • Echocardiography (TTE): A non-invasive test where a technician moves a wand (transducer) over the chest to create real-time ultrasound images.

  • Transesophageal Echo (TEE): A specialized probe is passed down the esophagus under sedation to get a clearer view of the heart's internal structures.

  • Cardiac Catheterization: Under local anesthesia, a long, thin tube (catheter) is inserted through a vessel in the wrist or groin and threaded to the heart.

  • Contrast Imaging: During catheterization, a specialized dye is injected to make the coronary arteries visible under X-ray (angiography).

  • Interventional Treatment: If a blockage is found during catheterization, the surgeon can immediately perform an angioplasty or place a stent.

  • Recovery: Echocardiograms require no recovery time, while catheterization requires a few hours of bed rest to ensure the insertion site heals.

  • 3D and 4D EchocardiographyAdvanced ultrasound that creates a moving, three-dimensional model of the heart, allowing for unprecedented views of valve function.

  • Radial Access CatheterizationThe standard practice of using the wrist instead of the groin for catheter insertion, significantly reducing the risk of bleeding and shortening recovery time.

  • Intravascular Ultrasound (IVUS)A tiny ultrasound camera placed on the tip of a catheter to see inside the artery walls, helping to determine the stability of a blockage.

  • Fractional Flow Reserve (FFR)A specialized wire used during catheterization that measures blood pressure across a blockage to determine if it truly needs a stent.

  • AI-Enhanced Echo InterpretationSoftware that automatically calculates heart measurements with higher accuracy than the human eye, reducing diagnostic errors.

  • Low-Dose Radiation LabsModern "Cath Labs" that utilize high-sensitivity X-ray detectors to provide clearer images while using significantly less radiation.

  • For Echo: No special diet is usually required; patients can typically take their normal medications.

  • For Catheterization: Patients must fast (NPO) for several hours and may need to pause certain blood-thinning medications.

  • Sedation Review: Discussion regarding light sedation to ensure comfort during invasive or transesophageal procedures.

  • Allergy Check: Specifically checking for iodine or contrast dye allergies before a cardiac catheterization.

  • Hydration: Encouraged before and after catheterization to help the kidneys process the contrast dye.

  • Ejection Fraction (EF): A percentage measurement of how much blood the left ventricle pumps out with each contraction.

  • Coronary Angiogram: The "Gold Standard" X-ray test during catheterization to map out blockages in the arteries.

  • Doppler Ultrasound: A part of the echo that measures the speed and direction of blood flow through the heart.

  • Wall Motion Analysis: Checking for areas of the heart muscle that are not moving normally, often a sign of a previous silent heart attack.

  • Pressure Manometry: Directly measuring the pressure inside each heart chamber during a catheterization.

  • Echocardiography provides a safe, radiation-free way to monitor the heart's mechanical health over a lifetime.

  • Cardiac Catheterization is the only way to provide a definitive diagnosis and immediate life-saving treatment for coronary blockages.

  • Precision Medicine: These tests allow for "custom-fit" treatments, ensuring patients only receive stents or surgery when absolutely necessary.

  • Early Detection: Can identify heart disease in its earliest stages, long before it causes a heart attack or stroke.

  • Valve Accuracy: 3D imaging has made heart valve repairs much more successful by providing surgeons with a perfect "road map."

  • Most patients return to light activities within 48 to 72 hours after a cardiac catheterization.

  • Echocardiogram results are often available immediately, allowing for rapid adjustments to heart medications.

  • A small bandage is placed over the wrist or groin site after catheterization; it typically heals completely within a week.

  • Following these tests, patients receive a personalized "Heart Health Plan" including diet, exercise, and medication guidance.

  • Regular follow-up echoes may be scheduled to ensure that treatments (like stents or medications) are working effectively.

ASD Device Closure
ASD Device Closure

Atrial Septal Defect (ASD) closure is a specialized cardiac procedure performed to repair a hole in the septum, which is the wall separating the heart's upper chambers. This treatment is essential for restoring normal blood flow, preventing the heart from overworking, and reducing the risk of long term complications such as pulmonary hypertension or stroke.

  • Persistent shortness of breath, especially during exercise or physical activity.

  • Frequent respiratory infections or lung issues.

  • Chronic fatigue or low energy levels during simple daily tasks.

  • Heart palpitations or the sensation of a skipped heartbeat.

  • Swelling in the legs, feet, or abdomen caused by fluid buildup.

  • Detection of a heart murmur during a routine physical checkup.

  • Secundum ASD which is the most common form located in the middle of the atrial wall.

  • Primum ASD which occurs in the lower part of the septum and may affect heart valves.

  • Sinus Venosus ASD located near the entry points of the large veins into the right atrium.

  • Coronary Sinus ASD which involves a defect in the wall between the coronary sinus and the left atrium.

  • Large defects that cause significant blood shunting and heart chamber enlargement.

  • General anesthesia is administered to ensure the patient is comfortable and pain free.

  • For transcatheter closure, a thin tube is guided through a vein in the groin to the heart.

  • For surgical repair, a chest incision is made to provide direct access to the heart wall.

  • A specialized mesh device or a surgical patch is placed to permanently seal the hole.

  • The heart function is tested using real time imaging to ensure the defect is fully closed.

  • Patients are moved to a specialized recovery unit for continuous monitoring.

  • Transcatheter Device Closure A minimally invasive method using a catheter to deliver a permanent sealing device to the heart.

  • Open Heart ASD Repair The traditional surgical approach used for very large or complex defects involving a chest incision.

  • Minimally Invasive ASD Surgery Performed through small incisions between the ribs to minimize scarring and speed up healing.

  • Robotic Assisted Repair Uses advanced robotic systems for high precision closure with the smallest possible incisions.

  • Stop smoking at least two to three weeks before the procedure for better lung recovery.

  • Ensure blood pressure and blood sugar levels are well controlled.

  • Follow specific fasting instructions provided by your Medivisor India Treatment coordinator.

  • Adjust or pause blood thinning medications only as advised by your cardiologist.

  • Complete all required cardiac imaging and blood work before the scheduled surgery date.

  • ECG to monitor the electrical activity and rhythm of the heart.

  • 2D or 3D Echocardiography to visualize the size and location of the defect.

  • Transesophageal Echo (TEE) for a more detailed view of the heart structures.

  • Chest X ray to evaluate the size of the heart and the condition of the lungs.

  • Routine blood panels including CBC, liver function, and clotting profiles.

  • Restores normal blood circulation and prevents oxygen rich blood from mixing with poor blood.

  • Eliminates symptoms like breathlessness and chronic fatigue within weeks.

  • Prevents the right side of the heart from becoming enlarged or failing.

  • Significantly improves daily stamina and long term quality of life.

  • Provides a permanent solution with high success rates in both children and adults.

  • ICU or recovery room stay for one to two days for close observation.

  • Early mobilization and walking are encouraged within twenty four hours.

  • For transcatheter patients, discharge is often possible within forty eight hours.

  • Surgical patients typically require four to seven days of hospital care.

  • Most patients return to school or work within one to four weeks depending on the method.

  • Exercise tolerance often improves significantly within two to three months of the repair.

  • Follow a heart healthy diet and stay hydrated to support the healing process.

  • Take daily aspirin or blood thinners for six months as prescribed to prevent clots.

  • Use antibiotics before dental procedures for six months to prevent heart infections.

  • Attend regular follow up appointments with a cardiologist to monitor heart health.

Coronary Angioplasty (PTCA)

Coronary Angioplasty, also known as Percutaneous Transluminal Coronary Angioplasty (PTCA), is a minimally invasive procedure used to open clogged heart arteries. While surgical bypass remains an option for multi-vessel disease, transcatheter techniques using drug-eluting stents have expanded to treat even complex blockages, restoring vital blood flow to the heart muscle.

  • Refractory Angina: Chest pain that does not improve with standard medication.

  • Exertional Dyspnea: Shortness of breath during physical activity or exercise.

  • Positive Stress Test: Significant blockages identified during a cardiac stress test.

  • Emergency Intervention: Performed during a heart attack to rapidly restore flow and limit heart muscle damage.

  • Cardiac Strain: Evidence of reduced blood flow causing heart enlargement or visible strain on imaging.

  • Balloon Angioplasty: A small, medical-grade balloon is inflated at the blockage site to push plaque against the artery walls.

  • Stent Placement: A tiny mesh tube is inserted and expanded to act as a permanent scaffold to keep the artery open.

  • Drug-Eluting Stents (DES): Stents coated with specialized medication that is slowly released to prevent the buildup of scar tissue (restenosis).

  • Rotational Atherectomy: Using a high-speed, diamond-tipped drill to break up heavily calcified or "hardened" plaque.

  • Laser Angioplasty: Utilizing precise laser energy to vaporize blockages within the coronary arteries.

  • Catheter Access: Under local anesthesia and sedation, a thin, flexible tube is guided through the radial artery (wrist) or femoral artery (groin) to the heart.

  • Real-time Imaging: Contrast dye is injected, and X-ray imaging (fluoroscopy) is used to ensure tools are perfectly positioned at the blockage.

  • Balloon Expansion: The balloon is inflated at the site of the narrowing to widen the passage for blood flow.

  • Stent Deployment: The mesh stent is expanded against the artery wall; the balloon is then deflated and removed, leaving the stent in place.

  • Final Validation: Heart rhythm and blood flow are monitored via an angiogram to confirm the artery is fully open before removing the catheters.

  • Fasting (NPO): No food or drink for 8–12 hours before the catheterization to ensure safety during sedation.

  • Baseline Diagnostics: Blood tests, ECG, and chest X-rays to assess overall cardiac health and kidney function.

  • Medication Adjustment: Reviewing all current prescriptions; blood thinners or certain diabetes medications may be adjusted by the clinical team.

  • Allergy Check: Discussing any known history of allergies, particularly to iodine-based contrast dye or metals like nickel.

  • Recovery Logistics: Arranging for a support person to drive you home and assist during the initial recovery period.

  • Echocardiogram (TTE): An ultrasound to determine the heart's pumping efficiency and valve function.

  • Cardiac Angiogram: The primary diagnostic mapping tool used to identify the exact location and severity of blockages.

  • Cardiac MRI or CT Scan: For detailed 3D mapping of the coronary anatomy in complex cases.

  • ECG: To monitor the heart's electrical rhythm and check for signs of current or past ischemia.

  • Pulse Oximetry: To evaluate baseline oxygen saturation levels in the blood.

  • Short Observation: Most patients require a short hospital stay, often 1–2 days, to monitor the access site and heart rhythm.

  • Activity Restrictions: Avoid strenuous activity, heavy lifting, or immersion in water (baths/pools) for several days post-procedure.

  • Medication Compliance: Strict adherence to prescribed antiplatelet medications (like Aspirin or Clopidogrel) is vital to prevent blood clots from forming on the new stent.

  • Follow-up Care: Regular visits with a cardiologist to monitor the treated site and manage underlying cardiovascular risk factors.

  • Symptom Relief: Most patients experience an immediate improvement in breathing, energy levels, and physical stamina.

  • Restored Perfusion: Immediately restores normal blood flow to the oxygen-starved heart muscle.

  • Muscle Preservation: Protects the heart from permanent damage or scarring caused by chronic ischemia.

  • Improved Mobility: Allows patients to return to physical activities and maintain an active, healthy lifestyle.

  • Risk Reduction: Significantly reduces the long-term risk of heart failure and enlargement of the heart's chambers.

  • High Success Rates: Provides a durable, long-term solution with exceptionally high technical success rates.

Transcatheter Mitral Valve Replacement (TMVR/TMVI)

TMVI (Transcatheter Mitral Valve Implantation) and TMVR (Transcatheter Mitral Valve Replacement) are minimally invasive procedures used to replace a diseased mitral valve without the need for traditional open-heart surgery. These procedures are typically reserved for high-risk patients with severe Mitral Regurgitation (a leaking valve) or Mitral Stenosis (a narrowed valve) who may not tolerate a standard sternotomy.

  • Severe Mitral Regurgitation: When the mitral valve does not close tightly, causing blood to flow backward into the lungs.

  • Mitral Stenosis: When the valve leaflets become thick or stiff, restricting blood flow from the left atrium to the left ventricle.

  • High Surgical Risk: For patients whose age or underlying health conditions (like lung or kidney disease) make traditional surgery too dangerous.

  • Failed Previous Valve: A "Valve-in-Valve" procedure for patients whose previously implanted surgical biological valve has begun to wear out.

  • Functional Mitral Disease: When heart failure has caused the heart to enlarge, pulling the mitral valve leaflets apart and causing a massive leak.

  • 3D Guidance: The surgical team uses a combination of real-time X-ray (fluoroscopy) and Transesophageal Echocardiography (TEE) to see the heart in three dimensions.

  • Access Routes: * Transseptal: The most common approach; a catheter is guided from the groin vein, through the wall of the heart (septum), and into the mitral position.
    Transapical: A small incision is made between the ribs to access the valve directly through the tip (apex) of the heart.

  • Valve Positioning: A collapsed artificial valve—constructed from biological tissue on a metal frame—is steered precisely into the center of the diseased native valve.

  • Deployment: The new valve is expanded, either by a balloon or a self-expanding mechanism. This pushes the old valve leaflets aside and anchors the new valve firmly in place.

  • Leak Check: Before finalizing the placement, the team checks for "paravalvular leaks" to ensure blood cannot escape around the edges of the new device.

  • Cardiac CT Scan: A specialized high-resolution scan is mandatory to measure the "neo-LVOT"—ensuring the new valve frame won't block the heart's main exit path.

  • Transesophageal Echocardiogram (TEE): An ultrasound probe passed down the esophagus to provide the clearest possible images of the valve structure.

  • Heart Team Evaluation: A collaborative review by interventional cardiologists and cardiac surgeons to confirm this is the safest treatment path.

  • Dental Clearance: To minimize the risk of bacteria entering the bloodstream and infecting the new heart valve (endocarditis).

  • Fasting (NPO): No food or drink for at least 8 hours prior to the procedure, as it is performed under general anesthesia.

  • 3D Cardiac CT: Essential for sizing the valve and mapping the internal dimensions of the left ventricle.

  • Diagnostic Catheterization: To check for blockages in the coronary arteries that might need treatment at the same time.

  • Blood Panels: To assess kidney function and ensure the blood's clotting ability is within a safe range for the procedure.

  • Lung Function Tests: To evaluate the patient's overall respiratory health for anesthesia planning.

  • Hospital Stay: Usually 2 to 5 days, which is significantly shorter than the recovery for open-heart surgery.

  • Medication Adherence: Patients must take anticoagulants (blood thinners) for at least 3 to 6 months—and often indefinitely—to prevent clots from forming on the metal frame.

  • Immediate Improvement: Most patients notice a dramatic reduction in shortness of breath and fatigue almost immediately after the procedure.

  • Activity Restrictions: Heavy lifting and strenuous exercise are restricted for 2 to 4 weeks while the access site in the groin or chest heals.

  • Long-Term Follow-up: Regular echocardiograms are required (at 30 days, 6 months, and annually) to ensure the valve remains functional and secure.

  • No Sternotomy: Avoids the need to open the chest bone, resulting in significantly less pain and a lower risk of wound infection.

  • Faster Mobilization: Patients are usually up and walking within a day of the procedure.

  • Effective Symptom Relief: Successfully stops the "back-pressure" on the lungs, allowing for better breathing and increased energy levels.

  • High Success Rate: Modern devices are highly effective at reducing or eliminating mitral leaks, even in the most complex heart geometries.

Transcatheter Aortic Valve Replacement (TAVR/TAVI)

Transcatheter Aortic Valve Implantation (TAVI), also known as TAVR, is a minimally invasive procedure used to treat severe aortic stenosis. As of 2026, it has become a standard of care for patients across all surgical risk categories—from high-risk to low-risk—offering an alternative to traditional open-heart surgery.

  • Diagnosis of severe aortic stenosis causing restricted blood flow

  • Chest pain (angina) or tightness during physical activity

  • Frequent shortness of breath or feeling easily winded

  • Dizziness, lightheadedness, or fainting spells

  • Symptoms of heart failure, such as swelling in the ankles or feet

  • Minimally invasive approach with no need for a large chest incision

  • Avoids the use of a heart-lung bypass machine in most cases

  • Significantly shorter recovery time compared to open-heart surgery

  • Faster improvement in breathing and energy levels

  • Lower risk of certain complications like major bleeding or infection

  • Access: Usually performed through a tiny incision in the groin (transfemoral approach).

  • Catheterization: A thin tube carries the collapsed replacement valve to the heart.

  • Deployment: The new valve is expanded, pushing the old valve leaflets aside.

  • Immediate Function: The new valve starts working instantly to restore blood flow.

  • Anesthesia: Most procedures use conscious sedation rather than general anesthesia.

  • Universal Risk Application: Now available for low-risk patients as well as high-risk.

  • Advanced Valve Materials: 2026 bioprosthetic valves are designed for greater durability.

  • Conscious Sedation: Improved protocols allow for faster wake-up and recovery times.

  • Cerebral Protection: Specialized filters are used during deployment to reduce stroke risk.

  • Precision Imaging: 3D mapping ensures perfect valve placement and fit.

  • Hospital Stay: Most patients are ready to go home within 1 to 2 days.

  • Post-Op Activity: Walking is encouraged almost immediately after the procedure.

  • Incision Care: The small groin incision heals quickly with minimal scarring.

  • Follow-up: Regular check-ups include an echocardiogram to monitor valve function.

  • Return to Life: Most patients return to normal daily activities within a week.

  • Heart-Healthy Lifestyle: Balanced diet and light exercise support long-term success.

  • Medication Management: Patients typically take blood-thinning medications for a short period.

  • Infection Prevention: Always inform dentists and doctors about your valve before procedures.

  • Regular Monitoring: Periodic imaging ensures the valve remains seated and functional.

  • Immediate Relief: Most patients report a dramatic reduction in symptoms right away.

Partial Nephrectomy (Kidney-Saving Surgery)

Partial Nephrectomy, also known as "Kidney-Sparing Surgery," is a complex procedure where only the diseased part of the kidney (usually a tumor) is removed, leaving the healthy, functioning kidney tissue intact. This is the preferred treatment for smaller kidney tumors to preserve as much renal function as possible.

  • Small Renal Masses: Typically the first choice for tumors less than 4 cm (Stage T1a) and many tumors up to 7 cm (Stage T1b).

  • Solitary Kidney: When a patient only has one functioning kidney, making it critical to avoid a total removal.

  • Bilateral Kidney Tumors: When tumors are present in both kidneys, requiring a sparing approach on one or both sides.

  • Pre-existing Kidney Disease: For patients with diabetes or hypertension who are at higher risk for future chronic kidney disease.

  • Genetic Predisposition: For patients with conditions like Von Hippel-Lindau (VHL) syndrome who may develop multiple tumors over their lifetime.

  • Robotic-Assisted (Da Vinci): The modern standard for precision. It allows the surgeon to perform complex suturing within the tight "ischemia" time window using 3D magnification.

  • Laparoscopic Surgery: A minimally invasive approach using small incisions and specialized instruments to remove the tumor and repair the kidney.

  • Open Surgery: Often reserved for very large or centrally located tumors where the surgeon needs direct physical access to the kidney.

  • Nerve and Vessel Sparing: A technique focusing on identifying the specific arterial branches feeding the tumor to avoid clamping the entire renal blood supply.

  • Renorrhaphy (Repair): The reconstructive phase where the "hole" left in the kidney is stitched closed using specialized sutures and hemostatic agents.

  • Anesthesia: Performed under General Anesthesia to ensure total patient comfort and muscle relaxation.

  • The "Clamping" Phase: To prevent heavy bleeding, the surgeon temporarily clamps the Renal Artery. This must usually be completed in under 20–30 minutes to protect kidney health.

  • Tumor Excision: The surgeon cuts out the tumor along with a small "margin" of healthy tissue to ensure no cancer cells remain.

  • Hemostasis: Specialized "bolsters" or glues are often applied to the raw surface of the kidney to stop bleeding instantly.

  • Unclamping: The artery clamp is removed, and the surgeon verifies that the kidney regains its pink color and shows no signs of active bleeding.

  • Drain Placement: A small tube is left in the side for 24–48 hours to monitor for any internal fluid or blood collection.

  • 3D Imaging: A high-resolution CT Scan or MRI with contrast is mandatory to map the "Renal Nephrometry Score" and tumor depth.

  • Kidney Function Test: A DTPA Scan or serum creatinine test is performed to establish a baseline for how well both kidneys are working.

  • Blood Prep: "Cross-matching" for blood units is done in advance due to the highly vascular nature of the kidney.

  • Medication Audit: You must stop all blood thinners (Aspirin, Warfarin, etc.) 7–10 days prior to the operation.

  • Fasting: Maintaining a "nil per oral" status for 8 hours before the procedure for anesthesia safety.

  • Complete Blood Count (CBC): To check baseline hemoglobin levels and ensure the body is ready for surgery.

  • Coagulation Profile: Testing PT/INR and Platelet counts to ensure the kidney repair will clot effectively.

  • Chest X-ray and EKG: Standard pre-operative checks to ensure heart and lung fitness for general anesthesia.

  • Urinalysis: To rule out any existing urinary tract infections before the procedure.

  • Electrolyte Panel: Checking sodium, potassium, and calcium levels to ensure the body’s chemistry is balanced.

  • Hospital Stay: Usually 2–3 days for Robotic/Laparoscopic surgery and 4–5 days for the Open approach.

  • Catheterization: A Foley catheter is placed in the bladder for 1–2 days to monitor urine output and filtration.

  • Activity Restrictions: No heavy lifting (over 5kg) or strenuous exercise for 6 weeks to prevent the repair from bleeding.

  • Hydration Therapy: Drinking 2–2.5 litres of water daily is recommended to keep the kidneys working at a steady, healthy pace.

  • Urine Leak Risk: If the repair isn't water-tight, a temporary JJ Stent may be placed to allow the kidney to heal.

  • Follow-Up Imaging: A CT scan is typically repeated at 3 or 6 months to monitor the surgical site and ensure no recurrence.

  • Preservation of Function: By saving the healthy part of the kidney, patients have a much lower risk of requiring dialysis in the future.

  • Oncological Equivalent: Modern studies show that for appropriately selected tumors, a partial removal is just as effective as a total removal for cancer control.

  • Robotic Precision: 2026 robotic technology allows for "ultra-selective clamping," where only the tumor's blood supply is stopped, leaving the rest of the kidney "warm."

  • Faster Recovery: Minimally invasive techniques lead to less pain, smaller scars, and a quicker return to normal life compared to traditional surgery.

  • Lower Cardiovascular Risk: Maintaining two functioning kidneys is linked to better long-term heart health and blood pressure control.

Kidney Transplant Surgery

Kidney transplant surgery is a life-saving procedure where a healthy kidney from a donor (living or deceased) is placed into a patient with end-stage renal disease (ESRD). It is generally the preferred treatment over lifelong dialysis, offering a significantly better quality of life and higher long-term survival rates. This procedure restores the body's ability to filter waste and maintain fluid balance naturally.

  • End-Stage Renal Disease (ESRD): When your kidneys have lost approximately 90% of their function due to chronic conditions.

  • Diabetes Mellitus: One of the leading causes of kidney failure that can be effectively managed through transplantation.

  • Chronic High Blood Pressure: Persistent hypertension that has caused irreversible damage to the kidney's filtering units (nephrons).

  • Polycystic Kidney Disease (PKD): A genetic disorder causing numerous cysts to grow in the kidneys, eventually leading to failure.

  • Preemptive Transplant: For patients whose kidney function is declining but who have not yet started dialysis, as this often leads to the best long-term outcomes.

  • Anesthesia: The operation is performed under general anesthesia and typically takes between 3 to 4 hours.

  • Placement: The donor kidney is placed in the lower abdomen (usually the right or left groin area).

  • Native Kidneys: Your original kidneys are generally left in place unless they are causing specific complications like chronic infection or severe high blood pressure.

  • Vascular Connections: The donor kidney's artery and vein are surgically attached to your existing iliac blood vessels in the lower abdomen to establish blood flow.

  • Ureteral Connection: The donor's ureter (the tube that carries urine) is connected directly to your bladder to allow for natural voiding.

  • Monitoring: Once blood starts flowing, the new kidney often begins producing urine immediately, though it can sometimes take several days to fully "wake up."

  • Transplant Evaluation: A comprehensive series of medical, surgical, and psychological tests to ensure you are a suitable candidate for the procedure.

  • Compatibility Testing: Blood typing (A, B, AB, or O) and tissue typing (HLA matching) to find the best possible donor match.

  • Crossmatch Test: A final blood test mixed with the donor's cells to ensure your immune system will not immediately attack the new organ.

  • Dental and Cancer Screenings: Ensuring there are no active infections or undiagnosed malignancies that could be exacerbated by anti-rejection medication.

  • Fasting: Following strict "nothing by mouth" instructions for 8 hours prior to your scheduled surgery.

  • Echocardiogram: A detailed heart ultrasound to ensure your cardiovascular system can handle the surgery.

  • Chest X-ray: To rule out any active lung infections or fluid buildup prior to anesthesia.

  • Panel Reactive Antibody (PRA) Test: Measures the level of antibodies in your blood to determine how difficult it will be to find a compatible match.

  • CT Scan of the Pelvis: To evaluate the blood vessels in the lower abdomen where the new kidney will be attached.

  • ECG: A routine heart check to confirm cardiac stability for the duration of the procedure.

  • Hospital Stay: Typically lasts 3 to 7 days for the recipient to monitor organ function and manage post-operative pain.

  • Lifelong Medication: You must take immunosuppressant (anti-rejection) drugs daily for the rest of your life to prevent your immune system from attacking the new kidney.

  • Physical Restrictions: Avoid lifting objects heavier than 4.5 kg (10 lbs) for at least 6 to 8 weeks to allow the abdominal wall to heal.

  • Driving and Work: Driving is usually restricted for 2 to 6 weeks, and most people can return to professional work within 8 to 12 weeks.

  • Dietary Adjustments: While restrictions are fewer than on dialysis, you must avoid raw/undercooked foods and grapefruit/grapefruit juice, which can dangerously interfere with anti-rejection medications.

  • Eliminates Dialysis: A successful transplant removes the need for time-consuming dialysis treatments, providing true freedom and independence.

  • Higher Energy Levels: Restoring natural kidney function helps correct anemia and remove toxins, leading to significantly increased vitality.

  • Fewer Dietary Restrictions: Patients can enjoy a much broader range of foods and fluids compared to the strict limitations of a renal diet.

  • Improved Long-term Survival: Statistics consistently show that transplant recipients live longer than patients who remain on long-term dialysis.

  • Cost-Effective Care: While the initial surgery is intensive, the long-term cost of maintaining a healthy transplant is much lower than the ongoing cost of dialysis.

URS (Ureteroscopy)
URS (Ureteroscopy)

URS (Ureteroscopy) is a minimally invasive surgical procedure used to diagnose and treat issues in the urinary tract, most commonly kidney stones located in the ureter or kidney. Because the procedure utilizes the body's natural openings, it requires no external incisions or surgical cuts. This advanced endoscopic approach allows urologists to reach and treat stones that are too large or too high to pass on their own, often providing immediate relief from renal colic.

  • Obstructing Ureteral Stones: When a stone is stuck in the ureter, causing severe pain, nausea, or potential kidney damage.

  • Large Kidney Stones: For stones located within the kidney that are unlikely to pass naturally or are causing chronic discomfort.

  • Failed Shockwave Therapy: If previous non-invasive treatments (like ESWL) have failed to break the stone into small enough pieces.

  • Diagnostic Necessity: To investigate the cause of blood in the urine (hematuria) or to biopsy suspicious lesions within the ureter or renal pelvis.

  • Bilateral Stones: When stones are present in both ureters, URS can sometimes address both sides in a single surgical session.

  • Access: A urologist inserts a thin, flexible, or rigid lighted telescope called a ureteroscope through the urethra and bladder, guiding it carefully up into the ureter or kidney.

  • Anesthesia: The surgery is typically performed under general anesthesia and usually takes between 30 minutes to 2 hours, depending on the size and number of stones.

  • Visualization: A sterile saline solution is used to gently expand the bladder and ureter, providing a clear 3D view of the stones and the urinary tract lining.

  • Treatment:
    Small Stones: These are captured and removed whole using a specialized tiny wire basket device.
    Larger Stones: These are fragmented into tiny, dust-like pieces using a high-precision Holmium laser beam.

  • Stone Extraction: Once fragmented, the pieces are either extracted with the basket or left to pass naturally and painlessly in the urine.

  • Stent Placement: Frequently, a small temporary tube called a ureteral stent (JJ stent) is placed in the ureter at the end of the procedure to ensure proper urine drainage and to manage internal swelling.

  • Imaging (CT or KUB): High-resolution scans to determine the exact size, density, and location of the stones.

  • Urine Culture: To ensure there is no active urinary tract infection (UTI) before the instruments are introduced.

  • Medication Audit: You may be asked to stop taking blood thinners (like aspirin or warfarin) several days before the procedure to minimize bleeding.

  • Fasting: Following "nothing by mouth" instructions for 8 hours prior to your scheduled anesthesia.

  • Hydration: Your doctor may encourage increased fluid intake in the days leading up to the procedure to help flush the urinary system.

  • Urinalysis: To check for signs of infection, blood, or crystals in the urine.

  • Blood Panels: A routine check of your blood count, electrolytes, and kidney function (creatinine and BUN levels).

  • ECG: A standard heart check to confirm cardiovascular stability for the duration of the procedure.

  • Coagulation Profile: To ensure your blood clots normally, which is essential for a safe endoscopic procedure.

  • Recovery Timeline: URS is often an outpatient procedure, allowing most patients to go home the same day. Most can resume light activities within 2 to 3 days, with a full recovery typically taking one week.

  • Initial Symptoms: For the first 24–48 hours, it is normal to experience mild pelvic pain, pinkish or reddish blood in the urine, and a frequent urge to urinate.

  • Critical Hydration: It is essential to drink 2–3 liters of water daily to flush out any remaining stone fragments and residual blood.

  • Stent Removal: If a stent was placed, it is typically removed in a quick, separate outpatient procedure 4 to 14 days after the surgery.

  • Activity Restrictions: Avoid heavy lifting and strenuous exercise for at least one week to allow the ureter to heal and reduce the risk of bleeding.

  • Immediate Stone Clearance: Unlike medications, URS offers the fastest way to physically remove an obstructing stone and stop the associated pain.

  • No Surgical Scars: By using the body's natural pathways, there is zero impact on your physical appearance and no wound care is required.

  • High Success Rate: Modern laser technology can break even the hardest stones (such as calcium oxalate monohydrate) that other treatments cannot touch.

  • Protects Kidney Function: Rapidly removing an obstruction prevents the backup of urine (hydronephrosis), which can lead to permanent kidney scarring or infection.

  • Precision Mapping: The high-definition cameras on modern ureteroscopes allow for a thorough inspection of the entire upper urinary tract, ensuring no small stones are left behind.

Percutaneous Nephrolithotomy (PCNL)

Percutaneous Nephrolithotomy (PCNL) is a minimally invasive "keyhole" surgery specifically used to remove large kidney stones—usually those over 2 cm—that cannot be passed naturally or treated effectively with standard shockwave therapy. This procedure allows surgeons to reach the kidney through a tiny incision in the back, providing a direct route to extract complex or "staghorn" stones that would otherwise require major open surgery.

  • Large Kidney Stones: Specifically those larger than 2 cm in diameter which are too substantial for laser ureteroscopy or shockwave lithotripsy.

  • Staghorn Calculi: Complex stones that branch out to fill the various drainage channels (calyces) of the kidney.

  • Failed Previous Treatments: When other non-invasive methods have failed to break or clear the stone.

  • Stones in Diverticula: When a stone is trapped in a small outpouching of the kidney that is difficult to access through the ureter.

  • Cystine or Stones of High Density: Very hard stones that are resistant to being broken by external sound waves.

  • Anesthesia: The surgery is performed under general anesthesia, ensuring you are completely asleep and comfortable throughout the procedure.

  • Positioning: You are typically placed in a prone (face-down) or supine (face-up) position to allow the surgeon precise access to the kidney through the flank.

  • The Incision: A small, "keyhole" incision (approximately 1 cm) is made in your flank area (the side of your back).

  • Access & Fragmentation:
    A protective sleeve is inserted through the incision directly into the kidney's collecting system.
    A nephroscope (a specialized thin camera) is passed through the sleeve to locate the stone under high magnification.
    If the stone is too large to remove whole, the surgeon uses a lithotripter (a laser, ultrasound, or pneumatic device) to fragment the stone into smaller, manageable pieces.

  • Extraction: The fragments are then physically removed from the kidney using specialized graspers or suction.

  • Drainage: To ensure the kidney heals properly, a nephrostomy tube (draining to an external bag) or an internal ureteral stent is often left in place temporarily.

  • Medical Evaluation: Comprehensive blood and urine tests to rule out active infection and assess kidney function.

  • Advanced Mapping: A high-resolution CT scan or intravenous pyelogram (IVP) to map the exact 3D location of the stones and the surrounding anatomy.

  • Antibiotic Protocol: A preventative dose of antibiotics is administered to minimize the risk of post-surgical infection.

  • Fasting: Adhering to "nothing by mouth" instructions after midnight on the night before your surgery.

  • Medication Audit: You will be asked to stop taking blood thinners (like aspirin, warfarin, or clopidogrel) several days before the procedure to prevent bleeding.

  • Urine Culture: Essential to confirm the urine is sterile before entering the kidney with surgical instruments.

  • CT Stone Protocol: A specialized scan to determine the "Hounsfield units" (density) of the stone, which helps the surgeon choose the right fragmentation tool.

  • Complete Blood Count (CBC): To establish a baseline for your red and white blood cells.

  • ECG: A standard heart check to confirm cardiovascular stability for a procedure that typically lasts 1 to 4 hours.

  • Hospital Stay: Most patients stay in the hospital for 1 to 2 days for close monitoring of kidney drainage and comfort levels.

  • Tube Management: If a nephrostomy tube was used, it is typically removed before you leave the hospital or at a quick follow-up visit a few days later.

  • Initial Symptoms: It is normal to see small amounts of blood in your urine (hematuria) or feel moderate soreness at the incision site for 1–2 weeks.

  • Activity Restrictions: Avoid strenuous activity, heavy exercise, or lifting anything heavier than 4 kg (approx. 9 lbs) for at least 2 weeks.

  • Hydration: Drinking plenty of fluids is critical to help flush out any remaining tiny microscopic stone fragments.

  • Follow-Up: A check-up is scheduled for 4 to 6 weeks after surgery, often including an X-ray or ultrasound to confirm the kidney is stone-free and functioning correctly.

  • Highest Clearance Rate: PCNL offers the highest "stone-free" rate for large and complex stones compared to any other surgical or non-surgical method.

  • Direct Extraction: Because stones are physically removed rather than just broken, there is a lower risk of fragments getting stuck in the ureter later.

  • Minimally Invasive: Despite treating large stones, the "keyhole" approach means less pain, smaller scars, and a much faster recovery than traditional open kidney surgery.

  • One-Step Solution: Even the largest staghorn stones can often be cleared in a single surgical session.

  • Protects Kidney Health: Rapidly clearing an obstructing stone prevents long-term pressure damage (hydronephrosis) and reduces the risk of recurrent kidney infections.

Extracorporeal Shockwave Lithotripsy (Non-Surgical)

Extracorporeal Shock Wave Lithotripsy (ESWL) is a purely non-invasive medical procedure. It is the only treatment that can break kidney stones from outside the body, using high-energy acoustic pulses.

  • Stone Size: ESWL is most effective for kidney stones that are under 2 cm.

  • Stone Location: Ideal for stones located in the kidney or the upper part of the ureter.

  • Symptomatic Stones: When stones cause persistent pain, urinary tract infections, or localized blockage.

  • Patient Preference: For individuals seeking a treatment option that requires no incisions, no catheters, and no internal scopes.

  • Stone Composition: Best suited for stones that are not excessively hard, such as those primarily composed of uric acid or certain calcium clusters.

  • Imaging & Mapping: The urologist uses Fluoroscopy (continuous X-ray) or Ultrasound to find the stone's exact 3D coordinates.

  • The "Coupling" Process: A water-filled cushion or a thick layer of conductive gel is placed against your back to transmit energy into the body.

  • Pain Management: While non-surgical, you are usually given sedation or a local anaesthetic block to keep you still and relaxed during the "thumping" sensation.

  • Medication Audit: Pausing blood thinners (like aspirin or warfarin) for several days prior to prevent bruising or bleeding around the kidney.

  • Fasting: Maintaining "nil per oral" (NPO) status for 6–8 hours before the procedure if sedation is being administered.

  • Shockwave Generation: A machine called a Lithotripter creates thousands of targeted shockwaves (usually 2,000 to 3,000 pulses).

  • The "Ramping" Technique: The doctor starts at a low power level to "soften" the stone and slowly increases the intensity to protect kidney tissue.

  • Direct Stress: Physical pressure from the acoustic pulses travels through the liquid "bridge" to crack the stone.

  • Cavitation: Tiny bubbles form and collapse on the stone's surface, acting like "micro-hammers" to turn the stone into "sand" or "gravel."

  • Duration: The entire fragmentation process usually takes 45 to 60 minutes.

  • KUB X-ray: A standard X-ray of the Kidneys, Ureters, and Bladder to confirm the stone is "radio-opaque" (visible to X-rays).

  • Renal Ultrasound: To check for "hydronephrosis" (swelling of the kidney) caused by the stone.

  • Non-Contrast CT Scan: The gold standard for measuring the "Hounsfield Units" (hardness) of the stone to predict if it will break.

  • Urine Culture: To ensure there is no active infection, as breaking an infected stone can release bacteria into the bloodstream.

  • Coagulation Profile: Blood tests to ensure your blood clots normally before the high-energy pulses are applied.

  • Observation: You stay in a recovery room for 1–2 hours to monitor for any reaction to the sedation or severe internal bruising.

  • Hydration Therapy: You are instructed to drink 3 to 4 litres of water daily to "wash out" the stone dust.

  • Medical Expulsive Therapy (MET): You are often prescribed Alpha-blockers (like Tamsulosin) to relax the ureter so fragments can pass with less pain.

  • Straining Urine: You will be given a fine-mesh strainer to catch pieces for chemical analysis to determine the stone's mineral type.

  • Haematuria: It is normal to see blood in the urine for 24–48 hours as fragments move through the urinary tract.

  • Follow-up Imaging: An X-ray or Ultrasound is typically done 2 to 4 weeks later to ensure the kidney is "Stone-Free."

  • Zero Incisions: As a completely extracorporeal treatment, there is a significantly lower risk of hospital-acquired infections compared to surgery.

  • Quick Recovery: Most patients return to work and normal activities within 24–48 hours after the procedure.

  • Precision Targeting: Advanced lithotripsy technology allows for real-time tracking, adjusting the focus even as the patient breathes.

  • Avoidance of General Anaesthesia: Many cases can be performed under light sedation, making it safer for elderly patients or those with heart conditions.

  • Repeatable Treatment: If a stone is particularly large, ESWL can be safely repeated or combined with other minor procedures to ensure total clearance.

Mini-PCNL / Micro-PCNL

Mini-PCNL is a "small-access" surgery used for stones between 1 cm and 2.5 cm. Micro-PCNL is an "all-in-one" needle surgery, usually reserved for stones around 1 cm to 1.5 cm.

  • Stone Size: Ideal for stones between 1 cm and 2.5 cm that are too large for ESWL but don't require standard PCNL.

  • Stone Hardness: When stones are too dense to be broken from outside the body by shockwaves.

  • Lower Pole Stones: Particularly effective for stones located in the bottom part of the kidney which are difficult to clear otherwise.

  • Failed Previous Treatments: When non-invasive methods like ESWL have failed to fragment the stone.

  • Patient Preference: For those seeking a higher "stone-free rate" with minimal scarring and a faster return to daily activities.

  • Mini-PCNL Access: A tiny incision (about 5 mm to 8 mm) is made in the flank area to allow for a thin telescope.

  • Micro-PCNL Access: Uses a specialized 1.5 mm needle—about the thickness of an injection needle—to enter the kidney without a traditional incision.

  • Laser Fragmentation: Utilization of high-power Holmium or Thulium Lasers to break stones into smaller pieces or fine dust.

  • Vortex Suction: A mechanism used in Mini-PCNL to automatically pull fragments out through the sheath using saline irrigation.

  • Dusting Technique: In Micro-PCNL, the laser turns the stone into a fine powder that washes out naturally through urine.

  • Anesthesia: Both procedures are performed under General Anesthesia to ensure the patient is completely asleep and still.

  • Imaging Guidance: Surgeons use Live X-ray (Fluoroscopy) and Ultrasound simultaneously to guide the needle or scope to the stone.

  • Nephroscopy: A thin Mini-Nephroscope or a tiny Micro-Lens camera is inserted directly into the kidney to visualize the stone.

  • Fragmentation: The laser fiber is passed through the scope or needle to precisely target and break the stone.

  • Stent Placement: In Mini-PCNL, a small internal JJ stent may be left for 1–2 weeks to ensure proper kidney drainage.

  • Fasting: Maintaining a "nil per oral" status for at least 8 hours before the procedure for anesthesia safety.

  • Medication Review: Suspending blood thinners several days in advance to minimize the risk of bleeding during the kidney puncture.

  • Antibiotic Prophylaxis: Receiving a dose of intravenous antibiotics just before the procedure to prevent urinary tract infections.

  • Hydration: Ensuring adequate fluid intake in the days leading up to the surgery to maintain good kidney function.

  • Clearance: Obtaining medical clearance, especially for patients with pre-existing heart or lung conditions.

  • NCCT KUB: A non-contrast CT scan to determine the exact size, location, and hardness (Hounsfield units) of the stone.

  • Urine Culture: To confirm the urine is sterile; surgery is postponed if an active infection is detected.

  • Coagulation Profile: Blood tests (PT/INR) to ensure the blood clots normally before making the kidney access.

  • Renal Function Test: Checking Creatinine and Urea levels to assess how well the kidneys are functioning.

  • ECG and Chest X-ray: Standard pre-anesthetic tests to ensure heart and lung fitness for general anesthesia.

  • Hospital Stay: Typically 24 hours for Mini-PCNL, while Micro-PCNL is often performed as a daycare (same-day) procedure.

  • Hydration Therapy: Drinking 3–4 litres of water daily is essential to flush out laser-dusted particles and fragments.

  • Physical Activity: Most patients return to light desk work within 3–4 days but should avoid heavy lifting for 2 weeks.

  • Urine Appearance: Expect light-pink or blood-tinged urine for 1–2 days as the kidney heals.

  • Stent Removal: If a JJ stent was placed, a minor follow-up procedure is required to remove it after 7–14 days.

  • High Stone-Free Rate: Provides a much higher chance of complete stone removal in a single session compared to ESWL.

  • Minimal Pain: Small access points lead to significantly less post-operative pain and a reduced need for painkillers.

  • Cosmetic Results: The incisions are so small (or non-existent in Micro-PCNL) that they often require no stitches and leave no visible scars.

  • Safety: Lower risk of bleeding and kidney damage compared to traditional, large-tract PCNL.

  • Fast Recovery: Allows for a quicker discharge from the hospital and a rapid return to a normal lifestyle.

Transurethral Resection of Prostate (TURP)

Transurethral Resection of the Prostate (TURP) is a surgical treatment used to treat urinary problems caused by an enlarged prostate (Benign Prostatic Hyperplasia or BPH). It is often called the "Gold Standard" because it is highly effective and requires no external incisions.

  • Moderate to Severe BPH Symptoms: When urinary frequency, urgency, or a weak stream significantly impact your quality of life.

  • Incomplete Bladder Emptying: If you consistently feel that your bladder is not empty after urinating, which can lead to infections.

  • Recurrent Urinary Tract Infections: When an enlarged prostate causes stagnant urine that leads to frequent UTIs.

  • Bladder Stones or Kidney Damage: When the obstruction is severe enough to cause secondary complications in the urinary system.

  • Failure of Medication: If alpha-blockers or 5-alpha reductase inhibitors are no longer providing sufficient relief.

  • Monopolar TURP: The traditional method using a wire loop and an electric current with glycine irrigation fluid.

  • Bipolar TURP: A modern advancement using saline irrigation, which significantly reduces the risk of "TURP Syndrome" and allows for safer treatment of larger prostates.

  • Resectoscope Access: A thin, lighted tube is inserted through the tip of the penis into the urethra, requiring no external cuts or stitches.

  • Wire Loop Resection: An electric current is passed through a loop to precisely "shave" away excess tissue blocking the urine flow.

  • Continuous Irrigation: Sterile fluid is pumped through the scope during surgery to wash away blood and tissue fragments.

  • Anesthesia: Performed under Spinal Anesthesia (numbing from the waist down) or General Anesthesia to ensure the patient is completely comfortable.

  • Insertion: The surgeon guides the resectoscope through the urethra until it reaches the prostate gland.

  • Tissue Removal: The obstructing lobes of the prostate are shaved into small chips using the electrified wire loop.

  • Fragment Flushing: The shaved tissue pieces are gathered and flushed out of the bladder at the conclusion of the surgery.

  • Catheterization: A three-way Foley catheter is inserted to allow for continuous bladder irrigation immediately following the procedure.

  • Medical Evaluation: Includes a Uroflowmetry test to measure urine speed and an ultrasound to determine the exact prostate size.

  • Medication Adjustment: You must stop blood thinners (like aspirin or warfarin) 5–7 days before surgery to prevent internal bleeding.

  • Fasting: Maintaining a "nil per oral" status for 6–8 hours before the procedure for anesthesia safety.

  • Antibiotic Prophylaxis: A preventative dose of antibiotics is given intravenously just before surgery to minimize infection risks.

  • PSA Testing: A blood test to screen for prostate-specific antigen levels prior to surgical intervention.

  • Urine Routine & Culture: To ensure there is no active infection before entering the urinary tract.

  • Prostate Ultrasound (TRUS): To map the dimensions of the prostate and plan the volume of tissue to be resected.

  • Cystoscopy: Occasionally performed beforehand to visualize the narrowness of the urethra and the shape of the prostate.

  • Blood Coagulation Profile: Testing PT/INR and Platelet counts to ensure safe surgical healing.

  • Basic Metabolic Panel: Checking kidney function (Creatinine) and electrolytes, especially important for managing irrigation fluid balance.

  • Hospital Stay: Most patients stay for 1 to 2 days until the urine is clear and the catheter can be safely removed.

  • Bladder Irrigation: While in the hospital, a sterile fluid "washes" the bladder through the catheter to prevent blood clots.

  • Hydration Therapy: Drinking at least 2–3 litres of water daily at home is essential to flush the healing surgical site.

  • Activity Restrictions: Avoid heavy lifting (over 5 kg) or vigorous exercise for 4–6 weeks to prevent secondary bleeding.

  • Sexual Activity: Avoid sexual intercourse for 4 weeks to allow the internal area to seal completely.

  • Urination Changes: It is normal to feel a temporary burning sensation or urgency for a few weeks as the raw prostatic bed heals.

  • Immediate Symptom Relief: Most patients experience a significantly stronger urine stream and better bladder emptying almost immediately after recovery.

  • No External Scarring: Because the surgery is entirely internal, there are no visible scars or wound care requirements on the skin.

  • Long-Term Durability: TURP results typically last for 15 years or more, often providing a permanent solution for BPH symptoms.

  • Bipolar Safety: Modern Bipolar technology allows surgeons to treat patients with heart conditions or larger prostates more safely than ever before.

  • Diagnostic Benefit: The shaved tissue is always sent for biopsy to confirm the absence of any hidden cancerous cells.

Laser Prostate Surgery (HoLEP / ThuLEP)

Laser prostate surgery, specifically HoLEP (Holmium Laser Enucleation of the Prostate) and ThuLEP (Thulium Laser Enucleation of the Prostate), is a modern, bloodless alternative to traditional TURP. Instead of shaving the prostate in small pieces, the laser "peels" the obstructing tissue away as a whole, making it highly effective for even the largest prostate glands.

  • Very Large Prostate: Especially effective for prostates over 80–100 grams that are too large for standard TURP.

  • High Risk of Bleeding: Ideal for patients who cannot safely stop blood thinners, due to the laser's superior vessel-sealing properties.

  • Severe Urinary Retention: When a patient is completely unable to pass urine and requires a catheter.

  • Recurrent Prostate Issues: For those who have had previous prostate surgery and are experiencing regrowth of obstructing tissue.

  • Desire for Fast Recovery: For patients who want a shorter hospital stay and quicker removal of the urinary catheter.

  • HoLEP (Holmium Laser): Uses a "pulsed" laser beam, which is excellent for "blunt dissection" (peeling) the prostate lobes away from the capsule.

  • ThuLEP (Thulium Laser): Uses a "continuous wave" laser that provides smoother cutting and even better blood vessel sealing (hemostasis).

  • Enucleation Technique: The surgeon uses the laser to peel away the entire obstructing lobe, similar to removing the flesh of an orange from its peel.

  • Morcellation: A specialized "blender-like" device is used to grind the large peeled-off lobes inside the bladder and vacuum them out.

  • Transurethral Access: The entire procedure is performed through the urethra using a laser-integrated scope, requiring no external incisions.

  • Anesthesia: Performed under General Anesthesia or Spinal Anesthesia to ensure the patient is completely still and pain-free.

  • Laser Dissection: The laser fiber is used to cut along the "capsule" of the prostate, separating the obstructing tissue from the healthy outer shell.

  • Simultaneous Cauterization: As the laser cuts, it seals every blood vessel it touches, resulting in minimal to no blood loss.

  • Intra-vesical Morcellation: Once the tissue is moved into the bladder, the morcellator sucks up and removes the fragments in a matter of minutes.

  • Final Inspection: The surgeon verifies that the bladder is clear of debris and that there is no active bleeding before finishing.

  • Catheter Placement: A Foley catheter is inserted at the end of the procedure, which is typically removed within 24 hours.

  • Imaging & Size Check: An Ultrasound (TRUS) or MRI is performed to measure the exact prostate volume and map the anatomy.

  • Urine Culture: A sterile urine sample is mandatory; any active infection must be treated with antibiotics before the laser is used.

  • Medication Audit: Patients on Aspirin or Warfarin usually stop these 5–7 days prior, though some laser cases can proceed while on thinners if necessary.

  • Fasting: Maintaining a "nil per oral" (NPO) status for 6–8 hours before the operation for anesthesia safety.

  • Medical Clearance: Ensuring heart and lung fitness for the procedure, especially since it is often performed on older patients.

  • Uroflowmetry: To measure the baseline speed and force of the urine stream before surgery.

  • Post-Void Residual (PVR) Volume: An ultrasound test to see how much urine remains in the bladder after peeing.

  • PSA Blood Test: To screen for prostate-specific antigen levels and rule out other underlying conditions.

  • Basic Metabolic Panel: Checking kidney function (Creatinine) and electrolytes to ensure the body can handle the procedure.

  • Coagulation Profile: Testing the blood's ability to clot (PT/INR) to ensure a safe, bloodless surgical outcome.

  • Hospital Stay: Usually a 24-hour stay; many patients are discharged the very next morning after the catheter is removed.

  • Immediate Results: Most patients notice an immediate, forceful urine stream once the initial catheter is taken out.

  • Hydration Therapy: Drinking 2.5–3 litres of water daily for the first week is essential to flush out any minor laser-charred debris.

  • Activity Rules: You can usually return to desk work within 3–5 days, but avoid heavy lifting (over 10 kg) for at least 2 weeks.

  • Retrograde Ejaculation: This is common (90% of cases), where semen travels into the bladder during orgasm; it is harmless but affects fertility.

  • Temporary Urgency: A frequent "urge" to pee or minor leaking may occur for the first few weeks as the internal capsule heals.

  • Superior Hemostasis: The laser's ability to seal vessels as it cuts makes this the safest option for patients with bleeding disorders or heart issues.

  • Complete Tissue Removal: By following the natural "capsule," laser surgery removes more obstructing tissue than TURP, reducing the risk of regrowth.

  • Shorter Catheter Time: Most patients are catheter-free within 24 hours, significantly reducing the risk of catheter-associated infections.

  • Treatment of Any Size: Unlike other minimally invasive methods, HoLEP and ThuLEP can treat prostates of virtually any size (even over 200 grams).

  • Minimal Side Effects: Lower risk of "TURP Syndrome" and other fluid-balance complications due to the use of saline irrigation.

Transurethral Incision of the Prostate (TUIP)

Transurethral Incision of the Prostate (TUIP) is a specialized surgical treatment for men with urinary symptoms caused by a moderately enlarged prostate (usually less than 30 grams) or a narrowing of the bladder neck. Unlike TURP or Laser surgery, no tissue is removed; instead, the "tight" area is widened to allow for better flow.

  • Small to Moderately Enlarged Prostate: Specifically indicated for prostates under 30 grams where the blockage is at the bladder neck.

  • Bladder Neck Obstruction: When the primary cause of urinary symptoms is a narrowing of the opening between the bladder and the urethra.

  • Preservation of Fertility: For men who wish to minimize the risk of retrograde ejaculation (dry orgasm) often associated with other prostate surgeries.

  • High-Risk Patients: For those who may not tolerate longer surgical procedures, as TUIP is significantly faster than TURP.

  • Failure of Medical Management: When medications like alpha-blockers are no longer providing sufficient relief for urinary flow.

  • Cystoscope Access: A thin, lighted scope is inserted through the tip of the penis into the urethra, requiring no external incisions.

  • Electric Knife Incision: The use of a specialized wire or knife to make one or two small, deep cuts (grooves) in the bladder neck.

  • Laser Incision: A modern alternative using a laser fiber to precisely cut the prostate and bladder neck tissue.

  • Channel Widening: Unlike "shaving" tissue, the mechanism relies on making a structural cut that allows the bladder neck to "spring open."

  • Minimal Tissue Trauma: A technique that avoids the removal of prostate mass, leading to significantly less internal wounding.

  • Anesthesia: Performed under Spinal Anesthesia (numbing from the waist down) or General Anesthesia for patient comfort.

  • Insertion: The surgeon guides the cystoscope through the urethra until the junction of the bladder and prostate is visualized.

  • Creating Grooves: The surgeon makes precise incisions through the prostate and the muscle of the bladder neck.

  • Widening: By cutting the tight muscle ring, the urethral channel is widened, immediately reducing the resistance to urine flow.

  • Catheterization: A Foley catheter is placed at the end of the 20–30 minute procedure to assist with initial healing and drainage.

  • Prostate Sizing: A Transrectal Ultrasound (TRUS) is essential to confirm the prostate is small enough (under 30g) for this technique.

  • Urodynamic Study: A test to confirm that the blockage is at the bladder neck and not caused by a weak bladder muscle.

  • Medication Review: You must stop blood thinners (like Aspirin or Warfarin) 5–7 days prior to surgery to prevent bleeding.

  • Fasting: Maintaining a "nil per oral" status for 6–8 hours before the procedure for anesthesia safety.

  • Antibiotic Prophylaxis: A dose of antibiotics is given intravenously just before surgery to prevent urinary tract infections.

  • Uroflowmetry: To measure the speed and force of the urine stream to establish a baseline for post-operative comparison.

  • Post-Void Residual (PVR): An ultrasound to measure how much urine is left in the bladder after peeing.

  • Urine Culture: To ensure the urinary tract is sterile before the procedure; any infection must be treated first.

  • Basic Metabolic Panel: Checking kidney function (Creatinine) and electrolytes to ensure surgical fitness.

  • Coagulation Profile: Testing the blood's ability to clot (PT/INR) to ensure safe healing of the internal incisions.

  • Hospital Stay: Often performed as a Daycare (Same-Day) procedure, or a maximum stay of 24 hours.

  • Catheter Removal: The Foley catheter is typically removed within 24 to 48 hours after the surgery.

  • Hydration Therapy: Drinking 2–3 litres of water daily is essential to flush the urinary tract as the "grooves" heal.

  • Activity Restrictions: Most patients can return to light work within 2–3 days but should avoid heavy lifting for 2 weeks.

  • Urinary Sensations: It is normal to feel a temporary urgency or stinging for the first few days post-surgery.

  • Fertility Preservation: Most men maintain normal ejaculation after TUIP, as the risk of retrograde ejaculation is much lower than with TURP.

  • Rapid Recovery: Due to the minimal tissue trauma, patients experience a much faster return to normal activities than with traditional surgery.

  • High Safety Profile: With very little bleeding and a short operative time, TUIP is an excellent option for patients with minor health concerns.

  • Functional Success: Effectively treats the root cause of bladder neck obstruction, providing a forceful urine stream immediately.

  • No External Scars: The procedure is entirely internal, leaving no visible marks and requiring no wound care on the skin.

  • Preservation of Sexual Health: Offers the best chance of maintaining normal sexual function and fertility compared to other surgical BPH treatments.

Radical Prostatectomy (Open/Laparoscopic/Robotic)

Radical Prostatectomy is the surgical removal of the entire prostate gland and surrounding tissues, typically performed to treat Prostate Cancer. Unlike treatments for an enlarged prostate (BPH) which only remove the "core," this treatment removes the entire organ to ensure the cancer is fully eliminated.

  • Localized Prostate Cancer: When imaging confirms the cancer is confined within the prostate capsule (Stages T1 or T2).

  • Aggressive Disease: For patients with a higher Gleason Score who require definitive surgical removal rather than "active surveillance."

  • Long Life Expectancy: Typically recommended for patients expected to live 10+ years, where surgical removal offers the best long-term cure rate.

  • Failure of Radiation: As a "salvage" treatment if the cancer returns after previous radiation therapy.

  • Patient Preference: For individuals who prefer the psychological certainty of having the cancerous organ physically removed.

  • Robotic-Assisted (Da Vinci): The modern gold standard. The surgeon sits at a console controlling robotic arms with 3D magnification and 360-degree "wristed" instruments for extreme precision.

  • Laparoscopic Surgery: A minimally invasive approach using 5–6 "keyhole" incisions, a camera, and long instruments to operate while viewing a 2D screen.

  • Open Surgery (Retropubic): The traditional method involving a single 4–5 inch incision in the lower abdomen to remove the gland.

  • Nerve-Sparing Technique: A meticulous process where the surgeon peels the delicate "neurovascular bundles" away from the prostate to preserve sexual function.

  • Vesicourethral Anastomosis: The reconstructive step where the bladder is stitched directly back to the urethra to restore the urinary path after the gland is removed.

  • Anesthesia: Performed under General Anesthesia to ensure the patient is completely asleep and the abdominal muscles are relaxed.

  • Dissection: The surgeon carefully separates the prostate from the bladder above it and the urethra below it.

  • Lymph Node Removal: Depending on the cancer's aggressiveness, nearby pelvic lymph nodes are often removed to check for microscopic spread.

  • Gland Extraction: The entire prostate and the attached seminal vesicles are removed as a single unit.

  • Catheterization: A Foley catheter is inserted through the penis into the bladder to act as a "splint" while the new connection (anastomosis) heals.

  • Drain Placement: A small suction tube may be left in the abdomen for 24–48 hours to remove excess surgical fluid.

  • Cancer Staging: Includes a Multiparametric MRI (mpMRI) and often a PSMA PET-CT scan to ensure the cancer has not spread.

  • Biopsy Review: The surgical team reviews the Gleason Score and genomic markers to plan the extent of the surgery.

  • Pelvic Floor Training: Patients are taught Kegel exercises weeks before surgery to strengthen the muscles responsible for urinary control.

  • Medication Audit: Patients must stop blood thinners (like Aspirin or Warfarin) 7–10 days prior to the operation.

  • Fasting: Maintaining a "nil per oral" status for 8 hours before the procedure for anesthesia safety.

  • PSA Blood Test: To establish the final pre-operative baseline for monitoring future "undetectable" levels.

  • EKG and Chest X-ray: Standard tests to ensure heart and lung fitness for a multi-hour surgical procedure.

  • Basic Metabolic Panel: Checking kidney function (Creatinine) and electrolytes to manage IV fluids during surgery.

  • Coagulation Profile: Testing PT/INR and Platelet counts to ensure safe surgical healing and minimal blood loss.

  • Complete Blood Count (CBC): To check baseline hemoglobin levels in case a blood transfusion is required (rare in robotic cases).

  • Hospital Stay: Usually 1–2 days for Robotic/Laparoscopic surgery, or 3–4 days for the Open approach.

  • Catheter Management: The Foley catheter must remain in place for 7 to 14 days to allow the bladder-urethra connection to heal water-tight.

  • Trial of Void: After 1–2 weeks, the catheter is removed in the clinic to ensure the patient can urinate independently.

  • Activity Restrictions: No heavy lifting (over 5kg) or driving for 4 weeks; early walking is encouraged to prevent blood clots.

  • Urinary Incontinence: Most patients experience leaking initially; this typically improves over 3–6 months with consistent pelvic floor exercises.

  • Erectile Dysfunction (ED): It can take 6–18 months for erections to return; doctors often start "Penile Rehabilitation" medication shortly after surgery.

  • Definitive Cure: Offers the highest probability of completely eliminating localized prostate cancer in a single treatment.

  • Pathological Certainty: Removing the gland allows for a total biopsy, giving the most accurate information on the cancer's stage and grade.

  • Robotic Precision: The 3D-high-definition view in 2026 allows surgeons to see nerves and vessels that are nearly invisible to the naked eye.

  • Predictable Monitoring: Post-surgery, the PSA level should drop to "undetectable," making it very easy to monitor for any future recurrence.

  • Limb-Sparing Mindset: Modern techniques focus heavily on "quality of life" preservation, aiming for the "Trifecta" of cancer control, continence, and potency.

Cystoscopy
Cystoscopy

Cystoscopy and Hypospadias Repair are fundamental urological procedures used to diagnose and correct anatomical issues within the urinary tract. While Cystoscopy is a diagnostic tool that provides a direct view of the bladder and urethra, Hypospadias Repair is a delicate reconstructive surgery. In many clinical cases, especially in pediatric urology, these procedures are performed together to ensure that the internal urinary anatomy is healthy before external reconstruction begins.

  • Congenital Misalignment: When a newborn is identified with a urethral opening on the underside of the penis rather than the tip.

  • Persistent Curvature: A condition known as "chordee," where the penis curves downward, often accompanying hypospadias.

  • Unexplained Hematuria: The presence of blood in the urine that requires internal visualization via cystoscopy.

  • Recurrent Urinary Tract Infections (UTIs): To rule out structural blockages or "valves" within the urethra.

  • Difficulties with Urination: A weak or misdirected urinary stream in children or adults.

  • Pre-Surgical Mapping: Performing a cystoscopy to ensure the proximal urethra is clear before starting a complex reconstruction.

  • Proximal Hypospadias: Severe cases where the urethral opening is located near the scrotum or perineum.

  • Redo (Revision) Surgery: Patients who have had a previous unsuccessful repair and require specialized tissue grafts.

  • Prostatic Utricle: An internal pocket sometimes found in children with hypospadias that must be identified via cystoscopy.

  • Intersex/DSD Conditions: Cases where urological reconstruction is part of a broader multidisciplinary care plan.

  • Adult Hypospadias: Complex repairs in adults which may involve strictures or scar tissue from childhood.

  • Cystoscopy: A thin, lighted tube (cystoscope) is gently inserted through the urethra. The surgeon uses high-definition monitors to inspect the lining of the bladder and the urethral path.

  • TIP Repair (Tubularized Incised Plate): The most common corrective technique where the existing urethral plate is used to create a new, functional tube.

  • Grafting: In severe cases, tissue may be taken from the foreskin or the inside of the cheek (buccal mucosa) to reconstruct the urinary channel.

  • Chordee Correction: If the penis is curved, the surgeon releases the fibrous tissue causing the bend to ensure a straight functional result.

  • Stenting: A small, flexible tube (stent) is often placed in the new urethra for 5 to 10 days to ensure it remains open during the initial healing phase.

  • Anesthesia: Children undergo general anesthesia for both procedures to ensure comfort and precision.

  • Robotic-Assisted MicrosurgeryUsing robotic systems for proximal repairs to achieve ultra-precise suturing of the delicate urethral tissues, reducing the risk of fistulas.

  • 3D-Printed Urethral ScaffoldsExperimental but progressing technology where bio-compatible scaffolds are used to help grow a new urethra in complex revision cases.

  • Ultra-Thin Fiber-Optic CystoscopesDigital scopes that are significantly thinner and more flexible than traditional models, minimizing tissue trauma during diagnostic exams.

  • Tissue EngineeringUtilizing lab-grown epithelial cells to create custom grafts, potentially eliminating the need to harvest tissue from the mouth.

  • Laser-Assisted Tissue BondingUsing specialized lasers to "weld" tissue edges together with high precision, creating a more watertight seal than traditional stitches.

  • Virtual Reality (VR) Surgical PlanningSurgeons use 3D reconstructions from scans to "rehearse" complex urological repairs before entering the operating room.

  • Optimal Timing: For children, the procedure is ideally scheduled between 6 and 18 months of age for faster healing and minimal psychological impact.

  • NPO Guidelines: Strict fasting instructions prior to surgery to ensure the safety of general anesthesia.

  • Hygiene and Skin Care: Ensuring the diaper area is free of rashes or infections before the scheduled surgery date.

  • Medication Review: Discussing any supplements or medications that could affect blood clotting.

  • Psychological Support: Providing "play therapy" or age-appropriate explanations for older children to reduce anxiety.

  • Retrograde Urethrogram: An X-ray test sometimes used alongside cystoscopy to map the urethral path.

  • Flow Rate Testing: Post-operative measurements to ensure the new urinary stream is strong and unobstructed.

  • Stent Management: Monitoring the drainage of the temporary stent to ensure proper kidney and bladder function.

  • Fistula Screening: Regular check-ups to ensure there are no unintended openings or "leaks" in the newly constructed channel.

  • Cosmetic Assessment: Evaluating the symmetry and appearance of the glans (tip) and the straightness of the penis.

  • Restored Functionality: Corrects the urinary stream, allowing for a normal standing position during urination and ensuring future reproductive health.

  • High Success Rates: Modern "TIP" repairs have a very high success rate with minimal complications for distal cases.

  • Comprehensive Diagnosis: The use of cystoscopy ensures that no internal anatomical surprises are missed before the external work begins.

  • Psychological Well-being: Early correction prevents the self-esteem issues that can arise from anatomical differences as a child grows.

  • Synergistic Care: Combining diagnosis and repair into a single session reduces the need for multiple anesthetic exposures.

  • Most patients go home the same day or after a single night of observation.

  • Double-diapering techniques are often used to protect the stent and keep the surgical site clean.

  • Pain management typically involves a combination of local nerve blocks administered during surgery and oral medications at home.

  • Baths are usually restricted for the first few days, though sponge baths are encouraged to maintain hygiene.

  • A follow-up visit is scheduled within the first 10 days to remove the stent and assess the early healing of the new urethra.

  • A normal, functional urinary stream directed from the tip of the penis.

  • A straight anatomical result that supports healthy physical and sexual development.

  • Significant reduction in the risk of long-term urological complications like strictures or infections.

  • Confidence for the child as they reach developmental milestones like potty training.

  • The peace of mind for parents knowing a complex congenital issue has been permanently resolved.

Kidney Cancer Treatment

Kidney cancer treatment involves a range of specialized medical and surgical interventions designed to eliminate malignant growths within the renal system. Modern clinical focus is centered on nephron-sparing techniques and precision immunotherapy, aiming to remove tumors while preserving maximum kidney function and preventing the systemic spread of Renal Cell Carcinoma (RCC).

  • Hematuria: The appearance of blood in the urine, which may look pink, red, or cola-colored.

  • Persistent Flank Pain: Pain or pressure in the side or lower back that is not related to an injury.

  • Abdominal Mass: The discovery of a palpable lump or mass in the side or abdominal area during a physical exam.

  • Unexplained Weight Loss: A sudden drop in weight accompanied by a persistent loss of appetite.

  • Chronic Fatigue: A general feeling of malaise or exhaustion that does not improve with rest.

  • Recurrent Fevers: Fevers that are not associated with a cold, flu, or other common viral infections.

  • Renal Cell Carcinoma (RCC): The most common form of kidney cancer, affecting the primary filtration cells of the kidney.

  • Histological Subtypes: Clear cell, papillary, or chromophobe renal malignancies, each requiring a tailored drug and surgical approach.

  • Hereditary Syndromes: Genetic conditions like Von Hippel-Landau (VHL) disease that can cause multiple tumors in both kidneys.

  • Small Renal Masses (SRMs): Tumors under 4 cm that require specialized characterization to avoid unnecessary major surgery.

  • Advanced Metastatic Disease: Kidney cancer that has spread beyond the primary site to the lungs, bones, or brain.

  • Partial Nephrectomy: A nephron-sparing surgery that removes only the tumor and a small margin of healthy tissue, preserving the rest of the kidney's function.

  • Radical Nephrectomy: The surgical removal of the entire kidney, often including the adrenal gland and nearby lymph nodes if the cancer is extensive.

  • Immuno-Oncology (IO) Combination: The use of drug duos (such as Nivolumab and Ipilimumab) to stimulate a powerful immune response against cancer cells.

  • Targeted Therapy: Precision medicines designed to treat specific growth signals, such as drugs used for VHL-associated tumors.

  • Thermal Ablation (Cryo/RFA): Minimally invasive techniques that use extreme cold or heat to "freeze" or "burn" small tumors in patients who cannot undergo surgery.

  • Adjuvant Immunotherapy: Post-surgical treatment used to reduce the risk of the cancer returning in patients considered to be at high risk for recurrence.

  • Precision Imaging: Specialized PET/CT imaging is utilized to distinguish between benign masses and malignant Renal Cell Carcinoma.

  • Histology Confirmation: If needed, a percutaneous (through the skin) biopsy may be conducted to identify the specific subtype of the tumor.

  • Robotic Surgery: Surgeons perform nephrectomies using robotic-assisted platforms to ensure maximum precision and smaller incisions.

  • Systemic Infusions: For advanced cases, combination immunotherapy infusions are administered in cycles to target cancer cells throughout the body.

  • Renal Monitoring: Ongoing monitoring of kidney function (creatinine levels) and blood pressure is maintained throughout the entire treatment process.

  • Staging Verification: Re-staging scans are performed after the primary intervention to ensure no microscopic disease remains.

  • Renal Reserve Evaluation: Testing the function of the unaffected kidney to ensure it can handle the body's filtration needs after the surgery.

  • Blood Pressure Optimization: Adjusting medications as directed, as kidney surgery and certain therapies can significantly impact blood pressure regulation.

  • Nutritional Mapping: Adhering to specific dietary guidelines to support the body’s ability to filter waste and heal after a renal procedure.

  • Surgical Roadmarking: Completing high-resolution 3D diagnostic mapping to provide the surgeon with a clear view of the complex renal blood vessels.

  • Recovery Logistics: Arranging for a period of rest following treatment that limits strenuous physical activity to protect the healing kidney.

  • PET/CT Scan: A diagnostic standard for accurately characterizing renal masses and identifying clear cell RCC.

  • Multiphasic CT or MRI: To determine the exact relationship between the tumor and the renal veins and arteries.

  • Glomerular Filtration Rate (GFR): A critical test to assess the current efficiency of the kidneys' filtration system.

  • Metabolic Panel: Comprehensive blood work to monitor for signs of anemia, hypercalcemia, or electrolyte imbalances.

  • Urinalysis: To check for the presence of microscopic blood cells and assess the overall health of the urinary tract.

  • Regular Surveillance: Routine imaging and blood tests every few months for the first several years to monitor the remaining kidney tissue.

  • Kidney-Healthy Lifestyle: Maintaining a balanced, often low-sodium diet and ensuring proper hydration to reduce the load on the kidneys.

  • Chronic Disease Management: Strict management of blood pressure and diabetes, as these are the leading causes of additional renal stress.

  • Toxin Avoidance: Permanent avoidance of smoking and environmental toxins known to irritate or damage the renal system.

  • Specialized Follow-up: Consistent consultations with both a nephrologist and an oncologist to ensure long-term wellness and organ function.

  • High Survival Rates: Localized cases achieve high survival rates through early detection and precise robotic surgery.

  • Targeted Success: Specific agents are used to manage hereditary cancers with significantly higher success than traditional chemotherapy.

  • Preserving Function: Prioritizing nephron-sparing approaches helps many patients avoid the long-term need for dialysis.

  • Durable Responses: Advanced combination immunotherapies can lead to long-term remission, even in some metastatic cases.

  • Rapid Recovery: Robotic-assisted minimally invasive technology helps reduce hospital stays and physical trauma to the body.

Bladder Cancer Surgery

Bladder cancer surgery ranges from minimally invasive procedures designed to preserve the organ to major reconstructive operations when the bladder must be removed. The specific surgical approach depends on the cancer's stage, its aggressiveness, and whether it has invaded the muscle layer of the bladder wall. These procedures are the primary treatment for eliminating tumors and preventing the spread of the disease to other organs.

  • Non-Muscle Invasive Bladder Cancer (NMIBC): For early-stage tumors that are located on the inner lining of the bladder and have not yet grown into the muscle.

  • Muscle-Invasive Bladder Cancer (MIBC): When the cancer has penetrated the deeper muscle layer of the bladder wall, requiring a more aggressive surgical approach.

  • Recurrent Tumors: If cancer returns after previous treatments or if the tumor grade is high (very aggressive).

  • Localized Muscle-Invasive Cancer: When the tumor is confined to a specific area that allows for partial removal while saving the rest of the bladder.

  • Diagnostic Necessity: A surgical biopsy is often the first step to accurately stage the cancer and determine the best long-term treatment plan.

  • Transurethral Resection of Bladder Tumor (TURBT): The most common procedure for early-stage cancer. A surgeon inserts a thin, lighted tool called a resectoscope through the urethra. An electric wire loop or laser is used to cut away or burn the tumor without any external incisions.

  • Partial Cystectomy: A specialized approach where only the cancerous portion of the bladder is removed. This is an option if the cancer is localized to one small area that can be removed without compromising the bladder's ability to hold urine.

  • Radical Cystectomy: The entire bladder is removed, along with nearby lymph nodes. In men, this often includes the prostate; in women, it may include the uterus and ovaries. This is the gold standard for treating muscle-invasive cancer.

  • Urinary Diversion (Reconstruction): If the entire bladder is removed, the surgeon creates a new way for the body to store and pass urine:
    Ileal Conduit (Urostomy): A piece of the small intestine creates a tube to carry urine to a stoma (opening) on the abdomen, draining into an external bag.
    Continent Urinary Reservoir: An internal pouch is made from the intestine. The patient empties the pouch several times a day using a thin catheter, avoiding an external bag.
    Neobladder Reconstruction: A new "bladder" is created from the intestine and connected to the urethra, allowing for more natural urination.

[Image showing the reconstruction of a neobladder using a segment of the intestine]

  • Cystoscopy: A visual inspection of the bladder using a camera to map the tumor's location and size.

  • Imaging (CT or MRI): Detailed scans to determine if the cancer has spread to nearby lymph nodes or other organs.

  • Bowel Prep: For radical surgery involving intestinal reconstruction, you may be required to follow a liquid diet and take laxatives a day before.

  • Fasting: Following "nothing by mouth" instructions for 8 hours prior to your scheduled anesthesia.

  • Anesthesia Consultation: A meeting to discuss general anesthesia or spinal blocks used during the procedure.

  • Urinalysis and Cytology: Testing urine for blood, infection, and the presence of microscopic cancer cells.

  • Blood Panels: A routine check of your blood count, electrolytes, and kidney function (creatinine levels).

  • Chest X-ray: To ensure the lungs are clear and the cancer hasn't spread to the chest area.

  • ECG: A standard heart check to confirm cardiovascular stability for the duration of the surgery.

  • Hospital Stay: TURBT patients often go home the same day. Radical cystectomy requires a hospital stay of approximately one week for monitoring and recovery.

  • Immediate Symptoms: You may experience blood in the urine (hematuria), frequent urges to go, or a burning sensation during urination for a few days.

  • Recovery Timeline: Full recovery from major surgery can take several weeks to months. Most patients return to light activities within 4–6 weeks.

  • Follow-up Care: Regular check-ups with a urologist and oncologist are essential. This includes periodic cystoscopies and scans to ensure the cancer has not returned.

  • Adjusting to Diversion: Patients with a neobladder or stoma will receive specialized training from a wound and ostomy nurse to manage their new urinary system.

  • Organ Preservation: Modern techniques like TURBT allow many patients to keep their natural bladder while effectively removing early-stage cancer.

  • Definitive Cancer Control: Radical cystectomy offers the highest chance of long-term survival for muscle-invasive bladder cancer by removing the primary source of the disease.

  • Reconstructive Excellence: Advanced neobladder surgery allows many patients to maintain a high quality of life with natural urinary function.

  • Minimally Invasive Options: Many bladder surgeries can now be performed robotically or laparoscopically, leading to less pain and faster healing.

  • Personalized Pathways: Surgeons can tailor the approach—from partial removal to complete reconstruction—based on the specific grade and location of your tumor.

Prostate Cancer Surgery

Prostate cancer treatment involves a range of clinical interventions aimed at managing or eliminating malignant cells within the prostate gland. Modern treatment focuses on high-precision oncology, utilizing robotic surgery and targeted radioligand therapies to address tumors while preserving urinary and reproductive function. This ensures a personalized approach based on the specific aggressiveness of the disease.

  • Increased Urinary Frequency: Particularly noticing the need to urinate more often during the night (nocturia).

  • Weak or Interrupted Flow: Noticing a hesitant, weak, or frequently interrupted urine stream.

  • Difficulty Starting: Struggling to start or maintain a consistent stream of urination.

  • Hematuria or Hematospermia: The presence of blood in the urine or the seminal fluid.

  • Discomfort: Persistent pain or a burning sensation during urination or ejaculation.

  • Chronic Pain: Persistent discomfort in the lower back, hips, or pelvic region that does not resolve with rest.

  • Adenocarcinoma: Confirmed prostate cancer often initially identified through elevated PSA (Prostate-Specific Antigen) levels.

  • High-Risk Tumors: Aggressive disease characterized by a high Gleason score (8–10).

  • Metastatic Disease: Cancer that has migrated beyond the gland to the bones or pelvic lymph nodes.

  • Recurrent Cancer: Cases where PSA levels begin to rise following initial surgical or radiation interventions.

  • Genetic Predispositions: Patients with inherited mutations such as BRCA1, BRCA2, or HOXB13, which may require specialized precision therapies.

  • Mapping: Multiparametric MRI (mpMRI) is utilized to visualize and map suspicious areas within the gland with high anatomical detail.

  • Biopsy: A targeted biopsy is conducted to confirm the presence of malignant cells and determine the precise grade of the tumor.

  • Robotic Surgery: A robotic-assisted radical prostatectomy is performed to remove the prostate gland with sub-millimeter precision, protecting adjacent nerves.

  • Hormonal Control: Androgen Deprivation Therapy (ADT) is administered via medication to reduce the testosterone levels fueling the cancer's growth.

  • Radioligand Therapy: Advanced systemic agents are introduced to the bloodstream to deliver radiation directly to cells expressing specific proteins like PSMA.

  • Monitoring: Regular follow-up testing of PSA levels is conducted to monitor the success of the treatment and ensure continued remission.

  • Robotic-Assisted Radical Prostatectomy: A minimally invasive surgical procedure to remove the entire prostate gland and nearby tissues through small incisions.

  • Active Surveillance: An intensive monitoring protocol for low-risk, slow-growing tumors designed to safely delay or avoid invasive intervention.

  • Stereotactic Body Radiation Therapy (SBRT): A highly targeted radiation treatment that delivers concentrated, high-dose beams to the tumor site while sparing healthy tissue.

  • Targeted Radioligand Therapy: An advanced treatment that seeks out and destroys cancer cells throughout the body by targeting the PSMA protein.

  • PARP Inhibitors: Precision medications used for patients with specific genetic mutations to block cancer cells from repairing their DNA.

  • Hormone Therapy (ADT): Systemic medications designed to "starve" cancer cells of the hormones they need to grow and spread.

  • Functional Consultation: Discuss potential impacts on urinary and sexual function with the surgical oncology team to set clear expectations.

  • Pelvic Floor Strength: Engage in pelvic floor exercises (Kegels) to strengthen the muscles responsible for continence before the procedure.

  • Clinical Guidelines: Adhere to strict fasting and medication instructions provided by the medical team.

  • Cardiovascular Assessment: Undergo a heart health evaluation to ensure readiness for a robotic surgical approach.

  • Recovery Planning: Arrange for a post-operative period that includes assistance with daily tasks during the initial phase of healing.

  • PSA Blood Test: To measure the current biochemical activity of the prostate gland.

  • Multiparametric MRI (mpMRI): To provide a detailed "roadmap" for the surgical or radiation oncology team.

  • Genomic Profiling: Testing the biopsy tissue to determine the exact Gleason score and the presence of specific genetic mutations.

  • PSMA PET/CT or Bone Scan: Advanced imaging to confirm whether the cancer is localized to the pelvis or has spread to the bones.

  • Comprehensive Blood Panels: A routine check of your blood count, electrolytes, and kidney function before the administration of anesthesia.

  • PSA Surveillance: Regular blood tests every few months to ensure PSA levels remain at undetectable or baseline levels.

  • Metabolic Health: Adoption of a heart-healthy diet and consistent exercise to support overall health and mitigate potential side effects of therapy.

  • Hormonal Management: Ongoing consultation with specialists to manage bone density, energy levels, and metabolic health.

  • Follow-up Imaging: Commitment to long-term diagnostic check-ups and scans as scheduled by your oncology team.

  • Wellness Support: Participation in survivor networks to navigate lifestyle changes and emotional health following treatment.

  • High Survival Rates: Localized prostate cancer boasts a nearly 100% five-year survival rate through early detection and modern intervention.

  • Radioligand Technology: Utilizes systemic radiation to treat advanced stages with significantly fewer side effects than traditional chemotherapy.

  • Nerve-Sparing Robotics: Employs advanced robotic systems that protect the vital nerve bundles responsible for urinary continence and sexual potency.

  • Genetic Personalization: Offers maintenance plans that target the specific genetic signature of your tumor for more durable results.

  • Combined Systemic Therapies: Significantly improves outcomes for metastatic patients through protocols that combine hormone, radiation, and targeted therapies.

Testicular Cancer Surgery

Testicular cancer surgery is the primary treatment for most stages of the disease. It serves two critical purposes: to physically remove the tumor and to provide a high-quality tissue sample for precise staging and molecular diagnosis. Because testicular cancer is highly treatable, surgery often represents the first and most important step toward a complete cure.

  • Palpable Mass: The discovery of a painless lump, hardness, or swelling in the scrotum.

  • Elevated Tumor Markers: High levels of Alpha-fetoprotein (AFP), Beta-HCG, or LDH found during blood testing.

  • Suspicious Ultrasound: Imaging that identifies a solid mass within the testicle that is not consistent with a benign cyst.

  • Staging and Diagnosis: When a definitive tissue sample is required to differentiate between seminoma and non-seminoma cell types.

  • Metastatic Spread: If imaging shows the cancer has moved to the retroperitoneal lymph nodes at the back of the abdomen.

  • Radical Inguinal Orchiectomy: This is almost always the first surgical step. It is an outpatient procedure performed under general or spinal anesthesia and typically takes 30 to 60 minutes.

  • The Incision: Unlike other scrotal surgeries, the incision is made in the groin (inguinal area). This specific approach prevents cancer cells from potentially spreading into the scrotal lymph nodes, protecting the integrity of the lymphatic system.

  • Removal: The entire affected testicle and the spermatic cord—which contains blood vessels and the primary lymph drainage pathway—are removed through this opening.

  • Prosthesis (Optional): If desired, a saline-filled silicone implant can be inserted during the same surgery to maintain a natural aesthetic appearance.

  • Closure: Internal layers are meticulously stitched, and the skin is typically closed with dissolvable sutures or surgical glue for a seamless recovery.

  • Retroperitoneal Lymph Node Dissection (RPLND): This may be required if imaging shows the cancer has spread to the lymph nodes at the back of the abdomen.

  • Robotic or Open Approach: This can be performed as an open surgery (midline incision) or as a minimally invasive robotic/laparoscopic procedure, depending on the complexity and location of the nodes.

  • Goal: To remove specific lymph nodes to prevent further spread and to determine if follow-up chemotherapy is necessary.

  • Scrotal Ultrasound: To confirm the presence of a solid mass and evaluate the health of the opposite testicle.

  • Sperm Banking: It is highly recommended to bank sperm before surgery or further treatment to ensure future fertility options are preserved.

  • Tumor Marker Blood Tests: Drawing blood for AFP, HCG, and LDH levels to establish a biochemical baseline.

  • Imaging (CT Scan): A scan of the chest, abdomen, and pelvis to determine if the cancer has spread beyond the primary site.

  • Fasting: Adhering to "nothing by mouth" instructions for 8 hours prior to your scheduled anesthesia.

  • Comprehensive Metabolic Panel: To check kidney and liver function before the administration of anesthesia.

  • Complete Blood Count (CBC): A routine check of your red and white blood cells and clotting factors.

  • Chest X-ray: To ensure the lungs are clear and the cancer has not affected the thoracic region.

  • ECG: A standard heart check to confirm cardiovascular stability for the procedure.

  • Hospital Stay: Most orchiectomy patients go home the same day. Patients undergoing RPLND typically stay in the hospital for 2 to 4 days for monitoring.

  • Initial Symptoms: Expect bruising, swelling, and mild soreness in the groin and scrotum for 1 to 2 weeks. Supportive underwear or a jockstrap is often recommended for comfort.

  • Activity Restrictions: No heavy lifting (over 5 kg) or strenuous exercise for 2 to 4 weeks. Most men return to light work or school within one week.

  • Hormones and Fertility: Since the remaining testicle usually produces sufficient testosterone and sperm, most men maintain a normal sex drive and fertility.

  • Long-term Surveillance: Regular follow-up appointments, blood tests, and scans are mandatory for several years to ensure continued remission.

  • Curative Potential: Testicular cancer is one of the most curable forms of cancer, with surgery often providing a complete resolution for early-stage cases.

  • Precise Staging: Obtaining the entire tumor allows pathologists to identify the exact cell type, which is vital for tailoring successful follow-up care.

  • Fertility Preservation: Modern surgical techniques and the recommendation of sperm banking ensure that your long-term family planning goals are protected.

  • Minimally Invasive RPLND: Robotic-assisted techniques allow for the removal of lymph nodes with smaller incisions, less pain, and a much faster return to normal activity.

  • Aesthetic Restoration: The availability of high-quality saline implants ensures that the physical changes from surgery do not impact your self-confidence or body image.

Lung Transplant Surgery

A lung transplant is a major surgical procedure to replace one or both diseased lungs with healthy donor lungs. It is typically a treatment of last resort for end-stage lung diseases that no longer respond to other medical therapies. The goal is to improve the patient's quality of life and extend life expectancy when other options have been exhausted.

  • End-Stage COPD (Emphysema): When chronic obstructive pulmonary disease has caused such severe damage that breathing is difficult even with supplemental oxygen.

  • Idiopathic Pulmonary Fibrosis: Progressive scarring of the lung tissue that prevents the lungs from transferring oxygen into the bloodstream.

  • Cystic Fibrosis: A genetic condition causing thick, sticky mucus to build up in the lungs, leading to repeated, life-threatening infections.

  • Pulmonary Hypertension: High blood pressure in the arteries of the lungs that can eventually lead to right-sided heart failure.

  • Alpha-1 Antitrypsin Deficiency: A genetic disorder that can cause severe lung and liver disease.

  • Single Lung Transplant: Replaces one damaged lung. This is often used for certain restrictive diseases like pulmonary fibrosis.

  • Double (Bilateral) Lung Transplant: Replaces both lungs simultaneously. This is the primary choice for infectious diseases like cystic fibrosis to ensure no infected tissue remains.

  • Heart-Lung Transplant: A rare procedure that replaces the heart and both lungs, usually for patients with severe pulmonary hypertension and concomitant heart failure.

  • Anesthesia: The procedure is highly complex and performed under general anesthesia.

  • Duration: A single transplant usually takes 4 to 8 hours, while a double transplant can take 6 to 12 hours.

  • Incision: For a single lung, an incision (thoracotomy) is made on the side of the chest. For a double lung, a horizontal "clamshell" incision is often made across the chest.

  • Support: During the surgery, you may be connected to a heart-lung bypass machine or ECMO (Extracorporeal Membrane Oxygenation) to circulate blood and oxygen.

  • Connection: Surgeons meticulously sew the new lung's main airway (bronchus) and major blood vessels (pulmonary artery and veins) to your own.

  • Transplant Evaluation: An extensive series of tests to ensure you are healthy enough for surgery and committed to a lifelong post-transplant regimen.

  • Psychological Assessment: To evaluate your support system and ability to manage complex medication schedules.

  • Pulmonary Rehab: Engaging in specialized exercise to keep your body as strong as possible while waiting for a donor match.

  • Vaccinations: Ensuring all immunizations are up to date, as your immune system will be suppressed after surgery.

  • The Waiting List: Once approved, you are placed on a national registry where donor lungs are matched based on blood type, organ size, and geographic distance.

  • Pulmonary Function Tests (PFTs): To measure exactly how much air your lungs can hold and how well they move gases.

  • Cardiac Catheterization: To check the pressure in your lung arteries and the overall strength of your heart.

  • Chest CT Scan: Providing high-resolution 3D images of your lung structure and chest cavity.

  • Tissue Typing: Matching your tissue markers with potential donors to reduce the risk of immediate organ rejection.

  • ECG and Stress Test: Ensuring your heart can withstand the rigors of a multi-hour major surgery.

  • Hospital Stay: Typically 1 to 3 weeks, with the first several days spent in the Intensive Care Unit (ICU) on a mechanical ventilator.

  • Lifelong Medication: You must take immunosuppressant (anti-rejection) drugs for the rest of your life to prevent your body from attacking the new lung.

  • Monitoring: Frequent follow-up visits, blood tests, and bronchoscopies (using a camera to look inside the lungs) are required, especially in the first year.

  • Physical Rehab: You will start walking within days of surgery and gradually progress to light exercise over 6 to 8 weeks.

  • Lifestyle Adjustments: Avoiding crowds during flu season, wearing masks in certain environments, and strict food safety are necessary to prevent infections.

  • Significant Survival Benefit: For many patients with end-stage disease, a transplant can extend life expectancy by many years.

  • Restored Breathing: Patients often transition from being housebound on oxygen to walking, traveling, and engaging in physical hobbies.

  • Advanced Surgical Support: The use of ECMO technology allows surgeons to perform transplants on the most critically ill patients with greater safety.

  • Comprehensive Care Teams: Post-transplant care involves a dedicated team of pulmonologists, surgeons, pharmacists, and coordinators to manage every aspect of recovery.

  • Improved Quality of Life: Beyond just survival, a successful transplant provides the "gift of breath," allowing for a return to a much more normal and active lifestyle.

Lobectomy (Lung cancer)

A Lobectomy is the surgical removal of an entire lobe of the lung. Since the right lung has three lobes and the left lung has two, this procedure removes a significant portion of lung tissue to treat localized conditions, most commonly Non-Small Cell Lung Cancer (NSCLC). By removing the affected lobe, surgeons aim to eliminate the primary tumor and prevent the spread of disease to the rest of the respiratory system.

  • Early-Stage Lung Cancer: It is the "gold standard" treatment for Stage I and Stage II Non-Small Cell Lung Cancer where the tumor is confined to a single lobe.

  • Tuberculosis (TB): In rare cases where a localized infection has caused extensive lung damage that does not respond to antibiotic therapy.

  • Bronchiectasis: When a portion of the lung's airways is permanently damaged and widened, leading to chronic infections and coughing up blood.

  • Fungal Infections: For localized fungal masses (aspergillomas) that carry a high risk of causing life-threatening bleeding.

  • Benign Tumors: Large non-cancerous growths that compress healthy lung tissue or interfere with normal breathing patterns.

  • Thoracotomy (Open Surgery): A traditional approach where a 6-to-10-inch incision is made on the side of the chest and the ribs are spread to provide direct access to the lung.

  • VATS (Video-Assisted Thoracoscopic Surgery): A minimally invasive method using 2–3 small "keyhole" incisions, a camera, and specialized long-handled instruments.

  • Robotic-Assisted Lobectomy: A variation of the minimally invasive approach that uses robotic arms controlled by the surgeon for higher precision in tight spaces.

  • Sleeve Lobectomy: A complex technique where a lobe is removed and the remaining parts of the airway are reconnected, often used to preserve more lung function.

  • Segmentectomy: Removing only a small segment of a lobe; occasionally considered if the patient's overall lung function is too weak for a full lobectomy.

  • Double-Lumen Intubation: Under general anesthesia, a special breathing tube is used to deflate the lung being operated on while the other lung continues to provide oxygen.

  • Access and Visualization: Depending on the chosen method, the surgeon enters the chest cavity and identifies the lobe containing the tumor or diseased tissue.

  • Vessel Dissection: The surgeon carefully identifies, clamps, and seals the three main structures connected to the lobe: the pulmonary artery, the pulmonary vein, and the bronchus (airway).

  • Lobe Removal: Once the blood supply and airway are disconnected, the diseased lobe is placed in a surgical bag and removed from the chest.

  • Lymph Node Dissection: Nearby lymph nodes are removed and tested to determine if the cancer has spread beyond the primary site.

  • Chest Tube Placement: A plastic tube is inserted through the chest wall to drain air, blood, and fluid, allowing the remaining lung tissue to re-expand and fill the space.

  • Pulmonary Function Test (PFT): A mandatory test to measure lung capacity and ensure the remaining lung tissue can support healthy breathing after surgery.

  • PET/CT Scan: High-resolution imaging used to confirm the cancer is localized and has not spread to other organs or distant lymph nodes.

  • Smoking Cessation: Patients must stop smoking at least 4 weeks prior to surgery to significantly reduce the risk of postoperative pneumonia and poor wound healing.

  • Cardiac Clearance: An EKG or stress test may be required to ensure the heart is strong enough to handle the physiological stress of lung surgery.

  • Fasting (NPO): No food or drink for 8–12 hours prior to the procedure to ensure safety under general anesthesia.

  • CT Angiography: To provide a detailed map of the pulmonary blood vessels and the tumor’s exact location relative to the heart.

  • Bronchoscopy: A thin camera is passed down the airway to inspect the bronchial tubes and confirm the tumor's boundaries.

  • Quantitative V/Q Scan: Occasionally used to predict exactly how much lung function will remain after the specific lobe is removed.

  • Blood Panels: Routine screens to check oxygen levels, kidney function, and blood clotting ability.

  • Hospital Stay: Typically 3 to 7 days; patients who undergo minimally invasive VATS or robotic surgery often recover and return home sooner.

  • Respiratory Therapy: Patients must use an incentive spirometer every hour and perform deep coughing exercises to keep the remaining lung clear of mucus.

  • Pain Management: Significant chest wall pain is expected; an epidural or specialized pain pump is often used for the first 48 hours to manage discomfort.

  • Early Mobilization: Walking is required within 24 hours of surgery to improve circulation and prevent blood clots in the legs (DVT).

  • Activity Resumption: Most patients return to normal daily activities within 6 to 12 weeks, though they may feel winded during heavy exercise for several months.

  • High Curative Potential: For early-stage lung cancer, removing the entire lobe offers the best chance for a long-term cure and cancer-free survival.

  • Prevents Spread: By removing the primary tumor and the associated lymph nodes, the surgery halts the progression of the disease to other parts of the body.

  • Diagnostic Certainty: Provides a large tissue sample for the pathology team to precisely stage the cancer and determine if further treatment is needed.

  • Improved Respiratory Health: In cases of chronic infection or bronchiectasis, removing the damaged lobe eliminates a constant source of illness and inflammation.

  • Long-Term Durability: For most patients, the remaining lung tissue expands and adapts, allowing for a healthy and active lifestyle after recovery.

Pneumonectomy (Cancer)

A pneumonectomy is the surgical removal of an entire lung. It is a major thoracic operation reserved for cases where a tumor is so centrally located or extensive that removing only a portion of the lung (like a lobectomy) would leave cancer cells behind. While it significantly impacts breathing capacity, many patients successfully adapt to living with one healthy lung through specialized pulmonary rehabilitation.

  • Central Tumors: When the cancer is located in the main bronchus (airway) or involves the main pulmonary artery or vein.

  • Multi-Lobar Involvement: When the tumor crosses the anatomical fissures and involves all lobes of a single lung.

  • Locally Advanced NSCLC: For Stage II or III Non-Small Cell Lung Cancer that cannot be cleared by a "sleeve" resection.

  • Malignant Mesothelioma: An Extrapleural Pneumonectomy may be performed to remove the lung, the lining (pleura), part of the diaphragm, and the heart sac (pericardium).

  • Recurrent Cancer: When cancer returns in a lung that has previously undergone a partial removal (Completion Pneumonectomy).

  • Traditional Pneumonectomy: Removal of the entire left or right lung.

  • Extrapleural Pneumonectomy (EPP): A radical version often used for mesothelioma, removing the lung along with surrounding membranes and a portion of the diaphragm.

  • Completion Pneumonectomy: The removal of the remaining part of a lung after a previous surgery has already been performed.

  • Carinal Pneumonectomy: A highly complex procedure where the lung is removed along with the "fork" of the windpipe (carina), followed by reconstruction of the airway.

  • One-Lung Ventilation: Performed under general anesthesia using a special tube that allows the surgeon to deflate the lung being removed while the other lung is safely ventilated.

  • Thoracotomy Access: Usually requires an incision around the side to the back (posterolateral thoracotomy) to provide the best view of the major heart and lung vessels.

  • Vascular Ligation: The main pulmonary artery and pulmonary veins are carefully tied off and divided using surgical staplers.

  • Bronchial Stump Closure: The main airway is cut close to the windpipe and sealed. Surgeons often reinforce this "stump" with a flap of nearby tissue to prevent air leaks.

  • The "Empty" Cavity: Unlike other lung surgeries, a chest tube is often not used for suction afterward. The empty space naturally fills with fluid over time, which eventually turns into a gel-like substance to prevent the heart from shifting too far.

  • Extensive PFTs: Comprehensive Pulmonary Function Tests to calculate exactly how much breathing capacity you will have left with just one lung.

  • Cardiac Stress Testing: Because removing a lung puts extra pressure on the heart, an Echocardiogram or Stress Test is mandatory to ensure the heart is strong enough.

  • Nutritional Optimization: A high-protein, calorie-dense diet is started weeks before to ensure the body can handle the significant healing required.

  • Pre-habilitation: Specialized exercises to strengthen the "good" lung and the muscles used for breathing before the surgery begins.

  • Smoking Cessation: Total cessation is required at least 4–8 weeks prior to reduce the high risk of post-operative pneumonia.

  • PET-CT and Brain MRI: To confirm that the cancer has not spread outside of the lung being removed.

  • EBUS / Mediastinoscopy: Biopsies of the lymph nodes in the center of the chest to ensure the cancer is still "resectable."

  • V/Q Scan: A quantitative Ventilation/Perfusion scan to determine the percentage of lung function contributed by each lung.

  • Baseline ABG: An Arterial Blood Gas test to measure the current oxygen and carbon dioxide levels in your blood.

  • Blood Type & Cross-match: Due to the risk of bleeding from major vessels, blood is held in reserve for the procedure.

  • ICU Stay: Most patients spend the first 24–48 hours in the Surgical Intensive Care Unit for close monitoring of heart rhythm and oxygen levels.

  • Hospital Timeline: Expect a stay of 7 to 10 days. Recovery at home typically takes 2 to 4 months.

  • Atrial Fibrillation (AFib): Common (up to 30%) as the heart adjusts to new pressures in the chest; it is usually temporary and managed with medication.

  • Shortness of Breath: You will likely feel breathless with heavy exertion, but most patients can perform daily activities without supplemental oxygen.

  • Post-Pneumonectomy Syndrome: A rare late complication where the heart shifts too far into the empty space; modern techniques use tissue flaps or fillers to prevent this.

  • Definitive Local Control: It is the most aggressive way to ensure a "clean margin" when a tumor is large or centrally located.

  • Lung Adaptation: The remaining lung undergoes "compensatory hyperinflation," expanding slightly and becoming more efficient at gas exchange over time.

  • Integrated 2026 Care: Combined with modern neoadjuvant immunotherapy, a pneumonectomy can provide long-term survival for cases previously considered inoperable.

  • Pulmonary Rehab: Supervised rehabilitation programs significantly improve "one-lung" quality of life, helping patients return to travel and hobbies.

Lung Biopsy (Surgical)

A Surgical Lung Biopsy is an invasive procedure used to remove a sample of lung tissue for laboratory analysis, typically when less invasive methods—such as needle biopsies—cannot provide a definitive diagnosis. It is a critical diagnostic tool used to identify lung cancer, interstitial lung diseases, or chronic infections. By obtaining a larger tissue sample, pathologists can more accurately determine the exact nature of a lung abnormality and guide a specific treatment plan.

  • Inconclusive Needle Biopsy: When previous, less invasive tests have failed to provide a clear diagnosis of a lung mass or nodule.

  • Interstitial Lung Disease (ILD): To identify the specific pattern of scarring or inflammation in the lung tissue to determine the best course of medication.

  • Complex Lung Infections: When a patient has a persistent infection that has not responded to standard treatments and the specific pathogen remains unknown.

  • Staging Lung Cancer: To confirm if a known cancer has spread to different areas of the lung or to evaluate the characteristics of a secondary nodule.

  • Unexplained Lung Nodules: For a suspicious spot on an X-ray or CT scan that is located in an area difficult to reach with a traditional biopsy needle.

  • VATS (Video-Assisted Thoracoscopic Surgery): The preferred, minimally invasive method where a surgeon makes 1–3 small "keyhole" incisions to insert a camera (thoracoscope) and surgical tools.

  • Open Lung Biopsy (Limited Thoracotomy): A traditional approach involving a larger incision between the ribs to access the lung directly; this is typically reserved for complex cases where VATS is not feasible.

  • Robotic-Assisted Thoracoscopic Biopsy: A modern variation of VATS that uses robotic precision to navigate tight spaces within the chest cavity.

  • Frozen Section Analysis: A technique where the removed tissue is immediately frozen and examined by a pathologist while the patient is still in surgery to guide the next surgical steps.

  • Transbronchial Cryobiopsy: A specialized method using a bronchoscope and freezing probe; while less invasive than surgery, it is sometimes used in conjunction with surgical planning.

  • Accessing the Chest: Under general anesthesia, the surgeon creates the necessary incisions (either keyhole for VATS or a single larger opening for an open biopsy).

  • Lung Deflation: A specialized breathing tube is used to temporarily deflate the lung being biopsied, allowing the surgeon a clear view of the tissue.

  • Tissue Resection: Using specialized surgical staplers or instruments, the surgeon removes a small, wedge-shaped piece of lung tissue containing the abnormality.

  • Site Inspection: The surgeon checks the remaining lung tissue for bleeding or air leaks before the procedure is finalized.

  • Chest Tube Placement: A plastic drainage tube is almost always inserted through the chest wall to drain air, blood, or fluid and help the lung re-expand.

  • Incision Closure: The surgical incisions are closed with sutures or surgical staples, and a protective dressing is applied to the site.

[Image showing the placement of a chest tube following lung surgery]

  • Medication Adjustment: Blood thinners (such as Warfarin, Plavix, or Eliquis) must be stopped several days prior as instructed to minimize the risk of bleeding.

  • Pulmonary Evaluation: Reviewing previous CT scans and X-rays to map the exact location of the tissue sample needed.

  • Physical Assessment: A thorough exam and blood tests to ensure the patient is a safe candidate for general anesthesia.

  • Smoking Cessation: Patients are strongly encouraged to stop smoking at least 4 weeks prior to surgery to reduce the risk of postoperative pneumonia.

  • Fasting (NPO): Patients must typically fast for at least 8 hours before the procedure to ensure safety during anesthesia.

  • High-Resolution CT Scan: To provide the surgeon with a detailed 3D map of the lung nodules or areas of interstitial disease.

  • Pulmonary Function Tests (PFTs): To measure baseline lung capacity and ensure the patient can tolerate the temporary lung deflation during surgery.

  • Electrocardiogram (EKG): To check heart health and ensure there are no underlying cardiac issues before undergoing a major procedure.

  • Basic Metabolic Panel (BMP): Routine blood work to check kidney function and electrolyte levels.

  • Hospital Stay: Patients usually remain hospitalized for 1 to 3 days to monitor lung expansion and manage the chest tube.

  • Chest Tube Management: The drainage tube is typically removed once the surgeon confirms there are no air leaks and the lung remains fully inflated.

  • Respiratory Care: Deep breathing exercises and the use of an incentive spirometer are essential to keep the lungs clear and prevent infection.

  • Pain Management: Discomfort at the incision site and referred shoulder pain are common; these are managed with oral medications or IV drips.

  • Activity Resumption: Patients are encouraged to walk within 24 hours of surgery, but strenuous activity and heavy lifting must be avoided for several weeks.

  • Definitive Diagnosis: Provides a much larger and more representative tissue sample than a needle biopsy, significantly increasing diagnostic accuracy.

  • Guides Targeted Treatment: Allows doctors to identify the specific type of lung disease, ensuring the most effective medications or therapies are used.

  • Immediate Surgical Decisions: If a "frozen section" confirms cancer, the surgeon can sometimes proceed immediately with a curative procedure like a lobectomy.

  • Identifies Rare Conditions: Is often the only way to accurately diagnose complex interstitial lung diseases or rare fungal infections.

  • Long-Term Peace of Mind: Resolves the uncertainty of suspicious lung findings that could not be identified through other means.

Mediastinal Lymph Node Dissection (Cancer)

Mediastinal Lymph Node Dissection (MLND) is a surgical procedure to remove the lymph nodes located in the mediastinum—the central area of the chest between the lungs. It is a critical component of lung cancer surgery. Rather than just taking a sample, the surgeon removes all the lymph nodes and surrounding fat within specific "stations" to ensure any microscopic cancer spread is captured. This procedure is the gold standard for accurate pathologic staging, which dictates whether a patient needs further treatment like immunotherapy or chemotherapy.

  • Lung Cancer Surgery: Performed as a mandatory part of a lobectomy or pneumonectomy for Non-Small Cell Lung Cancer (NSCLC).

  • Staging Accuracy: When imaging (PET-CT) suggests nodes might be involved, or even if they look normal but the primary tumor is large.

  • Thymic Tumors: For patients with thymoma or thymic carcinoma to check for regional spread.

  • Esophageal Cancer: Often included in an esophagectomy to clear the lymphatic drainage path of the esophagus.

  • Diagnostic Uncertainty: When non-surgical biopsies (like EBUS) are inconclusive but suspicion of nodal involvement remains high.

  • Robotic-Assisted (RATS) Dissection: The preferred modern tool for MLND. Its 3D magnification allows surgeons to see tiny nerves and vessels clearly, making it safer to remove nodes deep in the chest.

  • Video-Assisted Thoracoscopic (VATS) Dissection: A minimally invasive approach using a camera and specialized instruments through small "keyhole" incisions.

  • Open Thoracotomy Dissection: Usually performed through the same large incision used for an open lung resection, allowing for direct manual access to the mediastinum.

  • Mediastinoscopy: A separate, smaller surgical procedure where a scope is inserted through a small notch at the base of the neck to reach the upper nodal stations.

  • Systematic Nodal Sampling: A less extensive version where only representative nodes are taken, though full dissection (MLND) is preferred for more accurate staging.

  • Surgical Access: The surgeon enters the chest cavity using the same approach selected for the primary lung or esophageal resection.

  • Anatomical Exposure: The surgeon opens the thin lining (pleura) over the mediastinum to expose the fat pads containing the lymph nodes near the trachea, esophagus, and heart.

  • Systematic Clearance: All lymphoid tissue and surrounding fat within the targeted "stations" are meticulously removed.

  • Nerve Preservation: Great care is taken to identify and protect the Phrenic nerve (for breathing) and the Recurrent Laryngeal nerve (for the voice) that run through the mediastinum.

  • Hemostasis: Using advanced energy devices like ultrasonic scalpels, the surgeon seals small lymphatic channels and blood vessels to prevent fluid buildup or "oozing."

  • Pathology Review: The removed nodes are labeled by their specific station number and sent to a lab where a pathologist examines them under a microscope for cancer cells.

  • PET-CT Scan: To identify which nodal stations show "metabolic activity," helping the surgeon prioritize specific areas for thorough dissection.

  • EBUS-TBNA: Many patients undergo an Endobronchial Ultrasound biopsy before surgery to "pre-stage" the nodes and plan the extent of the dissection.

  • Cardiovascular Review: Since the surgery occurs near the heart and great vessels, ensuring stable heart function is vital for a safe procedure.

  • Anticoagulation Management: Stopping blood thinners is critical, as MLND involves working around highly vascular structures where bleeding must be strictly controlled.

  • Incentive Spirometry: Strengthening the lungs before the procedure to ensure you can cough effectively and clear your airway post-operatively.

  • High-Resolution Chest CT: To map the anatomy of the lymph nodes in relation to the laryngeal nerve and the superior vena cava.

  • Endobronchial Ultrasound (EBUS): To provide a preliminary assessment of the nodes through the airway before the definitive surgical removal.

  • Chest MRI: Sometimes used if nodes are near the spine or major nerves to evaluate if the tumor has invaded those structures.

  • Blood Coagulation Profile: To ensure the body can effectively stop minor oozing from the lymphatic channels after the nodes are removed.

  • Baseline Vocal Assessment: Since nerves controlling the voice box are located in the mediastinum, a baseline check of the voice is often performed for comparison after surgery.

  • Chest Tube Management: You will have a chest tube for a few days to drain any fluid or air; it is removed once the drainage levels from the dissection site are safe.

  • Vocal Cord Monitoring: A temporary hoarse voice can occur if the laryngeal nerve is irritated during the dissection; most cases recover with time and specialized therapy.

  • Dietary Adjustments: In rare cases of "Chylothorax" (lymphatic fluid leak), a specific low-fat diet may be required for a short period to allow the duct to heal.

  • Pain Management: Dissection near the ribs and spine can cause localized "aching" or soreness; this is managed with nerve blocks and oral medications.

  • Follow-up Treatment: The final "nodal status" (Pathology Report) typically takes 5–7 days and is the most important factor in determining if you need follow-up chemotherapy or immunotherapy.

  • Definitive Staging: MLND provides the most accurate "N" (Nodal) stage, which is far more precise than a PET-CT or EBUS biopsy alone.

  • Reduced Recurrence: Removing all nodes in a station (rather than just sampling) significantly lowers the chance of the cancer returning in the center of the chest.

  • Adjuvant Guidance: Knowing exactly which nodes are involved allows oncologists to prescribe targeted therapies or immunotherapies that can significantly improve survival rates.

  • Minimal Impact on Recovery: When performed robotically or thoracoscopically, adding MLND to a lung resection adds very little time to the hospital stay but provides invaluable data.

  • Comprehensive Clearance: Ensures that any microscopic clusters of cancer cells in the regional lymph system are physically removed from the body.

Thymectomy
Thymectomy

Thymectomy is the surgical removal of the thymus gland, located in the upper chest directly behind the breastbone (sternum). This procedure is primarily performed to treat Myasthenia Gravis (MG), an autoimmune disorder, or to remove tumors of the thymus known as thymomas. While the thymus is critical for immune development in childhood, it often shrinks and becomes less active in adults, allowing for its safe removal when medically necessary.

  • Myasthenia Gravis (MG): For patients with generalized MG, removal of the thymus often improves muscle weakness, reduces the need for heavy medications, and can lead to long-term remission.

  • Thymoma: The discovery of a tumor within the thymus gland, which requires removal to prevent the growth or spread of potentially cancerous cells.

  • Thymic Carcinoma: A more aggressive form of thymic cancer that necessitates a complete surgical resection of the gland and surrounding tissue.

  • Thymic Hyperplasia: When the thymus gland is abnormally enlarged and contributing to autoimmune symptoms.

  • Ocular Myasthenia: In specific cases where eye-related muscle weakness does not respond to standard medical therapies.

  • Robotic-Assisted Thymectomy: A modern, minimally invasive approach that uses robotic arms for extreme precision in the tight space between the heart and the breastbone.

  • Video-Assisted Thoracoscopic Surgery (VATS): A minimally invasive technique using 3 small incisions on the side of the chest and a camera to visualize and remove the gland.

  • Transsternal (Open) Thymectomy: The traditional method where the surgeon splits the breastbone (sternum) to provide a wide, direct view of the entire mediastinum.

  • Transcervical Thymectomy: A less common approach where the gland is removed through a small incision in the lower neck, typically used for non-cancerous cases.

  • Extended Thymectomy: A more thorough removal that includes the thymus and all surrounding fat in the chest to ensure no microscopic thymic tissue remains.

  • Surgical Access: Depending on the method, the surgeon either splits the sternum or makes small "keyhole" incisions between the ribs to reach the thymus.

  • Gland Isolation: The surgeon carefully separates the thymus from the pericardium (the sac around the heart) and the large blood vessels in the chest.

  • Nerve Identification: Critical care is taken to identify and protect the phrenic nerves, which run along both sides of the thymus and control the diaphragm for breathing.

  • Vessel Ligation: The small veins and arteries supplying the thymus are sealed and cut using specialized surgical clips or energy devices.

  • Complete Resection: The entire gland is removed, often along with the surrounding fatty tissue, to ensure a complete treatment for MG or cancer.

  • Chest Tube Placement: A temporary drainage tube is often placed in the chest cavity to remove any air or fluid and ensure the lungs re-expand properly after surgery.

  • Diagnostic Imaging: A CT scan or MRI of the chest is mandatory to visualize the gland’s size and its relationship to the heart, lungs, and major vessels.

  • Medical Optimization: For MG patients, symptoms must be strictly controlled with medications like pyridostigmine or treatments like plasmapheresis to prevent a post-operative breathing crisis.

  • Pulmonary Evaluation: Breathing tests (spirometry) to ensure the respiratory muscles are strong enough to handle the recovery period.

  • Smoking Cessation: Stopping smoking at least 4 weeks prior to surgery is essential to reduce the risk of pneumonia and support wound healing.

  • Fasting (NPO): No food or drink for 8–12 hours before the procedure to ensure safety under general anesthesia.

  • Chest CT with Contrast: The primary test used to map the anatomy of the thymus and check for any signs of tumor invasion into nearby structures.

  • Acetylcholine Receptor (AChR) Antibody Test: A blood test used to confirm the diagnosis of Myasthenia Gravis and monitor the severity of the autoimmune response.

  • Electrocardiogram (EKG): To ensure heart health before undergoing a procedure that occurs in close proximity to the heart and great vessels.

  • Basic Metabolic Panel: Routine blood work to check electrolyte levels and kidney function before general anesthesia.

  • Hospital Stay: Patients who undergo minimally invasive surgery typically stay 1 to 2 days, while open surgery patients may require 3 to 5 days for the breastbone to stabilize.

  • Pain Management: Significant chest wall soreness is expected; patients are managed with oral medications and occasionally nerve blocks for the first few days.

  • Respiratory Care: Using an incentive spirometer and performing deep breathing exercises every hour is critical to prevent lung collapse and infection.

  • Activity Restrictions: If the sternum was split, heavy lifting and driving are restricted for 4 to 6 weeks to allow the bone to heal (similar to a broken arm).

  • Long-Term Monitoring: Improvement in MG symptoms is not immediate and can take 6 months to 2 years; cancer patients will require regular CT scans to check for recurrence.

  • High Remission Rates: For many MG patients, surgery offers the best chance at achieving a medication-free life or significantly reducing symptom severity.

  • Prevents Cancer Spread: Early removal of a thymoma prevents the tumor from growing into the lungs, heart, or lining of the chest.

  • Minimally Invasive Options: Modern robotic and VATS techniques allow for a much faster recovery and less scarring than traditional open chest surgery.

  • Stabilizes Immune Function: By removing the source of abnormal antibodies in MG, the surgery helps the body return to a more balanced immune state.

  • Curative for Thymoma: Complete surgical resection remains the most effective cure for localized tumors of the thymus gland.

Pleurectomy / Decortication

Pleurectomy and Decortication are major thoracic surgeries often performed together to treat diseases of the pleura (the lining of the lungs). While a pleurectomy involves the surgical removal of the diseased lining, decortication focuses on "peeling" off a thick layer of inflammatory or scar tissue—often called a "rind"—that is trapping the lung and preventing it from expanding. Together, these procedures aim to restore lung function and alleviate the chronic "heaviness" or shortness of breath caused by pleural disease.

  • Malignant Pleural Mesothelioma: Used as a lung-sparing surgical option to remove as much cancer as possible from the chest lining.

  • Chronic Empyema: When a long-term infection or pus buildup has created a thick, restrictive layer of scar tissue around the lung.

  • Persistent Pleural Effusions: For patients with recurring fluid buildup that has led to a "trapped lung" that can no longer expand on its own.

  • Fibrothorax: When the lung is encased in a rigid layer of fibrous tissue following a previous injury, infection, or inflammatory condition.

  • Chronic Hemothorax: To remove old, clotted blood and the resulting scar tissue that has formed after a traumatic chest injury.

  • Open Thoracotomy: The traditional and most common approach, involving a 6–10 inch incision on the side of the chest to provide the surgeon with maximum access for the meticulous "peeling" process.

  • Video-Assisted Thoracoscopic Surgery (VATS): A minimally invasive method used in earlier stages of infection or cancer, utilizing small "keyhole" incisions and a camera.

  • HIPE (Hyperthermic Intrathoracic Chemotherapy): An advanced technique where heated chemotherapy is circulated within the chest cavity during surgery to target remaining cancer cells.

  • Extended Pleurectomy/Decortication: A more radical version that may include removing the diaphragm or the sac around the heart (pericardium) if the disease has spread to those areas.

  • Robotic-Assisted Decortication: A modern variation of the minimally invasive approach that offers enhanced precision for separating delicate scar tissue from the lung surface.

  • Surgical Access: Under general anesthesia, the surgeon enters the chest cavity—usually through a thoracotomy—and deflates the lung on the affected side.

  • Pleurectomy: The surgeon meticulously strips away the parietal pleura (the lining attached to the ribs and chest wall), systematically removing the source of disease.

  • Decortication: In this highly delicate stage, the surgeon "peels" the thick, restrictive fibrous rind off the surface of the lung (the visceral pleura).

  • Lung Re-expansion: The surgeon gently inflates the lung to ensure it can now fill the chest cavity and that the fibrous "trap" has been successfully removed.

  • Hemostasis and Air Leak Check: The lung surface is carefully inspected for tiny holes or bleeding points, which are sealed using surgical glues, staples, or sutures.

  • Chest Tube Placement: Two or three large drainage tubes are placed in the chest to remove air, blood, and fluid, ensuring the lung remains expanded during the healing process.

[Image showing a thoracotomy incision and the removal of the pleural lining]

  • Imaging and Mapping: High-resolution CT scans or MRIs are mandatory to assess the thickness of the rind, while a PET scan may be used to evaluate cancer activity.

  • Pulmonary Function Tests (PFTs): Essential tests to measure baseline lung capacity and ensure the patient can tolerate the temporary deflation of the lung during surgery.

  • Smoking Cessation: Patients must stop smoking at least 4 weeks prior to the procedure to significantly reduce the risk of postoperative pneumonia.

  • Nutritional Support: Because this is an extensive surgery, optimizing protein and calorie intake is vital to support complex tissue healing.

  • Fasting (NPO): No food or drink for 8–12 hours before the surgery to ensure safety under general anesthesia.

  • Chest CT with Contrast: The primary tool used to visualize the "pleural peel" and plan the surgical approach.

  • Quantitative V/Q Scan: Occasionally performed to predict exactly how much each lung is contributing to the patient’s overall breathing.

  • Electrocardiogram (EKG): To ensure heart health, as the procedure involves working near the heart and major blood vessels.

  • Complete Blood Count (CBC): To check for underlying infection (high white blood cell count) or anemia before a procedure where blood loss can be significant.

  • Hospital Stay: Typically 7 to 14 days; the stay depends heavily on how long it takes for the "air leaks" on the lung surface to seal and for the chest tubes to be removed.

  • Pain Management: This is considered one of the most painful surgical recoveries; patients often receive an epidural or specialized nerve blocks for the first few days.

  • Intensive Respiratory Therapy: Frequent use of an incentive spirometer and deep coughing exercises are mandatory to keep the lung expanded and prevent infection.

  • Early Mobilization: Patients are encouraged to sit up and walk within 24 hours of surgery to improve circulation and prevent blood clots (DVT).

  • Long-Term Recovery: It typically takes 8 to 12 weeks to return to normal energy levels, with dramatic improvements in breathing often felt once the chest wall has healed.

  • Restores Lung Capacity: By removing the restrictive rind, the lung can once again expand and provide oxygen, significantly improving quality of life.

  • Cytoreduction in Cancer: Effectively removes the vast majority of visible tumor in mesothelioma cases, allowing follow-up treatments to work more effectively.

  • Clears Chronic Infection: Provides a definitive cure for trapped infections (empyema) that cannot be drained by simple needles or tubes.

  • Reduces Chest Heaviness: Alleviates the chronic, "tight" sensation and pain associated with a thickened and scarred pleural lining.

  • Lung-Sparing Approach: Unlike a pneumonectomy, this procedure preserves the lung tissue itself, maintaining a higher level of long-term respiratory function.

Video-Assisted Thoracoscopic Surgery (VATS)

Video-Assisted Thoracoscopic Surgery (VATS) is a minimally invasive surgical technique used to diagnose and treat conditions within the chest (thorax). Instead of a large open incision (thoracotomy), the surgeon utilizes a small camera called a thoracoscope and specialized long-handled instruments inserted through several "keyhole" incisions. This modern approach allows for complex thoracic procedures to be performed with significantly less trauma to the chest wall, leading to faster recovery times and reduced postoperative pain.

  • Lung Cancer Diagnosis: When a suspicious nodule or mass is found on a CT scan and requires a precise tissue biopsy for staging.

  • Early-Stage Lung Cancer Treatment: For the removal of a lung lobe (lobectomy) or a smaller segment (wedge resection) when the tumor is localized.

  • Recurrent Collapsed Lung (Pneumothorax): To repair leaks on the lung surface and perform pleurodesis to prevent the lung from collapsing again.

  • Pleural Effusion: To drain persistent fluid buildup around the lungs and biopsy the chest lining to find the underlying cause.

  • Mediastinal Tumors: For the removal of the thymus gland (thymectomy) or other growths located in the center of the chest.

  • Hyperhidrosis: To perform a sympathectomy, which involves cutting specific nerves to treat excessive hand sweating.

  • VATS Lobectomy: The most common major VATS procedure, involving the removal of an entire lobe of the lung through small incisions.

  • VATS Wedge Resection: Removing a small, triangle-shaped slice of the lung to excise a localized tumor or perform a biopsy.

  • VATS Pleurodesis: A procedure where the lung is intentionally adhered to the chest wall to prevent fluid or air from accumulating in the pleural space.

  • VATS Decortication: Using thoracoscopic tools to "peel" a restrictive layer of infected or fibrous tissue off the lung surface.

  • VATS Sympathectomy: A specialized nerve-interruption procedure performed through the chest to treat severe sweating or certain vascular conditions.

  • Uniportal VATS: An advanced variation where the entire surgery is performed through a single small incision rather than three.

  • Double-Lumen Intubation: Under general anesthesia, a specialized breathing tube is used to deflate the lung on the operative side, providing the surgeon with a clear space to work.

  • Keyhole Access: The surgeon makes 2 to 3 small incisions (approximately 1–3 cm each) between the ribs, avoiding the need to spread or cut the ribs themselves.

  • High-Definition Visualization: The thoracoscope is inserted, transmitting magnified, high-definition images of the lungs and pleura to a video monitor in the operating room.

  • Instrument Navigation: Using specialized long-handled surgical tools, the surgeon performs the dissection, suturing, or stapling required for the specific procedure.

  • Specimen Removal: If a piece of tissue or a lobe is removed, it is placed in a small surgical bag and pulled through one of the keyhole incisions.

  • Chest Tube Placement: At the end of the procedure, a temporary drainage tube is placed through one of the incisions to help the lung re-expand and drain any residual fluid.

[Image showing the internal view of a lung via a thoracoscope during VATS]

  • Diagnostic Mapping: Reviewing recent CT scans or PET scans to precisely locate the area of interest within the chest.

  • Pulmonary Function Test (PFT): Mandatory testing to ensure the patient's breathing capacity is sufficient for surgery and temporary lung deflation.

  • Cardiac Clearance: Ensuring the heart is healthy enough for general anesthesia, often involving an EKG or stress test.

  • Medication Management: Patients must stop blood-thinning medications several days before the procedure as directed by their surgical team.

  • Fasting (NPO): No food or drink for 8–12 hours prior to the procedure to ensure patient safety during anesthesia.

  • Chest X-ray and CT Scan: To provide a visual roadmap of the lungs, ribs, and major blood vessels before the incisions are made.

  • Complete Blood Count (CBC): To check for signs of infection or anemia that could affect surgical outcomes.

  • Coagulation Profile: To confirm the blood's ability to clot properly, minimizing the risk of bleeding during the minimally invasive dissection.

  • Basic Metabolic Panel: To assess kidney function and electrolyte balance before receiving anesthesia.

  • Hospital Stay: Patients typically remain in the hospital for 2–4 days, which is significantly shorter than the stay required for traditional open surgery.

  • Chest Tube Removal: The drainage tube is usually removed within 24–72 hours once the surgeon confirms the lung is fully expanded and there are no air leaks.

  • Pain Management: Postoperative discomfort is generally well-managed with oral medications and occasionally a local nerve block near the incision sites.

  • Incentive Spirometry: Regular use of a breathing device is required to help the lungs re-expand and prevent postoperative pneumonia.

  • Activity Resumption: Most patients can return to light daily activities and work within 2 to 4 weeks, though heavy lifting should be avoided for a month.

  • Significantly Less Pain: Because the ribs are not spread with a metal retractor, there is far less trauma to the chest wall and intercostal nerves.

  • Reduced Risk of Infection: Smaller incisions result in a lower rate of wound complications and less overall stress on the immune system.

  • Faster Return to Normalcy: Patients experience a much quicker recovery of their physical strength and lung function compared to open thoracotomy.

  • Minimal Scarring: The "keyhole" incisions heal with very small, often barely visible scars compared to the large incision of traditional surgery.

  • Shorter Hospitalization: Most patients return to the comfort of their own homes days sooner, reducing the risk of hospital-acquired complications.

Thoracoabdominal Aneurysm Repair

Thoracoabdominal Aortic Aneurysm (TAAA) Repair is one of the most extensive and technically demanding operations in vascular surgery. It involves repairing an aneurysm that spans both the thorax (chest) and the abdomen, affecting the critical segment of the aorta that supplies blood to the spinal cord, kidneys, liver, and intestines. Because this surgery involves the "vital zone" of the aorta, it requires sophisticated organ protection strategies to prevent permanent damage to these life-sustaining systems.

  • Critical Aneurysm Size: When the diameter of the thoracoabdominal aorta exceeds 5.5–6.0 cm, where the risk of rupture outweighs the risks of surgery.

  • Rapid Expansion: If serial CT scans show the aneurysm is growing by more than 0.5 cm within a six-month period.

  • Symptomatic Aneurysms: For patients experiencing new-onset back, chest, or abdominal pain, which may indicate an impending rupture.

  • Connective Tissue Disorders: Patients with Marfan Syndrome or Loeys-Dietz Syndrome often require earlier intervention due to a higher risk of aortic dissection.

  • Acute Aortic Dissection: When a tear in the aortic wall extends from the chest into the abdomen, compromising blood flow to the kidneys or gut.

  • Open Surgical Repair: The traditional "gold standard" involving a large incision and direct replacement of the aorta with a synthetic Dacron graft.

  • Fenestrated Endovascular Repair (FEVAR): A minimally invasive approach using a custom stent-graft with "windows" precisely aligned to the renal and visceral arteries.

  • Branched Endovascular Repair (BEVAR): Utilizing a stent-graft with small internal or external "cuffs" that connect to the branch arteries via smaller covered stents.

  • Hybrid Repair: A combination of "de-branching" surgery (moving the organ arteries) followed by a standard endovascular stent-graft.

  • Left Heart Bypass: A specialized circulation technique used during open surgery to maintain blood flow to the lower body while the aorta is clamped.

  • Surgical Access: Under general anesthesia, a large thoracoabdominal incision is made, extending from the side of the chest, across the ribs, and down into the abdomen.

  • Organ Protection Setup: Surgeons place a spinal drain (CSF drainage) to protect the spinal cord and prepare chilled fluid (cold perfusion) for the kidneys.

  • Aortic Clamping: The aorta is clamped above and below the diseased segment. Distal perfusion or bypass is often started to protect the lower organs and legs.

  • Graft Interposition: The aneurysm is opened, and a large synthetic fabric tube (Dacron) is sewn into the healthy parts of the aorta.

  • Visceral Re-attachment: The most critical step; the surgeon meticulously re-sews the individual arteries for the liver, stomach, gut, and kidneys into the side of the new graft.

  • Restoring Circulation: Clamps are gradually removed, and the surgeon confirms that all vital organs are receiving robust blood flow before closing the chest and abdomen.

  • High-Resolution CT Angiography: Mandatory 3D mapping of the entire aorta to identify the exact location of the renal, celiac, and mesenteric arteries.

  • Cardiovascular Optimization: Extensive heart and lung testing (PFTs and Stress Echo) to ensure the patient can survive the significant physiological stress of the procedure.

  • CSF Drain Placement: For open repairs, a small catheter is placed in the lower back the morning of surgery to regulate spinal fluid pressure and prevent paralysis.

  • Nutritional Loading: High-protein supplementation is often started weeks before surgery to assist with the massive metabolic demands of recovery.

  • Fasting (NPO): No food or drink for at least 8–12 hours prior to the procedure to ensure safety under general anesthesia.

  • CT Angiogram (CTA): The primary tool for Crawford Classification and determining if the patient is a candidate for endovascular (stent) options.

  • Pulmonary Function Test (PFT): To evaluate the risk of respiratory failure, as the chest incision and lung deflation significantly impact breathing.

  • Carotid Ultrasound: To ensure there are no major blockages in the neck arteries that could lead to a stroke during the period of aortic clamping.

  • Creatinine & GFR: Blood tests to establish a baseline for kidney function, which is at high risk during this specific surgery.

  • Hospital Stay: Usually 10 to 14 days, with the first 3–5 days spent in the Intensive Care Unit (ICU) for high-level neurological and organ monitoring.

  • Post-Op Drains: Patients wake up with several temporary tubes (chest tube, abdominal drain, and spinal drain) that are removed as the body stabilizes.

  • Pain Management: Due to the large incision, an epidural or specialized nerve block is typically used for the first week, followed by oral medications.

  • Physical Rehabilitation: Walking is required within 48 hours to prevent blood clots, but it takes 6 to 12 weeks to regain basic daily strength.

  • Long-term Energy: It is common for patients to feel fatigued for 6 months to a year as the body recovers from such a large-scale reconstruction.

  • Permanent Fixation: In open surgery, the graft is sewn directly to healthy tissue, providing a highly durable, lifelong solution for the aneurysm.

  • Prevention of Catastrophic Rupture: Successfully treating a TAAA eliminates the high risk of sudden death associated with a burst thoracoabdominal aorta.

  • Comprehensive Treatment: Unlike smaller repairs, TAAA surgery addresses the entire "vital zone" of the aorta in a single, definitive operation.

  • Improved Survival in High-Risk Patients: For those with suitable anatomy, modern endovascular (FEVAR/BEVAR) options offer a life-saving alternative without a large incision.

  • Restores Systemic Stability: Eliminates the "ticking time bomb" of a large aneurysm, allowing patients to return to a normal lifestyle after the recovery period.

Chest Tube Insertion (Tube Thoracostomy)

Chest tube insertion, or tube thoracostomy, is a critical medical procedure used to drain air, blood, pus, or fluid from the pleural space—the narrow area between the lungs and the chest wall. By removing these abnormal collections, the procedure relieves pressure on the lung tissue, allowing it to fully re-expand and restore normal respiratory function. This is a life-saving intervention frequently performed in trauma centers, emergency departments, and post-surgical intensive care units.

  • Pneumothorax: Relieving a collapsed lung by draining air that has leaked into the pleural space.

  • Hemothorax: Removing blood accumulation, typically resulting from blunt or penetrating chest trauma.

  • Pleural Effusion: Draining excess fluid caused by systemic conditions such as heart failure, infection, or malignancy.

  • Empyema: Clearing a collection of pus caused by severe pulmonary infections like pneumonia.

  • Chylothorax: Removing lymphatic fluid that has leaked into the chest cavity.

  • Post-Surgical Drainage: Providing prophylactic drainage after open-heart or thoracic surgery to prevent fluid buildup.

  • The "Safety Triangle": To minimize the risk of injury to internal organs, surgeons target an area bordered by the pectoralis major, the latissimus dorsi, and the nipple line (usually the 4th or 5th intercostal space).

  • Positioning: The patient is positioned with the arm on the affected side raised above the head to widen the spaces between the ribs.

  • Anesthesia: A local anesthetic is injected to numb the skin, the underlying intercostal muscles, and the sensitive pleural lining.

  • Surgical Entry: * Open Technique: A small incision is made, and blunt instruments are used to create a path to the pleural space. A "digital sweep" (using a finger) is often performed to ensure no adhesions are present.
    Percutaneous Technique: For smaller tubes, a guidewire (Seldinger) method is used to thread the tube into place with minimal tissue disruption.

  • Securing the Tube: The tube is advanced into the chest, sutured to the skin for stability, and covered with an airtight dressing.

  • Drainage Connection: The tube is attached to a one-way water-seal drainage system, which allows air and fluid to escape the chest while preventing outside air from entering.

  • Digital Drainage SystemsElectronic monitoring devices that provide precise, real-time data on air leaks and fluid volume, allowing for more objective decisions on when to remove the tube.

  • Ultrasound-Guided PlacementThe standard use of bedside ultrasound to identify fluid pockets and avoid the diaphragm or liver during insertion, significantly increasing safety.

  • Small-Bore "Pigtail" CathetersSmaller, more flexible tubes that provide the same drainage capacity for air and thin fluids as traditional large tubes but with significantly less patient discomfort.

  • Valved Chest Drains (Heimlich Valves)One-way mobile valves that allow stable patients to move around or even be discharged home while the lung continues to drain.

  • Fibrinolytic Therapy IntegrationUsing the chest tube as a port to deliver specialized medications that "break up" thick, infected fluid or blood clots that are difficult to drain.

  • Smart-Suture KitsAdvanced wound closure materials that provide a more secure, "purse-string" seal once the tube is removed to prevent air from leaking back in.

  • Immediate Complications: Potential for minor bleeding from intercostal vessels or localized pain at the insertion site.

  • Infection Management: Risks of "tube-associated" infections are managed through sterile insertion techniques and proactive antibiotic use.

  • Subcutaneous Emphysema: A condition where air becomes trapped under the skin; while usually harmless, it is monitored closely as the lung heals.

  • Re-expansion Pulmonary Edema: A rare fluid buildup in the lung that can occur if it is re-inflated too rapidly; clinicians manage this by controlling the rate of drainage.

  • Monitoring Protocol: Healthcare teams continuously monitor the drainage system for "swinging" (respiratory oscillations) and "bubbling" (active air leaks).

  • Instant Respiratory Relief: By removing the "tension" in the chest, it immediately resolves life-threatening shortness of breath.

  • Definitive Fluid Clearance: Provides a continuous way to remove blood or pus that could otherwise lead to permanent lung scarring.

  • Objective Lung Assessment: Allows doctors to measure exactly how much fluid is being lost, which is critical for patients with trauma or post-surgical bleeding.

  • Facilitates Healing: By keeping the pleural space empty, the two layers of the pleura can touch and heal together, preventing a recurrence of the collapse.

  • The "Breath-Hold" Removal: The tube is removed quickly during a specific breathing maneuver to ensure no air enters the chest during the split second the hole is open.

  • Radiological Confirmation: A follow-up chest X-ray is typically performed to ensure the lung has remained fully expanded.

  • Wound Healing: The small incision usually heals within a week, leaving a minimal scar.

  • Full Recovery: Most patients return to full physical activity within 3 to 4 weeks, depending on the severity of the underlying condition that required the tube.

Lung & Thoracic Cancer Surgery

Lung and Thoracic Cancer Surgery involves the surgical removal of tumours from the lungs, chest wall, or the mediastinum (the space between the lungs). The primary goal is to achieve an "R0 resection," meaning the entire tumour is removed with clear, cancer-free margins. Clinical standards favor minimally invasive approaches like VATS and RATS to preserve respiratory function and accelerate recovery.

  • Early-Stage NSCLC: For Non-Small Cell Lung Cancer (Stage I or II) where surgery offers the highest chance of a permanent cure.

  • Solitary Pulmonary Nodules: When a suspicious "spot" on the lung is growing or has high-risk features on a PET-CT.

  • Mediastinal Tumours: Malignancies located in the center of the chest, such as thymomas or germ cell tumours.

  • Metastatic "Oligometastases": When cancer from another organ (like the kidney or colon) has spread only to a limited area of the lung.

  • Chest Wall Involvement: When a lung tumour has invaded the ribs, requiring a combined resection and reconstruction.

  • Wedge Resection: Removal of a small, pie-shaped piece of lung; reserved for very small peripheral tumours or patients with limited lung capacity.

  • Segmentectomy: Removal of a specific functional segment. This 2026 standard preserves more healthy tissue than a lobectomy for early-stage "ground-glass" opacities.

  • Lobectomy: The "gold standard" for most lung cancers. One of the five lobes (three right, two left) is removed entirely to capture all local lymph drainage.

  • Pneumonectomy: Removal of an entire lung; only performed for centrally located tumours involving the main bronchus.

  • Sleeve Resection: A lung-sparing alternative to pneumonectomy where a section of the bronchus is removed and the healthy ends are sewn back together.

  • RATS (Robotic-Assisted Thoracic Surgery): The 2026 preferred method for complex dissections. It provides 3D visualization and extreme precision for removing lymph nodes in the narrow mediastinum.

  • VATS (Video-Assisted Thoracoscopic Surgery): A minimally invasive approach using 2–3 small incisions (1–3 cm). It results in significantly less pain and faster return to activity.

  • Thoracotomy (Open Surgery): A larger incision on the side of the chest where ribs are spread; necessary for very large tumours or those involving major heart vessels.

  • Mediastinoscopy: A small incision at the base of the neck used to biopsy lymph nodes and confirm the cancer hasn't spread before a major resection.

  • Pleurodesis: A procedure for fluid buildup (effusion) where a sterile agent is used to make the lung stick to the chest wall, preventing fluid return.

  • Anaesthesia: Performed under general anaesthesia, typically using a "double-lumen" tube to deflate the lung being operated on.

  • Nodal Staging: Regardless of resection type, surgeons perform a mandatory lymphadenectomy to check for microscopic spread.

  • Airlock Testing: Before closing, the lung is reinflated under water to check for bubbles, ensuring the surgical site is airtight.

  • Chest Tube Placement: One or two tubes are placed in the pleural space to drain air and fluid, allowing the lung to remain fully expanded during healing.

  • Pathologic Staging: The removed tissue is analyzed to determine if "adjuvant" chemotherapy or immunotherapy is needed post-surgery.

  • PFT/Spirometry: Completing a Pulmonary Function Test to ensure the remaining lung tissue can support your breathing needs after surgery.

  • Smoking Cessation: Adhering to a strict "zero-tobacco" policy for at least 4 weeks prior to surgery to reduce the risk of post-operative pneumonia.

  • Incentive Spirometry: Training with a breathing exercise device to strengthen respiratory muscles before the procedure.

  • Cardiac Risk Stratification: Undergoing an EKG or Echo to ensure the heart can handle the circulatory changes of thoracic surgery.

  • Nutritional Optimization: A high-protein diet to ensure the pleura (lung lining) heals quickly and prevents prolonged air leaks.

  • High-Resolution CT (Chest): To map the tumour's exact location in relation to the pulmonary arteries and veins.

  • PET-CT Scan: To rule out any metabolic activity in other parts of the body, ensuring the surgery remains a curative option.

  • Quantitative V/Q Scan: In borderline cases, this determines exactly how much "work" each lobe of your lung is doing.

  • EBUS (Endobronchial Ultrasound): A specialized internal ultrasound used to biopsy lymph nodes near the windpipe before the main surgery.

  • Liquid Biopsy: 2026 protocols may include a blood test to check for circulating tumour DNA (ctDNA) as a baseline for recovery.

  • Chest Tube Management: Tubes are usually removed within 2–4 days once the "air leak" has stopped and drainage is minimal.

  • AFib Monitoring: Irregular heart rhythms occur in 10–20% of patients due to inflammation near the heart; this is typically temporary.

  • Early Mobilization: You will be encouraged to sit up and walk within 24 hours to prevent blood clots and help the lung expand.

  • Subcutaneous Emphysema: A "crackling" sensation under the skin if air traps there; it is harmless and usually resolves on its own.

  • Long-Term Breathlessness: Most patients return to normal activity in 4–8 weeks, though heavy aerobic exercise may feel different depending on the amount of lung removed.

  • Robotic Precision: RATS allows for more thorough lymph node removal than traditional surgery, leading to more accurate staging and treatment.

  • Lung-Sparing Techniques: 2026 advancements in segmentectomy and sleeve resections allow for cancer removal while saving as much healthy lung as possible.

  • Enhanced Recovery (ERAS): Specialized thoracic protocols significantly reduce the need for heavy narcotics, allowing for faster mental and physical recovery.

  • Curative Foundation: Surgery remains the single most effective way to eliminate early-stage lung cancer and prevent future spread.

Trabeculectomy Surgery

Trabeculectomy is a specialized surgical procedure used to treat glaucoma by creating a new drainage pathway to lower the internal pressure of the eye (IOP). It is typically recommended when eye drops or laser treatments are no longer effective at preventing progressive optic nerve damage and vision loss.

  • Uncontrolled Glaucoma: When your intraocular pressure remains high despite the maximum use of eye drops or oral medications.

  • Progressive Vision Loss: If visual field tests show that your peripheral vision is continuing to deteriorate.

  • Optic Nerve Damage: When clinical examinations show worsening "cupping" or thinning of the optic nerve fibers.

  • Inadequate Laser Results: If previous procedures like Selective Laser Trabeculoplasty (SLT) have failed to maintain a safe pressure level.

  • Advanced Disease: In cases of severe glaucoma where a very low "target pressure" is required to preserve the remaining sight.

  • Anesthesia: The surgery is usually performed as an outpatient procedure under local anesthesia and takes about 45 to 60 minutes.

  • Creating the Flap: The surgeon creates a microscopic "trapdoor" (flap) in the sclera—the white part of the eye—usually hidden under the upper eyelid.

  • Removing Tissue: A tiny piece of the eye's blocked drainage meshwork is removed from under the flap to create a new opening.

  • The "Bleb": The flap is loosely stitched back in place, allowing fluid (aqueous humor) to bypass the blocked natural drains and flow into a small reservoir called a Filtering Bleb.

  • Fluid Absorption: The fluid in the bleb is naturally reabsorbed by the surrounding blood vessels, effectively lowering the pressure inside the eye.

  • Anti-Scarring Medication: Medications like Mitomycin-C (MMC) are applied during surgery to prevent the new drainage hole from scarring shut.

  • Pressure Mapping: Recording several pressure readings to establish the baseline and determine the "target pressure" needed for safety.

  • Medication Audit: Reviewing current glaucoma drops; some may need to be stopped or adjusted before surgery to reduce inflammation.

  • Infection Screen: Ensuring the eyelids and tear ducts are healthy and free of infection before the procedure.

  • Transportation: Arranging for a ride home, as the eye will be patched and vision will be temporarily blurry.

  • Anesthesia Discussion: Confirming the type of sedation or local numbing that will be used for your comfort.

  • Visual Field Test: To document the current extent of peripheral vision loss and provide a baseline for post-operative monitoring.

  • Optical Coherence Tomography (OCT): To measure the thickness of the retinal nerve fiber layer around the optic nerve.

  • Gonioscopy: A specialized exam using a mirrored lens to view the drainage angle and plan the surgical entry point.

  • Pachymetry: Measuring corneal thickness, which can influence how eye pressure readings are interpreted.

  • Initial Vision: Vision is usually blurry for the first 2 to 4 weeks as the eye pressure stabilizes and the internal fluid levels adjust.

  • Frequent Check-ups: Close monitoring is required in the first few weeks to allow the surgeon to adjust stitches or manage the flow of fluid.

  • Medication Regimen: Patients must strictly use prescribed antibiotic and steroid eye drops for several weeks to prevent infection and control inflammation.

  • Activity Restrictions: Avoid heavy lifting, bending over, or strenuous exercise for about one month to prevent dangerous pressure spikes.

  • Long-Term Monitoring: Because there is a permanent "hole" in the eye, patients must watch for signs of Blebitis (infection of the bleb), such as sudden redness or pain.

  • Significant Pressure Reduction: It is one of the most powerful tools available for achieving the very low pressures needed in advanced glaucoma.

  • Protects Remaining Sight: By reaching the target pressure, the procedure stops the ongoing "mechanical" damage to the optic nerve.

  • Outpatient Experience: Allows for major internal eye reconstruction with minimal downtime and a return to home on the same day.

  • Customizable Flow: The use of adjustable or "removable" sutures allows the surgeon to fine-tune the eye pressure in the office after the surgery.

  • Long-Lasting Results: When the bleb heals correctly and remains functional, it can provide years of stable pressure control without the need for additional drops.

Glaucoma Drainage Device Implant

A Glaucoma Drainage Device (GDD) implant, also known as a tube shunt or aqueous shunt, is a specialized medical device used to lower intraocular pressure (IOP). This procedure is typically reserved for cases where conventional treatments, such as eye drops, laser therapy, or trabeculectomy, have been insufficient or are likely to fail.

  • Refractory Glaucoma: When previous glaucoma surgeries, like a trabeculectomy, have failed or are high-risk due to scarring.

  • Neovascular Glaucoma: If abnormal blood vessel growth in the eye is blocking the natural drainage angles.

  • Uveitic Glaucoma: For managing high pressure caused by chronic internal eye inflammation.

  • Traumatic Glaucoma: When physical injury to the eye has permanently damaged the natural drainage meshwork.

  • Congenital Glaucoma: In pediatric cases where the eye's drainage system did not develop correctly.

  • Anesthesia: The procedure is usually performed as an outpatient surgery under local anesthesia with sedation and takes about one hour.

  • Incision: A small pocket is created under the conjunctiva (the clear membrane covering the white of the eye).

  • Plate Fixation: A thin, curved silicone plate is sutured to the sclera (the white part of the eye), usually tucked high under the upper eyelid.

  • Tube Insertion: A microscopic, flexible tube is trimmed and inserted into the front chamber of the eye to create a new drainage channel.

  • Patch Graft: A small piece of donor tissue (sclera or cornea) is often placed over the tube to protect it and prevent it from eroding through the eye's surface.

  • Fluid Flow: Excess fluid (aqueous humor) flows through the tube to the plate, where it forms a reservoir (bleb) and is naturally absorbed by the body.

  • Valved Implants (e.g., Ahmed Valve): These feature a pressure-sensitive valve that limits fluid flow until a specific pressure is reached, helping to prevent the eye pressure from dropping too low (hypotony) immediately after surgery.

  • Non-Valved Implants (e.g., Baerveldt or Molteno): These lack a valve and offer a larger surface area for drainage. The surgeon often temporarily ties off the tube during surgery to allow a protective capsule to form before drainage begins.

  • Surgical Planning: A detailed evaluation to choose between a valved or non-valved device based on your specific pressure goals.

  • Medication Review: Discussing current glaucoma drops; some may need to be adjusted to manage inflammation before the implant.

  • Donor Tissue Coordination: Ensuring the necessary patch graft material is available for the day of surgery.

  • Transportation: Arranging for a companion to drive you home, as the eye will be patched and vision will be temporarily blurry.

  • Physical Readiness: Confirming you are comfortable lying still for approximately one hour during the micro-surgical steps.

  • Gonioscopy: A specialized exam to view the internal drainage angle and determine the safest placement for the tube.

  • Visual Field Test: Establishing a baseline of peripheral vision to monitor the long-term success of the pressure control.

  • Endothelial Cell Count: Checking the health of the inner cornea, as the tube's position must not interfere with these delicate cells.

  • Intraocular Pressure (IOP) Profile: Tracking your pressure fluctuations to confirm the need for a surgical shunt.

  • Initial Vision: Vision may be blurry for several days to a few weeks as the eye adjusts to the new drainage system.

  • Activity Restrictions: Patients must avoid bending over, straining, or lifting objects heavier than 5 kg for several weeks to prevent pressure spikes or tube movement.

  • Medication Use: Most patients will still need to continue some glaucoma medications even after the implant is fully functional.

  • Monitoring: Regular checkups are essential to ensure the tube is in the correct position and the plate is draining fluid effectively.

  • Safety Watch: Monitor for rare signs of complications, such as double vision (if the plate affects eye muscles) or redness at the patch graft site.

  • Robust Pressure Control: Offers a reliable long-term solution for eyes that do not respond to other forms of glaucoma treatment.

  • Bypasses Scarred Tissue: Because the tube is inserted directly into the eye, it bypasses damaged or scarred natural drainage channels.

  • Standard of Care for Complex Cases: Successfully manages pressure in high-risk conditions like neovascular or inflammatory glaucoma.

  • Durable Design: The silicone materials used are highly biocompatible and designed to remain functional inside the eye for many years.

  • Predictable Outcomes: Modern surgical techniques and a variety of implant sizes allow surgeons to tailor the treatment to the specific volume of the patient's eye.

Laser Iridotomy
Laser Iridotomy

Laser Iridotomy, or Laser Peripheral Iridotomy (LPI), is a quick outpatient procedure used primarily to treat or prevent angle-closure glaucoma. By creating a microscopic hole in the outer edge of the iris, the procedure allows fluid to flow more freely between the back and front of the eye. This bypass balances internal pressure and prevents sudden, sight-threatening pressure spikes.

  • Narrow-Angle Suspects: If a routine eye exam reveals that your drainage angles are naturally narrow, putting you at high risk for a sudden glaucoma "attack."

  • Acute Angle-Closure: Used as an emergency intervention during a sudden, painful spike in eye pressure to save vision.

  • Chronic Angle-Closure: For patients whose drainage system is permanently narrowed or partially blocked by the iris.

  • Preventative Care: If you have had an angle-closure attack in one eye, LPI is typically performed on the other eye as a preventative measure.

  • Anatomical Narrowing: When the iris is physically "bowed" forward, preventing the natural drainage of aqueous humor.

  • Preparation: The eye is numbed with anesthetic drops. Specialized drops (like pilocarpine) are used to constrict the pupil, which thins the iris and makes it easier for the laser to penetrate.

  • Positioning: You sit at a slit-lamp machine—similar to a standard eye exam microscope—with your chin and forehead in a steady rest.

  • Focusing: A specialized contact lens is placed on the eye to focus the laser beam and keep your eyelids open during the pulses.

  • Laser Application: The surgeon uses a focused laser (commonly a YAG or Argon laser) to create a tiny opening in the outer edge of the iris, usually hidden under the upper eyelid.

  • Monitoring: You will remain at the clinic for 30 minutes to 2 hours post-procedure so the specialist can check for any immediate spikes in eye pressure.

  • Duration: The procedure is typically completed in 5 to 15 minutes per eye.

  • Gonioscopy: A specialized diagnostic exam to view the drainage angle and confirm that the iris is causing the obstruction.

  • Medication Review: Discussing any blood thinners or history of eye inflammation (uveitis) with your surgeon.

  • Pupil Preparation: Being aware that the constricting drops used before surgery may cause a temporary brow ache or dim vision.

  • Transportation: Arranging for a ride home, as your vision may be temporarily blurred from the specialized lenses and laser light.

  • Intraocular Pressure (IOP) Check: Establishing a baseline pressure to compare against post-laser readings.

  • Anterior Segment OCT: A high-resolution scan that provides a cross-sectional view of the drainage angle and iris position.

  • Visual Acuity: Measuring your current vision to ensure the laser treatment does not affect your baseline sight.

  • Slit-Lamp Examination: A microscopic check of the iris thickness and the health of the cornea before the laser application.

  • Initial Recovery: Most patients return to normal activities within 24 to 48 hours.

  • Common Symptoms: Temporary blurred vision, mild headache, light sensitivity, or a "gritty" feeling in the eye are normal for a day or two.

  • Medication: You will be prescribed anti-inflammatory (steroid) eye drops to use for about a week to ensure the microscopic hole stays open and heals.

  • Activity Restrictions: Avoid strenuous exercise, heavy lifting, or rubbing the eyes for the first 2–3 days.

  • Follow-up: A pressure check and gonioscopy are usually performed 1 to 2 weeks later to confirm the angle has successfully opened.

  • Prevents Blindness: It is the primary defense against acute angle-closure glaucoma, which can cause permanent blindness in hours if untreated.

  • Minimally Invasive: Requires no surgical incisions, no stitches, and is performed entirely in an office setting.

  • Permanent Solution: Once the microscopic hole is created and healed, it typically provides a life-long pathway for fluid flow.

  • Rapid Results: The internal pressure often begins to stabilize immediately after the bypass is created.

  • High Safety Profile: Complications are uncommon, and the procedure is considered the global standard of care for narrow-angle conditions.

Minimally Invasive Glaucoma Surgery (MIGS)

Minimally Invasive Glaucoma Surgery (MIGS) is a group of modern surgical techniques designed to lower eye pressure with significantly less trauma than traditional glaucoma surgeries. These procedures use microscopic incisions and specialized devices to improve fluid drainage, typically for patients with mild-to-moderate open-angle glaucoma who wish to reduce their dependence on daily eye drops.

  • Mild-to-Moderate Glaucoma: When your eye pressure is not adequately controlled by one or two types of eye drops.

  • Concurrent Cataract Surgery: MIGS is frequently performed alongside cataract removal, as it uses the same tiny incision and adds only minutes to the total procedure time.

  • Intolerance to Medications: If you experience severe dry eye, redness, or allergies caused by long-term use of glaucoma eye drops.

  • Desire for Faster Recovery: When you require a pressure-lowering procedure but cannot afford the long downtime associated with traditional surgery.

  • Preserving Future Options: Because MIGS is "micro-invasive," it preserves the outer layers of the eye (conjunctiva) in case more intensive surgery is needed later in life.

  • Micro-Incision: The surgeon enters the eye through a microscopic incision (often only 1–2 mm) in the clear cornea.

  • Ab Interno Approach: The procedure is performed from the inside of the eye, allowing the surgeon to view the internal drainage angle directly through a specialized lens.

  • Methods of Treatment:
    Trabecular Bypass (Stents): Tiny implants like the iStent or Hydrus Microstent are placed into the eye's natural drainage canal to bypass blockages.
    Tissue Excision: Tools like the Kahook Dual Blade (KDB) are used to remove a small strip of the blocked meshwork to let fluid flow freely.
    Subconjunctival Filtration: A flexible gelatin tube, such as the Xen Gel Stent, creates a tiny tunnel to redirect fluid to a reservoir under the eye's outer membrane.
    Ciliary Body Ablation: A laser probe (ECP) is used inside the eye to treat the tissue that produces fluid, reducing the overall "inflow" of pressure.

  • Duration: When performed alone, MIGS typically takes 10 to 15 minutes; when combined with cataract surgery, it adds approximately 5 to 10 minutes.

  • Gonioscopy: A detailed exam using a mirrored lens to view your internal drainage angle and ensure it is "open" enough for MIGS.

  • Visual Field Mapping: Documenting your current peripheral vision to establish a baseline for long-term stability.

  • Medication Audit: Reviewing your current eye drops; your surgeon will determine if you should continue or stop them immediately after the procedure.

  • Transportation: Arranging for a ride home, as your vision may be temporarily blurry from the surgical microscope and dilating drops.

  • Optical Coherence Tomography (OCT): To measure the thickness of the optic nerve fibers and assess the severity of glaucoma.

  • Intraocular Pressure (IOP) Tracking: Recording your pressure at different times of the day to determine your "target pressure."

  • Pachymetry: Measuring the thickness of your cornea to ensure the most accurate eye pressure readings.

  • Endothelial Cell Count: Checking the health of the inner cornea, especially if a permanent stent is being considered.

  • Rapid Recovery: Most patients return to normal daily activities within 3 to 7 days, which is much faster than traditional glaucoma surgery.

  • Medication Regimen: You will need to use antibiotic and anti-inflammatory eye drops for several weeks to ensure proper healing.

  • Pressure Monitoring: Temporary "pressure spikes" can occur in the first few days, requiring close follow-up with your surgeon.

  • Activity Restrictions: Avoid heavy lifting, swimming, or rubbing the treated eye for at least 2 to 4 weeks.

  • Reduced Drop Burden: Many patients are able to significantly reduce or even stop their daily glaucoma eye drops once the drainage device is fully functional.

  • High Safety Profile: Carries a much lower risk of serious complications like hypotony (dangerously low pressure) or severe bleeding.

  • Versatile Pathways: Surgeons can target multiple drainage pathways (trabecular, uveoscleral, or subconjunctival) depending on your eye's unique anatomy.

  • Standardized Precision: The use of microscopic stents and blades ensures a predictable result with minimal damage to healthy tissue.

  • Sustained Control: Unlike eye drops, which can be forgotten or difficult to administer, a MIGS implant provides 24/7 pressure management.

  • Synergy with Cataract Care: Offers a "two-for-one" opportunity to improve vision clarity and lower eye pressure in a single, efficient session.

Corneal Transplant (Keratoplasty)

Corneal transplant surgery, or keratoplasty, is a specialized procedure to replace damaged or diseased corneal tissue with healthy tissue from a human donor. Modern surgical techniques allow for "component surgery," where surgeons replace only the specific damaged layers of the eye, significantly improving success rates and recovery times.

  • Keratoconus: When progressive thinning causes the cornea to bulge into a cone shape and specialty lenses no longer restore vision.

  • Fuchs’ Dystrophy: If you experience persistent swelling or cloudiness due to the deterioration of the innermost cell layers.

  • Corneal Scarring: To restore vision lost to physical trauma, chemical burns, or severe infections like herpes keratitis.

  • Graft Failure: When a previous donor transplant has been rejected by the body or has stopped functioning.

  • Advanced Thinning: When medical treatments like cross-linking can no longer provide structural integrity or relieve chronic eye pain.

  • Anesthesia: Typically performed as an outpatient procedure under either local or general anesthesia, depending on the complexity.

  • Tissue Removal: The surgeon uses high-precision tools to carefully remove the diseased or damaged layers of the patient's cornea.

  • Methods of Transplant:
    Penetrating Keratoplasty (PKP): A full-thickness transplant where the entire central cornea is replaced and secured with microscopic sutures.
    Deep Anterior Lamellar Keratoplasty (DALK): Replaces the front and middle layers while preserving the patient's own healthy inner lining.
    Endothelial Keratoplasty (DMEK/DSAEK): Minimally invasive procedures to replace only the innermost layer (endothelium).

  • Securing the Graft: In full-thickness surgeries, fine sutures are used. In endothelial transplants, a specialized Air Bubble Tamponade is used to hold the new tissue in place against the eye.

  • Duration: The surgical procedure typically lasts between 1 to 2 hours.

  • Comprehensive Eye Examination: To determine exactly which layers of the cornea need replacement (full-thickness vs. lamellar).

  • Graft Matching: Sourcing high-quality donor tissue from an eye bank and reviewing success rates, which often exceed 90%.

  • Recovery Planning: Preparing for post-operative requirements, such as strict face-up positioning for several days.

  • Medication Review: Discussing the necessity of long-term or life-long steroid eye drops to inhibit immune rejection.

  • Anesthesia Assessment: Evaluating overall health to determine the safest sedation method for the patient.

  • Pachymetry: To measure corneal thickness and identify specific areas of extreme thinning or fluid buildup (edema).

  • Specular Microscopy: A detailed evaluation of the health and density of the endothelial cell layer.

  • Corneal Topography: Creating a 3D map of the curvature and surface irregularities of the diseased cornea.

  • Visual Acuity Test: Establishing a clear baseline of current vision impairment to measure post-surgical improvement.

  • Positioning Requirements: For DMEK or DSAEK, patients must maintain a face-up position for several days to allow the air bubble to support the graft.

  • Steroid Regimen: A committed long-term schedule of steroid eye drops is required to prevent the immune system from attacking the new tissue.

  • Rejection Monitoring: Patients must immediately report "RSVP" symptoms: Redness, Sensitivity to light, Vision blurriness, or Pain.

  • Recovery Timeline: Healing varies by procedure—weeks for endothelial transplants (DMEK) and 6 to 12 months for full-thickness (PKP) procedures.

  • Follow-up Care: Regular appointments are necessary to manage the sutures and monitor for potential risks like glaucoma or astigmatism.

  • Restores Transparency: Effectively clears vision by replacing opaque or scarred tissue with crystal-clear donor tissue.

  • Reduced Rejection Risk: Modern "component" surgery (DALK/DMEK) leaves more of the patient's own tissue intact, lowering the chance of an immune response.

  • Last-Resort Solutions: For patients who cannot receive human donor tissue, an Artificial Cornea (Keratoprosthesis) offers a high-tech synthetic alternative.

  • Eliminates Chronic Pain: Resolves the significant discomfort associated with corneal surface diseases and recurring erosions.

  • Proven Success: Keratoplasty remains the most common and successful type of human organ transplant worldwide.

Cross-linking (for Keratoconus)

Corneal Collagen Cross-linking (CXL) is a specialized medical procedure used to treat Keratoconus, a progressive condition where the cornea thins and bulges into a cone shape. Unlike LASIK or SMILE, which are designed to correct vision, the primary goal of CXL is to strengthen the corneal tissue to stop the disease from worsening and prevent future vision loss.

  • Progressive Keratoconus: When repeat eye exams show that the cornea is continuing to thin or the "cone" shape is becoming more pronounced.

  • Post-LASIK Ectasia: A rare complication where the cornea becomes unstable and thins following refractive surgery.

  • Pellucid Marginal Degeneration: A similar corneal thinning condition that affects the lower part of the cornea.

  • Fluctuating Vision: When your eyeglass or contact lens prescription is changing rapidly due to corneal instability.

  • Early Diagnosis: It is highly effective when performed early to stabilize the cornea before significant vision loss occurs.

  • Numbing: Anesthetic eye drops are applied so the patient remains comfortable and feels no pain during the process.

  • Epithelium Management:
    Epi-off Method: The thin outer layer (epithelium) is gently removed to allow the medication to saturate the deeper layers more effectively.
    Epi-on (Trans-epithelial): The outer layer is left intact, which may reduce post-operative discomfort.

  • Riboflavin Saturation: Vitamin B2 (riboflavin) drops are applied to the eye every few minutes for about 30 minutes until the cornea is fully saturated.

  • UV Light Exposure: The eye is exposed to a controlled amount of Ultraviolet A (UVA) light for several minutes.

  • The Chemical Reaction: The interaction between the Riboflavin and UV light creates new "cross-links" (chemical bonds) between the collagen fibers, making the cornea stiffer and more stable.

  • Bandage Lens: A clear, soft contact lens is placed on the eye to protect the surface while it heals.

  • Duration: The entire treatment typically takes 30 to 60 minutes.

  • Corneal Mapping: Detailed scans (topography) are taken to document the current shape and thickness of the cornea as a baseline.

  • Contact Lens Holiday: Patients must stop wearing hard or gas-permeable contact lenses for several weeks before the procedure to allow the cornea to settle.

  • Medication Review: Discussing any history of slow healing or eye infections with your specialist.

  • Transportation: Arranging for a ride home, as the eye may be sensitive to light and vision may be blurry immediately after the UV exposure.

  • Pachymetry: To measure the thinnest point of the cornea; a minimum thickness is often required to safely perform the UV light stage.

  • Corneal Topography/Tomography: To identify the "apex" of the cone and track the rate of disease progression.

  • Slit-Lamp Examination: To check for any pre-existing corneal scarring that might affect the treatment outcome.

  • Visual Acuity: Establishing the current level of corrected and uncorrected vision.

  • Initial Discomfort: Especially in "Epi-off" cases, the eye may feel sore, gritty, or highly light-sensitive for the first 3–5 days.

  • Vision Fluctuations: It is normal for vision to be slightly "foggy" or worse immediately after the procedure before it stabilizes over several weeks.

  • Medication Regimen: Patients must use prescribed antibiotic and steroid drops for several weeks to prevent infection and manage inflammation.

  • Healing Timeline: While the surface heals within a week, the full strengthening effect of the cross-linking takes 3 to 6 months to reach maximum stability.

  • Follow-up Care: Regular checkups are essential to monitor the "haze" (temporary cloudiness) and ensure the epithelium has regrown properly.

  • Prevents Disease Progression: CXL has a success rate of over 90% in stopping Keratoconus from getting worse.

  • Avoids Major Surgery: By stabilizing the cornea early, the vast majority of patients can avoid the need for a full corneal transplant later in life.

  • Long-Term Stability: The new chemical bonds created between collagen fibers provide a permanent increase in corneal rigidity.

  • Preserves Vision: While it does not eliminate the need for glasses, it "locks" the vision in place and prevents further deterioration.

  • Minimally Invasive: It is an outpatient procedure that does not require stitches or a long hospital stay.

Corneal Collagen Cross-linking

Corneal Collagen Cross-linking (CXL) is a specialized medical treatment designed to stop the progression of Keratoconus and other corneal thinning disorders. Unlike most laser eye surgeries, its goal is not to improve vision, but to strengthen and stabilize the cornea's structure. By creating new chemical bonds between corneal fibers, CXL acts as a support system to prevent the eye from bulging further.

  • Progressive Keratoconus: When regular eye exams show that the cornea is continuing to thin or the "cone" shape is becoming more pronounced.

  • Post-LASIK Ectasia: A rare condition where the cornea becomes unstable and begins to thin following previous refractive surgery.

  • Pellucid Marginal Degeneration: A specific type of corneal thinning that typically affects the lower portion of the cornea.

  • Rapidly Changing Vision: When your eyeglass or contact lens prescription is shifting frequently due to structural changes in the eye.

  • Early Diagnosis: It is most effective when performed early to "lock" the cornea in place before significant vision loss occurs.

  • Numbing: Anesthetic eye drops are applied so the patient remains comfortable and feels no pain throughout the process.

  • Epithelium Management:
    Epi-off Method: The thin outer layer (epithelium) is gently removed to allow the riboflavin medicine to penetrate the deeper layers more effectively.
    Epi-on (Trans-epithelial): The outer layer is left intact, which may lead to less post-operative discomfort but sometimes slower saturation.

  • Riboflavin Loading: Vitamin B2 (riboflavin) drops are applied every few minutes for about 30 minutes until the cornea is fully saturated.

  • UVA Activation: The eye is exposed to a precise, controlled beam of Ultraviolet-A light.

  • The Cross-linking: The UV light reacts with the riboflavin to create new "cross-links" (chemical bonds) between the collagen fibers, making the cornea stiffer.

  • Protection: A clear, soft bandage contact lens is placed on the eye to protect the surface while the epithelium regrows.

  • Duration: The entire treatment typically takes between 30 and 60 minutes.

  • Baseline Mapping: Detailed 3D scans (topography) are taken to document the current shape and thickness of the cornea.

  • Contact Lens Holiday: Patients must stop wearing hard or gas-permeable contact lenses for several weeks before the procedure to ensure the cornea is in its natural state.

  • Medication Audit: Reviewing any history of slow healing, dry eyes, or chronic eye infections with the surgical team.

  • Transportation Planning: Arranging for a ride home, as the eye will be sensitive to light and vision may be blurry immediately following the UV exposure.

  • Pachymetry: To measure the thickness of the cornea at its thinnest point; a safe minimum thickness is required for the UV light phase.

  • Corneal Topography/Tomography: To identify the "apex" of the cone and track the exact rate of disease progression over time.

  • Slit-Lamp Examination: A microscopic check for any pre-existing corneal scarring or inflammation that might impact the outcome.

  • Visual Acuity Test: Establishing the current level of corrected vision to monitor stability after the procedure.

  • Initial Discomfort: Especially in "Epi-off" cases, the eye may feel sore, gritty, or highly light-sensitive for the first 3–5 days.

  • Vision Fluctuations: It is normal for vision to be "hazy" or slightly worse than before surgery for a few weeks while the surface heals.

  • Medication Regimen: Patients must strictly follow the schedule for prescribed antibiotic and steroid drops for several weeks.

  • Stabilization Timeline: While the surface heals within a week, the full strengthening effect and final vision stabilization can take 3 to 6 months.

  • Follow-up Care: Regular checkups are essential to monitor "corneal haze" (temporary cloudiness) and confirm the epithelium has fully regrown.

  • Stops Disease Progression: CXL is highly successful at preventing the cornea from bulging further and worsening the condition.

  • Prevents Major Surgery: By stabilizing the cornea early, most patients can avoid the need for a full corneal transplant later in life.

  • Permanent Strengthening: The new chemical bonds provide a long-term increase in corneal rigidity and structural integrity.

  • Preserves Vision Quality: While it may not eliminate the need for glasses, it "locks" the vision in place and prevents further loss of sight.

  • Minimally Invasive: It is an outpatient procedure that requires no incisions into the inner eye and no stitches.

Phacoemulsifacation
Phacoemulsifacation

Phacoemulsification, commonly referred to as "phaco," is the modern gold standard for cataract surgery. This procedure uses ultrasonic energy to fragment a clouded natural lens (cataract), allowing it to be removed through a microscopic, often stitchless incision. It is then replaced with a permanent artificial intraocular lens (IOL) to restore clear vision.

  • Cloudy or Blurry Vision: When daily activities like reading or driving become difficult due to a "foggy" lens.

  • Glare and Halos: Increased sensitivity to light, especially during night driving.

  • Fading Colors: When vibrant colors appear yellowed, dull, or faded.

  • Frequent Prescription Changes: Rapid changes in eyeglass or contact lens strength.

  • Double Vision: Experiencing multiple images in a single eye.

  • Anesthesia: Numbing eye drops (topical anesthesia) or a local injection are used so the patient remains awake but feels no pain.

  • The Incision: A microscopic, self-sealing incision (typically 2.2 to 2.8 mm) is made at the edge of the cornea.

  • Capsulorhexis: A precise circular opening is created in the thin membrane (capsule) that surrounds the lens.

  • Phacoemulsification: A specialized probe emitting ultrasonic waves vibrates at high frequencies to fragment the cataract into tiny pieces.

  • Aspiration: The fragmented pieces are gently suctioned out of the eye using the same high-tech probe.

  • IOL Implantation: A foldable artificial lens is inserted through the tiny incision; it unfolds naturally inside the lens capsule to restore focus.

  • Closure: Because of the precise shape of the incision, stitches are usually unnecessary.

  • Eye Measurement (Biometry): Precise ultrasound or laser measurements are taken to determine the correct power of the artificial lens (IOL).

  • Medication Audit: Patients may be asked to start antibiotic or anti-inflammatory drops a few days before the procedure.

  • Fasting: Following specific instructions regarding food and drink intake on the morning of the surgery.

  • Transportation: Arranging for a family member or friend to drive you home, as vision will be blurry immediately after the procedure.

  • Visual Acuity Test: To measure exactly how much the cataract is affecting your sight.

  • Slit-Lamp Examination: A detailed microscopic look at the front structures of the eye, including the lens.

  • Retinal Exam: Checking the back of the eye to ensure the retina is healthy and capable of good vision after surgery.

  • Keratometry: Measuring the curvature of the cornea to help select the most appropriate artificial lens.

  • Initial Vision: Vision may be blurry for the first 24–48 hours but typically improves rapidly as the eye heals.

  • Medication: Patients must use prescribed antibiotic and anti-inflammatory eye drops for several weeks to prevent infection.

  • Eye Protection: A plastic shield is often worn while sleeping for the first week to prevent accidental rubbing or pressure.

  • Activity Restrictions: Avoid heavy lifting, bending over, or getting water/soap in the eye for at least the first 2–3 weeks.

  • Follow-up: Regular checkups ensure the IOL is perfectly positioned and the eye pressure remains stable.

  • Rapid Recovery: Most patients return to light daily activities within one to two days.

  • Micro-Incision Precision: Smaller incisions significantly reduce the risk of surgically induced astigmatism.

  • Customized Vision: Modern IOLs can correct pre-existing nearsightedness, farsightedness, or even presbyopia (reading vision).

  • Minimal Complications: Advanced technology has lowered the risks of infection, bleeding, and inflammation compared to older methods.

  • Permanent Solution: Once the clouded lens is removed and replaced, a cataract cannot grow back on the artificial lens.

Small Incision Cataract Surgery (SICS)

Manual Small Incision Cataract Surgery (MSICS or SICS) is a surgical technique where the clouded lens is manually removed through a specialized, self-sealing tunnel. It is primarily used as a cost-effective, high-volume alternative for treating advanced cataracts, especially in resource-limited settings. This procedure is a vital bridge in global eye care, offering outcomes comparable to more expensive technologies.

  • Mature or "Hard" Cataracts: When the cataract is very dense (black or brown) and may be difficult to break apart using ultrasound energy.

  • Cost-Effective Treatment: When seeking a high-quality surgical outcome at a lower price point compared to laser or ultrasonic methods.

  • Limited Infrastructure: Ideal for settings where consistent electricity or expensive high-tech maintenance is unavailable.

  • Complex Eye Conditions: Useful for patients with small pupils, weak fibers holding the lens (zonules), or a history of eye trauma.

  • Advanced Vision Loss: When the cataract has progressed to the point of "white" or "hypermature" stages, making other techniques riskier.

  • Preparation: The eye is numbed using local or peribulbar anesthesia and sterilized with povidone-iodine.

  • Sclerocorneal Tunnel Construction: The surgeon creates a 5.5 mm to 7 mm triplanar tunnel in the sclera (the white of the eye) that extends into the cornea.

  • Capsulotomy: An opening is made in the lens capsule—the "bag" holding the lens—to access the cataract.

  • Hydrodissection: Fluid is injected to gently loosen the lens from its surrounding capsule.

  • Nucleus Delivery: The hard central part of the lens (nucleus) is manually expressed through the tunnel using specialized tools like an irrigating vectis or via hydrostatic pressure.

  • IOL Implantation: A permanent artificial intraocular lens (IOL) is inserted into the capsule to restore clear focus.

  • Closure: The tunnel's specific internal shape makes it self-sealing, meaning it stays closed due to natural eye pressure and usually does not require stitches.

  • Biometry: Precise measurements of the eye's length and corneal curvature to determine the correct power for the artificial lens.

  • Infection Screen: Ensuring the eyelids and surrounding skin are free of infection or inflammation before the incision.

  • Medication Audit: Discussing current medications with the surgeon, particularly blood thinners or prostate medications that can affect the iris.

  • Fasting: Following clinical instructions regarding food and water intake on the day of the procedure.

  • Visual Acuity: Measuring the baseline level of vision impairment caused by the cataract.

  • Slit-Lamp Exam: A microscopic evaluation of the cataract's density and the health of the cornea and iris.

  • Intraocular Pressure (IOP): Checking the pressure inside the eye to ensure it is within a safe range for surgery.

  • B-Scan Ultrasound: Performed if the cataract is so dense that the surgeon cannot see the back of the eye, to ensure the retina is healthy.

  • Initial Vision: Vision often improves within 24 to 48 hours, though full stabilization and final healing typically take 4 to 6 weeks.

  • Medications: Patients must strictly use prescribed antibiotic and anti-inflammatory eye drops for several weeks.

  • Eye Protection: Wearing a protective shield or glasses to prevent accidental rubbing, especially while sleeping.

  • Activity Restrictions: Avoid heavy lifting, bending over, or getting water, soap, or dust in the eye for the first 1–2 weeks.

  • Follow-up: Attending scheduled appointments to monitor the healing of the self-sealing tunnel and check for any inflammation.

  • Superior for Dense Cataracts: Allows for the safe removal of very hard lenses that might cause complications with other methods.

  • Rapid Visual Recovery: Provides a quick return to functional vision, which is essential for patients in high-volume settings.

  • Durability: The self-sealing tunnel is structurally strong and resistant to accidental trauma during the healing phase.

  • Accessibility: Eliminates the need for phacoemulsification machines, making life-changing surgery available in rural and remote areas.

  • Excellent Outcomes: When performed by skilled surgeons, the visual results and safety profile are excellent and long-lasting.

Femtosecond Laser Cataract Surgery

Femtosecond Laser-Assisted Cataract Surgery (FLACS) is a modern, high-precision version of cataract surgery that uses a computer-guided laser to perform several critical steps traditionally done by hand. Often referred to as "robotic" cataract surgery, it relies on advanced 3D imaging and automated laser pulses to ensure unparalleled accuracy and safety.

  • Premium Lens Selection: If you are choosing multifocal, trifocal, or toric IOLs, where perfect lens centration is critical for optimal vision.

  • Pre-existing Astigmatism: When you wish to correct corneal astigmatism during the same procedure to reduce dependence on glasses.

  • Vulnerable Corneas: For patients with conditions like Fuchs' dystrophy, where reducing surgical energy is vital to protecting the cornea.

  • Advanced Cataracts: When the lens is particularly dense, the laser can pre-soften the cataract, making removal safer.

  • Desire for Precision: When seeking the highest level of computer-guided accuracy to minimize manual variability.

  • Imaging & Mapping: The surgeon uses Optical Coherence Tomography (OCT) to create a detailed 3D map of the eye's unique internal anatomy.

  • Corneal Incisions: Based on the 3D map, the laser creates ultra-precise, self-sealing incisions for surgical entry.

  • Capsulotomy: The laser creates a perfectly circular opening in the thin membrane (capsule) that holds the lens.

  • Lens Fragmentation: The laser vibrates at high speeds to soften and break the cataract into tiny pieces before any tools enter the eye.

  • Lens Removal: The pre-softened fragments are gently suctioned out using an ultrasonic probe with significantly reduced energy.

  • IOL Implantation: A permanent artificial intraocular lens (IOL) is inserted to restore clear focus.

  • Duration: The entire outpatient process typically takes between 15 and 30 minutes per eye.

  • Detailed Biometry: Advanced laser measurements of the eye's length and curvature to select the most appropriate IOL.

  • 3D Surgical Planning: Using the OCT data to program the laser for the exact depth and location of all incisions.

  • Medication Audit: Starting antibiotic or anti-inflammatory eye drops a few days before the procedure as prescribed.

  • Fasting: Following clinical instructions regarding food and water intake on the morning of the surgery.

  • Logistics: Arranging for a companion to assist with the return home, as vision may be temporarily blurry.

  • Optical Coherence Tomography (OCT): To visualize the different layers of the eye and ensure the macula is healthy.

  • Topography: Mapping the surface of the cornea to plan for astigmatism correction.

  • Endothelial Cell Count: Checking the health of the inner corneal layer, especially for patients with pre-existing corneal issues.

  • Visual Field Testing: To confirm that the cataract is the primary cause of vision loss and rule out other underlying conditions.

  • Initial Vision: Many patients report clearer vision within 24 to 48 hours due to reduced intraoperative inflammation.

  • Medication: Strict adherence to antibiotic and anti-inflammatory eye drops for several weeks is necessary for healing.

  • Eye Protection: Wearing a protective shield while sleeping for the first week to prevent accidental pressure or rubbing.

  • Activity Restrictions: Patients should avoid heavy lifting, bending over, or getting water/dust in the eye for the first 2–3 weeks.

  • Long-Term Healing: While initial improvement is rapid, full stabilization of the eye typically takes 4 to 6 weeks.

  • Enhanced Precision: Laser-guided steps are accurate to within a hundredth of a millimeter, significantly reducing manual variability.

  • Reduced Stress on the Eye: Because the laser pre-softens the lens, much less ultrasound energy is required, leading to faster corneal recovery.

  • Perfect Centration: The automated capsulotomy ensures the artificial lens is perfectly centered, which is vital for the performance of premium lenses.

  • Customized Correction: The laser can reshape the cornea to treat minor astigmatism with a level of accuracy difficult to achieve by hand.

  • Consistent Outcomes: The integration of real-time 3D imaging allows for a highly predictable and standardized surgical experience.

Breast Cancer Treatment

Breast Cancer Treatment involves a multidisciplinary approach to identify and eliminate abnormal cell growth within the breast tissue. Modern oncology focuses on precision medicine to target tumors in the milk ducts or lobules, aiming to restore physical health, maintain aesthetics, and prevent the spread of cancer cells to other parts of the body.

  • Discovery of a new lump or thickened tissue in the breast or underarm area.

  • Visible changes in the size, shape, or symmetry of the breast.

  • Skin abnormalities such as dimpling, redness, or a texture resembling orange peel.

  • Nipple inversion or persistent pain in the nipple area.

  • Spontaneous discharge other than breast milk.

  • Persistent swelling or localized discomfort that does not correlate with the menstrual cycle.

  • HR-Positive breast cancer fueled by estrogen or progesterone hormones.

  • HER2-Positive or HER2-Low cancers with specific protein over-expression.

  • Triple-Negative Breast Cancer (TNBC) requiring aggressive systemic intervention.

  • Inflammatory Breast Cancer characterized by rapid skin changes and swelling.

  • Metastatic conditions where cells have migrated to the lymph nodes or distant organs.

  • Advanced imaging and biopsy are used to determine the tumor’s molecular profile.

  • Surgical intervention is performed to remove the tumor while preserving as much healthy tissue as possible.

  • Targeted drug therapies are administered to interrupt specific growth signals of cancer cells.

  • Systematic treatment like immunotherapy is used to enhance the body's natural defenses.

  • Precision radiation is applied to the affected area to eliminate any microscopic remnants.

  • Ongoing monitoring and hormonal therapy are utilized to prevent future recurrence.

  • Lumpectomy (Breast-Conserving Surgery) The surgical removal of the tumor and a small margin of surrounding healthy tissue.

  • Mastectomy The removal of the entire breast tissue, often accompanied by immediate oncoplastic reconstruction.

  • Antibody-Drug Conjugates (ADCs) Advanced "smart" chemotherapy that delivers medication directly to the cancer cells to minimize side effects.

  • Targeted Therapy Medications designed to attack specific genetic mutations or proteins like HER2 or ESR1.

  • Immunotherapy Treatment that assists the immune system in identifying and destroying aggressive cancer cells.

  • Precision Radiation Therapy High-energy beams focused on the tumor site using shortened, highly effective schedules.

  • Discuss surgical options and reconstruction preferences with the oncoplastic team.

  • Undergo a complete physical evaluation to ensure readiness for anesthesia.

  • Follow specific instructions regarding the cessation of certain medications or supplements.

  • Arrange for post-operative support and home care during the initial recovery phase.

  • Complete all pre-treatment mapping and diagnostic scans as scheduled.

  • Diagnostic Mammography to provide detailed views of the breast tissue.

  • Breast MRI for high-resolution imaging of the tumor's extent and location.

  • Ultrasound-guided biopsy to determine the specific molecular subtype of the cancer.

  • Blood chemistry panels including tumor markers and organ function tests.

  • Genetic testing to identify inherited mutations that may influence treatment choices.

  • Utilizes real-time biomarkers to match patients with the most effective medications.

  • Minimizes damage to healthy cells through the use of targeted delivery systems.

  • Offers high survival rates through early detection and rapid intervention.

  • Integrates aesthetic considerations with life-saving surgical procedures.

  • Provides a personalized roadmap to recovery based on the unique biology of the tumor.

  • Specialized post-operative care to manage incision sites and physical comfort.

  • Early physical therapy to maintain range of motion in the arm and shoulder.

  • Transition from hospital care to home recovery within the recommended timeframe.

  • Gradual return to daily activities guided by the clinical oncology team.

  • Scheduled follow-up visits to monitor healing and long-term wellness.

  • Regular surveillance through imaging to ensure continued remission.

  • Adherence to long-term hormonal or maintenance therapies as prescribed.

  • Participation in nutritional and lifestyle programs to support overall health.

  • Engagement with survivor support networks for emotional and psychological well-being.

  • Consistent physical activity to improve energy levels and metabolic health.

Thyroid Cancer Treatment

Thyroid cancer treatment is highly successful, with a cure rate exceeding 90% for the most common types. Unlike many other cancers, it often relies on a combination of surgery and radioactive isotopes rather than traditional chemotherapy. Modern protocols are increasingly conservative, with "active surveillance" or partial surgery being used for small, low-risk tumors to preserve natural hormone function.

  • Painless Lump: A noticeable nodule or swelling in the front of the neck, often near the Adam's apple.

  • Voice Changes: Increasing hoarseness or breathiness that does not resolve within a few weeks.

  • Dysphagia: Difficulty swallowing or a persistent "lump in the throat" sensation.

  • Persistent Cough: A chronic cough that is not caused by a cold or respiratory infection.

  • Neck Pain: Pain that starts in the front of the neck and sometimes radiates up toward the ears.

  • Family History: If you have a known genetic predisposition, such as the RET gene mutation (common in Medullary Thyroid Cancer).

  • Hemithyroidectomy (Lobectomy): Removal of only one of the two thyroid lobes. This is a common preference for small, low-risk tumors to avoid lifelong medication.

  • Total Thyroidectomy: Removal of the entire gland; the standard for larger tumors or high-risk variants like Papillary or Follicular cancer.

  • Neck Dissection: If the cancer has reached the lymph nodes, the surgeon removes them during the same operation to prevent further spread.

  • Robotic/Endoscopic Thyroidectomy: Minimally invasive techniques that can sometimes be performed through the armpit or mouth to avoid a visible neck scar.

  • Targeted Internal Radiation: Used after surgery to destroy any remaining microscopic thyroid cells or cancer that has spread elsewhere.

  • How it Works: Since thyroid cells specifically absorb iodine, patients swallow a pill (I-131) that kills those cells specifically, sparing the rest of the body.

  • Preparation: Patients follow a low-iodine diet for 1–2 weeks and receive Thyrogen injections to make any remaining cancer cells "hungry" for the radioactive dose.

  • Isolation Protocols: Because you temporarily become a radiation source, you must follow strict isolation (usually 3–5 days) to protect family members and pets.

  • Diagnostic Mapping: Ultrasound and Fine Needle Aspiration (FNA) are used to confirm the cancer type and map the tumor's size.

  • Anesthesia: Surgery is performed under general anesthesia, typically lasting 2 to 4 hours.

  • Nerve Monitoring: Surgeons use specialized equipment to monitor the laryngeal nerves during surgery to protect your voice.

  • Hormone Replacement: Following a total thyroidectomy, you will start a daily dose of Levothyroxine (T4) to replace the missing hormones.

  • Suppression Therapy: Doctors prescribe a hormone dose to keep TSH (Thyroid Stimulating Hormone) levels very low, which helps prevent any dormant cancer cells from being stimulated to grow.

  • Voice Assessment: A baseline check of your vocal cord function is often conducted by an ENT specialist.

  • Calcium Management: Your surgeon may check your parathyroid function, as these tiny glands (which control calcium) sit right behind the thyroid.

  • Medication Review: Stopping any blood thinners or supplements that could increase bleeding risk during the neck surgery.

  • Fasting (NPO): Standard instructions starting at midnight before the operation to ensure safety during anesthesia.

  • Low-Iodine Planning: If RAI is scheduled, start familiarizing yourself with iodine-free recipes (avoiding iodized salt, dairy, and seafood).

  • Neck Ultrasound: The primary tool for determining the exact size of the tumor and whether lymph nodes look suspicious.

  • Fine Needle Aspiration (FNA): A biopsy where a thin needle collects cells to determine if the tumor is Papillary, Follicular, or Medullary.

  • Thyroid Function Tests (TFTs): Blood tests to measure T3, T4, and TSH levels before the gland is altered.

  • CT/MRI Scan: Occasionally used for advanced cases to see if the tumor is invading the esophagus or windpipe.

  • Molecular Testing: Biopsies are often sent for mutation testing (like BRAF or TERT) to predict how aggressive the cancer might be.

  • Lifelong Medication: If the entire thyroid was removed, you will take a small pill every morning on an empty stomach for the rest of your life.

  • Tumor Marker (Tg) Monitoring: You will have regular Thyroglobulin (Tg) blood tests. Since only thyroid tissue makes this protein, a rising level acts as an early warning system.

  • Periodic Scans: Neck ultrasounds every 6–12 months to ensure the "bed" of the thyroid remains clear of any recurrence.

  • Calcium Supplements: Some patients may need temporary calcium and Vitamin D if the parathyroid glands were "stunned" during surgery.

  • Energy Management: It can take a few months to find your perfect hormone dose; communicate any fatigue or heart palpitations to your doctor.

  • Exceptionally High Cure Rate: Most common thyroid cancers have a 10-year survival rate near 95–98%.

  • Targeted Radiation: RAI therapy provides a way to treat metastatic disease with much less toxicity than standard chemotherapy.

  • Preservation of Function: Current protocols allow many patients to keep half their thyroid, potentially avoiding the need for lifelong medication.

  • Minimal Disruption: Most patients return to work and normal activity within 2 weeks of surgery.

  • Precision Monitoring: The Thyroglobulin test provides one of the most accurate early detection systems in all of oncology.

Limb Salvage Surgery

Limb salvage surgery, also known as limb-sparing surgery, is a complex procedure performed to remove a tumor—typically a bone or soft tissue sarcoma—while preserving the function and appearance of the limb. This surgery serves as a highly effective alternative to amputation and is now a viable option in over 90% of specialized cases. By utilizing custom implants and advanced surgical navigation, surgeons can precisely remove cancerous tissue while saving the vital nerves and blood vessels necessary for a functional hand or foot.

  • Primary Bone Sarcoma: For tumors such as Osteosarcoma or Ewing Sarcoma that are contained within a single bone and haven't spread extensively.

  • Soft Tissue Sarcoma: When a malignant mass in the muscle or connective tissue can be removed while leaving a "safe margin" of healthy surrounding tissue.

  • Metastatic Bone Disease: When cancer from another organ (like the breast or kidney) spreads to a single bone, threatening to cause a fracture or severe pain.

  • Neurovascular Integrity: When the cancer has not encased the major nerves or blood vessels that supply the limb, allowing them to be safely separated from the tumor.

  • Positive Response to Chemotherapy: When "neoadjuvant" (pre-operative) chemotherapy has successfully shrunk the tumor, making a clean surgical removal more achievable.

  • Internal Endoprosthesis: Replacing the removed bone with a custom-made metal implant. For children, "expandable" rods can be used that grow along with the patient.

  • Allograft Reconstruction: Using sterilized bone transplanted from a deceased donor to act as a biological scaffold for the patient's own bone to grow into.

  • Autograft (Vascularized Bone Transfer): Moving a piece of the patient's own healthy bone (such as the fibula) from another part of the body to fill the gap.

  • Soft Tissue Flap Coverage: Plastic surgeons move muscle and skin from a healthy area to cover the internal repair, ensuring a robust blood supply for healing.

  • Extracorporeal Irradiation: A specialized technique where the patient's own bone is removed, treated with high-dose radiation to kill cancer cells, and then re-implanted.

  • Tumor Resection: Under general anesthesia, the surgeon removes the tumor along with a "cuff" of healthy tissue (the margin) to ensure no microscopic cancer cells are left behind.

  • Computer-Assisted Navigation: Surgeons use real-time tracking—similar to a GPS—to ensure the bone cuts perfectly match the pre-operative 3D plan.

  • Vascular and Nerve Protection: The surgical team carefully identifies and protects the major neurovascular bundle, occasionally performing bypass grafts if a vessel must be removed.

  • Prosthetic Fitting: The metal endoprosthesis is securely anchored into the healthy remaining bone, often using "porous" surfaces that allow the patient's bone to bond with the metal.

  • Reconstruction & Closure: Once the bone is replaced, the muscles are re-attached to the implant or allograft, and the skin is closed over drainage tubes to prevent fluid buildup.

  • 3D Imaging and Mapping: Undergoing high-resolution MRI and CT scans to create a detailed 3D model of the limb and the tumor’s exact boundaries.

  • Physical "Pre-hab": Strengthening the muscles around the affected area and practicing with crutches or a walker before the surgery to aid in early recovery.

  • Nutritional Optimization: A high-protein diet is often recommended to support the significant tissue healing and metabolic demands of the reconstruction.

  • Infection Screening: Ensuring there are no active dental or skin infections, as bacteria can easily settle on large internal metal implants.

  • Biopsy Site Review: The surgeon confirms the original biopsy location, as the entire "tract" where the needle entered must be removed to prevent local cancer recurrence.

  • Whole-Body PET-CT: To confirm the cancer is localized and has not spread to the lungs or other bones, ensuring a limb-sparing approach is appropriate.

  • CT or MR Angiogram: To visualize the exact path of the arteries and veins around the tumor, which is critical for the resection plan.

  • Baseline Blood Work: Comprehensive CBC and chemistry panels to ensure the patient has recovered from any pre-operative chemotherapy cycles.

  • Bone Density Scan (DEXA): To check the quality of the "host bone" where the metal prosthesis or donor bone will be attached.

  • Cardiopulmonary Clearance: A thorough heart and lung check to ensure safety during a lengthy, multi-specialty operation that can last several hours.

  • Hospital Stay: Patients typically stay for 5 to 10 days to manage pain, monitor the surgical site, and begin the first steps of rehabilitation.

  • Intensive Physical Therapy: Rehabilitation usually begins within 24–48 hours; this is the most critical part of the journey and continues for 6 to 12 months.

  • Weight-Bearing Restrictions: If a leg bone was replaced, you may need to use a walker or crutches for several months while the bone and implants stabilize and integrate.

  • Infection Awareness: Because of the large implants, patients must be vigilant for signs of infection (redness, fever) and may need antibiotics before future dental work.

  • Long-Term Monitoring: Regular follow-up scans are mandatory to ensure the cancer has not returned and to check for any mechanical wear of the hardware over time.

  • Preserves Natural Appearance: Maintaining the natural limb significantly improves body image and long-term emotional well-being compared to amputation.

  • Excellent Functional Outcomes: Modern prosthetic technology allows many patients to walk without a noticeable limp and return to daily activities and low-impact sports.

  • Precise Cancer Control: Advanced 3D-guided resections offer the same oncological safety and survival rates as amputation for the vast majority of patients.

  • Biological Integration: The use of "smart" metal surfaces and donor bone allows the body to eventually incorporate the reconstruction into its own skeletal system.

  • Multidisciplinary Success: Patients benefit from a combined team of orthopedic oncologists, plastic surgeons, and specialized therapists working in sync for a comprehensive recovery.

Head and Neck Cancer Treatment

Head and Neck Cancer Treatment encompasses a range of specialized medical and surgical interventions designed to eliminate malignant tumors in the mouth, throat, voice box, and nasal passages. Clinical protocols prioritize the preservation of speech and swallowing functions through a multimodal approach, integrating precision surgery with advanced immunotherapy to address squamous cell carcinomas effectively.

  • Persistent Sores: Appearance of a sore, ulcer, or red and white patches in the mouth that do not heal within two weeks.

  • Throat Discomfort: A persistent sore throat or a constant feeling that something is caught in the back of the throat.

  • Voice Changes: Noticeable hoarseness or a significant change in the quality or pitch of the voice.

  • Dysphagia: Difficulty or pain experienced during the process of swallowing food or liquids.

  • New Growths: Discovery of a new lump, swelling, or painless mass in the neck, jaw, or facial area.

  • Nasal/Ear Symptoms: Frequent nosebleeds, persistent nasal congestion, or chronic ear pain without an active infection.

  • Oral Cavity Cancers: Malignancies affecting the lips, tongue, gums, or the mucosal lining of the cheeks.

  • Oropharyngeal Cancers: Particularly those linked to the HPV-16 virus, often located in the tonsils or the base of the tongue.

  • Laryngeal Malignancies: Cancers occurring in the tissues of the voice box that impact breathing and speech.

  • Sinonasal Tumors: Rare tumors in the nasopharynx or paranasal sinuses requiring complex anatomical access.

  • Recurrent/Metastatic HNSCC: Squamous cell carcinomas that have returned or spread to distant organs like the lungs.

  • Transoral Robotic Surgery (TORS): A minimally invasive technique used to remove throat tumors through the mouth, avoiding large external incisions.

  • Neck Dissection: The surgical removal of lymph nodes in the neck to prevent or treat the regional spread of cancer.

  • Immunotherapy: Checkpoint inhibitors (such as Pembrolizumab or Nivolumab) are now standard first-line treatments for advanced disease.

  • Targeted Therapy: Precision medications like Cetuximab that block specific proteins facilitating cancer cell growth.

  • Intensity-Modulated Radiation Therapy (IMRT): High-precision radiation that conforms to the tumor's 3D shape to spare the salivary glands.

  • Photodynamic Therapy: A treatment using light-sensitive drugs and laser energy to destroy superficial mucosal cancers.

  • Diagnostic Mapping: High-resolution CT, MRI, and PET scans are utilized to create a precise map of the tumor and nearby nerves.

  • Histology Confirmation: A tissue biopsy is conducted to confirm the presence of squamous cell carcinoma and check for HPV status.

  • Precision Surgery: Surgeons remove the primary tumor, often using robotic tools to navigate the narrow passages of the throat.

  • Adjuvant Radiation: Precision radiation is applied to the mucosal lining to destroy any microscopic cells remaining after surgery.

  • Immune Priming: Immunotherapy infusions help the body's T-cells identify and destroy cancer cells throughout the system.

  • Functional Rehab: Specialized sessions are integrated early to support the recovery of speech, airway protection, and swallowing.

  • Baseline Therapy: Consult with a speech and swallow therapist to establish a functional baseline for post-operative recovery.

  • Dental Clearance: Undergo a comprehensive dental evaluation, as radiation can significantly impact jawbone health and density.

  • Cessation Programs: Adhere to strict smoking and alcohol cessation programs, as continued use significantly lowers treatment success.

  • Nutritional Mapping: Follow specific high-calorie nutritional guidelines to maintain strength and prevent weight loss during therapy.

  • Surgical Roadmarking: Complete all diagnostic mapping to ensure the surgical team has a clear view of critical tumor margins.

  • Fiberoptic Endoscopy: A visual inspection using a thin, flexible tube to examine the throat, larynx, and nasal passages.

  • Head and Neck MRI: To determine the exact size and depth of the malignancy and its proximity to major blood vessels.

  • PET-CT Scan: To evaluate metabolic activity and check if the cancer has spread to the chest or distant lymph nodes.

  • HPV Biomarker Testing: Specifically testing for p16 protein to identify viral status, which dictates the intensity of the treatment.

  • Immune Profiling: Comprehensive blood panels to assess PD-L1 levels, helping to predict responsiveness to immunotherapy.

  • Surveillance Schedule: Regular physical exams and imaging every 3 months for the first two years to monitor for early signs of recurrence.

  • Oral Health Vigilance: Commitment to lifelong dental hygiene and fluoride treatments to manage the long-term effects of radiation on saliva.

  • Lifestyle Maintenance: Absolute avoidance of tobacco and alcohol to prevent the development of a second primary cancer.

  • Functional Maintenance: Continued participation in speech therapy and swallowing exercises to prevent long-term joint stiffness (trismus).

  • Mucosal Monitoring: Routine follow-up appointments with a specialist to ensure the continued health of the mucosal surfaces.

  • Superior Survival Rates: Features high survival rates for localized cases through early detection and robotic surgery.

  • Revolutionary Immunotherapy: Modern standards use neoadjuvant (pre-surgery) immunotherapy to shrink tumors and improve surgical outcomes.

  • Aesthetic Preservation: Employs robotic technology and reconstructive microsurgery to minimize physical changes and preserve facial appearance.

  • Organ Preservation: Prioritizes de-escalated protocols for HPV-positive cases to preserve vital functions like speaking and eating.

  • Biologically Tailored Care: Every plan is customized based on the tumor's genetic signature and viral status for maximum impact.

Neck Dissection (Cancer)

A neck dissection is a major surgery to remove lymph nodes from the neck when cancer from the head, neck, or thyroid has spread (metastasized) or is at high risk of doing so. The goal is to clear the "drainage pathways" for cancer cells and provide a comprehensive pathology report for staging the disease. Surgical techniques prioritize the preservation of vital nerves and muscles to ensure better functional recovery.

  • Node-Positive (N+): When scans (PET-CT/MRI) or a physical exam show clinically visible or palpable cancer in the lymph nodes.

  • Elective/Prophylactic Surgery: When there is a greater than 15–20% risk of "hidden" (occult) metastasis, even if the neck appears clear on initial scans.

  • Salvage Surgery: To address recurrent disease in the neck after previous radiation or chemotherapy treatments have failed.

  • Primary Cancer Management: Often performed concurrently with the removal of the primary tumor (e.g., glossectomy or thyroidectomy) to ensure regional control.

  • Unknown Primary: When a cancerous lymph node is found in the neck, but the original source of the cancer has not yet been identified.

  • Selective Neck Dissection (SND): The most common approach; removes only the specific lymph node groups (e.g., Levels I–III or II–IV) most likely to harbor cancer based on the tumor's location.

  • Modified Radical Neck Dissection (MRND): Removes lymph nodes from Levels I–V but spares one or more key structures (muscle, vein, or nerve) to preserve neck and shoulder function.

  • Radical Neck Dissection (RND): Removes all lymph nodes (Levels I–V) on one side, along with the sternocleidomastoid muscle (SCM), internal jugular vein (IJV), and spinal accessory nerve (SAN).

  • Extended Neck Dissection: Involves removing additional lymph node groups (like Level VI/central or retropharyngeal nodes) or extra structures like the carotid artery.

  • Anesthesia: Performed under general anesthesia. Surgeons often use specialized nerve monitors to identify and protect motor nerves during the procedure.

  • Incision: Often a single incision placed within a natural neck skin crease ("apron incision") to minimize visible scarring.

  • Systematic Clearance: The surgeon carefully dissects the fatty tissue containing the lymph nodes away from the carotid artery, jugular vein, and the nerves that control the tongue and shoulder.

  • Nerve Monitoring: Real-time monitoring of the Spinal Accessory Nerve (which moves the shoulder) and the Marginal Mandibular Nerve (which moves the lower lip) is a clinical standard.

  • Drain Placement: One or more suction drains are placed under the skin to prevent fluid (seroma) or blood (hematoma) from collecting while the area heals.

  • Pathology Processing: Each level of lymph nodes is labeled and sent separately to the lab to determine exactly how far the cancer has spread.

  • Shoulder Mobility Assessment: Establishing a baseline for shoulder strength and range of motion to track progress during post-operative physical therapy.

  • Imaging Correlation: Reviewing 3D reconstructions of CT or MRI scans to identify the proximity of enlarged nodes to the internal jugular vein.

  • Tobacco Cessation: Stopping smoking at least 4 weeks prior is essential to prevent "skin flap necrosis," where the skin of the neck fails to heal properly.

  • Medication Audit: Pausing any blood thinners or herbal supplements (like Ginkgo or Vitamin E) that could increase the risk of bleeding around major neck vessels.

  • Nutritional Optimization: Ensuring adequate protein intake to support the healing of the large surgical surface area created during the dissection.

  • Contrast-Enhanced CT or MRI: To map the "N-stage" of the cancer and identify any nodes that are "matted" or involving major veins.

  • PET-CT Scan: To rule out distant spread to the lungs or liver, ensuring the neck surgery is part of a curative plan.

  • Ultrasound-Guided FNAC: A fine-needle biopsy of suspicious nodes to confirm the presence of squamous cell carcinoma or thyroid cancer cells.

  • Thyroid Profile: If the dissection involves Level VI (central neck), baseline calcium and PTH levels are checked to monitor parathyroid function.

  • Coagulation Profile: A standard check (PT/INR) to ensure safe surgical hemostasis during the dissection of the "great vessels" of the neck.

  • Hospital Stay: Expect to remain in the hospital for 2 to 5 days until the surgical drains are ready to be removed.

  • Shoulder Weakness: If the spinal accessory nerve was handled or removed, you may experience "shoulder drop" or difficulty lifting your arm; physical therapy is vital.

  • Nerve Weakness: Potential temporary or permanent weakness in the lower lip (marginal mandibular nerve) or tongue (hypoglossal nerve).

  • Chyle Leak: A rare (1–2.5%) complication where a lymphatic channel is damaged, causing milky fluid to drain; this usually requires a special low-fat diet.

  • Numbness: Permanent or temporary numbness in the neck, earlobe, or jawline is common because small sensory nerves are often divided.

  • Activity Rules: Avoid heavy lifting (over 4.5kg) for 4 to 6 weeks to prevent strain on the healing neck tissues.

  • Definitive Regional Control: Neck dissection is the most reliable way to remove microscopic cancer that imaging might miss, significantly reducing the risk of recurrence.

  • Accurate Staging: The pathology report from the dissection determines whether you will need additional "adjuvant" radiation or chemotherapy.

  • Functional Preservation: "Selective" techniques allow surgeons to remove the cancer while leaving the muscles and nerves intact for a better quality of life.

  • Integrated Care: Modern surgical protocols focus on early movement and specialized physical therapy to prevent long-term neck stiffness.

  • Lymphedema Management: Specialized therapy programs help manage any facial or neck swelling through manual lymphatic drainage and compression.

Modified Radical Mastectomy

A Modified Radical Mastectomy (MRM) is a major surgery used to treat breast cancer by removing the entire breast tissue while preserving the underlying chest muscles. It was developed as a less disfiguring alternative to the older "Radical Mastectomy," which involved removing the chest wall muscles as well. MRM remains a cornerstone of treatment for patients with larger tumors or multi-focal disease, providing a high level of local cancer control.

  • Large Tumor Size: When the tumor is too large to be removed with a lumpectomy while maintaining an acceptable breast shape.

  • Multicentric Disease: When there are multiple tumors located in different quadrants of the same breast.

  • Extensive Nodal Involvement: When cancer has spread significantly to the axillary lymph nodes, requiring a formal dissection of Level I and II nodes.

  • Radiation Contraindications: For patients who cannot undergo the radiation therapy that is mandatory after a lumpectomy (due to prior chest radiation or specific connective tissue diseases).

  • Inflammatory Breast Cancer: Often used as part of a multi-modal plan following initial chemotherapy to ensure all cancer cells are cleared.

  • Patient Preference: For individuals who prefer the definitive nature of removing all breast tissue to minimize the risk of a local recurrence.

  • The Entire Breast: This includes all glandular breast tissue, the skin envelope, the nipple, and the areola.

  • Axillary Lymph Nodes: Most or all of the lymph nodes under the arm (typically Level I and II) are removed to check for spread and provide definitive staging.

  • The Pectoral Fascia: The thin layer of connective tissue covering the pectoralis major muscle is removed, but the muscle itself is left intact to preserve arm strength.

  • Clear Margins: A deep margin of tissue is removed down to the muscle layer to ensure no microscopic cells are left on the chest wall.

  • Anesthesia: Performed under general anesthesia. A PECS block (nerve block) is often administered to significantly reduce post-operative pain.

  • The Incision: An elliptical incision is made to remove the nipple-areola complex and the primary tumor site while allowing for the best possible closure.

  • Axillary Dissection: The surgeon carefully identifies and protects the long thoracic and thoracodorsal nerves while clearing the fatty tissue and lymph nodes from the armpit.

  • Drain Placement: One or two flexible plastic tubes (Jackson-Pratt drains) are placed under the skin to prevent fluid (seroma) from building up during initial healing.

  • Wound Closure: The skin is closed with dissolvable sutures or surgical glue, ensuring the tension is distributed evenly across the chest wall for a smoother scar.

  • Reconstruction Consultation: Meeting with a plastic surgeon to discuss whether immediate reconstruction (during the same surgery) or delayed reconstruction is right for you.

  • Physical Therapy Baseline: Measuring arm circumference and range of motion to help track and prevent lymphedema after the lymph nodes are removed.

  • Medication Audit: Pausing aspirin, ibuprofen, or certain supplements (like Vitamin E) that can increase the risk of bleeding or hematoma.

  • Tobacco Cessation: Strictly stopping smoking at least 4 weeks before surgery to ensure the large skin flaps on the chest heal without complications.

  • Emotional Support: Connecting with breast cancer support groups or counseling to prepare for the physical and emotional changes of the procedure.

  • Breast MRI: To confirm the extent of the disease and ensure there are no hidden tumors in either breast.

  • CT Scan or PET-CT: To rule out any spread to the lungs, liver, or bones before committing to localized surgery.

  • Ultrasound of the Axilla: To map out the lymph nodes and identify any that appear suspicious for cancer spread.

  • Baseline Blood Work: Comprehensive blood counts (CBC) and chemistry panels to ensure you are healthy enough for 2–4 hours of surgery.

  • Cardiac Screening (ECG): A heart check, especially for patients who may have received cardiotoxic chemotherapy prior to surgery.

  • Hospital Stay: Most patients stay 1 to 2 nights in the hospital for monitoring.

  • Drain Management: Drains typically stay in for 1 to 2 weeks; you will be taught how to "milk" the tubes and record fluid output at home.

  • Activity Restrictions: You will have restricted arm movement (no lifting over 2–4 kg) for several weeks to protect the incision and allow tissues to heal.

  • Lymphedema Risk: Because lymph nodes are removed, there is a lifelong risk of swelling in the arm; modern protocols emphasize early surveillance and specialized sleeve fitting.

  • Sensation Changes: Permanent or long-term numbness is common in the chest wall and the back of the upper arm where small sensory nerves were divided.

  • Phantom Sensation: Some patients feel as if the breast is still there or experience itching/tingling; this is a normal neurological response.

  • Definitive Local Control: MRM offers the most thorough removal of breast tissue, providing high confidence that the local cancer has been cleared.

  • Staging Accuracy: Removing Level I and II lymph nodes gives the oncology team an accurate roadmap for determining if further chemotherapy or hormone therapy is needed.

  • Preservation of Strength: By keeping the chest muscles intact, patients retain functional strength for activities like swimming, lifting, and overhead reaching.

  • Modern Reconstruction: Advanced reconstructive techniques (like flap surgery or implants) can recreate a natural-looking breast, helping patients regain body confidence.

  • Improved Survival: When combined with modern targeted therapies, the survival rates for patients undergoing MRM are higher than ever before.

Whipple Surgery (Pancreatic Cancer)

The Whipple procedure, or pancreaticoduodenectomy, is one of the most complex and demanding abdominal surgeries. It is primarily performed to treat tumors in the head of the pancreas, the bile duct, or the duodenum (the first part of the small intestine). Many of these procedures are now performed using robotic-assisted platforms to improve precision and shorten recovery times for this intricate "re-plumbing" of the digestive tract.

  • Pancreatic Head Tumors: When a malignancy is localized in the widest part of the pancreas (the head).

  • Bile Duct Cancer: For tumors located in the distal (lower) portion of the bile duct.

  • Duodenal Cancer: When cancer is found in the first section of the small intestine.

  • Ampullary Cancer: For tumors at the "Ampulla of Vater," where the bile and pancreatic ducts join.

  • Localized Management: When imaging confirms the tumor has not yet encased major arteries, making it surgically resectable.

  • Pancreas Head: The surgeon removes the right, widest part of the pancreas where the tumor is located.

  • Duodenum: The first 25–30 cm of the small intestine is removed to ensure clear margins.

  • Biliary System: The gallbladder and the common bile duct are removed as they are physically attached to the pancreatic head.

  • Stomach (Variable): In a "classic" Whipple, the lower portion of the stomach is removed. In a "pylorus-preserving" Whipple, the entire stomach and its exit valve are kept intact.

  • Lymph Nodes: Surrounding nodes are excised to check for cancer spread and ensure the most accurate staging.

  • Pancreaticojejunostomy: The remaining tail and body of the pancreas are attached to the small intestine so digestive enzymes can reach food.

  • Hepaticojejunostomy: The remaining bile duct is reconnected to the small intestine to allow bile from the liver to drain properly.

  • Gastrojejunostomy: The stomach (or remaining duodenum) is attached to the small intestine so food can pass through the digestive system.

  • Vascular Reconstruction: Specialized surgeons can often replace or repair nearby veins if the tumor has minimally invaded them.

  • Anesthesia: The operation is performed under general anesthesia and typically lasts between 4 to 12 hours depending on complexity.

  • Surgical Approach: Can be performed via a traditional "open" incision or through minimally invasive robotic-assisted surgery.

  • Margin Assessment: Real-time pathology (frozen sections) is often used during the surgery to ensure all edges of the removed tissue are cancer-free.

  • Drain Placement: Small tubes (drains) are placed near the new connections to monitor for fluid leaks during the first few days of recovery.

  • Feeding Tube: In some cases, a temporary feeding tube is placed to ensure nutrition while the new stomach-to-intestine connection heals.

  • Biliary Decompression: If you have severe jaundice, a stent may be placed in the bile duct a few weeks before surgery to allow the liver to recover.

  • Pre-habilitation: Engaging in a guided walking and breathing exercise program to improve heart and lung stamina before the long surgery.

  • Nutritional Loading: Following a high-protein diet to prevent muscle wasting and ensure the body has the resources to heal complex internal sutures.

  • Medication Audit: Pausing blood thinners or certain herbal supplements that can increase bleeding risks during the extensive resection.

  • Cardiac Clearance: A thorough heart evaluation to ensure you can safely tolerate several hours of general anesthesia.

  • Multi-Phase CT (Pancreas Protocol): A specialized scan to see exactly how the tumor sits against the mesenteric veins and arteries.

  • Endoscopic Ultrasound (EUS): Used to take a biopsy and look at the tumor's proximity to the "re-plumbing" site.

  • CA 19-9 Marker: A blood test to establish a baseline for monitoring the cancer's response to surgery and future treatments.

  • Chest CT: To confirm the lungs are clear of any metastatic activity before proceeding with the abdominal resection.

  • Complete Metabolic Panel: Assessing liver and kidney function to ensure the body can process the medications used during and after surgery.

  • Hospital Stay: Usually 7 to 14 days in a specialized surgical unit to monitor the stability of the new connections.

  • Pancreatic Fistula: The most serious common risk, where pancreatic juice leaks from a connection; this requires careful drain management.

  • Delayed Gastric Emptying (DGE): The stomach may temporarily lose its ability to push food into the intestine, causing nausea for 7–10 days.

  • Enzyme Replacement (PERT): Many patients require daily pancreatic enzyme supplements for life to help digest fats and proteins.

  • New-Onset Diabetes: If a significant portion of the pancreas was removed, you may need insulin or oral meds to manage blood sugar.

  • Significantly Higher Survival: For pancreatic cancer, the 5-year survival rate after a successful Whipple is 20–25%, much higher than without surgery.

  • Potential for Cure: It remains the only treatment that offers a definitive chance to completely remove a localized pancreatic tumor.

  • Pain Relief: Removing a tumor that is pressing on the celiac plexus (nerves) can significantly reduce chronic abdominal and back pain.

  • Robotic Precision: Modern robotic techniques have reduced the incidence of post-operative infections and shortened hospital stays.

  • Multidisciplinary Success: When paired with modern chemotherapy, the Whipple procedure provides the strongest foundation for long-term remission.

Tongue Resection (Cancer)

Tongue Resection, clinically termed a glossectomy, is the surgical removal of all or part of the tongue to treat oral cancer. The primary goal is to excise the malignant tumor with a 1–2 cm "clear margin" of healthy tissue to prevent recurrence. Advanced microvascular reconstruction is now the standard for maintaining speech and swallowing functions after a resection.

  • Squamous Cell Carcinoma (SCC): The most common form of tongue cancer, often appearing as a persistent ulcer or growth on the lateral (side) border.

  • Deep Invasion: When a tumor has grown into the underlying intrinsic muscles of the tongue.

  • Leukoplakia with Dysplasia: When precancerous white patches show high-grade changes that are likely to become invasive.

  • Recurrent Disease: When cancer returns in a previously treated area of the mouth.

  • Base of Tongue Tumors: When the malignancy is located at the very back of the tongue, near the throat.

  • Partial Glossectomy: Removal of a small portion of the tongue. Usually, the remaining tissue is sewn together, and speech and swallowing remain near normal.

  • Hemiglossectomy: Removal of one full side of the tongue. This typically requires reconstruction using tissue from another part of the body to maintain volume and mobility.

  • Total Glossectomy: Removal of the entire tongue. This is a life-altering procedure reserved for advanced cancers and requires extensive microvascular reconstruction.

  • Base of Tongue Resection: A specialized procedure for tumors at the back of the tongue, often performed robotically (TORS) to avoid large external incisions.

  • Compartmental Resection: Removing the tumor along with the entire anatomical compartment of muscles to ensure no microscopic cells remain.

  • Anesthesia: Performed under general anesthesia, often with a "nasotracheal" tube to provide the surgeon with a clear view of the oral cavity.

  • Neck Dissection: A concurrent procedure where lymph nodes are removed from the neck to check for microscopic cancer spread.

  • Resection with Margins: The surgeon uses specialized tools to cut 1–2 cm away from the visible tumor to ensure a "pathologically clear" margin.

  • Microvascular Reconstruction (Free Flap): For larger defects, tissue (skin, fat, or muscle) is taken from the forearm or thigh, and its blood vessels are sewn to vessels in the neck using a microscope.

  • Tracheostomy: A temporary breathing hole is made in the neck because postoperative swelling can block the airway; it is usually removed after 5–10 days.

  • Feeding Tube Placement: Since the patient cannot swallow while the sutures heal, a temporary NG (nose-to-stomach) or PEG tube provides nutrition for 1–2 weeks.

  • Speech and Swallow Baseline: Meeting with a specialist to assess current function and plan for intensive rehabilitation after surgery.

  • Dental Evaluation: Removing any decayed teeth that might cause infection during healing or interfere with future radiation therapy.

  • Allen’s Test: If a forearm flap is planned, this test ensures the hand has a sufficient secondary blood supply.

  • Nutritional Optimization: Starting high-protein supplements to ensure the body has the resources to heal complex microvascular connections.

  • Imaging Correlation: Reviewing 3D CT or MRI scans to map the tumor's depth and its proximity to the lingual artery and nerve.

  • Contrast-Enhanced MRI: The "gold standard" for determining the exact depth of invasion (DOI) into the tongue muscle.

  • PET-CT Scan: To rule out any spread to the lungs or distant lymph nodes before committing to a major reconstructive procedure.

  • Biopsy Verification: Confirming the histological grade of the cancer to determine the necessary extent of the neck dissection.

  • Doppler Ultrasound: To map the blood vessels in the donor site (arm or leg) to ensure they are suitable for a "free flap" transfer.

  • Coagulation Profile: To ensure blood clots properly at the resection site but remains fluid enough for microscopic vascular connections.

  • Hospital Stay: Typically 7 to 14 days, with the first few days spent in a specialized unit for frequent "flap checks" to ensure blood flow.

  • Flap Failure: A rare but critical risk where the microscopic blood vessel connection clots, requiring immediate emergency re-operation.

  • Aspiration Risk: If the new tongue cannot protect the airway during swallowing, food or saliva may enter the lungs, potentially causing pneumonia.

  • Fistula: An abnormal leak of saliva from the mouth into the neck tissues, which usually requires specialized wound care to heal.

  • Sensory Changes: Permanent numbness in the resected area or a loss of taste is common, though the other side of the tongue often compensates.

  • Microvascular Precision: Modern "free flap" techniques allow surgeons to rebuild a tongue that can still move, speak, and push food to the back of the throat.

  • Comprehensive Staging: Performing a neck dissection during the same surgery ensures that any microscopic spread is caught and treated early.

  • Robotic (TORS) Advancements: For base-of-tongue cancers, robotic surgery allows for removal through the mouth, avoiding the need to "split" the jawbone.

  • Intensive Rehabilitation: Standardized speech and swallow therapy significantly improves quality of life, helping patients return to a normal diet.

  • Multidisciplinary Success: When surgery is followed by modern adjuvant radiation, local control rates for tongue cancer are at an all-time high.

Bone & Soft Tissue Tumor Surgery

Surgery for bone and soft tissue tumors (primarily sarcomas) is a highly specialized field where the goal is to remove the cancer completely while preserving as much physical function and appearance as possible. Because these tumors often grow near major nerves, blood vessels, and joints, the surgery requires meticulous planning. The standard of care involves using 3D-printed models and computer-assisted navigation to achieve precise "clear margins" while sparing the limb.

  • Primary Bone Cancer: For malignancies such as osteosarcoma, Ewing sarcoma, or chondrosarcoma.

  • Soft Tissue Sarcoma: When a cancerous mass is identified in the muscle, fat, nerves, or connective tissues (e.g., liposarcoma or synovial sarcoma).

  • Benign but Aggressive Tumors: For non-cancerous growths like Giant Cell Tumors (GCT) that can destroy local bone if not removed.

  • Metastatic Bone Disease: When cancer from another organ (like the lung or breast) has spread to a bone and threatens to cause a fracture.

  • Recurrent Tumors: When a previously treated tumor returns in the same anatomical compartment.

The "margin" is the area of healthy tissue removed along with the tumor. Surgeons use specific classifications to define how much tissue to take:

  • Intralesional (Curettage): The tumor is scraped out from the inside. This is generally used only for benign (non-cancerous) bone tumors.

  • Marginal Excision: The tumor is removed exactly at its edge (pseudocapsule). This is often used for benign soft tissue tumors like lipomas.

  • Wide Excision: The tumor is removed with a continuous "cuff" of healthy tissue surrounding it. This is the standard of care for malignant tumors (sarcomas) to ensure no microscopic cells are left behind.

  • Radical Resection: Removal of the entire anatomical compartment (the whole bone or muscle group) containing the tumor.

Once a tumor is removed, the resulting gap must be rebuilt to restore strength and mobility:

  • Biological Reconstruction: Uses the body's own ability to heal.
    Allograft: Uses donated bone from a bone bank to act as a scaffold.
    Autograft: Uses the patient's own bone, such as the fibula (calf bone), often moved with its blood vessels intact.

  • Mechanical Reconstruction: Uses artificial megaprostheses (large metal implants) to replace joints or long sections of bone. These allow for immediate weight-bearing.

  • Distraction Osteogenesis: Using devices like the Ilizarov fixator to slowly "grow" new bone to fill a gap.

Because children's bones are still growing, surgery requires unique solutions to prevent leg-length discrepancies:

  • Expandable Prostheses: Metal implants that can be lengthened non-invasively using magnets as the child grows to keep the legs equal in length.

  • Rotationplasty: A specialized procedure where the middle of the leg is removed, and the lower leg is rotated 180° and reattached to the thigh. The ankle then functions as a knee joint.

  • Growth Plate Sparing: Advanced 3D navigation allows surgeons to remove tumors while saving the natural growth plates whenever possible.

[Image showing an expandable "growing" prosthesis for a pediatric patient]

  • Anesthesia: Performed under general anesthesia. Advanced nerve blocks are often used to provide long-term pain relief to the limb.

  • Computer-Assisted Navigation: Surgeons use "GPS for surgery" to follow a pre-planned 3D map, ensuring they cut exactly where the cancer ends and healthy bone begins.

  • Multidisciplinary Collaboration: If the tumor involves major blood vessels or leaves a large skin defect, vascular and plastic surgeons work simultaneously to perform bypasses or skin flaps.

  • 3D-Printed Cutting Guides: Custom-made templates are placed on the bone during surgery to guide the saw blade with sub-millimeter precision.

  • Intraoperative Imaging: Using O-arm or C-arm technology to verify the placement of implants and the completeness of the resection before the patient leaves the OR.

  • Tumor Board Review: Your case is reviewed by a team of radiologists, pathologists, and oncologists to determine the best sequence of treatment.

  • 3D Virtual Planning: Surgeons use MRI/CT scans to create a virtual 3D model of your limb to practice the surgery before the actual procedure.

  • Physical Therapy Baseline: Establishing a baseline for your limb's strength and range of motion to guide your post-operative recovery.

  • Nutritional Optimization: Ensuring high protein intake to support the extensive bone and tissue healing required.

  • "Pre-hab" Exercise: Strengthening the healthy limbs to prepare for the period of restricted weight-bearing on the operated side.

  • High-Resolution MRI: The most critical test for visualizing the tumor's relationship to muscles, nerves, and blood vessels.

  • Systemic CT Scan: To rule out "skip lesions" or spread to the lungs, which is common with certain sarcomas.

  • PET-CT Scan: To identify any other areas of metabolic activity that might indicate the cancer has moved elsewhere.

  • Core Needle Biopsy: To confirm the exact grade and type of the sarcoma, which dictates how wide the surgical margins must be.

  • Angiography: To map out the blood supply of the limb, especially if a vascularized bone graft (autograft) is planned.

  • Hospital Stay: Typically 5 to 10 days depending on the complexity of the reconstruction and the level of pain management needed.

  • Rehabilitation: This is the most critical phase. Physical therapy usually begins within 24–48 hours and can continue for 6 to 12 months.

  • Weight-Bearing Rules: Depending on the type of bone graft or prosthesis, you may need to use crutches or a walker for 3 to 6 months while the bone heals.

  • Mechanical Wear: Over many years, metal megaprostheses can wear out or loosen, potentially requiring a revision surgery.

  • Infection Monitoring: Large implants and pre-operative chemotherapy can increase the risk of infection, requiring long-term monitoring.

  • Limb Salvage Success: Over 90% of sarcoma patients can have their limbs saved rather than amputated, with no loss in survival rates.

  • Precise Margin Control: Advanced 3D navigation has significantly lowered the risk of local recurrence by ensuring no microscopic cells are missed.

  • Functional Recovery: Modern megaprostheses and biological grafts allow many patients to return to walking, swimming, and an active lifestyle.

  • Growth Management: Expandable technology ensures that children can reach their full height without the need for multiple major open surgeries.

  • Integrated Care: When surgery is combined with modern immunotherapy and targeted radiation, the long-term cure rates for sarcomas are higher than ever before.

Gastrointestinal Cancer Surgery

Gastrointestinal (GI) Cancer Surgery refers to a broad category of operations used to remove tumors from the digestive tract, including the esophagus, stomach, liver, pancreas, and intestines. The primary goal is curative resection, where the surgeon removes the tumor along with a surrounding margin of healthy tissue and nearby lymph nodes. These procedures are increasingly performed using robotic platforms to enhance precision and protect delicate internal structure.

  • Esophageal Malignancies: When cancer is located in the tube connecting the throat to the stomach.

  • Gastric Adenocarcinoma: When a tumor is identified in the lining of the stomach.

  • Localized Pancreatic/Biliary Tumors: For cancers in the head of the pancreas or the bile ducts.

  • Colorectal Cancer: When malignant growths are found in the large intestine or the rectum.

  • Primary or Metastatic Liver Cancer: When tumors are confined to specific segments of the liver, allowing for safe removal.

  • Gastrointestinal Stromal Tumors (GIST): For specialized mesenchymal tumors found anywhere along the GI tract.

  • Oesophagectomy: Removal of part or most of the esophagus. The stomach is typically shaped into a tube and pulled up into the chest to replace the missing section.

  • Gastrectomy: The removal of either a portion (subtotal) or the entirety of the stomach. In a total gastrectomy, the esophagus is connected directly to the small intestine.

  • Whipple Procedure: A complex "re-plumbing" of the digestive system used for pancreatic head tumors, involving the removal of the pancreas head, duodenum, and gallbladder.

  • Hepatectomy: Surgical removal of a portion of the liver. This is highly effective because the liver can regenerate to nearly its full size within weeks.

  • Colectomy: Removal of a diseased section of the colon (large intestine), followed by an anastomosis (reconnection) of the healthy ends.

  • Low Anterior Resection (LAR): A sphincter-preserving surgery for rectal cancer that avoids the need for a permanent stoma.

  • Anesthesia: All major GI surgeries are performed under general anesthesia, often supplemented with an epidural for post-operative pain control.

  • Minimally Invasive Approaches: Most modern procedures utilize laparoscopic or robotic-assisted techniques through small "keyhole" incisions.

  • Lymphadenectomy: A critical step where surgeons remove specific groups of lymph nodes (e.g., D2 dissection in stomach cancer) to check for microscopic spread.

  • Anastomosis: The process of reconnecting the digestive tract using specialized surgical staples or hand-sewn sutures to ensure a watertight seal.

  • Stoma Creation (Optional): In some colorectal cases, a temporary or permanent opening (stoma) is created on the abdomen to allow waste to exit the body while the internal connections heal.

  • Pathologic Verification: All removed tissue is sent for immediate and long-term analysis to ensure "R0" margins (no cancer cells left behind).

  • Nutritional Optimization: Many patients require a high-protein diet or specialized supplements to combat "cancer cachexia" before a major operation.

  • Bowel Preparation: For colorectal surgery, a mechanical bowel prep (drinking a clearing solution) is necessary to reduce the risk of infection.

  • Endoscopic Staging: Undergoing a final EUS (Endoscopic Ultrasound) to confirm the tumor depth and nodal involvement.

  • Cardiopulmonary Clearance: Ensuring the heart and lungs are strong enough to tolerate the shifts in fluid and circulation during long GI procedures.

  • Cessation Protocols: Strictly adhering to tobacco and alcohol cessation to improve the healing of new internal connections.

  • Multi-Phase CT or MRI: High-resolution imaging to map the tumor’s relationship with major abdominal blood vessels (like the mesenteric artery).

  • PET-CT Scan: To rule out any spread of the cancer to the bones or lungs, ensuring surgery remains the correct curative path.

  • Endoscopy / Colonoscopy: To physically visualize the tumor and mark its location for the surgeon using "clipping" or tattooing.

  • Tumor Markers: Blood tests for markers like CEA, CA 19-9, or AFP to establish a baseline for post-operative monitoring.

  • Biopsy Verification: Confirming the cellular grade of the tumor to determine if chemotherapy should be given before surgery (neoadjuvant).

  • Hospital Stay: Varies by procedure—3–5 days for a colectomy, but 7–14 days for more complex cases like a Whipple or Oesophagectomy.

  • Anastomotic Leak: The most serious risk; modern protocols involve early monitoring of inflammatory markers to catch and treat leaks quickly.

  • Dietary Transition: Starting with clear liquids and slowly progressing to soft, small, frequent meals as the bowel "wakes up."

  • Nutritional Monitoring: Patients may need lifelong vitamin supplements (like B12) if large portions of the stomach or intestine were removed.

  • Long-Term Activity: Most patients return to light activities in 6 weeks, but full core strength and bowel habit stabilization can take 6–12 months.

  • Curative Foundation: Surgery remains the primary treatment for most localized GI cancers and provides the best chance for long-term survival.

  • D2 Lymph Node Clearance: Specialized centers use advanced techniques to remove regional nodes, significantly lowering the risk of local recurrence.

  • Organ Regeneration & Adaptation: The liver's ability to regrow and the intestine's ability to adapt allow for extensive resections with minimal long-term impact on lifestyle.

  • Minimally Invasive Recovery: Robotic-assisted techniques lead to less internal scarring (adhesions) and a much faster return to normal eating.

  • Multidisciplinary Care: When integrated with modern neoadjuvant and adjuvant protocols, GI surgery outcomes have reached historic highs.

Liver Resection (Cancer)

Liver Resection (also known as a Hepatectomy) is a major surgical procedure to remove malignant tumours from the liver. Because the liver is the only internal organ capable of regeneration, surgeons can safely remove a large portion of it, and the remaining healthy tissue will grow back to nearly its original size within 6 to 10 weeks. This remains the "gold standard" for curative intent when cancer is confined to the liver.

  • Hepatocellular Carcinoma (HCC): The most common primary liver cancer, particularly in patients with a history of hepatitis or cirrhosis.

  • Intrahepatic Cholangiocarcinoma: When cancer originates in the bile ducts located within the liver tissue.

  • Metastatic Colorectal Cancer: If colorectal cancer has spread only to the liver, a resection can still be a curative pathway.

  • Clear Margins: When imaging confirms the tumour can be removed while leaving a healthy "rim" of tissue behind.

  • Solitary or Limited Tumours: When the malignancy is confined to specific segments that allow for a safe "Future Liver Remnant."

  • Anatomic Resection: Removing a specific functional segment or lobe (the liver has 8 segments) along with its dedicated blood supply and bile duct.

  • Non-Anatomic (Wedge) Resection: Removing the tumour plus a 1-cm "rim" of healthy tissue; typically used for small tumours near the surface.

  • Open Surgery: Performed via a "Mercedes-Benz" or "J-shaped" incision; used for large or centrally located tumours.

  • Laparoscopic/Robotic Surgery: Performed through several 1-cm punctures. This 2026 standard offers faster recovery and less pain for suitable tumour locations.

  • Two-Stage Hepatectomy: In complex cases, surgeons may remove tumours from one side, allow it to regenerate, and then remove the rest in a second surgery.

  • Anaesthesia: The procedure typically takes 3 to 7 hours under general anaesthesia.

  • Intraoperative Ultrasound: Surgeons use a specialized probe directly on the liver during surgery to find hidden tumours and map blood vessels.

  • Transection: The liver tissue is carefully divided using advanced tools (like ultrasonic aspirators) that seal blood vessels and bile ducts as they cut.

  • Pringle Manoeuvre: A technique used to temporarily "clamp" blood flow to the liver to prevent heavy bleeding during the removal phase.

  • Drain Placement: Small tubes may be left in the abdomen to monitor for any bile leaks or fluid buildup during the first few days of recovery.

  • Future Liver Remnant (FLR) Assessment: Ensuring that the amount of healthy liver left after surgery (at least 25–30% for healthy livers) is sufficient for survival.

  • Portal Vein Embolization (PVE): If the planned remnant is too small, a procedure is done weeks prior to "trick" the healthy side into growing larger before the operation.

  • Nutritional Optimization: Following a specific diet to reduce liver fat (steatosis), which improves the organ's ability to regenerate.

  • Cardiovascular Clearance: Undergoing a stress test to ensure the heart can handle the circulatory shifts that occur during liver surgery.

  • Medication Audit: Strictly stopping all blood-thinners and certain herbal supplements at least one week before the procedure.

  • Tri-Phasic CT or MRI: To visualize the liver's blood supply and precisely locate tumours in relation to the eight segments.

  • Indocyanine Green (ICG) Clearance: A specialized test to measure how well the liver filters dye, predicting its post-operative function.

  • AFP (Alpha-fetoprotein) Test: A blood marker used to establish a baseline for monitoring primary liver cancer.

  • FibroScan: To assess the degree of underlying scarring (cirrhosis), which dictates how much liver can safely be removed.

  • PET-CT Scan: To ensure there is no hidden cancer outside the liver that would make surgery ineffective.

  • Regeneration Timeline: The most intense growth happens in the first 14 days, with the liver returning to nearly full size within 2 months.

  • Haemorrhage Risk: Because the liver is highly vascular, significant bleeding is the primary risk during the surgery and the immediate recovery phase.

  • Bile Leak: A 5–10% risk where bile leaks from the cut surface; most are managed with temporary plastic drains.

  • Post-Hepatectomy Liver Failure (PHLF): A serious risk if the remaining liver is too small or weak to filter toxins and produce clotting factors.

  • Pleural Effusion: Fluid buildup around the right lung is common after right-sided surgery and is monitored closely in the hospital.

  • Unique Regenerative Power: The liver’s ability to grow back allows for the removal of up to 75% of the organ while maintaining life.

  • Curative Intent: For colorectal metastases, the 5-year survival rate after a successful resection is approximately 40–60%.

  • 2026 Robotic Precision: Minimally invasive techniques have significantly reduced the "Mercedes-Benz" scar and shortened hospital stays to 5 days.

  • PVE Advancements: Portal Vein Embolization now allows patients who were previously "inoperable" to become candidates for surgery.

  • Multidisciplinary Success: When paired with modern chemotherapy, resection offers the best long-term outlook for primary and metastatic liver cancers.

Esophageal Cancer Treatment

Esophageal Cancer Treatment involves a range of advanced medical and surgical procedures designed to eliminate malignant tumors within the esophagus—the muscular tube connecting the throat to the stomach. Clinical protocols emphasize a personalized, multimodal approach to restore swallowing function and prevent the systemic spread of cancer cells while prioritizing the patient’s overall quality of life.

  • Persistent difficulty or pain while swallowing solid foods or liquids.

  • Unexplained weight loss without changes in diet or physical activity.

  • Chronic chest pain or a sensation of pressure behind the breastbone.

  • Frequent or worsening symptoms of acid reflux and heartburn.

  • Persistent hoarseness or a chronic cough that does not resolve.

  • Frequent choking on food or a feeling of something being stuck in the throat.

  • Adenocarcinoma occurring primarily in the lower part of the esophagus.

  • Squamous Cell Carcinoma affecting the thin, flat cells of the upper and middle esophagus.

  • Barrett’s Esophagus with high-grade dysplasia that may lead to malignancy.

  • Gastroesophageal Junction (GEJ) tumors affecting the area where the esophagus meets the stomach.

  • Recurrent esophageal cancer following previous chemotherapy or surgical interventions.

  • Diagnostic upper endoscopy and biopsies are utilized to identify the cellular subtype.

  • Imaging scans including PET and CT are conducted to map the extent of the tumor.

  • Minimally invasive surgery is performed to remove the diseased segment of the esophagus.

  • Immunotherapy infusions are administered to help the immune system identify malignant cells.

  • Precision radiation is applied to the tumor site to reduce its size before surgical removal.

  • Real-time monitoring of tumor markers in the blood is used to guide post-operative recovery decisions.

  • Robotic-Assisted Esophagectomy A minimally invasive surgical procedure to remove the tumor and nearby lymph nodes with high precision.

  • Radiofrequency Ablation (RFA) The use of thermal energy to destroy precancerous tissue in patients with Barrett’s esophagus.

  • Immunotherapy Modern checkpoint inhibitors like pembrolizumab and tislelizumab that empower the immune system to fight advanced cancer.

  • FLOT Chemotherapy Regimen A specialized drug protocol used to achieve superior systemic control in cases of adenocarcinoma.

  • Endoscopic Mucosal Resection (EMR) A procedure used to remove small, early-stage tumors from the lining of the esophagus without major surgery.

  • Targeted Therapy Medications designed to attack specific molecular markers found on esophageal cancer cells.

  • Engage in nutritional counseling to ensure the body is strong enough for the recovery process.

  • Adhere to breathing exercises and pulmonary rehabilitation to optimize lung function.

  • Follow specific guidelines for fasting and hydration as directed by the anesthesia team.

  • Consult with the surgical team regarding the use of feeding tubes for post-operative support.

  • Complete all cardiovascular clearances to ensure safe management during the procedure.

  • Upper Endoscopy to visually inspect the esophagus and collect tissue samples.

  • Endoscopic Ultrasound (EUS) to determine how deeply the tumor has invaded the esophageal wall.

  • CT and PET Scans to evaluate whether the cancer has spread to distant organs.

  • Circulating Tumor DNA (ctDNA) test to establish a baseline for molecular monitoring.

  • Pulmonary Function Tests to assess the strength of the respiratory system before surgery.

  • Incorporates 2026 breakthroughs in immunotherapy for first-line treatment success.

  • Utilizes robotic technology to reduce surgical trauma and shorten hospital stays.

  • Employs "guided" ablative therapies to treat early-stage cancer without major incisions.

  • Targets systemic disease more effectively through modern chemotherapy combinations.

  • Provides a more accurate prognosis using molecular monitoring and precision imaging.

  • Intensive monitoring of swallowing function and respiratory health in a clinical setting.

  • Early mobilization and physical therapy to prevent complications and restore strength.

  • Gradual transition from liquid diets to soft foods under the supervision of a dietitian.

  • Specialized care for surgical incisions to ensure proper healing and prevent infection.

  • Follow-up evaluations with the oncology team to manage any side effects of systemic therapy.

  • Permanent adoption of smaller, more frequent meals to accommodate changes in digestive capacity.

  • Maintaining an elevated sleeping position to prevent reflux and respiratory irritation.

  • Regular follow-up appointments with periodic imaging to ensure continued remission.

  • Ongoing monitoring of tumor markers through non-invasive blood-based liquid biopsies.

  • Commitment to a lifestyle free from tobacco and excessive alcohol to reduce recurrence risk.

Low Anterior Resection (Rectal Cancer)

Low Anterior Resection (LAR) is a major surgical procedure used to treat cancers located in the upper or middle parts of the rectum. The primary goal is to remove the cancerous section while preserving the anal sphincter, allowing for the maintenance of normal bowel continuity and avoiding a permanent stoma. The integration of Total Mesorectal Excision (TME) and robotic-assisted precision has made LAR the standard of care for sphincter-preserving rectal surgery.

  • Mid-to-Upper Rectal Tumors: When the malignancy is located typically 5 cm or more from the anal verge.

  • Sphincter Preservation: When the cancer has not invaded the anal sphincter muscles, allowing for a safe reconnection.

  • Clear Distal Margins: When imaging confirms enough healthy tissue remains below the tumor to create a secure internal connection.

  • Response to Chemoradiotherapy: For patients who have undergone neoadjuvant treatment to shrink a tumor into a resectable range.

  • Non-Metastatic Localized Disease: When the primary goal is curative intent through the complete removal of the rectum and surrounding lymph nodes.

  • Robotic-Assisted LAR: The 2026 preferred method for mid-to-low tumors. The robotic platform’s 3D high-definition vision and "wristed" instruments provide superior precision in the narrow male or female pelvis.

  • Laparoscopic Surgery: A minimally invasive "keyhole" approach that offers faster recovery and less pain than open surgery.

  • Open Surgery: Performed via a midline abdominal incision; reserved for very large tumors or complex cases involving multiple organ involvements.

  • Total Mesorectal Excision (TME): A meticulous technique used during LAR to remove the rectum along with the intact fatty envelope (mesorectum) containing the lymph nodes, significantly reducing recurrence.

  • Ultra-Low LAR: A specialized variation for tumors very close to the pelvic floor, where the connection is made almost at the level of the anal opening.

  • Anaesthesia: The procedure typically takes 3 to 6 hours under general anaesthesia.

  • Mobilization: The surgeon frees the sigmoid colon and rectum from the surrounding pelvic structures and critical nerves.

  • Vascular Control: The main artery supplying the rectum (Inferior Mesenteric Artery) is ligated to ensure a complete lymph node harvest.

  • Stapled Anastomosis: Specialized circular staplers are used to connect the healthy colon to the remaining rectal stump.

  • Air-Leak Testing: A routine safety check is performed during surgery to ensure the new connection is airtight and watertight.

  • Defunctioning Ileostomy: A temporary stoma is often created to "divert" stool, allowing the internal connection (anastomosis) to heal without stress for 2–3 months.

  • Neoadjuvant Therapy: Completing a 5-week course of chemoradiotherapy to shrink the tumor and "sterilize" the surgical field.

  • Mechanical Bowel Prep: A thorough clearing of the bowels the day before surgery to minimize infection risks.

  • Pelvic Floor Baseline: Consulting with a physiotherapist to establish pelvic muscle strength before surgery.

  • Stoma Education: Meeting with a Wound, Ostomy, and Continence (WOC) nurse to mark a potential stoma site and learn about temporary bag management.

  • Nutritional Loading: Adhering to a "pre-habilitation" diet to maintain protein levels, which is crucial for internal healing.

  • Pelvic MRI: The "gold standard" for staging rectal cancer and determining the exact distance of the tumor from the sphincter.

  • Endorectal Ultrasound: To assess the depth of tumor invasion into the rectal wall layers.

  • CEA Blood Test: To establish a baseline tumor marker level for post-operative monitoring.

  • Rigid Proctoscopy: A physical measurement of the tumor's height to plan the exact level of the resection.

  • CT Chest/Abdomen/Pelvis: To ensure the cancer has not spread to the liver or lungs before proceeding with major pelvic surgery.

  • Hospital Stay: Usually 4 to 7 days, focusing on the return of bowel function and pain management.

  • Anastomotic Leak: A serious complication (5–10% risk) where the internal connection fails; 2026 protocols use early CRP monitoring to detect this before symptoms appear.

  • LARS (Low Anterior Resection Syndrome): A cluster of symptoms including urgency, frequency, and "clustering" of bowel movements that typically improves over 6–12 months.

  • Pelvic Nerve Preservation: While robotic surgery reduces risk, some may experience temporary urinary or sexual dysfunction due to the proximity of the autonomic nerves.

  • Low-Residue Diet: A temporary post-operative diet low in fiber to allow the bowel connections to heal without irritation.

  • Lower Recurrence Rates: TME technique combined with neoadjuvant therapy has reduced local recurrence to below 5% in specialized centers.

  • Permanent Stoma Avoidance: Modern LAR techniques allow over 90% of mid-rectal cancer patients to avoid a permanent colostomy.

  • Robotic Precision: 2026 data shows that robotic LAR leads to better preservation of sexual and bladder function compared to traditional methods.

  • Enhanced Recovery (ERAS): Specialized protocols allow patients to walk and eat sooner, reducing the risk of blood clots and pneumonia.

  • Biologically Tailored Care: Integration of tumor genetic profiling helps determine if a patient needs further "mop-up" chemotherapy after a successful LAR.

Colectomy (Colon Cancer)

Colon Cancer Treatment involves a combination of specialized surgical, medical, and radiological interventions to remove malignant tumors from the large intestine. As of 2026, clinical standards emphasize a precision-based approach, utilizing robotic surgery for localized tumors and advanced immunotherapy for cases with specific genetic biomarkers (MSI-H/dMMR), aiming to achieve long-term remission while preserving bowel function.

  • Persistent changes in bowel habits, such as diarrhea, constipation, or narrowing of the stool.

  • Presence of bright red blood or dark, tarry stools during bowel movements.

  • Ongoing abdominal discomfort, including persistent cramps, gas, or localized pain.

  • A frequent feeling that the bowel does not empty completely after a movement.

  • Unexplained weight loss accompanied by chronic fatigue or weakness.

  • Signs of anemia, such as paleness and lack of energy, due to hidden internal bleeding.

  • Adenomatous Polyps that show signs of high-grade dysplasia or early transformation.

  • Localized Colon Adenocarcinoma confined to the inner layers of the intestinal wall.

  • Hereditary Syndromes including Lynch Syndrome or Familial Adenomatous Polyposis (FAP).

  • Inflammatory Bowel Disease (IBD) such as long-term Ulcerative Colitis or Crohn’s disease.

  • Advanced or metastatic colon cancer that has spread to the liver, lungs, or peritoneum.

  • Diagnostic colonoscopy is utilized to visualize the colon and remove precancerous polyps.

  • High-resolution CT, MRI, or PET scans are performed to map the tumor’s size and spread.

  • A partial or total colectomy is surgically performed to remove the malignant section of the colon.

  • Adjuvant chemotherapy is administered after surgery to eliminate any remaining microscopic cells.

  • Systematic immunotherapy is introduced for tumors with specific genetic MSI-H or dMMR markers.

  • Targeted drug therapy is used to block the proteins that allow cancer cells to grow and spread.

  • Laparoscopic or Robotic Colectomy A minimally invasive surgery to remove the cancerous part of the colon through small abdominal incisions.

  • Polypectomy The removal of small, early-stage cancerous growths directly through a colonoscope without external incisions.

  • Immunotherapy (Pembrolizumab/Nivolumab) Advanced biological treatments that help the immune system identify and attack cancer cells.

  • Targeted Therapy (Bevacizumab/Cetuximab) Precision medications that target specific growth factors or blood vessel formation in the tumor.

  • Cytoreductive Surgery with HIPEC A specialized procedure where the abdominal cavity is bathed in heated chemotherapy after tumor removal.

  • Colostomy or Ileostomy A surgical procedure to create a stoma (opening) in the abdomen to allow waste to exit the body temporarily or permanently.

  • Complete a "bowel prep" to thoroughly clear the colon of stool before the procedure.

  • Consult with a dietitian to establish a low-residue diet in the days leading up to surgery.

  • Adjust or stop blood-thinning medications as instructed by the surgical oncology team.

  • Undergo a preoperative physical to ensure readiness for general anesthesia and recovery.

  • Meet with an ostomy nurse if there is a possibility of needing a temporary or permanent stoma.

  • Colonoscopy with biopsy to confirm the specific pathology and grade of the cancer.

  • CT Scan of the chest, abdomen, and pelvis to determine the clinical stage of the disease.

  • CEA (Carcinoembryonic Antigen) Blood Test to establish a baseline for post-treatment monitoring.

  • MSI/dMMR Biomarker Testing to identify if the tumor will respond to modern immunotherapies.

  • Complete Blood Count (CBC) to check for anemia or other blood-related issues before surgery.

  • Features a 91% five-year survival rate for localized cases through early detection and surgery.

  • Utilizes 2026 precision medicine to match treatments to the tumor's unique genetic profile.

  • Offers minimally invasive robotic options that significantly reduce recovery time and pain.

  • Employs neoadjuvant therapies to shrink large tumors, making them easier to remove safely.

  • Integrates multidisciplinary care to manage complex cases that have spread to other organs.

  • In-hospital monitoring for 3–5 days to ensure the return of normal bowel function.

  • Personalized pain management and early mobilization to prevent blood clots and lung issues.

  • Gradual transition from a liquid diet to soft foods as the digestive tract heals.

  • Specialized wound care and training for patients who require a temporary or permanent stoma.

  • Follow-up visits with the surgical and oncology teams to monitor healing and plan next steps.

  • Regular surveillance through colonoscopies and blood tests every 6–12 months for the first few years.

  • Adoption of a high-fiber diet rich in fruits, vegetables, and whole grains to support colon health.

  • Commitment to regular physical activity and maintaining a healthy weight to reduce recurrence risk.

  • Avoidance of tobacco products and limiting alcohol consumption as part of a cancer-prevention lifestyle.

  • Participation in survivorship programs to manage the emotional and physical transition after treatment.

Gynecologic Oncology Surgery

Gynecologic oncology surgery is a specialized field focused on the surgical treatment of cancers affecting the female reproductive system, including the ovaries, uterus (endometrium), cervix, vulva, and vagina. These complex procedures are performed by gynecologic oncologists who have advanced training in pelvic, abdominal, urologic, and gastrointestinal surgery to manage tumor spread. Many of these surgeries now utilize robotic-assisted platforms to ensure maximum precision within the narrow pelvic cavity.

  • Ovarian or Fallopian Tube Cancer: When a mass is detected that requires both removal and "surgical staging" to determine the extent of the disease.

  • Endometrial (Uterine) Cancer: Often the primary treatment for cancer of the uterine lining, typically involving the removal of the uterus and ovaries.

  • Cervical Cancer: For localized tumors that require a radical hysterectomy or, in younger patients, fertility-sparing options.

  • Vulvar or Vaginal Cancer: When lesions are present on the external genitalia or the vaginal canal that require surgical excision.

  • Recurrent Pelvic Cancer: When cancer returns to the pelvic region after previous radiation or chemotherapy treatments.

  • Prophylactic (Risk-Reducing) Surgery: For women with genetic mutations (like BRCA1/2 or Lynch Syndrome) who are at a high risk of developing gynecologic cancers.

  • Hysterectomy: Removal of the uterus. A radical hysterectomy is used for cervical cancer and involves removing the uterus, cervix, part of the vagina, and surrounding supportive tissues.

  • Salpingo-Oophorectomy: Removal of one or both ovaries and fallopian tubes.

  • Debulking (Cytoreduction): Often performed for advanced ovarian cancer; the goal is to remove as much visible tumor as possible to improve chemotherapy effectiveness.

  • Lymph Node Dissection: Removal of pelvic or para-aortic lymph nodes for staging. Sentinel lymph node mapping uses dye to target only the most likely nodes, reducing the risk of leg swelling.

  • Vulvectomy: Removal of part or all of the vulva. Advanced cases may require plastic reconstruction or skin grafts.

  • Pelvic Exenteration: A radical procedure for recurrent cancer that involves removing all pelvic organs, which may include the bladder and/or rectum.

  • Anesthesia: Performed under general anesthesia. For open abdominal surgeries, an epidural may be used for superior post-operative pain control.

  • Robotic-Assisted Surgery: The standard for many hysterectomies and stagings. It provides 3D visualization and instruments that can operate effectively in the deep pelvis.

  • Laparoscopy: A minimally invasive approach using several small incisions, which significantly reduces recovery time and blood loss.

  • Systematic Staging: The surgeon meticulously inspects the diaphragm, liver, bowel, and omentum (fatty apron in the abdomen) to identify any microscopic spread.

  • Cold Knife Conization: A smaller procedure used for very early cervical cancer or high-grade precancerous changes to remove a cone-shaped piece of the cervix.

  • Imaging Correlation: Reviewing high-resolution MRI or CT scans to check for involvement of the ureters or major pelvic blood vessels.

  • ERAS Protocols: Following "Enhanced Recovery" guidelines, which may include drinking specialized carbohydrate-loading liquids 2–3 hours before surgery.

  • Bowel Preparation: In some cases, a mechanical bowel prep is required if there is a high likelihood of the tumor involving the intestines.

  • Genetic Counseling: Confirming genetic status to determine if the ovaries should be removed during a hysterectomy for high-risk patients.

  • Fertility Discussion: Reviewing options such as egg freezing or fertility-sparing surgery (like a trachelectomy) if the patient wishes to maintain pregnancy potential.

  • Pelvic MRI or CT: To map the tumor size and look for enlarged lymph nodes or fluid (ascites) in the abdomen.

  • Tumor Markers (CA-125, HE4, CEA): Blood tests used as a baseline to monitor the effectiveness of surgery and future treatments.

  • Chest X-ray or CT Chest: To ensure the cancer has not spread to the lungs before starting a major abdominal operation.

  • Cystoscopy/Proctoscopy: If the cancer is advanced, these tests check if the tumor has invaded the bladder or rectum.

  • Baseline Blood Work: Standard CBC and chemistry panels to check for anemia or kidney issues that might affect surgical safety.

  • Hospital Stay: Varies by procedure—1–2 days for robotic surgery, but 4–7 days for major open debulking or radical procedures.

  • Early Mobilization: Recovery protocols emphasize walking within 24 hours of surgery to prevent blood clots and jumpstart bowel function.

  • Lymphedema: Chronic swelling in the legs can occur if extensive lymph nodes were removed; this is managed with specialized physical therapy.

  • Surgical Menopause: If the ovaries are removed in a pre-menopausal patient, symptoms like hot flashes may occur immediately.

  • Organ Monitoring: Because tumors are often near the bladder and ureters, there is a risk of temporary urinary issues that require monitoring.

  • Superior Debulking: Patients treated by gynecologic oncologists generally have better "optimal debulking" rates, which directly leads to longer survival.

  • Fertility Preservation: Procedures like radical trachelectomy allow women with early cervical cancer to keep their uterus and potentially have children.

  • MIS Advancements: Minimally invasive techniques mean less surgical stress, allowing patients to start necessary chemotherapy or radiation much sooner.

  • Sentinel Mapping Precision: Modern dye-mapping technology allows for accurate staging while sparing majority of lymph nodes, preventing life-long swelling.

  • Multidisciplinary Care: Combining surgery with modern immunotherapy and PARP inhibitors provides a comprehensive path to management and cure.

Radical Hysterectomy

A radical hysterectomy is a specialized surgical procedure used primarily to treat early-stage cervical cancer and some cases of endometrial (uterine) cancer that have spread to the cervix. It is significantly more extensive than a total hysterectomy because it removes not just the uterus and cervix, but also the surrounding supporting tissues where cancer cells are most likely to hide. Gynecologic oncologists prioritize "nerve-sparing" techniques to minimize the impact on bladder and bowel function.

  • Early-Stage Cervical Cancer: The primary treatment for Stage IA2, IB1, and some IB2 tumors where the goal is a complete cure.

  • Complex Endometrial Cancer: When uterine cancer has clearly invaded the cervical stroma, requiring wider margins than a standard hysterectomy.

  • Cervical Adenocarcinoma: For specific glandular cancers where a wider resection of the supportive ligaments is necessary.

  • Recurrent Disease: Occasionally used as "salvage" surgery if cancer returns in the cervix after previous radiation.

  • Upper Vaginal Cancer: When the malignancy is located in the top portion of the vagina near the cervix.

  • The Uterus and Cervix: The entire womb and its opening are removed as a single unit.

  • The Parametrium: The connective tissue and ligaments (cardinal and uterosacral) that hold the uterus in place; this is where microscopic cancer cells often travel first.

  • The Upper Vagina: Usually the top 1 to 2 inches (about 2–3 cm) of the vaginal canal to ensure clear surgical margins.

  • Pelvic Lymph Nodes: Nearby lymph glands are systematically removed (lymphadenectomy) or mapped using sentinel node technology to check for spread.

  • Ovaries and Fallopian Tubes: These may be removed (salpingo-oophorectomy) depending on your age and the type of cancer, but are not always part of the procedure if hormonal health is a priority.

[Image comparing a total hysterectomy vs a radical hysterectomy showing the additional tissue removed]

  • Anesthesia: Performed under general anesthesia. For open abdominal cases, a "TAP block" or epidural may be used to manage pain after the operation.

  • Abdominal (Open) Surgery: The current standard of care for most cervical cancers. A vertical or horizontal incision provides the surgeon with the best access to clear the parametrial tissue safely.

  • Robotic-Assisted Surgery: Utilized for specific lower-risk cases or endometrial cancer. The robot's 3D vision helps in identifying delicate pelvic nerves.

  • Ureteral Stenting: Small tubes may be temporarily placed in the ureters (tubes from the kidneys) to protect them during the extensive dissection of the parametrium.

  • Nerve-Sparing Dissection: A meticulous technique where the autonomic nerves in the pelvis are identified and preserved to maintain bladder sensation and function.

  • Imaging Correlation: Reviewing pelvic MRI scans to measure the exact size of the tumor and its proximity to the bladder and rectum.

  • ERAS Protocols: Following "Enhanced Recovery" steps, such as carbohydrate-loading drinks and early movement plans to prevent blood clots.

  • Bladder Awareness: Understanding that you may need to learn "timed voiding" after surgery while the pelvic nerves recover.

  • Smoking Cessation: Stopping tobacco use at least 4 weeks before surgery to ensure the vaginal "cuff" (where the vagina is reconnected) heals properly.

  • Blood Cross-match: Due to the extensive nature of radical pelvic surgery, blood is held in reserve as a standard safety precaution.

  • Pelvic MRI (with Contrast): The most important test to determine if the cancer has stayed within the cervix or moved into the surrounding ligaments.

  • PET-CT Scan: To ensure there is no spread to distant lymph nodes in the abdomen or chest before starting a radical operation.

  • Cystoscopy: A visual inspection of the inside of the bladder to confirm the tumor has not pushed through the bladder wall.

  • Kidney Function (Creatinine): To ensure the kidneys are healthy, especially if ureteral stents are planned.

  • Tumor Markers: Blood tests (such as SCC Antigen) that can help monitor for recurrence after the surgery is complete.

  • Hospital Stay: Expect 3 to 7 days for an open surgery, or 1 to 2 days for minimally invasive approaches.

  • Bladder Function: Temporary difficulty with urination is common due to nerve manipulation; some patients go home with a urinary catheter for 7–10 days.

  • Physical Recovery: Full recovery usually takes 6 to 8 weeks. You must avoid heavy lifting or sexual intercourse during this time to allow the vaginal cuff to heal.

  • Bowel Changes: You may experience temporary constipation or changes in bowel habits as the pelvic organs shift and the nerves recover.

  • Fertility and Menopause: This surgery results in a permanent loss of the ability to carry a pregnancy. If ovaries are removed, surgical menopause begins immediately.

  • Superior Survival Rates: Current data shows that for cervical cancer, an open radical hysterectomy provides the highest long-term cure rates.

  • Nerve-Sparing Innovation: Modern techniques significantly reduce the long-term risk of bladder dysfunction compared to older surgical methods.

  • Comprehensive Staging: By removing the lymph nodes and parametrium, your oncology team gets a "roadmap" for whether additional radiation is needed.

  • Reduced Recurrence: Providing a wide "clear zone" of tissue around the cervix is the most effective way to prevent the cancer from returning in the pelvis.

  • Multi-Modal Success: When early-stage cancer is treated with a radical hysterectomy, many patients do not require any further radiation or chemotherapy.

Oncoplastic Breast Surgery

Oncoplastic breast surgery combines cancer surgery (oncology) with plastic surgery techniques. The goal is to remove the tumor with wide, safe margins while simultaneously reshaping the remaining breast tissue to ensure it looks as natural as possible. It is often described as a "middle ground" between a standard lumpectomy and a full mastectomy. This approach is the preferred standard for preserving both oncological safety and the psychological well-being of the patient.

  • Large Tumor-to-Breast Ratio: When a standard lumpectomy would leave a significant "dent" or deformity due to the amount of tissue removed.

  • Tumor Location: When cancer is located in difficult areas, such as the lower fold (inframammary fold) or the inner quadrant, where traditional surgery causes visible pulling.

  • Desire for Breast Conservation: For patients who are candidates for mastectomy but strongly prefer to keep their natural breast.

  • Large or Drooping Breasts: Patients who would benefit from a therapeutic breast reduction or lift as part of their cancer clearance.

  • Multifocal Disease: When multiple tumors in the same area can be removed through a single, strategically planned oncoplastic incision.

  • Volume Displacement: After the tumor is removed, the remaining breast tissue is shifted, rotated, or advanced to fill the void. This often utilizes breast reduction or "mastopexy" (lift) patterns.

  • Volume Replacement: If too much tissue is removed to reshape what is left, the surgeon brings in tissue from nearby (like a "lateral intercostal artery perforator" or LICAP flap) to fill the space.

  • Symmetry Surgery: Often, the opposite (healthy) breast is operated on at the same time (matching reduction or lift) to ensure both breasts match in size and contour.

  • Level I Oncoplastic Surgery: Basic glandular flaps used for smaller resections (less than 20% of breast volume).

  • Level II Oncoplastic Surgery: Complex reshaping involving skin and nipple repositioning for larger resections (20–50% of breast volume).

  • Anesthesia: Performed under general anesthesia. Many surgeons use "paravertebral blocks" to provide long-lasting pain relief after the procedure.

  • Tumor Localization: Like a standard lumpectomy, a wire or magnetic seed is used to guide the surgeon to the exact location of the cancer.

  • Wide Excision: The cancer is removed with a wide margin. Because reconstruction is planned, the surgeon can be more aggressive in ensuring clear margins.

  • Glandular Reshaping: The breast tissue is mobilized off the chest wall and "knitted" back together to create a rounded, natural breast mound.

  • Sentinel Node Biopsy: Performed concurrently through the same or a separate small incision to check for nodal spread.

  • Nipple Repositioning: If the breast is being lifted or reduced, the nipple is moved to a new, higher position that matches the reshaped breast.

  • Surgical Mapping: Detailed markings are made on the skin while you are standing to plan the new breast shape and nipple position.

  • Plastic Surgery Consultation: A thorough discussion about expectations for size, symmetry, and scar placement.

  • Imaging Correlation: Reviewing 3D mammography or breast MRI to ensure the surgical plan covers the entire extent of the disease.

  • Support Garments: Purchasing a front-closure post-surgical compression bra to stabilize the reshaped tissue during the first 4 weeks.

  • VTE Prophylaxis: Starting protocols to prevent blood clots, as oncoplastic procedures can take longer than standard lumpectomies.

  • High-Resolution Breast MRI: Essential to accurately measure tumor volume and plan the precise amount of tissue displacement needed.

  • Diagnostic Mammogram: To identify any suspicious calcifications that must be included in the wide excision.

  • Breast Ultrasound: To evaluate the axillary lymph nodes and guide the sentinel node biopsy plan.

  • Baseline Photography: Standard medical photos are taken to assist in planning the symmetry surgery on the opposite breast.

  • Standard Pre-op Bloods: CBC, electrolytes, and coagulation studies to ensure safe surgical healing.

  • Hospital Stay: Usually performed as an outpatient procedure or with a single overnight stay for monitoring.

  • Physical Recovery: Most patients return to normal daily activities within 2 to 3 weeks. Strenuous exercise should be avoided for 4–6 weeks.

  • Fat Necrosis: Small areas of firm, scarred fat may form where blood supply was moved; these are harmless but may require an ultrasound later to confirm they are not new tumors.

  • Delayed Healing: Because the incisions are larger and more complex, there is a slightly higher risk of minor wound issues compared to a simple lumpectomy.

  • Radiation Stability: Reshaping the breast before radiation helps it heal in a more stable shape, though radiation can still cause some late-term firmness.

  • Nipple Sensation: Depending on the extent of the lift, there may be temporary or permanent changes in nipple sensitivity.

  • Maximized Cancer Clearance: Because the surgeon knows they can "fix" the shape, they are often more comfortable taking wider, safer margins around the tumor.

  • Avoidance of Mastectomy: This approach "saves" the breast for many women who were previously told they had no choice but a full mastectomy.

  • Immediate Symmetry: Operating on both breasts simultaneously avoids the "psychological gap" of waiting months for a second surgery to fix an uneven appearance.

  • Easier Radiation Planning: A well-contoured breast is easier for radiation oncologists to treat, leading to fewer "hot spots" of skin irritation.

  • Superior Quality of Life: Patient-reported outcome data shows that women undergoing oncoplastic surgery have significantly higher body image satisfaction than those undergoing standard lumpectomy.

Oral Cancer Surgery
Oral Cancer Surgery

Oral Cancer Surgery (also known as head and neck surgery) is the primary treatment for cancers of the lips, tongue, inner cheeks, gums, and the floor or roof of the mouth. The goal is to remove the entire tumor while preserving as much function (speaking and swallowing) and appearance as possible. Many of these procedures are integrated with microvascular reconstruction in a single session to ensure the best functional outcomes.

  • Tongue Malignancy: When a biopsy confirms squamous cell carcinoma on the lateral borders or base of the tongue.

  • Hard Palate or Gum Tumors: When cancer involves the roof of the mouth or the bony structures supporting the teeth.

  • Lip Cancer: For lesions that do not respond to topical treatments or show signs of deep invasion.

  • Floor of Mouth Lesions: When a tumor is located under the tongue, often requiring a "pull-through" resection.

  • Buccal Mucosa Cancer: For malignancies on the inner lining of the cheeks that may involve the underlying muscle.

  • Glossectomy: Removal of part or all of the tongue. A partial glossectomy removes only the cancerous edge, while a total glossectomy requires extensive reconstruction.

  • Mandiblectomy: Removal of a portion of the jawbone. A "marginal" resection removes the bone surface, while a "segmental" resection removes a full section if the cancer has invaded the marrow.

  • Maxillectomy: Removal of part or all of the hard palate (the roof of the mouth).

  • Mohs Surgery: Often utilized for lip cancer; thin layers of tissue are removed and examined microscopically in real-time until no cancer cells remain.

  • Wide Local Excision: Removing the tumor along with a 1-cm to 2-cm "clear margin" of healthy tissue to prevent local recurrence.

  • Selective Neck Dissection: Removing only the lymph nodes in specific "levels" most likely to contain microscopic spread.

  • Radical Neck Dissection: Removing nearly all lymph nodes on one side of the neck; reserved for advanced disease where cancer involves the surrounding muscle or veins.

  • Sentinel Node Biopsy: Injecting a radioactive tracer or dye to identify and remove only the "first" node in the drainage path.

  • Level-Specific Clearance: Surgeons use precise mapping to clear Level I, II, and III nodes, which are the primary sites for oral cancer metastasis.

  • Free Flap Transfer: The "gold standard." Surgeons transfer tissue (skin, muscle, or bone) from the forearm or leg and sew the tiny blood vessels to the neck vessels using a microscope.

  • Fibula Free Flap: Taking a piece of the lower leg bone to reconstruct a segment of the jawbone (mandible).

  • Radial Forearm Free Flap: Using skin from the inner wrist to reconstruct the tongue or the floor of the mouth.

  • Skin Grafts: Utilizing a thin layer of skin from the thigh to cover smaller defects within the oral cavity.

  • Local Flaps: Rotating nearby tissue from the neck or forehead to fill gaps in the cheek or palate.

  • Anesthesia: Performed under general anesthesia, often involving a specialized tube to keep the mouth clear for the surgeon.

  • Tracheostomy: A temporary hole is made in the windpipe to ensure a safe airway while post-operative swelling subsides.

  • Micro-dissection: Using high-powered magnification to identify and preserve the nerves responsible for tongue movement and facial expression.

  • Feeding Tube Placement: A temporary tube is placed to provide nutrition while the oral tissues heal.

  • Frozen Section Analysis: Real-time pathology checks during surgery to confirm that all margins are negative for cancer before the reconstruction begins.

  • Dental Clearance: A thorough dental exam to remove any decayed teeth in the radiation field or surgical site.

  • Speech and Swallow Baseline: Meeting with a therapist to evaluate your current function and plan for post-operative rehabilitation.

  • Allen’s Test: If a forearm flap is planned, this test ensures the hand has adequate blood supply from other arteries.

  • Nutritional Loading: High-protein supplementation to prevent weight loss, as eating will be difficult immediately following surgery.

  • Imaging Correlation: Reviewing 3D reconstructions of CT or MRI scans to plan exact bone cuts for jaw reconstruction.

  • CT/MRI Head and Neck: To determine the depth of invasion and whether the tumor is attached to the jawbone.

  • PET-CT Scan: To rule out distant spread to the lungs or liver before committing to a major reconstructive surgery.

  • Angiography/Doppler: To check the blood vessels in the "donor site" (arm or leg) to ensure they are healthy enough for a free flap.

  • Panendoscopy: A visual inspection of the throat and esophagus under anesthesia to rule out a second primary tumor.

  • Biopsy Confirmation: Confirming the histological type and grade of the cancer to determine the extent of neck dissection required.

  • Hospital Stay: Typically 7 to 14 days, with the first few days often spent in an ICU or High Dependency Unit for flap monitoring.

  • Flap Monitoring: A rare but serious risk where the blood supply to the new tissue fails, requiring an immediate return to the operating room.

  • Fistula: An abnormal opening where saliva leaks from the mouth into the neck; usually managed with specialized dressings.

  • Lymphedema: Swelling of the neck and face that may require specialized massage therapy after the lymph nodes are removed.

  • Rehabilitation: Daily sessions with speech and language pathologists to relearn how to swallow safely and speak clearly.

  • Functional Restoration: Modern microvascular surgery allows patients to maintain the ability to eat and speak even after extensive resections.

  • High Cure Rates: For early-stage oral cancer, surgery offers a high probability of complete cure and long-term survival.

  • 3D Precision: The use of surgical guides ensures that jaw reconstructions match the patient's original facial structure perfectly.

  • Integrated Care: Combining surgery with adjuvant radiation ensures that any remaining microscopic cells are eliminated.

  • Quality of Life: Dedicated head and neck teams focus on both removing cancer and the aesthetic and social reintegration of the patient.

Ovarian Cancer Debulking Surgery

Ovarian cancer debulking surgery (also called cytoreductive surgery) is a high-stakes procedure where the surgeon aims to remove as much of the visible tumor as possible from the abdomen. Because ovarian cancer tends to spread across the surfaces of abdominal organs rather than forming a single mass, this surgery often involves several procedures performed during a single operation. The goal remains "Optimal Debulking" to ensure that any subsequent chemotherapy is as effective as possible.

  • Advanced Ovarian Cancer: For patients with Stage III or IV disease where the cancer has spread beyond the pelvis into the abdominal cavity.

  • Fallopian Tube or Peritoneal Cancer: Since these cancers behave similarly to ovarian cancer, they require the same aggressive surgical approach.

  • Good Performance Status: When a patient is physically strong enough to undergo a lengthy abdominal operation (often 4–6 hours).

  • Chemo-Responsive Disease: When tumors have shrunk significantly after initial chemotherapy, making a "Complete Resection" more likely.

  • Recurrent Ovarian Cancer: Occasionally performed for a second time (secondary debulking) if the cancer returns in a localized area after a long period of remission.

The success of the surgery is measured by the size of the largest remaining tumor at the end of the procedure:

  • Complete Resection (R0): The ideal outcome where no visible cancer remains. This is associated with the best long-term survival rates.

  • Optimal Debulking: Achieved when no single remaining tumor is larger than 1 centimeter (roughly the size of a pea).

  • Sub-optimal Debulking: When tumors larger than 1 cm remain; while still helpful, the benefit is less than that of an optimal result.

Why it matters: Chemotherapy penetrates smaller nodules much more effectively, allowing the drugs to "clean up" microscopic cells rather than struggling to reach the center of large, solid masses.

  • Primary Debulking Surgery (PDS): Surgery is the very first treatment, followed by chemotherapy. This is preferred if the surgeon believes all visible cancer can be safely removed immediately.

  • Interval Debulking Surgery (IDS): The patient receives 3 to 4 cycles of chemotherapy first (neoadjuvant chemotherapy) to shrink the tumors and reduce abdominal fluid (ascites), making the eventual surgery safer and more effective.

  • Secondary Debulking: Performed if the cancer returns after a patient has been in remission for at least 6–12 months.

  • Reproductive Organs: Both ovaries, fallopian tubes, and the uterus (Total Abdominal Hysterectomy and Bilateral Salpingo-Oophorectomy).

  • The Omentum: A fatty "apron" that hangs over the intestines; this is a common site for spread and is almost always removed (omentectomy).

  • Peritoneal Stripping: Removing the thin lining of the abdominal wall or diaphragm if tumor "seeds" are found on the surface.

  • Bowel Resection: If the cancer is firmly attached to the colon or small intestine, a section of the bowel may be removed and reconnected.

  • Other Organs: In extensive cases, the spleen, gallbladder, or small portions of the liver surface may be removed to achieve an R0 resection.

  • Lymph Nodes: Systematic removal of pelvic and para-aortic lymph nodes to accurately stage the disease.

  • Anesthesia: Performed under general anesthesia, typically with an epidural catheter for continuous pain management during the first few days of recovery.

  • Midline Incision: Most debulking is done through a large vertical incision to allow the surgeon to see and reach all areas from the pelvis up to the diaphragm.

  • Systematic Exploration: The surgeon checks all abdominal quadrants, including the liver, spleen, and the underside of the diaphragm, for any sign of tumor deposits.

  • HIPEC (Heated Chemotherapy): In specialized centers, heated chemotherapy is circulated inside the open abdomen for 60–90 minutes after the tumors are removed to kill microscopic cells.

  • Fluid Management: Large amounts of fluid (ascites) are drained, and the abdominal cavity is thoroughly washed with sterile saline (peritoneal lavage).

  • Nutritional Assessment: Many patients require specialized high-protein drinks for 5–7 days before surgery to help the body heal from a major abdominal operation.

  • ERAS Protocols: Following "Enhanced Recovery" steps, including carbohydrate loading 2 hours before surgery and avoiding long periods of fasting.

  • Bowel Prep: You may be asked to take a laxative solution the day before to clear the intestines, especially if a bowel resection is anticipated.

  • VTE Prophylaxis: Starting blood-thinning injections or wearing compression stockings early to prevent clots during the long surgery.

  • Physical Pre-hab: Engaging in light walking or breathing exercises to ensure the lungs are clear and the body is ready for the stress of surgery.

  • CT Scan (Abdomen and Pelvis): To map out the "Fagotti Score," which helps surgeons predict if an optimal debulking is feasible.

  • CA-125 Blood Test: To establish a baseline level; a drop in this marker after surgery is a key indicator of success.

  • Chest CT or X-ray: To ensure the cancer has not spread into the chest cavity (pleural effusion).

  • Organ Function Panels: To ensure the body can process the anesthesia and the chemotherapy that follows.

  • Cardiopulmonary Clearance: A stress test or Echocardiogram to ensure the heart can handle a lengthy, complex procedure.

  • Hospital Stay: Typically 3 to 7 days. You will be encouraged to sit up and walk within 24 hours to prevent pneumonia and blood clots.

  • Bowel Function: It may take several days for your bowels to "wake up" (peristalsis). You will start with clear liquids and slowly progress to soft foods.

  • Surgical Menopause: If you were pre-menopausal, removing the ovaries will trigger immediate menopause symptoms like hot flashes and night sweats.

  • Fatigue: This is a major surgery; expect to feel significantly tired for 6 to 8 weeks, though some take up to 3 months to feel fully "normal."

  • Major Risks: These include infection, blood clots (DVT), or injury to the bladder or ureters. If a bowel resection was performed, there is a small risk of a leak at the connection site.

  • Impact on Survival: Patients who achieve "Optimal Debulking" live significantly longer than those with larger remaining tumors.

  • Chemotherapy Synergy: Reducing the "tumor burden" allows modern platinum-based chemotherapies and PARP inhibitors to work with maximum efficiency.

  • HIPEC Success: Clinical data shows that adding heated chemotherapy during surgery can add months or even years to a patient's remission period.

  • Multidisciplinary Precision: Modern surgical teams use advanced imaging and specialized dyes to find and remove hidden tumor deposits.

  • Symptom Relief: By removing large masses that cause bloating and pain, debulking surgery significantly improves a patient's daily comfort and mobility.

Gastrectomy (Stomach Cancer)

Stomach Cancer Treatment, also known as Gastric Cancer Treatment, involves a range of medical and surgical interventions to eliminate malignant growths within the stomach lining. Clinical protocols prioritize the removal of adenocarcinomas while preserving digestive function, utilizing precision therapies to target specific genetic markers and improve long-term outcomes for patients.

  • Persistent Indigestion: A lasting burning sensation in the upper abdomen.

  • Early Satiety: Feeling unusually full or bloated after consuming only small meals.

  • Nausea and Vomiting: Chronic episodes, particularly if blood is present.

  • Dysphagia: Difficulty swallowing or a sensation of food being "stuck" in the esophagus.

  • Tarry Stools: Black, sticky stools which may indicate internal gastrointestinal bleeding.

  • Unexplained Fatigue: Persistent weakness often associated with anemia.

  • Gastric Adenocarcinomas: Originating in the glandular cells of the stomach mucosa.

  • HER2-Positive Tumors: Stomach cancers that require specific targeted medications.

  • CLDN18.2-Positive Cancers: Identified through modern molecular profiling.

  • H. pylori Infections: Chronic bacterial infections that have led to malignant cellular changes.

  • Genetic Syndromes: Diffuse gastric cancer related to inherited conditions or Lynch syndrome.

  • Endoscopy: An upper endoscopy is conducted to visualize the stomach lining and obtain tissue biopsies.

  • Staging: Advanced imaging and endoscopic ultrasounds are used to determine the depth of the tumor.

  • Surgical Resection: Intervention is performed to remove part or all of the affected stomach tissue.

  • Perioperative Therapy: Chemotherapy is often administered to shrink the tumor before the primary procedure.

  • Targeted Biology: Biological therapies are introduced to attack specific proteins on the cancer cells.

  • Systematic Immunotherapy: Utilized to enhance the body's natural response to the malignancy.

  • Partial Gastrectomy: The surgical removal of the specific portion of the stomach containing the tumor and nearby lymph nodes.

  • Total Gastrectomy: A procedure where the entire stomach is removed and the esophagus is connected directly to the small intestine.

  • Targeted Therapy: The use of specialized drugs like Trastuzumab or Zolbetuximab to attack specific cancer cell markers.

  • Immunotherapy: Checkpoint inhibitors that empower the immune system to recognize and destroy gastric cancer cells.

  • Endoscopic Mucosal Resection: A minimally invasive technique used to remove very early-stage tumors during an endoscopy.

  • HIPEC (Heated Chemotherapy): The delivery of heated chemotherapy directly into the abdominal cavity during surgery for advanced cases.

  • Nutritional Counseling: Consult with a specialized dietitian to manage intake and prepare for digestive changes.

  • Physical Assessment: A comprehensive evaluation to ensure readiness for general anesthesia.

  • Medication Audit: Adhering to specific adjustments as advised by the surgical oncology team.

  • Fasting Protocols: Strict adherence to fasting in the hours leading up to the scheduled procedure.

  • Support Planning: Arranging for assistance during the transition to a modified eating schedule.

  • Upper GI Endoscopy: To provide a direct view of the gastric environment and tumor site.

  • Endoscopic Ultrasound (EUS): To evaluate how far the cancer has invaded the stomach wall.

  • CT and PET Scans: To check for the spread of cells to the liver, lungs, or lymph nodes.

  • Biomarker Testing: HER2 and CLDN18.2 testing to determine the most effective drug therapies.

  • Blood Work: Complete Blood Count (CBC) and iron studies to assess for internal blood loss.

  • Dietary Adaptation: Adopting a lifestyle of eating small, frequent, and nutrient-dense meals throughout the day.

  • Supplementation: Regular vitamin and mineral support, particularly Vitamin B12, following a gastrectomy.

  • Routine Surveillance: Ongoing monitoring through imaging and endoscopy to ensure continued remission.

  • Weight Management: Consultation with nutritionists to maintain a healthy weight and energy levels.

  • Survivorship Support: Participation in programs to manage the emotional and physical impact of the disease.

  • Precision Guidelines: Matches therapies with the tumor's specific molecular profile.

  • Perioperative Success: Significantly reduces the risk of cancer recurrence through timed therapy.

  • Minimally Invasive Options: Results in faster recovery and less discomfort for eligible patients.

  • Targeted Strategies: Provides life-prolonging options even for advanced or metastatic conditions.

  • Integrated Care: Maintains high standards of digestive and nutritional health through multidisciplinary teams.

Lumpectomy (Breast-Conserving Surgery)

A lumpectomy, also known as breast-conserving surgery (BCS), is a procedure to remove a breast cancer tumor along with a small "margin" of healthy tissue surrounding it. Unlike a mastectomy, the goal is to save as much of the natural breast appearance as possible. Many lumpectomies are performed as "oncoplastic" procedures, combining cancer removal with plastic surgery techniques to ensure the best cosmetic outcome.

  • Early-Stage Breast Cancer: For Stage I or II tumors where the cancer is localized to one area.

  • Small Tumor-to-Breast Ratio: When the tumor is small enough that its removal won't significantly distort the breast shape.

  • Single Focal Point: When there is only one area of malignancy rather than multiple tumors spread throughout the breast.

  • Patient Preference: For those who wish to maintain their natural breast and are committed to the follow-up radiation required.

  • Ductal Carcinoma In Situ (DCIS): For non-invasive cancers that are confined to the milk ducts.

  • Cancer Removal: Extracting the primary tumor in its entirety.

  • Clear Margins: Ensuring the edges (margins) of the removed tissue are cancer-free. Surgeons often use real-time cavity imaging to verify clear margins during the surgery.

  • Aesthetic Preservation: Maintaining the nipple position, breast contour, and sensation as much as possible.

  • Regional Staging: Assessing the lymph nodes to see if the cancer has begun to travel.

  • Localization: If a tumor is too small to feel, a radiologist may use a wire, a radioactive seed, or a magnetic reflector to mark the exact spot for the surgeon.

  • Anesthesia: Typically performed under general anesthesia or heavy sedation with a local nerve block for post-operative comfort.

  • The Incision: The surgeon makes a curved incision, often following the natural line of the areola or a skin crease to hide the scar.

  • Sentinel Node Biopsy: A dye or radioactive tracer is injected to identify the first few lymph nodes ("sentinel nodes") the cancer would drain into; these are removed through a small second incision.

  • Oncoplastic Reconstruction: The surrounding breast tissue is rearranged to fill the "hole" left by the tumor removal, preventing a dimple or indentation.

  • Clip Placement: Small titanium clips are often left at the site so the radiation oncologist knows exactly where to aim the follow-up treatment.

  • Imaging Correlation: Reviewing the most recent mammogram, ultrasound, or breast MRI to confirm the tumor's dimensions.

  • Medication Audit: Stopping blood thinners or certain herbal supplements that could cause bruising or a "seroma" (fluid collection).

  • Support Garments: Purchasing a firm, supportive sports bra (front-closing is best) to wear immediately after the surgery.

  • Lymphedema Baseline: Taking measurements of the arms to establish a baseline in case of future swelling after lymph node removal.

  • Radiation Consultation: Meeting with a radiation oncologist before surgery to understand the follow-up treatment plan that follows healing.

  • Diagnostic Mammogram: To provide a high-definition view of the tumor and any surrounding calcifications.

  • Breast Ultrasound: To help the surgeon determine if the tumor is solid or cystic and to check the lymph nodes in the axilla (armpit).

  • Breast MRI: Often used to ensure there are no other hidden spots of cancer in either breast.

  • Core Needle Biopsy: To confirm the "receptor status" (ER/PR/HER2) of the cancer, which helps determine if other treatments are needed first.

  • Baseline Blood Work: Standard CBC and coagulation profiles to ensure safe surgical healing.

  • Hospital Stay: Most lumpectomies are outpatient procedures, meaning you usually go home the same day.

  • Physical Recovery: You can typically return to light daily tasks in 2 to 3 days and full activity (including exercise) in 1 to 2 weeks.

  • Radiation Therapy: The standard of care involves radiation after the breast has healed. This lowers the chance of recurrence to a level equal to a full mastectomy.

  • Changes in Breast Shape: Depending on the amount of tissue removed, there may be a small change in size, firmness, or a slight shift in the nipple position.

  • Seroma: A collection of fluid may form where the tumor was; this usually resolves on its own but can be drained if it becomes uncomfortable.

  • Numbness: Temporary or permanent numbness near the scar or in the armpit is common due to small sensory nerve interference.

  • Equal Survival Rates: For early-stage cancer, a lumpectomy combined with radiation offers the same long-term survival as a full mastectomy.

  • Oncoplastic Innovation: Modern techniques allow for larger tumors to be removed while still achieving an excellent cosmetic result that preserves the patient's body image.

  • Sentinel Mapping: By only removing a few "sentinel" nodes, the risk of chronic arm swelling (lymphedema) is significantly reduced.

  • Shorter Radiation Courses: Modern "hypofractionated" radiation allows some patients to complete their follow-up treatment in just 1 to 3 weeks.

  • Psychological Wellbeing: Preserving the natural breast often leads to higher long-term satisfaction and a faster emotional recovery after cancer treatment.

Cervical Cancer Treatment

Cervical Cancer Treatment refers to a comprehensive range of medical and surgical protocols aimed at eliminating malignant cells within the tissues of the cervix. The focus is on highly precise interventions that target tumors while prioritizing the preservation of reproductive health. Advanced immunotherapies and Antibody-Drug Conjugates (ADCs) are now standard for managing advanced cases, ensuring long-term remission and the prevention of recurrence.

  • Abnormal Bleeding: Unusual vaginal bleeding occurring between menstrual periods or specifically after intercourse.

  • Postmenopausal Bleeding: Any vaginal bleeding that begins after the onset of menopause.

  • Unusual Discharge: Persistent vaginal discharge that may have an unusual color, consistency, or odor.

  • Pelvic or Back Pain: Chronic pelvic discomfort or unexplained pain in the lower back region.

  • Dyspareunia: Pain or discomfort experienced during sexual activity.

  • Systemic Signs: General fatigue or persistent swelling in the lower extremities (legs).

  • Squamous Cell Carcinoma: Affecting the thin, flat cells lining the outer part of the cervix (most common type).

  • Adenocarcinoma: Originating in the glandular cells of the cervical canal that produce mucus.

  • Recurrent Cervical Cancer: Cancer that has returned after an initial period of successful remission.

  • Metastatic Disease: Advanced cancer that has spread to the pelvic lymph nodes or distant organs like the lungs or liver.

  • High-Risk Precancerous Lesions (CIN III): Lesions that require immediate removal to prevent them from turning into invasive malignancy.

  • Radical Trachelectomy: A specialized fertility-sparing surgery that removes the cervix and upper vagina while leaving the uterus intact, allowing for future pregnancy.

  • Hysterectomy: The surgical removal of the uterus and cervix; used for cases where fertility preservation is not a priority or the cancer is more advanced.

  • Antibody-Drug Conjugates (ADCs): Precision medications like Tisotumab Vedotin that deliver potent treatment directly to tumor proteins.

  • Immunotherapy: The use of checkpoint inhibitors (like Pembrolizumab) to help the immune system recognize and eliminate HPV-related cancer cells.

  • Brachytherapy (Internal Radiation): A procedure where radioactive material is placed directly into the cervix for high-dose, localized treatment.

  • Concurrent Chemoradiation: The strategic combination of chemotherapy and radiation given together to maximize the "kill rate" of cancer cells.

[Image showing the process of Brachytherapy with a radiation source placed near the cervix]

  • Diagnostic Mapping: Primary HPV DNA testing and specialized pelvic imaging are completed to determine the tumor's exact boundaries.

  • Surgical Intervention: Depending on the stage, surgeons remove either the lesion (Cone Biopsy), the cervix (Trachelectomy), or the entire reproductive structure.

  • Targeted Delivery: If the cancer is advanced, ADCs or targeted drugs are administered via IV to seek out specific markers on the cancer cells.

  • Radiation Application: High-precision external beams or internal "seeds" are used to destroy cells in the pelvic area while sparing the bladder and bowel.

  • Immune Stimulation: Systematic immunotherapy is used to "unmask" HPV-driven cells so the body's natural defenses can attack them.

  • Surveillance: Rigorous follow-up including co-testing (Pap + HPV) is conducted to monitor cellular health.

  • Fertility Consultation: Discuss long-term goals regarding reproductive health; options like egg freezing may be considered.

  • Physical Optimization: Follow recommended guidelines for nutrition and light activity to ensure the body is prepared for anesthesia.

  • Medication/Fasting Audit: Adhere to strict fasting (NPO) protocols and stop any blood-thinning supplements as directed.

  • Recovery Logistics: Arrange for a supportive home environment and a caregiver to assist during the initial 2-week healing phase.

  • Multidisciplinary Review: Ensure the case has been reviewed by a specialized team, including surgeons, radiation oncologists, and pathologists.

  • Primary HPV DNA Test: To identify the specific high-risk strain of the virus driving the cellular changes.

  • Colposcopy & Biopsy: A microscopic exam of the cervix with a targeted tissue sample to confirm the depth of the cancer.

  • Pelvic MRI: The standard for determining if the cancer has affected surrounding ligaments or moved toward the vaginal wall.

  • PET-CT Scan: To check for any increased metabolic activity in the lymph nodes or distant organs.

  • Renal & Immune Panels: Comprehensive blood work to ensure the kidneys can handle contrast dyes and the immune system is prepared for treatment.

  • Rigorous Follow-up: Adherence to a schedule involving regular HPV testing and physical exams every 3–6 months for the first few years.

  • Lifestyle Shifts: Commitment to a healthy lifestyle, including absolute smoking cessation, as smoking significantly increases the risk of recurrence.

  • Pelvic Health: Engagement with pelvic floor physical therapy to manage any changes in bladder, bowel, or sexual function.

  • Family Prevention: Continued education for family members regarding the benefits of the HPV vaccine.

  • Emotional Wellness: Participation in support programs to manage the psychological impact of a cancer diagnosis and potential fertility changes.

  • Root Cause Targeting: Addresses the underlying HPV-driven changes rather than just treating the tumor surface.

  • Fertility Preservation: Modern surgical pathways prioritize keeping the uterus intact for young women whenever oncologically safe.

  • Reduced Toxicity: Targeted ADCs and precision radiation reduce the "collateral damage" to healthy pelvic organs like the bladder.

  • Prevention Standards: Benefit from standardized protocols designed to achieve high cure rates and prevent recurrence.

  • Individualized Care: Every treatment plan is biologically mapped to the specific genetic profile of the tumor.

Parotid Gland Surgery (Cancer)

Parotid Gland Surgery, or Parotidectomy, is the surgical removal of part or all of the parotid gland—the largest salivary gland, located just in front of the ear. When performed for cancer, the surgery is highly complex because the facial nerve, which controls all facial expressions (smiling, blinking, frowning), passes directly through the middle of the gland. The use of continuous intraoperative nerve monitoring is the standard of care to ensure the highest level of nerve preservation.

  • Parotid Tumors: For any growth in the parotid gland, as about 20% of these are malignant (cancerous).

  • Mucoepidermoid Carcinoma: The most common primary parotid cancer requiring surgical intervention.

  • Adenoid Cystic Carcinoma: A slow-growing but aggressive cancer known for traveling along nerve fibers.

  • Metastatic Skin Cancer: When skin cancer from the scalp or face spreads to the parotid lymph nodes.

  • Recurrent Pleomorphic Adenoma: When a previously removed benign tumor returns, requiring a more extensive resection.

  • Superficial Parotidectomy: Removal of the portion of the gland "outside" the facial nerve. This is the most common approach for tumors that have not invaded the deep lobe.

  • Total Parotidectomy: Removal of the entire gland, including the deep lobe. The surgeon carefully "unfolds" the gland to peel it away from the facial nerve fibers.

  • Radical Parotidectomy: Removal of the entire gland and the facial nerve. This is reserved for cases where the cancer has physically encased the nerve, causing paralysis before surgery.

  • Extended Parotidectomy: Removal of the gland plus surrounding structures like the skin, ear canal, or jawbone if the cancer has spread beyond the gland boundaries.

  • Enucleation/Extracapsular Dissection: A more limited removal used only for very small, superficial, and low-grade tumors.

  • Anesthesia: Performed under general anesthesia. Surgeons avoid long-acting muscle relaxants to ensure the facial nerve can still be stimulated and monitored.

  • The Incision: The incision usually starts in front of the ear and curves down into the neck (Blair or Face-lift incision), often hidden in natural skin creases.

  • Facial Nerve Identification: The surgeon identifies the "trunk" of the facial nerve as it exits the skull and then meticulously follows its five branches.

  • Nerve Monitoring: Small electrodes in the facial muscles alert the surgical team if the nerve is touched or stimulated, preventing accidental injury.

  • Micro-dissection: Using high-power magnification or a microscope to separate the tumor from the delicate nerve fibers.

  • Neck Dissection: If the cancer is high-grade, the surgeon removes lymph nodes in Levels I, II, and III of the neck during the same operation.

  • Facial Nerve Baseline: A thorough examination of facial movements to document any pre-existing weakness caused by the tumor.

  • Fine Needle Aspiration (FNA): A biopsy to determine the type and grade of the cancer, which helps plan the extent of the surgery.

  • Dental Check: Ensuring there are no active oral infections that could complicate the surgical site.

  • Tobacco Cessation: Stopping smoking at least 4 weeks prior to improve skin healing and reduce the risk of a salivary fistula.

  • Medication Audit: Pausing any blood thinners or supplements that increase the risk of a hematoma (blood clot) under the facial skin.

  • Contrast-Enhanced MRI: The preferred imaging to visualize the facial nerve's relationship to the tumor and check for spread along nerves.

  • CT Scan: Useful for evaluating whether the cancer has invaded the nearby jawbone or the base of the skull.

  • PET-CT Scan: Used for high-grade parotid cancers to rule out spread to the lungs or other distant sites.

  • Ultrasound-Guided Biopsy: To obtain a tissue sample from the tumor or suspicious neck lymph nodes.

  • Audiogram: Occasionally performed if the surgery involves the ear canal to establish a baseline for hearing.

  • Hospital Stay: Usually 1 to 2 nights. A small plastic drain is often left in the neck for 24 hours to prevent fluid buildup.

  • Facial Nerve Paresis: Temporary weakness of the face (e.g., a crooked smile or difficulty closing the eye) due to nerve manipulation. This usually resolves within 3–6 months.

  • Frey’s Syndrome: A long-term complication where the cheek sweats or flushes while eating; treatments include Botox injections or specialized skin barriers.

  • Numbness: Permanent numbness of the earlobe is common because a sensory nerve (greater auricular nerve) is often divided to reach the gland.

  • Salivary Fistula: Saliva may leak from the remaining gland tissue under the skin, often managed with temporary pressure dressings.

  • Nerve Preservation: Intraoperative monitoring has significantly reduced the rates of permanent facial paralysis in parotid surgery.

  • Aesthetic Focus: Modern incisions ensure that surgical scars are nearly invisible once fully healed.

  • Advanced Reconstruction: If the nerve must be removed, "cable grafting" techniques can often restore facial movement over 6–12 months.

  • Targeted Adjuvant Therapy: Following surgery with precision radiation ensures that any microscopic cells near the facial nerve are eliminated.

  • Multidisciplinary Excellence: Combining the skills of head and neck surgeons with reconstructive experts provides the best balance of cancer clearance and functional preservation.

Amputation (Cancer)
Amputation (Cancer)

Amputation for cancer is a definitive surgical procedure to remove all or part of a limb when a malignant tumour, such as a bone or soft tissue sarcoma, cannot be safely or functionally treated with limb-salvage surgery. While limb salvage is now the gold standard (successful in up to 95% of cases), amputation remains a critical life-saving or palliative option for specific advanced scenarios. The focus has shifted toward "Pre-prosthetic Surgery," where nerves are rewired during the amputation to minimize phantom pain and improve control over high-tech bionic limbs.

  • Neurovascular Involvement: When the cancer has invaded the major nerves and blood vessels, meaning a functional limb cannot be preserved even if the tumour is removed.

  • Failed Limb Salvage: When previous attempts to save the limb have failed to achieve clear (negative) margins or the cancer has reoccurred multiple times.

  • Extensive Tissue Loss: If removing the tumour would require taking so much bone or muscle that the remaining limb would be non-functional or a source of chronic pain.

  • Palliative Management: To relieve intractable pain, manage severe bleeding, or treat an infected, "fungating" tumour in advanced metastatic disease.

  • Infection Risks: When a tumour is associated with a deep-seated infection that makes the use of internal metal implants (for limb salvage) too dangerous.

The level of amputation is determined by the need to achieve clear surgical margins while preserving the best possible site for a future prosthesis.

Lower Limb:

  • Transtibial (Below-Knee): Preserves the natural knee joint, offering significantly better functional outcomes and lower energy expenditure for walking.

  • Transfemoral (Above-Knee): Performed through the thigh bone; requires more energy for mobility due to the loss of the natural knee joint.

  • Hip Disarticulation: Removal of the entire leg at the hip joint.

  • Hemipelvectomy (Hindquarter): A radical procedure involving the removal of the entire leg and part of the pelvis, usually for tumours involving the pelvic bone itself.

Upper Limb:

  • Transradial / Transhumeral: Amputation below or above the elbow.

  • Forequarter Amputation: Removal of the entire arm, including the shoulder blade (scapula) and collarbone (clavicle), for advanced shoulder or chest wall tumours.

  • Anaesthesia: Performed under general anaesthesia, typically combined with a regional nerve block or epidural to "numb" the nerves before they are cut, which helps prevent future phantom pain.

  • Margin Verification: The surgeon identifies the highest point of the tumour and moves a safe distance (usually 5–10 cm) above it to ensure the bone is cut through a completely healthy area.

  • TMR (Targeted Muscle Reinnervation): A 2026 standard technique where severed nerves are "plugged" into nearby muscles. This prevents painful "neuromas" and allows for the future use of mind-controlled bionic prosthetics.

  • Myoplasty / Myodesis: The remaining muscles are carefully attached to the end of the bone or to each other to create a stable, well-padded "cushion" for the prosthesis.

  • Skin Flap Design: Surgeons create a "long flap" of healthy skin and fat to wrap around the end of the stump, ensuring the surgical scar is not located on a weight-bearing surface.

  • Prosthetic Consultation: Meeting with a prosthetist before surgery to discuss the types of artificial limbs available and how the amputation level will affect your future mobility.

  • Psychological Support: Connecting with peer support groups or counselors who specialize in limb loss to prepare for the emotional transition.

  • Upper Body Strengthening: If a lower-limb amputation is planned, focusing on arm and core strength to prepare for using crutches or a wheelchair.

  • Phantom Pain Education: Learning about "Mirror Therapy" and other techniques to manage neurological sensations after surgery.

  • VTE Prophylaxis: Starting blood-thinning protocols to prevent clots, as amputation involves major blood vessel management.

  • Contrast-Enhanced MRI or CT: To determine the exact "proximal" extent of the tumour and ensure the planned amputation level is high enough to achieve clear margins.

  • Angiography: To assess the blood flow in the limb and ensure the remaining "stump" will have enough circulation to heal the surgical flaps.

  • Bone Scan or PET-CT: To rule out any other tumours in the same limb (skip lesions) that might require a higher level of amputation.

  • Baseline CBC and Nutrition: Checking for anaemia or low protein (albumin) levels, which are critical for healing a large surgical wound.

  • Cardiovascular Stress Test: To ensure the heart can handle the increased energy demands of walking with a prosthesis.

  • Wound Healing: Focuses on shaping the residual limb (stump) using elastic bandages or "shrinkers" to reduce swelling and prepare for a prosthesis.

  • Prosthetic Fitting: A temporary prosthesis may be used within weeks, followed by a permanent, custom-fitted device once swelling has subsided (usually 8–12 weeks).

  • Physical Therapy: Vital for gait training and strengthening remaining muscles. Walking with an above-knee prosthesis can require 60–100% more energy than natural walking.

  • Phantom Limb Pain: The feeling of pain or sensation in the missing part of the limb. 2026 treatments include nerve-mapping, specialized medications, and virtual reality therapy.

  • Activity Rules: You will work with occupational therapists to adapt your home and car to ensure you can return to independence as quickly as possible.

  • Definitive Disease Control: Amputation provides the highest possible level of local cancer clearance for tumours that are too large for limb-sparing techniques.

  • Faster Return to Activity: For some complex sarcomas, a well-performed amputation and modern prosthesis allow a patient to return to walking and daily life faster than a multi-year limb-reconstruction process.

  • Advanced Bionics: 2026 prosthetic technology includes microprocessors and sensors that allow for a near-natural gait and even the restoration of some "touch" sensations.

  • TMR Integration: By performing Targeted Muscle Reinnervation during the initial surgery, 2026 surgeons have significantly reduced the incidence of chronic, debilitating phantom pain.

  • Multidisciplinary 2026 Care: The combination of oncology surgeons, prosthetists, and specialized physical therapists ensures a holistic recovery aimed at "total mobility."

Acute Lymphoid Leukemia

Acute Lymphoblastic Leukemia (ALL), also known as acute lymphoid or lymphocytic leukemia, is a fast-growing cancer of the blood and bone marrow. It occurs when the body overproduces immature white blood cells, called lymphoblasts, which crowd out healthy red blood cells, platelets, and normal white blood cells.

  • Persistent fatigue or weakness due to low red blood cell counts.

  • Frequent or unexplained fevers and infections.

  • Easy bruising, frequent nosebleeds, or tiny red spots under the skin (petechiae).

  • Bone or joint pain caused by the buildup of lymphoblasts.

  • Swelling in the neck, armpits, or groin (lymph nodes) or a mass in the chest.

  • B-cell ALL: The most common form, accounting for about 85% of childhood cases and 75–80% of adult cases.

  • T-cell ALL: More common in adults (25%) and often associated with a mediastinal (chest) mass.

  • Philadelphia Chromosome-Positive (Ph+ ALL): A high-risk subtype involving a specific genetic translocation that requires specialized targeted therapy.

  • Induction Therapy: Intensive chemotherapy lasting 4–6 weeks aimed at killing most cancer cells to achieve remission.

  • CNS-Directed Therapy: Intrathecal chemotherapy injected into spinal fluid to prevent cancer from hiding in the brain or spinal cord.

  • Consolidation Therapy: High-dose therapy lasting 6–8 months to destroy any remaining "hidden" cells after remission.

  • Maintenance Therapy: Lower-dose oral and IV drugs administered over 2–3 years to prevent the cancer from returning.

  • Advanced Options: Includes Targeted Therapy (blocking specific enzymes), Immunotherapy (monoclonal antibodies), and CAR T-cell Therapy (genetically modified T-cells).

  • Detailed genetic testing and chromosomal analysis to identify specific ALL subtypes like Ph+.

  • Placement of a central venous catheter (port) to facilitate long-term chemotherapy and blood draws.

  • Discussion of fertility preservation options before starting intensive chemotherapy or radiation.

  • Baseline heart and lung function tests to ensure the body can tolerate intensive induction therapy.

  • Bone Marrow Aspiration and Biopsy: To confirm the percentage of lymphoblasts in the marrow.

  • Lumbar Puncture (Spinal Tap): To check if leukemia cells have spread to the central nervous system.

  • Complete Blood Count (CBC): To evaluate the levels of red cells, white cells, and platelets.

  • Flow Cytometry: To determine the exact immunophenotype (B-cell vs. T-cell) of the leukemia cells.

  • Children (Ages 1–10) see the best prognosis, with 5-year survival rates exceeding 90%.

  • Adolescents and young adults have an estimated 5-year survival rate of roughly 65–75%.

  • Regular follow-up for 2 to 3 years is required during the maintenance phase to monitor for relapse.

  • Long-term monitoring for "late effects" of treatment, such as cardiac issues or secondary cancers.

  • Achieves high rates of complete remission through structured therapy phases.

  • Prevents central nervous system involvement through proactive CNS-directed treatments.

  • Offers curative potential for relapsed cases using modern advances like CAR T-cell therapy.

  • Restores normal bone marrow function and healthy blood cell production.

Acute Myeloid Leukemia

Acute Myeloid Leukemia (AML) is a fast-growing cancer where the bone marrow makes abnormal myeloblasts, red blood cells, or platelets. These "leukemia cells" quickly crowd out healthy cells, leading to a high risk of infection, anemia, and easy bleeding.

  • Sudden bruising or tiny red spots on the skin called petechiae.

  • Shortness of breath and extreme pale skin indicating anemia.

  • Persistent fevers that do not respond to standard antibiotics.

  • Evidence of high risk for infection or unexplained, easy bleeding.

  • FLT3 Mutation: Found in about 30% of cases and usually requires specific targeted drugs.

  • IDH1/IDH2 Mutations: Subtypes targeted by newer oral therapies.

  • TP53 Mutation: Often indicates a more resistant form of the disease.

  • APL (Acute Promyelocytic Leukemia): A unique, highly curable subtype treated with non-chemo drugs like arsenic trioxide.

  • Secondary AML: Often found in older adults (60+) arising from previous blood disorders.

  • Induction Therapy: Typically a "7+3" regimen involving 7 days of one chemotherapy and 3 days of another to achieve complete remission.

  • Consolidation (Post-remission): Additional chemotherapy or a Stem Cell Transplant to kill remaining microscopic cells.

  • Targeted Therapy: Use of specific drugs for mutations like FLT3 or IDH1/IDH2.

  • Low-Intensity Options: Use of Venetoclax pills or Hypomethylating Agents (HMA) like Azacitidine for patients who cannot handle high-dose chemo.

  • Non-Chemo Regimens: Use of All-Trans Retinoic Acid (ATRA) specifically for the APL subtype.

  • Cytogenetic profiling to determine the specific genetic mutations and treatment plan.

  • Assessment of age and physical tolerance for intensive chemotherapy.

  • Evaluation of heart or kidney function to determine if low-intensity options like Venetoclax are necessary.

  • Screening for previous blood disorders that may lead to secondary AML.

  • Bone Marrow Analysis: To identify abnormal myeloblasts and clear the marrow of visible blasts.

  • Genetic Testing: To check for FLT3, IDH1/IDH2, or TP53 mutations.

  • Blood Counts: To assess the severity of anemia and low platelet levels.

  • Cytogenetic Profiling: To map the "cytogenetic" profile which dictates the specific therapy.

  • For younger adults (<60), the 5-year survival rate is roughly 40% to 50%.

  • For older adults (60+), survival is lower, typically around 10% to 20%.

  • Patients with the APL subtype enjoy an excellent cure rate of over 90%.

  • Ongoing monitoring is required during the consolidation phase to prevent a relapse.

  • Clears the blood and bone marrow of visible leukemia blasts.

  • Provides "insurance" against relapse through consolidation or transplants.

  • Offers improved survival for older patients through modern low-intensity pill combinations.

  • Restores the production of healthy white blood cells, red cells, and platelets.

Colectomy (Bowel Resection Surgery

A Colectomy is a major surgical procedure performed to remove all or part of the colon (large intestine). As a critical intervention for both life-threatening emergencies and chronic conditions, it is used to treat colon cancer, severe inflammatory bowel diseases, and obstructive disorders. By 2026, advances in surgical technology have transformed the colectomy from a traditional open surgery into a high-precision procedure, often utilizing robotic assistance to improve patient recovery and preserve as much natural bowel function as possible.

  • Colorectal Cancer: To remove malignant tumors and the surrounding lymph nodes to prevent the spread of disease.

  • Inflammatory Bowel Disease (IBD): When Crohn’s disease or Ulcerative Colitis no longer responds to medication.

  • Severe Diverticulitis: To remove segments of the colon that have become chronically inflamed or have developed abscesses.

  • Bowel Obstruction: An emergency scenario where a blockage prevents the passage of waste and threatens blood flow to the tissue.

  • Gastrointestinal Bleeding: Uncontrolled bleeding in the large intestine that cannot be stopped via endoscopy.

  • Familial Adenomatous Polyposis (FAP): A preventive measure for patients with a genetic predisposition to developing hundreds of precancerous polyps.

  • Partial Colectomy (Hemicolectomy): Removal of the diseased portion of the colon on either the right or left side.

  • Total Colectomy: Removal of the entire large intestine.

  • Proctocolectomy: Removal of both the colon and the rectum, often requiring a specialized internal reservoir or an ostomy.

  • Total Abdominal Colectomy: Removal of the colon while leaving the rectum intact, typically used in specific Crohn’s or FAP cases.

  • Surgical Access: Depending on the case, the surgeon uses either a traditional open incision or several "keyhole" laparoscopic ports.

  • Resection: The diseased segment of the bowel is carefully detached from its blood supply and the surrounding supportive tissue (mesentery).

  • Lymph Node Mapping: In cancer cases, the surrounding lymph nodes are removed along with the colon segment for pathological testing.

  • Anastomosis (Reconnection): The healthy ends of the remaining intestine are sewn or stapled back together to allow for normal waste passage.

  • Stoma Creation (Optional): If a safe reconnection is not possible, the end of the intestine is brought through the abdominal wall (a colostomy or ileostomy).

  • Robotic Dexterity: Surgeons often utilize robotic platforms to perform delicate suturing in the deep pelvic cavity with 3D high-definition visualization.

  • Robotic-Assisted ResectionAdvanced platforms that provide 3D visualization and wristed instruments, allowing for more precise nerve preservation and faster suturing.

  • Fluorescence-Guided AngiographyThe use of an injectable dye that glows under infrared light, allowing the surgeon to ensure the new connection has a perfect blood supply.

  • ERAS (Enhanced Recovery After Surgery)A standardized pathway involving pre-operative "carb loading," non-opioid pain management, and early mobilization to speed up bowel recovery.

  • Stapling Technology with AISmart surgical staplers that measure tissue thickness and adjust the firing pressure to create more consistent, leak-resistant connections.

  • Intraoperative Pathological Margin AssessmentRapid testing techniques that ensure all cancer cells have been removed before the surgeon closes the incision.

  • Bio-Luminescent Nerve MarkingExperimental technology that makes autonomic nerves visible, helping the surgeon avoid damage that could impact bladder or sexual function.

  • Bowel Prep: A strict regimen of clear liquids and laxatives to empty the colon, reducing the risk of infection.

  • Nutritional Optimization: Ensuring the patient has adequate protein and vitamin levels to support the complex healing of the intestinal wall.

  • Cardiac and Pulmonary Clearance: A thorough review to ensure the patient can safely undergo a lengthy surgical procedure.

  • Ostomy Education: Meeting with a Wound, Ostomy, and Continence (WOC) nurse to discuss the potential for a temporary or permanent stoma.

  • Medication Adjustment: Pausing certain blood thinners or immunosuppressants that could interfere with the healing of the reconnection site.

  • Anastomotic Leak Detection: Monitoring for signs of fever, abdominal rigidity, or elevated white blood cell counts following the reconnection.

  • Bowel Function Tracking: Watching for the return of "flatus" (gas) or bowel movements, which indicate the digestive system has restarted.

  • C-Reactive Protein (CRP) Trends: Tracking inflammatory markers to identify potential internal complications before they become symptomatic.

  • Electrolyte Surveillance: Monitoring sodium and potassium levels, which can fluctuate rapidly after bowel surgery.

  • Cancer Cure Potential: In many cases, a colectomy is the only way to achieve a complete cure for localized colon cancer.

  • Resolution of Chronic Pain: Removes the source of recurring, debilitating pain for patients with severe divertiverticulitis or IBD.

  • Emergency Stabilization: Provides a life-saving solution for bowel perforations or complete obstructions.

  • Improved Quality of Life: For many with Ulcerative Colitis, removing the diseased colon eliminates the daily burden of urgency and bleeding.

  • Precision and Safety: Modern minimally invasive techniques have significantly reduced the risk of large-scale infections and long-term scar tissue.

  • The hospital stay typically ranges from 3 to 7 days, depending on whether the surgery was laparoscopic or open.

  • Early walking (within 24 hours) is essential to prevent blood clots and encourage the "waking up" of the digestive tract.

  • Patients transition from clear liquids to a "low-residue" (low-fiber) diet for several weeks to allow the internal staples to heal.

  • Heavy lifting and strenuous abdominal exercises are restricted for 6 to 8 weeks to prevent the formation of an incisional hernia.

  • If a stoma was created, specialized nursing care is provided to teach the patient how to manage their external pouching system.

  • Most patients return to a varied, healthy diet once the initial healing phase (about 6–8 weeks) is complete.

  • For many, the surgery results in a significant reduction in medication dependence and a return to active professional and social life.

  • Regular follow-up colonoscopies and imaging are scheduled to ensure continued health and monitor for any recurrence.

  • The body's digestive patterns may change, but most individuals adapt successfully to their "new normal" over time.

  • Empowerment through the resolution of a chronic or life-threatening gastrointestinal condition.

Slip Disc (Lumbar Discectomy)

Lumbar Discectomy is a surgical procedure to remove the fragmented or protruding portion of a herniated disc (slip disc) that is compressing a spinal nerve. It is most commonly performed in the lower back (lumbar spine) to relieve radiating leg pain, known as sciatica, by decompressing the affected nerve root.

  • Failed Conservative Treatment: When 6–12 weeks of physical therapy, NSAIDs, or steroid injections fail to provide relief.

  • Radiculopathy (Sciatica): Severe, radiating pain, numbness, or weakness that travels down the leg and into the foot.

  • Neurological Deficit: Progressive muscle weakness or a "foot drop" caused by sustained nerve compression.

  • Cauda Equina Syndrome: An emergency condition involving loss of bowel or bladder control or "saddle anesthesia" (numbness in the groin).

  • Significant Functional Impairment: When back and leg pain prevents the performance of basic daily activities or work.

  • Microdiscectomy (Gold Standard): Using a high-powered operating microscope to minimize the incision size and improve visualization of the nerve.

  • Endoscopic Discectomy: An ultra-minimally invasive technique using a tiny camera and specialized tools inserted through a small tube.

  • Laminotomy/Laminectomy: Removing a small portion of the vertebral bone (lamina) to create a window to access the spinal canal.

  • Tubular Retractor Discectomy: Using a series of dilating tubes to part the muscles rather than cutting them, reducing post-operative soreness.

  • Sequestrectomy: Removing only the free-floating disc fragment without entering the main disc space, which may reduce the risk of future collapse.

  • Positioning: The patient is placed face down on a specialized surgical frame that opens the spaces between the vertebrae.

  • Incision: A small 2–3 cm midline incision is made in the lower back directly over the level of the herniation (most commonly L4-L5 or L5-S1).

  • Exposure: The surgeon moves the spinal muscles aside and removes a small amount of ligament and bone to view the spinal canal.

  • Nerve Protection: The compressed nerve root is gently retracted to one side to expose the herniated disc material underneath.

  • Fragment Removal: The surgeon identifies the "jelly-like" protrusion and removes it. The healthy portion of the disc is left intact to serve as a shock absorber.

  • Closure: The muscles return to their original position, and the skin is closed with dissolvable stitches and surgical glue.

  • Confirmation of the herniation level via MRI to ensure the surgical site matches the patient's clinical symptoms.

  • Smoking cessation is mandatory for several weeks prior, as nicotine restricts blood flow to the spine and significantly hinders healing.

  • Fasting (NPO) for 8–12 hours before the procedure to ensure safety during general anesthesia.

  • Discussion of the "BLT" (Bending, Lifting, Twisting) restrictions that will be required immediately following the surgery.

  • Lumbar MRI: The primary diagnostic tool used to visualize the disc herniation and its relationship to the nerve roots.

  • X-ray (Flexion/Extension): Performed to ensure there is no underlying spinal instability or "slipped" vertebrae (spondylolisthesis).

  • Electromyography (EMG): Occasionally used to confirm which specific nerve is being damaged and to assess the severity of the nerve injury.

  • Blood Panels: Routine screens to ensure the patient is fit for anesthesia and has no signs of active infection.

  • Most procedures are performed as same-day (outpatient) surgeries or require only a single overnight stay.

  • Patients are encouraged to stand and walk within 4 hours of waking up to promote circulation and prevent stiffness.

  • The "BLT" Rule: For the first 6 weeks, you must strictly avoid Bending at the waist, Lifting anything over 2kg, and Twisting the spine.

  • Incisions must be kept dry for the first 3–5 days; stitches are usually dissolvable and do not require removal.

  • Physical therapy typically begins around the 6-week mark to strengthen the core and multifidus muscles that support the spine.

  • Over 90% of patients report immediate and dramatic relief from radiating leg pain (sciatica).

  • Minimally invasive techniques allow for smaller scars, less muscle damage, and a faster return to daily life.

  • Prevents permanent nerve damage by removing the source of chronic compression and inflammation.

  • Restores the ability to perform physical activities, work, and exercise without the limitation of debilitating leg pain.

Cervical Discectomy
Cervical Discectomy

Cervical Discectomy is a surgical procedure to remove a herniated or degenerative disc in the neck (cervical spine). It is performed to relieve pressure on the spinal cord or nerve roots, which typically causes neck pain, radiating arm pain (brachialgia), or weakness. By removing the damaged disc, the surgeon creates more space for the neural structures to function properly.

  • Radiculopathy: Persistent arm pain, numbness, or "electric shock" sensations that have not improved with 6–12 weeks of conservative therapy.

  • Cervical Myelopathy: Urgent signs of spinal cord compression, such as clumsiness in the hands, loss of fine motor skills, or difficulty walking/balance issues.

  • Failed Conservative Care: When physical therapy, activity modification, and anti-inflammatory medications fail to provide adequate relief.

  • Progressive Weakness: Measurable loss of strength in the arms, shoulders, or grip due to sustained nerve compression.

  • Disc Degeneration: Severe wear and tear that leads to spinal instability or significant narrowing of the spinal canal (stenosis).

  • Anterior Cervical Discectomy and Fusion (ACDF): The most common method, reaching the disc from the front of the neck and fusing the vertebrae together for stability.

  • Cervical Disc Replacement (Arthroplasty): Inserting a mechanical artificial disc to maintain neck motion and potentially protect the surrounding discs from extra wear.

  • Posterior Cervical Discectomy: Approaching the disc from the back of the neck, typically used for specific types of "lateral" herniations that do not require a fusion.

  • Minimally Invasive Discectomy: Using specialized retractors and microscopes to minimize tissue damage and speed up recovery time.

  • Hybrid Surgery: A combination of fusion at one level and disc replacement at another for multi-level cervical disease.

  • Approach: For the common anterior (front) approach, a 2–3 cm horizontal incision is made in a skin fold on the front of the neck.

  • Pathway: The surgeon gently moves the windpipe (trachea) and esophagus to the side to gain a direct view of the front of the spine.

  • Discectomy: The entire damaged disc is removed, and the surgeon uses a microscope to ensure all bone spurs or fragments are cleared from the nerves.

  • Stabilization (ACDF): A bone graft or synthetic cage is placed into the empty disc space. A small titanium plate and screws are usually attached to hold the bones steady.

  • Stabilization (Replacement): A specialized metal and plastic joint is secured into the space to allow for continued flexion, extension, and rotation.

  • Closure: The internal tissues return to their natural positions, and the skin is closed with dissolvable sutures or surgical glue.

  • Confirmation of the specific disc level (most commonly C5-C6 or C6-C7) using high-resolution MRI and X-ray imaging.

  • Smoking cessation is mandatory for 4–6 weeks prior to surgery; nicotine significantly prevents the bone from fusing and increases the risk of complications.

  • Fasting (NPO) for at least 8 hours prior to the procedure to ensure safety under general anesthesia.

  • Pre-operative screening to ensure the patient can safely tolerate the retraction of the esophagus and neck tissues.

  • Cervical MRI: The gold standard for identifying disc herniations and the degree of spinal cord or nerve root compression.

  • X-rays (Static and Dynamic): Used to assess overall spinal alignment and check for any abnormal movement (instability) between vertebrae.

  • CT Scan: Sometimes required to better visualize "hard" bone spurs (osteophytes) that may be contributing to the compression.

  • Electromyography (EMG): Performed to confirm that the arm symptoms are originating from the neck and not from other sites like the elbow or wrist.

  • Many patients undergo the procedure as a same-day surgery or require only a single overnight stay for observation.

  • Depending on the surgeon’s preference and the complexity of the case, a soft or hard neck brace may be worn for 2 to 6 weeks.

  • Walking is encouraged immediately after surgery; however, lifting is strictly limited to less than 2–3 kg for the first 6 weeks.

  • Temporary hoarseness or a "lump in the throat" sensation when swallowing is common and usually fades within 2–4 weeks.

  • Driving is typically restricted for 2 weeks or until the patient can comfortably turn their head to check blind spots without pain.

  • Extremely high success rates (over 90–95%) for the permanent relief of radiating arm pain and "electric shock" sensations.

  • Prevents the progression of permanent spinal cord damage and neurological deficits in patients with myelopathy.

  • Restores the ability to perform daily tasks, such as writing, buttoning clothes, and walking, by decompressing the neural pathways.

  • Provides significant stabilization to the neck, reducing the chronic "deep" ache associated with degenerative disc disease.

Spinal Decompression Surgery

Spinal Decompression Surgery is a general term for various procedures performed to relieve pressure on the spinal cord or nerve roots. It is most commonly used to treat Spinal Stenosis (narrowing of the spinal canal) caused by bone spurs, thickened ligaments, or bulging discs, allowing the neural structures to function without compression.

  • Neurogenic Claudication: Leg pain, heaviness, or cramping that occurs when walking or standing and is relieved by sitting or leaning forward.

  • Radiculopathy: Shooting pain, numbness, or "pins and needles" that radiates into the arms or legs due to a pinched nerve.

  • Failed Conservative Care: When physical therapy, activity modification, and epidural steroid injections fail to improve quality of life after 3–6 months.

  • Progressive Weakness: Measurable loss of motor function, such as a weakened grip or a "foot drop," indicating severe nerve compromise.

  • Spinal Stenosis: Diagnostic confirmation of a narrowed spinal canal that correlates with the patient's physical limitations and pain patterns.

  • Laminectomy: The "gold standard" procedure where the entire bony arch (lamina) at the back of the vertebra is removed to create significant room for the spinal cord.

  • Laminotomy: A less invasive approach where only a small portion of the lamina is removed, creating a "window" to access a specific pinched nerve.

  • Foraminotomy: Enlarging the "exit holes" (foramina) where the nerve roots leave the spinal canal to relieve localized compression.

  • Discectomy: Removing the specific portion of a herniated disc that is pressing directly against a spinal nerve.

  • Corpectomy: An extensive procedure where a portion of the vertebral body and adjacent discs are removed to decompress the spinal cord across a larger area.

  • Positioning: The patient is placed face down (prone) on a specialized surgical frame that minimizes pressure on the abdomen and helps open the spinal spaces.

  • Incision: A midline incision is made over the affected area of the spine. The length of the incision depends on how many levels of the spine require decompression.

  • Muscle Retraction: The spinal muscles are gently moved aside to expose the bony elements of the vertebrae.

  • Bone and Ligament Removal: The surgeon carefully removes the bone spurs (osteophytes), thickened ligaments, or portions of the lamina that are encroaching on the spinal canal.

  • Nerve Inspection: The surgeon uses magnification to ensure the nerve roots are completely free and "floating" within the newly enlarged space.

  • Closure: The muscles are allowed to return to their natural position, and the incision is closed with sutures, staples, or surgical glue.

  • Confirmation of the degree of narrowing via high-resolution MRI or CT Myelogram to plan the exact surgical levels.

  • Smoking cessation is mandatory for at least 4 weeks prior to surgery, as nicotine significantly hinders bone and tissue healing and increases the risk of infection.

  • Fasting (NPO) for 8–12 hours before the procedure to ensure safety under general anesthesia.

  • Evaluation of spinal stability via X-rays to determine if a fusion might be necessary in addition to the decompression.

  • Lumbar or Cervical MRI: The primary diagnostic tool used to visualize the soft tissues, nerves, and the extent of the canal narrowing.

  • X-rays (Flexion/Extension): Used to check for spinal instability, such as one vertebra sliding over another (spondylolisthesis).

  • CT Scan: Provides detailed images of the bony structures, which is helpful for mapping out dense bone spurs or ligament calcification.

  • Electrodiagnostic Studies (EMG/NCS): Performed to confirm that the symptoms are caused by spinal compression rather than peripheral nerve issues like diabetes or carpal tunnel.

  • Hospital stays vary from same-day discharge for simple procedures to 2–4 days for multi-level laminectomies.

  • Patients are encouraged to stand and walk within 4–6 hours of surgery to promote circulation and prevent complications like blood clots or pneumonia.

  • The "BLT" Restrictions: For the first 6 weeks, patients must strictly avoid Bending at the waist, Lifting anything over 3-5kg, and Twisting the spine.

  • Physical therapy typically begins 4–6 weeks post-operatively to strengthen the core and back muscles that support the spine.

  • While leg or arm pain often improves dramatically and quickly, the surgical site may remain sore for several weeks during the healing process.

  • Over 80% of patients experience a significant reduction in radiating limb pain and an improved ability to walk longer distances.

  • Effectively halts the progression of neurological damage, such as permanent numbness or muscle wasting.

  • Restores the ability to engage in daily activities, hobbies, and work that were previously limited by spinal stenosis symptoms.

  • Provides a durable, long-term solution for mechanical compression that does not respond to non-surgical interventions.

Laminectomy
Laminectomy

Laminectomy, often called "decompression surgery," is a major spinal procedure used to relieve pressure on the spinal cord or nerve roots by removing the lamina—the bony arch that forms the back of the spinal canal. By removing this bone and any associated thickened tissue, the surgeon creates significantly more room for the nerves to function without compression.

  • Spinal Stenosis: Narrowing of the spinal canal that leads to persistent leg pain, numbness, or a "heavy" feeling in the limbs.

  • Neurogenic Claudication: Difficulty walking or standing for long periods due to leg cramping and weakness that is relieved by sitting or leaning forward.

  • Failed Conservative Management: When symptoms persist despite months of physical therapy, medication, or steroid injections.

  • Nerve Root Compression: Significant pinching of the nerves by bone spurs or thickened ligaments that interferes with daily activity.

  • Progressive Neurological Symptoms: Measurable loss of muscle strength or sensory function in the legs or feet.

  • Open Laminectomy: The traditional approach, providing the surgeon with a wide view to decompress multiple levels of the spine.

  • Micro-Laminectomy: A minimally invasive version using smaller incisions and an operating microscope to reduce tissue trauma.

  • Hemilaminectomy: Removing only one side of the lamina to relieve pressure on a specific side while preserving more of the natural bone structure.

  • Laminotomy: Removing only a small portion of the lamina to create a window, rather than removing the entire bony arch.

  • Laminectomy with Fusion: Performing decompression alongside a spinal fusion if there is underlying instability or "slippage" of the vertebrae.

  • Positioning: The patient is placed face-down (prone) on a specialized surgical frame to allow the spine to flex and open the spaces between vertebrae.

  • Incision: A midline incision (usually 2–5 inches long) is made over the affected area of the spine.

  • Exposure: The surgeon detaches the back muscles from the bone to access the posterior elements of the vertebrae.

  • Bone Removal: Using specialized tools like rongeurs or high-speed drills, the surgeon removes the lamina and the spinous process (the bony bump on the back).

  • Decompression: Thickened ligaments (ligamentum flavum) and bone spurs are removed to ensure the spinal cord and nerves can "breathe" within the enlarged canal.

  • Closure: The muscles are sewn back into place, and the skin is closed with stitches, staples, or surgical glue.

  • Diagnostic mapping via MRI to identify the exact levels of compression (e.g., L3-L4, L4-L5) and X-rays to assess spinal stability.

  • Blood thinners (like aspirin or clopidogrel) must be stopped 5–7 days prior to surgery to prevent the risk of bleeding in the spinal canal.

  • Fasting (NPO) for 8–12 hours before the procedure to ensure safety under general anesthesia.

  • Discussion of the recovery phase and the specialized "No BLT" movement restrictions that will be required.

  • Lumbar or Cervical MRI: The primary test to visualize the nerves and determine the exact location and severity of the narrowing.

  • X-rays (Flexion/Extension): Used to check if the spine is "wobbly" or if one bone is sliding over another (spondylolisthesis).

  • CT Myelogram: Sometimes used if an MRI is not possible, providing a detailed look at the space around the spinal cord using contrast dye.

  • Electrodiagnostic Studies (EMG): Performed to confirm that the leg or arm symptoms are caused by the spinal blockage rather than other nerve issues.

  • Hospital stays typically range from 1 to 3 days, though micro-procedures may be performed on a same-day basis.

  • Patients are required to stand and walk within 4–6 hours of surgery to promote circulation and prevent blood clots.

  • The "No BLT" Rule: For 6 weeks post-op, you must strictly avoid Bending at the waist, Lifting anything over 3kg, and Twisting the spine.

  • Stitches or staples are usually removed at 10–14 days, and the incision must be kept dry for the first 5 days.

  • Physical therapy usually begins at the 4–6 week mark to rebuild "core" strength and stabilize the back muscles.

  • Over 80% of patients report immediate and significant relief from radiating leg pain and cramping.

  • Dramatically increases walking distance and the ability to stand comfortably for longer periods.

  • Halts the progression of nerve damage that could otherwise lead to permanent weakness or muscle wasting.

  • Restores the ability to engage in daily activities and hobbies that were previously hindered by spinal stenosis.

Spinal Fusion Surgery

Spinal Fusion is a major surgical procedure designed to permanently connect two or more vertebrae, eliminating painful motion between them. The procedure is characterized by Minimally Invasive Spine Surgery (MISS) and robotic assistance, utilizing bone grafts and high-precision hardware to create a solid bone mass. This approach aims to stabilize the structural integrity of the spine while protecting the surrounding nerves and musculature.

  • Chronic Pain: Debilitating back or neck pain that has not responded to physical therapy, medications, or injections.

  • Neurological Symptoms: Persistent numbness, tingling, or weakness in the arms or legs caused by sustained nerve compression.

  • Mechanical Instability: Significant pain that worsens with specific movements, such as bending, twisting, or lifting.

  • Spinal Deformity: Visible curvature or a sensation of the spine "slipping," often associated with structural instability.

  • Functional Limitation: Difficulty standing or walking for extended periods due to structural spinal narrowing or collapse.

  • Trauma or Tumor: Severe pain or instability following a spinal fracture or the surgical removal of a spinal tumor.

  • Degenerative Disc Disease: Where worn-out discs cause painful friction and micro-motion between vertebrae.

  • Spondylolisthesis: A condition where one vertebra slips forward over the one below it, potentially pinching nerves.

  • Spinal Stenosis: Resulting in the narrowing of the spinal canal and significant nerve pressure.

  • Scoliosis or Kyphosis: Involving abnormal curvatures of the spine that require corrective alignment and stabilization.

  • Pseudoarthrosis: A condition where a previous fusion attempt failed to heal into a solid bone mass.

  • Minimally Invasive Spine Surgery (MISS): Techniques that use tubular retractors to spread muscles rather than cutting them, reducing blood loss and recovery time.

  • Robotic-Assisted Fusion: The use of advanced guidance systems to ensure screws and rods are placed with sub-millimeter accuracy.

  • Anterior Lumbar Interbody Fusion (ALIF): Accessing the spine through the abdomen to provide a large surface area for the fusion cage.

  • Lateral Interbody Fusion (XLIF/LLIF): A side-access approach that avoids major back muscles and the spinal canal, often allowing for faster mobilization.

  • Posterior Lumbar Interbody Fusion (PLIF): The traditional approach from the back, offering the most direct access to compressed nerves and the spinal canal.

  • Transforaminal Lumbar Interbody Fusion (TLIF): An evolution of the posterior approach that accesses the disc space from a more lateral angle to reduce nerve retraction.

  • Surgical Mapping: Digital mapping or Augmented Reality (AR) is used to project the patient's internal anatomy for the surgeon.

  • Access: Minimally invasive incisions are made to reach the spine from the most appropriate clinical angle (front, back, or side).

  • Disc Removal: The intervertebral disc or damaged bone is removed to decompress nerves and create space for the fusion.

  • Cage Insertion: A "cage" or spacer filled with bone graft material is inserted between the vertebrae to stimulate bone growth.

  • Hardware Stabilization: Robotic arms often assist in the precise placement of pedicle screws and rods to hold the vertebrae steady while they fuse.

  • Biological Stimulation: Bone Morphogenetic Proteins (BMP) or specialized bone grafts are applied to accelerate the natural bone-healing process.

  • Smoking Cessation: Patients must commit to a strict no-nicotine program, as smoking significantly increases the risk of fusion failure (non-union).

  • Pre-habilitation: Strengthening "core" stabilizer muscles through directed physical therapy to support the spine post-operatively.

  • Home Setup: Coordinate a "home recovery station" to avoid the need for bending, lifting, or twisting during the initial healing phase.

  • Bone Health Optimization: Undergo a bone density scan (DEXA) to ensure the vertebrae are strong enough to support surgical hardware.

  • Bracing Consultation: Discuss the use of a post-operative back brace with the surgical team to ensure proper fitting and sizing.

  • Standing X-rays and MRI: Used to identify the exact source of nerve compression and the degree of mechanical instability.

  • High-resolution CT Scan: Essential for 3D surgical planning and robotic navigation mapping.

  • Electrocardiogram (EKG): Along with comprehensive blood panels to confirm cardiovascular readiness for a major procedure.

  • Neurological Baseline Testing: Measuring nerve conduction and muscle strength to provide a comparison for post-operative recovery.

  • DEXA Scan: To evaluate the quality of the "host bone" for successful graft integration and hardware stability.

  • Immediate Recovery: Hospital stays typically last 1 to 3 days, with an emphasis on early, assisted walking to prevent blood clots.

  • The "No BLT" Rule: For the first 3 to 6 months, patients must strictly avoid Bending at the waist, Lifting over 3kg, and Twisting the spine.

  • Bracing: Wear a customized back brace as prescribed to maintain spinal alignment during the critical fusion window.

  • Phased Physical Therapy: Focusing on core stabilization and safe movement patterns once the initial bone healing is confirmed.

  • Long-term Monitoring: Routine follow-up imaging (X-rays or CT) is required to confirm the success of the bone bridge across the joint.

  • Activity Resumption: Gradual return to a more active lifestyle once the vertebrae have fused into a single, solid, and stable bone mass.

  • Significant Pain Reduction: Achieves a 70% to 90% success rate for patients with chronic instability-related pain.

  • Enhanced Precision: Utilizes AR and robotic technology to make surgery safer and more accurate than traditional "freehand" methods.

  • Neurological Protection: Stabilizes the spine to prevent further nerve injury or progressive physical deformity.

  • Accelerated Healing: Stimulates the body's natural recovery using bio-engineered proteins for faster bone growth.

  • Permanent Stability: Eliminates the painful micro-motion that causes chronic inflammation and structural wear.

Minimally Invasive Spine Surgery (MISS)

Minimally Invasive Spine Surgery (MISS) is an advanced surgical approach used to treat spinal conditions—such as herniated discs or spinal stenosis—through significantly smaller incisions than traditional "open" surgery. The primary objective is to achieve the same clinical results while minimizing trauma to the surrounding muscles and tissues, leading to faster recovery and less post-operative pain.

  • Herniated Discs: For procedures like a lumbar discectomy to relieve nerve pressure.

  • Spinal Stenosis: When a laminotomy or foraminotomy is required to enlarge the spinal canal or nerve exit points.

  • Spinal Instability: For spinal fusions (such as TLIF or XLIF) that require hardware stabilization.

  • Failed Conservative Care: When months of physical therapy and injections have failed to resolve chronic radiating pain.

  • Desire for Faster Recovery: For patients who wish to return to work and daily activities more quickly with less reliance on heavy pain medication.

  • Tubular Retraction: Using a series of dilating tubes to stretch muscle fibers apart rather than cutting them from the bone.

  • Endoscopic Spine Surgery: Utilizing a tiny camera (endoscope) through a "keyhole" incision to visualize the spinal anatomy on a high-definition monitor.

  • Microscopic MISS: Operating through a tubular retractor using a high-powered surgical microscope for enhanced lighting and 3D depth perception.

  • Percutaneous Hardware Placement: Inserting screws and rods through small skin punctures using real-time X-ray (fluoroscopy) or robotic guidance.

  • Lateral Access (XLIF/LLIF): Reaching the spine through the side of the body to avoid the major back muscles and the spinal canal.

  • Precision Mapping: Surgeons use pre-operative MRI or CT scans to create a precise "map" for the entry point, as the view during surgery is focused on a small area.

  • Keyhole Incision: Instead of a long midline incision, one or more small (1–2 cm) incisions are made over the target area.

  • Muscle Dilation: A thin guide wire is inserted, followed by progressively larger "tubular retractors" that gently push muscle fibers aside to create a tunnel to the spine.

  • Decompression or Repair: Using specialized long-handled miniature tools, the surgeon removes bone spurs or disc fragments through the tube.

  • Hardware Insertion (if needed): If a fusion is being performed, screws and rods are guided into place using robotic navigation or fluoroscopy through the same small ports.

  • Tube Removal: Once the repair is complete, the tube is withdrawn, and the muscle fibers naturally fall back into their original position.

  • Closure: The tiny skin incisions are closed with a single stitch or surgical glue, requiring only a small bandage.

  • Diagnostic confirmation via MRI or CT scan to ensure the surgical plan is tailored to the specific nerve compression site.

  • Fasting (NPO) for 8–12 hours prior to the procedure to ensure safety under anesthesia.

  • Smoking cessation is critical, particularly if a fusion is planned, as nicotine restricts blood flow and prevents the bone from growing and healing.

  • Pre-operative physical assessment to ensure the patient is a candidate for a same-day or outpatient surgical procedure.

  • High-Resolution MRI: To provide a detailed view of the soft tissues and the exact location of the disc herniation or stenosis.

  • CT Scan with 3D Reconstruction: Often used for surgical planning, especially when robotic navigation is being utilized for hardware placement.

  • X-ray (Flexion/Extension): To assess for any underlying spinal instability that might require a fusion instead of a simple decompression.

  • Blood Panels: To check for clotting factors and overall health markers before undergoing general anesthesia.

  • Hospital Stay: Frequently performed as an outpatient (same-day) procedure; patients often go home within 3–4 hours of waking up.

  • Pain Management: Patients typically experience significantly less muscle soreness and have a lower requirement for opioid painkillers than open surgery.

  • Mobilization: Walking is encouraged almost immediately—often within 2 hours of the procedure—to promote circulation.

  • Recovery Timeline: Most patients return to desk work within 1–2 weeks and can begin light exercise by 4–6 weeks post-op.

  • Wound Care: The small incisions must be kept dry for the first few days, but they generally heal very quickly with minimal scarring.

  • Reduced Tissue Trauma: By stretching rather than cutting muscles, the body heals much faster with less internal scarring.

  • Lower Infection Rates: Smaller incisions and less exposure of internal tissues to the environment significantly reduce the risk of post-operative infection.

  • Minimal Blood Loss: Many procedures result in less than a tablespoon of blood loss, virtually eliminating the need for transfusions.

  • Equal Clinical Outcomes: Long-term studies show that MISS is just as effective as traditional open surgery for pain relief and functional improvement.

Spine Fracture Fixation

Spinal Fracture Fixation is a major surgical procedure used to stabilize a broken vertebra (backbone) to protect the spinal cord and prevent deformity. It is primarily performed for "unstable" fractures caused by high-impact trauma, such as car accidents or falls, or for "pathological" fractures resulting from osteoporosis or cancer. By utilizing metal hardware or medical-grade cement, the procedure aims to restore the structural integrity of the spinal column.

  • Unstable Fractures: When the break is severe enough that the spine can no longer support the body's weight or maintain alignment.

  • Neurological Threat: If bone fragments are pressing on or have entered the spinal canal, risking damage to the spinal cord or nerve roots.

  • Progressive Deformity: To correct or prevent a "hunchback" deformity (kyphosis) caused by a collapsing vertebra.

  • Intractable Pain: When a compression fracture causes debilitating pain that does not respond to bracing or medication.

  • Pathological Risk: To stabilize a vertebra weakened by tumors or severe osteoporosis before a complete collapse occurs.

  • Open Reduction and Internal Fixation (ORIF): The traditional approach where an incision is made to manually realign the bones and secure them with screws and rods.

  • Kyphoplasty: A minimally invasive procedure where a balloon is inflated inside a compressed vertebra to restore height before injecting bone cement.

  • Vertebroplasty: Injecting medical-grade bone cement directly into a fractured vertebra to "glue" the cracks and provide immediate stability.

  • Percutaneous Pedicle Screw Fixation: A minimally invasive technique where screws are inserted through small skin punctures using robotic or X-ray guidance.

  • Decompression and Fusion: Removing bone fragments that are pinching the spinal cord (decompression) and then joining the vertebrae together (fusion).

  • Real-Time Imaging: The surgeon uses Fluoroscopy (live X-ray) or 3D navigation to visualize the fracture and plan the exact placement of hardware.

  • Hardware Placement: For trauma cases, titanium pedicle screws are drilled into the healthy vertebrae above and below the break.

  • Internal Splinting: Two metal rods are contoured and connected to the screws, acting as a permanent internal splint to hold the spine rigid.

  • Bone Grafting: Small pieces of bone (graft) are placed over the stabilized area to stimulate the vertebrae to grow together into one solid mass.

  • Cement Injection (for Compression): In kyphoplasty or vertebroplasty, a needle is guided into the bone, and polymethylmethacrylate (PMMA) cement is injected to stabilize the fracture.

  • Neuromonitoring: Throughout the procedure, electrical signals in the limbs are monitored to ensure the spinal cord remains safe while hardware is being installed.

  • Stabilization: Trauma patients often remain on "log-roll" precautions (moving the body as a single unit) and wear a rigid brace until the moment of surgery.

  • Diagnostic Mapping: Extensive imaging via CT Scan (to see bone fragments) and MRI (to assess ligament and spinal cord health).

  • Fasting (NPO): No food or drink for 8–12 hours prior to the procedure to ensure safety under general anesthesia.

  • Surgical Fitting: Measurement for a custom-fitted TLSO (hard plastic brace) that will be required immediately after the surgery.

  • CT Scan: Provides the most detailed 3D view of the bony architecture and the specific pattern of the break.

  • MRI Scan: Essential for checking the "soft tissues," including the spinal cord, discs, and the ligaments that hold the spine together.

  • Dynamic X-rays: Taken in different positions to check if the fracture site moves or "slides" when the patient shifts weight.

  • Blood Panels: Routine screens to assess for blood loss, infection, and readiness for a potentially long surgical procedure.

  • Hospital Stay: Typically ranges from 3 to 7 days, depending on the severity of the trauma and the patient's mobility.

  • Early Mobilization: Walking with assistance is encouraged within 24 hours to prevent blood clots and keep the lungs clear.

  • Bracing Requirements: Many patients must wear a custom-fitted TLSO brace whenever they are out of bed for 6 to 12 weeks.

  • The "No BLT" Rule: Strict avoidance of Bending, Lifting (over 2kg), and Twisting for at least 3 months to allow the bone to heal.

  • Healing Timeline: It takes 3 to 6 months for the bone graft to fully "knit" the vertebrae together into a solid fusion.

  • Prevents Paralysis: Stabilizing the spine immediately protects the spinal cord from further injury caused by moving bone fragments.

  • Pain Reduction: Provides a solid internal structure that eliminates the "grinding" and mechanical pain associated with a broken vertebra.

  • Deformity Correction: Restores the natural alignment of the spine, preventing a permanent "hunchback" posture.

  • Early Return to Mobility: Hardware provides enough immediate stability to allow patients to sit up and walk much sooner than traditional bed rest would allow.

  • Long-Term Durability: Titanium hardware is intended to be permanent, providing a lifelong scaffold for the stabilized spinal segment.

Pedicle Screw Fixation

Pedicle Screw Fixation is a major surgical procedure used to stabilize the spine by inserting specialized screws into the pedicles—the strongest, thickest parts of the vertebral bone. These screws act as permanent "anchor points" for metal rods that hold the spine in a fixed position, providing the necessary stability for a successful spinal fusion.

  • Spinal Instability: When vertebrae move excessively or abnormally, causing chronic pain or risk of nerve damage.

  • Severe Fractures: To stabilize a broken vertebra and protect the spinal cord while the bone heals.

  • Scoliosis or Kyphosis: To provide the mechanical leverage needed to straighten and hold the spine in a corrective alignment.

  • Spondylolisthesis: When one vertebra has slipped forward over another, requiring the bones to be pulled back into place and locked.

  • Multi-Level Fusion: For extensive degenerative disease where multiple segments of the spine need to be joined into a single, solid unit.

  • Open Fixation: The traditional approach involving a midline incision, giving the surgeon a direct and wide view of the bony anatomy.

  • Minimally Invasive (Percutaneous) Fixation: Inserting screws through small "keyhole" skin punctures using specialized guidance, which reduces muscle trauma.

  • Robotic-Assisted Fixation: Utilizing a robotic arm to guide the drill and screw into the pedicle with sub-millimeter precision based on a pre-operative CT map.

  • Computer-Navigated Fixation: Using real-time 3D "GPS-like" technology to track surgical instruments in relation to the patient's anatomy.

  • Fluoroscopic Guidance: Using continuous, real-time X-ray imaging during the procedure to verify the angle and depth of each screw.

  • Identification: Using real-time imaging or robotic navigation, the surgeon identifies the "entry point" on the pedicle, the narrow bridge of bone connecting the front and back of the vertebra.

  • Drilling & Tapping: A small pilot hole is drilled through the pedicle and into the vertebral body. The hole is then "tapped" (threaded) to ensure the screw fits securely.

  • Screw Insertion: Permanent titanium or stainless steel screws are driven deep into the bone. Typically, two screws are placed in each vertebra (one on each side).

  • Rod Placement: Once all levels are instrumented, a metal rod is contoured and dropped into the "heads" of the screws.

  • Final Locking: "Set screws" are tightened into the screw heads to lock the rod in place, creating a rigid internal scaffold.

  • Bone Grafting: Small pieces of bone are packed around the hardware to stimulate the growth of a permanent bone bridge (fusion).

  • Precision Mapping: Mandatory high-resolution CT scans or 3D X-rays are used to measure the exact width and angle of the pedicles, which vary significantly between patients.

  • Medication Adjustment: Blood thinners (such as aspirin or clopidogrel) must be stopped 5–7 days prior to prevent bleeding in the spinal canal.

  • Fasting (NPO): No food or drink for 8–12 hours before the procedure to ensure safety under general anesthesia.

  • Neuromonitoring Setup: Preparation for intra-operative electrical monitoring of the nerves in the legs to ensure safety during screw placement.

  • Thin-Cut CT Scan: Provides the most accurate measurement of the "pedicle diameter" to help the surgeon select the correct screw size.

  • MRI Scan: Used to visualize the proximity of the spinal cord and nerve roots to the planned screw path.

  • Bone Density Scan (DEXA): To ensure the bone is strong enough to hold the screws; in patients with osteoporosis, the screws may require specialized cement "augmentation."

  • Blood Panels: Routine screens to assess kidney function and clotting factors before a major surgical intervention.

  • Hospital Stay: Typically ranges from 2 to 5 days, depending on the complexity of the fusion.

  • Early Mobilization: Patients are encouraged to stand and take a few steps within 24 hours to prevent blood clots and promote recovery.

  • The "No BLT" Rule: For 3 to 6 months, you must strictly avoid Bending at the waist, Lifting anything over 2–4kg, and Twisting the spine.

  • Bracing: Many patients are required to wear a TLSO (hard plastic brace) for 6–12 weeks whenever they are out of bed to protect the hardware.

  • Hardware Status: The screws and rods are intended to stay in the body forever and are rarely removed unless they cause irritation or become infected.

  • Immediate Internal Stability: Provides a rigid structure that allows patients to move and walk much sooner than bone grafting alone would permit.

  • High Fusion Success Rate: Fixation achieves a solid bone bridge in over 90% of cases by preventing any micro-motion at the surgical site.

  • Corrective Power: Allows surgeons to mechanically realign a curved or slipped spine, restoring a more natural posture.

  • Neurological Protection: By locking the spine in place, it prevents the "shifting" that can lead to chronic nerve pinching or spinal cord injury.

  • Durable Support: Provides a lifelong permanent scaffold for the stabilized spinal segments.

Vertebroplasty/Kyphoplasty

Vertebroplasty and kyphoplasty are minimally invasive image-guided procedures used primarily to treat painful vertebral compression fractures. These fractures are most commonly caused by osteoporosis, but can also result from spinal tumors or trauma. Left untreated, these fractures can lead to chronic pain, height loss, and a hunched posture known as kyphosis.

  • Persistent Pain: Severe back pain caused by a vertebral compression fracture that does not respond to conservative management.

  • Limited Mobility: Difficulty performing daily activities or walking due to spinal instability and pain.

  • Height Loss: Noticeable decrease in stature or the development of a hunched back (kyphosis) following a fracture.

  • Osteoporosis Complications: Fractures occurring in patients with low bone density who require immediate stabilization.

  • Spinal Tumors: Compression fractures resulting from certain types of cancer or benign spinal lesions.

  • Trauma Impact: Acute fractures caused by a fall or injury that compromise the structural integrity of the spine.

  • Vertebroplasty: A procedure where a thin needle is guided via X-ray into the fractured vertebra to inject medical-grade bone cement directly for stabilization.

  • Kyphoplasty: A technique where a small balloon is inflated inside the vertebra to create a cavity and help restore lost height before injecting cement.

  • Synthetic Patching: Use of specialized bone cement (PMMA) to act as an internal cast and seal the fracture.

  • Device Occlusion: Deployment of balloons or needles to stabilize the bone without the need for major open surgery.

  • Diagnostic Synchronization: Utilization of X-ray (fluoroscopy) to guide the needle or balloon precisely into the fractured level.

  • Cavity Creation: In kyphoplasty cases, a balloon is expanded to create space and lift the compressed bone.

  • Cement Deployment: Medical-grade bone cement is injected into the fracture or the newly formed space to seal it permanently.

  • Monitoring: Real-time imaging ensures the cement is perfectly positioned and contained within the vertebra before finishing.

  • Short Procedure Time: These treatments typically take 30 to 60 minutes per vertebral level.

  • Fluoroscopic Guidance: Real-time X-ray mapping to ensure robotic-like precision during needle placement.

  • Balloon Inflation Systems: Advanced technology used in kyphoplasty to specifically target height restoration in collapsed vertebrae.

  • High-Viscosity Cements: Modern materials designed to reduce the risk of leakage and provide immediate structural support.

  • Minimally Invasive Access: Use of small puncture sites rather than traditional incisions, leading to faster healing and less scarring.

  • MRI or CT Scan: Detailed 3D mapping to confirm the age, location, and severity of the compression fracture.

  • Bone Density Test (DEXA): To evaluate the underlying health of the skeleton and the risk of future fractures.

  • Physical Examination: Assessment of localized tenderness and neurological function.

  • X-Ray Imaging: To determine the degree of vertebral collapse and spinal alignment.

  • Rapid Pain Relief: Approximately 70–90% of patients report significant improvement, often within 24 to 48 hours.

  • Improved Mobility: Restores the ability to walk and perform daily routines on the same day as the procedure.

  • Internal Stability: The hardened cement prevents the painful movement of bone fragments.

  • Reduced Mortality: Helps prevent complications related to prolonged immobility and bed rest.

  • Long-Term Cure: Provides a permanent stabilization of the fractured bone with high technical success rates.

  • Short Hospital Stay: Often performed as an outpatient procedure, allowing patients to return home the same day.

  • Activity Restrictions: Strenuous exertion and heavy lifting should be avoided for a few weeks to ensure proper healing.

  • Bone Health Management: Regular follow-ups often include bone-strengthening medications and nutritional supplements like Calcium and Vitamin D.

  • Immediate Improvement: Patients typically experience a swift return to light activity and significant reduction in chronic pain.

Spinal Tumor Removal

Spinal Tumor Removal is a complex procedure to remove abnormal growths from the spinal canal or the vertebrae. The primary goals are to decompress the spinal cord, stabilize the spine, and obtain a tissue sample (biopsy) to determine if the tumor is benign or malignant. By removing or debulking the mass, the surgeon aims to preserve neurological function and restore the structural integrity of the spinal column.

  • Spinal Cord Compression: When a tumor is pressing on the cord, causing progressive weakness, numbness, or loss of coordination.

  • Intractable Pain: Severe, localized back pain that does not respond to medication and often worsens at night or when lying down.

  • Neurological Deficits: Loss of bladder or bowel control, difficulty walking, or radiating pain in the arms or legs.

  • Pathological Fracture Risk: When a tumor has eaten away enough of the vertebral bone to make the spine unstable or prone to collapse.

  • Need for Diagnosis: To obtain a tissue sample to guide further cancer treatments like targeted radiation or chemotherapy.

  • Intradural-Intramedullary: Tumors that grow inside the actual tissue of the spinal cord (e.g., astrocytomas or ependymomas).

  • Intradural-Extramedullary: Tumors that grow inside the protective sac (dura) but outside the spinal cord itself (e.g., meningiomas or schwannomas).

  • Extradural: Tumors located outside the dura, usually within the bones of the vertebrae (most common in metastatic cancers).

  • Microsurgical Access: A midline incision is made over the tumor site, and a laminectomy (removing the back of the vertebrae) is performed to reach the spinal canal.

  • Durotomy: If the tumor is inside the protective sac, the surgeon uses an operating microscope to make a precise incision in the dura mater.

  • Ultrasonic Aspiration: Surgeons often use a CUSA (Cavitron Ultrasonic Surgical Aspirator), which uses sound waves to fragment and vacuum out the tumor without pulling on delicate nerves.

  • Tumor Resection: * Benign Tumors: The goal is usually "gross total resection" (complete removal).
    Malignant Tumors: If the tumor is wrapped around vital nerves, a "subtotal resection" (partial removal) may be performed to avoid causing paralysis.

  • Stabilization: If the tumor or the surgery has destroyed significant bone, pedicle screws and rods are installed to prevent the spine from collapsing.

  • Neuromonitoring: Throughout the surgery, electrical signals (SSEP/MEP) are monitored in the limbs to ensure the spinal cord remains safe.

[Image showing microscopic resection of an intradural tumor]

  • High-Dose Steroids: Patients often receive Dexamethasone for 24–48 hours before surgery to reduce spinal cord swelling and inflammation.

  • Diagnostic Mapping: High-resolution MRI with Contrast is used to visualize the tumor’s relationship to nerve roots and the spinal cord.

  • Systemic Screening: PET or CT scans may be used to determine if the spinal tumor has spread from a primary site elsewhere in the body.

  • Fasting (NPO): No food or drink for 8–12 hours prior to the procedure to ensure safety under general anesthesia.

  • MRI with Contrast: The gold standard for seeing the exact borders of the tumor and its vascularity.

  • CT Scan: Best for assessing how much of the vertebral bone has been destroyed or weakened by the growth.

  • PET Scan: Used to check for other tumor sites in the body if the spinal mass is suspected to be metastatic.

  • Neurological Baseline: A comprehensive exam to document muscle strength and sensation before surgery for post-operative comparison.

  • Hospital Stay: Typically 3 to 7 days; patients often spend the first 24 hours in a Neuro-ICU for close monitoring.

  • Immediate Recovery: Mobilization depends on the patient's neurological status, but sitting up and walking with assistance is encouraged as soon as possible.

  • Pain Management: A combination of patient-controlled analgesia (PCA) and specialized nerve pain medications (like Gabapentin) is common.

  • Follow-up Adjuvant Therapy: If the tumor was malignant, radiation or chemotherapy typically begins 4 to 6 weeks after the surgical wound has fully healed.

  • Long-Term Surveillance: Regular MRI scans (every 3–6 months initially) are mandatory to ensure the tumor does not return.

  • Preserves Mobility: Decompressing the spinal cord can prevent permanent paralysis and restore the ability to walk.

  • Significant Pain Relief: Removing the mass that is stretching the dura or compressing nerves provides major relief from localized and radiating pain.

  • Structural Stability: Fusion and hardware placement restore the spine's ability to support weight and maintain alignment.

  • Information for Treatment: Provides a definitive diagnosis, allowing oncologists to tailor the best possible follow-up cancer therapies.

Intradural Tumor Surgery

Intradural Tumor Surgery is a highly delicate neurosurgical procedure to remove tumors located inside the dura mater (the tough outer membrane protecting the spinal cord). These tumors are classified as Extramedullary (outside the cord but inside the membrane, like meningiomas) or Intramedullary (growing inside the spinal cord tissue itself). The surgery focuses on preserving neurological function while removing as much of the abnormal growth as possible.

  • Spinal Cord Compression: When the tumor’s growth begins to pinch the spinal cord, leading to a loss of coordination or "heaviness" in the limbs.

  • Progressive Weakness: Measurable loss of muscle strength in the arms or legs, or a change in your ability to walk.

  • Sensory Disturbances: Persistent numbness, tingling, or "electric shock" sensations that correlate with a mass seen on imaging.

  • Autonomic Dysfunction: New or worsening issues with bowel or bladder control, which may indicate urgent spinal cord pressure.

  • Radicular Pain: Severe, radiating pain that follows the path of a specific nerve root being compressed by the tumor.

  • Microsurgical Resection: The primary method, using a high-powered operating microscope to distinguish between the tumor and the delicate spinal cord tissue.

  • Laminectomy/Laminoplasty: Creating an opening in the back of the spinal column to provide the surgeon access to the dural sac.

  • Myelotomy: A specialized technique for intramedullary tumors where a precise incision is made in the back of the spinal cord to reach the growth inside.

  • Ultrasonic Aspiration (CUSA): Using sound waves to fragment and remove tumor tissue without the physical pulling or tugging associated with traditional tools.

  • Endoscopic-Assisted Surgery: Utilizing tiny cameras in certain cases to provide a better view of the tumor’s "hidden" edges.

[Image showing a microsurgical dural incision and tumor exposure]

  • Accessing the Dura: A midline incision is made over the tumor site, and a portion of the vertebral bone (lamina) is removed to expose the protective dural membrane.

  • Durotomy: The surgeon carefully opens the dura mater under high magnification to reveal the spinal cord and the tumor.

  • Micro-Dissection: Using specialized micro-instruments, the surgeon gently peels the tumor away from the spinal cord (for extramedullary tumors) or removes it from within the cord (for intramedullary tumors).

  • Neuromonitoring: Throughout the procedure, electrical signals (SSEP and MEP) are monitored to ensure the nerves are not being stressed or injured.

  • Dural Closure: The dura is stitched shut with extremely fine, water-tight sutures. A synthetic patch or surgical "fibrin glue" is often used to prevent any leaks of spinal fluid.

  • Final Closure: The spinal muscles are returned to their natural position, and the skin is closed with sutures or surgical glue.

  • Diagnostic Imaging: High-resolution MRI both with and without Gadolinium contrast is mandatory to differentiate the tumor from healthy nerve tissue.

  • Anti-Inflammatory Steroids: Patients are often started on Dexamethasone 24–48 hours before surgery to reduce spinal cord swelling and optimize safety.

  • Neuromonitoring Setup: Coordination with a specialized neuro-monitoring team to place electrodes for real-time tracking of nerve signals during the operation.

  • Fasting (NPO): No food or drink for 8–12 hours prior to the procedure to ensure safety under general anesthesia.

  • Contrast-Enhanced MRI: The most critical test to map the tumor’s size, location, and its relationship to the spinal cord.

  • CT Scan: Used to evaluate the bony anatomy and ensure the laminectomy can be performed safely without causing instability.

  • Pre-operative Baseline Neurological Exam: A detailed assessment of motor and sensory function to serve as a benchmark for recovery.

  • Blood Panels: Standard screens to check kidney function (for contrast processing) and ensure proper blood clotting.

  • Hospital Stay: Typically 3 to 7 days; the first 24 hours are usually spent in a Neuro-ICU for hourly neurological checks.

  • Flat Bed Rest: Depending on the strength of the dural seal, you may be required to lie perfectly flat for 24 to 48 hours to prevent a spinal fluid leak.

  • Rehabilitation: Most patients require 3–6 months of physical therapy. Nerve recovery is a slow process, and strength improvements can continue for up to a year.

  • Sensory Changes: It is common to experience temporary "altered sensation" (tingling or coldness) as the spinal cord adapts to the removal of the pressure.

  • Surveillance: Annual follow-up MRIs are mandatory for several years to ensure the tumor does not recur.

  • Halts Neurological Decline: Effectively stops the progression of paralysis or sensory loss caused by tumor growth.

  • High Cure Rate for Benign Growths: Many intradural tumors, such as schwannomas or meningiomas, can be cured with complete surgical removal.

  • Neurological Recovery: Removing the pressure often allows the spinal cord to heal, restoring strength and coordination over several months.

  • Definitive Diagnosis: Provides the tissue sample needed to determine if further treatments, such as radiation or targeted therapy, are necessary.

Cervical Laminoplasty

A Cervical Laminoplasty is a non-fusion, decompression surgical procedure performed in the neck to relieve pressure on the spinal cord and nerves. By expanding the spinal canal—which may be narrowed due to age-related changes or arthritis—this procedure effectively treats compression while preserving the natural motion of the spine.

This surgery is primarily recommended for patients with multi-level compression of the spinal cord who maintain a healthy natural neck curvature. Key indications include:

  • Cervical Spondylotic Myelopathy (CSM): Inadequate spinal cord function due to bone spurs or degenerative changes.

  • Ossification of the Posterior Longitudinal Ligament (OPLL): A condition where spinal ligaments harden into bone, pressing on the cord.

  • Congenital Narrowing: Being born with a naturally narrow spinal canal.

  • Fine Motor Skill Loss: Difficulty buttoning shirts, changes in handwriting, or loss of coordination.

  • Balance Issues: Noticeable gait disturbances or difficulty walking.

  • Open-Door Laminoplasty: The most common technique where one side of the lamina is hinged and the other is opened like a door.

  • French-Door Laminoplasty: A technique where the midline of the lamina is split and both sides are hinged to create an opening in the center.

  • Titanium Plate Fixation: Using tiny, specialized plates and screws to securely hold the "door" in its new, expanded position.

  • Bone Graft Wedging: Inserting small wedges of bone graft material to maintain the widened canal space during healing.

  • Surgical Access: A 3-to-4-inch incision is made in the back of the neck, and muscles are moved aside to expose the lamina (the back of the vertebrae).

  • Creating the Hinge: The surgeon carefully cuts a groove on one side of the lamina to act as a flexible hinge.

  • Opening the Canal: The opposite side of the lamina is cut through, allowing the bone to be "swung" outward, widening the canal by up to 30%.

  • Securing the Gap: Small titanium plates or bone wedges are placed in the gap to keep the canal permanently open.

  • Verification: Real-time imaging ensures the spinal cord is fully decompressed before the incision is closed.

  • Fasting: Patients are typically required to fast for 8–12 hours before the surgery.

  • Medical Clearances: Blood tests, ECG, and chest X-rays are conducted to assess overall surgical health.

  • Medication Review: Discussing current medications with the surgical team to manage blood thinners or anti-inflammatory drugs.

  • Recovery Planning: Arranging for a support person to assist with home care during the initial weeks of recovery.

  • MRI Scan: The gold standard for visualizing the extent of spinal cord compression and soft tissue health.

  • CT Scan: Provides a detailed view of bony changes, such as OPLL or bone spurs.

  • X-rays: Used to evaluate the natural curvature (lordosis) of the neck, which is a key factor for surgical success.

  • EMG/Nerve Conduction Study: To confirm the specific nerve levels affected and rule out other neurological conditions.

  • Hospital Stay: Most patients remain in the hospital for 1 to 3 days, with walking encouraged just hours after surgery.

  • Short-Term Recovery: A return to light activities or desk work is typically possible within 1 to 4 weeks.

  • Activity Restrictions: Strenuous activities should be avoided for 6 to 12 weeks to allow for proper bone healing.

  • Long-Term Rehabilitation: Physical therapy is often initiated to rebuild neck muscle strength and maintain flexibility.

  • Motion Preservation: Unlike spinal fusion, this procedure maintains the natural movement and flexibility of the neck.

  • Extensive Decompression: Effectively treats multiple levels of the spine through a single approach.

  • Reduced Risk of Adjacent Segment Disease: By avoiding fusion, it reduces the extra stress placed on the discs above and below the surgical site.

  • Improved Neurological Function: Offers significant relief from radiating pain and helps prevent the progression of spinal cord damage.

Corpectomy (Vertebral Body Removal)

A Corpectomy, also known as a vertebrectomy, is a major spinal surgery involving the removal of all or part of a vertebral body to relieve significant pressure on the spinal cord and nerves. Unlike a discectomy, which only removes disc material, a corpectomy is used when disease or damage extends into the bone of the vertebra itself.

Surgeons typically recommend this procedure for severe conditions that cannot be treated with less invasive methods. Indications include:

  • Severe Spinal Stenosis: Confluent narrowing that extends behind the vertebral body.

  • Vertebral Tumors: Primary or metastatic tumors that destroy the bone and compress the spinal cord.

  • Spinal Fractures: Traumatic burst fractures where bone fragments are pushed into the spinal canal.

  • Bone Infections: Conditions like osteomyelitis or tuberculosis that cause vertebral collapse.

  • Cervical Myelopathy: Compression of the spinal cord in the neck causing loss of coordination or bladder control.

  • Anterior Cervical Corpectomy: Performed through the front of the neck to access the cervical spine.

  • Side-Access Lumbar Corpectomy: Approached from the side of the body for issues in the lower back.

  • Reconstruction with Strut Grafts: Using bone from the patient (autograft) or a donor (allograft) to fill the gap.

  • Reconstruction with Expandable Cages: Using titanium or synthetic mesh cages packed with bone graft for structural support.

  • Surgical Access: The surgeon makes an incision, most commonly through the front or side, depending on the location of the affected vertebra.

  • Vertebral Removal: The surgeon removes the damaged vertebral body along with the discs directly above and below it.

  • Reconstruction: To fill the resulting gap, the "anterior column" is rebuilt using a graft or a specialized expandable cage.

  • Stabilization: Metal plates and screws are attached to the remaining vertebrae to hold the reconstruction in place while the bones fuse.

  • Fasting: Patients must fast for 8–12 hours prior to the procedure.

  • Medical Clearances: Extensive blood tests, ECG, and chest X-rays are required to assess fitness for major surgery.

  • Medication Review: Guidance from the cardiology or surgical team on adjusting medications that may affect bleeding or healing.

  • Recovery Planning: Arranging for significant post-operative support and home modifications for the initial recovery phase.

  • MRI Scan: Essential for visualizing spinal cord compression and soft tissue involvement.

  • CT Scan: Provides detailed mapping of the bony structures and the extent of vertebral damage.

  • X-rays: Used to evaluate overall spinal alignment and stability.

  • Cardiac Catheterization or Stress Test: May be required for older patients or those with high-risk factors to measure heart health before major surgery.

  • Hospital Stay: Typically requires 1 to 3 days, though complex lumbar cases may stay longer.

  • Initial Restrictions: Patients often wear a cervical collar or back brace for 4 to 8 weeks to protect the fusion site.

  • Activity: Desk work and light daily activities can often be resumed within 3 to 6 weeks.

  • Long-term Healing: Complete bony fusion between the graft and the vertebrae typically takes 6 months to 1 year.

  • Spinal Cord Protection: Stops the progression of neurological damage and protects the lungs and body from further disability.

  • Structural Stability: Restores the integrity of the spinal column following trauma or tumor-related destruction.

  • Long-term Cure: Provides a definitive treatment for complex bone-related nerve compression with high success rates.

  • Functional Improvement: Significant improvement in coordination, strength, and overall physical stamina.

Microdiscectomy Surgery

In 2026, a Microdiscectomy (also called microdecompression) is the gold-standard surgical procedure for treating a herniated lumbar disc that is pressing on a spinal nerve. Unlike a traditional discectomy, this version uses high-powered magnification—either a microscope or an endoscope—to allow the surgeon to work through a very small incision.

  • Sciatica: Sharp, "electric" radiating leg pain caused by nerve root compression.

  • Herniated Lumbar Disc: When the inner "jelly-like" material of a disc leaks out and pinches a spinal nerve.

  • Neurological Deficits: Numbness, tingling, or weakness in the legs or feet.

  • Failure of Conservative Treatment: When physical therapy, epidural injections, and medications fail to provide relief after 6–12 weeks.

  • Severe Nerve Impingement: Evidence of significant pressure on the nerve root as confirmed by advanced imaging.

  • Micro-Decompression: Using high-powered microscopes to visualize and treat the spine through a 1–2 cm incision.

  • Endoscopic Discectomy: A ultra-minimally invasive approach using a camera-equipped tube to reach the herniated fragment.

  • Muscle Preservation: Utilizing tubular dilators to stretch back muscles apart rather than cutting them away from the bone.

  • Disc Annular Repair: Using specialized biological glues or closure devices to "plug" the hole in the outer disc rim.

  • Laminotomy: The removal of a tiny piece of the overlying bone to safely reach the spinal canal and nerve root.

  • Anesthesia: The procedure is performed under general anesthesia to ensure the patient remains perfectly still and comfortable.

  • Precision Access: A 1 to 2-centimeter incision is made directly over the affected disc level.

  • Nerve Retraction: The surgeon carefully moves the nerve root aside to access the disc space.

  • Fragment Removal: Only the "damaged" protruding part of the disc is removed, leaving the healthy portion to provide cushioning.

  • Annular Closure: Modern 2026 techniques may include sealing the disc wall to significantly reduce the risk of re-herniation.

  • Fasting: Patients must follow strict fasting protocols for 8–12 hours prior to surgery.

  • Imaging Review: A final review of high-resolution MRI scans to confirm the exact location of the herniation.

  • Medical Clearance: Blood tests and an ECG are conducted to ensure the patient is a safe candidate for anesthesia.

  • Medication Adjustment: Pausing anti-inflammatory or blood-thinning medications as directed by the surgical team.

  • Recovery Support: Arranging for a support person to drive the patient home after the same-day procedure.

  • Lumbar MRI: The definitive imaging tool to visualize the disc herniation and nerve compression.

  • CT Scan: Occasionally used to assess the bone structure surrounding the herniated disc.

  • Electromyography (EMG): To measure the electrical activity of muscles and the extent of nerve damage.

  • ECG: To monitor the heart's electrical rhythm as part of the standard pre-surgical screening.

  • Physical Examination: Assessing muscle strength, reflexes, and sensation in the lower extremities.

  • Hospital Stay: Almost always an outpatient procedure in 2026, with most patients returning home within 3–5 hours.

  • Immediate Relief: Radiating leg pain often disappears immediately upon waking from surgery.

  • The "No BLT" Rule: For six weeks, patients must strictly avoid Bending, Lifting (over 2kg), or Twisting.

  • Activity Resumption: Light walking is encouraged immediately; sedentary work can typically be resumed in 1–2 weeks.

  • Long-term Care: Post-operative physical therapy often focuses on core strengthening to protect the spine.

  • High Success Rate: Offers a 90% to 95% success rate for the immediate relief of radiating leg pain.

  • Minimally Invasive: The tiny 1–2 cm incision results in minimal scarring and reduced surgical trauma.

  • Rapid Recovery: Outpatient nature allows patients to recover in the comfort of their own homes.

  • Nerve Protection: Prevents further decline and permanent damage to the compressed nerve roots.

  • Innovative Sealing: 2026 annular repair technologies significantly lower the risk of future re-herniation.

Brain Tumor Removal (Craniotomy)

A craniotomy is the primary surgical procedure used to remove a brain tumor. It involves carefully removing a section of the skull, known as a "bone flap," to provide the surgeon direct access to the brain. Once the tumor is addressed, the bone flap is typically replaced and secured with small titanium plates and screws. This procedure is the cornerstone of neurosurgical oncology, allowing for both the removal of the mass and the acquisition of tissue for a precise diagnosis.

  • Primary Brain Tumors: For tumors that originate in the brain, such as gliomas or meningiomas, where removal can reduce pressure and slow progression.

  • Metastatic Tumors: When cancer from another part of the body has spread to the brain and is causing neurological symptoms or is surgically accessible.

  • Diagnostic Biopsy: When a tumor's type is unknown, a craniotomy allows for a larger tissue sample than a needle biopsy, leading to a more accurate treatment plan.

  • Intracranial Pressure Relief: To alleviate the "mass effect" caused by a tumor that is compressing healthy brain tissue, which can cause severe headaches, nausea, or vision loss.

  • Symptom Management: To stop or reduce seizures and focal neurological deficits (like weakness or speech issues) caused by the tumor’s location.

  • Mapping: Surgeons use Neuronavigation—a high-tech system similar to GPS for the brain—and pre-operative MRI scans to pinpoint the tumor's exact coordinates before making an incision.

  • Anesthesia: The surgery is performed under general anesthesia and can take anywhere from 3 to 7 hours depending on the tumor's location and complexity.

  • The Opening: A precise incision is made in the scalp, and a specialized surgical drill (craniotome) is used to remove a piece of the skull.

  • Tumor Removal (Resection):
    Gross Total Resection: The surgeon removes the entire visible tumor.
    Subtotal Resection: If the tumor is too close to critical areas (eloquent brain) controlling speech or movement, only a portion is removed to preserve function.

  • Advanced Tools: Surgeons may use an ultrasonic aspirator to break up the tumor or fluorescent dye (5-ALA), which makes tumor cells glow under a special light to help distinguish them from healthy tissue.

  • Closing: After the tumor is removed, the bone flap is put back in its original position, and the scalp is closed with stitches or surgical staples.

  • Awake Craniotomy: The patient is woken up during the middle of surgery to perform tasks like talking or moving fingers. This allows the surgeon to map and avoid "eloquent" areas responsible for speech or motor skills in real-time.

  • Endoscopic Craniotomy: A minimally invasive approach using a small hole and a camera (endoscope), often used for tumors located in the ventricles or deep within the brain.

  • Keyhole Craniotomy: A smaller, more targeted opening (often behind the ear or above the eyebrow) used to access specific areas with minimal disruption to surrounding tissue.

  • High-Resolution Imaging: Detailed MRI or CT scans with contrast to map the tumor’s size, vascularity, and relationship to functional brain zones.

  • Steroid Protocol: You may be started on medications like dexamethasone a few days before surgery to reduce brain swelling (edema) caused by the tumor.

  • Anti-Seizure Medication: Often prescribed preventatively to reduce the risk of a seizure during or after the procedure.

  • Fasting: Adhering to "nothing by mouth" instructions for 8 hours prior to your scheduled anesthesia.

  • Scalp Preparation: The surgical area may be washed with a specialized antiseptic, and a small amount of hair may be trimmed along the incision line.

  • Functional MRI (fMRI): To identify specific areas of the brain used for speech, movement, and sensation relative to the tumor.

  • Diffusion Tensor Imaging (DTI): A specialized MRI that maps the white matter "wiring" of the brain to help the surgeon avoid critical pathways.

  • Blood Panels: A routine check of your blood count, electrolytes, and clotting factors to ensure a safe surgical experience.

  • ECG: A standard heart check to confirm cardiovascular stability for a multi-hour procedure.

  • Hospital Stay: Typically 3 to 7 days. You will likely spend the first night in the Neuro-ICU for intensive monitoring of your neurological status.

  • Initial Symptoms: It is common to experience headaches, fatigue, and "brain fog." You may also notice temporary swelling around the eyes or scalp.

  • Activity Restrictions: No heavy lifting or strenuous exercise for 6 to 8 weeks. Most patients can return to light desk work within 4–6 weeks.

  • Stitch Removal: Scalp stitches or staples are typically removed by the surgical team 10–14 days after the procedure.

  • Follow-up Treatment: Depending on the biopsy results (pathology), further treatments such as radiation or chemotherapy may begin a few weeks after the brain has had time to heal.

  • Maximum Safe Resection: The combination of neuronavigation and intraoperative mapping allows surgeons to remove the largest amount of tumor possible while protecting your personality and physical abilities.

  • Immediate Pressure Relief: Removing the tumor mass often leads to a rapid improvement in headaches and other symptoms caused by brain compression.

  • Precision Technology: Tools like fluorescent dyes and ultrasonic aspirators allow for cleaner margins and less trauma to the surrounding healthy brain tissue.

  • Multidisciplinary Expertise: Care is coordinated between neurosurgeons, neuro-oncologists, and rehabilitation specialists to provide a comprehensive path from surgery to recovery.

  • Definitive Diagnosis: A craniotomy provides the highest quality tissue samples, ensuring that follow-up treatments (like targeted therapy) are based on the exact molecular profile of the tumor.

Glioma Surgery
Glioma Surgery

Glioma surgery is a specialized craniotomy performed to remove tumors that arise from the "gluey" supportive cells (glial cells) of the brain. Because gliomas often blend into healthy brain tissue rather than having a clear border, the surgical goal is Maximal Safe Resection—removing as much tumor as possible while preserving vital functions like speech, vision, and movement.

  • New Diagnosis: When imaging shows a suspected glioma (Grade I–IV) that requires both removal and a tissue sample for molecular diagnosis.

  • Symptom Management: To reduce the "mass effect" that causes severe headaches, personality changes, or cognitive "brain fog."

  • Seizure Control: If a glioma is irritating the brain's surface and causing frequent or uncontrolled seizures.

  • Recurrent Glioma: When a previously treated tumor shows signs of regrowth on follow-up scans and requires further debulking.

  • Increased Intracranial Pressure: To alleviate pressure that may be affecting your vision or causing nausea and vomiting.

  • Neuronavigation: Surgeons use a 3D "GPS" system mapped from your pre-operative MRI to guide their instruments in real-time with sub-millimeter precision.

  • Anesthesia: The surgery is typically performed under general anesthesia (unless an "awake" approach is required) and takes between 4 to 7 hours.

  • Fluorescence-Guided Surgery (5-ALA/Glow): You may drink a specialized solution (Gliolan) before surgery that causes high-grade glioma cells to glow pink under a specific blue light, helping the surgeon distinguish the tumor from healthy brain tissue.

  • Intraoperative Monitoring: Small electrodes track your brain’s electrical activity throughout the procedure to ensure motor and sensory pathways remain intact.

  • The Resection: The surgeon uses an ultrasonic aspirator—a tool that uses high-frequency vibrations to break up the tumor while suctioning it away—to gently remove the mass.

  • Pathology: Pieces of the tumor are sent immediately to a pathologist to confirm the tumor grade and identify specific molecular markers that guide future treatments.

  • Awake Craniotomy: If the glioma is located near the "speech center" or motor strip, you may be woken up during surgery to talk or follow commands. This ensures the surgeon can remove the tumor without touching areas responsible for your communication.

  • Intraoperative MRI (iMRI): Some advanced neurosurgical centers use an MRI scanner located directly inside the operating room to scan the brain during the surgery. This allows the surgeon to see if any hidden tumor remains before the final closing.

  • Stereotactic Biopsy: In cases where a glioma is in a very deep or "inoperable" location, a tiny needle is used to take a sample through a small burr hole for diagnosis.

  • Molecular Mapping: Advanced MRI sequences (like Spectroscopy or DTI) to understand the chemical makeup and wiring of the tumor.

  • Steroid Protocol: You will likely be started on Dexamethasone several days before surgery to reduce brain swelling (edema) caused by the glioma.

  • Anti-Seizure Medication: Most patients are prescribed preventative medication to stabilize the brain's electrical activity before the procedure.

  • Fasting: Following "nothing by mouth" instructions for 8 hours prior to your scheduled anesthesia.

  • Hair Preparation: A small strip of hair along the incision line may be trimmed, though many modern techniques allow for minimal hair removal.

  • Contrast-Enhanced MRI: The primary tool used to define the tumor's boundaries and its relationship to major blood vessels.

  • Functional MRI (fMRI): To map exactly where your brain processes language and movement relative to the glioma.

  • Blood Panels: A routine check of your blood count, electrolytes, and clotting factors to ensure a safe surgical experience.

  • ECG: A standard heart check to confirm cardiovascular stability for a multi-hour neurosurgical procedure.

  • Hospital Stay: Typically 3 to 5 days, usually beginning with one night in the Neuro-ICU for intensive monitoring.

  • Post-Op Steroids: Continued use of Dexamethasone for several days to manage temporary brain swelling, which can sometimes cause a brief worsening of symptoms.

  • Medication Management: Most patients stay on anti-seizure medications for several weeks or months post-op to prevent "electrical storms" in the brain.

  • Recovery Timeline: Stitches or staples are removed in 10–14 days. Most patients return to light activity within 4 weeks and can resume normal routines in 6 to 8 weeks.

  • Next Steps in Care: Because gliomas can be infiltrative, surgery is often followed by Radiation and Chemotherapy (such as Temozolomide) starting 3–4 weeks after the brain has healed.

  • Maximal Safe Resection: Utilizing real-time mapping and fluorescence allows for the removal of the maximum amount of tumor while protecting your quality of life.

  • Molecularly Targeted Care: The tissue obtained during surgery allows oncologists to tailor your follow-up chemotherapy to the specific genetic profile of your tumor.

  • Minimizes "Mass Effect": Removing the bulk of the glioma provides immediate relief from the pressure and headaches associated with brain tumors.

  • Neuro-Protective Technology: Intraoperative monitoring and awake mapping ensure that the "high-rent" areas of your brain are avoided, preserving your ability to speak and move.

  • Integrated Recovery: Care is managed by a multidisciplinary team of neurosurgeons, neuro-oncologists, and therapists to provide a seamless transition from surgery to long-term management.

Meningioma Surgery
Meningioma Surgery

Meningioma surgery is a specialized craniotomy performed to remove a tumor that grows from the meninges—the protective membranes surrounding the brain and spinal cord. Because the vast majority of meningiomas are benign (Grade 1) and grow outside the brain tissue rather than infiltrating it, the primary surgical goal is usually Gross Total Resection. This involves the complete removal of the tumor and its attachment point to the dura mater to prevent the tumor from growing back.

  • Symptomatic Growth: If the tumor is causing persistent headaches, seizures, or personality changes.

  • Neurological Deficits: When the mass compresses critical structures, leading to weakness, numbness, or loss of coordination.

  • Vision or Hearing Loss: For tumors located near the skull base that press against the optic or auditory nerves.

  • Documented Growth: If follow-up MRIs show the tumor is enlarging, even if you currently have few symptoms.

  • Mass Effect: To alleviate significant pressure on the brain tissue or shift of the brain's midline structures.

  • Image Guidance: Surgeons use Neuronavigation (a 3D GPS system mapped from your pre-operative MRI) to plan the exact entry point and trajectory, minimizing disruption to healthy tissue.

  • Anesthesia: The surgery is performed under general anesthesia and typically lasts 3 to 6 hours, depending on the tumor's size and its proximity to major blood vessels or nerves.

  • The Opening: A precise scalp incision is made, and a section of the skull (bone flap) is temporarily removed to provide direct access.

  • Tumor Removal:
    Since meningiomas are often firm, the surgeon may use an ultrasonic aspirator to hollow out the center of the tumor first.
    The "shell" of the tumor is then carefully peeled away from the brain surface, sensitive nerves, and major blood vessels.

  • Dural Repair: The piece of the meninges where the tumor was originally attached is removed to ensure no microscopic cells remain. The surgeon then patches this area with a synthetic graft or tissue from your own scalp (fascia).

  • Closing: The bone flap is secured back in place with small titanium plates and screws, and the scalp is closed with stitches or surgical staples.

  • Skull Base Surgery: For tumors at the very bottom of the brain (near the eyes or ears), specialized drilling techniques are used to reach the tumor without having to move or retract the brain significantly.

  • Endoscopic Endonasal Surgery: For specific meningiomas near the optic nerves or pituitary gland, some can be removed entirely through the nose using a high-definition camera (endoscope), leaving no external scars.

  • Keyhole Craniotomy: A minimally invasive approach using a much smaller opening, often hidden in the eyebrow or behind the hairline, for specifically located tumors.

  • Contrast MRI: A high-resolution scan to map the tumor’s blood supply and its relationship to the surrounding venous sinuses.

  • Steroid Protocol: You may be started on medications like dexamethasone a few days before surgery to reduce brain swelling (edema) caused by the tumor.

  • Anti-Seizure Medication: Often prescribed preventatively to stabilize the brain's electrical activity before and after the procedure.

  • Fasting: Following "nothing by mouth" instructions for 8 hours prior to your scheduled anesthesia.

  • Physical Exam: A thorough check-up to ensure your heart and lungs are healthy enough for a multi-hour surgery.

  • Visual Field Testing: If the tumor is near the optic nerves, a detailed eye exam is necessary to establish a baseline.

  • Audiogram: For tumors near the hearing nerves (internal auditory canal) to document current hearing levels.

  • Blood Panels: A routine check of your blood count, electrolytes, and clotting factors.

  • ECG: A standard heart check to confirm cardiovascular stability for the duration of the procedure.

  • Hospital Stay: Typically 3 to 5 days, including at least one night in the Neuro-ICU for intensive neurological monitoring.

  • Initial Symptoms: Headaches and fatigue are common. You may also have temporary swelling or bruising around the eyes or forehead for about a week.

  • Activity Restrictions: No heavy lifting, straining, or high-impact exercise for 6 weeks to allow the bone and scalp to heal properly.

  • Return to Routine: Most patients can return to driving and light desk work within 4–8 weeks, depending on their recovery progress.

  • Long-term Monitoring: Even with a complete removal, you will need periodic MRIs (initially every 6–12 months) to ensure there is no recurrence over the long term.

  • Curative Potential: For most Grade 1 meningiomas, a successful surgical resection is considered a permanent cure.

  • Preserves Brain Function: Because these tumors grow outside the brain, skilled surgeons can usually remove them with minimal impact on your cognitive or physical abilities.

  • Advanced Tools: The use of ultrasonic aspirators and micro-dissection tools allows for the safe separation of the tumor from delicate nerves and arteries.

  • Immediate Pressure Relief: Removing the mass provides instant relief from the "dragging" sensation and headaches associated with intracranial pressure.

  • Minimal Scarring: Modern surgical planning allows for incisions that are often hidden within the hairline or natural skin creases.

Pituitary Tumor Surgery (Endoscopic)

Endoscopic Pituitary Surgery, also known as Endoscopic Transsphenoidal Surgery, is a minimally invasive procedure that uses the nostrils as natural pathways to reach and remove tumors from the pituitary gland. Because it avoids large incisions and brain retraction, it typically offers a faster recovery and fewer side effects than traditional open surgery. This approach allows surgeons to access the "master gland" at the base of the brain with extreme precision.

  • Hormone-Secreting Tumors: Such as those causing Cushing’s disease (excess cortisol), acromegaly (excess growth hormone), or prolactinomas.

  • Non-Functioning Macroadenomas: Large tumors that do not produce hormones but press on the optic nerves, causing vision loss, double vision, or chronic headaches.

  • Pituitary Apoplexy: An emergency condition where a tumor bleeds or outgrows its blood supply, requiring rapid decompression.

  • Failed Medical Management: When medications are unable to sufficiently control hormone levels or stop the growth of the tumor.

  • Rathke’s Cleft Cysts: Benign fluid-filled growths that can interfere with normal gland function or cause pressure symptoms.

  • Collaborative Team: The surgery is usually a joint effort between a neurosurgeon and an Ear, Nose, and Throat (ENT) surgeon, taking about 2 to 3 hours under general anesthesia.

  • Nasal Access: The ENT surgeon inserts a thin, lighted tube with a high-definition camera (endoscope) through one nostril to navigate to the very back of the nasal cavity.

  • Opening the Sphenoid Sinus: The surgeon opens the sphenoid sinus (an air-filled space behind the nose) to reach the sella turcica, the small bony compartment that houses the pituitary gland.

  • Tumor Removal: Using specialized long instruments through the other nostril, the neurosurgeon removes the tumor in small pieces. The endoscope provides a panoramic, high-magnification view of the area, including nearby carotid arteries and optic nerves.

  • Reconstruction: If needed, a small fat graft (often taken from the abdomen) or synthetic material is used to fill the space and seal the area to prevent cerebrospinal fluid (CSF) leaks.

  • Endocrine Evaluation: Comprehensive blood and urine tests to establish your baseline hormone levels (growth hormone, ACTH, prolactin, etc.).

  • High-Resolution MRI: A dedicated "pituitary protocol" scan to map the tumor’s exact size and its relationship to the optic chiasm.

  • Ophthalmology Exam: A detailed visual field test to document any current vision loss before the surgery.

  • Nasal Assessment: An ENT evaluation to ensure your nasal passages are clear and suitable for the endoscopic approach.

  • Fasting: Following "nothing by mouth" instructions for 8 hours prior to your scheduled anesthesia.

  • Visual Field Testing: To measure peripheral vision, which is often the first thing affected by pituitary tumors.

  • Dynamic Hormone Testing: Specialized "stimulation" or "suppression" tests to confirm the type of secreting tumor.

  • Carotid Imaging: Occasionally required if the tumor is very large and wrapping around the main arteries of the brain.

  • ECG: A standard heart check to confirm cardiovascular stability for the duration of the procedure.

  • Hospital Stay: Typically 1 to 3 days, often starting with one night in the Intensive Care Unit (ICU) for close monitoring of your fluid balance and hormone levels.

  • Immediate Symptoms: It is normal to experience nasal congestion, mild headaches, and "watery" or blood-tinged nasal drainage for 1 to 2 weeks.

  • The "No" Rules: For 4 to 6 weeks, you must strictly avoid:
    Blowing your nose: To prevent pressure buildup that could cause a CSF leak.
    Lifting and Straining: No lifting objects over 5 lbs or heavy straining, which increases intracranial pressure.
    Drinking through straws: The suction can interfere with the healing of the nasal repairs.

  • Hormone Monitoring: You will work closely with an endocrinologist to check if your gland is producing the correct amount of hormones post-op.

  • Follow-up MRI: A baseline scan is usually performed 3 months after surgery to ensure the entire tumor was removed.

  • No External Scars: By using the natural pathway of the nose, there are no visible incisions on the face or scalp.

  • Superior Visualization: The endoscope allows surgeons to "see around corners," identifying tumor tissue that might be missed with traditional microscopic surgery.

  • Rapid Vision Improvement: Decompressing the optic nerves often leads to a quick and significant improvement in peripheral vision and clarity.

  • Preserves Gland Function: The high-magnification view helps surgeons distinguish between the tumor and the healthy part of the pituitary gland.

  • Reduced Brain Trauma: Because the brain is not "moved" or retracted to reach the tumor, post-operative headaches and recovery times are greatly reduced.

Aneurysm Clipping
Aneurysm Clipping

Aneurysm clipping is a specialized neurosurgical procedure used to treat a brain aneurysm by placing a small metal clip across its "neck." This prevents blood from entering the weakened, bulging area of the artery, effectively eliminating the risk of a life-threatening rupture or re-bleeding. Unlike endovascular coiling, which treats the aneurysm from the inside, clipping is an open surgical approach that provides a definitive, mechanical seal.

  • Ruptured Aneurysm: Performed as an emergency procedure to stop a subarachnoid hemorrhage (brain bleed) and prevent a second, often fatal, rupture.

  • Large Unruptured Aneurysms: A preventative measure for aneurysms that are growing or have reached a size where the risk of bursting outweighs the risk of surgery.

  • Complex Aneurysm Shape: For wide-necked or irregular aneurysms that may not be suitable for endovascular coiling.

  • Younger Patients: Clipping is often favored for younger patients as it typically offers a highly durable, lifelong solution with a very low rate of recurrence.

  • Mass Effect: When a large aneurysm is pressing on nearby cranial nerves, causing symptoms like double vision or facial pain.

  • Craniotomy: A precise incision is made in the scalp, usually behind the hairline. A small section of the skull (bone flap) is temporarily removed to provide the surgeon access to the brain's protective layers.

  • Anesthesia: The surgery is performed under general anesthesia and typically lasts 3 to 5 hours, depending on the aneurysm's location.

  • Microdissection: Using a high-powered operating microscope, the neurosurgeon carefully navigates the natural folds and fluid-filled spaces of the brain to locate the aneurysm without disturbing healthy tissue.

  • Clip Application: A tiny, permanent titanium clip is placed precisely across the neck of the aneurysm. This seals the bulge while allowing blood to flow normally through the main (parent) artery.

  • Flow Verification: Surgeons often use intraoperative fluorescence (ICG dye) or micro-Doppler ultrasound to confirm the aneurysm is completely closed and that all surrounding vessels remain open and healthy.

  • Closure: The bone flap is secured back in place with small titanium plates and screws, and the scalp is closed with stitches or surgical staples.

  • Cerebral Angiography: The "gold standard" diagnostic test to map the exact size, shape, and orientation of the aneurysm relative to other blood vessels.

  • Neurological Assessment: A detailed baseline exam of your motor skills, speech, and vision.

  • Steroid/Anti-Seizure Protocol: In some cases, medications are started before surgery to reduce brain irritation or the risk of a seizure.

  • Fasting: Following "nothing by mouth" instructions for 8 hours prior to your scheduled anesthesia.

  • Medication Audit: You will be asked to stop taking blood thinners or anti-inflammatory medications (like aspirin or ibuprofen) several days before the procedure.

  • CTA or MRA Scan: High-resolution 3D imaging used to plan the surgical trajectory and identify the best "angle" for clip placement.

  • Blood Panels: A routine check of your blood count, electrolytes, and clotting factors to ensure a safe surgical experience.

  • ECG and Chest X-ray: Standard checks to confirm your heart and lungs are healthy enough for a multi-hour neurosurgical procedure.

  • Cerebrospinal Fluid (CSF) Analysis: For ruptured cases, this helps determine the extent of the initial bleed.

  • Hospital Stay: Patients with unruptured aneurysms typically stay 2 to 5 days. For ruptured cases, the stay often extends to 2 to 3 weeks in a specialized Neuro-ICU for intensive monitoring.

  • Initial Symptoms: Headaches, fatigue, and "clicking" or "popping" sensations in the scalp are common as the bone flap heals.

  • Activity Restrictions: No heavy lifting, straining, or vigorous exercise for 6 to 8 weeks. Most patients can return to driving and light desk work within one month.

  • Follow-up Imaging: While the clip is a permanent solution, periodic imaging (MRA or CTA) is performed to monitor the surgical site and ensure no new aneurysms develop.

  • Vasospasm Monitoring: For those who experienced a rupture, the team will monitor closely for "vasospasm" (narrowing of brain vessels) for up to 14 days following the initial bleed.

  • Definitive Mechanical Seal: Once clipped, the risk of the aneurysm ever bleeding again is extremely low, providing long-term peace of mind.

  • Preserves Parent Artery: Advanced micro-surgical techniques ensure that the "hammock" of the clip seals the bulge while maintaining 100% of the normal blood flow to the brain.

  • Real-Time Verification: Intraoperative dye (ICG) allows the surgeon to see blood flow through the vessels in real-time, ensuring the clip is perfectly positioned before the surgery ends.

  • Durability: Titanium clips are MRI-safe and designed to stay in place for a lifetime without needing adjustment or replacement.

  • Addresses Complex Cases: Surgery remains the gold standard for aneurysms that are technically difficult to treat via the "inside" catheter-based methods.

AVM Brain Surgery
AVM Brain Surgery

AVM (Arteriovenous Malformation) surgery, clinically known as surgical resection, is a major neurosurgical procedure to physically remove an abnormal tangle of blood vessels from the brain or spinal cord. The primary goal is to eliminate the risk of a life-threatening brain hemorrhage. Unlike other treatments that may take years to work, surgical resection provides an immediate and definitive "cure" by removing the malformation entirely in a single session.

  • Preventing Hemorrhage: AVMs carry a 2–4% annual risk of bursting; surgery is often the most definitive way to permanently eliminate this risk.

  • Ruptured AVM: Performed as an emergency to remove the malformation and any resulting blood clot (hematoma) to relieve life-threatening pressure on the brain.

  • Seizure Control: If the AVM is irritating the brain's surface and causing frequent seizures that are difficult to manage with medication.

  • Accessible Location: Surgery is highly effective for AVMs located on or near the surface of the brain where they can be reached without disturbing deep, critical structures.

  • Vascular Steal Syndrome: When the AVM "steals" blood from healthy surrounding brain tissue, leading to progressive neurological weakness or cognitive decline.

  • Craniotomy: The surgeon makes a precise incision in the scalp, usually behind the hairline, and temporarily removes a small section of the skull (bone flap) to access the brain.

  • Anesthesia: The surgery is performed under general anesthesia and typically lasts 4 to 8 hours depending on the size and complexity of the AVM.

  • Microdissection: Using a high-powered operating microscope, the neurosurgeon carefully separates the AVM from the surrounding healthy brain tissue with sub-millimeter precision.

  • Vessel Ligation: The "feeding" arteries that bring high-pressure blood into the AVM are identified and closed with tiny permanent clips or cautery. The "draining" veins are left for last to ensure blood does not back up and cause a rupture during the procedure.

  • Resection: Once the blood supply is completely cut off, the entire malformed tangle is lifted out of the brain cavity.

  • Closing: After confirming there is no remaining bleeding, the bone flap is replaced and secured with small titanium plates, and the scalp is closed with stitches or surgical staples.

  • Digital Subtraction Angiography (DSA): A detailed "road map" of the brain's blood vessels to identify every feeding artery and draining vein.

  • Functional MRI (fMRI): To map critical areas of the brain near the AVM responsible for speech, movement, or vision.

  • Pre-Surgical Embolization: In some cases, a catheter procedure is done a day or two before surgery to "glue" some of the vessels, making the final resection safer and reducing blood loss.

  • Fasting: Following "nothing by mouth" instructions for 8 hours prior to your scheduled anesthesia.

  • Anti-Seizure Medication: Often started before the procedure to stabilize the brain's electrical activity.

  • CT and MRI Scans: To provide a 3D view of the AVM's volume and its exact relationship to the surrounding healthy brain tissue.

  • Diffusion Tensor Imaging (DTI): A specialized MRI that shows the white matter "wiring" near the AVM to help the surgeon avoid important pathways.

  • Blood Panels: A routine check of your blood count, electrolytes, and clotting factors to ensure a safe surgical experience.

  • ECG: A standard heart check to confirm cardiovascular stability for a multi-hour neurosurgical procedure.

  • Hospital Stay: Typically 3 to 7 days. For a ruptured AVM, the stay may extend to 2 or 3 weeks in a specialized Neuro-ICU for intensive recovery.

  • Initial Symptoms: Headaches, fatigue, and "brain fog" are common for the first few weeks. Some patients may also experience temporary scalp numbness or "clicking" sensations as the bone flap heals.

  • Activity Restrictions: No heavy lifting, straining, or vigorous exercise for 6 to 8 weeks. Most patients can return to light work or school within 1–2 months.

  • Final Confirmation: A follow-up angiogram is usually performed before discharge or a few months later to prove the AVM is 100% gone.

  • Rehabilitation: If the AVM was in a functional area, physical or occupational therapy may be recommended to help regain strength or coordination.

  • Immediate Risk Elimination: Once the AVM is removed, the risk of a future brain hemorrhage is effectively reduced to zero.

  • Definitive Cure: Unlike radiation therapy, which can take 2–3 years to close an AVM, surgical resection provides an instant resolution.

  • Advanced Micro-Neurosurgery: The use of high-definition microscopes and neuronavigation allows surgeons to navigate the brain's natural folds with minimal impact on healthy tissue.

  • Reduces Brain Irritation: Removing the physical tangle of vessels often leads to a significant reduction in chronic headaches and seizure activity.

  • Integrated Care Teams: Patients benefit from a multidisciplinary team including neurosurgeons, interventional neuroradiologists, and specialized nurses to manage every stage of the journey.

Endoscopic Skull Base Surgery

Endoscopic Skull Base Surgery is a minimally invasive technique used to reach tumors and abnormalities at the very bottom of the brain and the top of the spine. Instead of utilizing large incisions or traditional "open" craniotomies, surgeons use the nose and sinuses as natural corridors to reach the target area. This advanced approach allows for the treatment of complex conditions located deep within the head without the need to retract or move the brain.

  • Pituitary Adenomas: The most common use for this approach, particularly for tumors affecting hormone levels or vision.

  • Meningiomas & Chordomas: Tumors located at the base of the skull that would otherwise require highly invasive open surgery.

  • Craniopharyngiomas: Complex tumors located near the pituitary gland and optic nerves.

  • CSF Leaks: Repairing physical holes in the skull base where brain fluid is dripping from the nose.

  • Acoustic Neuromas: Certain tumors affecting the nerves responsible for balance and hearing.

  • Esthesioneuroblastoma: Rare tumors arising from the olfactory (smell) nerves at the roof of the nose.

  • Team Effort: The surgery is typically a collaborative effort between a Neurosurgeon and an ENT (Otolaryngologist), performed under general anesthesia over 3 to 7 hours.

  • Nasal Access: The ENT surgeon inserts a high-definition endoscope (a thin tube with a camera) through the nostrils. No external skin incisions are made on the face or scalp.

  • Navigation: Using a 3D "GPS" system mapped from your pre-operative MRI, the surgeons navigate through the sphenoid or ethmoid sinuses to reach the skull base bone.

  • Bone Opening: A small, precise window is created in the thin bone at the base of the skull to expose the protective lining of the brain (dura) or the tumor itself.

  • Tumor Removal: Using long, specialized micro-instruments through the other nostril, the tumor is removed in sections. The endoscope provides a close-up, panoramic view of critical structures like the optic nerves and carotid arteries.

  • Reconstruction: To prevent brain fluid leaks, the surgical opening is sealed using a nasoseptal flap (a flap of your own nasal tissue with its own blood supply), fat grafts, or specialized synthetic glues.

  • High-Resolution Imaging: Dedicated skull base MRI and CT scans to map the bone anatomy and vascular structures.

  • Endocrine Testing: Comprehensive blood panels to check pituitary hormone function before the gland is approached.

  • Ophthalmology Review: Detailed visual field and acuity testing if the tumor is near the optic nerves.

  • Nasal Endoscopy: A quick office-based look at your nasal passages to ensure there are no obstructions like polyps or a severely deviated septum.

  • Fasting: Adhering to "nothing by mouth" instructions for 8 hours prior to your scheduled anesthesia.

  • CT Navigation Scan: A specialized scan used to "sync" your anatomy with the surgical GPS system in the operating room.

  • Visual Field Test: To establish a baseline for your peripheral vision, which is often improved by the surgery.

  • Blood Panels: A routine check of your blood count, electrolytes, and clotting factors.

  • ECG: A standard heart check to confirm cardiovascular stability for a multi-hour procedure.

  • Hospital Stay: Typically 2 to 4 days, with the first night often spent in the Neuro-ICU for intensive monitoring.

  • Immediate Symptoms: Nasal congestion, "crusting" inside the nose, and mild headaches are normal for 2 to 3 weeks as the sinuses heal.

  • Nasal Care: You will need to perform frequent saline nasal rinses to keep the surgical area clean and moist.

  • The "No" Rules (4–6 Weeks): To protect the internal seal and prevent a CSF leak, you must strictly avoid:
    Blowing your nose: This can force air into the brain cavity.
    Straining: Stool softeners are usually prescribed to prevent internal pressure.
    Heavy lifting: Nothing over 5 kg (11 lbs).
    Drinking through a straw: The suction pressure can disrupt the nasal flap.

  • Long-term Follow-up: Regular nasal debridement (cleaning) by your ENT and follow-up MRIs are required to monitor healing and ensure no tumor recurrence.

  • No Visible Scars: By using the nose as a natural corridor, there are no incisions on the face, preserving your natural appearance.

  • Faster Recovery: Avoiding a traditional craniotomy means significantly less post-operative pain and a quicker return to daily activities.

  • Panoramic Visualization: The endoscope allows surgeons to see "around the corner" of critical nerves and arteries with better clarity than a traditional microscope.

  • Brain-Sparing Technique: Because the approach is from underneath the brain, there is no need for brain retraction, reducing the risk of post-operative swelling or cognitive changes.

  • Highly Precise Reconstruction: The use of vascularized nasoseptal flaps has revolutionized the success rate of sealing the skull base, making the procedure safer than ever before.

Acoustic Neuroma Surgery

Acoustic neuroma surgery (vestibular schwannoma resection) is a specialized craniotomy performed to remove a benign tumor growing on the hearing and balance nerves. Because these tumors are located in the cerebellopontine angle—a crowded space near the brainstem—the primary goal is to remove the tumor while preserving the facial nerve and, if possible, any remaining hearing. This surgery requires extreme precision to protect the delicate structures that control facial movement and balance.

  • Documented Growth: If follow-up MRI scans show the tumor is enlarging, increasing the risk of future nerve damage.

  • Brainstem Compression: Large tumors that press against the brainstem can become life-threatening and require surgical decompression.

  • Progressive Hearing Loss: When a tumor is still small enough that a hearing-preservation surgical approach is a viable option.

  • Balance Instability: Persistent vertigo or dizziness caused by the tumor’s pressure on the vestibular (balance) nerve.

  • Facial Twitching or Numbness: Signs that the tumor is beginning to impact the adjacent facial or trigeminal nerves.

  • Anesthesia: The surgery is performed under general anesthesia and typically lasts 4 to 10 hours, depending on the tumor's size and the chosen surgical approach.

  • Intraoperative Monitoring: Small electrodes are placed on the face and near the ear to provide real-time nerve monitoring. This provides the surgeon with immediate feedback if the facial or hearing nerves are being stressed.

  • Surgical Approaches:
    Translabyrinthine: The surgeon reaches the tumor through the inner ear bone (mastoid). This provides the best view of the facial nerve but results in permanent, total hearing loss in that ear.
    Retrosigmoid (Sub-occipital): An incision is made behind the ear to reach the tumor from behind. This offers a chance to preserve existing hearing.
    Middle Fossa: An opening is made above the ear, used primarily for very small tumors when the primary goal is to save hearing.

  • Tumor Removal: Using a high-powered microscope and an ultrasonic aspirator, the surgeon meticulously peels the tumor away from the brainstem and cranial nerves.

  • Fat Graft: If the inner ear was opened, a small piece of fat (usually taken from the abdomen) is used to seal the area and prevent cerebrospinal fluid (CSF) leaks.

  • Closing: The bone flap is replaced or the opening is covered with a titanium mesh or plate, and the scalp is closed with stitches.

  • High-Resolution MRI: A dedicated "internal auditory canal" protocol scan to map the tumor’s exact relationship to the nerves.

  • Audiogram and ABR: Detailed hearing tests to establish your baseline hearing level and the health of the auditory nerve.

  • Vestibular Testing: To evaluate how much your balance system has already been affected by the tumor.

  • Fasting: Following "nothing by mouth" instructions for 8 hours prior to your scheduled anesthesia.

  • Medication Audit: You may be asked to stop taking blood thinners or anti-inflammatory medications several days before the procedure.

  • Contrast-Enhanced CT Scan: To provide a detailed map of the bone structures surrounding the inner ear and skull base.

  • Videonystagmography (VNG): A specialized test to record eye movements and determine the extent of balance nerve involvement.

  • Blood Panels: A routine check of your blood count, electrolytes, and clotting factors.

  • ECG: A standard heart check to confirm cardiovascular stability for a multi-hour neurosurgical procedure.

  • Hospital Stay: Typically 3 to 5 days, usually including at least one night in the Neuro-ICU for intensive monitoring.

  • Balance and Vertigo: Since the balance nerve is often removed with the tumor, significant dizziness and vertigo are common for the first few days. The brain usually adapts within a few weeks through "vestibular compensation."

  • Activity Restrictions: No heavy lifting or straining for 6 weeks. Most patients return to professional work within 6–12 weeks.

  • Vestibular Rehabilitation: Specialized balance therapy is often started shortly after surgery to speed up the brain's ability to compensate for the lost balance nerve.

  • Facial Nerve Recovery: If the facial nerve was stretched during surgery, temporary facial drooping may occur; specialized facial exercises and eye care (drops/gels) are necessary during the recovery phase.

  • Advanced Nerve Monitoring: The use of real-time electrical feedback significantly increases the chances of preserving the facial nerve and maintaining your natural appearance.

  • Tailored Surgical Approaches: Surgeons can choose the specific "pathway" to the tumor that best balances tumor removal with the goal of hearing preservation.

  • Microsurgical Precision: Utilizing high-definition operating microscopes allows for the safe separation of the tumor from the delicate brainstem surface.

  • Multidisciplinary Expertise: Care is coordinated between neurosurgeons and neuro-otologists (ear specialists) to manage both the neurological and hearing aspects of the condition.

  • Long-Term Tumor Control: For most benign vestibular schwannomas, a complete surgical resection provides a permanent cure with a very low risk of recurrence.

Brainstem Surgery
Brainstem Surgery

Brainstem surgery is one of the most complex and delicate procedures in neurosurgery. The brainstem controls vital life functions—including breathing, heart rate, and consciousness—and acts as the "highway" for all nerve signals traveling between the brain and the body. Because the brainstem is packed with critical nuclei and fiber tracts in a very small space, the surgical goal is usually Maximal Safe Resection or decompression while strictly avoiding these "high-rent" areas.

  • Focal Brainstem Gliomas: Specific types of tumors that can be safely separated from the surrounding healthy brainstem tissue.

  • Cavernous Malformations (Cavernomas): Small clusters of abnormal blood vessels that have bled or pose a high risk of future hemorrhage within the brainstem.

  • Brainstem Hemangioblastomas: Highly vascular tumors, often associated with Von Hippel-Lindau disease, that cause progressive pressure.

  • Symptomatic Cysts or Abscesses: Collections of fluid or infection that are causing life-threatening pressure on the body's respiratory or cardiac centers.

  • Tectal Plate Tumors: Lesions located in the back of the midbrain that can block the flow of cerebrospinal fluid, causing hydrocephalus.

  • Anesthesia: The surgery is performed under general anesthesia and typically lasts 6 to 10 hours due to the extreme precision required.

  • Surgical Approaches: The entry point is tailored to the exact location of the lesion:
    Suboccipital/Telovelar: Accessing the back of the brainstem (medulla or pons) through an incision at the very base of the skull.
    Retrosigmoid: Reaching the side of the brainstem, often used for issues near the cranial nerves.
    Endoscopic Endonasal: For specific lesions at the very front of the brainstem, surgeons may access the area through the nose.

  • Intraoperative Neuromonitoring (IONM): This is the most critical safety feature. Electrodes continuously monitor motor pathways, sensory pathways, and cranial nerves (eye movement, swallowing, and facial sensation) to warn the surgeon if they are near vital tissue.

  • Microsurgical Dissection: Using a high-powered microscope and specialized lasers or ultrasonic aspirators, the surgeon removes the lesion through "safe entry zones"—specific areas where the density of critical nerve fibers is lowest.

  • Closing: After ensuring all bleeding is controlled, the skull opening is meticulously closed with titanium plates or mesh, and the scalp is stitched.

  • Advanced Neuroimaging: Utilizing specialized MRI sequences like Tractography (DTI) to map the exact location of the "wiring" inside your brainstem.

  • Steroid Protocol: You will likely be started on high doses of Dexamethasone before surgery to minimize brainstem swelling (edema).

  • Neurological Baseline: A comprehensive assessment of your current motor strength, coordination, and cranial nerve function (swallowing, vision, facial movement).

  • Fasting: Following "nothing by mouth" instructions for 8 hours prior to your scheduled anesthesia.

  • Medication Audit: You must stop all blood thinners and anti-inflammatory medications several days before the procedure to prevent bleeding.

  • Brainstem Auditory Evoked Response (BAER): To check the integrity of the hearing pathways through the brainstem.

  • Somatosensory Evoked Potentials (SSEP): To monitor the sensory pathways that travel from your limbs to your brain.

  • Cerebrospinal Fluid (CSF) Study: To rule out active infection or check for specific tumor markers if the diagnosis is unclear.

  • ECG and Chest X-ray: Standard checks to ensure your heart and lungs can handle a long, intensive surgical procedure.

  • Hospital Stay: Typically 7 to 14 days. Most patients spend the first several days in a specialized Neuro-ICU for intensive monitoring of breathing and heart rate.

  • Initial Symptoms: Temporary "cranial nerve palsies" (double vision, facial numbness, or swallowing difficulty) are common as the brainstem heals from surgical manipulation.

  • Post-Op Steroids: Continued use of Dexamethasone is essential to manage swelling within the tight confines of the skull base.

  • Inpatient Rehabilitation: Most patients transition to specialized physical, occupational, and speech therapy for several weeks to regain coordination and strength.

  • Long-term Monitoring: Regular MRI scans and neurological check-ups are mandatory to monitor healing and ensure no recurrence of the lesion.

  • Protects Vital Functions: The use of real-time IONM monitoring provides an unparalleled safety net, allowing surgeons to stop immediately if vital pathways are at risk.

  • Targeted "Safe Zones": Advanced anatomical knowledge allows surgeons to enter the brainstem through areas that do not contain critical nerve centers, preserving your quality of life.

  • Immediate Decompression: For lesions causing pressure, surgery provides the fastest way to relieve strain on the centers that control breathing and heart rate.

  • Precision Technology: Ultrasonic aspirators allow for the gentle removal of tumor tissue without the "pulling" or "tugging" that can damage delicate brainstem fibers.

  • Multidisciplinary ICU Care: Recovery is managed by a team of neuro-intensivists and specialized nurses trained specifically to handle the unique needs of brainstem surgery patients.

Endoscopic Endonasal Surgery

Endoscopic Endonasal Surgery (EES) is a minimally invasive surgical technique that uses the nose and sinuses as natural "corridors" to reach and treat conditions at the base of the brain or the top of the spine. Unlike traditional "open" brain surgery, it requires no external incisions on the face or scalp and avoids the need to remove large parts of the skull. This advanced approach allows surgeons to access deep-seated tumors and vascular issues with minimal disruption to healthy brain tissue.

  • Pituitary Tumors: This is the primary and most common use for EES, particularly for adenomas affecting hormone levels or vision.

  • Skull Base Tumors: Including meningiomas, chordomas, and craniopharyngiomas located at the very bottom of the brain.

  • Cerebrospinal Fluid (CSF) Leaks: To repair physical holes or defects in the skull base where brain fluid is dripping through the nose.

  • Optic Nerve Compression: To decompress nerves that are being pinched by tumors, often leading to rapid vision improvement.

  • Sinus or Nasal Malignancies: For specialized removal of tumors that have invaded the bone separating the nose from the brain.

  • Top-of-Spine Disorders: To treat abnormalities where the skull meets the spinal column without traditional neck surgery.

  • Collaborative Team: The surgery is typically a joint effort between a neurosurgeon and an ENT (Otolaryngologist), performed under general anesthesia.

  • Access: A high-definition endoscope (a thin tube with a camera) is inserted through the nostrils. This provides a panoramic, high-magnification view of the surgical field.

  • Navigation: Surgeons use an image-guided system (neuronavigation), similar to a GPS for the brain, to map the exact location of the target in real-time using your pre-operative scans.

  • Removal: Specialized long-reach micro-instruments are passed through the nostrils to remove tumors or treat the affected area without any external skin cuts.

  • Reconstruction: To prevent brain fluid leaks, the surgeon may reconstruct the surgical site using a nasoseptal flap (the patient's own nasal tissue with its own blood supply) or specialized synthetic sealants.

  • Closing: Because there are no external incisions, no stitches are needed on the face or scalp; the internal nasal passages are simply cleaned and occasionally padded with temporary sponges.

  • Skull Base MRI and CT: High-resolution scans to provide a 3D "roadmap" of your bone structure and major blood vessels.

  • Endocrine Evaluation: Comprehensive blood tests to check your current pituitary hormone levels.

  • Visual Field Testing: A detailed eye exam to establish a baseline for your vision and peripheral awareness.

  • Nasal Assessment: An ENT check-up to ensure your nasal anatomy (like the septum) is suitable for the endoscopic instruments.

  • Fasting: Following "nothing by mouth" instructions for 8 hours prior to your scheduled anesthesia.

  • CT Navigation Scan: A specialized scan performed close to the surgery date to "calibrate" the surgical GPS system.

  • Hormone Panels: Specifically checking thyroid, adrenal, and growth hormones which may be impacted by the surgery.

  • Blood Panels: A routine check of your blood count, electrolytes, and clotting factors.

  • ECG: A standard heart check to confirm cardiovascular stability for the duration of the procedure.

  • Hospital Stay: Patients typically stay in the hospital for 1 to 5 days, often spending the first night in a specialized Neuro-ICU.

  • Immediate Symptoms: It is normal to experience nasal congestion, mild headaches, and blood-tinged nasal drainage for 1 to 2 weeks.

  • Nasal Care: Regular saline nasal rinses are essential to keep the nasal passages clean, moist, and free of crusting.

  • The "No" Rules (4–6 Weeks): To protect the internal seal and prevent a brain fluid leak, you must strictly avoid:
    Blowing your nose: This can force air into the brain cavity.
    Straining: Stool softeners are often prescribed to prevent internal pressure.
    Heavy lifting: Nothing over 5–7 kg (11–15 lbs).
    Bending over at the waist: Keep your head above your heart level at all times.

  • Follow-up Debridement: You will visit your ENT specialist several times in the first month to have the nasal passages professionally cleaned (debrided).

  • No External Scars: By utilizing natural pathways, there is no impact on your facial appearance or hairline.

  • Enhanced Visualization: The endoscope allows surgeons to see "around corners" and behind critical nerves that would be hidden in traditional surgery.

  • Faster Recovery: Avoiding a craniotomy (opening the skull) significantly reduces post-operative pain and shortens the hospital stay.

  • Direct Access: EES provides the shortest, most direct route to the pituitary gland and skull base, minimizing the "travel distance" through healthy brain tissue.

  • Superior Seal Techniques: The use of vascularized nasal flaps has revolutionized the safety of this procedure, dramatically reducing the risk of post-operative infections and leaks.

Chiari Decompression

Chiari decompression is a specialized neurosurgical procedure performed to treat Chiari malformation, a condition where the cerebellum extends into the foramen magnum. In the 2026 medical landscape, this surgery focuses on restoring the natural flow of cerebrospinal fluid and relieving pressure on the brainstem. By utilizing precision bone-sparing technology and advanced intraoperative imaging, the procedure aims to halt neurological progression and eliminate chronic pain.

  • Severe headaches at the base of the skull that intensify during coughing, sneezing, or straining.

  • Chronic neck pain that radiates into the shoulders or upper back.

  • Loss of fine motor skills or frequent episodes of dizziness and imbalance.

  • Persistent numbness or a tingling sensation in the hands and feet.

  • Difficulty swallowing or frequent choking episodes caused by brainstem compression.

  • New onset of weakness in the extremities that interferes with daily mobility.

  • Type I or Type II Chiari Malformation with documented descent of the cerebellar tonsils.

  • Syringomyelia, characterized by the formation of fluid-filled cysts within the spinal cord.

  • Hydrocephalus resulting from the obstruction of cerebrospinal fluid at the base of the skull.

  • Scoliosis or spinal curvature related to abnormal fluid pressure in the spinal canal.

  • Basilar invagination or other complex craniovertebral junction abnormalities.

[Image Placeholder: A sagittal Cine-MRI view showing the cerebellar tonsils protruding through the foramen magnum and obstructing fluid flow]

  • Pre-operative 3D surgical planning using high-definition MRI to map the exact anatomy of the posterior fossa.

  • Administration of general anesthesia with continuous neuro-monitoring of the brainstem and spinal cord.

  • A small vertical incision is made at the back of the head to access the base of the skull.

  • Precise removal of a small section of the occipital bone using ultrasonic bone-cutting tools.

  • Performance of a C1 laminectomy if the cerebellar tonsils have descended past the first cervical vertebra.

  • Application of a dural graft to expand the protective lining of the brain and ensure long-term decompression.

  • Ultrasonic Piezoelectric Surgery: Using high-frequency vibrations to selectively remove bone while protecting the delicate dura and neural tissues.

  • Intraoperative Color Doppler Ultrasound: Providing real-time visualization of cerebrospinal fluid pulse waves during the procedure to confirm successful decompression.

  • Synthetic Biomimetic Dural Grafts: Utilizing 2026 bio-engineered materials that integrate seamlessly with natural tissue and reduce the risk of leaks.

  • Cine-MRI Flow Analysis: Using movie-like imaging sequences to quantify the velocity and volume of fluid movement before and after surgery.

  • Endoscopic-Assisted Decompression: Employing micro-cameras to allow for smaller incisions and improved visualization of the cerebellar tonsils.

  • Laser-Assisted Duraplasty: Using precision laser technology to seal dural grafts, significantly lowering the incidence of post-operative fluid leaks.

[Image Placeholder: A neurosurgeon utilizing an intraoperative ultrasound probe to verify fluid circulation during a decompression procedure]

  • Comprehensive baseline neurological assessment to document existing motor and sensory function.

  • Participation in a 2026 pre-surgical optimization program to manage systemic inflammation and nutrition.

  • Discontinuation of anti-platelet medications or herbal supplements that may affect blood clotting.

  • Pre-surgical imaging using advanced flow-sensitive MRI sequences to identify the primary points of obstruction.

  • Coordination with a specialized neuro-rehabilitation team to plan for post-operative recovery milestones.

  • High-resolution Cine-MRI to evaluate the dynamic movement of cerebrospinal fluid around the brainstem.

  • CT scan of the craniovertebral junction to assess bone structure and potential anatomical variants.

  • Formal swallow evaluation to determine if brainstem compression is affecting the lower cranial nerves.

  • Standard 2026 pre-operative blood panels including metabolic and hematologic screening.

  • Audiology and vestibular testing to establish a baseline for balance and coordination.

  • Success rates for headache relief in 2026 range from 80% to 90% through optimized surgical techniques.

  • Early intervention effectively prevents the expansion of a syrinx and subsequent spinal cord damage.

  • Real-time intraoperative imaging ensures that the decompression is anatomically sufficient before the patient leaves the operating room.

  • Minimally invasive bone-sparing approaches lead to reduced post-operative neck pain and faster recovery times.

  • Improved dural sealants and graft materials have nearly eliminated the historical risk of cerebrospinal fluid leaks.

  • Hospitalization for 2 to 4 days for close monitoring of neurological status and wound healing.

  • Implementation of a specialized neck-strengthening program starting 4 to 6 weeks after the procedure.

  • Short-term use of modern non-narcotic pain management protocols to address post-operative stiffness.

  • Avoidance of high-impact activities or heavy lifting for at least 8 weeks to allow the bone and dura to heal.

  • First post-operative Cine-MRI at 3 months to verify the restoration of normal fluid dynamics.

  • Significant reduction or total elimination of "tussive" headaches triggered by physical exertion.

  • Stabilization or shrinkage of spinal cord syrinxes, leading to improved sensory and motor function.

  • Regular annual monitoring with non-invasive imaging to ensure continued spinal stability.

  • Resumption of most recreational activities and professional duties with improved focus and coordination.

  • Ongoing connection with 2026 digital health platforms for symptom tracking and long-term wellness support.

Deep Brain Stimulation (DBS)

Deep Brain Stimulation (DBS) is a neurosurgical procedure that uses a "brain pacemaker" to send electrical impulses to specific areas of the brain. As of 2026, it is an established standard of care for movement disorders and is increasingly used for psychiatric conditions when traditional medications fail.

  • Parkinson’s Disease symptoms such as tremors, rigidity, and "off" time that are no longer managed by medication.

  • Essential Tremor causing severe, uncontrollable shaking in the hands and arms.

  • Dystonia involving painful or involuntary muscle contractions.

  • Epilepsy characterized by refractory partial-onset seizures.

  • Treatment-resistant Obsessive-Compulsive Disorder (OCD).

  • Parkinson’s Disease: Significantly reduces tremors and motor fluctuations.

  • Essential Tremor: Suppresses severe shaking to improve daily function.

  • Dystonia: Helps control involuntary muscle movements and postures.

  • Epilepsy: Approved as an adjunctive therapy for difficult-to-treat seizures.

  • Obsessive-Compulsive Disorder (OCD): Used under a humanitarian device exemption for chronic, severe cases.

  • Adaptive DBS (aDBS): Systems that sense real-time brain activity and automatically adjust stimulation levels.

  • Directional Leads: Electrodes that allow surgeons to "steer" current toward targets to minimize side effects.

  • Personalized Programming: Precise digital adjustment of electrical pulses tailored to the patient's brain signals.

  • Sensing Technology: Capability to record brain signals (local field potentials) to monitor disease progression.

  • Improved Battery Life: Advances in battery chemistry providing longer intervals between replacements.

  • Brain Surgery (Stage 1): Fine leads are placed in specific brain targets, often while the patient is awake to test for relief.

  • Testing: Surgeons use microelectrode recording to ensure the leads are in the optimal location.

  • Chest Surgery (Stage 2): The pulse generator (battery) is implanted under the skin near the collarbone.

  • Connection: Extension wires are tunneled under the skin to connect the chest device to the brain leads.

  • Closing: Small incisions are closed with sutures or surgical staples.

  • Hospital Stay: Most patients stay for 1–3 days for observation.

  • Honeymoon Effect: Temporary symptom relief may occur immediately from the surgery itself.

  • Device Activation: Official programming and device "turn-on" typically occurs 2–4 weeks after surgery.

  • Rechargeable Models: Newer 2026 models can last up to 15 years before needing replacement.

  • Non-Rechargeable Models: Standard batteries typically last between 3–5 years.

  • Brain Bleed: There is a 1–3% risk of a brain bleed or stroke during lead placement.

  • Infection: A 3–5% risk of infection exists at the incision sites or around the hardware.

  • Hardware Issues: Potential for lead migration, wire breakage, or skin erosion over the device.

  • Side Effects: Stimulation can sometimes cause temporary speech, balance, or mood changes.

  • Programming Time: It may take several months of adjustments to find the most effective settings.

  • Substantial reduction in the need for daily medications and their associated side effects.

  • Significant improvement in the ability to perform activities of daily living.

  • Continuous, 24-hour symptom control that does not "wear off" like oral medication.

  • Reversible and adjustable technology that can be updated as the condition changes.

  • Enhanced quality of life and independence for patients with chronic movement disorders.

Epilepsy Surgery
Epilepsy Surgery

Epilepsy surgery in 2026 is a specialized neurosurgical field focused on achieving seizure freedom or significant reduction through the removal or modulation of specific neural networks. As a primary intervention for drug-resistant epilepsy, this surgery moves beyond traditional medication management to address the mechanical and electrical source of the condition. By integrating robotic-assisted mapping and minimally invasive thermal therapies, 2026 protocols offer personalized solutions that prioritize the preservation of cognitive function and long-term quality of life.

  • Failure of two or more appropriately chosen anti-seizure medications to provide complete seizure control.

  • Documented drug-resistant epilepsy that significantly interferes with employment, education, or social independence.

  • Presence of focal seizures that consistently originate from a single, identifiable region of the brain.

  • Experiencing severe "drop attacks" or tonic-clonic seizures that pose a high risk of physical injury.

  • Side effects from high-dose medications that impair memory, mood, or overall daily functioning.

  • Clear evidence of a structural lesion, such as a focal cortical dysplasia or hippocampal sclerosis, on high-resolution imaging.

  • Mesial Temporal Lobe Epilepsy (MTLE), often characterized by hippocampal scarring and high surgical success rates.

  • Lesional epilepsy caused by cortical malformations, cavernomas, or low-grade tumors.

  • Generalized or multifocal epilepsy where neuromodulation is the safest and most effective option.

  • Lennox-Gastaut Syndrome or other severe pediatric epilepsy syndromes requiring disconnection procedures.

  • Refractory focal epilepsy located in non-eloquent areas of the brain that are safe for resection.

  • Pre-surgical Phase I evaluation including prolonged video-EEG monitoring to capture and map seizure activity.

  • Phase II intracranial monitoring using robotic-assisted SEEG electrodes to pinpoint the seizure focus with sub-millimeter accuracy.

  • Administration of general anesthesia or, in specific functional cases, an awake craniotomy to map language and motor centers.

  • Precise resection of the seizure-generating tissue or the thermal ablation of the focus using laser fibers.

  • For neuromodulation, the surgical implantation of leads into the brain or chest connected to an intelligent pulse generator.

  • Real-time intraoperative neuro-monitoring to ensure the total preservation of surrounding healthy brain tissue and critical pathways.

  • Laser Interstitial Thermal Therapy (LITT): Utilizing a thin laser fiber to destroy seizure-causing tissue via a tiny 2mm incision, eliminating the need for a traditional craniotomy.

  • Responsive Neurostimulation (RNS): Deploying a smart intracranial device that acts as a brain computer, detecting abnormal activity and delivering a corrective pulse before a seizure starts.

  • Robotic-Assisted Stereoelectroencephalography (SEEG): Using high-precision robotic arms to place deep brain electrodes for the most accurate 3D seizure mapping available in 2026.

  • 7-Tesla High-Field MRI: Employing ultra-high-resolution imaging to identify subtle structural abnormalities that were invisible on standard 2026 scanners.

  • Focused Ultrasound: Using non-invasive sound waves to target and ablate deep brain seizure foci without any surgical incisions.

  • Magnetoencephalography (MEG): Measuring the magnetic fields produced by brain activity to provide a detailed functional map of seizure-prone networks.

  • Extensive neuropsychological evaluation to establish a baseline for memory, language, and cognitive processing.

  • Functional MRI (fMRI) or WADA testing to determine which hemisphere of the brain dominates speech and motor control.

  • Nutritional and lifestyle optimization to stabilize systemic health and prepare the body for the recovery phase.

  • Collaborative consultation between the patient, neurosurgeon, and epileptologist to set realistic seizure-reduction goals.

  • Mapping of "eloquent" brain regions to ensure the surgical plan avoids areas critical for daily functioning.

  • Multi-day Video-EEG monitoring to confirm the clinical and electrical correlation of seizure events.

  • Positron Emission Tomography (PET) scans to identify areas of the brain with abnormal glucose metabolism related to epilepsy.

  • Single-Photon Emission Computed Tomography (SPECT) to visualize blood flow changes specifically during a seizure event.

  • Comprehensive 2026 genetic testing to identify underlying metabolic or genetic causes of drug resistance.

  • High-density EEG caps to provide a non-invasive, high-resolution topographical map of electrical spikes.

  • Success rates for becoming completely seizure-free reach up to 80% for temporal lobe resections in 2026.

  • Minimally invasive laser techniques reduce the hospital stay to a single day and minimize post-operative pain.

  • Neuromodulation devices like RNS and DBS offer a 75% or greater reduction in seizures for those not eligible for resection.

  • Targeted interventions significantly lower the risk of Sudden Unexpected Death in Epilepsy (SUDEP).

  • Early surgical intervention in 2026 is proven to prevent the cognitive decline associated with chronic, uncontrolled seizures.

  • Variable hospital stays ranging from 24 hours for laser procedures to 5 days for traditional resections.

  • Gradual resumption of physical activity, with most patients returning to light work or school within 2 to 4 weeks.

  • Continuous monitoring of mood and cognitive health through specialized 2026 post-surgical support programs.

  • Strict adherence to anti-seizure medication schedules during the initial 6 to 12 month brain-healing phase.

  • Regular follow-up with a dedicated epilepsy team to evaluate seizure control and adjust device settings if applicable.

  • Potential for achieving long-term seizure freedom, allowing for the restoration of driving privileges and occupational independence.

  • Gradual reduction or elimination of anti-seizure medications under strict medical supervision after a seizure-free period.

  • Dramatic improvement in overall mental health, including reductions in anxiety and depression related to seizure unpredictability.

  • Enhanced social participation and improved family dynamics due to the removal of the burden of daily seizures.

  • Lifetime surveillance through a Level 4 Epilepsy Center to ensure ongoing neurological health and wellness.

Gamma Knife Surgery (Radiosurgery)

Gamma Knife Surgery, or Stereotactic Radiosurgery (SRS), is a non-invasive treatment that uses roughly 200 pinpoint beams of gamma radiation to treat brain abnormalities without an incision. As of 2026, it remains the "gold standard" for small, deep-seated lesions.

  • Diagnosis of small to medium malignant brain metastases.

  • Presence of benign tumors like meningiomas or acoustic neuromas.

  • Chronic facial pain caused by Trigeminal Neuralgia.

  • Deep-seated Arteriovenous Malformations (AVMs) unsuitable for traditional surgery.

  • Functional disorders such as essential tremors or OCD.

  • Elekta Esprit: The newest generation platform offering sub-millimeter accuracy for complex cases.

  • Frameless Mask Options: Modern standards allow for mask-based treatments, enabling fractionated doses over several days.

  • Lightning Inverse Planning: Automated, real-time software that reduces planning time and human error.

  • Non-Invasive Approach: High-dose radiation delivered with surgical precision without a single scalp incision.

  • Brain Tumors: Malignant and benign growths located deep within the brain.

  • Vascular Malformations: Correcting blood vessel tangles (AVMs).

  • Nerve Disorders: Targeted treatment for the trigeminal nerve root.

  • Functional Issues: Neurological conditions impacting movement or behavior.

  • Tumor Control: Generally ranges between 85% and 95% for small tumors.

  • Acoustic Neuromas: Approximately 90% of patients see growth stop or shrink.

  • Trigeminal Neuralgia: About 90% of patients achieve significant pain relief within one year.

  • Quick Recovery: Most procedures are outpatient; patients typically return home the same day.

  • Activity Resumption: You can usually return to normal daily activities within 24 to 48 hours.

  • Post-Op Care: Monitoring for mild headaches, fatigue, or minor scalp irritation.

  • Long-term Follow-up: Periodic MRI scans to track the shrinkage or stabilization of the treated area.

  • No general anesthesia is required for most adult patients.

  • Eliminates the risks of infection and bleeding associated with open brain surgery.

  • Extremely high precision spares the surrounding healthy brain tissue.

  • Cost-effective compared to traditional neurosurgery due to shorter hospital stays.

Microvascular Decompression (MVD)

Microvascular Decompression (MVD) is a highly specialized neurosurgical procedure designed to resolve cranial nerve compression at the brainstem. In the 2026 clinical landscape, it is recognized as the definitive restorative treatment for conditions like Trigeminal Neuralgia and Hemifacial Spasm. By physically separating pulsating blood vessels from hypersensitive nerve tissue and inserting protective medical-grade buffers, MVD addresses the mechanical root cause of chronic facial pain and involuntary spasms, offering a long-term cure rather than temporary symptom management.

  • Sudden, electric-shock-like stabs of facial pain triggered by light touch, shaving, or applying makeup.

  • Excruciating pain in the jaw or cheek while eating, drinking, or speaking that has become resistant to medication.

  • Involuntary twitching of the eyelid or facial muscles that has progressed to the lower face and neck.

  • Intense, sharp pain in the back of the throat or ear canal when swallowing or clearing the throat.

  • Failure to achieve adequate relief from pharmacological treatments or side effects from high-dose nerve-stabilizing drugs.

  • A desire for a permanent surgical solution to avoid the nerve-damaging effects of repeated radiation or chemical injections.

  • Trigeminal Neuralgia (Type 1 and Type 2) caused by neurovascular conflict at the root entry zone.

  • Hemifacial Spasm resulting from arterial compression of the seventh cranial nerve.

  • Glossopharyngeal Neuralgia causing severe paroxysmal pain in the tonsillar fossa or pharynx.

  • Geniculate Neuralgia, a rare condition involving deep ear pain and sensory nerve compression.

  • Recurrent facial pain syndromes where previous non-microvascular interventions have failed to provide lasting relief.

  • Pre-operative 2026 high-resolution FIESTA or 3D-CISS MRI sequences to visualize the exact vessel-nerve conflict.

  • Administration of general anesthesia with integrated intraoperative neuromonitoring (IONM) of the hearing and facial nerves.

  • Creation of a small, precise opening (retrosigmoid craniotomy) roughly the size of a postage stamp behind the ear.

  • Microsurgical dissection using high-definition visualization to identify the offending artery or vein pressing on the nerve.

  • Gentle repositioning of the vessel and the insertion of a permanent, non-reactive Teflon felt cushion to act as a barrier.

  • Multi-layer closure of the site using advanced 2026 surgical sealants to ensure a watertight seal of the cranial space.

  • Endoscopic-Assisted Microsurgery: Utilizing ultra-thin endoscopes to visualize hidden "around-the-corner" vascular loops that a traditional microscope might miss.

  • Real-Time Brainstem Auditory Evoked Potentials (BAEP): Continuous monitoring of hearing signals during surgery to provide the surgeon with instant feedback and preserve auditory function.

  • Stealth Neuronavigation: Using GPS-guided digital overlays to plan the most direct and least invasive surgical corridor to the brainstem.

  • Medical-Grade Teflon Buffers: Utilizing advanced, biocompatible materials designed to remain in place for decades without causing an inflammatory response.

  • Fused 3D Image Guidance: Integrating MRI and CT data into the surgical oculars, allowing the surgeon to see through bone and tissue layers digitally.

  • Laser-Assisted Micro-Dissection: Using low-heat lasers for the bloodless separation of delicate arachnoid tissues surrounding the compressed nerve.

  • Comprehensive dental evaluation to rule out localized tooth or jaw issues that may mimic facial pain.

  • Detailed baseline hearing test (audiogram) to establish a reference point for post-operative monitoring.

  • Optimization of blood pressure to ensure vascular stability before, during, and after the intracranial procedure.

  • Education on the 2026 "rapid recovery" protocol, which emphasizes early mobilization and specialized pain management.

  • Assessment of current nerve-stabilizing medications to create a post-operative weaning plan as pain subsides.

  • High-field (3T or 7T) MRI with 2026 neurovascular protocols to confirm the presence of a compressing blood vessel.

  • Magnetic Resonance Angiography (MRA) to map the arterial branches near the brainstem and identify the offending vessel.

  • Trigeminal Reflex Testing to assess the physiological integrity of the nerve pathways.

  • Routine 2026 cardiac and hematologic clearance to ensure the patient is a safe candidate for general anesthesia.

  • High-resolution CT of the temporal bone to plan the exact craniotomy entry point and avoid critical venous sinuses.

  • Success rates for immediate pain relief in 2026 exceed 90% for typical Trigeminal Neuralgia.

  • MVD is the only treatment that preserves natural nerve function rather than intentionally damaging or numbing the nerve.

  • The use of permanent cushions prevents the "short-circuiting" effect of pulsating vessels, leading to the lowest recurrence rates in neurosurgery.

  • Advanced intraoperative monitoring has reduced the risk of major complications, such as hearing loss, to less than 2-3% in specialized centers.

  • Patients often wake up from surgery completely free of the "electric" pain they have suffered from for years.

  • A typical 2026 hospital stay of 24 to 48 hours to ensure normal recovery from anesthesia and monitoring of fluid balance.

  • Immediate resolution of facial spasms or "shocks" is expected, though some mild numbness or tingling may temporarily occur.

  • Gradual resumption of soft foods and normal speaking as the facial triggers are no longer present.

  • Restriction of heavy lifting or strenuous exertion for 4 to 6 weeks to allow the surgical site and scalp to heal fully.

  • Short-term use of specialized anti-nausea and non-opioid pain medications during the first 72 hours post-op.

  • Permanent cessation of electric-shock facial pain, allowing for a return to normal social activities, eating, and grooming.

  • Systematic weaning from long-term anti-seizure or nerve-pain medications under the supervision of a neurologist.

  • Significant improvement in psychological well-being and elimination of the "fear of the next attack."

  • Annual 2026 digital follow-ups to track long-term wellness and ensure the continued success of the decompression.

  • Resumption

Knee Arthroscopy Surgery

Knee Arthroscopy is a minimally invasive surgical procedure used to diagnose and treat problems in the knee joint through tiny incisions using a camera. This specialized "keyhole" approach allows surgeons to view and repair joint structures without the need for a large open incision.

  • Persistent knee pain that has not responded to rest, physical therapy, or injections.

  • Mechanical symptoms such as the knee "locking," "catching," or "giving way" during movement.

  • Swelling and stiffness caused by loose fragments of bone or cartilage within the joint.

  • Confirmed soft tissue injuries, such as a meniscus tear or a ligament injury (ACL/PCL).

  • Chronic inflammation of the joint lining (synovium) that requires surgical removal.

  • Diagnostic Arthroscopy: A procedure focused on exploring the joint to identify the source of unexplained pain or instability.

  • Meniscectomy: Trimming away the damaged or frayed edges of a torn meniscus.

  • Meniscal Repair: Suturing a torn meniscus back together to preserve the natural cushioning of the knee.

  • Chondroplasty: Smoothing out damaged or irregular articular cartilage to improve joint glide.

  • Loose Body Removal: Extracting floating bits of bone or cartilage that cause painful mechanical interference.

  • Portal Creation: The surgeon makes two or three tiny incisions, or portals (about 0.5 cm each), around the kneecap.

  • Saline Insufflation: The joint is expanded with sterile saline to stretch the capsule, providing a clear view and space for the tools.

  • Visualization: A high-definition fiber-optic camera (arthroscope) is inserted through one portal to project live images onto a monitor.

  • Surgical Intervention: Miniature specialized tools, such as shavers or probes, are used to repair, trim, or remove damaged tissue.

  • Closure: After the saline is drained, the tiny portals are closed with a single stitch or sterile tape (Steri-Strips).

  • Fasting (NPO) for 6–8 hours prior to the surgery to ensure safety during anesthesia.

  • Evaluation of current medications; blood thinners are typically only stopped if significant bleeding is anticipated.

  • Choosing the most appropriate anesthesia option, which may include general, spinal, or a regional nerve block.

  • Diagnostic confirmation through physical stability tests and imaging to map out the internal damage.

  • MRI Scan: The primary imaging tool used to visualize soft tissues like ligaments, tendons, and cartilage.

  • X-rays: Used to rule out significant bone-on-bone arthritis or fractures that may not be treatable via arthroscopy.

  • Physical Stability Exams: Specialized maneuvers (like the Lachman or McMurray tests) to assess ligament and meniscus integrity.

  • Blood Panels: Routine screens to ensure general health and fitness for an outpatient surgical procedure.

  • Almost always an outpatient procedure, with most patients returning home 2–3 hours after waking up.

  • Adherence to the R.I.C.E. protocol (Rest, Ice, Compression, Elevation) is critical for the first 48–72 hours.

  • Weight-bearing status depends on the procedure: simple trimming allows walking in days, while repairs may require crutches for 4–6 weeks.

  • Driving is typically restricted for 1–2 weeks, particularly if the surgery was on the right leg or the patient drives a manual vehicle.

  • Physical therapy focuses on restoring range of motion and strengthening the muscles surrounding the knee joint.

  • Minimally invasive nature results in significantly less post-operative pain and swelling than open surgery.

  • Tiny incisions lead to faster wound healing and minimal surgical scarring.

  • High success rates for resolving mechanical issues like joint locking or catching.

  • Reduced risk of infection and lower blood loss compared to traditional joint procedures.

ACL Reconstruction Surgery

ACL Reconstruction is a specialized surgical procedure to replace a torn Anterior Cruciate Ligament with a high-strength tissue graft to restore stability and rotation to the knee. The clinical focus is on "anatomic reconstruction" and biologic augmentation, utilizing sub-millimeter robotic precision and internal bracing to return athletes to peak performance while minimizing the risk of future joint degeneration.

  • Audible Trauma: A loud "pop" sensation in the knee followed by immediate, severe swelling.

  • Instability: A feeling of the knee "giving way" or extreme instability during pivoting movements.

  • Functional Limitation: Inability to continue playing sports or perform physical labor after a twisting injury.

  • Persistent Pain: Knee pain and a limited range of motion that hinders daily activities.

  • Mechanical Buckling: Recurrent episodes of the knee buckling during simple tasks like walking or climbing stairs.

  • Therapy Failure: Failure of conservative physical therapy to provide the stability required for your desired activity level.

  • High-Grade Tears: Complete or high-grade partial ACL tears identified via MRI.

  • Multi-Ligament Injuries: Complex cases involving the ACL along with the MCL, PCL, or meniscus.

  • Chronic Deficiency: Long-term ACL instability leading to secondary meniscus tears or cartilage damage.

  • High-Pivot Athletes: Individuals in sports like soccer, basketball, or skiing who require maximum rotational stability.

  • Revision Surgery: Failed primary ACL reconstruction requiring a complex revision with specialized graft placement.

  • Quadriceps Tendon Autograft: A modern gold standard offering robust thickness and excellent stability with lower donor-site pain.

  • Patellar Tendon Autograft (BTB): A high-strength option often preferred for elite athletes due to its reliable bone-to-bone healing.

  • Hamstring Tendon Autograft: A traditional, minimally invasive choice that provides a strong, flexible replacement.

  • Internal Brace Reinforcement: The use of high-strength fiber tape to protect the healing graft and allow for earlier rehabilitation.

  • Robotic-Assisted Placement: The use of digital mapping to ensure perfect graft alignment, reducing the risk of long-term failure.

  • Biologic Augmentation: The application of Platelet-Rich Plasma (PRP) during surgery to accelerate the graft’s integration into the bone.

  • Arthroscopic Visualization: Small cameras are used to inspect the joint and treat any associated meniscus or cartilage damage.

  • Graft Harvesting: A graft is harvested from the patient’s own tissue (autograft) or prepared from a donor (allograft).

  • Tunnel Drilling: Precision tunnels are drilled into the femur (thigh bone) and tibia (shin bone) using robotic navigation.

  • Graft Fixation: The new graft is pulled through the tunnels and secured with specialized screws or suspensory buttons.

  • Augmentation: An "Internal Brace" or Anterolateral Ligament (ALL) reinforcement may be added for extra stability.

  • Tensioning: Real-time tensioning ensures the graft perfectly mimics the natural ligament's function and tension.

  • "Pre-hab" Therapy: Engaging in physical therapy to reduce swelling and regain full extension before the operation.

  • Muscle Strengthening: Strengthening the quadriceps and hamstrings to provide better support for the joint post-operatively.

  • Recovery Logistics: Arrange for a recovery assistant, as you will likely be on crutches for the first 1 to 2 weeks.

  • Cold Therapy: Prepare a station at home with an ice machine to manage post-surgical inflammation and pain.

  • Anatomical Mapping: Complete all pre-operative imaging to allow the surgeon to map the exact anatomy of your knee.

  • High-Resolution MRI: To confirm the ACL tear and assess for associated meniscus or cartilage involvement.

  • Stress Radiographs: Specialized X-rays to measure the degree of laxity (looseness) in the knee joint.

  • Systemic Health Screening: Complete Blood Count (CBC) and Metabolic Panel to ensure safety for anesthesia.

  • Cardiac Clearance (EKG): A heart check to ensure the patient is fit for surgery, particularly for high-intensity athletes.

  • Laxity Testing: Clinical stability testing to compare the injured knee against the healthy knee.

  • Initial Phase: Focus on the "straightening" of the knee and activation of the quadriceps in the first 4 weeks.

  • Graft Maturation: Strict adherence to a phased 9-to-12-month rehabilitation protocol to allow the graft to fully integrate.

  • Endurance Building: Introduction of low-impact cycling and swimming between months 2 and 4 to build stamina.

  • Agility Training: Sport-specific agility training and "Return to Play" testing typically starting around the 6-month mark.

  • Functional Bracing: Use of a functional knee brace during the early stages of returning to high-impact activities.

  • High Success Rate: Boasts a 90% success rate for returning patients to their pre-injury levels of physical activity.

  • Anatomic Precision: Replicates the original ligament's rotational stability to provide a more "natural" feeling knee.

  • Reduced Re-tear Risk: Significantly lowers re-tear rates when combined with modern reinforcement or internal bracing.

  • Minimally Invasive: Advanced arthroscopic methods lead to less surgical trauma and smaller scars.

  • Joint Longevity: Provides a durable solution that helps protect the knee from early-onset osteoarthritis.

The cost of ACL Reconstruction Surgery in India is generally affordable compared with many other countries, making India a popular destination for international patients seeking quality medical care. The treatment cost depends on factors such as the hospital, doctor’s experience, treatment approach, medical condition, hospital stay, diagnostic tests, medicines, and any additional procedures required. For international patients, the starting cost of ACL Reconstruction Surgery in India is approximately $1000 USD, although the final price may vary based on individual treatment requirements. Patients are advised to obtain a personalized treatment estimate after medical evaluation.

PCL Reconstruction
PCL Reconstruction

Posterior Cruciate Ligament (PCL) Reconstruction is a surgical procedure to replace a torn PCL—the strongest ligament in the knee—with a graft. The PCL is the primary stabilizer that prevents the shinbone (tibia) from sliding too far backward. This surgery is essential for restoring joint stability, especially following high-impact injuries such as dashboard accidents or significant sports falls.

  • Grade III Tears: A complete tear of the ligament that results in significant knee instability.

  • Multi-Ligament Injuries: Cases where the PCL is torn alongside other structures like the ACL, MCL, or meniscus.

  • Persistent Instability: Feeling the knee "give way" during daily activities or sport, despite undergoing physical therapy.

  • Chronic Pain and Swelling: Persistent joint issues related to the tibia sagging backward (posterior sag).

  • High-Demand Lifestyle: For athletes or individuals in physically demanding jobs who require maximum joint stability.

  • Arthroscopic Reconstruction: A minimally invasive approach using a camera and small incisions to replace the ligament.

  • Single-Bundle Technique: Replacing the PCL with a single graft strand, focusing on the largest part of the original ligament.

  • Double-Bundle Technique: Using two separate graft strands to more closely mimic the natural, complex anatomy of the PCL.

  • Autograft Replacement: Utilizing the patient's own tissue, typically from the hamstring or quadriceps tendon.

  • Allograft Replacement: Utilizing donor tissue (cadaver), often preferred in PCL surgery to achieve a thicker, stronger graft.

  • Graft Preparation: The selected autograft or allograft is prepared and sized to match the patient's original ligament dimensions.

  • Portal Creation: Small arthroscopic incisions are made around the knee to allow for the camera and surgical instruments.

  • Tunnel Drilling: Precise tunnels are drilled through the femur (thigh bone) and tibia (shin bone) at the exact attachment points of the PCL.

  • Graft Passage: The new ligament graft is pulled through the bone tunnels and positioned across the knee joint.

  • Fixation: The graft is secured tightly under tension using interference screws, metal buttons, or specialized surgical staples.

  • Stability Check: The surgeon performs stability tests to ensure the tibia no longer slides backward before closing the incisions.

  • Diagnostic confirmation using the "Posterior Drawer Test" and MRI to assess the extent of the damage.

  • A "pre-habilitation" program lasting 3–4 weeks to strengthen the quadriceps muscles.

  • Fasting (NPO) and preoperative medical clearance for general anesthesia.

  • Coordination of a femoral nerve block to provide localized pain relief for the first 12–24 hours post-surgery.

  • MRI Scan: The gold standard for visualizing the PCL and checking for associated injuries to cartilage or other ligaments.

  • Posterior Drawer Test: A physical exam where the surgeon pushes the tibia backward to measure the degree of joint laxity.

  • Stress X-rays: Occasionally used to measure the exact amount of "posterior shift" in millimeters compared to the healthy knee.

  • Blood Panels: Routine testing to ensure the patient is fit for surgery and has no underlying signs of infection.

  • Recovery is often slower and more restrictive than ACL surgery, with most patients being outpatients or staying one night.

  • A specialized PCL Jack Brace is mandatory for 6 to 12 weeks to keep the tibia pushed forward while the graft heals.

  • Patients are typically non-weight-bearing on crutches for the first 4 to 6 weeks.

  • Bending the knee is usually limited to 90 degrees for the first month to avoid putting stress on the new graft.

  • Full return to competitive sports typically requires 9 to 12 months of intensive, quadriceps-focused rehabilitation.

  • Restores essential stability to the knee, preventing the "sagging" sensation and joint shifting.

  • Reduces the long-term risk of developing premature osteoarthritis caused by joint misalignment.

  • Allows approximately 80% of patients to return to their previous levels of daily activity and non-contact sports.

  • Effectively protects other structures in the knee, such as the meniscus and cartilage, from secondary damage.

Meniscus Repair
Meniscus Repair

Meniscus Repair is a minimally invasive surgical procedure used to stitch together a torn meniscus—the crescent-shaped cartilage that acts as a shock absorber in the knee. Unlike a meniscectomy, which trims the tear away, a repair aims to preserve the natural tissue to prevent long-term joint wear and premature arthritis.

  • Presence of a "red zone" tear located in the outer 25% of the meniscus, where blood supply is rich enough for healing.

  • Mechanical symptoms like knee locking, catching, or a painful clicking sensation.

  • Younger age or an active lifestyle where preserving the joint's natural shock absorbers is critical.

  • Tears occurring alongside an ACL injury, as repairing both simultaneously often improves healing outcomes.

  • Persistent joint line tenderness that has not improved with rest or physical therapy.

  • All-Inside Repair: Performed entirely within the knee joint using tiny anchors and sutures, typically for tears in the back of the meniscus.

  • Inside-Out Repair: The gold standard for large tears, involving flexible needles that pass sutures from the inside of the knee to be tied on the outside.

  • Outside-In Repair: Sutures are passed from the outside skin through the meniscus to fix tears located in the front (anterior horn).

  • Meniscal Root Repair: Re-anchoring the meniscus to the shinbone using small bone tunnels when it has detached from its primary attachment point.

  • Fibrin Clot or Stem Cell Augmentation: Specialized biological techniques sometimes used to enhance the healing environment of the repair.

  • Diagnostic Mapping: The surgeon uses an arthroscope to grade the severity and location of the tear.

  • Tissue Debridement: The frayed edges of the tear are "sanded" or smoothed to stimulate fresh blood flow to the area.

  • Suture Placement: Using specialized needles or anchors, the surgeon precisely stitches the torn edges of the cartilage back together.

  • Knot Security: The sutures are tied securely to ensure the meniscus remains stable under the natural pressure of the joint.

  • Final Inspection: The surgeon checks the tension of the repair throughout a range of motion before draining the saline and closing the portals.

  • Fasting (NPO) for at least 12 hours prior to the surgery.

  • Smoking cessation at least 6 weeks before the procedure to ensure adequate blood oxygenation for tissue healing.

  • Confirmation of the tear's grade and location via a specialized knee MRI.

  • Pre-operative coordination for crutches and a hinged knee brace to be used immediately following the surgery.

  • Knee MRI: The primary diagnostic tool used to determine if a tear is in the "red zone" (repairable) or "white zone" (non-repairable).

  • McMurray Test: A physical exam maneuver where the surgeon rotates the knee to identify the specific location of the tear.

  • Joint Line Palpation: Checking for pinpoint tenderness along the space where the femur and tibia meet.

  • Standard Blood Panels: To confirm the patient is a healthy candidate for general or regional anesthesia.

  • Recovery is slower than a simple trimming because the tissue must physically grow back together.

  • Patients are typically non-weight-bearing on crutches for 4 to 6 weeks to protect the delicate stitches.

  • A hinged knee brace, often locked in a straight position, is worn for approximately 6 weeks.

  • Bending the knee is usually restricted to 90 degrees for the first month to avoid putting shear force on the repair.

  • Full return to high-impact sports like basketball or soccer generally takes 6 to 9 months of rehabilitation.

  • Preserves the knee's natural shock-absorbing capacity, significantly reducing the risk of early-onset arthritis.

  • Maintains the long-term structural stability of the knee joint.

  • Offers a high success rate (85–90%), particularly when the repair is performed alongside an ACL reconstruction.

  • Provides a superior long-term outcome for younger patients compared to removing the damaged cartilage.

Shoulder Arthroscopy

Shoulder Arthroscopy is a minimally invasive surgical procedure used to diagnose and treat various joint problems, such as rotator cuff tears and labral injuries. Using a tiny camera called an arthroscope, surgeons can see inside the joint and perform high-precision repairs through small, buttonhole-sized incisions.

  • Persistent shoulder pain that has not improved with physical therapy, rest, or injections.

  • Loss of range of motion or weakness, often associated with a torn rotator cuff.

  • Recurrent shoulder dislocations or a feeling of "looseness" in the joint (instability).

  • Mechanical symptoms such as painful catching, clicking, or "locking" of the shoulder.

  • Presence of bone spurs that cause "impingement," where tendons are pinched during overhead movement.

  • Rotator Cuff Repair: Reattaching torn tendons to the humerus (arm bone) using specialized suture anchors.

  • Labral Repair (Bankart or SLAP Repair): Stitching the cartilage ring (labrum) back to the socket to restore stability.

  • Subacromial Decompression: Shaving down bone spurs and inflamed tissue to create more space for the tendons to move.

  • Biceps Tenodesis: Relocating a damaged biceps tendon to a new attachment point to relieve pain.

  • Capsular Release: Surgically stretching or cutting tight tissue to treat severe "frozen shoulder."

  • Fluid Insufflation: The surgeon injects sterile saline into the shoulder to inflate the joint capsule, providing a clear workspace and view.

  • Portal Placement: Two to three small incisions (0.5–1 cm) are made around the shoulder to serve as entry points for the camera and tools.

  • Joint Inspection: The arthroscope is inserted to project high-definition images of the tendons, ligaments, and cartilage onto a monitor.

  • Specialized Repair: Miniature tools, such as shavers or suture passers, are used to trim damaged tissue or anchor tendons back to the bone.

  • Portal Closure: Once the repair is complete, the saline is drained and the tiny incisions are closed with a single stitch or sterile tape.

  • Diagnostic confirmation through MRI or X-rays to map the internal damage and plan the surgical approach.

  • Fasting (NPO) for 6–12 hours prior to the procedure to ensure safety during anesthesia.

  • Coordination of a regional nerve block, which numbs the entire arm for up to 24 hours to assist with immediate pain control.

  • Pausing certain medications, such as blood thinners or anti-inflammatories, as directed by the surgical team.

  • Shoulder MRI: The gold standard for visualizing soft tissue injuries like rotator cuff tears and labral damage.

  • MRI Arthrogram: An MRI where dye is injected into the joint to highlight small tears that might be missed on a standard scan.

  • X-rays: Used to identify bone spurs, arthritis, or fractures that may contribute to shoulder pain.

  • Physical Strength Testing: Assessing the deltoid and rotator cuff muscles to determine the functional impact of the injury.

  • This is typically an outpatient procedure, allowing most patients to return home the same day.

  • A shoulder sling is mandatory for 1 to 6 weeks, depending on the complexity of the repair (e.g., longer for a rotator cuff repair).

  • Pendulum exercises, involving gently swinging the arm, are often started within days to prevent "frozen shoulder" stiffness.

  • Driving is generally restricted for at least 1 week, or until the patient has stopped taking narcotic pain medications.

  • Heavy lifting and overhead sports are avoided for 3 to 6 months while the repaired tendons fully bond to the bone.

  • Significantly less post-operative pain and swelling compared to traditional "open" shoulder surgery.

  • Smaller incisions result in minimal scarring and a lower risk of wound-related complications.

  • High success rate for restoring shoulder stability and relieving chronic pain.

  • Allows for a more precise diagnosis by giving the surgeon a dynamic, 360-degree view of the internal joint structures.

Rotator Cuff Repair
Rotator Cuff Repair

Rotator Cuff Repair is a surgical procedure to reattach torn tendons of the rotator cuff to the head of the humerus (upper arm bone). These tendons are essential for shoulder stability and lifting power; when they are partially or completely detached due to injury or wear, surgery is often required to restore function.

  • Persistent shoulder pain that disrupts sleep or daily activities and has not improved with 6–12 weeks of physical therapy.

  • Significant weakness or the inability to lift the arm to perform overhead tasks.

  • Acute injuries, such as a sudden fall or heavy lifting incident, resulting in an immediate loss of shoulder function.

  • Large or "massive" tears where the tendon has completely pulled away from the bone.

  • Failure of conservative treatments like cortisone injections or anti-inflammatory medications.

  • Arthroscopic Repair: The most common minimally invasive approach, using tiny incisions, a camera, and specialized instruments.

  • Open Repair: A traditional technique involving a larger incision, typically reserved for very large or complex tears.

  • Mini-Open Repair: A hybrid approach using arthroscopy to inspect the joint and a small incision to perform the actual tendon repair.

  • Single-Row Fixation: Attaching the tendon to the bone using one row of suture anchors.

  • Double-Row Fixation: Using two rows of anchors to create a broader "footprint" of contact between the tendon and bone for potentially stronger healing.

  • Subacromial Decompression: The surgeon shaves down bone spurs and removes inflamed tissue to prevent the tendon from being "pinched" during movement.

  • Bone Bed Preparation: The area of the humerus where the tendon will be reattached is scuffed to create a "bleeding bone" surface, which provides the biological nutrients necessary for healing.

  • Anchor Placement: Small screw-like devices (suture anchors) are inserted into the bone footprint.

  • Tendon Suturing: High-strength threads from the anchors are woven through the torn tendon.

  • Tensioning and Tying: The sutures are pulled tight and tied down, firmly pressing the tendon against the prepared bone surface to allow for biological reattachment.

  • Diagnostic confirmation via MRI to determine the exact size, shape, and retraction of the tear.

  • Smoking cessation for at least 4 weeks prior to surgery, as nicotine significantly impairs the tendon's ability to knit back to the bone.

  • Fasting (NPO) for 8–12 hours before the procedure.

  • Coordination of an Interscalene Nerve Block, which numbs the shoulder and arm for up to 24 hours to manage immediate post-operative pain.

  • Shoulder MRI: The essential imaging tool for grading the tear as small, medium, or massive and assessing muscle quality.

  • X-rays: Used to identify bone spurs or signs of "cuff tear arthropathy" (arthritis caused by long-standing tears).

  • Physical Strength Testing: To evaluate which specific tendons (supraspinatus, infraspinatus, or subscapularis) are affected.

  • Blood Panels: Routine screens to ensure the patient is fit for general anesthesia and outpatient surgery.

  • This is almost always an outpatient procedure, allowing patients to return home the same day.

  • A shoulder sling with an abduction pillow must be worn 24/7 (including during sleep) for 4 to 6 weeks.

  • For the first 6 weeks, only "passive" motion is allowed, where a therapist or a machine moves the arm to prevent stiffness without stressing the repair.

  • Active lifting of the arm typically begins at 6 to 8 weeks, with formal resistance training starting later.

  • Full recovery for heavy lifting, overhead sports, or manual labor generally takes 6 to 9 months.

  • Provides high success rates (85–95%) for permanent pain relief and improved quality of sleep.

  • Restores the strength and lifting power required for daily overhead activities.

  • Prevents the progression of the tear, which could otherwise lead to irreversible muscle atrophy or shoulder arthritis.

  • Improves overall joint stability, reducing the risk of secondary injuries to the shoulder.

Bankart Repair (Shoulder Instability)

Bankart Repair is a surgical procedure used to treat recurrent shoulder dislocation by reattaching the torn labrum—the cuff of cartilage that lines the shoulder socket—to the bone. This injury typically occurs during an anterior shoulder dislocation, where the humerus (ball) pops out of the glenoid (socket) and rips the labrum away from the front-bottom of the joint.

  • Chronic Instability: The shoulder feels "loose" or has dislocated multiple times, hindering daily activities.

  • Recurrent Subluxation: Frequent episodes where the joint partially slips out of place and snaps back.

  • Younger, Active Patients: Individuals who participate in sports or physically demanding jobs that require a stable shoulder.

  • Failure of Physical Therapy: Persistent instability despite 3–6 months of targeted strengthening of the rotator cuff.

  • Confirmed Bankart Lesion: A specific tear at the bottom-front of the socket identified via diagnostic imaging.

  • Arthroscopic Bankart Repair: The most common minimally invasive approach, using tiny incisions, a camera, and suture anchors.

  • Open Bankart Repair: A traditional surgical approach involving a larger incision, sometimes preferred for patients with very high-impact needs or specific bone defects.

  • Arthroscopic Capsular Shift: A technique performed alongside the repair to "tuck" or tighten a loose joint capsule.

  • Thermal Capsulorrhaphy: A historical technique using heat to shrink the capsule, though largely replaced by mechanical tightening (suturing).

  • Joint Debridement: The surgeon cleans the edge of the glenoid (socket) to create a "bleeding bone" surface, which is essential for the cartilage to knit back to the bone.

  • Anchor Placement: Small, screw-like suture anchors (made of biocomposite or fiber) are drilled into the rim of the bone socket.

  • Labral Reattachment: High-strength sutures from the anchors are looped through the torn labrum.

  • Cinching the Joint: The threads are tied down, pulling the labrum firmly against the bone to restore the deep "cup" shape of the socket.

  • Capsular Tightening: The surgeon may "pleat" the joint capsule (capsulorrhaphy) to reduce overall joint laxity and further stabilize the shoulder.

  • Diagnostic confirmation via an MRI Arthrogram, where dye is injected into the joint to highlight the Bankart lesion.

  • Assessment for bone loss; if the socket is significantly worn down, a different procedure (such as a Latarjet) may be recommended.

  • Fasting (NPO) for 8–12 hours prior to the procedure.

  • Coordination of an Interscalene Nerve Block to provide localized numbness and pain relief for the first day after surgery.

  • MRI Arthrogram: The primary imaging tool used to visualize the specific detachment of the labrum from the glenoid.

  • CT Scan: Used if the surgeon suspects "Bony Bankart" (where a piece of bone broke off with the labrum) or other socket defects.

  • Apprehension and Relocation Tests: Physical exams where the surgeon moves the arm to reproduce the sensation of instability.

  • Blood Panels: Routine testing to ensure the patient is fit for general anesthesia and outpatient surgery.

  • This is almost always an outpatient procedure, allowing patients to return home the same day.

  • A shoulder sling must be worn 24/7 for 4 to 6 weeks to protect the repair while the tissue knits to the bone.

  • Initial physical therapy (weeks 1–6) focuses on "passive" motion only; "external rotation" (turning the hand outward) is strictly forbidden to avoid tearing the new stitches.

  • Active strengthening of the rotator cuff and shoulder blade muscles begins around week 6 to 8.

  • Return to non-contact sports typically occurs at 3 to 4 months, while contact sports (football, rugby) require 6 to 9 months of rehabilitation.

  • Excellent success rates for preventing future dislocations and restoring confidence in the joint.

  • Restores the natural anatomy of the shoulder socket, providing a more stable "cradle" for the humerus.

  • Minimally invasive techniques lead to smaller scars and less post-operative pain than open surgery.

  • Significantly reduces the long-term risk of developing shoulder arthritis caused by repeated dislocations.

Ankle Arthroscopy
Ankle Arthroscopy

Ankle Arthroscopy (keyhole surgery) is a minimally invasive procedure used to diagnose and treat issues inside the ankle joint using a tiny camera and specialized tools. It is widely preferred over open surgery because it allows for high-precision joint repair with faster recovery times and a lower risk of wound-related complications.

  • Persistent Impingement: Pain or limited motion caused by inflamed soft tissue or bone spurs (osteophytes) that have not responded to physical therapy.

  • Mechanical Symptoms: Feeling the joint "lock," "catch," or "click," often due to free-floating fragments of bone or cartilage.

  • Cartilage Damage: Treatment of Osteochondral Lesions of the Talus (OLT) where the smooth surface of the joint has been chipped or worn down.

  • Chronic Synovitis: Recurring inflammation of the joint lining caused by trauma, overuse, or rheumatoid arthritis.

  • Joint Instability: Evaluation and repair of torn ligaments (such as the ATFL) when the ankle feels "loose" or gives way frequently.

  • Debridement: Trimming away inflamed tissue or smoothing out frayed cartilage to reduce pain and friction.

  • Microfracture: Making tiny holes in the bone to stimulate a healing response and the growth of new fibrocartilage.

  • Synovectomy: Removing the diseased or inflamed lining of the joint.

  • Ligament Stabilization: Using arthroscopic techniques to tighten or reattach torn ligaments to restore joint stability.

  • Bone Spur Removal: Shaving down bony growths that pinch the joint during movement (anterior or posterior impingement).

  • Portal Creation: The surgeon makes 2–3 tiny incisions (less than 1 cm each), typically at the front of the ankle (anteromedial and anterolateral portals).

  • Joint Distention: The ankle is expanded with sterile saline or a mechanical distraction device to create a clear workspace for the camera.

  • Visualization: A miniature high-definition camera (arthroscope) is inserted to project live images of the joint internal structures onto a monitor.

  • Surgical Intervention: Miniature shavers, burrs, and graspers are inserted through the other portals to repair or remove damaged tissue.

  • Closure: Once the repair is complete, the fluid is drained and the tiny portals are closed with a single stitch or sterile tape.

  • Diagnostic confirmation through physical exams and imaging to identify the specific source of joint pain.

  • Fasting (NPO) as directed by the surgical team prior to the procedure.

  • Evaluation for regional anesthesia, which numbs the leg and provides several hours of pain relief after the surgery.

  • Arrangement for a post-operative walking boot or splint, depending on the anticipated type of repair.

  • Ankle MRI: The primary tool for assessing soft tissue damage, ligament tears, and cartilage lesions.

  • X-rays: Used to identify bone spurs or loose bone fragments that may be contributing to mechanical joint issues.

  • CT Scan: Occasionally used to provide a detailed view of complex bone anatomy or "bony" impingement.

  • Blood Panels: Routine testing to ensure the patient is fit for general anesthesia and outpatient surgery.

  • Almost always an outpatient (daycare) procedure, with patients returning home the same day.

  • Strict elevation of the ankle above the heart for the first 2–3 days is critical to minimize swelling and pain.

  • Weight-bearing status varies: simple trimming allows immediate walking, while cartilage repairs may require crutches for 4–8 weeks.

  • Physical therapy typically begins around 2 weeks post-op to regain range of motion and ankle strength.

  • Return to desk work is often possible in 1–2 weeks, while high-impact sports usually take 3 to 6 months.

  • Minimally invasive nature results in significantly less post-operative pain and swelling than traditional open incisions.

  • Tiny incisions lead to a lower risk of infection and faster overall healing of the surgical site.

  • Provides a dynamic and comprehensive view of the joint, allowing the surgeon to address multiple issues in one session.

  • High success rates for resolving mechanical symptoms like locking or catching in the ankle.

Open Reduction Internal Fixation (ORIF)

ORIF (Open Reduction Internal Fixation) is a two-part surgical procedure used to fix severe bone fractures that cannot be treated with a simple cast or splint. It involves manually "reducing" (realigning) the bone through an incision and "fixing" it in place using permanent hardware like plates, screws, or rods to ensure proper healing.

  • Displaced Fractures: The bone fragments have moved out of their normal alignment and cannot be reset manually.

  • Comminuted Fractures: The bone has shattered into multiple pieces that require mechanical stabilization.

  • Intra-articular Fractures: The break extends into a joint surface (such as the ankle, wrist, or hip), where perfect alignment is critical to prevent future arthritis.

  • Open Fractures: Cases where the bone has broken through the skin, requiring surgical cleaning and immediate stabilization.

  • Failed Conservative Treatment: When a fracture fails to heal correctly or shifts while in a traditional cast.

  • Plates and Screws: A metal plate is contoured to the bone and secured with screws to bridge the fracture site.

  • Intramedullary (IM) Nailing: Inserting a long metal rod into the hollow center of long bones, such as the femur or tibia, for internal support.

  • K-Wires and Pins: Utilizing thin wires to hold smaller bone fragments in place, often used in the hand, foot, or wrist.

  • Cerclage Wiring: Wrapping high-strength wire around bone fragments to hold them together, frequently used in complex hip or kneecap fractures.

  • Lag Screws: Using individual screws to compress two bone fragments together for maximum stability.

  • Surgical Exposure: An incision is made over the fracture site to allow the surgeon to directly visualize the broken bone.

  • Open Reduction: Using specialized clamps and levers, the surgeon manually pulls and maneuvers the bone fragments back into their anatomically correct position.

  • Hardware Application: Once aligned, the appropriate fixation (plate, rod, or screws) is applied to "lock" the bones in place.

  • Fluoroscopy (X-ray) Verification: Real-time X-rays are taken during the surgery to ensure the hardware is positioned perfectly and the bone alignment is correct.

  • Wound Closure: The soft tissues and skin are stitched back together, sometimes with a temporary drain to prevent fluid buildup.

  • Mandatory high-resolution X-rays; CT scans are often required for complex joint fractures to map fragments in 3D.

  • Potential delay of 5–7 days if the skin is severely swollen or blistered, which reduces the risk of wound complications.

  • Fasting (NPO) and preoperative medical clearance for general anesthesia or regional blocks.

  • Discussion of long-term hardware expectations, as these implants are typically intended to remain in the body permanently.

  • High-Resolution X-rays: The primary tool for identifying the fracture pattern and planning the surgical approach.

  • CT Scan: Provides a 3D view of the bone, which is essential for fractures involving joint surfaces or multiple fragments.

  • Vascular Assessment: Checking pulses and blood flow distal to the fracture to ensure no major arteries are compromised.

  • Blood Panels: Routine screens to check for anemia (blood loss) and ensure the patient is fit for surgery.

  • Hospital stays vary by injury: wrist repairs may be same-day, while hip or femur fractures often require 3–5 days of monitoring.

  • Strict weight-bearing restrictions are common; patients may be Non-Weight-Bearing (NWB) for 6 to 12 weeks to protect the hardware.

  • Physical therapy usually begins within days to prevent joint stiffness, though heavy strengthening is delayed until bone healing is visible on X-ray.

  • Hardware is only removed in a secondary surgery if it causes localized pain, irritation, or becomes infected.

  • Total biological healing of the bone typically takes several months, during which time smoking should be avoided to prevent "non-union."

  • Provides immediate internal stability, often allowing for earlier joint movement compared to a full-leg or arm cast.

  • Ensures the highest level of anatomical accuracy, which is vital for maintaining joint function and preventing long-term disability.

  • Significantly reduces the risk of "malunion," where a bone heals in a crooked or shortened position.

  • Allows for the successful repair of complex fractures that would otherwise result in permanent loss of limb function.

Interlocking Nailing

Interlocking Nailing, also known as Intramedullary (IM) Nailing, is a surgical procedure used to fix fractures of "long bones"—specifically the femur, tibia, or humerus. It involves inserting a specially designed metal rod into the hollow central cavity (medullary canal) of the bone to provide internal stability and load-sharing during the healing process.

  • Shaft Fractures: Breaks located in the middle section of the thigh bone (femur), shin bone (tibia), or upper arm bone (humerus).

  • Comminuted Shaft Fractures: Severe breaks where the bone has splintered into several pieces along the canal.

  • Pathological Fractures: Breaks caused by weakened bone (such as from tumors or cysts) that require internal reinforcement.

  • Non-unions: Cases where a previous fracture failed to heal and requires a stable rod to stimulate new bone growth.

  • Gold Standard Treatment: Most orthopedic surgeons consider this the primary treatment for femur and tibia shaft fractures because it allows for early mobility.

  • Antegrade Nailing: The nail is inserted from the top of the bone (e.g., entering the femur at the hip).

  • Retrograde Nailing: The nail is inserted from the bottom of the bone (e.g., entering the femur through the knee joint).

  • Reamed Nailing: Slightly widening the internal bone canal with a power tool to allow for a thicker, stronger nail.

  • Unreamed Nailing: Inserting a thinner nail without widening the canal, often used to preserve blood flow in specific types of open fractures.

  • Static Interlocking: Locking screws are placed at both ends of the nail to prevent any movement or rotation.

  • Traction and Alignment: The patient is placed on a specialized "traction table" to pull the bone fragments back into alignment before the surgery begins.

  • Entry Point Creation: A small incision is made at the end of the bone, and a guide wire is passed through the medullary canal across the fracture site.

  • Canal Preparation: If reaming is required, flexible rods widen the hollow center of the bone to accommodate the selected nail diameter.

  • Nail Insertion: The titanium or stainless steel rod is hammered down the center of the bone, guided by real-time X-ray (C-arm) imaging.

  • Interlocking Screw Placement: The surgeon inserts crosswise screws through the bone and the nail at both the top and bottom to "lock" the assembly and prevent bone shortening or twisting.

  • Closure: The small incisions at the entry and screw sites are closed with sutures or staples.

  • Precise X-rays of the entire bone to measure the length and diameter of the canal for custom nail sizing.

  • Fasting (NPO) and preoperative medical clearance for general or spinal anesthesia.

  • Discussion of the entry site location (hip vs. knee), as this can affect post-operative joint sensations.

  • Screening for systemic health markers to ensure the patient can tolerate the "reaming" process.

  • Full-Length Bone X-rays: To assess the fracture pattern and measure the required length of the intramedullary nail.

  • Template Mapping: Using X-rays of the uninjured limb to determine the "normal" anatomy and diameter of the bone canal.

  • Blood Panels: Routine screens to check for blood loss and ensure stable inflammatory markers.

  • Cardiac and Pulmonary Evaluation: Essential for older patients or those with trauma to ensure they can tolerate the risk of fat embolization during the procedure.

  • Hospital stays typically range from 2 to 4 days, depending on the patient's overall mobility.

  • Early weight-bearing is a primary benefit; patients with femur or tibia nails are often encouraged to walk with assistance within 24–48 hours.

  • Physical therapy focuses on the joints near the entry site (e.g., hip and knee) to prevent stiffness.

  • Biological healing of the bone is usually visible on X-rays by 6 to 12 weeks.

  • The nail is intended to stay in permanently and is only removed if it causes persistent irritation or becomes infected.

  • Acts as a "load-sharing" device, allowing the bone to experience natural stresses that promote faster healing.

  • Smaller incisions compared to plate-and-screw surgery lead to less soft tissue damage and a lower risk of infection.

  • Significantly faster return to walking and weight-bearing activities compared to other fracture fixation methods.

  • Provides superior rotational stability for long bone fractures, ensuring the limb heals in the correct anatomical position.

External Fixator Application

External Fixator (ExFix) Application is a surgical treatment used to stabilize severe bone fractures by using a metal frame located outside the body. The frame is connected to the bone via high-strength pins or wires that pass through the skin, providing stable alignment while allowing doctors to treat surrounding soft tissue injuries.

  • Open Fractures: Cases where the bone has broken through the skin, requiring the wound to remain accessible for cleaning and dressing.

  • Polytrauma (Damage Control): Used as a rapid, temporary stabilizer for patients with multiple life-threatening injuries until they are stable enough for permanent surgery.

  • Comminuted Fractures: Severe breaks where the bone is shattered into many small pieces that are difficult to fix with internal plates.

  • Infected Fractures: When an internal implant cannot be used because of an active infection in the bone or tissue.

  • Bone Lengthening or Deformity Correction: Specialized circular frames used to slowly pull bone apart or straighten a limb over several months.

  • Uniplanar Fixation: A simple arrangement where rods are placed along one side of the limb, commonly used for rapid stabilization of the femur or tibia.

  • Bilateral Fixation: Rods are placed on both sides of the limb for increased stability in high-stress areas.

  • Circular Fixation (Ilizarov): Rings that completely surround the limb, connected by wires and rods; these are the gold standard for complex limb reconstructions.

  • Multiplanar Fixation: Using multiple rods in different directions to stabilize complex fractures near joints like the wrist or ankle.

  • Hybrid Fixation: A combination of a circular frame near a joint and a uniplanar rod along the bone shaft.

  • Site Selection: The surgeon identifies "safe zones" in the limb where pins can be inserted without hitting major nerves or blood vessels.

  • Pin Insertion: Small incisions are made, and threaded steel or titanium pins (Schanz screws) are drilled through the skin and into the healthy bone above and below the fracture.

  • Fracture Reduction: Under real-time X-ray (C-arm) guidance, the surgeon manually pulls and aligns the bone fragments into the correct position.

  • Frame Assembly: External rods and clamps are attached to the protruding pins, creating a rigid bridge across the break.

  • Tightening and Locking: Once alignment is confirmed, the clamps are tightened to "lock" the bone in place, and the surgical wounds are dressed.

  • Standard X-rays to map the fracture; the surgeon must also perform a detailed neurovascular exam to ensure pins avoid critical structures.

  • Thorough "debridement" (surgical cleaning) of any open wounds to remove dirt, debris, and dead tissue.

  • Fasting (NPO) and medical clearance for general anesthesia or a regional nerve block.

  • Discussion of the "temporary vs. definitive" plan—determining if the frame will stay on for weeks or months.

  • High-Resolution X-rays: The primary tool for assessing the fracture pattern and selecting the correct frame size.

  • CT Scan: Often used for complex fractures involving joints to understand the three-dimensional layout of the bone fragments.

  • Doppler Ultrasound: Occasionally used to verify the location of major arteries if the injury involves significant soft tissue swelling.

  • Blood Panels: Routine screens to check for inflammatory markers and ensure the patient is fit for anesthesia.

  • Hospital stays vary from 2 days to a week, depending on the severity of associated soft tissue wounds.

  • Daily pin-site cleaning with saline or Chlorhexidine is mandatory to prevent "crust" buildup and infection.

  • Most patients remain Non-Weight-Bearing or "Touch-Down" only, as the frame is a bridge and does not replace the bone's strength.

  • Modified clothing, such as tear-away pants or wide-leg shorts, is necessary to fit over the bulky external hardware.

  • Removal is typically performed in a clinic setting using local anesthesia or light sedation; the pins are unscrewed once X-rays show the bone is stable.

  • Provides immediate, rigid stabilization with minimal additional trauma to the injured soft tissues.

  • Allows for constant monitoring and specialized care of open wounds or skin grafts during the bone-healing process.

  • Offers a "damage control" solution that saves lives and limbs in complex trauma cases.

  • Highly adjustable; the surgeon can fine-tune the bone alignment even after the surgery is finished by adjusting the external clamps.

Pelvic Fracture Fixation

Pelvic Fracture Fixation is a critical surgical procedure used to stabilize the pelvic ring, typically following high-impact trauma such as motor vehicle accidents or significant falls. Because the pelvis protects major internal organs and a complex network of blood vessels, stabilizing these fractures is often a life-saving measure to control internal bleeding and restore structural integrity.

  • Unstable Pelvic Ring: Injuries where the structural "circle" of the pelvis is broken in two or more places, making it unable to support the weight of the body.

  • Open Book Fractures: A severe injury where the front of the pelvis (pubic symphysis) is pulled apart, leading to a significant risk of internal hemorrhage.

  • Vertical Shear Fractures: When one side of the pelvis is pushed upward, often after a fall from a height, requiring mechanical realignment.

  • Persistent Pain and Malalignment: Fractures that have not healed correctly (malunion) or cause chronic instability and gait issues.

  • Emergency Hemorrhage Control: Use of an external frame as a rapid intervention to decrease pelvic volume and stop life-threatening bleeding.

  • External Fixation: A rapid "damage control" method using metal pins drilled into the hip bones and connected to an external carbon fiber frame.

  • Anterior ORIF: Placing surgical plates and screws across the front of the pelvis, such as the pubic symphysis.

  • Posterior ORIF: Internal stabilization of the back of the pelvic ring using heavy-duty plates for sacroiliac (SI) joint injuries.

  • Percutaneous Cannulated Screws: A minimally invasive technique where long screws are inserted through tiny "stab" incisions into the sacrum under real-time X-ray guidance.

  • Pelvic C-Clamp: An emergency external device used specifically to compress the back of the pelvis in cases of severe posterior instability and bleeding.

  • Resuscitation and Alignment: In emergencies, the patient is stabilized with a pelvic binder or sheet to control bleeding before entering the operating room.

  • Reduction: For internal surgery, the surgeon makes an incision to manually pull and maneuver the pelvic bones back into their anatomically correct "ring" shape.

  • Plate and Screw Fixation: High-strength titanium or stainless steel plates are contoured to the curve of the pelvic bone and secured with multiple screws.

  • Iliosacral Screw Insertion: For posterior injuries, long screws are driven from the side of the hip bone directly into the sacrum to lock the back of the pelvis.

  • Fluoroscopic Verification: Throughout the procedure, the surgeon uses a C-arm (mobile X-ray) to ensure hardware is not impinging on nerves or blood vessels.

  • Wound Closure: Given the complexity of pelvic anatomy, deep sutures and sometimes surgical drains are used to prevent fluid or blood buildup.

  • Emergency stabilization using a pelvic binder to minimize internal volume and promote blood clotting.

  • Diagnostic imaging including AP, inlet, and outlet X-rays, alongside CT scans with 3D reconstruction to map the fracture.

  • Aggressive resuscitation with IV fluids and blood transfusions to achieve hemodynamic stability.

  • Detailed neurological and urological exams to document any nerve or bladder damage existing prior to surgery.

  • CT Scan with 3D Reconstruction: The gold standard for understanding complex pelvic displacement and planning hardware placement.

  • Retrograde Cystourethrogram: A specialized imaging test to check for injuries to the bladder or urethra, which are common with pelvic breaks.

  • Angiography: Occasionally performed if there is persistent bleeding to identify and "plug" (embolize) damaged arteries.

  • Blood Panels: Frequent monitoring of hemoglobin and hematocrit levels due to the high risk of blood loss associated with pelvic trauma.

  • Hospital stays are often extended, ranging from several days to several weeks depending on other trauma.

  • This is the most restrictive recovery phase; patients are typically Non-Weight-Bearing or "toe-touch" only for 6 to 12 weeks to protect the hardware.

  • Mandatory use of blood thinners (anticoagulants) for 2–6 weeks is required to prevent life-threatening blood clots (DVT).

  • Many patients require a transition to a specialized rehabilitation facility to regain the ability to sit, stand, and eventually walk.

  • Full biological union of the bone typically occurs within 3 to 4 months, but full strength recovery can take up to a year.

  • Provides immediate mechanical stability to the core of the body, allowing for earlier mobilization and seated upright positions.

  • Dramatically reduces the risk of death from internal hemorrhage by "closing" the pelvic space.

  • Restores the anatomical symmetry of the hips, preventing long-term leg-length discrepancies and chronic back pain.

  • Protects the long-term function of the pelvic organs by providing a stable "house" for the bladder, rectum, and reproductive systems.

Wrist/Ankle Fracture Surgery

Wrist and ankle fractures that require surgery are almost always treated using ORIF. This involves making an incision to manually realign the bones (reduction) and securing them with metal hardware (fixation) to ensure they heal in the correct anatomical position.

  • Displaced Fractures: The bone fragments have moved so far out of place that they cannot be held together by a cast alone.

  • Intra-articular Involvement: The break extends into the joint surface (the wrist or the ankle mortise), where even minor misalignment can cause permanent loss of motion.

  • Unstable Twisting Injuries: Ankle fractures involving multiple "malleoli" (the bony bumps on the sides) or torn ligaments (syndesmosis).

  • Open Fractures: Injuries where the bone has pierced the skin, requiring immediate surgical cleaning and stabilization.

  • Falling on an Outstretched Hand (FOOSH): A common cause of Colles' fractures in the wrist that often require a volar locking plate.

  • Volar Locking Plate: A titanium plate contoured specifically for the palm side of the wrist, providing rigid support for distal radius fractures.

  • Lateral Malleolar Plating: A narrow plate used to bridge and stabilize a fracture of the fibula (outer ankle).

  • Medial Malleolar Screws: Two long, parallel screws typically used to fix the inner ankle bone (tibia).

  • Syndesmotic "Tight-Rope": A high-strength cord used instead of a screw to stabilize the connection between the tibia and fibula while allowing for natural micro-movements.

  • Fragment-Specific Fixation: Using tiny, individual plates or pins for complex breaks involving multiple small bone pieces.

  • Incision and Exposure: The surgeon makes a 3–5 cm incision (on the palm side for the wrist or the sides for the ankle) to access the broken bone.

  • Manual Reduction: Using specialized tools, the surgeon maneuvers the bone fragments back into their anatomically correct position, restoring "radial tilt" in the wrist or the "ankle mortise" hinge.

  • Hardware Application: A metal plate is laid across the break and secured with specialized screws that "lock" into the plate for maximum stability.

  • Fluoroscopic Guidance: Real-time X-rays are used during the surgery to verify that the screws are the correct length and the joint surfaces are perfectly smooth.

  • Wound Closure: The skin is closed with stitches or staples. Because ankle skin is thin, surgeons take extra care to ensure a tension-free closure to prevent wound breakdown.

  • Diagnostic confirmation through high-resolution X-rays and occasionally a CT scan to map complex fragment patterns.

  • Fasting (NPO) for at least 8 hours prior to the surgery.

  • For ankle surgery, a delay of 7–10 days may be necessary if the skin is too swollen or blistered to close safely.

  • Coordination of a regional nerve block (at the collarbone for the wrist or behind the knee for the ankle) to manage pain for the first 24 hours.

  • X-ray Series: AP, lateral, and oblique views to determine the "length" and "tilt" of the fracture.

  • CT Scan: Often used for "pilon" ankle fractures or complex wrist breaks to see exactly how much of the joint surface is involved.

  • Physical Exam: Checking for "tenting" of the skin (where bone pushes against skin) and assessing nerve function in the fingers or toes.

  • Blood Panels: Routine testing to ensure the patient is a healthy candidate for anesthesia.

  • These are typically outpatient procedures, though complex ankle repairs may require an overnight stay for elevation.

  • Wrist Recovery: A heavy splint is worn for 10–14 days. Early finger wiggling is encouraged within 24 hours, but lifting is restricted to "coffee cup" weight for 6–8 weeks.

  • Ankle Recovery: Strict Non-Weight-Bearing (NWB) is required for 6 to 8 weeks. Patients must keep the foot "toes above nose" for the first week to manage extreme swelling.

  • Physical therapy is essential to regain forearm rotation (wrist) or the "hinge" movement (ankle) once the initial splint is removed.

  • In the ankle, about 20–30% of patients choose to have hardware removed a year later if the plates "catch" on boots or feel uncomfortable under the skin.

  • Restores the perfect alignment of the joint surface, which is the most effective way to prevent rapid-onset arthritis.

  • Allows for much earlier movement of the fingers and toes compared to a traditional long-arm or long-leg cast.

  • Provides the internal stability needed to ensure the bone heals at its original length, preventing permanent deformity.

  • Significantly improves the chances of regaining full range of motion and returning to previous activity levels.

Flow Diverter Placement

Flow Diverter Placement is a highly specialized endovascular procedure used to treat complex, large, or wide-necked brain aneurysms. Unlike coiling, which fills the "bulge" itself, a flow diverter is a high-density mesh stent placed in the main artery. It redirects blood flow away from the aneurysm, causing the blood inside the bulge to stagnate, clot, and eventually be absorbed by the body.

  • Giant Aneurysms: Bulges larger than 25mm that are difficult or dangerous to treat with traditional coils.

  • Fusiform Aneurysms: Cases where the entire circumference of the artery is bulging rather than just a single "berry" shape.

  • Wide-Necked Aneurysms: When the opening of the aneurysm is so broad that coils would not remain securely inside.

  • Recurrent Aneurysms: Aneurysms that have failed previous coiling treatments or have started to regrow.

  • Complex Locations: When an aneurysm is located at a segment of the artery where surgical clipping or standard coiling carries a high risk of complication.

  • Single-Device Placement: Deploying a single high-density mesh tube across the neck of the aneurysm to disrupt blood flow.

  • Telescoping Technique: Using two or more flow diverters overlapped to increase the density of the mesh in specific areas or to cover a longer segment of the artery.

  • Surface-Modified Diverters: Newer devices with specialized coatings (like phosphorylcholine) designed to reduce the risk of blood clots and the need for heavy blood thinners.

  • Distal Access Navigation: Using highly flexible microcatheters to reach aneurysms in the smaller, more distant branches of the brain's vascular tree.

  • Vascular Access: A catheter is inserted through the femoral artery (groin) or radial artery (wrist) and navigated up to the brain.

  • Precise Positioning: Under high-definition fluoroscopy (X-ray), the surgeon positions a microcatheter across the segment of the artery where the aneurysm is located.

  • Device Deployment: The flow diverter, a tightly woven tube made of cobalt-chromium or nickel-titanium, is slowly unsheathed and expanded against the artery walls.

  • Wall Apposition: The surgeon meticulously ensures the device is snug (apposed) against the artery wall so that blood cannot leak behind the mesh.

  • Stasis Verification: Contrast dye is injected to confirm that the blood flow into the aneurysm has slowed significantly, a sign that the "diversion" is working.

  • Access Closure: The microcatheter is removed, and the initial puncture site in the groin or wrist is sealed.

[Image showing the "stasis effect" of blood clotting inside an aneurysm after flow diversion]

  • Dual Antiplatelet Therapy (DAPT): Patients must take Aspirin and Clopidogrel (Plavix) for at least 5–7 days prior to prevent clots from forming on the dense mesh.

  • P2Y12 Blood Test: A mandatory test to ensure the body is properly responding to the blood-thinning medication.

  • 3D Rotational Angiography: A detailed mapping of the artery to determine the exact diameter and length needed for the flow diverter.

  • Fasting (NPO): No food or drink for 8–12 hours prior to the procedure, which is performed under general anesthesia.

  • Digital Subtraction Angiography (DSA): The gold standard imaging used to map the precise architecture of the aneurysm and nearby side branches.

  • CT or MRI Scan: To assess the brain for any existing damage or conditions that may influence the surgical plan.

  • Kidney Function Screen: Checking the patient's ability to process the contrast dye used during the imaging phases.

  • Neurological Baseline Exam: A comprehensive assessment of speech, vision, and motor skills to monitor during and after recovery.

  • The Healing Process: Unlike coiling, which works instantly, a flow diverter takes 6 to 12 months to completely cure the aneurysm as the natural artery lining grows over the mesh.

  • Hospital Stay: Usually 24 to 48 hours in a Neuro-ICU for close monitoring of neurological status.

  • Strict Medication Adherence: This is the most critical part of the treatment; patients cannot miss even one dose of blood thinners for the first 6–12 months without risking a major stroke.

  • Activity Restrictions: Most patients can return to normal desk work within 1 week, though heavy lifting is restricted for the first few days while the incision site heals.

  • Long-Term Follow-up: Mandatory Angiography or MRA at 6 and 12 months to verify the aneurysm has shrunk and the artery has healed.

  • Higher Success Rates: Provides a complete "occlusion" (closure) rate of 75–90% at one year for complex aneurysms that were previously untreatable.

  • Artery Remodeling: Promotes the growth of a new, healthy artery lining (endothelium) across the neck of the aneurysm, permanently sealing it.

  • Minimally Invasive: Avoids the risks associated with open brain surgery and large craniotomy incisions.

  • Protects Side Branches: The mesh is designed to allow enough blood to reach small "side-branch" arteries while still blocking flow into the aneurysm.

Arthrocentesis (Joint Aspiration)

Arthrocentesis, commonly known as joint aspiration, is a medical procedure used to collect synovial fluid from a joint capsule for diagnostic or therapeutic purposes. It is an essential tool in orthopedics and rheumatology for evaluating joint health. The use of ultrasound-guided techniques has become a clinical benchmark for increasing accuracy, particularly in smaller or medium-sized joints like the wrist, ankle, or elbow, significantly improving success rates compared to traditional landmark-guided methods.

  • Diagnostic Investigation: Identifying the root cause of joint swelling (effusion) by analyzing the synovial fluid's chemistry and cell count.

  • Septic Arthritis Detection: Serving as the "gold standard" to rule out or confirm joint infections, which are considered medical emergencies.

  • Crystal-Induced Arthritis: Confirming the presence of uric acid or calcium crystals to diagnose gout or pseudogout.

  • Therapeutic Relief: Providing immediate pain relief by removing excess fluid that causes internal pressure and restricts mobility.

  • Intra-articular Injection: Using the aspiration site to deliver therapeutic medications, such as corticosteroids or hyaluronic acid, directly into the joint space.

  • Preparation: The skin over the joint is thoroughly sterilized with medical-grade antiseptic to maintain a sterile field and prevent the introduction of bacteria.

  • Ultrasound Mapping: Providers use real-time ultrasound imaging to visualize the joint space, identify the largest pocket of fluid, and map a safe needle path that avoids nerves and blood vessels.

  • Anesthesia: A local anesthetic is injected to numb the skin and the deeper soft tissues, ensuring the patient feels only pressure during the aspiration.

  • Aspiration: A hollow needle is carefully inserted into the joint space. The provider may gently "milk" the joint or apply external pressure to help drain the maximum volume of fluid.

  • Analysis: The collected fluid is placed in sterile tubes and sent to a laboratory for microscopic examination of cell counts, crystal analysis, and bacterial cultures.

  • Completion: Once the needle is removed, a small bandage is applied. If a therapeutic injection was performed, the joint may be moved through its range of motion to distribute the medication.

  • Real-Time Ultrasound GuidanceProviding a "live" view of the needle tip to ensure 100% accuracy in fluid removal and medication placement, even in deep or complex joints.

  • Point-of-Care Synovial AnalysisPortable diagnostic devices that can detect signs of infection or gout crystals in the office within minutes, allowing for immediate treatment.

  • Automated Aspiration DevicesAdvanced syringes that maintain consistent pressure, making fluid collection faster and less traumatic for the surrounding tissue.

  • Bio-Inductive InjectionsUtilizing the arthrocentesis site to deliver platelet-rich plasma (PRP) or stem cell therapies designed to promote the natural healing of joint cartilage.

  • Micro-Needle TechnologyThe use of ultra-fine, specialized needles that reduce the sensation of the procedure, making it more tolerable for patients with needle anxiety.

  • Infection Prevention: While rare, clinicians take extreme care to avoid passing a needle through infected skin (cellulitis) to prevent spreading bacteria into the joint.

  • Bleeding (Hemarthrosis): Minor bleeding into the joint can occur, particularly in patients taking blood-thinning medications; this is typically managed with rest and ice.

  • Post-Injection Flare: A temporary increase in localized pain or swelling may occur following a steroid injection, usually subsiding within 24–48 hours.

  • Recovery Timeline: Patients are generally advised to rest the joint for 24 to 48 hours to allow the puncture site to heal and the medication to settle.

  • Warning Signs: Patients should monitor for fever, chills, or severe worsening of pain, which may indicate a rare post-procedure complication.

  • Definitive Diagnostics: It is the only way to distinguish between an infection, an autoimmune flare, and a crystal-induced injury with absolute certainty.

  • Instant Mechanical Relief: Removing even a few milliliters of fluid can significantly restore the joint's range of motion and reduce pain.

  • High Precision: Ultrasound guidance ensures that medications are delivered exactly where they are needed, maximizing the drug's effectiveness.

  • Minimally Invasive: Offers a fast, office-based alternative to more invasive surgical explorations of the joint.

  • A rapid reduction in joint swelling and a return to improved mobility and comfort.

  • A clear diagnostic roadmap, allowing your specialist to prescribe the correct medication for your specific type of arthritis.

  • The ability to return to daily activities within a short period, supported by a personalized joint-health maintenance plan.

  • Long-term protection of joint surfaces by removing inflammatory fluids that can cause cartilage breakdown over time.

Intra-articular Steroid Injection

Intra-articular steroid injections involve the delivery of powerful anti-inflammatory medications (corticosteroids) directly into a joint space. This targeted approach allows for high concentrations of medicine to treat localized inflammation and pain while minimizing systemic side effects. They remain a primary tool for managing acute flares and chronic pain associated with degenerative and inflammatory joint conditions.

  • Osteoarthritis (OA): Providing relief for weight-bearing joints like the knee, hip, and shoulder when physical therapy or oral medications are no longer sufficient.

  • Inflammatory Arthritis: Managing localized "flares" in patients with Rheumatoid or Psoriatic arthritis.

  • Crystal-Induced Arthritis: Rapidly resolving the intense inflammation and pain caused by Gout or Pseudogout.

  • Bursitis and Tendonitis: Delivering targeted relief to the bursa sacs or tendons surrounding the joint structures.

  • Improving Mobility: Reducing swelling to allow patients to participate more effectively in physical rehabilitation and exercise.

Clinicians typically utilize long-acting crystalline steroids, often combined with a local anesthetic (such as lidocaine or bupivacaine) to provide both immediate diagnostic feedback and long-term relief.

  • Triamcinolone & Methylprednisolone: The most common long-acting agents used to suppress the immune response within the joint.

  • Microsphere Technology: Specialized extended-release formulations designed to provide consistent pain relief for up to 12 weeks.

  • Local Anesthetics: Often mixed with the steroid to provide instant, temporary numbing, which helps confirm the needle reached the exact source of pain.

  • Imaging Guidance: For deep or complex joints—such as the hip, spine, or the small joints of the hand—the use of ultrasound or fluoroscopy is the clinical standard to ensure the medication reaches the intra-articular space rather than surrounding soft tissue.

  • Sterile Preparation: The skin is thoroughly cleaned with antiseptic to prevent the introduction of bacteria into the joint.

  • Numbing: A local anesthetic is applied to the skin and needle track to maximize patient comfort.

  • Aspiration: If excess fluid (effusion) is present, the clinician will often remove it (arthrocentesis) before injecting the steroid to improve the medication's effectiveness.

  • Injection & Distribution: The steroid is injected, and the joint may be gently moved to help distribute the medication throughout the capsule.

  • Biologic "Bridge" TherapiesThe integration of steroids with biologics or platelet-rich plasma (PRP) to combine immediate inflammation control with long-term tissue support.

  • AI-Assisted Needle TrackingAdvanced imaging software that highlights the optimal entry point and real-time needle trajectory, reducing the risk of hitting nerves or vessels.

  • Smart-Relief MicrospheresBiodegradable spheres that release the steroid slowly over several months, preventing the "peak and trough" effect of traditional injections.

  • Non-Crystalline FormulationsNewer steroid types that reduce the risk of "steroid flare" (post-injection irritation) by dissolving more smoothly in the synovial fluid.

  • Digital Patient MonitoringUsing wearable sensors to track a patient’s range of motion and activity levels before and after the injection to objectively measure success.

  • Frequency Limits: Injections are typically limited to 3–4 times per year in a single joint to prevent potential damage to the joint cartilage.

  • The "Steroid Flare": A temporary increase in pain for 24–48 hours as the medicine settles; this is usually managed with ice and rest.

  • Septic Arthritis Risk: While extremely rare, any joint entry carries a minor risk of infection, requiring strict sterile protocols.

  • Metabolic Impact: Diabetics should monitor their blood glucose, as localized steroids can cause a temporary systemic spike in sugar levels.

  • Skin Changes: Potential for localized thinning of the skin (atrophy) or loss of pigment at the injection site.

  • Targeted Potency: Delivers a high dose of anti-inflammatory power directly to the source of pain without the stomach or kidney risks of oral pills.

  • Rapid Onset: Most patients experience significant relief within 3 to 7 days, with the anesthetic providing a "preview" of relief within minutes.

  • Delays Surgery: Can successfully manage symptoms for years, allowing patients to postpone or avoid invasive joint replacement surgeries.

  • Facilitates Rehab: By "quieting" a painful joint, it creates a window of opportunity for physical therapy to strengthen the surrounding muscles.

  • A significant reduction in daily pain levels and a noticeable increase in joint flexibility and function.

  • Resumption of low-impact activities, such as walking, swimming, or cycling, with less discomfort.

  • A clear follow-up plan with your specialist to determine if further injections or alternative therapies are needed.

  • The peace of mind that comes from a minimally invasive, office-based solution for chronic joint inflammation.

Total Knee Replacement (TKR)

Total Knee Replacement (TKR), also known as Total Knee Arthroplasty, is a major surgical procedure to resurface a damaged, arthritic, or diseased knee joint with artificial components (prostheses). It is most commonly performed for end-stage osteoarthritis where conservative treatments have failed.

  • Severe knee pain or stiffness that limits everyday activities, such as walking or climbing stairs.

  • Moderate or severe knee pain while resting, either day or night.

  • Chronic knee inflammation and swelling that does not improve with rest or medications.

  • Knee deformity, such as a bowing in or out of the knee (knock-knees or bowlegs).

  • Failure to substantially improve with other treatments such as anti-inflammatory medications, cortisone injections, or physical therapy.

  • Standard TKR: The traditional surgical approach involving an 8- to 10-inch incision to resurface the entire joint.

  • Robotic-Assisted TKR: Utilizing advanced systems for ultra-precise bone cuts and ligament balancing to achieve a more "natural" joint feel.

  • Cemented Fixation: Using specialized bone cement (polymethylmethacrylate) to secure the metal components to the bone.

  • Cementless (Press-fit) Fixation: Relying on new bone growing into the surface of the implant, typically preferred for younger or more active patients.

  • Patellar Resurfacing: A specific technique where the undersurface of the kneecap is replaced with a plastic button.

  • Bone Preparation: Damaged cartilage and a small amount of underlying bone are removed from the ends of the femur and tibia.

  • Implant Positioning: A metal femoral shell and a metal tibial plate are precisely fixed to the prepared bone surfaces.

  • Spacer Insertion: A medical-grade plastic (polyethylene) insert is placed between the metal components to ensure a smooth gliding surface.

  • Ligament Balancing: The surgeon adjusts the surrounding ligaments to ensure the knee joint moves with proper tension and stability.

  • Closure: The incision is closed with sutures or surgical staples, and a sterile dressing is applied to the front of the knee.

  • Comprehensive medical evaluation, including weight-bearing X-rays and blood work.

  • Pre-habilitation exercises focused on strengthening the quadriceps and hamstrings to speed up recovery.

  • Cardiac clearance for patients with a history of heart conditions to ensure safety under anesthesia.

  • Fasting (NPO) and stopping certain medications, such as blood thinners, several days prior to surgery.

  • Weight-Bearing X-rays: The primary imaging used to assess the extent of joint damage and bone alignment.

  • MRI Scan: Occasionally performed to provide a more detailed view of the soft tissues and bone condition.

  • Electrocardiogram (ECG): To evaluate heart rhythm and function before administering anesthesia.

  • Blood Panels: To check for anemia, infection risk, and to ensure proper kidney and liver function.

  • Patients typically stand and take a few steps with a walker within 4 to 6 hours of surgery to prevent blood clots.

  • Hospital stays range from same-day discharge to 3 days, followed by 6–12 weeks of intensive physical therapy.

  • Achievement of 0° extension (straight leg) and at least 120° flexion (bend) is the primary goal of rehabilitation.

  • Use of blood thinners for 3–6 weeks is required to prevent Deep Vein Thrombosis (DVT).

  • High-impact sports like running are generally discouraged, but walking, swimming, and cycling are highly recommended.

  • Significant pain relief and improved joint mobility in over 90% of patients.

  • Correction of knee deformities and restoration of proper leg alignment.

  • High durability, with modern implants lasting 15 to 20 years in the vast majority of cases.

  • Substantial improvement in the ability to perform daily tasks and overall quality of life.

Bilateral Total Knee Replacement

Bilateral Total Knee Replacement (BTKR) involves the surgical replacement of both knee joints with advanced prosthetic implants during a single clinical episode or a closely staged sequence. This procedure is optimized through robotic-assisted mapping and "Single-Stage" simultaneous protocols, allowing patients with severe bilateral arthritis to achieve symmetrical alignment and a faster, consolidated return to an active lifestyle.

  • Severe pain in both knees that interferes with daily activities like walking or climbing stairs.

  • Persistent joint stiffness in both legs, especially after waking up or sitting for long periods.

  • Visible bowing or "knock-knee" deformity affecting both legs.

  • Inadequate relief from non-surgical treatments like injections, physical therapy, or NSAIDs.

  • Chronic inflammation and swelling that does not improve with rest or medication.

  • A significant decline in quality of life due to the inability to bear weight on either leg.

  • Advanced Bilateral Osteoarthritis resulting in "bone-on-bone" contact in both joints.

  • Severe Rheumatoid Arthritis causing systemic joint destruction.

  • Post-traumatic arthritis affecting both knees following prior injuries.

  • Complex joint deformities that require simultaneous correction for proper gait alignment.

  • Chronic end-stage joint disease in patients who prefer a single anesthesia and recovery event.

  • 3D CT mapping or robotic software is used to create a digital blueprint of both knee joints.

  • Simultaneous or Sequential surgery is performed under a single general or spinal anesthetic.

  • Damaged bone and cartilage are precisely removed from the femur, tibia, and patella.

  • High-grade metal and plastic prosthetic components are securely fixed to the bone surfaces.

  • Real-time balancing is conducted to ensure both knees have symmetrical tension and range.

  • Immediate post-operative mobilization begins within 24 hours to promote blood flow.

  • Simultaneous Bilateral TKR Both knees are replaced during a single surgery, offering the convenience of one hospital stay and one rehab period.

  • Staged Bilateral TKR Two separate surgeries performed at least 90 days apart, reducing initial cardiovascular strain and allowing one leg to heal first.

  • Sequential Same-Day TKR Both knees are replaced one after the other on the same day during a single hospital admission.

  • Robotic-Assisted BTKR The use of robotic arms (like Mako or ROSA) to achieve millimeter-level precision in implant alignment for both legs.

  • Patient-Specific Implants (Conformis) Custom-made implants designed from a patient’s CT scan to fit their unique anatomy perfectly.

  • Minimally Invasive Quad-Sparing Surgery Techniques designed to bypass the major thigh muscles, potentially reducing early post-operative pain.

  • Strengthen the upper body to prepare for using a walker or crutches without a "strong" leg for support.

  • Optimize cardiovascular and renal health, as simultaneous BTKR is physically demanding.

  • Arrange for a 2–3 week stay at a rehabilitation facility or intensive home-care support.

  • Modify your home environment by removing rugs and installing grab bars or a raised toilet seat.

  • Stock up on prepared meals and ensure a dedicated caregiver is available for the first few weeks.

  • Standing Weight-Bearing X-rays to assess the full extent of joint narrowing and misalignment.

  • 3D CT Scan for robotic planning or customized implant manufacturing.

  • Electrocardiogram (EKG) and Cardiac Clearance to ensure the heart can handle a longer surgery.

  • Complete Blood Count (CBC) and Metabolic Panel to screen for anemia or underlying infections.

  • Nasal swab screening for MRSA to implement pre-emptive infection control protocols.

  • Eliminates the risk of a "bad" leg hindering the recovery of a "new" leg, ensuring symmetrical healing.

  • Reduces overall healthcare costs by 18% to 36% compared to two separate staged surgeries.

  • Accelerates the total return to normal life by approximately 3 months through a single rehab cycle.

  • Corrects bilateral deformities simultaneously, resulting in a more natural and balanced gait.

  • Features a high patient satisfaction rate for those who meet the 2026 strict "ideal candidate" criteria.

  • Early mobilization in the hospital using a walker, focusing on achieving a 70–90° knee bend.

  • Intensive inpatient or outpatient physical therapy to manage pain and prevent joint stiffness.

  • Use of ice machines and elevation "above the heart" for 40 minutes each hour to control swelling.

  • Gradual transition from a walker to a cane, typically occurring between weeks 3 and 6.

  • Monitoring for signs of blood clots (DVT) through compression stockings and prescribed blood thinners.

  • Resumption of low-impact activities like swimming, cycling, or golfing within 3 to 6 months.

  • Significant reduction in chronic pain and a dramatic increase in walking distance and mobility.

  • Requirement for a lifelong commitment to low-impact exercise to maintain muscle strength and joint health.

  • Annual follow-up appointments with the orthopedic team to monitor the wear of the implants.

  • Notification of security personnel at airports, as metal implants will likely trigger detectors.

Revision Knee Replacement

Revision Total Knee Replacement (RTKR) is a complex surgical procedure to replace a previously implanted artificial knee joint that has failed, worn out, or become infected. It is technically more demanding than a primary replacement because there is often less healthy bone remaining, requiring specialized components and techniques.

  • Increased pain or a "giving way" sensation in a previously replaced knee.

  • New onset of swelling, redness, or warmth, which may indicate a late-stage infection.

  • Noticeable instability or a feeling that the knee joint is loose during movement.

  • Aseptic loosening, where the bond between the metal and bone has broken down.

  • Mechanical wear of the original plastic spacer, leading to bone-on-metal contact.

  • Single-Stage Revision: The removal of old components and placement of new ones during a single operation, typically for non-infected failures.

  • Two-Stage Revision: The gold standard for infection, involving the temporary placement of an antibiotic spacer followed by a second surgery weeks later.

  • Augmentation: Using metal pieces (augments) or "cones" to fill holes or voids where bone has been lost.

  • Bone Grafting: Utilizing donor bone (allograft) to rebuild the platform for the new implant.

  • Stemmed Fixation: Using revision implants with long stems that reach deep into the femur and tibia for added stability.

  • Component Removal: The surgeon delicately removes the original metal and plastic parts while preserving as much healthy bone as possible.

  • Debridement: Removal of scar tissue and any infected tissue or "biofilm" found within the joint space.

  • Structural Rebuilding: Reconstructing the bone platform using grafts or metal augments to ensure a level surface for the new joint.

  • Constrained Implant Placement: Installing a new joint mechanism that is more rigid to compensate for weakened or damaged ligaments.

  • Fixation: Securing the new, longer-stemmed components using specialized bone cement or press-fit technology.

  • Extensive diagnostic testing, including specialized X-rays, CT scans, or MRIs to assess bone loss.

  • Mandatory blood tests (CRP and ESR) and joint fluid aspiration to rule out hidden infections.

  • Surgical planning that may involve 3D-printed models of the patient's specific bone structure.

  • Medical optimization, including heavy sedation or general anesthesia, to prepare for a longer surgery (2 to 4 hours).

  • Joint Fluid Aspiration: Drawing fluid from the knee to check for bacteria or high white blood cell counts.

  • CT and MRI Scans: To provide a detailed map of bone voids and the integrity of the surrounding soft tissue.

  • ESR and CRP Blood Tests: Markers used to detect systemic inflammation or localized infection.

  • Specialized Revision X-rays: To evaluate the alignment and stability of the existing implants before removal.

  • Hospital stays are typically longer than primary replacements, ranging from 3 to 5 days.

  • Weight-bearing may be restricted to "partial" status with crutches or a walker for 6 to 12 weeks.

  • Physical therapy is more intensive and slower-paced due to the presence of significant scar tissue.

  • Revision implants typically have a lifespan of 10 to 15 years, slightly shorter than primary implants.

  • While 80–90% of patients achieve good results, the range of motion may be slightly less than after the first surgery.

  • Successfully restores mobility and relieves chronic pain caused by a failed primary implant.

  • Addresses life-threatening or joint-threatening infections through the two-stage process.

  • Provides a stable joint for patients who have suffered significant bone loss or ligament damage.

  • Utilizes advanced stemmed technology to ensure the new joint remains secure within the bone.

Partial Knee Replacement

A Partial Knee Replacement (PKR), also known as Unicompartmental Knee Arthroplasty, is a surgical procedure where only the damaged part of the knee is replaced with metal and plastic components. Unlike a Total Knee Replacement, this surgery preserves the healthy bone, cartilage, and ligaments in the rest of the knee.

  • Arthritis that is strictly confined to only one "compartment" of the knee (typically the inner side).

  • Persistent knee pain that has not responded to non-surgical treatments like physical therapy or injections.

  • Maintenance of intact and healthy ligaments, specifically the ACL and PCL.

  • Desire for a more "natural" feeling joint and a faster return to daily activities.

  • Absence of inflammatory conditions like Rheumatoid arthritis or significant joint stiffness.

  • Medial Unicompartmental Arthroplasty: Replacing the inner compartment of the knee, which is the most common PKR site.

  • Lateral Unicompartmental Arthroplasty: Replacing the outer compartment of the knee joint.

  • Patellofemoral Arthroplasty: Replacing only the "track" under the kneecap (patella).

  • Robotic-Assisted PKR: Utilizing robotic guidance to ensure the precise removal of bone and accurate implant alignment.

  • Cemented Fixation: Securing the metal femoral and tibial components using high-strength bone cement.

  • Bone Preparation: The surgeon removes a thin layer of damaged bone and cartilage only from the diseased area of the femur and tibia.

  • Implant Fitting: A small metal cap is placed on the end of the thigh bone, and a small metal tray is fixed to the shin bone.

  • Spacer Insertion: A medical-grade plastic (polyethylene) insert is snapped into the tibial tray to create a smooth gliding surface.

  • Ligament Preservation: The surgeon carefully works around the natural ligaments to ensure they remain functional and intact.

  • Closure: The small incision is closed with sutures or surgical glue, typically resulting in less scarring than a total replacement.

  • Comprehensive evaluation using weight-bearing X-rays and sometimes MRI to confirm the other two compartments are healthy.

  • Discussion regarding the potential "conversion" to a Total Knee Replacement if more widespread damage is found during surgery.

  • Fasting (NPO) and preoperative medical clearance for either spinal or general anesthesia.

  • Identifying the specific compartment (medial, lateral, or patellofemoral) targeted for resurfacing.

  • Weight-Bearing X-rays: The primary imaging used to assess the location and severity of arthritis.

  • MRI Scan: Used to ensure the ligaments (ACL/PCL) are healthy and that the non-diseased compartments have intact cartilage.

  • Physical Range-of-Motion Test: To check for significant knee stiffness that might make a total replacement a better option.

  • Blood Panels: Routine testing to check for infection risk and general surgical readiness.

  • Often performed as an outpatient procedure, allowing patients to return home the same day.

  • Mobilization begins quickly, with patients often walking with a cane or walker within 2–4 hours.

  • Recovery is typically faster than TKR, with most patients regaining a full range of motion in 2–4 weeks.

  • Physical therapy is essential but generally less intense due to the preservation of natural knee structures.

  • Long-term monitoring is required to ensure arthritis does not develop in the untreated sections of the knee.

  • The knee often has a more "natural" feel because the original ligaments are preserved.

  • Generally results in a better "bend" (flexion) and range of motion compared to a total replacement.

  • Smaller incisions lead to significantly less post-operative pain, swelling, and blood loss.

  • Modern implants are highly durable, often lasting 15 to 20 years in appropriately selected patients.

Total Hip Replacement (THR)

Total Hip Replacement (THR), also known as Total Hip Arthroplasty, is a major surgical procedure where a damaged or diseased hip joint is replaced with an artificial joint (prosthesis). It is most commonly performed to treat advanced osteoarthritis, rheumatoid arthritis, or hip fractures.

  • Hip pain that keeps you awake at night or limits daily activities like walking or bending.

  • Stiffness in the hip that limits the ability to move or lift the leg.

  • Inadequate pain relief from anti-inflammatory drugs, physical therapy, or walking supports.

  • Advanced joint damage or "bone-on-bone" contact visible on X-ray imaging.

  • Difficulty performing simple tasks such as putting on shoes and socks.

  • Posterior Approach (Back): The traditional method providing excellent visibility; involves a slightly higher risk of post-operative dislocation.

  • Anterior Approach (Front): A technique that parts the muscles rather than cutting them, often leading to less initial pain and a faster recovery.

  • Lateral Approach (Side): A balanced approach providing stable access to the joint, though it may cause temporary muscle irritation.

  • Cemented Fixation: Using specialized bone glue to secure the prosthesis, often used for older patients with thinner bone.

  • Press-fit (Cementless) Fixation: Featuring a porous metal surface that allows natural bone to grow into the implant over time.

  • Femoral Head Removal: The surgeon removes the damaged "ball" of the thigh bone to prepare for the new prosthesis.

  • Acetabular Preparation: The "socket" in the pelvic bone is hollowed out to fit the new artificial cup.

  • Cup and Liner Placement: A metal cup is pressed or screwed into the socket, and a plastic, ceramic, or metal liner is snapped inside.

  • Stem Insertion: A metal stem is inserted into the hollow center of the femur to provide a stable foundation.

  • Ball Attachment: A metal or ceramic ball is attached to the top of the stem to complete the new "ball-and-socket" joint.

  • Comprehensive evaluation including X-rays to measure the exact "cup" and "ball" sizes for the implants.

  • "Pre-hab" exercises to strengthen the gluteal muscles, which are critical for supporting the new joint.

  • Medical clearance from specialists for patients with existing heart or lung conditions.

  • Fasting (NPO) and stopping specific medications, such as blood thinners, as directed by the surgical team.

  • Hip X-rays: The primary tool used for surgical templating and assessing the severity of joint degradation.

  • Blood Panels: To ensure the patient is fit for surgery and to check for markers of systemic health.

  • Electrocardiogram (ECG): To evaluate heart function before the administration of spinal or general anesthesia.

  • Physical Assessment: To check current leg length and range of motion for post-operative comparison.

  • Patients are typically required to stand and walk with a walker within 4 to 6 hours of surgery to prevent blood clots.

  • Hospital stays are generally 1 to 2 days, with some healthy patients eligible for same-day discharge.

  • Strict "hip precautions" are followed for 6–12 weeks, such as avoiding bending the hip past 90 degrees or crossing legs.

  • Mandatory use of blood thinners (Aspirin or Xarelto) for 3–6 weeks to prevent Deep Vein Thrombosis (DVT).

  • Most patients return to low-impact activities like walking, swimming, and cycling after the initial healing phase.

  • Over 95% of patients report a total loss of hip pain and a significant increase in mobility.

  • Provides a highly durable solution, with modern implants expected to last 20 to 25 years.

  • Restores the ability to perform daily tasks that were previously impossible due to joint stiffness.

  • Corrects physical deformities and helps normalize gait and leg alignment.

Hip Replacement (Cemented/Uncemented)

Total hip replacements are classified by how the artificial components are secured to the bone. While both methods are highly successful, the choice depends on the patient's bone quality, age, and activity level.

  • Cemented: Preferred for patients over 70 or those with osteoporosis whose bone may be too porous to grow into an implant.

  • Uncemented: Ideal for younger, active patients (typically under 65) with strong, healthy bone density.

  • Hybrid Approach: In some cases, a surgeon may use a cemented stem in the femur and an uncemented cup in the socket.

  • Revision Surgery: Often utilizes specialized versions of either method depending on the amount of remaining healthy bone.

  • Cemented Fixation: Utilizing surgical-grade polymethylmethacrylate (PMMA) to create a tight mechanical interlock between the metal and the bone.

  • Uncemented (Press-fit) Fixation: Relying on a high-precision friction fit followed by natural bone growth into a porous metal surface.

  • Biological Fixation: The process where natural bone cells migrate into the "beaded" coating of an uncemented implant over 6 to 12 weeks.

  • Antibiotic-Loaded Cement: A variation where cement is pre-mixed with antibiotics to provide localized protection against infection.

  • Bone Preparation: The surgeon clears the arthritic bone and prepares the hollow center of the femur and the acetabular socket.

  • Grout Injection (Cemented): Wet PMMA is injected into the bone cavity immediately before the components are pressed into place.

  • Precision Carving (Uncemented): The bone is carved to be slightly smaller than the implant to ensure an extremely tight fit when hammered into position.

  • Impacting the Component: For cementless types, the metal components are impacted until they achieve a stable "friction fit" against the healthy bone.

  • Curing: For cemented types, the surgeon holds the implant perfectly still for 10 to 12 minutes while the cement hardens completely.

  • Bone density scanning (DEXA) may be performed to determine if the bone is strong enough for an uncemented implant.

  • Pre-operative templating using X-rays to ensure the high-precision tools match the size of the selected uncemented components.

  • Evaluation of allergy history, specifically regarding the components of surgical bone cement or specific metals like Titanium.

  • Fasting (NPO) and standard surgical clearance for general or spinal anesthesia.

  • Weight-Bearing X-rays: To assess the "fit and fill" of the femoral canal and the quality of the pelvic bone.

  • DEXA Scan: To provide a definitive measure of bone mineral density in the hip region.

  • Blood Panels: To ensure the patient is a candidate for surgery and to check for systemic inflammation.

  • Cardiac Clearance: Particularly for cemented procedures, to ensure the heart can tolerate potential pressure changes during cement implantation.

  • Cemented Recovery: Patients can usually put full weight on the leg within hours, as the bond reaches maximum strength almost instantly.

  • Uncemented Recovery: Some surgeons require 4–6 weeks of "partial weight-bearing" with crutches to allow the bone to grow into the metal.

  • Long-term Monitoring: Uncemented implants are designed to become a permanent part of the skeleton, while cement may eventually degrade after 20–25 years.

  • Activity Levels: Uncemented implants are specifically designed to withstand the higher mechanical stresses of a more active lifestyle.

  • Cemented Benefits: Provides an immediate, rock-solid foundation and allows for the localized delivery of antibiotics.

  • Uncemented Benefits: Preserves more natural bone and offers the potential for a longer-lasting, biological bond that does not "wear out" like cement.

  • Reduced Failure Rates: Both methods reduce the failure rate of hip replacements to very low levels compared to historical techniques.

  • Customization: Surgeons can tailor the fixation method to the specific anatomy and bone health of each individual patient.

Revision Hip Replacement

Revision Hip Replacement is a complex surgical procedure performed to replace a previously implanted artificial hip joint that has failed due to wear, infection, or injury. It is significantly more challenging than primary hip surgery because it involves working with compromised bone, scar tissue, and often significant bone loss.

  • Persistent or new pain in a hip that was previously replaced.

  • A "clunking" or "giving way" sensation during movement or walking.

  • Redness, warmth, or drainage around the old surgical scar, which may indicate infection.

  • Recurrent dislocations where the ball pops out of the socket repeatedly.

  • A fall or injury resulting in a fracture of the bone surrounding the existing implant.

  • Single-Stage Revision: The removal of failed components and the immediate implantation of new ones in one operation.

  • Two-Stage Revision: The gold standard for treating deep infections; involves the temporary use of an antibiotic spacer followed by a later permanent replacement.

  • Modular Stem Implantation: Using specialized implants with long, adjustable stems that reach deep into the femur for stability.

  • Acetabular Reconstruction: Using metal augments, tantalum cones, or specialized "cages" to rebuild a damaged hip socket.

  • Bone Grafting: Utilizing donor bone (allograft) to fill "voids" or holes in the patient's natural bone.

  • Component Extraction: The surgeon carefully removes the old metal and plastic parts, ensuring the surrounding healthy bone is preserved.

  • Cement Removal: If the original implant was cemented, the hardened "glue" is meticulously cleared out of the bone canal.

  • Joint Debridement: Cleaning out scar tissue, inflammatory debris (osteolysis), or infected material from the joint space.

  • Structural Rebuilding: Reconstructing the hip foundation using metal augments or bone grafts to ensure a secure fit for the new joint.

  • Re-Implantation: Installing new components with longer stems and specialized liners to compensate for weakened bone and tissue.

  • Extensive diagnostic imaging, including specialized X-rays and CT scans, to map out existing bone loss.

  • Laboratory testing (CRP and ESR) and joint fluid aspiration to rule out or identify hidden infections.

  • Medical optimization to ensure the patient can tolerate a longer surgery (typically 2 to 4+ hours).

  • Discussion of potential leg length discrepancy and the intensive rehabilitation timeline.

  • Joint Fluid Aspiration: Drawing a sample from the hip to test for bacteria and determine the appropriate antibiotic treatment.

  • CT and MRI Scans: To provide a 3D view of the bone "defects" and the condition of the surrounding soft tissues.

  • Inflammatory Markers: Blood tests used to detect systemic signs of infection or reaction to implant wear particles.

  • Specialized Revision X-rays: High-resolution images to evaluate the stability and alignment of the failing components.

  • Hospital stays are generally longer than primary replacements, typically ranging from 3 to 7 days.

  • Weight-bearing may be restricted to "partial" status with a walker or crutches for 6 to 12 weeks to protect bone grafts.

  • Strict "hip precautions" (no crossing legs or bending past 90 degrees) are enforced for at least 6 weeks post-op.

  • Physical therapy is critical and may continue for up to a year to rebuild muscles weakened by multiple surgeries.

  • Full recovery typically takes 6 to 12 months, and patients may notice a permanent but slight difference in leg length.

  • Effectively relieves chronic, debilitating pain caused by a failed or loose primary implant.

  • Restores the ability to walk and perform daily activities by stabilizing the hip joint.

  • Clears deep-seated infections that cannot be treated with antibiotics alone.

  • Rebuilds the structural integrity of the pelvis and femur following significant bone loss or fractures.

Hip Resurfacing
Hip Resurfacing

Hip Resurfacing is an alternative to total hip replacement designed to preserve more of the patient's natural bone. Instead of removing the entire head of the thigh bone (femur), the damaged surface is trimmed and capped with a smooth metal covering, maintaining the original anatomy of the femoral neck.

  • Younger, active patients (typically under 60) who wish to return to high-impact activities.

  • Patients with strong bone density, particularly in the femoral neck region.

  • Desire for a joint that has a lower risk of dislocation due to the larger size of the artificial "ball."

  • When bone preservation is a priority to make potential future revision surgeries easier.

  • Advanced hip arthritis that has not responded to conservative management.

  • Metal-on-Metal Bearing: A specialized technique where a metal femoral cap moves directly against a metal pelvic socket.

  • Cemented Capping: Securing the mushroom-shaped metal cap to the shaped femoral head using a small amount of bone cement.

  • Press-Fit Acetabular Fixation: Placing a metal cup into the pelvic socket without cement, allowing the bone to grow into the implant.

  • Computer-Assisted Navigation: Utilizing digital mapping to ensure the precise alignment of the cap and socket during the procedure.

  • Socket Resurfacing: The arthritic surface of the pelvic socket (acetabulum) is removed and replaced with a durable metal cup.

  • Femoral Reaming: The surgeon shapes the existing "ball" of the femur into a cylinder rather than cutting it off entirely.

  • Cap Placement: A hollow metal cap is placed over the newly shaped femoral head to provide a smooth, new joint surface.

  • Alignment Verification: The surgeon ensures the metal-on-metal components are perfectly positioned to minimize friction and wear.

  • Closure: The incision is closed with sutures or surgical glue, following a path similar to a standard hip replacement.

  • Precise X-rays and DEXA scans (bone density tests) to confirm the femoral neck can support the metal cap.

  • Screening for metal allergies, specifically to nickel, cobalt, or chromium.

  • Fasting (NPO) and standard medical clearance for either general or spinal anesthesia.

  • Discussion of gender-specific outcomes, as the procedure is most often indicated for male patients due to bone size and density requirements.

  • DEXA Scan: The mandatory "gold standard" test to ensure the bone mineral density is high enough to prevent post-op fractures.

  • Template X-rays: High-resolution imaging used to determine the exact size of the cap and socket required.

  • Metal Ion Baseline: Sometimes performed to check pre-operative levels of cobalt and chromium in the blood.

  • Kidney Function Test: To ensure the body can effectively filter any microscopic metal ions released by the joint over time.

  • Hospital stays are typically brief, ranging from 1 to 2 days.

  • Immediate weight-bearing is usually allowed with a walker or crutches.

  • Heavy impact activities, such as running or jumping, are restricted for 6 to 12 months while the bone strengthens.

  • Blood thinners (Aspirin or Xarelto) are required for 4–6 weeks to prevent Deep Vein Thrombosis (DVT).

  • Intensive physical therapy focuses on the abductor muscles to ensure a stable and natural walking pattern.

  • Preserves the femoral head and neck, making future "standard" hip replacements much easier to perform.

  • Offers a significantly lower risk of dislocation because the artificial ball is nearly the same size as the natural one.

  • Allows for a safe return to high-impact sports and heavy lifting that might damage a standard hip replacement.

  • Provides a more "natural" range of motion and stable joint feel for younger, active individuals.

Total Shoulder Replacement

Shoulder replacement surgery, or shoulder arthroplasty, is a specialized procedure to replace the damaged "ball and socket" joint of the shoulder with high-performance artificial components. This procedure increasingly utilizes "Mixed Reality" navigation and Reverse Total Shoulder Replacement. By utilizing 3D-printed guides and digital mapping, this surgery restores pain-free motion and function for patients with advanced arthritis or complex rotator cuff failures.

  • Chronic Shoulder Pain: Persistent pain that interferes with basic daily tasks like reaching into a cabinet, washing your hair, or getting dressed.

  • Severe Joint Stiffness: A loss of range of motion that prevents you from lifting your arm sideways or reaching behind your back.

  • Resting Pain: Shoulder pain that persists even while you are sitting or lying down and frequently interrupts your sleep.

  • Mechanical Symptoms: A noticeable "grinding," "clicking," or "popping" sensation within the joint during arm movement.

  • Functional Weakness: Significant weakness in the arm that makes it difficult to lift even light objects or perform overhead activities.

  • Treatment Failure: Inadequate relief from conservative measures such as physical therapy, cortisone injections, or anti-inflammatory medications.

  • Advanced Osteoarthritis: The "wear and tear" of the joint causing a total loss of the shoulder's protective cartilage.

  • Rotator Cuff Tear Arthropathy: A specific type of arthritis where a long-term, massive tendon tear leads to the destruction of the joint surface.

  • Complex Fractures: Severe proximal humerus (upper arm) fractures that cannot be reliably repaired with standard plates and screws.

  • Avascular Necrosis (Osteonecrosis): A condition affecting the blood supply to the bone of the humeral head, causing it to collapse.

  • Failed Prior Surgeries: Previous shoulder repairs or older replacements that have loosened or worn out, requiring a complex revision.

  • Anatomic Total Shoulder Replacement: Replaces the joint while maintaining the natural "ball-on-top, socket-on-bottom" anatomy; ideal for patients with healthy, intact rotator cuffs.

  • Reverse Total Shoulder Replacement: Switches the position of the ball and socket to allow the deltoid muscle to lift the arm when the rotator cuff is missing or damaged.

  • Hemiarthroplasty: A partial replacement where only the "ball" (humeral head) of the joint is replaced, often used in specific trauma or fracture cases.

  • Stemless Shoulder Replacement: A bone-preserving technique that uses a smaller, bone-sparing anchor for the humeral head rather than a long stem inside the arm bone.

  • Outpatient Shoulder Arthroplasty: A modern protocol allowing healthy candidates to return home the same day as their procedure through advanced pain management.

[Image comparing an anatomic shoulder replacement vs. a reverse shoulder replacement]

  • Digital Mapping: A pre-operative CT scan is converted into a 3D digital model to plan the exact size and placement of the implants.

  • Mixed Reality (MR) Navigation: During surgery, the surgeon may use a headset to project a holographic "GPS" map onto the patient's bone for extreme precision.

  • Humeral Preparation: The damaged "ball" (humeral head) is removed and replaced with a polished metal component.

  • Glenoid Resurfacing: The "socket" (glenoid) is cleaned of arthritis and fitted with a high-durability, medical-grade plastic liner.

  • Alignment Verification: 3D-printed "Patient-Specific Instrumentation" (PSI) guides are often used to ensure the components are aligned perfectly with the patient's unique anatomy.

  • Soft Tissue Balancing: The surgeon meticulously adjusts the tension of the surrounding muscles and ligaments to ensure the new joint is stable and mobile.

  • "Pre-hab" Exercises: Strengthening the muscles around the scapula (shoulder blade) and forearm to assist with recovery.

  • One-Arm Practice: Practice performing daily tasks, such as eating or using a phone, with only your non-operated arm.

  • Home Modification: Set up a "recovery station" with easy-access clothing, pump-style soap, and pre-prepared meals.

  • Wardrobe Adjustments: Secure loose-fitting shirts or front-buttoning clothes that can easily accommodate a post-operative sling and bulky dressing.

  • Support System: Arrange for a support person to assist with household chores, pet care, and driving for the first 4 to 6 weeks.

  • High-Resolution CT Scan: Essential for 3D reconstruction and the creation of surgical navigation plans and custom guides.

  • Shoulder MRI: Used to evaluate the health and integrity of the rotator cuff tendons, which determines the type of replacement needed.

  • X-rays (Multiple Views): Standard imaging to assess the degree of bone loss, joint deformity, and the "bone-on-bone" status.

  • General Health Screening: Complete Blood Count (CBC) and Metabolic Panel to ensure the body is ready for the procedure.

  • Cardiac Clearance: An EKG and physical exam to confirm the heart is fit for the chosen anesthesia (general or regional nerve blocks).

  • Sling Protection: The arm is kept in a protective sling for 4 to 6 weeks to protect the healing soft tissues and allow the implant to stabilize.

  • Passive Motion Therapy: Physical therapy usually begins within days, focusing on "passive" movements where a therapist or your other arm moves the operated limb.

  • Active Strengthening: Strengthening exercises are introduced gradually, typically around the 3-month mark, once the bone has successfully integrated with the implant.

  • Swelling Management: Utilizing specialized ice machines and sleeping in a semi-upright position (such as a recliner) to manage early post-operative discomfort.

  • Functional Milestone: While initial recovery is fast, most patients achieve their maximum strength and range of motion within 6 to 12 months.

  • High Success Rate: Boasts a success rate exceeding 90% for significant, long-term pain relief and improved quality of life.

  • Navigation Accuracy: Uses advanced technology to eliminate the guesswork in "blind" socket placement, reducing the risk of early implant failure.

  • Restored Function: Enables patients with previously "inoperable" conditions to regain the ability to reach overhead and perform daily activities independently.

  • Implant Longevity: Utilizes advanced materials designed to resist wear for 15 to 20 years or more in most patients.

  • Active Lifestyle: Successfully restores the ability to participate in low-impact activities such as swimming, golf, doubles tennis, and yoga.

Reverse Shoulder Replacement

Reverse Total Shoulder Arthroplasty (RTSA) is a specialized surgery where the positions of the "ball" and "socket" in the shoulder joint are switched. It is primarily used when the rotator cuff muscles are severely damaged or non-functional, as the "reverse" design allows the larger deltoid muscle to take over the work of lifting the arm.

  • Rotator Cuff Tear Arthropathy: Severe arthritis combined with a massive, unrepairable rotator cuff tear.

  • Complex Fractures: Severe shoulder fractures where the bone is too damaged for a standard repair.

  • Failed Prior Replacements: When a standard shoulder replacement has failed or dislocated.

  • Pseudoparalysis: The inability to lift the arm despite having no nerve damage, usually due to massive cuff tears.

  • Chronic Pain: Shoulder pain that limits daily tasks and has not responded to injections or physical therapy.

  • Standard RTSA: The traditional approach using a metal glenosphere on the shoulder blade and a socket on the humerus.

  • Revision RTSA: A more complex version performed to replace a failing or infected prior shoulder implant.

  • Computer-Navigated RTSA: Using 3D mapping during surgery to ensure the precise placement of screws in the thin shoulder blade bone.

  • Patient-Specific Instrumentation (PSI): Utilizing 3D-printed guides created from the patient's CT scan for highly accurate bone preparation.

  • Bony Increased Offset (BIO-RSA): A specialized technique using a bone graft behind the glenosphere to improve the range of motion.

  • Bone Resurfacing: The surgeon removes the damaged surfaces of the humerus and the flat socket of the shoulder blade (glenoid).

  • Glenosphere Fixation: A metal ball is secured into the old socket using a baseplate and long surgical screws.

  • Humeral Socket Placement: A metal stem is inserted into the arm bone, topped with a plastic-lined socket where the natural ball used to be.

  • Deltoid Tensioning: The surgeon adjusts the height of the components to ensure the deltoid muscle is tight enough to lift the arm.

  • Verification: The joint is moved through a range of motion to ensure it remains stable and does not "pop out" or dislocate.

  • Assessment of the deltoid muscle strength, as this muscle must be functional for the surgery to succeed.

  • Imaging via X-rays and MRI or CT scans to evaluate the quality of the remaining shoulder blade bone.

  • Fasting (NPO) and stopping blood-thinning medications several days before the procedure.

  • Receiving a regional nerve block in addition to general anesthesia to manage pain for the first 12–24 hours post-op.

  • CT Scan with 3D Reconstruction: Often considered the gold standard for measuring bone volume in the shoulder blade.

  • Electromyography (EMG): Occasionally performed to ensure the nerves supplying the deltoid muscle are healthy.

  • Shoulder X-rays: To visualize the "high-riding" humerus often seen in patients with massive rotator cuff tears.

  • Blood Panels: Routine screens to ensure the patient is fit for surgery and to check for markers of systemic health.

  • Hospital stays are typically brief, ranging from 1 to 2 days for monitoring.

  • A specialized shoulder immobilizer or sling must be worn 24/7 for the first 4 to 6 weeks.

  • Early "pendulum" exercises are encouraged, but active lifting of the arm usually does not begin until week 6.

  • Most patients regain the ability to lift their arm to shoulder level, though reaching behind the back remains a common limitation.

  • Patients are typically advised to observe a lifelong weight-lifting limit of 5 to 10 kg to protect the implant.

  • Provides a dramatic reduction in chronic shoulder pain for over 90% of patients.

  • Restores the ability to perform essential daily tasks, such as eating, grooming, and dressing.

  • Offers a reliable solution for patients who were previously told their shoulder condition was "unfixable."

  • Modern designs and precise surgical navigation have significantly increased the long-term durability of the joint.

Endovascular Coiling

Endovascular Coiling (also known as Endovascular Embolization) is a minimally invasive procedure used to treat a brain aneurysm—a weak, bulging spot in an artery wall. Instead of performing traditional open surgery (clipping), the surgeon reaches the brain through the network of blood vessels to "pack" the aneurysm with platinum coils, effectively sealing it off from blood flow and preventing a life-threatening rupture.

  • Unruptured Aneurysms: Found incidentally during scans, these are treated to prevent a future "worst headache of your life" subarachnoid hemorrhage.

  • Ruptured Aneurysms: An emergency intervention to stop further bleeding and stabilize a patient who has suffered a brain bleed.

  • Surgical Risk Factors: When the aneurysm is located in a deep or difficult-to-reach area of the brain where open skull surgery would be too dangerous.

  • Patient Age and Health: Often preferred for older patients or those with medical conditions that make recovery from major open surgery difficult.

  • Specific Anatomy: Aneurysms with a narrow "neck" are ideal candidates for coiling, as the coils are more likely to stay securely inside the bulge.

  • Simple Coiling: Filling the aneurysm with soft platinum coils until blood can no longer enter.

  • Balloon-Assisted Coiling: A temporary balloon is inflated in the main artery to hold coils in place while they are being packed into a wide-necked aneurysm.

  • Stent-Assisted Coiling: A permanent mesh stent is placed across the neck of the aneurysm to act as a scaffold, preventing coils from falling back into the main bloodstream.

  • Flow Diversion: A specialized, high-density stent is placed in the main artery to redirect blood flow away from the aneurysm entirely, causing it to shrink over time without necessarily filling it with coils.

  • Liquid Embolics: In rare cases, a medical "glue" or liquid polymer is used instead of or alongside coils to seal the space.

  • Vascular Access: The surgeon makes a tiny incision in the groin (femoral artery) or wrist (radial artery) and inserts a sheath.

  • Catheter Navigation: A long, thin guide catheter is threaded through the body's main arteries up into the carotid or vertebral arteries in the neck.

  • Microcatheter Placement: Using real-time X-ray guidance (fluoroscopy), a much thinner microcatheter is maneuvered into the brain and directly into the opening of the aneurysm.

  • Coil Deployment: Soft platinum wires (coils) are pushed through the microcatheter. Once they enter the aneurysm, they curl into a mesh ball, filling the space.

  • Induced Thrombosis: The coils disrupt the blood flow, causing the blood inside the aneurysm to clot (thrombose), which creates a solid seal.

  • Final Angiogram: The surgeon performs a final dye test to confirm that blood is flowing normally through the healthy brain arteries and is no longer entering the aneurysm.

  • Digital Subtraction Angiography (DSA): A specialized "map" of the brain's blood vessels is created to measure the aneurysm’s dimensions precisely.

  • Blood Thinner Regimen: For unruptured cases, patients start antiplatelet medications (like aspirin or clopidogrel) days in advance to prevent clots during the procedure.

  • Fasting (NPO): No food or drink for 8–12 hours prior, as the procedure is performed under general anesthesia to ensure total immobility.

  • Kidney Function Check: Blood tests are performed to ensure the kidneys can safely filter the contrast dye used during the X-ray imaging.

  • CT Angiogram (CTA) or MRA: Non-invasive scans used to detect the presence and approximate size of the aneurysm.

  • Digital Subtraction Angiogram (DSA): The gold standard test to see the 3D architecture of the aneurysm neck and its relationship to nearby branches.

  • Platelet Function Test: To ensure that blood-thinning medications are working at the correct level to prevent procedural strokes.

  • Electrocardiogram (EKG): Routine heart monitoring to ensure the patient is fit for general anesthesia.

  • Unruptured Recovery: Most patients stay 1 to 2 days for observation and can return to normal activities within 1 to 2 weeks.

  • Ruptured Recovery: Requires a lengthy stay (14–21 days) in a Neuro-ICU to manage complications like vasospasm (artery tightening).

  • Immediate Post-Op: Patients must lie flat for about 6 hours to ensure the artery access site in the groin or wrist heals properly without bleeding.

  • Medication Adherence: If a stent was used, taking dual blood thinners is mandatory for 6–12 months to keep the stent from clogging.

  • Long-Term Monitoring: Because coils can "compact" or settle, follow-up MRA or angiography scans are required at 6 and 12 months, and periodically thereafter.

  • No Craniotomy: Eliminates the need to open the skull, resulting in significantly less physical trauma and a faster recovery.

  • Reduced Pain: Most patients experience only minor discomfort at the incision site rather than the headaches associated with open brain surgery.

  • Access to Deep Arteries: Allows surgeons to treat aneurysms that are located in areas of the brain that would be impossible or highly dangerous to reach with a scalpel.

  • Proven Efficacy: For many patients, coiling offers a safety profile and success rate comparable to or better than traditional surgical clipping.

Stent-Assisted Coiling

Stent-Assisted Coiling is an advanced endovascular procedure used to treat wide-necked brain aneurysms that cannot be safely packed with coils alone. In these cases, the opening of the aneurysm is too broad to hold coils in place; the stent acts as a "scaffold" or fence, keeping the coils securely inside the bulge while ensuring the main artery remains open for blood flow.

  • Wide-Necked Aneurysms: Aneurysms where the "neck" (opening) is wider than 4mm or the dome-to-neck ratio is less than 2.

  • Complex Aneurysm Shapes: Irregularly shaped bulges that would otherwise allow coils to "prolapse" or fall back into the parent artery.

  • Recurrent Aneurysms: Cases where previous coiling has settled or compacted, requiring a stent to provide a more permanent seal.

  • Unstable Aneurysms: When the structural integrity of the artery wall needs reinforcement alongside the coiling process.

  • Fusiform Aneurysms: Spindle-shaped bulges that involve a segment of the artery rather than a simple "berry" shape.

  • Jailing Technique: A microcatheter is positioned inside the aneurysm before the stent is deployed. Once the stent is opened, it "jails" the catheter against the wall, allowing the surgeon to pack coils through the mesh.

  • Trans-Stent Technique: The stent is deployed first, and the surgeon then maneuvers a microcatheter through the tiny holes in the stent mesh to reach the aneurysm.

  • Y-Stenting: For aneurysms located at a "fork" in the artery, two stents are placed in a Y-configuration to protect both branching vessels.

  • Self-Expanding Stents: High-tech mesh tubes that automatically expand to the size of the artery when released from the catheter.

  • Balloon-Assisted Stenting: Using a temporary balloon to help position or expand the stent in complex vascular pathways.

  • Vascular Navigation: Using fluoroscopy (real-time X-ray), a guide catheter is threaded from the groin or wrist up to the target artery in the brain.

  • Stent Deployment: The surgeon carefully positions and releases the cylindrical mesh stent across the neck of the aneurysm.

  • Coiling the "Bulge": Through a microcatheter, tiny platinum coils are pushed into the aneurysm. The stent mesh acts as a permanent barrier, preventing any part of the coils from entering the main bloodstream.

  • Flow Disruption: The presence of the stent across the neck helps slow down the blood entering the aneurysm, which aids in the clotting (thrombosis) process.

  • Occlusion Confirmation: Contrast dye is injected to verify that the aneurysm is completely blocked and that the parent artery remains perfectly clear.

  • Incision Closure: The access site in the groin or wrist is closed with a pressure device or a small collagen "plug."

  • Dual Antiplatelet Therapy (DAPT): This is the most critical phase; patients must take Aspirin and Clopidogrel (Plavix) for at least 5–7 days before the procedure to prevent the body from treating the metal stent as a foreign object and forming a clot.

  • 3D Angiography: A high-resolution scan to measure the exact diameter of the parent artery to ensure the stent is sized perfectly.

  • Fasting (NPO): No food or drink for 8–12 hours prior to general anesthesia.

  • Kidney Function Assessment: Ensuring the patient can safely process the contrast dye used for the X-ray mapping.

  • Platelet Function Test (VerifyNow): A blood test to confirm the antiplatelet medications have effectively thinned the blood to the "therapeutic window" for a stent.

  • Digital Subtraction Angiography (DSA): The gold standard for mapping the complex 3D relationship between the aneurysm and nearby arterial branches.

  • CT or MRI Scan: To rule out any recent bleeding or other neurological conditions that might affect the surgical approach.

  • Physical Neurological Baseline: A detailed exam of motor and sensory function to serve as a comparison for post-operative monitoring.

  • Most patients spend 1 to 2 days in a Neuro-ICU for monitoring (unruptured) or 2 to 3 weeks if the aneurysm had previously bled.

  • Strict Medication Adherence: This is life-or-death; missing a single dose of blood thinners in the first 6–12 months can cause the stent to clog, leading to a stroke.

  • Over 6–12 months, the natural lining of the artery grows over the stent (endothelialization), making it a permanent, integrated part of the vessel wall.

  • Patients must follow a strict imaging schedule (MRA or Angiography) at 6, 12, and 24 months to ensure the stent remains open and the aneurysm closed.

  • Normal activity can typically be resumed in 1–2 weeks, though heavy lifting is restricted for the first few days while the incision site heals.

  • Allows for the safe and effective treatment of wide-necked aneurysms that were previously considered "uncoilable."

  • Provides a significantly lower recurrence rate compared to coiling alone, as the stent provides a more robust seal.

  • Offers a minimally invasive alternative to open skull surgery for complex or deep-seated brain aneurysms.

  • The presence of the stent can actually help remodel the artery wall, promoting long-term vascular health.

Balloon-Assisted Coiling

Balloon-Assisted Coiling (BAC), also known as the remodeling technique, is a minimally invasive endovascular procedure used to treat brain aneurysms, particularly those with a wide neck or complex shape. It utilizes a temporary balloon to provide a protective barrier while platinum coils are packed into the aneurysm, ensuring the main artery remains clear.

  • Wide-Neck Aneurysms: Aneurysms where the opening is too wide to hold coils on their own (dome-to-neck ratio < 2), preventing them from falling into the bloodstream.

  • Acute Rupture: Often the preferred choice for recently ruptured aneurysms because, unlike stents, it does not require long-term dual antiplatelet therapy, which is dangerous during an active brain bleed.

  • Bifurcation Aneurysms: Useful for aneurysms located where blood vessels branch off, as the balloon helps keep those vital side branches open during the coiling process.

  • Emergency Salvage: When a sudden rupture occurs during a standard coiling procedure, the balloon can be instantly inflated to stop the bleeding.

  • Avoidance of Permanent Hardware: Ideal for patients who cannot tolerate or do not want a permanent metal stent left inside their artery.

  • Standard Remodeling: A single balloon is used to cover the neck of the aneurysm while a second microcatheter delivers the coils.

  • Double-Balloon Technique: Used for extremely complex or wide-base aneurysms, involving two balloons to protect multiple branching vessels simultaneously.

  • Dual-Lumen Ballooning: Utilizing a specialized catheter that can both inflate a balloon and deliver coils through the same device.

  • Temporary Stenting Effect: The balloon is used to "mold" the coil mass into a specific shape that conforms to the aneurysm wall before the balloon is removed.

  • Vascular Navigation: A catheter is inserted, usually through the femoral artery (groin) or radial artery (wrist), and guided to the brain using real-time X-ray imaging (fluoroscopy).

  • Balloon Placement: A specialized balloon microcatheter is positioned in the main artery, directly across the opening (neck) of the aneurysm.

  • Inflation and "Remodeling": The balloon is temporarily inflated with a mixture of saline and contrast dye to create a temporary wall across the aneurysm's neck.

  • Coil Packing: While the balloon is inflated, soft platinum coils are packed into the aneurysm sac. The balloon prevents the coils from protruding into the main artery.

  • Stability Verification: The balloon is periodically deflated to check if the coils remain stable and in place. If they shift, the balloon is reinflated for further packing.

  • Catheter Removal: Once the aneurysm is densely filled and the coils are stable without support, the balloon is deflated and all catheters are removed. No hardware is left in the artery.

  • Diagnostic mapping via Digital Subtraction Angiography (DSA) to determine the exact width of the aneurysm neck.

  • Fasting (NPO) for 8–12 hours prior to the procedure.

  • Administration of heparin (a short-term blood thinner) during the procedure to prevent clots from forming while the balloon is inflated.

  • Baseline neurological assessment to monitor the patient's speech, motor, and sensory functions before and after the surgery.

  • Digital Subtraction Angiography (DSA): The gold standard for measuring the "dome-to-neck" ratio to decide if a balloon is necessary.

  • CT or MRI Scan: To assess the brain for any signs of recent hemorrhage or structural abnormalities.

  • Kidney Function Tests: To ensure the patient's kidneys can safely filter the contrast dye used during the X-ray process.

  • Blood Coagulation Profile: Checking the patient's natural clotting ability before introducing surgical blood thinners.

  • Hospital Stay: Patients are typically monitored for 1 to 2 days for unruptured aneurysms. For ruptured cases, the stay extends to 2 to 3 weeks in a Neuro-ICU.

  • Immediate Post-Op: Strict bed rest is required for 6 hours to prevent bleeding at the catheter insertion site (groin or wrist).

  • Medication: Most patients only require short-term aspirin (2–4 weeks), which is a significant benefit over the months of intense blood thinners required for stents.

  • Activity: Most patients return to normal light activities within 1 to 3 weeks.

  • Follow-up: Mandatory MRA or Angiography scans are performed at 6 and 12 months to ensure the coils haven't settled and the aneurysm remains sealed.

  • No Permanent Implant: Unlike stent-assisted coiling, no metal is left in the main artery, reducing the long-term risk of blood clots or "clogging" (restenosis).

  • Superior Safety in Ruptures: Allows for the treatment of wide-necked aneurysms without the high risk of bleeding complications associated with long-term blood thinners.

  • Immediate Hemorrhage Control: Provides a "safety net" that can immediately stop internal bleeding if the aneurysm ruptures during the procedure.

  • Improved Packing Density: Allows the surgeon to pack more coils into the aneurysm than would be possible without the balloon's support, potentially reducing recurrence.

Intracranial Artery Stenting

Intracranial Artery Stenting (IAS) is a minimally invasive procedure used to treat severe narrowing (stenosis) of the arteries located deep inside the brain. By placing a tiny metal mesh tube (stent) to prop open the vessel, the procedure restores critical blood flow and serves as a vital intervention for preventing major ischemic strokes in patients who have not responded to medication alone.

  • High-Grade Stenosis: Blockage of the brain's internal arteries exceeding 70%, particularly when the narrowing is severe enough to limit blood flow.

  • Failed Medical Therapy: Patients who continue to suffer from strokes or mini-strokes (TIAs) despite taking maximum doses of blood thinners and cholesterol-lowering statins.

  • Recurrent TIAs: Frequent "warning strokes" that indicate a specific area of the brain is consistently being starved of oxygen.

  • Hypoperfusion: Cases where advanced imaging shows that a significant portion of brain tissue is at risk of dying because the blood pressure behind the blockage is too low.

  • Specific Vascular Anatomy: When the narrowing is located in a major "trunk" artery of the brain where a total blockage would be catastrophic.

  • Balloon-Expandable Stenting: The stent is mounted on a balloon; as the balloon inflates, it simultaneously opens the artery and expands the stent into place.

  • Self-Expanding Stenting: A highly flexible "low-profile" stent is released from a catheter and automatically expands to the shape of the brain artery.

  • Submaximal Angioplasty: Gently widening the artery with a balloon before placing the stent to reduce the risk of tearing the fragile vessel walls.

  • Drug-Eluting Stenting: Using stents coated with specialized medication to prevent the growth of scar tissue inside the vessel (restenosis).

  • Wingspan Stent System: A specific type of self-expanding stent system designed specifically for the unique, twisty environment of the brain's vasculature.

  • Vascular Access: A catheter is inserted through the femoral artery (groin) or radial artery (wrist) and navigated through the body's main vessels up into the skull.

  • Micro-Navigation: Using real-time, high-definition X-ray (fluoroscopy), a microcatheter is guided through the fragile and twisty arteries deep within the brain to reach the blockage.

  • Pre-Dilation (Angioplasty): A very small, high-pressure balloon is positioned at the blockage and inflated to carefully widen the narrowed segment.

  • Stent Deployment: The micro-stent (made of nitinol or cobalt-chromium) is deployed across the narrowed area. It acts as a permanent internal scaffold to keep the artery open.

  • Blood Flow Assessment: Contrast dye is injected to ensure the artery is successfully propped open and that blood is reaching the distal (further) parts of the brain.

  • Final Verification: The surgeon confirms the stent is perfectly "apposed" (snug) against the artery wall before removing the delivery catheters.

  • Digital Subtraction Angiography (DSA): The gold standard imaging used to measure the exact length and diameter of the blockage before the procedure.

  • Dual Antiplatelet Therapy (DAPT): Taking Aspirin and Clopidogrel (Plavix) for 5–7 days prior is mandatory to prevent the body from forming clots on the metal stent.

  • Platelet Function Test: A mandatory blood test to verify that the antiplatelet medications have reached the "therapeutic window" needed for safe stenting.

  • Fasting (NPO): No food or drink for 8–12 hours prior to general anesthesia, which is required to keep the patient perfectly still.

  • Perfusion CT or MRI: Advanced scans to map exactly how much brain tissue is currently at risk and if the blood flow is significantly restricted.

  • Digital Subtraction Angiography (DSA): Provides the highest-resolution map of the brain's "plumbing" to plan the navigation route.

  • Kidney Function Screen: Checking the patient's ability to safely filter the contrast dye used during the imaging phases.

  • Neurological Baseline: A comprehensive assessment of motor skills, speech, and vision to serve as a comparison for post-operative monitoring.

  • Hospital Stay: Usually 24 to 48 hours in a Neuro-ICU for intensive blood pressure monitoring; keeping blood pressure stable is critical to prevent brain bleeding.

  • Immediate Recovery: Bed rest is required for about 6 hours post-op to ensure the entry site in the groin or wrist heals properly.

  • Strict Medication Adherence: This is mandatory; missing a single dose of blood thinners in the first 6–12 months can cause the stent to clog, leading to a massive stroke.

  • Activity: Most patients can return to normal light activities within a week, but strenuous exercise should be avoided for 1 to 2 weeks.

  • Follow-up Imaging: Mandatory MRA or CTA scans at 3, 6, and 12 months are required to monitor for "over-healing" or scar tissue growth inside the stent.

  • Direct Stroke Prevention: Significantly reduces the long-term risk of a major stroke in the specific area of the brain supplied by the narrowed artery.

  • Restored Brain Function: Many patients report improvements in "brain fog" or chronic dizziness as healthy blood flow is restored to starved brain tissue.

  • Minimally Invasive: Reaches the deep structures of the brain through the blood vessels, avoiding the need for a major open-skull surgery (craniotomy).

  • Immediate Structural Support: Provides a permanent solution to high-grade blockages that have already proven resistant to the best available medications.

Vertebral Artery Stenting

Vertebral artery stenting is a minimally invasive endovascular procedure used to open narrowed vertebral arteries, which provide critical blood supply to the brainstem and the back of the brain. It is primarily performed to reduce the risk of a vertebrobasilar stroke in patients who have already experienced symptoms like vertigo or minor strokes despite medical treatment. By placing a small mesh tube within the vessel, the procedure restores healthy blood flow to the brain.

  • Symptomatic Narrowing: If you have 50% or greater narrowing of the vertebral artery and continue to experience TIAs (mini-strokes) or minor strokes.

  • Persistent Vertigo: Recurrent dizziness or balance issues caused by "vertebrobasilar insufficiency" that does not improve with medication.

  • Failed Medical Therapy: For patients who have recurrent neurological symptoms despite taking blood thinners and high-dose cholesterol medications.

  • High-Risk Surgical Anatomy: Because traditional open surgery on these deep arteries is highly complex, stenting is the preferred surgical alternative for most patients.

  • Posterior Circulation Stroke: If a previous stroke has been traced back to a blockage in the vertebral artery system.

  • Anaesthesia: The procedure is performed under local anaesthesia with conscious sedation or general anaesthesia, taking about 1 to 2 hours.

  • Access: A small incision is made in the groin (femoral artery) or the wrist (radial artery) to insert a thin, flexible catheter.

  • Guidance: Using real-time X-ray (fluoroscopy), the specialist guides a wire and catheter through the vascular system to the narrowed section of the vertebral artery.

  • Stent Placement: A small, specialized mesh tube (stent) is guided through the catheter and positioned exactly at the site of the blockage.

  • Expansion: The stent is expanded, pushing against the artery walls to flatten the plaque and keeping the vessel held open to restore full blood flow.

  • Completion: The catheter is removed, and the small access site in the groin or wrist is closed with a pressure device or a small stitch.

[Image showing a catheter-guided stent placement in the neck]

  • Diagnostic Angiography: A detailed mapping of your arteries to determine the exact location and degree of the narrowing.

  • Blood Thinning Protocol: You will likely be started on aspirin and clopidogrel (Plavix) several days before the procedure to prevent clots.

  • Kidney Function Tests: To ensure your kidneys can safely process the contrast dye used during the X-ray guidance.

  • Fasting: Following "nothing by mouth" instructions for 6–8 hours prior to your scheduled procedure.

  • Medication Audit: Reviewing all current supplements and medications, especially any that affect blood clotting.

  • CT Angiogram (CTA) or MRA: High-resolution 3D imaging used to visualize the blood vessels in the neck and brain.

  • Doppler Ultrasound: A non-invasive test to measure the speed and direction of blood flow through the vertebral arteries.

  • Neurological Exam: A baseline assessment of your strength, balance, and coordination.

  • ECG: A routine heart check to confirm cardiovascular stability for the duration of the procedure.

  • Hospital Stay: Most patients stay in the hospital overnight for close neurological observation and are discharged the following day.

  • Antiplatelet Therapy: This is the most critical part of aftercare; you must take Dual Antiplatelet Therapy (DAPT), typically aspirin and clopidogrel, for 1 to 6 months to prevent clots.

  • Activity Restrictions: Avoid heavy lifting and strenuous exercise for about 5 to 7 days to allow the artery access site (groin or wrist) to heal.

  • Long-term Monitoring: Regular Doppler ultrasound or CT scans are performed at 3, 6, and 12 months to ensure the stent remains open and free of new plaque.

  • Lifestyle Management: Continued management of blood pressure and cholesterol is essential to prevent "restenosis" (narrowing again).

  • Minimally Invasive: Avoids the need for large neck incisions, leading to less pain and a significantly faster recovery than open surgery.

  • Stroke Prevention: Successfully opening the artery provides a durable defense against life-threatening strokes in the back of the brain.

  • Immediate Flow Restoration: Patients often experience an immediate improvement in blood supply to the brainstem and cerebellum.

  • High Success in the Neck: Stenting the portion of the artery in the neck (extracranial) is considered very safe with low complication rates.

  • Advanced Imaging Guidance: The use of high-tech fluoroscopy allows for sub-millimeter precision when placing the stent within the vessel.

AVM Embolization
AVM Embolization

AVM (Arteriovenous Malformation) Embolization is a minimally invasive, catheter-based procedure used to block or reduce blood flow to an abnormal tangle of blood vessels. It is most commonly used to treat brain AVMs but can also address malformations in the spine or other parts of the body. By plugging the "feeding" arteries of the malformation, the procedure stabilizes the vascular structure and reduces the risk of life-threatening hemorrhages.

  • Pre-Surgical Preparation: To shrink the AVM and block deep, hard-to-reach feeding vessels, making surgical removal (resection) safer by significantly reducing blood loss.

  • Pre-Radiosurgical Adjunct: To reduce the total volume of the AVM, making it a better candidate for targeted Stereotactic Radiosurgery (SRS).

  • Vascular Steal Syndrome: When the AVM "steals" blood from healthy brain tissue, causing chronic headaches, seizures, or progressive neurological deficits.

  • High Rupture Risk: If diagnostic imaging shows weakened vessel walls (aneurysms) within the AVM that are at high risk of bleeding.

  • Inoperable AVMs: For malformations located in "eloquent" or deep areas of the brain where traditional open surgery is too risky.

  • Access: A thin, flexible tube called a catheter is inserted into a major artery, usually in the groin (femoral) or the wrist (radial). No skull incisions are required.

  • Anesthesia: The procedure is typically performed by a neurointerventional specialist under general anesthesia and lasts between 2 to 3 hours.

  • Guidance: Using real-time X-ray imaging (fluoroscopy) and contrast dye, the surgeon threads the micro-catheter through the vascular system directly to the AVM's feeding vessels.

  • Blocking (Embolization): A specialized "embolic agent" is injected through the catheter to seal the vessels. Common agents include:
    Liquid Glues (Onyx or NBCA): Medical-grade substances that harden quickly to permanently seal the abnormal vessels.
    Microcoils: Tiny platinum or steel coils that trigger the body's natural clotting process.
    Particles: Small medical grains that physically plug the smaller, intricate vessels of the AVM.

  • Completion: Once the desired blood flow reduction is achieved, the catheter is removed, and the access site is closed with a pressure device.

[Image showing the "Onyx" embolic agent filling the AVM nest]

  • Cerebral Angiography: A detailed "road map" of your brain's blood vessels to identify the exact feeders of the AVM.

  • Neurological Baseline: A comprehensive exam to document your current motor skills, speech, and vision before the procedure.

  • Kidney Function Tests: To ensure your body can safely clear the contrast dye used during the imaging process.

  • Fasting: Following "nothing by mouth" instructions for 8 hours prior to your scheduled anesthesia.

  • Medication Audit: You may be asked to stop taking blood thinners several days before the procedure to minimize the risk of bleeding at the access site.

  • CT or MRI Scan: To visualize the relationship between the AVM and the surrounding healthy brain tissue.

  • Functional MRI (fMRI): Occasionally used to map critical areas of the brain (like speech or movement centers) near the AVM.

  • Blood Panels: A routine check of your blood count and coagulation profile to ensure a safe surgical experience.

  • ECG: A standard heart check to confirm you are healthy enough for the administration of anesthesia.

  • Hospital Stay: Most patients stay at least one night for close observation. If the AVM has previously ruptured, a longer stay in a neuro-intensive care unit (ICU) may be required.

  • Immediate Symptoms: It is normal to experience mild headaches, nausea, or temporary fatigue for a few days following the procedure.

  • Activity Restrictions: Avoid heavy lifting and strenuous exercise for about 5 to 7 days to allow the artery access site (groin or wrist) to heal completely.

  • Follow-up Imaging: A repeat angiography is typically performed within 6 to 12 months to check for recanalization (vessels reopening) or new blood flow pathways.

  • Multidisciplinary Care: Embolization is often just one step; you will continue to be monitored by a team including neurosurgeons and radiation oncologists.

  • Minimally Invasive Access: Treating complex brain vascular issues through a tiny puncture in the wrist or groin avoids the need for a craniotomy.

  • Enhanced Surgical Safety: By "turning off" the high-pressure blood flow to the AVM, surgeons can remove the remaining malformation with much higher precision and lower risk.

  • Immediate Pressure Reduction: Successfully blocking feeding vessels reduces the immediate strain on fragile AVM walls, lowering the risk of a sudden hemorrhage.

  • Precision Delivery: Modern micro-catheters can navigate deep into the brain's smallest vessels, allowing for highly targeted treatment of even the most complex malformations.

  • Symptom Resolution: Many patients find that redirected blood flow to healthy brain tissue alleviates chronic seizures and headaches.

Dural AV Fistula Embolization

Dural Arteriovenous Fistula (DAVF) Embolization is a specialized endovascular procedure used to close abnormal connections (fistulas) between the dural arteries and the venous system surrounding the brain or spinal cord. Unlike congenital malformations, DAVFs are typically acquired later in life due to factors such as trauma, blood clots (sinus thrombosis), or infections. The procedure uses a catheter-based approach to navigate the vascular system and "plug" the high-pressure leak into the veins.

  • Cortical Venous Reflux: A high-risk condition where blood flows backward into the brain's veins, significantly increasing the risk of a life-threatening hemorrhage or stroke.

  • Pulsatile Tinnitus: A debilitating "whooshing" or rhythmic thumping sound in the ear that matches your heartbeat, caused by high-pressure blood flow near the ear structures.

  • Increased Intracranial Pressure: When the fistula interferes with normal drainage, causing severe headaches, nausea, or progressive vision loss.

  • Neurological Deficits: Sudden or progressive weakness, numbness, or seizures caused by "venous congestion" in the brain or spinal cord.

  • Aggressive Lesion Grading: If diagnostic imaging (Borden or Cognard classification) identifies the fistula as high-grade with a significant risk of bleeding.

  • Access: A thin, flexible catheter is inserted into a blood vessel in the groin or wrist and threaded toward the brain using real-time X-ray guidance (fluoroscopy).

  • Anesthesia: The procedure is typically performed under general anesthesia to ensure the patient remains perfectly still, taking approximately 2 to 4 hours.

  • Transarterial Route: The most common approach, reaching the fistula through the feeding dural arteries (such as the middle meningeal artery).

  • Transvenous Route: An alternative or combined approach accessing the site through the venous sinuses, which is often highly effective for specific high-grade lesions.

  • Embolization: Once the catheter is at the target, "embolic agents" are injected to permanently seal the connection. Common agents include:
    Liquid Embolics (Onyx or PHIL): Non-adhesive liquids that harden upon contact with blood to fill the fistula "nest."
    Microcoils: Small platinum coils that trigger the body's natural clotting process.
    Medical Glue (NBCA): A fast-acting adhesive used to instantly seal high-flow connections.

  • Digital Subtraction Angiography (DSA): The "gold standard" diagnostic test to map the complex architecture of the fistula and its feeding vessels.

  • Neurological Assessment: A detailed baseline exam of your vision, motor function, and cranial nerves.

  • Kidney Function Tests: To ensure your kidneys can safely process the contrast dye used during the X-ray guidance.

  • Fasting: Following "nothing by mouth" instructions for 8 hours prior to the administration of anesthesia.

  • Medication Audit: You may be asked to stop taking blood thinners several days before the procedure to minimize the risk of bleeding at the access site.

  • MRI or CT Angiography: To visualize the relationship between the fistula, the dural sinuses, and the surrounding brain tissue.

  • Formal Hearing Test: Often required for patients presenting with pulsatile tinnitus to establish a baseline.

  • Blood Panels: A routine check of your blood count and clotting factors to ensure a safe endovascular experience.

  • ECG: A standard heart check to confirm cardiovascular stability for the duration of the procedure.

  • Hospital Stay: Patients are typically monitored in the hospital for 1 to 2 days to ensure there are no changes in neurological status.

  • Immediate Symptoms: It is normal to experience mild headaches and soreness at the puncture site (groin or wrist) for 2–3 days.

  • Activity Restrictions: No heavy lifting (over 4.5 kg / 10 lbs) or strenuous exercise for 5 days following the procedure to allow the access site to heal.

  • Follow-up Imaging: A repeat angiography is usually performed at 6 and 12 months to ensure the fistula remains completely closed.

  • Symptom Resolution: Most patients notice an immediate disappearance of pulsatile tinnitus and a gradual reduction in headaches as the venous pressure normalizes.

  • Minimally Invasive: Treating complex brain vascular connections through a tiny puncture in the wrist or groin avoids the risks and recovery time of a craniotomy.

  • High Success Rates: Modern embolic agents allow for complete occlusion of the fistula in 72% to 90% of cases in a single session.

  • Targeted Pressure Relief: By closing the fistula, the procedure immediately stops the dangerous backward flow of blood into the brain's delicate veins.

  • Preserves Normal Flow: Advanced micro-catheters allow specialists to seal the abnormal connection while carefully preserving the healthy blood flow necessary for brain function.

  • Prevents Future Stroke: Definitive closure of high-risk fistulas provides a durable defense against intracranial hemorrhage and long-term neurological damage.

Leukemia
Leukemia

Leukemia is a type of cancer that starts in the blood-forming tissues, usually the bone marrow. It causes the body to overproduce abnormal white blood cells that don’t work correctly and eventually "crowd out" healthy red blood cells, normal white blood cells, and platelets.

  • Constant fatigue, weakness, and pale skin (Anemia).

  • Frequent fevers, chills, or mouth sores (Infections).

  • Easy bruising, nosebleeds, or tiny red spots on the skin called petechiae.

  • Painless swelling of lymph nodes in the neck or armpits.

  • An enlarged liver or spleen causing a feeling of abdominal fullness.

  • Acute Lymphoblastic Leukemia (ALL): Progresses rapidly; most common in children but also affects adults.

  • Acute Myeloid Leukemia (AML): Involves rapid growth of myeloid cells in both adults and children.

  • Chronic Lymphocytic Leukemia (CLL): Most common in older adults; progresses slowly and may not require immediate treatment.

  • Chronic Myeloid Leukemia (CML): Primarily affects adults and is often linked to the Philadelphia chromosome mutation.

  • Chemotherapy: The primary treatment using powerful drugs to kill cancer cells.

  • Targeted Therapy: Drugs that attack specific vulnerabilities in cancer cells, often used for CML.

  • Immunotherapy: Treatments designed to help the immune system recognize and attack leukemia cells.

  • Stem Cell Transplant: Replacing diseased bone marrow with healthy stem cells from a donor.

  • CAR T-cell Therapy: Re-engineering a patient's own T-cells to identify and fight the cancer.

  • Discussing the specific type and stage of leukemia with an oncology team.

  • Undergoing a physical exam to check for swelling in the lymph nodes, spleen, or liver.

  • Preparing for potential hospital stays if intensive chemotherapy or transplants are required.

  • Evaluating donor matches if a stem cell transplant is part of the treatment plan.

  • Complete Blood Count (CBC): To check for abnormal levels of white cells, red cells, and platelets.

  • Bone Marrow Biopsy: Taking a marrow sample from the hip bone for microscopic and genetic testing.

  • Lumbar Puncture: Checking spinal fluid to see if the cancer has reached the central nervous system.

  • Genetic Testing: Identifying specific mutations to determine the best targeted therapies.

  • Long-term survival rates have improved to over 65% for all types combined.

  • Children with ALL now see a cure rate of over 90%.

  • Regular follow-up appointments are required to monitor for remission or recurrence.

  • Ongoing management of potential side effects from intensive therapies like radiation or chemo.

  • Eradicates or controls the production of abnormal "blast" cells.

  • Restores the body's ability to produce healthy red cells, white cells, and platelets.

  • Reduces the risk of life-threatening infections and severe bleeding episodes.

  • Significantly increases the 5-year survival rate compared to historical outcomes.

Chronic Lymphoid Leukemia

Chronic Lymphocytic Leukemia (CLL) is the most common type of leukemia in adults. It is a slow-growing cancer of B-lymphocytes (a type of white blood cell) that originates in the bone marrow and spreads to the blood and lymph nodes. Unlike acute leukemias, many people with CLL live for years or even decades without needing immediate treatment.

  • Extreme fatigue, drenching night sweats, or unexplained weight loss.

  • Massive or painful swelling of the spleen or lymph nodes.

  • Worsening anemia (low red cells) or thrombocytopenia (low platelets) indicating bone marrow failure.

  • Rapid lymphocyte doubling, where the white blood cell count doubles in less than 6 months.

  • Active Surveillance (Watch and Wait): The standard of care for early-stage, asymptomatic patients where starting chemotherapy early has not shown to increase lifespan.

  • BTK Inhibitors: Daily oral pills, such as Ibrutinib, Acalabrutinib, or Zanubrutinib, that block survival signals in B-cells.

  • BCL-2 Inhibitors: Targeted drugs like Venetoclax that trigger "cell death" in leukemia cells.

  • Monoclonal Antibodies: IV treatments like Obinutuzumab or Rituximab that "tag" cancer cells for the immune system to destroy.

  • IVIG Infusions: Regular immunoglobulin infusions to manage high infection risks for pneumonia or shingles.

  • Regular Testing: Patients typically undergo blood tests and physical exams every 3 to 6 months.

  • Disease Progression Checks: Doctors monitor for signs of "active disease" that would necessitate a shift from surveillance to therapy.

  • Immune System Screening: Watching for autoimmune issues where the body attacks its own red blood cells (AIHA) or platelets (ITP).

  • Transformation Monitoring: Screening for Richter’s Transformation, where CLL evolves into an aggressive large B-cell lymphoma.

  • Understanding the "Watch and Wait" approach and why immediate intervention is often avoided to prevent unnecessary side effects.

  • Comprehensive baseline blood work and physical assessments to establish a comparison for future monitoring.

  • Discussion of potential long-term risks, including a weakened immune system and increased infection susceptibility.

  • Evaluation of age and overall health, as the average age at diagnosis is 70.

  • Complete Blood Count (CBC): To track white blood cell doubling time and levels of red cells and platelets.

  • Physical Examination: To check for organ issues like swelling of the spleen or lymph nodes.

  • Genetic Testing: To determine if specific mutations are present that might respond better to targeted oral therapies.

  • Clinical Trials Review: Assessment of trial data regarding the timing of treatment for stable patients.

  • The overall 5-year survival rate for CLL is high, approximately 88%.

  • Many patients live for years or decades with the disease, eventually dying from causes unrelated to leukemia.

  • Patients must remain vigilant for complications like pneumonia, shingles, or the sudden onset of aggressive lymphoma.

  • Ongoing active surveillance remains the primary "lifestyle" for many early-stage patients.

  • Avoids the toxicity and side effects of traditional chemotherapy through targeted oral therapies.

  • Provides a structured monitoring system to ensure treatment begins only when clinically necessary.

  • Utilizes modern medications that are more effective and less toxic than historical options.

  • Maintains a high quality of life for stable patients through the "Watch and Wait" strategy.

Chronic Myeloid Leukemia

Chronic Myeloid Leukemia (CML) is a slow-growing cancer of the bone marrow that results in the overproduction of white blood cells. It is unique because nearly all cases (approx. 95%) are caused by a specific genetic abnormality known as the Philadelphia chromosome.

  • Persistent fatigue or weakness.

  • Drenching night sweats.

  • Fullness or discomfort on the left side of the abdomen due to an enlarged spleen.

  • Unexplained weight loss or mild fevers.

  • Many patients have no symptoms and are diagnosed during routine blood tests.

  • Chronic Phase: The most common stage at diagnosis (85–90% of patients) where symptoms are mild and the disease responds well to standard treatment.

  • Accelerated Phase: The cancer grows faster with blast counts rising to 10–19%, and symptoms become more noticeable.

  • Blast Phase (Blast Crisis): An aggressive stage with 20% or more blasts that behaves like acute leukemia and is harder to treat.

  • Genetic Cause: Driven by the BCR-ABL gene, created when pieces of chromosomes 9 and 22 swap places.

  • TKI Therapy: Daily oral pills such as Imatinib (Gleevec), Dasatinib (Sprycel), or Nilotinib (Tasigna) that specifically "turn off" the BCR-ABL protein.

  • Hematologic Management: Normalizing blood counts, which typically occurs within the first few weeks of treatment.

  • Molecular Monitoring: Using sensitive PCR tests to measure and reduce the level of the BCR-ABL gene in the blood.

  • Treatment-Free Remission (TFR): For eligible patients who maintain a deep response, stopping medication under strict medical supervision.

  • Understanding that CML is now a manageable chronic condition requiring consistent, long-term medication.

  • Establishing a baseline through physical exams and medical history to check for an enlarged spleen.

  • Discussing the importance of adherence to daily oral therapy to achieve a Major Molecular Response.

  • Planning for frequent initial monitoring to ensure the "genetic switch" is being effectively turned off.

  • Bone Marrow Biopsy: To confirm the diagnosis and determine the phase of the disease.

  • FISH or PCR Testing: Highly sensitive blood tests used to detect the Philadelphia chromosome and the BCR-ABL gene.

  • Complete Blood Count (CBC): To evaluate the levels of abnormal white blood cells.

  • Cytogenetic Analysis: To identify the physical exchange of genetic material between chromosomes 9 and 22.

  • Life expectancy for those in the chronic phase is now approaching that of the general population.

  • The 5-year survival rate is currently over 90%, compared to roughly 20% before the year 2000.

  • Patients require lifelong monitoring to ensure the disease remains in molecular remission.

  • Most patients can maintain a normal lifestyle while taking daily oral targeted therapy.

  • Revolutionizes the prognosis from a once-fatal disease to a manageable chronic condition.

  • Specifically targets the genetic "stuck switch" (BCR-ABL) without the need for traditional intensive chemotherapy.

  • Achieves Major Molecular Response, making the cancer gene nearly undetectable in the blood.

  • Offers the potential for treatment-free remission in patients with deep, sustained responses.

Lymphoma
Lymphoma

Lymphoma is a cancer of the lymphatic system, which is part of the body's germ-fighting immune network. It starts in white blood cells called lymphocytes. Unlike leukemia, which is primarily in the blood and bone marrow, lymphoma often begins in the lymph nodes, spleen, thymus, or tonsils.

  • Painless swelling of lymph nodes in the neck, armpit, or groin.

  • Drenching night sweats.

  • Unexplained fever.

  • Sudden weight loss (more than 10% of body weight).

  • Persistent fatigue or itchy skin.

  • Hodgkin Lymphoma (HL): Characterized by the presence of giant Reed-Sternberg cells; often follows a predictable path through the lymph nodes.

  • Non-Hodgkin Lymphoma (NHL): A diverse group further divided into B-cell (85%) and T-cell lymphomas.

  • Indolent (Slow-growing): Types such as Follicular Lymphoma where patients may live for years with minimal symptoms.

  • Aggressive (Fast-growing): Types such as Diffuse Large B-cell Lymphoma that require immediate, intensive treatment.

  • Chemotherapy: The primary treatment backbone for most aggressive forms of the disease.

  • Radiation Therapy: Used to target specific areas of bulky disease.

  • Immunotherapy: Utilizing drugs like Rituximab to help the immune system identify and kill B-cells.

  • Targeted Therapy: Using medications that block specific growth signals within cancer cells.

  • CAR T-cell Therapy: A cutting-edge treatment where a patient's own T-cells are reprogrammed to kill the lymphoma.

  • Stem Cell Transplant: Often utilized if the lymphoma relapses or returns after initial treatment.

  • Performing a physical exam to locate swollen lymph nodes, spleen, or liver.

  • Discussing the specific subtype (indolent vs. aggressive) to determine the urgency of treatment.

  • Preparing for a biopsy, which is the only definitive way to confirm a lymphoma diagnosis.

  • Evaluating heart and lung function if intensive chemotherapy or a stem cell transplant is planned.

  • Lymph Node Biopsy: Surgical removal of a node or tissue sample for laboratory testing.

  • PET and CT Scans: Advanced imaging used to determine the location and stage of the cancer.

  • Bone Marrow Aspiration: Checking the bone marrow to see if the cancer has spread to the blood-cell "factory."

  • Blood Tests: To assess general health and look for markers associated with certain lymphoma types.

  • For Hodgkin Lymphoma, the 5-year survival rate is now approximately 88%.

  • For Non-Hodgkin Lymphoma, the 5-year survival rate is approximately 74%, varying by subtype.

  • Regular follow-up scans and blood tests are required to monitor for remission or relapse.

  • Many patients with indolent types can live for decades with active surveillance or periodic treatment.

  • High potential for cure, especially in Hodgkin Lymphoma and certain aggressive subtypes.

  • Targeted therapies and immunotherapies offer effective options with fewer side effects than traditional chemo.

  • CAR T-cell therapy provides a powerful alternative for cases that have not responded to standard care.

  • Effectively reduces the size of bulky tumors and alleviates systemic "B symptoms" like fever and weight loss.

Hodgkin Lymphoma
Hodgkin Lymphoma

Hodgkin Lymphoma (HL) is a highly treatable cancer of the lymphatic system, distinguished by the presence of a specific giant cell called the Reed-Sternberg cell. It typically spreads in a predictable, orderly fashion from one group of lymph nodes to the next.

  • Painless, firm swelling of lymph nodes in the neck, armpits, or groin.

  • Drenching night sweats that require a change of clothes.

  • Unexplained fevers that may come and go.

  • Significant weight loss of more than 10% of body weight in 6 months.

  • Rare but specific pain in the lymph nodes after consuming alcohol.

  • Classical Hodgkin Lymphoma (cHL): Accounts for about 95% of cases; includes subtypes like Nodular Sclerosis which often affects the chest and neck.

  • Nodular Lymphocyte-Predominant (NLPHL): A rarer, slower-growing version that often requires less intensive treatment.

  • Staging (Stages I–IV): Categorized based on whether the cancer is on one or both sides of the diaphragm.

  • ABVD Chemotherapy: The "gold standard" regimen using a combination of four specific drugs (Adriamycin, Bleomycin, Vinblastine, and Dacarbazine).

  • Radiation Therapy: Utilized as "involved-site" radiation to target specific areas of bulky disease after chemotherapy.

  • Immunotherapy: Use of checkpoint inhibitors like Nivolumab or Pembrolizumab to help the immune system identify and kill cancer cells.

  • Targeted Therapy: Drugs like Brentuximab Vedotin that specifically seek out the CD30 protein found on Hodgkin cells.

  • Identifying the specific subtype through an excisional biopsy for the most accurate diagnosis.

  • Baseline testing of heart and lung function to minimize long-term "late effects" from chemotherapy drugs.

  • Detailed consultation for younger patients (teens to 30s) regarding fertility preservation and future health risks.

  • Nutritional assessment to manage significant weight loss associated with "B symptoms."

  • Excisional Biopsy: Preferred over needle biopsies to accurately identify Reed-Sternberg cells.

  • PET/CT Scan: Advanced imaging used to map active cancer sites and determine the stage of the disease.

  • Blood Work: To evaluate overall health and check for inflammatory markers.

  • Diaphragm Assessment: Imaging to determine if the cancer has crossed the muscle separating the chest and abdomen.

  • The 5-year survival rate is excellent, currently at approximately 89%.

  • For early-stage disease, cure rates often exceed 90%.

  • Long-term monitoring is essential to watch for second cancers or cardiovascular issues later in life.

  • Regular follow-up appointments focus on ensuring the patient remains in remission and managing treatment side effects.

  • High cure rates even in advanced stages of the disease.

  • Standardized "gold standard" regimens provide predictable and successful outcomes.

  • Modern targeted therapies and immunotherapies reduce the need for more toxic treatments if the cancer returns.

  • Successfully alleviates systemic symptoms such as drenching night sweats and chronic fevers.

Non-Hodgkin Lymphoma

Non-Hodgkin Lymphoma (NHL) is a diverse group of blood cancers that start in the lymphocytes (white blood cells). Unlike Hodgkin Lymphoma, NHL is much more common and behaves in a less predictable way, often appearing in multiple lymph node groups simultaneously.

  • Painless swelling of lymph nodes in the neck, armpit, or groin.

  • Drenching night sweats.

  • Unexplained fever and persistent fatigue.

  • Sudden weight loss of more than 10% of body weight.

  • Abdominal pain or swelling, which may indicate liver or spleen involvement.

  • Indolent (Low-grade): Slow-growing types like Follicular Lymphoma that are manageable over many years.

  • Aggressive (High-grade): Fast-growing types like Diffuse Large B-cell Lymphoma (DLBCL) that require immediate intensive treatment.

  • B-cell Lymphomas: The most common category, accounting for approximately 85% of all cases.

  • T-cell Lymphomas: A less common category, making up about 15% of cases.

  • R-CHOP Chemotherapy: The standard regimen for aggressive B-cell lymphomas, combining traditional chemotherapy with the antibody Rituximab.

  • Immunotherapy: Use of bispecific antibodies like Polatuzumab or Mosunetuzumab to help the immune system target cancer cells.

  • CAR T-cell Therapy: A revolutionary approach for relapsed cases involving the genetic re-engineering of a patient's own T-cells.

  • Watch and Wait: Active surveillance used for slow-growing indolent types to monitor the disease before starting intervention.

  • Targeted Therapy: Specialized drugs tailored to the specific genetic makeup of the lymphoma subtype.

  • Determining the growth rate (indolent vs. aggressive) to establish the necessary speed of treatment.

  • Preparing for a surgical biopsy to ensure a large enough tissue sample for accurate subtyping.

  • Baseline cardiac and organ function testing to ensure the patient can tolerate intensive R-CHOP regimens.

  • For CAR T-cell therapy, undergoing a process to collect T-cells from the blood for laboratory modification.

  • Excisional Biopsy: The removal of an entire lymph node to definitively identify the specific NHL subtype.

  • PET/CT Scan: Advanced imaging to determine the stage (I to IV) based on the location of the cancer relative to the diaphragm.

  • Bone Marrow Biopsy: A procedure to check if the lymphoma has spread to the body's blood-producing marrow.

  • Molecular Profiling: Testing the cancer cells for specific proteins or genetic markers to guide immunotherapy choices.

  • The overall 5-year survival rate for NHL is approximately 74%, though this varies by subtype.

  • Many patients with aggressive types achieve a total cure if they respond well to initial intensive therapy.

  • Indolent lymphoma patients may live for many years, managing the disease as a chronic condition with periodic monitoring.

  • Regular follow-up scans and blood work are essential to detect potential recurrence early.

  • Offers a high chance of a total cure for many aggressive high-grade types.

  • Effectively manages symptoms and maintains quality of life for those with slow-growing indolent types.

  • Provides cutting-edge options like CAR T-cell therapy for patients who have relapsed after standard treatments.

  • Utilizes targeted antibodies to increase treatment success while minimizing damage to healthy cells.

Intravenous Chemotherapy

Intravenous (IV) Chemotherapy is the systemic administration of cytotoxic (cell-killing) drugs directly into the circulatory system. Because the drugs enter the bloodstream immediately, they reach almost all areas of the body, making this the primary treatment for cancers that have spread or carry a high risk of spreading. many IV protocols are now paired with targeted therapies or immunotherapies to increase effectiveness while attempting to spare more healthy cells.

  • Systemic Treatment: When cancer cells have potentially moved beyond the original tumor site into the lymph nodes or other organs.

  • Neoadjuvant Therapy: To shrink a large tumor before surgery, making the operation safer and more effective.

  • Adjuvant Therapy: To kill any "microscopic" cancer cells that might remain after a tumor has been surgically removed.

  • Palliative Care: To reduce the size of tumors that are causing pain or obstructing organs, even if a total cure is not the primary goal.

  • Ineligibility for Oral Meds: When a specific cancer type only responds to drugs that would be destroyed by stomach acid if taken as a pill.

  • Peripheral IV Cannula: A short plastic catheter inserted into a vein in the hand or forearm; replaced for every session.

  • PICC Line: A long, flexible tube inserted into the upper arm with the tip sitting in a large vein near the heart; can stay in for months.

  • Implantable Port (Chemo-Port): A small, drum-like device surgically placed under the skin of the chest. This is a standard for long-term treatment as it allows for a more active lifestyle.

  • Central Line: A catheter inserted into a large vein in the neck or chest, typically reserved for high-volume or intensive bone marrow treatments.

  • Scalp Cooling: While not an access method, many IV centers now offer "cold caps" during infusion to help reduce chemotherapy-induced hair loss.

  • Pre-Medication: 30–60 minutes before chemo, patients receive a "cocktail" of anti-nausea drugs, steroids, and antihistamines to prevent reactions.

  • IV Push (Bolus): The nurse manually injects the drug using a syringe over a few minutes for quick-acting doses.

  • IV Infusion: The most common method, where drugs drip from a bag through an electronic pump over 30 minutes to several hours.

  • Continuous Infusion: Using a small, portable pump that delivers a slow dose over 24 to 48 hours while the patient is at home.

  • The Cycle System: Treatment is given in "cycles" (e.g., 1 day of chemo followed by 21 days of rest) to allow healthy blood cells and the mouth lining to recover.

  • Blood Tests: A Complete Blood Count (CBC) is required 24–48 hours before every dose to ensure white blood cells (neutrophils) are high enough.

  • Hydration: Drinking plenty of water the day before and the morning of treatment helps protect the kidneys and makes veins easier to find.

  • Nutrition: A light meal is usually recommended; avoid heavy or greasy foods that might trigger nausea during the infusion.

  • Port Care: If you have an implantable port, apply a numbing cream to the skin over the site about an hour before your appointment.

  • Transport: Because pre-meds can cause drowsiness, you should have someone drive you home after your first few sessions.

  • Tumor Markers: Periodic blood tests to see if specific cancer proteins (like CEA or CA-125) are decreasing.

  • Nadir Checks: Blood counts taken 7–14 days after a dose (the "nadir") when the immune system is at its lowest point.

  • Imaging (CT/PET/MRI): Scans are typically performed every 2 to 3 cycles to physically measure if the tumor is shrinking.

  • Echocardiogram: Some chemo drugs can affect heart strength, requiring regular monitoring of the "ejection fraction."

  • Organ Panels: Frequent blood tests to ensure the kidneys and liver are successfully filtering toxins from the body.

  • Infection Prevention: Because chemo causes "neutropenia" (low white blood cells), avoid large crowds and wash hands frequently.

  • Dietary Management: Focus on high-protein, easy-to-digest foods. Many clinics provide personalized plans to manage taste changes.

  • Activity: Light walking is encouraged to combat "chemo-fatigue," though it is important to rest when the body requires it.

  • Skin & Hair Care: Use gentle, fragrance-free lotions. If hair loss is expected, some patients choose to cut their hair short before the second cycle.

  • The "Emergency Fever": Any fever over 38°C (100.4°F) during chemo is a medical emergency and requires immediate contact with the oncology team.

  • Comprehensive Reach: Effectively treats cancer cells that may have migrated to parts of the body not visible on standard scans.

  • Rapid Action: Entering the bloodstream directly allows for high concentrations of medicine to begin killing cancer cells immediately.

  • Proven Durability: For many cancers, IV chemotherapy remains the most researched and reliable method for achieving long-term remission.

  • Flexible Combinations: IV access allows doctors to easily switch or combine different drugs as the cancer responds or changes.

  • Modern Management: Advanced anti-nausea medications have made the treatment experience significantly more tolerable.

Oral Chemotherapy
Oral Chemotherapy

Oral Chemotherapy involves taking anti-cancer medications in the form of tablets, capsules, or liquids by mouth. While it offers the convenience of treatment at home, these are high-potency cytotoxic drugs that require the same level of precision and safety as IV chemotherapy. Oral therapy is frequently used for long-term "maintenance" to keep cancer in remission or as the primary treatment for specific blood and brain cancers.

[Image showing a caregiver wearing gloves while preparing oral chemotherapy medication]

  • Home-Based Treatment: For patients who live far from a cancer center or prefer to avoid frequent hospital visits for infusions.

  • Chronic Management: When cancer is being managed as a chronic condition over several years rather than a short-term crisis.

  • Specific Cancer Types: Certain cancers, such as Chronic Myeloid Leukemia (CML) or specific brain tumors, respond exceptionally well to oral "targeted" agents.

  • Combination Therapy: Sometimes taken in conjunction with radiation or IV therapy to increase the overall "kill rate" of cancer cells.

  • Maintenance Therapy: Used after successful IV chemotherapy to help prevent the cancer from returning.

  • The "No-Touch" Rule: Caregivers should wear disposable gloves when handling the pills to avoid absorbing the medication through their skin.

  • No Crushing or Splitting: Tablets should never be crushed, broken, or opened unless specifically instructed; doing so can cause the drug to release too quickly or create dangerous chemical dust.

  • Strict Storage: Keep medications in their original container, away from food and water, and out of reach of children or pets. Some formulations may require refrigeration.

  • Bodily Fluid Safety: Trace amounts of chemo remain in sweat, urine, and stool for 48–72 hours. Patients are often advised to close the lid and "double-flush" the toilet after use.

  • Safe Disposal: Never throw unused chemotherapy in the trash or down the drain. Return expired or unused pills to a certified oncology pharmacy for hazardous waste disposal.

  • Strict Scheduling: Medication must be taken at the exact same time every day to maintain a steady "therapeutic level" in the bloodstream.

  • Meal Coordination: Depending on the drug, you may need to take it on an empty stomach to increase absorption or with food to prevent stomach irritation.

  • The "Pulsed" Schedule: Many oral chemos are taken in cycles (e.g., 2 weeks of daily pills followed by 1 week of rest) to allow healthy cells to recover.

  • Missed Doses: If a dose is missed, you should never "double up" the next day. Contact your oncology nurse immediately for instructions.

  • Hydration: You are typically encouraged to drink 2–3 liters of water daily to help the kidneys flush the drug's toxins out of your system.

  • Financial Clearance: Oral chemo can be costly; ensure insurance or patient assistance programs are active before starting.

  • Drug Diary Setup: Prepare a logbook or use a digital health app to record the exact time of every dose and any side effects.

  • Baseline Bloodwork: You will need a full set of tests (CBC, liver, and kidney function) to ensure the body is strong enough to start.

  • Medication Review: Provide a full list of supplements and over-the-counter meds, as some (like St. John’s Wort) can interfere with the chemotherapy.

  • Anti-Nausea Prep: Have "as-needed" anti-vomiting medications ready at home before taking the first dose.

  • Complete Blood Count (CBC): Frequent checks to monitor for bone marrow suppression (low white blood cells, red blood cells, or platelets).

  • Liver & Kidney Function: Blood tests to ensure these organs are successfully processing and clearing the medication.

  • Therapeutic Drug Monitoring: Some centers perform blood tests to measure the exact concentration of the drug in the system to adjust the dose.

  • Imaging Scans: CT or MRI scans are required periodically to physically measure if the cancer is responding to the treatment.

  • Adherence Checks: Your doctor will review drug diaries and pill counts to ensure the treatment plan is being followed exactly.

  • Adherence Responsibility: Unlike IV chemo managed by a nurse, you are responsible for your own compliance. Missing doses can allow the cancer to become resistant.

  • Skin Care: Watch for redness, peeling, or tingling on the palms and soles of the feet. Use thick, fragrance-free moisturizers.

  • Digestive Health: Use a "bland diet" (such as bananas, rice, applesauce, and toast) if you experience mild diarrhea or nausea.

  • Sun Protection: Many oral chemos increase skin sensitivity to light; wear SPF 50+ and protective clothing even on cloudy days.

  • Infection Vigilance: You are still immunosuppressed. Avoid contact with sick individuals and report any fever over 38°C (100.4°F) immediately.

  • Maximum Convenience: Eliminates the need for long travel times and hours spent in an infusion chair.

  • Steady Drug Levels: Taking a daily pill provides a more consistent "attack" on cancer cells compared to the peaks and valleys of IV sessions.

  • Non-Invasive: Avoids the need for repeated needle sticks or the surgical implantation of a chemo-port in many cases.

  • Patient Empowerment: Allows patients to take an active, leading role in their own treatment and recovery process.

  • Targeted Smart Drugs: Many of the most advanced targeted therapies (such as Imatinib or Erlotinib) are primarily available in oral form.

Adjuvant Chemotherapy (After Surgery)

Adjuvant Chemotherapy is the administration of anti-cancer drugs after a primary treatment—usually surgery—to eliminate any microscopic cancer cells that may remain in the body but are too small to be detected by scans. Its goal is to reduce the risk of the cancer returning (recurrence) and to improve long-term survival. Modern protocols are increasingly personalized using "liquid biopsies" that detect circulating tumor DNA (ctDNA) to determine exactly who needs this "cleanup" treatment.

  • Post-Surgical Security: When a surgeon has removed the visible tumor but the pathology report suggests a high risk of "micrometastases" (hidden cells).

  • Lymph Node Involvement: If cancer cells were found in the lymph nodes near the original tumor site, indicating the cancer may have begun to spread.

  • High-Grade Tumors: When the cancer cells look particularly aggressive under a microscope, making them more likely to multiply quickly.

  • Positive ctDNA Status: If a post-operative blood test detects microscopic fragments of tumor DNA in your bloodstream.

  • Genomic Risk: When genetic tests (such as Oncotype DX or MammaPrint) indicate your specific tumor has a high "recurrence score."

  • The "Cleanup Crew": Even with "clear margins" after surgery, individual cells can detach and enter the blood or lymphatic systems. Adjuvant chemo acts as a safety net to destroy these cells.

  • Targeting Rapid Division: Chemo is most effective against cells that are actively dividing; by starting shortly after surgery, it catches any remaining cells before they can form a new mass.

  • The "Window of Opportunity": Adjuvant treatment is most effective when started within 4 to 8 weeks after surgery. Delaying beyond 12 weeks may significantly reduce the treatment's ability to prevent recurrence.

  • Combination Defense: By using 2 or 3 different drugs (like FOLFOX for colon cancer), doctors can attack hidden cells from multiple biological angles at once.

  • Systemic Protection: Unlike radiation, which is local, adjuvant chemo travels throughout the entire body to protect every organ.

  • Fixed Duration: Unlike treatment for advanced cancer, adjuvant therapy has a definite "finish line," typically lasting 3 to 6 months.

  • Cycle-Based Delivery: Treatment is given in cycles (e.g., 1 day of treatment followed by 2 or 3 weeks of rest) to allow your healthy bone marrow to recover.

  • Access Points: Depending on the regimen, it may be delivered via a temporary IV, a PICC line, or a surgically implanted chemo-port.

  • Pre-Medication: You will receive anti-nausea and anti-inflammatory medications before each session to minimize side effects.

  • Dose Calibration: Your oncology team will carefully adjust the dose based on how well you recovered from your recent surgery.

  • Surgical Recovery: You must be sufficiently healed from your operation (usually 4+ weeks) before the body can safely handle chemotherapy.

  • Baseline Labs: A complete blood count (CBC) and metabolic panel are required to ensure your organs are ready for systemic treatment.

  • Dental Clearance: It is vital to address dental issues before starting, as chemo can make oral infections much harder to treat.

  • Nutritional Optimization: Focus on high-protein foods to help repair the tissues stressed by both the recent surgery and the upcoming chemo.

  • Support System: Since you are moving directly from surgical recovery into chemo, arrange for help with household tasks to combat cumulative fatigue.

  • CBC (Complete Blood Count): Frequent monitoring (often weekly) to check for a drop in white blood cells (neutropenia) or platelets.

  • ctDNA Monitoring: Regular blood draws to see if the "circulating tumor DNA" levels are dropping to zero.

  • Kidney & Liver Panels: To ensure these organs are successfully filtering the chemotherapy as they recover from the stress of anesthesia.

  • Heart Monitoring: If using certain drugs (like Herceptin or Anthracyclines), regular echocardiograms are performed to check heart strength.

  • Physical Assessment: Frequent checks of your surgical incision site to ensure the chemotherapy isn't interfering with the final stages of healing.

  • Managing Fatigue: The "double hit" of surgery followed by chemo can cause significant exhaustion. Light, daily walks are the best proven way to maintain energy.

  • Infection Prevention: Your immunity will be lowest about 7–14 days after each dose (the "nadir"). Avoid crowds and people with active illnesses.

  • Wound Care: Keep your surgical scar protected from the sun, as chemo can make healing skin extra sensitive to UV rays.

  • Brain Health: Some patients experience "chemo-brain" (mild fogginess). Using planners and organizers can help manage daily tasks.

  • The Goal in Mind: Remember that adjuvant therapy is often the bridge between "remission" and a permanent cure.

  • Reduced Recurrence Risk: Significantly lowers the chance of the cancer returning in the same spot or elsewhere in the body.

  • Improved Overall Survival: Clinical data shows that for many cancers (Stage II/III breast, colon, and lung), adjuvant chemo adds years to life expectancy.

  • Peace of Mind: Provides the reassurance that every possible measure has been taken to eliminate the disease.

  • Disease-Free Survival: Increases the amount of time you can live without any active signs of cancer.

  • Precision Medicine: Modern genomic tools ensure that adjuvant chemo is only given to those who will truly benefit, sparing others unnecessary treatment.

Neoadjuvant Chemotherapy (Before Surgery)

Neoadjuvant Chemotherapy is the administration of anti-cancer drugs before a primary treatment, such as surgery or radiation. While adjuvant therapy "cleans up" after surgery, neoadjuvant therapy is a proactive strike designed to shrink the tumor and make local treatment more successful. This approach is the standard of care for many "locally advanced" cancers, allowing doctors to witness exactly how a tumor responds to specific drugs in real-time.

  • Tumor Downstaging: When a tumor is currently too large or too close to vital structures (like blood vessels) to be safely removed.

  • Organ Preservation: If shrinking the tumor could allow for a less invasive surgery, such as a breast-conserving lumpectomy instead of a full mastectomy.

  • Locally Advanced Disease: When the cancer has spread to nearby lymph nodes but has not yet metastasized to distant organs.

  • Molecular High-Risk: For specific subtypes like Triple-Negative or HER2-positive breast cancer, where early systemic treatment is critical.

  • In-Vivo Testing: When your oncology team wants to "test" if a specific chemo regimen is effective against your unique cancer before proceeding to surgery.

  • Early Systemic Control: By starting chemo immediately, you target microscopic cells that may have already entered the bloodstream, rather than waiting for surgical recovery.

  • Easier Surgery: A smaller, "downstaged" tumor often has better defined edges, allowing the surgeon to achieve "clear margins" more easily.

  • Pathologic Complete Response (pCR): The ultimate goal is to have the pathologist find zero active cancer cells in the tissue removed during surgery—a strong indicator of long-term survival.

  • Real-Time Assessment: If a tumor does not shrink during the first few cycles, doctors can pivot to a different treatment or move to surgery sooner, avoiding ineffective toxicity.

  • Lymph Node Clearance: Neoadjuvant therapy can often "clear" involved lymph nodes, which may reduce the need for extensive (and potentially side-effect-heavy) lymph node removal.

[Image showing a "Pathologic Complete Response" (pCR) where no cancer cells are visible under a microscope after treatment]

  • Treatment Timeline: Typically lasts 2 to 4 months (4 to 8 cycles) before the scheduled surgery.

  • Re-Staging Scans: After every 2 cycles, you will undergo an MRI, CT, or PET scan to physically measure how much the tumor has shrunk.

  • The "Surgery Window": Operation is usually scheduled 3 to 6 weeks after the final dose to allow your immune system and blood counts to fully recover for safe healing.

  • Access Points: Usually delivered via a chemo-port or PICC line to ensure the drugs reach the tumor at maximum concentration.

  • Combined Protocols: Often paired with targeted "biological" therapies that tag the cancer cells for destruction.

  • Precise Staging: You must have a baseline high-definition scan (like an MRI or PET-CT) and a biopsy to confirm the tumor's "molecular profile."

  • Tumor Marking: A tiny metal clip or "marker" is often placed inside the tumor via a needle; if the chemo works perfectly and the tumor disappears on scans, the surgeon still needs to know where to operate.

  • Heart and Organ Checks: Baseline echocardiograms and blood tests are vital to ensure your body can handle the chemo and the upcoming surgery.

  • Financial and Support Planning: Since surgery will follow shortly after chemo, ensure your leave-of-absence and home-care plans cover both phases of treatment.

  • Nutritional Support: Building up physical strength before the "double hit" of chemo and surgery is essential for a smooth recovery.

  • Physical Exams: Your doctor will manually feel the tumor (if accessible) to check for softening or shrinking.

  • Mid-Treatment Imaging: To confirm the tumor is responding; if it is growing (a 5% risk), the treatment plan will be changed immediately.

  • CBC (Complete Blood Count): Weekly checks to monitor for neutropenia, ensuring you don't develop an infection that could delay your surgery.

  • Molecular Tracking (2026 Standard): Liquid biopsies may be used to track the decline of tumor DNA in your blood as the mass shrinks.

  • Pathology Review: After surgery, the removed tissue is extensively studied to see how much of the original tumor was killed by the chemo.

  • The "Waiting Game": It can be psychologically challenging to "wait" for surgery while undergoing chemo. Trust in the scans showing the tumor is shrinking.

  • Surgical Readiness: Stay as active as possible. "Pre-habilitation" (exercise before surgery) is proven to reduce complications and speed up hospital discharge.

  • Skin & Tissue Health: Avoid tanning or irritating the skin near the tumor site, as healthy skin is vital for the surgeon's incisions later.

  • Wound Healing Concerns: Some neoadjuvant drugs (like Bevacizumab) must be stopped weeks before surgery to ensure your incisions will close properly.

  • Communication: Keep a direct line to your surgical team; they need to know about any chemo side effects that might affect your fitness for anesthesia.

  • Better Cosmetic Results: Smaller tumors allow for smaller incisions and less tissue removal, which is particularly important in breast and head/neck cancers.

  • Proven Survival Benefit: For many aggressive cancers, starting with chemo provides better long-term outcomes than starting with surgery.

  • Reduces Surgical Risk: Shrinking a tumor away from major nerves or vessels makes the eventual operation significantly safer.

  • Eliminates Micrometastases: Provides the earliest possible treatment for any cancer cells that have traveled elsewhere in the body.

  • 2026 Innovation: Modern "antibody-drug conjugates" used in the neoadjuvant setting are achieving pCR rates higher than ever before.

Palliative Chemotherapy

Palliative Chemotherapy is the use of anti-cancer drugs in cases where the cancer is advanced, metastatic, or technically incurable. Unlike curative chemotherapy, the primary objective is not to eliminate every cancer cell, but to improve quality of life and extend survival by managing the disease as a chronic condition. The emergence of "metronomic" dosing (frequent, low doses) allows many patients to remain on treatment for years with minimal disruption to their daily lives.

[Image showing the balance between tumor control and quality of life in palliative care]

  • Symptom Management: When a tumor is causing physical pain, pressing on a nerve, or obstructing an organ (like the airway or bowel).

  • Disease Stabilization: To slow or stop the progression of metastatic cancer that has spread to the lungs, liver, or bones.

  • Maintaining Function: When you are still active and want to remain strong enough to perform daily activities and enjoy time with family.

  • Metastatic Diagnosis: For many Stage IV cancers, systemic chemotherapy is the most effective way to manage the disease throughout the entire body.

  • Failed Primary Treatment: If cancer has returned after surgery or radiation, palliative chemo can often keep the recurrence under control.

  • Long-Term Management: Palliative chemotherapy is a management strategy; it is distinct from hospice and is often used for years to gain meaningful time.

  • The "Trade-Off" Balance: The central theme is weighing the toxicity of the drugs against the benefit. If a drug causes more suffering than the cancer itself, the plan is adjusted.

  • Performance Status (PS): Doctors use specific scales to ensure you are strong enough for treatment. A patient who is still mobile and self-sufficient is a prime candidate.

  • Lines of Treatment: Care is structured in "lines." If the first-line drug stops working, doctors "pivot" to a second or third-line option to keep the cancer at bay.

  • Functional Maintenance: The goal is to keep you out of the hospital and in your home environment for as long as possible.

  • Reduced Intensity: Doctors often use lower doses or "single-agent" (one drug) therapy to minimize side effects like severe nausea or hair loss.

  • Maintenance Therapy: Once the cancer is stable, you may transition to a low-dose oral drug indefinitely to keep the cancer "asleep."

  • Treatment Holidays: If the cancer is stable and you are feeling exhausted, your doctor may schedule a "break" of several weeks to let your body recover.

  • Metronomic Dosing: A modern approach using smaller, more frequent doses that attack the tumor's blood supply with fewer systemic side effects.

  • Palliative Infusions: Often delivered via a chemo-port to avoid repeated needle sticks and allow for a more comfortable infusion experience.

  • Symptom Mapping: Create a clear list of your current pain levels and physical limitations so the doctor can choose drugs that target those specific issues.

  • Advance Care Planning: It is helpful to discuss your personal boundaries for treatment—what side effects you are willing to tolerate and what your specific goals are.

  • Nutritional Optimization: Staying well-nourished helps your body tolerate the drugs and maintain your energy levels.

  • Financial Counseling: Since palliative care can be long-term, ensure your insurance or patient assistance programs are set up for multi-year coverage.

  • Support Team: It is common to meet with a dedicated palliative specialist alongside your oncologist to manage pain and emotional health.

  • Response Assessment Scans: CT or PET scans are typically done every 2 to 3 months to ensure the cancer is stable or shrinking.

  • Tumor Markers: Blood tests are used as a quick way to monitor the "burden" of the disease between major scans.

  • Quality of Life Surveys: You will often fill out regular assessments to track your energy, pain, and mood; these are as important as the blood tests.

  • Organ Monitoring: Regular blood tests to ensure the chemotherapy isn't causing excessive damage to your bone marrow, liver, or kidneys.

  • Liquid Biopsies: Advanced blood tests that detect "circulating tumor DNA" to see if the cancer is becoming resistant to the current line of chemo.

  • Focus on the "Now": Use the time gained to pursue hobbies and spend time with loved ones. Palliative chemo is designed to facilitate life.

  • Managing Side Effects: Be proactive. Tell your care team about even minor numbness, fatigue, or nausea so they can adjust your dose or medications immediately.

  • Stay Mobile: Gentle exercise like yoga or walking helps prevent the muscle loss and depression that can accompany long-term treatment.

  • Mental Health Support: Living with a chronic, advanced illness is a significant burden. Counseling or support groups are highly recommended.

  • The "Pivot" Discussion: If scans show the cancer is growing, have an open talk with your doctor about whether to try a new "line" of chemo or focus solely on comfort.

  • Extended Life Expectancy: For many advanced cancers, modern palliative regimens can add months or even years of life.

  • Definitive Pain Relief: Shrinking a tumor that is pressing on a bone or nerve is often more effective than high-dose painkillers.

  • Improved Vital Functions: Can clear obstructions in the lungs or gut, restoring the ability to eat and breathe comfortably.

  • Psychological Relief: Knowing that the disease is being actively managed and monitored provides a sense of control and hope.

  • Access to Innovation: Being on treatment often provides earlier access to new targeted drugs and clinical trials that are available for advanced stages.

Targetted Therapy
Targetted Therapy

Targeted Therapy is a type of cancer treatment that uses drugs designed to "target" specific molecules—usually proteins—that tell cancer cells to grow, divide, and spread. Unlike traditional chemotherapy, which kills all rapidly dividing cells (including healthy ones like hair and gut lining), targeted therapy is more precise. It is considered the cornerstone of Precision Medicine, acting like a "smart bomb" that identifies and attacks cancer cells while sparing healthy tissue.

  • Mutation-Positive Cancers: When genetic testing confirms your tumor has a specific "driver mutation" (like EGFR, ALK, or HER2).

  • Resistance to Chemotherapy: If standard chemotherapy has stopped working, targeted drugs may bypass the resistance pathways.

  • Chronic Management: When the goal is to manage cancer as a long-term condition with fewer systemic side effects than traditional chemo.

  • Combination Treatment: Often used alongside chemotherapy or radiation to make the cancer cells more vulnerable to treatment.

  • Specific Cancers: Standard of care for many cases of Stage IV lung cancer, breast cancer, melanoma, and certain leukemias.

  • Blocking Growth Signals: Targeted drugs block the mutated receptors on a cancer cell's surface that are stuck in the "on" position, effectively cutting off the command to grow.

  • Angiogenesis Inhibition: These drugs stop the tumor from growing its own blood vessels, effectively "starving" it of the nutrients it needs to expand.

  • Apoptosis Induction: Healthy cells naturally "self-destruct" when damaged; targeted therapy can jumpstart this process in cancer cells that have learned to ignore it.

  • Delivering Toxins: Some drugs, known as Antibody-Drug Conjugates (ADCs), act as delivery trucks, carrying chemotherapy or radiation directly to the cancer cell to minimize "collateral damage."

  • Signal Transduction Interference: Small-molecule drugs enter the cell to disrupt the internal communication lines that allow cancer to spread.

[Image showing angiogenesis inhibition where a tumor is deprived of new blood vessel growth]

  • Foundation of Precision Medicine: Targeted therapy is not "one size fits all." It is only effective if your cancer possesses the specific target the drug was built for.

  • Genetic Mapping: Before starting, a pathologist performs Next-Generation Sequencing (NGS) on a biopsy sample to identify mutations like BRAF, KRAS, or ROS1.

  • The Match: If a mutation is present, the drug is used. If absent, the drug will not work and may cause unnecessary side effects.

  • Liquid Biopsies (2026 Standard): In many cases, a simple blood test can now detect these mutations, sometimes avoiding the need for a painful repeat tissue biopsy.

  • Re-testing: Because cancer can mutate over time, doctors may re-test the tumor if it starts growing again to find a "second-generation" target.

  • Small-Molecule Drugs: These tiny molecules enter the cancer cell to target proteins inside. They are almost always taken as daily oral tablets. (Examples: Imatinib, Erlotinib).

  • Monoclonal Antibodies: Larger molecules that attach to the outer surface of the cancer cell or the surrounding area. These are usually given via IV Infusion. (Examples: Trastuzumab, Bevacizumab).

  • Bispecific Antibodies (2026 Standard): A newer class that attaches to two different targets at once—often one on the cancer cell and one on an immune cell—to bring the "killer" cells directly to the tumor.

  • Agnostic Drugs: Treatments that target a specific mutation regardless of where in the body the cancer started (e.g., NTRK inhibitors).

[Image comparing small-molecule drugs entering a cell vs. monoclonal antibodies attaching to the surface]

  • Comprehensive Genomic Profiling (CGP): Ensure your tumor has been tested for the full range of actionable mutations before selecting a drug.

  • Baseline Bloodwork: Liver and kidney function tests are critical, as these organs process targeted medications.

  • Blood Pressure Check: Many targeted therapies (especially angiogenesis inhibitors) can cause sudden spikes in blood pressure.

  • Skin Care Prep: Since skin rashes are a very common side effect, stock up on the specific alcohol-free, thick moisturizers recommended by your oncology team.

  • Medication Review: Some targeted drugs interact poorly with common supplements (like St. John’s Wort) or acid-reflux medications.

  • Daily Consistency: Unlike chemo cycles with rest periods, oral targeted therapy is usually taken every single day to keep the cancer suppressed.

  • Managing "The Rash": Many patients develop an acne-like rash on the face and chest. While frustrating, this often indicates the drug is working effectively.

  • Monitoring Blood Pressure: You may be asked to keep a daily log of your blood pressure at home.

  • Diarrhea Management: Small-molecule inhibitors can cause frequent digestive upset; keeping a "bland diet" and having anti-diarrheal meds ready is helpful.

  • Long-term Stability: Many patients live for years on targeted therapy, maintaining a high quality of life and continuing to work or travel.

  • Highly Precise: Specifically attacks cancer cells, which often means no hair loss and less severe nausea compared to chemotherapy.

  • Oral Convenience: Many forms are simple pills taken at home, reducing the need for hours spent in an infusion center.

  • Effective Against "Un-chemo-able" Cancers: Some cancers that are resistant to traditional chemo respond dramatically to targeted drugs.

  • Improved Survival: For many Stage IV patients, targeted therapy has turned a terminal diagnosis into a manageable chronic illness.

  • 2026 Advancements: Modern drugs are now being designed to cross the "blood-brain barrier," effectively treating cancer that has spread to the brain.

Immunotherapy
Immunotherapy

Immunotherapy is a type of cancer treatment that helps your immune system recognize and attack cancer cells. Unlike chemotherapy, which directly kills cancer cells, immunotherapy uses substances made by the body or in a laboratory to bolster or restore immune system function. It is considered a revolutionary turning point in oncology, moving the needle for cancers that were once considered difficult to treat by training the body's natural defenses to fight back.

  • High PD-L1 Expression: When testing shows your tumor uses the PD-L1 protein to "hide" from immune cells; drugs can block this signal.

  • High Tumor Mutational Burden (TMB): Cancers with many genetic changes (like those caused by smoking or UV damage) are often easier for the immune system to "see" as a threat.

  • Frontline Treatment: For many advanced lung cancers and melanomas, immunotherapy is now the first choice before traditional chemotherapy.

  • Durable Response Seekers: For patients looking for "long-term remission," as the immune system can sometimes "remember" the cancer and keep fighting it even after treatment stops.

  • MSI-High Status: If your cancer has a specific genetic feature called "Microsatellite Instability-High," making it highly sensitive to immune-based drugs.

  • Checkpoint Inhibitors: These block the "off-switches" (like PD-1 or CTLA-4) on immune cells. By keeping the switches "on," the immune system stays active enough to kill the cancer.

  • Monoclonal Antibodies: Lab-made proteins that "mark" cancer cells so the immune system can find them, or block specific proteins that help tumors grow.

  • T-cell Transfer Therapy (CAR-T): Your own immune cells are removed, "reprogrammed" in a lab to find your specific cancer, and re-infused as "super-soldiers."

  • Cancer Vaccines: Unlike preventive vaccines, these are given to people who already have cancer to help the body recognize and destroy existing tumor cells.

  • Dual-Targeting (2026 Standard): Newer "bispecific" antibodies that attach to a cancer cell and an immune cell simultaneously, physically pulling the killer cell toward its target.

  • IV Infusion: Most drugs (like Keytruda or Opdivo) are given via a vein in an outpatient clinic.

  • Cycle-Based Schedule: Administered in cycles, typically once every 2, 3, 4, or 6 weeks, depending on the specific drug and your body's response.

  • Long-Term Duration: Treatment can continue for up to two years if the cancer remains stable and you do not experience severe side effects.

  • Home Monitoring: Because side effects can be delayed, you may be asked to use a digital health app to track symptoms like cough or diarrhea daily.

  • Combination Protocols: Frequently given alongside low-dose chemo or targeted therapy to "prime" the tumor for an immune attack.

  • Biomarker Testing: You must undergo PD-L1 or NGS testing to confirm that immunotherapy is the right biological match for your cancer.

  • Baseline Organ Function: Thorough checks of your thyroid, liver, and lungs are essential, as these are the organs most likely to be affected by an overactive immune system.

  • Infection Screening: Doctors will screen for latent infections (like Hepatitis B or C) that could be reactivated when the immune system is "revved up."

  • Steroid Review: High doses of steroids (like prednisone) can sometimes make immunotherapy less effective, so your medications will be reviewed.

  • Patient Education: It is vital to learn the "early warning signs" of immune-related side effects, which are very different from chemotherapy side effects.

  • Response Assessment (The "Wait"): Scans are done every 2 to 3 months. Note: You may experience "Pseudo-progression," where a tumor looks larger at first because it is full of fighting immune cells.

  • Endocrine Panels: Monthly blood tests to check thyroid (TSH) and adrenal function, as the immune system can sometimes accidentally attack these glands.

  • Liquid Biopsy (2026 Standard): Monitoring "circulating tumor DNA" in the blood to see if the treatment is working before it shows up on a traditional CT scan.

  • Liver Enzymes: Regular checks for immune-mediated hepatitis (inflammation of the liver).

  • Lung Monitoring: Checking for pneumonitis (lung inflammation) via physical exams and, if needed, chest X-rays or CT scans.

  • The "Healthy" Appearance: Many patients do not lose their hair or experience severe nausea, allowing them to continue working and exercising during treatment.

  • Reporting irAEs: You must report even minor "new" symptoms immediately. A simple rash or a slight cough can escalate quickly if the immune system is over-attacking.

  • The "Steroid Pivot": If you develop significant inflammation, you may need to pause treatment and take high-dose steroids to "calm" the immune system down.

  • Sun Protection: Some immunotherapies make your skin extra sensitive; use high-SPF sunscreen and protective clothing.

  • Long-Term Vigilance: Side effects can occasionally appear months or even a year after you finish treatment, so stay in touch with your oncology team.

  • Potential for "Cure": In certain cancers, immunotherapy has led to long-term survival that was previously impossible with chemotherapy alone.

  • Less Collateral Damage: By targeting the immune system rather than killing all fast-growing cells, many patients maintain a much higher quality of life.

  • Broad Application: Some immunotherapy drugs are "tumor-agnostic," meaning they can treat many different types of cancer as long as the genetic marker is present.

  • Memory Effect: The immune system's ability to "remember" cancer cells provides a built-in defense system against future recurrence.

  • 2026 Precision: Advances in AI and molecular profiling now allow doctors to predict with 80% accuracy who will respond to these life-saving drugs.

Hormone Therapy
Hormone Therapy

Hormone Therapy (also called endocrine or anti-hormone therapy) is a systemic cancer treatment that slows or stops the growth of "hormone-sensitive" tumors. It works by either lowering the body's natural hormone levels or blocking hormones from attaching to cancer cells. It is a cornerstone of long-term cancer management, often used for years to keep cancer in a "sleeping" or dormant state.

  • HR+ Breast Cancer: If your pathology report shows the tumor is Estrogen Receptor-positive (ER+) or Progesterone Receptor-positive (PR+).

  • Prostate Cancer: Used to lower androgen levels (testosterone) which fuel the growth of prostate cancer cells.

  • Recurrence Prevention: Often used as an "adjuvant" therapy for 5–10 years after surgery to ensure no hidden cells regrow.

  • Metastatic Management: To control the spread of hormone-sensitive cancers in the bones or other organs.

  • Gynecological Cancers: Occasionally used for specific types of uterine or ovarian cancers that respond to hormonal shifts.

  • Blocking Receptors: Medications like Selective Estrogen Receptor Modulators (SERMs), such as Tamoxifen, act as a "broken key" in a lock, preventing real hormones from signaling the cell to grow.

  • Aromatase Inhibitors (AIs): Drugs like Letrozole or Anastrozole block the enzyme that creates estrogen in fatty tissues, primarily used for postmenopausal women.

  • LHRH Agonists/Antagonists: These signal the brain to stop the ovaries or testicles from producing sex hormones altogether (medical castration).

  • Androgen Receptor Blockers: Modern anti-androgens that block testosterone even more effectively in advanced prostate cancer.

  • Surgical Removal: Permanent removal of the ovaries (Oophorectomy) or testicles (Orchiectomy) to eliminate the body's main hormone factory.

  • Daily Oral Pills: The most common form, where tablets are taken at the same time every day at home.

  • Periodic Injections: Administered in a clinic every 1, 3, or 6 months to suppress hormone production.

  • Subcutaneous Implants: Small pellets placed under the skin that slowly release medication over several months.

  • Long-Term Duration: Unlike chemo, this treatment usually lasts 5 to 10 years for early-stage patients to maximize the chance of a permanent cure.

  • Step-Down Protocols: Doctors may "switch" drugs halfway through a 10-year course (e.g., from Tamoxifen to an AI) to improve efficacy.

  • Hormone Receptor Testing: A biopsy must confirm that the cancer is "hormone-sensitive" before starting; otherwise, the drugs will not work.

  • Bone Density Scan (DEXA): Essential at baseline because lowering estrogen or testosterone can lead to bone thinning (osteoporosis).

  • Cardiac Evaluation: Some hormone therapies can affect cholesterol or heart health; a baseline blood panel and blood pressure check are required.

  • Fertility Counseling: Since these drugs shut down reproductive organs, patients of childbearing age should discuss egg or sperm freezing before starting.

  • Medication Audit: Certain medications can interfere with how the body processes hormone therapy; your doctor will review all current prescriptions.

  • Tumor Marker Monitoring: Periodic blood tests (like PSA for prostate or CA 15-3 for breast) to ensure the cancer remains suppressed.

  • Annual DEXA Scans: To monitor bone health and determine if you need "bone-strength" medications like Bisphosphonates.

  • Lipid Profile: Regular checks of cholesterol and triglycerides, as hormone therapy can sometimes increase LDL levels.

  • Gynecological Exams: For women on specific therapies, regular pelvic exams are needed to monitor the lining of the uterus.

  • Liver Function Tests: To ensure the daily oral medications are being processed safely by the liver over the years of treatment.

  • Managing "The Change": Side effects often mimic menopause or "male menopause," including hot flashes and night sweats. Using cooling fans and moisture-wicking clothes can help.

  • Bone & Joint Health: Weight-bearing exercises (like walking or light weights) are vital to keep bones strong and reduce the joint pain common with Aromatase Inhibitors.

  • Mood Management: Hormone shifts can cause "brain fog" or irritability. Many patients benefit from mindfulness or support groups during long-term therapy.

  • Sexual Health: Loss of libido or dryness is common. Specialized oncology-focused sexual health clinics offer non-hormonal solutions to maintain intimacy.

  • The "Pill Habit": Adherence is the biggest challenge. Using a 7-day pill box or a smartphone reminder is critical for the full 5-to-10-year duration.

  • Highly Targeted: Only affects cells that are hormone-sensitive, meaning no hair loss and much less nausea than traditional chemotherapy.

  • Significant Survival Gain: For HR+ breast cancer, 5 years of Tamoxifen reduces the risk of death by about one-third.

  • Home-Based Convenience: Most patients can manage their treatment with a simple daily pill, maintaining their normal work and social life.

  • Proven Long-Term Success: Hormone therapy has decades of data proving its ability to prevent cancer from returning.

  • Precision Medicine: Advances in "Genomic Profiling" now help doctors predict exactly who can skip chemotherapy and use hormone therapy alone.

Uterine Cancer Treatment

Uterine cancer (also known as womb cancer) is primarily divided into endometrial cancer, which starts in the uterine lining, and the rarer, more aggressive uterine sarcoma, which starts in the muscle or connective tissue. Treatment protocols are highly individualized based on molecular testing, with a strong emphasis on minimally invasive surgery and targeted immunotherapies for advanced cases.

  • Abnormal Bleeding: Any vaginal bleeding, spotting, or discharge after menopause is the most significant warning sign.

  • Irregular Periods: Unusually heavy bleeding or bleeding between periods in those who have not reached menopause.

  • Pelvic Pain: Persistent pain or pressure in the pelvic region that does not resolve.

  • Urinary Changes: Difficulty or pain during urination, or the presence of a persistent pelvic mass.

  • Dyspareunia: Pain or discomfort experienced during sexual intercourse.

  • Systemic Signs: Unintentional weight loss or persistent fatigue associated with pelvic symptoms.

  • Total Hysterectomy: The most common surgery, involving the removal of the entire uterus and cervix; often performed robotically.

  • Bilateral Salpingo-Oophorectomy (BSO): Removal of both ovaries and fallopian tubes to prevent recurrence, as ovaries produce estrogen that can fuel tumor growth.

  • Sentinel Lymph Node (SLN) Mapping: A precise technique using fluorescent dye to identify and remove only the first few "gatekeeper" lymph nodes.

  • Lymphadenectomy: More extensive removal of pelvic and para-aortic lymph nodes if cancer spread is suspected.

  • Radical Hysterectomy: Required if cancer has reached the cervix; includes removal of the uterus, cervix, parametrium, and upper vagina.

  • Vaginal Brachytherapy (Internal): A radioactive source is placed inside a cylinder and inserted into the vagina for short, highly localized sessions.

  • External Beam Radiation (EBRT): A machine directs X-rays at the pelvic area, typically scheduled daily for 4 to 6 weeks.

  • IMRT: A specialized radiation therapy that shapes beams to the tumor, sparing the bladder and bowel from unnecessary exposure.

  • Proton Therapy: Used in specific high-risk cases to further reduce the "exit dose" of radiation to surrounding healthy tissue.

  • Chemotherapy: IV drug combinations like Carboplatin and Paclitaxel used for high-grade or metastatic disease.

  • Hormone Therapy: Uses progestins to block estrogen receptors, often used for low-grade tumors in patients wishing to preserve fertility.

  • Immunotherapy: Drugs like Pembrolizumab or Dostarlimab that help the immune system attack cancer, especially in specific genetic profiles.

  • Targeted Therapy: Medications such as Lenvatinib that block the blood supply to tumors, often paired with immunotherapy for a dual attack.

  • Molecular Profiling: Testing the tumor biopsy for specific markers to determine if immunotherapy will be more effective than chemo.

  • Imaging Workup: Completing an MRI or CT scan to check the depth of "myometrial invasion" (how deep the cancer has grown into the muscle).

  • Physical Optimization: Engaging in light activity to improve cardiovascular health before the abdominal procedure.

  • Bowel Prep: Following specific liquid diets or bowel cleansing instructions if required by the surgical team.

  • Fertility Discussion: For younger patients, discussing hormonal sparing options or egg freezing before a hysterectomy.

  • Endometrial Biopsy: To confirm the type and grade of the cancer (Endometrioid vs. Serous vs. Sarcoma).

  • Transvaginal Ultrasound: To measure the thickness of the uterine lining and check the condition of the ovaries.

  • Chest X-ray or CT: To ensure the cancer has not migrated to the lungs or upper abdomen.

  • CA-125 Blood Test: While not always definitive, it can help track treatment response in certain advanced types.

  • Complete Blood Count (CBC): To check for anemia, which is common in patients experiencing heavy vaginal bleeding.

  • Menopause Management: If ovaries were removed, you may experience hot flashes; non-hormonal management strategies are often prioritized.

  • Lymphedema Vigilance: Monitoring for swelling in the legs if pelvic lymph nodes were removed; early physical therapy is key.

  • Vaginal Health: Using specialized moisturizers or dilators if radiation therapy caused narrowing or dryness of the vaginal canal.

  • Surveillance Schedule: Regular pelvic exams and scans every 3–6 months for the first 2 years to ensure the surgical site remains clear.

  • Support Systems: Connecting with survivorship programs to manage the emotional impact of a hysterectomy and changes in body image.

  • High Cure Rates: Most Stage I endometrial cancers have a 5-year survival rate exceeding 90%.

  • Fertility Sparing: Modern protocols may allow progestin-only therapy for very early cases in young women who wish to preserve fertility.

  • Precision Mapping: Sentinel node mapping reduces the risk of permanent leg swelling (lymphedema) by over 50%.

  • Targeted Success: Immunotherapy has significantly improved survival times for patients with specific genetic markers.

  • Rapid Recovery: Minimally invasive robotic surgery often allows patients to return home within 24–48 hours.

Peripheral Bypass Surgery (Leg Arteries)

Peripheral Bypass Surgery (also known as Lower Extremity Bypass) is a major vascular procedure used to reroute blood flow around a blocked artery in the leg. It is the primary surgical treatment for advanced Peripheral Artery Disease (PAD) to restore circulation, relieve severe pain, and prevent tissue death or amputation. By creating a new pathway for blood, the surgery ensures that oxygen and nutrients reach the lower leg and foot.

  • Critical Limb Ischemia: Severe leg pain that occurs even at rest, often waking you up at night.

  • Non-Healing Ulcers: Sores or wounds on the toes, feet, or legs that do not heal despite standard wound care.

  • Gangrene: Visible tissue death in the foot or toes due to a total lack of blood supply.

  • Failed Conservative Care: When walking exercise programs, smoking cessation, and medications have failed to improve symptoms.

  • Ineligible for Stenting: When the blockage is too long, too hard (calcified), or located in an area where a stent would easily fail or kink.

  • Autologous Vein Bypass (Gold Standard): Using the patient's own healthy vein (usually the Great Saphenous Vein) to create the new bridge. This has the highest long-term success rate.

  • Synthetic Graft Bypass: Utilizing a medical-grade plastic tube (such as PTFE or Dacron) if the patient's natural veins are too small or diseased.

  • In-Situ Bypass: Leaving the patient's vein in its natural place but stripping the internal valves and connecting it to the blocked artery above and below.

  • Reversed Vein Bypass: Harvesting the vein, turning it around so the valves don't block blood flow, and stitching it into the new position.

  • Composite Graft: Using a combination of a natural vein and a synthetic tube for very long bypasses that extend from the groin to the ankle.

  • Mapping: The surgeon uses pre-operative imaging to identify the exact "inflow" (healthy artery above) and "outflow" (healthy artery below) for the graft.

  • Incisions: Two main incisions are made—one in the groin to access the femoral artery and another near the knee or ankle to access the target artery.

  • Graft Preparation: The surgeon either harvests the patient's saphenous vein or prepares the synthetic graft for implantation.

  • Tunneling: The graft is carefully "tunneled" through the tissues, either under the skin or deep beneath the muscles, to bypass the clogged arterial segment.

  • Anastomosis: Using extremely fine sutures and magnification, the surgeon stitches the graft into the healthy sections of the artery at both ends.

  • Flow Verification: A completion angiogram (dye test) or Doppler ultrasound is performed in the operating room to ensure blood is pulsing through the new bypass without leaks or kinks.

  • Vascular Mapping: A CT Angiogram (CTA) or MR Angiogram (MRA) is mandatory to provide a detailed "road map" of the blockages.

  • Vein Ultrasound: A specialized ultrasound to check if the leg veins are large and healthy enough to be used as a graft.

  • Smoking Cessation: Patients must stop smoking for at least 4 weeks prior; nicotine causes the new graft to clog almost immediately and prevents wound healing.

  • Medication Review: Coordination of blood thinners and diabetic medications to ensure the body is ready for a long surgical procedure.

  • Fasting (NPO): No food or drink for 8–12 hours before the procedure to ensure safety under general or spinal anesthesia.

  • CT or MR Angiography: To visualize the exact length and location of the arterial blockages.

  • Duplex Ultrasound: To evaluate the quality of the "donor" veins and the speed of blood flow in the remaining healthy arteries.

  • Ankle-Brachial Index (ABI): A baseline measurement of the blood pressure in the legs compared to the arms to assess the severity of the PAD.

  • Cardiac Clearance: Because PAD often coexists with heart disease, an EKG or stress test is often required to ensure the heart can handle the surgery.

  • Hospital Stay: Typically 3 to 7 days; nurses will check the pulses in your foot every hour for the first 24 hours to ensure the graft is open.

  • Early Mobilization: You will be encouraged to stand and take short walks within 24–48 hours to prevent blood clots and pneumonia.

  • Leg Elevation: Keeping the leg elevated when sitting is critical for the first 4 weeks to manage the significant swelling that follows the return of blood flow.

  • Lifelong Medication: Daily aspirin and usually a second blood thinner (like Clopidogrel) are required indefinitely to keep the graft from clotting.

  • Surveillance: Regular Duplex Ultrasound scans are required every 3–6 months for the first two years to monitor the bypass and catch any narrowing early.

  • Limb Salvage: Effectively prevents the need for amputation in patients with critical limb ischemia and gangrene.

  • Dramatic Pain Relief: Restoring blood flow immediately eliminates the severe "rest pain" caused by a lack of oxygen to the tissues.

  • Heals Chronic Wounds: Provides the necessary circulation for long-standing ulcers and sores to finally heal.

  • Restores Mobility: Allows patients to walk significantly further without the cramping and weakness associated with PAD.

  • Long-Term Durability: When performed with a natural vein, the bypass can remain open and functional for many years, significantly improving quality of life.

Carotid Endarterectomy

Carotid Endarterectomy (CEA) is a major surgical procedure used to remove fatty deposits (plaque) from the carotid artery in the neck. This is the primary surgical method for stroke prevention when the artery is significantly narrowed (stenosis). By cleaning out the artery, the surgery restores healthy blood flow to the brain and removes the source of potential blood clots.

  • Significant Stenosis: When the carotid artery is blocked by more than 70%, even if you have not experienced symptoms.

  • Symptomatic Narrowing: When the artery is blocked by more than 50% and you have already experienced a stroke or a Transient Ischemic Attack (TIA/mini-stroke).

  • TIA (Mini-Stroke): Warning signs such as sudden numbness, facial drooping, or speech difficulty that resolve within 24 hours but indicate high stroke risk.

  • Amaurosis Fugax: Temporary loss of vision in one eye, often described as a "shade being pulled down," caused by a small piece of plaque blocking a retinal artery.

  • Failed Medical Management: When plaque continues to build up despite the use of blood thinners and high-dose cholesterol medications.

  • Traditional CEA: The standard method where the artery is opened vertically to peel out the plaque and then closed with a patch to widen the vessel.

  • Eversion CEA: A technique where the internal carotid artery is cut at its base, turned inside out to remove the plaque, and then reattached to the main artery.

  • CEA under Local/Regional Anesthesia: Performing the surgery while the patient is awake to allow the surgeon to monitor neurological function (speech and grip) in real-time.

  • CEA with Shunting: Using a temporary plastic tube to reroute blood to the brain while the artery is being cleaned, ensuring continuous oxygen delivery.

  • Patch Angioplasty: The use of a synthetic (Dacron) or biological (vein) patch during closure to prevent the artery from narrowing again.

  • Exposure: A vertical incision (approx. 7–10 cm) is made along the side of the neck, following a natural skin crease to minimize scarring.

  • Control: The surgeon identifies the common, internal, and external carotid arteries and places temporary surgical clamps to pause blood flow to the treatment site.

  • Plaque Removal: A vertical cut is made in the artery, and the surgeon meticulously "peels" out the yellow, waxy plaque from the inner lining of the vessel.

  • Widening: To ensure the artery remains wide and open, a patch made of synthetic material or a vein harvested from the leg is stitched over the incision.

  • Flushing and Restoration: The surgeon carefully flushes the artery to remove any debris before removing the clamps and restoring full blood flow to the brain.

  • Closure: A small drain may be left in the neck for 24 hours to prevent fluid buildup, and the skin is closed with fine sutures or surgical glue.

  • Vascular Mapping: Diagnosis is confirmed via Carotid Ultrasound, CT Angiography (CTA), or MR Angiography (MRA) to determine the exact location and "hardness" of the plaque.

  • Cardiac Clearance: Because carotid disease often coexists with heart disease, a cardiology evaluation is often required to ensure the heart is stable for surgery.

  • Medication Review: Patients are typically instructed to continue taking aspirin but may need to adjust other blood thinners under surgical guidance.

  • Fasting (NPO): No food or drink for 8–12 hours before the procedure to ensure safety during anesthesia.

  • Carotid Duplex Ultrasound: A non-invasive test that uses sound waves to measure the speed of blood flow and the degree of narrowing.

  • CT Angiography (CTA): Provides a detailed 3D map of the neck arteries and identifies calcified (hard) vs. soft plaque.

  • Electrocardiogram (EKG): To assess heart rhythm and check for underlying coronary artery disease before the stress of surgery.

  • Neurological Assessment: A baseline exam of speech, vision, and motor strength to allow for accurate post-operative comparisons.

  • Hospital Stay: Typically 24 to 48 hours; intensive blood pressure monitoring is critical during the first 12 hours to prevent stress on the repair.

  • Immediate Recovery: Soreness and numbness around the neck incision are common and can last for several weeks or months.

  • Activity Resumption: Most patients return to normal light activities within 1 to 2 weeks. Driving is usually restricted for one week until full neck rotation is comfortable.

  • Lifelong Medication: Daily Aspirin and Statins (cholesterol medication) are mandatory to prevent new plaque from forming in the repaired artery.

  • Long-Term Surveillance: A follow-up Carotid Ultrasound is typically performed at 1 month, 6 months, and then annually to ensure the artery remains open.

  • Significant Stroke Prevention: Reduces the risk of a future stroke on the operated side by over 60–80% compared to medication alone.

  • Restores Cerebral Blood Flow: Increases the volume of oxygenated blood reaching the brain, which can improve cognitive clarity and reduce "mini-stroke" symptoms.

  • Long-Term Durability: The artery remains open in approximately 95% of cases over a 10-year period.

  • Minimal Scarring: The use of skin-crease incisions and fine suturing techniques ensures a subtle cosmetic result once fully healed.

Laser Varicose Vein Treatment

Laser Varicose Vein Treatment, scientifically known as Endovenous Laser Ablation (EVLA) or EVLT, is a minimally invasive procedure used to seal shut diseased veins. Unlike traditional "vein stripping," this approach uses targeted laser heat to collapse the vein from the inside, naturally rerouting blood flow to healthier veins. It is considered the modern gold standard for treating the underlying cause of painful, bulging varicose veins.

  • Chronic Venous Insufficiency: When leaky valves in the leg veins cause blood to pool, leading to leg heaviness, aching, and swelling.

  • Bulging Varicose Veins: Large, twisted veins on the surface of the legs that are often painful or cause skin irritation.

  • Venous Ulcers: Open sores near the ankles caused by long-term high pressure in the leg veins.

  • Phlebitis: Recurrent inflammation or painful "clots" in the superficial veins.

  • Skin Changes: Brownish discoloration (hyperpigmentation) or thickening of the skin near the ankles, which indicates advanced vein disease.

  • Endovenous Laser Ablation (EVLA): The primary method using a specialized laser fiber to deliver heat energy directly to the vein wall.

  • Radiofrequency Ablation (RFA): A similar technique that uses high-frequency electrical energy instead of light to generate heat and close the vein.

  • Ultrasound-Guided Sclerotherapy: Often used as a secondary treatment to close smaller "branch" veins that remain after the main vein is sealed.

  • VenaSeal (Medical Adhesive): A non-thermal alternative that uses a specialized medical "glue" to seal the vein without the need for heat or tumescent numbing.

  • Clarivein (MOCA): A mechanical-chemical approach that uses a rotating wire and a liquid sclerosant to close the vein without heat.

  • Mapping: Under ultrasound guidance, the surgeon identifies the exact "leaky" segment of the Great Saphenous Vein or Small Saphenous Vein.

  • Access: A tiny needle is used to create a small "stab" entry point, usually near the knee or ankle.

  • Fiber Placement: A thin laser fiber is threaded through a catheter and positioned at the top of the diseased vein, near the groin or behind the knee.

  • Tumescent Anesthesia: A large volume of numbing fluid (lidocaine and saline) is injected around the vein. This "cushion" numbs the area and protects the skin and nerves from the laser's heat.

  • Laser Activation: As the surgeon slowly withdraws the fiber, the laser emits intense light energy that collapses and seals the vein wall.

  • Completion: The fiber is removed, and since the entry point is so small, no stitches are required—only a simple adhesive bandage.

[Image showing the steps of EVLT from catheter insertion to vein closure]

  • Venous Doppler Ultrasound: A mandatory "mapping" scan to identify the location of leaky valves and measure the diameter of the veins.

  • Compression Fitting: Patients should be measured for medical-grade compression stockings to be worn immediately after the procedure.

  • Attire: Wear loose-fitting clothing or shorts to the clinic to accommodate the bandages and stockings.

  • Medication: Most patients can continue their normal medications, as the procedure is performed under local rather than general anesthesia.

  • Duplex Ultrasound: The primary tool used to confirm "reflux" (blood flowing the wrong way) and plan the surgical path.

  • Visual Assessment: To document the presence of edema (swelling), skin changes, or ulcers for insurance and clinical staging.

  • Ankle-Brachial Index (ABI): Occasionally performed to ensure the arterial circulation in the legs is healthy before applying high-pressure compression.

  • Immediate Mobilization: This is a "walk-in, walk-out" procedure; you are required to walk for 15–20 minutes immediately after the session.

  • Compression Therapy: High-pressure stockings must be worn 24/7 for the first 3–7 days, and then during the day for another 1–2 weeks to ensure the vein remains closed.

  • Activity: Normal daily activities and walking can resume immediately. However, heavy weightlifting and hot baths should be avoided for 2 weeks.

  • Healing Sensations: It is normal to feel a "tightness" or a pulling sensation along the inner thigh for 5–10 days as the vein naturally turns into scar tissue.

  • Follow-up Scan: An ultrasound is typically performed within the first week to confirm the vein is successfully occluded and to rule out any deep vein clots.

  • Extremely High Success Rate: Over 95% of treated veins remain permanently closed and are eventually absorbed by the body.

  • No Surgical Incisions: Eliminates the need for large cuts, preventing scarring and significantly reducing the risk of infection.

  • Minimal Downtime: Most patients return to work the following day with very little discomfort.

  • Symptom Relief: Provides rapid relief from the "heavy leg" sensation, aching, and nighttime cramping associated with venous disease.

  • Cosmetic Improvement: Bulgy surface veins often shrink or disappear once the high-pressure "root cause" is sealed shut.

Embolectomy/Thrombectomy

Embolectomy and Thrombectomy are emergency surgical procedures used to remove a physical blockage from a blood vessel to restore blood flow. While these terms are often used interchangeably, an embolectomy specifically removes an embolus (a clot that traveled from elsewhere in the body), whereas a thrombectomy removes a thrombus (a clot that formed locally within the vessel). These are critical interventions used to prevent permanent tissue death, organ failure, or limb loss.

  • Acute Limb Ischemia: A sudden loss of blood flow to a leg or arm, characterized by the "6 Ps": Pain, Pallor (pale skin), Pulselessness, Paresthesia (numbness), Paralysis, and Perishing Cold.

  • Ischemic Stroke: When a large blood vessel in the brain is blocked, leading to sudden facial drooping, arm weakness, or speech difficulties.

  • Massive Pulmonary Embolism (PE): A large clot lodged in the lung arteries that causes severe shortness of breath, low blood pressure, and strain on the heart.

  • Failed Thrombolysis: When "clot-busting" medications (like tPA) are either unsafe for the patient or have failed to dissolve a large, stubborn blockage.

  • Organ Ischemia: Sudden blockage of the arteries supplying the kidneys or intestines (Mesenteric Ischemia), which is a surgical emergency.

  • Surgical (Open) Embolectomy: The traditional method where the vessel is opened manually to remove the blockage under direct vision.

  • Mechanical (Endovascular) Thrombectomy: A minimally invasive approach using specialized catheters to retrieve or dissolve the clot from within the vessel.

  • Aspiration Thrombectomy: Using high-powered suction catheters to "vacuum" the clot out of the artery or vein.

  • Stent-Retriever Thrombectomy: A mesh-like device is expanded into the clot, snagging it so it can be safely pulled out of the body; this is the gold standard for many stroke treatments.

  • Fogarty Balloon Catheterization: A classic surgical technique where a balloon is passed beyond the clot, inflated, and withdrawn to sweep the blockage out.

  • Rapid Access: For a surgical embolectomy, an incision is made directly over the affected artery (often in the groin). For mechanical procedures, a small puncture is made in the groin or wrist.

  • Navigation: Using real-time X-ray guidance (fluoroscopy), the surgeon steers a catheter to the exact location of the blockage.

  • Clot Extraction:
    Open: The surgeon opens the vessel, inserts a Fogarty catheter past the clot, inflates the balloon, and pulls the blockage out through the incision.
    Mechanical: A stent-retriever or suction device is deployed to capture and remove the thrombus through the catheter.

  • Flow Assessment: Contrast dye is injected to perform an angiogram, ensuring that blood flow is fully restored to all downstream branches.

  • Vessel Repair: In open surgery, the artery is meticulously sewn shut. In endovascular cases, the catheter is removed, and the small puncture site is closed with a pressure device or a special "plug."

  • Emergency Mapping: Rapid diagnosis via CT Angiogram (CTA) or Duplex Ultrasound is mandatory to locate the exact position and size of the clot.

  • Immediate Anticoagulation: Patients are typically started on high-dose Heparin immediately to prevent the existing clot from growing while they wait for surgery.

  • Vital Stabilization: Managing blood pressure and oxygen levels to keep the "starved" tissue alive as long as possible before the procedure.

  • Fasting (NPO): While these are emergencies, patients are kept from eating or drinking as soon as the diagnosis is suspected to prepare for potential general anesthesia.

  • CT Angiography (CTA): The most common test to provide a high-definition 3D map of the blocked vessels.

  • Duplex Ultrasound: A quick, bedside tool used to visualize clots in the limbs or neck.

  • Blood Panels: To check clotting times (PT/INR), kidney function (for contrast safety), and "markers" of muscle damage (CPK).

  • Electrocardiogram (EKG): To determine if a heart rhythm issue, such as Atrial Fibrillation, was the source of the wandering clot (embolus).

  • Hospital Stay: Typically 3 to 7 days, often starting in a specialized Intensive Care Unit (ICU) for close monitoring.

  • Frequent Checks: Nurses will perform hourly pulse checks, skin temperature assessments, and neurological exams to ensure the vessel remains open.

  • Fasciotomy Care: In severe cases of limb swelling (Compartment Syndrome), patients may have surgical incisions in their muscles that require specialized wound care.

  • Lifelong Anticoagulation: Most patients will require long-term blood thinners (like Eliquis or Warfarin) to prevent new clots from forming.

  • Rehabilitation: Physical therapy is often necessary to recover muscle strength or coordination lost during the time the tissue was without blood flow.

  • Life and Limb Salvage: Effectively prevents the need for amputation or the death of vital organ tissue.

  • Rapid Recovery of Function: In stroke cases, successful thrombectomy can lead to the immediate return of speech or movement.

  • Prevents Heart Strain: Removing a massive pulmonary embolism immediately reduces the workload on the heart, preventing right-sided heart failure.

  • High Technical Success: Modern mechanical devices allow surgeons to reach and remove clots in very small or deep vessels that were previously unreachable.

Arteriovenous Fistula Surgery

An Arteriovenous (AV) Fistula is a surgically created connection between an artery and a vein, designed to provide a reliable, long-term access point for hemodialysis. It remains the "gold standard" for vascular access because it is constructed entirely from the patient's own biological tissue. Compared to synthetic grafts or temporary catheters, an AV fistula offers a significantly lower risk of infection, fewer instances of clotting, and the longest functional lifespan, making it the foundation of high-quality renal care.

  • End-Stage Renal Disease (ESRD): When kidney function has declined to the point where regular hemodialysis is necessary to filter waste from the blood.

  • Long-Term Dialysis Planning: For patients expected to be on dialysis for several years, as the fistula provides the most durable access.

  • Vessel Health: When a patient has healthy, adequately sized veins and arteries in the arm that can support the increased blood flow.

  • Infection Prevention: For individuals who are highly susceptible to infections or have had complications with synthetic grafts or central venous catheters.

  • Home Hemodialysis: It is often the preferred access for patients performing their own treatments at home due to its reliability and safety profile.

  • Radiocephalic Fistula: Created at the wrist by joining the radial artery and cephalic vein; usually the first choice to preserve upper arm veins.

  • Brachiocephalic Fistula: Created at the elbow; often used when wrist veins are too small or have been damaged by previous medical procedures.

  • Brachiobasilic Transposition: A more complex surgery where a deep vein in the upper arm is moved closer to the skin to make it reachable for needles.

  • Endovascular (Percutaneous) Fistula: A modern, "no-scalpel" approach using radiofrequency energy to join vessels through a tiny needle stick, leaving no surgical scar.

  • Gracz Fistula: A specific type of elbow connection involving the perforating vein, often used when other elbow options are limited.

  • Vessel Mapping: Before surgery, an ultrasound is used to find the healthiest artery and vein to ensure the highest chance of success.

  • Anesthesia: The procedure is performed under local anesthesia with light sedation, or a regional "block" that numbs the entire arm.

  • The Connection: The surgeon makes a small incision and carefully stitches the side of the vein to the side (or end) of the artery.

  • Immediate Flow Check: Once the connection is made, the surgeon can usually feel a "thrill" (vibration), indicating arterial blood is successfully entering the vein.

  • Incision Closure: The skin is closed with small sutures or surgical glue, and a light protective dressing is applied.

  • Endovascular Alternative: If using a "no-scalpel" system, the vessels are fused using a specialized catheter under X-ray or ultrasound guidance.

  • Vein Preservation: The chosen arm must be "protected"—meaning no blood draws, IVs, or blood pressure checks should be performed on that arm once a fistula is planned.

  • Early Planning: Specialists recommend creating the fistula 3 to 6 months before you expect to start dialysis to ensure it is ready for use on day one.

  • Diagnostic Imaging: Undergoing a formal "vessel map" ultrasound to confirm the diameter and depth of the target vessels.

  • Fasting (NPO): Depending on the type of sedation used, you may be asked to fast for 8 hours prior to the procedure.

  • Duplex Ultrasound: To measure the size of the arteries and veins and check for any existing blockages or clots.

  • Allen's Test: A manual clinical test to ensure the hand has adequate blood supply from both the radial and ulnar arteries.

  • Blood Panels: Routine labs to check for anemia, electrolyte balance, and clotting factors before the minor surgical intervention.

  • Cardiac Evaluation: In some cases, to ensure the heart can handle the increased workload created by the new "shunt" in the circulation.

  • The "Ripening" Phase: A fistula needs 6 to 12 weeks to mature. During this time, the vein thickens and toughens so it can safely handle dialysis needles.

  • Fistula Exercises: Patients are often taught "stress ball" or "grip" exercises to strengthen the arm and encourage the vein to enlarge.

  • Daily Monitoring: Patients are taught to touch their fistula daily to feel for a constant vibration (the thrill) and listen for the whooshing sound (the bruit).

  • Arm Protection: 1. Never let anyone take blood pressure on the fistula arm. 2. Never let anyone draw blood or start an IV in that arm. 3. Avoid wearing tight jewelry or restrictive sleeves.

  • Activity: Once the initial surgical wound heals, patients can return to normal activities, though they should avoid sleeping with the fistula arm tucked under their body.

  • Superior Durability: Once matured, a fistula can last for many years, often outperforming all other types of dialysis access.

  • Lower Infection Rates: Since no foreign material is implanted, the risk of life-threatening bloodstream infections is significantly reduced.

  • High Blood Flow: It provides the robust, high-volume blood flow necessary for the dialysis machine to clean the blood effectively.

  • Better Health Outcomes: Studies consistently show that patients with a functioning AV fistula have better overall survival rates on dialysis.

  • Natural Healing: Because it is made of your own tissue, the site heals itself after each dialysis session, reducing the need for long-term maintenance.

AVM Surgery (Vascular/Peripheral)

Arteriovenous Malformation (AVM) Surgery, also known as surgical resection, is an intricate procedure to remove a tangled mass of abnormal blood vessels that bypasses the normal capillary system. This "nidus" of vessels is often found in the brain or spinal cord and can be life-threatening if it ruptures and causes a hemorrhage. The primary goal of surgery is to completely remove the malformation to eliminate the risk of bleeding while preserving the surrounding healthy neural tissue.

  • Prior Hemorrhage: If the AVM has already bled, the risk of a second, more dangerous rupture increases significantly.

  • Seizure Management: When the AVM irritates the surrounding brain tissue, leading to chronic or severe seizures that are difficult to control with medication.

  • Progressive Neurological Deficits: If the malformation is "stealing" blood from healthy brain tissue, causing worsening weakness, numbness, or vision changes.

  • AVM Size and Location: For AVMs located in accessible areas of the brain where surgical removal carries a lower risk than the lifelong risk of rupture.

  • Severe Headaches: In cases where the high-pressure blood flow within the AVM causes chronic, debilitating migraines or localized head pain.

  • Microsurgical Resection: The primary surgical method using a high-powered operating microscope to meticulously separate the AVM from healthy brain tissue.

  • Stereotactic Radiosurgery (Gamma Knife): A non-invasive alternative using targeted radiation to slowly shrink and close the vessels over 1 to 3 years; often used for deep or small AVMs.

  • Endovascular Embolization: A catheter-based technique where "glue" or coils are injected to block blood flow; often used as a precursor to make the main surgery safer.

  • Staged Resection: Breaking the removal into multiple smaller surgeries to allow the brain’s blood flow patterns to adapt gradually.

  • Image-Guided Navigation: Using specialized "GPS-like" computer systems to map the exact boundaries of the AVM in real-time during the operation.

  • Accessing the Site: A craniotomy (opening the skull) or laminectomy (opening the spine) is performed to provide direct access to the site of the malformation.

  • Microdissection: Using a high-powered operating microscope, the surgeon carefully identifies and isolates the feeding arteries that supply the AVM.

  • Sealing Feeders: The surgeon uses specialized tiny surgical clips to seal off the high-pressure feeding arteries one by one.

  • En Bloc Removal: Once the blood supply is cut off, the entire tangled mass (the nidus) is delicately separated from healthy brain or spinal tissue and removed as a single piece.

  • Preserving Drainage: The draining veins are typically left intact until the very end of the procedure to prevent the AVM from swelling and rupturing during dissection.

  • Intraoperative Confirmation: ICG videoangiography (a fluorescent dye test) is often used to ensure no hidden shunts or fragments of the AVM remain before closing.

  • Imaging & Planning: High-resolution Cerebral Angiography, MRI, and CT scans are mandatory to map the complex "feeding" and "draining" patterns of the vessels.

  • Pre-Surgical Embolization: Many patients undergo a separate catheter procedure days before surgery to "plug" parts of the AVM and reduce the risk of intraoperative bleeding.

  • Multidisciplinary Review: The case is typically reviewed by a team of neurosurgeons and interventional radiologists to assess the risk to critical (eloquent) brain areas.

  • Medication Adjustment: Patients may be started on anti-seizure medications or steroids to reduce brain swelling before the intervention.

  • Fasting (NPO): No food or drink for 8–12 hours prior to the procedure to ensure safety under general anesthesia.

  • Cerebral Angiography: The gold standard test for visualizing the exact blood flow architecture and identifying any associated aneurysms.

  • Functional MRI (fMRI): Used to map the AVM’s proximity to critical brain functions like speech, movement, or memory.

  • CT Angiography (CTA): Provides a rapid, 3D view of the AVM in relation to the skull and bony structures.

  • Baseline Neurological Exam: A comprehensive assessment of strength, coordination, and cognitive function to serve as a benchmark for post-operative recovery.

  • Hospital Stay: Typically 4 to 7 days, with at least the first 24 hours spent in a Neuro-ICU for continuous neurological monitoring.

  • Immediate Recovery: It is normal to experience fatigue, severe headaches, and swelling or bruising around the incision site or eyes for the first week.

  • Activity Restrictions: Strenuous activity, heavy lifting, and contact sports are strictly prohibited for 4 to 6 weeks to allow the skull and brain to heal.

  • Rehabilitation: Depending on the AVM's location, many patients require physical, occupational, or speech therapy to regain or optimize function.

  • Surveillance: Follow-up imaging (Angiography or MRI) is typically performed at 1 month and then periodically for several years to ensure no recurrence.

  • Eliminates Rupture Risk: If the AVM is completely removed, the patient is considered cured, and the lifelong threat of a brain hemorrhage is eliminated.

  • Seizure Control: Removal often leads to a significant reduction or total elimination of seizures caused by the malformation.

  • Permanent Solution: Unlike radiation, which takes years to work, surgery provides an immediate result once the resection is complete.

  • Restores Normal Circulation: By removing the "shunt," blood flow is redirected back to the healthy brain tissue that was previously deprived of oxygen.

  • Peace of Mind: Provides long-term security for patients, knowing the abnormal vessel mass is no longer present in their nervous system.

Aortic Valve Replacement (AVR)

Aortic Valve Replacement (AVR) is an advanced cardiac procedure that replaces a damaged, stiff, or leaking aortic valve with a new mechanical or tissue valve. This restores healthy blood flow, improves heart pumping capacity, reduces symptoms, and prevents long-term heart failure or life-threatening complications.

  • Severe or persistent shortness of breath that limits walking, climbing stairs, or daily activity.

  • Chest pain, pressure, or heaviness due to the heart struggling to push blood through a narrowed valve.

  • Extreme tiredness or low energy even during simple tasks.

  • Dizziness or fainting episodes, especially during exertion.

  • Irregular heartbeat or noticeable palpitations, indicating the heart is under stress.

  • Swelling in the feet, legs, or ankles, a sign of poor blood circulation or early heart failure.

  • Severe Aortic Stenosis – the valve becomes narrowed and heavily calcified, restricting blood flow.

  • Severe Aortic Regurgitation – the valve leaks and allows blood to flow backward into the heart.

  • Congenital valve abnormalities, including bicuspid valves.

  • Infection-related valve damage (endocarditis) that weakens or destroys the valve.

  • Aged, stiff, or heavily calcified aortic valve due to long-term wear and tear.

  • General anesthesia is given to ensure a pain-free and comfortable procedure.

  • The surgeon makes either a full chest incision or a minimally invasive cut depending on your case.

  • The damaged aortic valve is carefully removed.

  • A new mechanical or biological valve is implanted to restore proper blood flow.

  • The heart is restarted, and valve function is tested to ensure smooth operation.

  • You are shifted to the ICU for continuous monitoring and early recovery.

  • Mechanical Valve Replacement
    Long-lasting artificial valve; ideal for younger patients. Requires lifelong blood thinners to prevent clots.

  • Biological (Tissue) Valve Replacement
    Made from natural tissue. Offers natural blood flow and usually requires minimal blood thinner use.

  • Minimally Invasive AVR
    Smaller incisions, less pain, reduced blood loss, and faster healing.

  • Robotic AVR
    Performed using robotic precision tools for high accuracy, minimal scars, and quicker recovery.

  • TAVR (Transcatheter Aortic Valve Replacement)
    A non-surgical, catheter-based procedure performed through the groin. Ideal for elderly or high-risk patients.

  • Quit smoking at least 2–3 weeks before surgery for better lung function.

  • Keep blood pressure, diabetes, and heart rate well controlled.

  • Follow fasting instructions before the procedure.

  • Stop blood thinners only if your cardiologist advises.

  • Complete all required heart and blood tests before the surgery date.

  • ECG to check heart rhythm.

  • 2D Echocardiography to evaluate valve structure and pumping strength.

  • CT scan or MRI for detailed imaging when needed.

  • Coronary Angiography to detect any artery blockages.

  • Chest X-ray to assess lung health.

  • Routine blood tests including CBC, kidney/liver function, and clotting profile.

  • Restores normal forward blood flow from the heart.

  • Reduces breathlessness and chest discomfort.

  • Prevents the heart from becoming enlarged or weak.

  • Improves daily stamina, energy levels, and activity tolerance.

  • Provides long-lasting results with modern valve technology.

  • ICU stay: Usually 1–2 days for close monitoring.

  • Early walking begins within 24 hours.

  • Tubes and drains are removed in 48–72 hours.

  • Home recovery: Typically 4–8 weeks depending on the surgery type.

  • Return to work: Usually within 6–10 weeks.

  • Avoid smoking permanently to protect the new valve.

  • Follow a heart-healthy, low-salt diet for lifelong cardiac wellness.

  • Exercise daily with light walking, avoid heavy lifting initially.

  • Take medications regularly, especially blood thinners if you have a mechanical valve.

  • Join a cardiac rehabilitation program for guided recovery and long-term heart strength.

Mitral Valve Replacement (MVR)

Mitral Valve Replacement (MVR) is a specialized heart procedure that restores healthy blood flow by replacing a diseased mitral valve with a mechanical or biological valve. This improves heart efficiency, reduces symptoms like breathlessness and fatigue, and prevents long-term complications such as heart failure.

  • Shortness of breath during daily activities or while lying down.

  • Chest discomfort or pressure caused by poor blood flow through the heart.

  • Fatigue or low energy during simple tasks.

  • Irregular heartbeat or palpitations due to valve dysfunction.

  • Swelling in feet, legs, or ankles from fluid retention.

  • Fainting or dizziness, especially during physical activity.

  • Severe Mitral Stenosis – narrowing of the mitral valve restricting blood flow.

  • Severe Mitral Regurgitation – leaking mitral valve causing backward blood flow.

  • Congenital mitral valve defects present from birth.

  • Valve damage from infection (endocarditis).

  • Calcified or thickened mitral valve leading to poor heart function.

  • General anesthesia is administered for a safe, painless procedure.

  • A chest or minimally invasive incision is made based on patient suitability.

  • The damaged mitral valve is carefully removed.

  • A mechanical or biological replacement valve is implanted.

  • Heart function is tested before closing the incision.

  • Patient is moved to the ICU for monitored recovery.

  • Mechanical Valve Replacement
    Long-lasting artificial valve; requires lifelong blood thinners.

  • Biological (Tissue) Valve Replacement
    Natural tissue valve; usually requires minimal blood thinner use.

  • Minimally Invasive MVR
    Smaller incisions, less pain, quicker healing, and reduced scarring.

  • Robotic MVR
    Uses robotic precision for high accuracy, minimal scarring, and faster recovery.

  • Transcatheter Mitral Valve Replacement (TMVR)
    Non-surgical, catheter-based procedure for high-risk or elderly patients.

  • Stop smoking 2–3 weeks before surgery.

  • Maintain blood pressure, diabetes, and heart rate within target range.

  • Follow fasting instructions as advised.

  • Pause blood thinners only if instructed by your cardiologist.

  • Complete all cardiac and routine blood tests prior to surgery.

  • ECG to check heart rhythm.

  • Echocardiography (2D/3D) to evaluate mitral valve function.

  • CT or MRI scans for detailed imaging if required.

  • Coronary angiography to detect any blocked arteries.

  • Chest X-ray to assess lung and heart health.

  • Routine blood tests including CBC, kidney/liver function, and clotting profile.

  • Restores normal blood flow through the heart.

  • Reduces shortness of breath, fatigue, and chest discomfort.

  • Prevents heart enlargement and failure.

  • Improves daily activity tolerance and quality of life.

  • Provides long-lasting results with modern valve options.

  • ICU stay: 1–2 days for close monitoring.

  • Walking usually begins within 24 hours.

  • Tubes and drains are removed in 48–72 hours.

  • Home recovery: 4–8 weeks depending on the procedure type.

  • Return to work: Typically 6–10 weeks, gradually increasing activity.

  • Avoid smoking permanently.

  • Follow a heart-healthy, low-salt diet.

  • Engage in daily light exercise; avoid heavy lifting initially.

  • Take prescribed medications regularly, especially blood thinners for mechanical valves.

  • Join a cardiac rehabilitation program for optimal long-term recovery.

Heart Bypass Surgery (CABG)

Coronary Artery Bypass Grafting (CABG), commonly called "heart bypass surgery," is a major surgical procedure used to treat severe coronary artery disease. It creates new pathways for blood to flow to the heart muscle by bypassing clogged or narrowed sections of the coronary arteries. By using healthy blood vessels from elsewhere in the body to "reroute" blood, CABG restores vital oxygen supply to the heart muscle and reduces the risk of a heart attack.

  • Left Main Disease: A severe blockage in the main artery supplying the left side of the heart, which is considered high-risk.

  • Triple Vessel Disease: Significant blockages in all three major coronary arteries.

  • Diabetes: Patients with diabetes and multi-vessel disease often have better long-term outcomes with surgery than with stenting.

  • Complex Anatomy: Blockages that are too long, heavily calcified (hardened), or located in areas where a stent cannot be safely placed.

  • Failed Angioplasty: When previous attempts to open arteries with balloons or stents have not been successful or the artery has narrowed again.

  • On-Pump CABG: The traditional method where a heart-lung bypass machine takes over the work of the heart and lungs, allowing the surgeon to operate on a still, non-beating heart.

  • Off-Pump (Beating Heart) CABG: The surgeon uses specialized stabilizers to operate while the heart continues to beat, avoiding the bypass machine. This is often preferred for patients at high risk for stroke.

  • Minimally Invasive (MIDCAB): Small incisions are made between the ribs rather than through the breastbone. This is typically used for bypassing one or two arteries on the front of the heart.

  • Endoscopic Vessel Harvesting (EVH): A 2026 standard where grafts from the leg or arm are removed through tiny incisions using a camera, reducing scarring and pain.

  • Incision: A midline incision is made, and the breastbone (sternum) is divided to access the heart.

  • Harvesting: Simultaneously, healthy vessels are harvested: the Internal Mammary Artery (chest), Saphenous Vein (leg), or Radial Artery (arm).

  • Bypass: One end of the graft is attached to the aorta (the main artery) and the other end below the blockage, creating a permanent "detour."

  • Restarting: Once the connections are tested for leaks, the heart is restarted (if it was stopped), and the bypass machine is disconnected.

  • Closing: The sternum is secured with permanent stainless steel wires, and the skin is closed with stitches or staples.

  • Fasting for at least 8–12 hours before surgery, as it is performed under general anesthesia.

  • Extensive blood work, chest X-rays, and an ECG to ensure you are fit for major surgery.

  • Dental clearance is often required to ensure no hidden infections could travel to the heart.

  • Stopping or adjusting certain medications, especially blood thinners like Clopidogrel or Aspirin, as directed.

  • Shaving and surgical scrubbing of the chest, legs, and arms to prevent infection.

  • Coronary Angiogram: The "roadmap" that shows exactly where the blockages are located.

  • Echocardiogram: To assess the heart's pumping strength (Ejection Fraction) and valve function.

  • Carotid Doppler: To check for blockages in the neck arteries that might increase the risk of stroke during surgery.

  • Pulmonary Function Test (PFT): To ensure the lungs are strong enough to handle anesthesia and recovery.

  • Vein Mapping: Ultrasound of the legs or arms to ensure the vessels are healthy enough to be used as grafts.

  • ICU Stay: Expect to spend the first 24 hours in the Intensive Care Unit for close monitoring of heart rhythm and blood pressure.

  • Hospital Stay: Total recovery in the hospital usually lasts 5 to 7 days.

  • Sternal Precautions: For the first 6 weeks, you must avoid lifting anything heavier than 2–3 kg to allow the breastbone to heal properly.

  • Cardiac Rehabilitation: Starting around week 6, supervised exercise programs are highly recommended to rebuild strength.

  • Long-term Meds: You will likely remain on Aspirin and cholesterol-lowering medications (statins) indefinitely to keep the new grafts clear.

  • Superior Longevity: Provides a long-term solution for complex multi-vessel disease, often outlasting stents.

  • Symptom Relief: Significant reduction or total elimination of chest pain (angina) and shortness of breath.

  • Reduced Heart Attack Risk: By restoring blood flow to large areas of the heart, the risk of a future major cardiac event is lowered.

  • Improved Quality of Life: Most patients return to an active lifestyle and can exercise more effectively than before surgery.

  • 2026 Success Rates: Elective CABG has a high survival rate (approx. 98–99%) due to advanced surgical and anesthesia protocols.

Off-Pump Bypass (Beating Heart Surgery)

Off-Pump Coronary Artery Bypass (OPCAB), also known as "Beating Heart Surgery," is a specialized technique where the surgeon performs the bypass while the heart continues to beat. Unlike traditional CABG, it does not use a heart-lung bypass machine to stop the heart and take over its function. This approach is highly valued for reducing systemic inflammation and protecting vital organs, particularly in high-risk patients.

  • Elderly Patients (70+ years): Those who may be more vulnerable to the systemic physiological stress of a heart-lung machine.

  • History of Stroke: Patients with a "porcelain" (heavily calcified) aorta where clamping the vessel during traditional surgery increases the risk of a stroke.

  • Chronic Kidney Disease: Maintaining natural blood pressure and pulsatile flow during surgery is generally safer for renal function.

  • Liver Disease or Blood Disorders: Patients who may face higher complications from the intense blood-thinning required for "on-pump" machines.

  • Lung Issues: Those with respiratory compromise who benefit from being taken off a ventilator as quickly as possible following the procedure.

  • Suction Stabilizers: Small, mechanical arms that "grip" a tiny area (1–2 cm) of the heart surface, keeping that specific spot perfectly still while the rest of the heart continues to pump.

  • Intracoronary Shunts: Tiny plastic tubes inserted into the artery during the stitching process to ensure blood continues to flow to the heart muscle while the surgeon sews the graft.

  • Heart Positioners: Suction devices used to gently lift and rotate the beating heart, allowing the surgeon to reach blockages on the side or back walls.

  • Transit Time Flow Measurement (TTFM): A clinical standard used during surgery to verify that blood flow through the new graft is perfect before closing the chest.

  • Deep Pericardial Stay Sutures: Specialized internal stitches that allow the surgeon to maneuver the heart safely into the necessary positions without stopping it.

  • Surgical Access: Under general anesthesia, a standard midline incision is made through the breastbone (sternotomy) to reach the heart.

  • Graft Harvesting: Healthy vessels are prepared from the chest (internal mammary artery), leg (saphenous vein), or arm (radial artery) to be used as the new bypass routes.

  • Heart Positioning: The surgeon carefully maneuvers the beating heart using positioners to expose the specific blocked coronary arteries.

  • The Bypass: The stabilizer is applied to the target site, and the surgeon meticulously sews the graft onto the artery using ultra-fine sutures.

  • Verification & Closing: After confirming flow with TTFM, the stabilizer is removed, and the breastbone is secured with permanent stainless steel wires.

  • Fasting (NPO): No food or drink for at least 8–12 hours before surgery to ensure safety during general anesthesia.

  • Baseline Diagnostics: Extensive blood tests, chest X-rays, and an ECG to assess overall surgical readiness and organ function.

  • Dental Clearance: A check to rule out any active oral infections that could travel through the bloodstream and compromise the heart surgery.

  • Medication Adjustment: Reviewing all prescriptions; anti-platelet drugs or blood thinners may need to be paused or adjusted several days prior.

  • Surgical Scrub: Shaving and antiseptic scrubbing of the chest and any potential graft harvest sites on the legs or arms.

  • Coronary Angiogram: The essential "roadmap" that identifies the exact location and severity of blockages for the surgical team.

  • Echocardiogram: An ultrasound to evaluate the heart's pumping strength and identify any underlying valve issues.

  • Carotid Ultrasound: To assess stroke risk by checking the health of the arteries supplying blood to the brain.

  • CT Scan of the Aorta: Specifically used to check for heavy calcification (porcelain aorta) that would favor an off-pump approach.

  • Vein/Artery Mapping: Ultrasound imaging to ensure the quality and size of the blood vessels intended for use as bypass grafts.

  • ICU Recovery: Patients typically spend the first 12 to 24 hours in the Intensive Care Unit for close hemodynamic monitoring.

  • Hospital Discharge: The total stay is usually 4 to 5 days, which is often 1–2 days shorter than traditional "on-pump" bypass surgery.

  • Sternal Precautions: To allow the breastbone to heal, patients must avoid lifting anything heavier than 2–3 kg (about 5 lbs) for 6 to 8 weeks.

  • Gradual Recovery: Most patients return to light daily activity quickly but require 2 to 3 months for a full return to strenuous levels.

  • Cardiac Rehab: Participating in a supervised exercise and education program starting around week 6 is vital for long-term cardiovascular health.

  • Reduced Stroke Risk: Avoiding the clamping of a calcified aorta minimizes the chance of dislodging plaque that could travel to the brain.

  • Organ Protection: Shorter ventilator times and more natural, pulsatile blood flow help protect the sensitive kidney and lung systems.

  • Less Bleeding: Beating heart surgery generally requires fewer blood transfusions than procedures involving a bypass machine.

  • Lower Inflammatory Response: Avoiding the heart-lung machine reduces the "whole-body" inflammation often seen after major cardiac surgery.

  • Faster Return to Normalcy: Many patients experience shorter hospital stays and a quicker initial recovery phase compared to traditional methods.

Redo Bypass Surgery
Redo Bypass Surgery

Redo Coronary Artery Bypass Grafting (Redo CABG) is a secondary heart bypass surgery performed on a patient who has already undergone at least one previous bypass. It is technically more demanding than the first surgery because the heart often develops scar tissue (adhesions) that causes it to stick to the underside of the breastbone. In 2026, while complex stenting is often the first choice for failed grafts, Redo CABG remains the definitive solution for patients with extensive new blockages or anatomical challenges that stents cannot fix.

  • Graft Attrition: When original vein grafts (typically used 10–15 years ago) have become diseased or completely blocked.

  • Native Disease Progression: New, severe blockages in the heart's original arteries that weren't bypassed during the first surgery.

  • Failed Complex Stenting: When attempts to open old grafts or native arteries with multiple stents have not been successful.

  • Ischemic Heart Failure: When poor blood flow is weakening the heart muscle, and a "complete revascularization" is needed to restore pumping strength.

  • LIMA Failure: In rare cases where the Left Internal Mammary Artery (the "gold standard" graft) has narrowed or failed.

  • The "Re-Entry" Problem: Surgeons use an oscillating saw and extreme caution to open the chest without damaging the heart or old, functioning grafts that may be stuck to the sternum.

  • New Graft Harvesting: Since the best vessels were likely used in the first surgery, surgeons may harvest the Right Internal Mammary Artery, Radial Artery (arm), or additional Leg Veins.

  • Embolic Protection: Old vein grafts are often "crumbly" and can release debris (emboli) if touched; surgeons usually tie these off and replace them to prevent a heart attack during surgery.

  • Retrograde Cooling: A specialized 2026 technique where cooling fluid is pumped backward through the heart's veins (coronary sinus) to protect the muscle while it is stopped.

  • Off-Pump (Beating Heart) Redo: Frequently chosen if the aorta is too calcified to be clamped, reducing the risk of stroke.

  • Access: The old chest scar is reopened with precision instruments to carefully separate the heart from the surrounding scar tissue.

  • Cannulation: The patient is connected to the heart-lung machine, often through the groin (femoral) vessels for extra safety before the chest is fully opened.

  • Dissection: The surgeon meticulously clears away adhesions to expose the target arteries and the old grafts.

  • Grafting: New bypasses are sewn into place, often using arterial grafts from the arm or chest to ensure better long-term durability.

  • Verification: Transit Time Flow Measurement (TTFM) is used to ensure the new grafts are providing high volumes of blood to the heart muscle.

  • Multi-Slice CT Scan: A 2026 requirement to map the distance between the heart and the breastbone to plan a safe entry.

  • Fasting: Standard 8–12 hour fast before the surgery, which is always performed under general anesthesia.

  • Blood Cross-Matching: Redo surgeries have a higher chance of needing a blood transfusion, so multiple units of blood are held in reserve.

  • Review of Previous Records: The original "operative note" from the first bypass is essential for the surgeon to know exactly where the old grafts are located.

  • Anticoagulant Adjustment: Blood thinners are carefully managed and often stopped 3–5 days prior to minimize bleeding.

  • Cardiac CT Angiography (CCTA): To visualize the location of old grafts and their proximity to the chest wall.

  • Coronary Angiogram: The essential "roadmap" to identify which old grafts have failed and where new blockages exist.

  • Echocardiogram: To assess current heart function and check for any valve issues that might need fixing at the same time.

  • Carotid Doppler: To ensure there are no blockages in the neck arteries that could increase stroke risk.

  • Viability Study (PET or MRI): To confirm that the heart muscle in the blocked area is still "alive" and will benefit from a new blood supply.

  • Extended ICU Stay: Patients usually spend 24 to 48 hours in the ICU for closer monitoring of bleeding and heart rhythm.

  • Hospital Stay: Total recovery in the hospital typically lasts 7 to 10 days, slightly longer than the first bypass.

  • Healing Phase: Full recovery can take 8 to 12 weeks. Skin healing may be slower because of the old scar tissue.

  • Cardiac Rehabilitation: Supervised exercise is non-negotiable for redo patients to ensure the new grafts remain open.

  • Aggressive Medical Therapy: High-dose statins and blood thinners are crucial to stop the progression of disease in the new grafts.

  • Complete Revascularization: Unlike stents, which may only fix one spot, a redo bypass can treat all major blockages in one go.

  • Long-Term Durability: Modern arterial grafts used in redos have much higher 10-year success rates than repeat stenting.

  • Symptom Resolution: Provides definitive relief for patients who have "refractory angina" (chest pain that doesn't respond to meds).

  • Improved Life Expectancy: For patients with left main disease or triple vessel disease, surgery offers better survival than medicine alone.

  • 2026 Success Rates: In specialized Indian centers, the success rate for redo CABG now exceeds 93–95% due to better imaging and surgical tech.

Tricuspid Valve Repair

Tricuspid Valve Repair is a surgical or minimally invasive procedure to fix a leaking (regurgitation) or narrowed (stenosis) tricuspid valve, which sits between the right atrium and right ventricle. Repair is increasingly preferred over valve replacement because it preserves the heart's natural anatomy and avoids the need for lifelong, heavy-duty blood thinners. It is a vital intervention for maintaining proper blood flow from the body into the lungs.

  • Secondary (Functional) Regurgitation: When the valve leaks because the right side of the heart has stretched (common in patients with left-sided heart disease).

  • Concomitant Repair: When you are already undergoing surgery for a mitral or aortic valve; repairing the tricuspid valve at the same time prevents future heart failure.

  • Severe Right-Sided Symptoms: Such as significant swelling in the legs, abdominal bloating, or unexplained fatigue.

  • Direct Valve Damage: Caused by infection (endocarditis), rheumatic fever, or blunt chest trauma.

  • Pulmonary Hypertension: When high pressure in the lungs forces the tricuspid valve to leak, requiring a surgical "tightening" of the valve base.

  • Annuloplasty (The Ring): The "gold standard" where a cloth-covered medical ring is sewn around the base of the valve to pull the leaflets together for a tight seal.

  • Leaflet Repair: Techniques like "bicuspidization" (tucking a leaflet) or patching holes with a piece of the heart's own sac (pericardium).

  • Neochords: Attaching artificial GORE-TEX strings to support drooping or "flail" leaflets that no longer close properly.

  • Edge-to-Edge Repair (TriClip): A leading-edge, minimally invasive option where a clip is guided through a leg vein to "pin" leaking leaflets together.

  • Minimally Invasive Surgery: Performing the repair through a small incision between the ribs (thoracotomy) rather than opening the breastbone.

  • Access: Performed via a midline incision (sternotomy) or a minimally invasive side incision.

  • Bypass: The patient is connected to a heart-lung machine, which takes over the work of the heart and lungs during the repair.

  • Inspection: The surgeon opens the right atrium to inspect the valve leaflets and the supporting "annulus" ring.

  • Implantation: The annuloplasty ring or neochords are meticulously sewn into place to restore the valve's shape.

  • Testing: Saline is injected into the ventricle to confirm the valve is leak-proof before the heart is closed and restarted.

  • Fasting: Required for 8–12 hours before surgery, as it is performed under general anesthesia.

  • Extensive Blood Tests: Including liver and kidney function panels, as these organs are often affected by tricuspid issues.

  • Dental Check-up: To ensure no oral bacteria could cause a post-surgical heart infection.

  • Medication Adjustment: Specifically regarding blood thinners, as directed by your surgical team.

  • Sanitization: Shaving and antiseptic cleaning of the chest and any potential graft sites.

  • Echocardiogram (TTE/TEE): The primary tool used to grade the severity of the leak and measure the size of the heart chambers.

  • Cardiac Catheterization: To check the pressures in the heart and lungs (pulmonary hypertension) and look for coronary artery blockages.

  • Cardiac MRI: To get a high-definition 3D view of the right ventricle's function and volume.

  • Liver Function Tests: To see if the "back-pressure" from the leaky valve has caused liver congestion.

  • Chest X-ray: To evaluate the size of the heart silhouette and the condition of the lungs.

  • Hospital Stay: Usually lasts 5 to 7 days, with the first 24–48 hours spent in the ICU for close monitoring.

  • Initial Recovery: Most patients are encouraged to sit up and begin walking within 24 hours of surgery.

  • Sternal Precautions: If a sternotomy was performed, no lifting over 3 kg for 6 to 8 weeks to allow the bone to heal.

  • Medication: Most patients take a mild blood thinner (like aspirin) for 3–6 months; lifelong Warfarin is typically not required for a repair.

  • Follow-up: Regular echocardiograms will be scheduled to ensure the repair remains stable and the heart size is shrinking back to normal.

  • High Durability: Over 90% of repairs are successful and significantly reduce leakage for many years.

  • Prevents Heart Failure: Directly reduces the risk of right-sided heart failure and associated liver congestion.

  • Improved Energy: Patients often notice a dramatic reduction in swelling and a significant increase in exercise capacity.

  • Preserves Heart Function: Keeping your natural valve (rather than a replacement) helps the right ventricle maintain its strength.

  • High Success Rates: Elective repairs in specialized centers have low complication rates (1% to 3%) and excellent long-term survival.

Double Valve Replacement (DVR)

Double Valve Replacement (DVR) is a major cardiac surgery where two of the heart's four valves—most commonly the Mitral and Aortic valves—are replaced during a single operation. This is typically required when both valves are severely diseased (stenosed or leaking) and cannot be effectively repaired. DVR remains a life-saving intervention for advanced multi-valve disease, often restoring normal life expectancy for patients with severe heart failure.

  • Rheumatic Heart Disease: The leading cause of multi-valve damage, where chronic inflammation scars both the mitral and aortic valves.

  • Calcific Degeneration: Age-related buildup of calcium that stiffens both heart structures simultaneously.

  • Endocarditis: A severe bacterial infection that has spread from one valve to another, causing structural destruction.

  • Left Ventricular Strain: When the failure of one valve causes a "domino effect," putting pressure on the second valve until it also fails.

  • Symptomatic Heart Failure: When symptoms like severe breathlessness, chest pain, and fainting can no longer be managed with medication.

  • Mechanical Valves: Made of carbon and metal. They are extremely durable and rarely need replacing, but require lifelong blood thinners (Warfarin).

  • Bioprosthetic (Tissue) Valves: Made from pig (porcine) or cow (bovine) tissue. They do not require long-term heavy blood thinners but usually wear out in 10–15 years.

  • On-X Mechanical Valves: A newer generation of mechanical valves that may allow for lower doses of blood thinners.

  • Ross Procedure (Specialized): Using the patient's own pulmonary valve to replace the aortic valve, though less common in a double-replacement scenario.

[Image comparing a mechanical heart valve and a bioprosthetic tissue valve]

  • Access: A midline incision is made through the breastbone (sternotomy) to provide the surgeon full access to the heart.

  • Cardiopulmonary Bypass: The patient is connected to a heart-lung machine; the heart is temporarily stopped to allow for precise surgery.

  • Valve Removal: The surgeon opens the aorta and the left atrium to meticulously excise the diseased aortic and mitral valves.

  • Implantation: Two new valves are sewn into the heart’s natural rings (annulus) using high-strength sutures.

  • De-airing & Restarting: Air is removed from the heart chambers, blood flow is restored, and the heart is restarted.

  • Fasting: Required for at least 8–12 hours before surgery, as it is performed under general anesthesia.

  • Blood Prep: Extensive blood work, including cross-matching for several units of blood in case a transfusion is needed.

  • Dental Clearance: Mandatory to ensure no oral bacteria could infect the new prosthetic valves.

  • Medication Adjustment: Adjusting current medications, especially blood thinners and anti-platelet drugs, as directed by the surgeon.

  • System Check: Pulmonary function tests and chest X-rays to ensure the lungs are prepared for recovery.

  • Echocardiogram (TTE/TEE): The primary imaging tool to grade the severity of both valve diseases and measure heart chamber size.

  • Coronary Angiogram: To check for blockages in the heart arteries that might need to be bypassed during the same surgery.

  • Cardiac CT or MRI: To provide 3D anatomical detail of the valves and the surrounding heart structures.

  • Carotid Doppler: To evaluate the risk of stroke by checking the arteries supplying the brain.

  • Organ Function Panels: Including kidney and liver function tests, as these organs are vital for a successful recovery.

  • ICU Stay: Patients spend 24 to 48 hours in the ICU for intensive monitoring of heart rhythm and blood pressure.

  • Hospital Stay: Total recovery in the hospital usually lasts 7 to 10 days.

  • Anticoagulation: If mechanical valves are used, strict monitoring of blood clotting levels (INR) begins immediately and continues for life.

  • Sternal Precautions: No lifting anything heavier than 3 kg for 8 to 12 weeks to allow the breastbone to heal.

  • Cardiac Rehabilitation: Supervised exercise is critical starting at week 6 to help the heart adjust to the new valves.

  • Corrects Circulation: Immediately corrects the "back-pressure" on the lungs and the rest of the body.

  • Symptom Relief: Drastically reduces shortness of breath, fatigue, and swelling in the legs.

  • Stops Progression: Prevents the progressive stretching and weakening of the heart muscle.

  • Long-Term Durability: Modern prosthetic options allow many patients to experience decades of improved health.

  • Single-Stage Correction: Treating both valves in one surgery avoids the high risk of a "redo" operation later in life.

Cardiac Tumor Removal Surgery

Cardiac Tumour Removal Surgery is a specialized procedure to excise abnormal growths from within or on the heart. While the majority of primary heart tumours (75–80%) are benign (non-cancerous), such as myxomas, they can still be life-threatening. These growths can obstruct blood flow, damage heart valves, or lead to strokes if pieces of the tumour break off and travel to the brain. Advanced imaging and robotic techniques allow for highly precise removal of these rare growths.

  • Benign Myxomas: The most common heart tumour, typically found in the left atrium, which requires removal to prevent blood flow obstruction.

  • Papillary Fibroelastomas: Small growths on heart valves that carry a high risk of causing a stroke or heart attack.

  • Symptoms of Obstruction: If a tumour causes dizziness, fainting, or sudden shortness of breath by blocking a heart valve.

  • Embolic Events: If pieces of a suspected tumour have already broken off and caused "mini-strokes" (TIAs) or blood clots in the limbs.

  • Malignant Sarcomas: Rare, aggressive cancers that require surgery to relieve symptoms or as part of a multi-stage treatment plan involving chemotherapy.

  • Open-Heart Surgery (Median Sternotomy): The traditional approach providing the most direct view, necessary for large, complex, or malignant tumours.

  • Minimally Invasive Surgery: Uses small incisions (3–5 cm) between the ribs, often assisted by a 3D endoscope to reduce pain and scarring.

  • Robotically Assisted Surgery: A standard for precision, where surgeons use robotic arms to remove tumours in tight spaces within the heart.

  • Cardiopulmonary Bypass (CPB): Using a heart-lung machine to maintain circulation while the heart is stopped for the safe excision of the growth.

  • Reconstructive Surgery: Using a patch (synthetic or from the patient’s own pericardium) to repair any holes left in the heart wall after the tumour is removed.

  • Access: The surgeon reaches the heart via a sternotomy or a minimally invasive port-access between the ribs.

  • Bypass: The patient is connected to the heart-lung machine, allowing the surgeon to open the heart chambers in a bloodless environment.

  • Excision: The tumour is meticulously removed, usually along with a small "margin" of healthy tissue to ensure no cells are left behind to regrow.

  • Repair: If the tumour was attached to a valve, the surgeon performs a valve repair or replacement during the same session.

  • Verification: The heart is closed and restarted, and an intraoperative echocardiogram is performed to ensure the tumour is gone and the valves are functioning perfectly.

  • Fasting: Required for at least 8–12 hours before surgery, as the procedure is performed under general anesthesia.

  • Blood Work: Extensive blood work and cross-matching for blood transfusions, which are common in complex cardiac resections.

  • Dental Clearance: To ensure no bacteria from the mouth could infect the surgical site or any repair patches.

  • Medication Adjustment: Stopping certain medications, particularly blood thinners, several days before the operation.

  • Logistics: Arranging for a hospital stay of roughly one week and a support person for the multi-week recovery at home.

  • Echocardiogram (TTE/TEE): The primary tool used to identify the tumour's size, mobility, and attachment point.

  • Cardiac MRI: Provides high-definition 3D tissue characterization to help distinguish between benign and malignant growths.

  • Cardiac CT Scan: Used to evaluate the tumour’s relationship with the coronary arteries and the chest wall.

  • Coronary Angiogram: Performed in older patients to check for blockages that may need to be bypassed during the same surgery.

  • PET Scan: Occasionally used if a malignant tumour is suspected, to check if the cancer has spread elsewhere in the body.

  • ICU Stay: Patients spend 1–2 days in the Intensive Care Unit for constant monitoring of heart rhythm and oxygen levels.

  • Hospital Discharge: Most patients go home after 5 to 10 days, depending on whether the approach was open or minimally invasive.

  • Activity Restrictions: No heavy lifting (over 4 kg) for 6 to 12 weeks to allow the breastbone or rib incisions to heal fully.

  • Cardiac Rehabilitation: Supervised exercise is strongly recommended to rebuild physical strength and cardiovascular endurance.

  • Long-term Monitoring: Annual echocardiograms are usually required for several years to ensure the tumour does not recur.

  • Cure for Benign Growths: For tumours like myxomas, surgery is often completely curative with excellent long-term results.

  • Stroke Prevention: Removing highly mobile tumours significantly reduces the risk of life-altering strokes or organ damage.

  • Restores Blood Flow: Eliminates heart failure symptoms caused by tumours obstructing the heart valves.

  • Specialized Outcomes: In-hospital mortality is relatively low (approximately 3%) for such a specialized and complex procedure.

  • Symptom Relief: Most patients experience an immediate improvement in energy levels and a reduction in fainting or palpitations.

Left Ventricular Aneurysm Repair

Left Ventricular (LV) Aneurysm Repair, often called an "Aneurysmectomy" or the "Dor Procedure," is a major surgical operation to correct a "bulge" in the heart's main pumping chamber. This bulge is typically a patch of thin, scarred, non-functioning muscle that forms after a massive heart attack. The focus of this surgery is "Ventricular Restoration"—reshaping the heart from a balloon-like state back into its natural, efficient oval shape to restore pumping power.

  • Congestive Heart Failure: When the scarred area "balloons" outward, wasting the heart's energy and causing severe breathlessness and fatigue.

  • Recurrent Blood Clots: When blood pools and stagnates inside the bulge, creating clots that carry a high risk of stroke.

  • Refractory Arrhythmias: Life-threatening fast heartbeats (Ventricular Tachycardia) triggered by the border between healthy muscle and scar tissue.

  • Large Aneurysm Size: Even if symptoms are mild, a very large or expanding aneurysm may require repair to prevent progressive heart stretching.

  • Concomitant Surgery: Often performed if you already need a heart bypass (CABG) or mitral valve repair to fully restore heart efficiency.

  • Linear Repair: For smaller aneurysms, the surgeon removes the scarred tissue and sews the healthy muscle edges back together.

  • The Dor Procedure (Endoventricular Circular Patch Plasty): The modern "gold standard" where a synthetic or tissue patch is placed inside the ventricle to rebuild its internal structure.

  • Hybrid LV Restoration: A 2026 approach combining surgical repair with catheter-based techniques for patients who are too high-risk for traditional surgery.

  • Extracellular Matrix (ECM) Patches: A newer option using biological "scaffolding" that may help the heart tissue integrate better than traditional synthetic materials.

  • Ventricular Reconstruction: Using internal sutures to "exclude" the dead tissue from the pumping chamber without actually cutting it out.

[Image showing a synthetic patch being sutured inside the left ventricle during a Dor Procedure]

  • Access: A midline incision is made through the breastbone (sternotomy) to reach the heart.

  • Bypass: The patient is connected to a heart-lung machine; the heart is stopped to allow the surgeon to safely open the ventricle.

  • Clot Removal: Any old blood clots (thrombi) trapped within the aneurysm are carefully removed to prevent future strokes.

  • Reshaping: The surgeon identifies the "border zone" of healthy muscle and secures the patch or sutures to create a new, smaller, and stronger pumping chamber.

  • Verification: An intraoperative ultrasound (TEE) is performed to ensure the heart's "Stroke Volume" (the amount of blood pumped per beat) has significantly improved.

  • Fasting for at least 8–12 hours before the surgery, which is performed under general anesthesia.

  • Extensive blood work, including kidney function tests and cross-matching for potential blood transfusions.

  • Dental clearance to eliminate any hidden infections that could compromise the surgical site or the patch.

  • Adjusting medications, specifically heart failure drugs like ACE inhibitors and blood thinners, as directed by the surgeon.

  • Review of a "Viability Study" to confirm that the remaining heart muscle is strong enough to support the repair.

  • Cardiac MRI: The best tool for mapping the exact size of the aneurysm and distinguishing between scar tissue and healthy muscle.

  • Echocardiogram (TEE): To measure the Ejection Fraction and check if the mitral valve is leaking due to the aneurysm.

  • Coronary Angiogram: To identify blockages in the arteries that will likely be bypassed during the same operation.

  • Cardiac CT Scan: To assess the proximity of the aneurysm to the chest wall, especially important for "redo" surgeries.

  • EP Study (Electrophysiology): Occasionally done if the patient has had life-threatening arrhythmias to locate the "trigger" points.

  • ICU Stay: Usually 2 to 3 days for intensive monitoring of blood pressure, heart rhythm, and fluid levels.

  • Hospital Stay: Total stay typically ranges from 7 to 12 days, depending on the speed of recovery.

  • Mechanical Support: Some patients may briefly require a temporary pump (like an IABP) to help the reshaped heart work in the first 48 hours.

  • Sternal Precautions: No lifting anything heavier than 3 kg for 8 to 12 weeks to ensure the breastbone heals.

  • Long-term Meds: Lifelong use of beta-blockers and blood thinners is often necessary to protect the repair and prevent new clots.

  • Improved Pumping Efficiency: Reshaping the heart significantly increases the Ejection Fraction and overall cardiac output.

  • Dramatic Symptom Relief: Most patients report a major decrease in shortness of breath and a return of energy within 4–8 weeks.

  • Reduced Stroke Risk: By removing the "pocket" where blood stagnates, the primary source of heart-related strokes is eliminated.

  • Rhythm Stability: Repairing the "border zone" often resolves or simplifies the management of dangerous heart arrhythmias.

  • 2026 Success Rates: In specialized Indian centers, the success rate for the Dor Procedure is approximately 90–95% for elective cases.

Ventricular Septal Rupture Repair

Ventricular Septal Rupture (VSR) Repair is a high-stakes, emergency surgical procedure to fix a hole in the septum (the wall dividing the left and right ventricles). This rupture is a rare but catastrophic complication of a massive heart attack, occurring when a lack of blood flow causes heart muscle to die and physically tear. Surgical intervention remains the "gold standard," as the condition is almost always fatal without mechanical closure.

  • Acute Heart Failure: When the septum tears, oxygen-rich blood surges into the right side of the heart, causing the heart to lose its ability to pump to the rest of the body.

  • Pulmonary Flooding: Sudden, excessive blood flow into the lungs leads to rapid fluid buildup (edema) and severe breathing difficulty.

  • Cardiogenic Shock: If blood pressure drops dangerously low and organs begin to fail due to the massive "shunt" of blood within the heart.

  • Post-Infarction Complication: Typically occurs within the first 24 hours or 3–5 days following a major heart attack.

  • High-Risk Stabilization: If a patient is currently on life support (ECMO) or a balloon pump (IABP) specifically to bridge them to a definitive surgical repair.

  • Infarct Exclusion: The modern standard where a large synthetic patch is "wallpapered" over the hole and anchored to healthy, firm heart muscle away from the fragile tear.

  • Triple Patch Technique: A newer method using three layers of bovine pericardium and surgical glue to ensure a leak-proof seal and minimize the risk of the hole reopening.

  • Extended Sandwich Patch: Using two large Dacron patches to "sandwich" the septum from both the left and right sides, often used for complex or posterior ruptures.

  • Hybrid Repair: A two-stage approach where surgery is followed by a transcatheter "plug" if a small residual leak (shunt) remains after the initial operation.

  • Concomitant CABG: Since a blocked artery caused the rupture, surgeons almost always perform a heart bypass during the same procedure to protect the remaining muscle.

  • Access: A midline incision is made through the breastbone (sternotomy) for the most direct access to the complex rupture site.

  • Bypass: The patient is connected to a heart-lung machine; the heart is stopped to allow the surgeon to operate on the delicate, damaged tissue.

  • Ventriculotomy: The surgeon opens the scarred area of the left ventricle (the chamber with the highest pressure) to inspect the tear.

  • Debridement: Any "mushy" or dead tissue at the edges of the hole is cleared away to reach firmer muscle that can hold sutures.

  • Patching & Gluing: The synthetic or tissue patch is meticulously secured. Specialized surgical glues are often used to reinforce the suture lines on fragile tissue.

  • Restarting: The heart is carefully restarted, and a transesophageal echo (TEE) is performed immediately to check for any residual leaks.

[Image showing a synthetic patch being sutured over a ventricular septal defect]

  • Emergency Stabilization: Hemodynamic stabilization is the priority; many patients receive an Intra-aortic Balloon Pump (IABP) to reduce the heart's workload.

  • Fasting: Required, though most patients are already under emergency care and receiving fluids intravenously.

  • Blood Cross-matching: Extensive cross-matching is performed, as these surgeries carry a high risk of bleeding and often require blood transfusions.

  • Tissue Friability Review: Surgeons may delay surgery for 3–7 days if the patient is stable enough to let the heart muscle toughen, which increases suture success.

  • Emergency Consent: Consent is often obtained from family members, as the patient is typically too ill or sedated to provide it themselves.

  • Echocardiogram (TTE/TEE): The essential test to confirm the location and size of the rupture and quantify the "shunt" volume.

  • Coronary Angiogram: Necessary to identify the blocked artery that caused the heart attack and plan the necessary bypass grafts.

  • Cardiac CT Scan: Sometimes used to assess the anatomy of the rupture, especially if it is in a difficult-to-reach posterior location.

  • Swan-Ganz Catheterization: To measure the pressures in the lungs and the degree of oxygen-rich blood mixing in the right side of the heart.

  • Blood Gas Analysis: To monitor how well the lungs are coping with the sudden influx of extra blood.

  • ICU Stay: Patients typically require 3 to 7 days in the ICU on a ventilator with multiple medications to support blood pressure.

  • Hospital Stay: Total recovery in the hospital usually lasts 2 to 3 weeks due to the severity of the initial heart attack.

  • Long-term Management: Lifelong heart failure medications (such as Beta-blockers and ARNI therapy) are essential to help the heart recover.

  • Residual Shunt Monitoring: 10–20% of cases may have a tiny remaining leak; these are monitored via regular echocardiograms and only repaired if they cause symptoms.

  • Rehabilitation: A slow, medically supervised cardiac rehab program is vital to rebuild strength after such a massive physiological trauma.

  • Life-Saving Intervention: Without surgery, the mortality rate is nearly 90% within weeks; repair offers the only realistic chance for survival.

  • Stops Pulmonary Flooding: Immediately halts the surge of blood into the lungs, allowing for easier breathing and recovery from edema.

  • Restores Systemic Pressure: By closing the hole, the heart can once again send oxygenated blood to the brain, kidneys, and liver.

  • Improved Outcomes: While high-risk, 30-day survival rates in specialized cardiac centers have improved significantly for stable patients.

  • Future Heart Health: For those who survive the initial recovery, long-term heart function can improve significantly with proper care.

Left Ventricular Assist Device (LVAD) Implantation

Left Ventricular Assist Device (LVAD) Implantation is a major surgical procedure to install a mechanical pump that assists a weakened heart in circulating blood throughout the body. Unlike a total artificial heart, an LVAD works with your existing heart to take over the pumping work of the left ventricle—the heart's main pumping chamber. These devices are increasingly used as "Destination Therapy" for those who may not be eligible for a heart transplant, serving as a long-term life-support system.

  • End-Stage Heart Failure: When medications and other treatments no longer help and the heart is too weak to support the body's metabolic needs.

  • Bridge to Transplant (BTT): To keep a patient stable and healthy enough to undergo a heart transplant while waiting for a suitable donor organ.

  • Destination Therapy (DT): As a permanent solution to improve quality of life for patients ineligible for a transplant due to age or other medical conditions.

  • Bridge to Recovery (BTR): In cases where heart failure is expected to be temporary (such as viral myocarditis), supporting the heart until it can pump on its own.

  • Severe Symptom Burden: When life is severely limited by extreme fatigue, shortness of breath even at rest, and frequent emergency hospitalizations.

  • The Internal Pump: Surgically implanted at the apex (tip) of the left ventricle to pull blood out and push it directly into the aorta.

  • The Driveline: A thin, reinforced cable that passes from the internal pump through the skin of the abdomen to connect to the external computer.

  • External Controller: A small computer worn on a belt or harness that monitors the pump's function and provides vital alerts or alarms.

  • Power Source: Uses rechargeable lithium-ion batteries for mobile use or a power cord that plugs into a standard electrical outlet while sleeping.

  • Mobile Monitoring: Modern controllers often sync with smartphone apps to allow caregivers and medical teams to monitor pump flow and battery life remotely.

  • Surgical Access: The surgeon makes an incision down the center of the chest and separates the breastbone (sternotomy) to reach the heart.

  • Heart-Lung Bypass: A bypass machine takes over heart and lung functions so the surgeon can safely work on a still heart.

  • Implantation: The inflow end of the pump is sewn into the left ventricle, and the outflow graft is meticulously attached to the aorta.

  • Driveline Tunneling: The power cable is carefully tunneled through the abdominal wall to exit the skin at a specific "exit site" on the abdomen.

  • Activation: Once the device is tested and circulating blood, the bypass machine is disconnected and the chest is secured with surgical wires.

  • Fasting (NPO): No food or drink for 8–12 hours before surgery, as the procedure is performed under general anesthesia.

  • Multidisciplinary Evaluation: Extensive review by a "Heart Failure Team," including cardiologists, surgeons, social workers, and nutritionists.

  • Organ Function Screens: Blood tests to ensure the liver and kidneys are healthy enough to withstand the surgery and the new circulatory demands.

  • Caregiver Training: Both the patient and a designated "caregiver" must learn how to manage the device, change batteries, and handle emergency alarms.

  • Infection Prevention: Dental clearance is required to ensure no oral bacteria could lead to an infection of the mechanical pump components.

  • Echocardiogram: To assess the strength of the right ventricle; if the right side of the heart is too weak, a standard LVAD may not be effective.

  • Right Heart Catheterization: To measure the pressures in the heart and lungs to ensure the body can handle the pump's mechanical flow.

  • Cardiac CT Scan: To map the anatomy of the chest and identify the best surgical placement for the pump and the outflow graft.

  • Pulmonary Function Tests: To ensure the lungs are strong enough for the patient to be successfully taken off a ventilator after the procedure.

  • Psychosocial Assessment: To ensure the patient has the necessary support system and cognitive ability to manage the device daily.

  • ICU Recovery: Patients spend the first few days in the Intensive Care Unit for close monitoring of the pump's speeds and blood flow parameters.

  • Hospital Education: Total recovery in the hospital typically lasts 2 to 3 weeks as the patient and family learn to live with the device.

  • Anticoagulation Therapy: Lifelong use of blood thinners (typically Warfarin) is required to prevent blood from clotting inside the mechanical pump.

  • Daily Maintenance: The driveline exit site requires meticulous daily cleaning and sterile dressing changes to prevent serious infections.

  • Activity Restrictions: While most return to an active life, swimming and soaking in baths are prohibited to keep the exit site completely dry.

  • Significant Longevity: One-year survival is approximately 80% to 85%, offering years of life to those with otherwise terminal heart failure.

  • Improved Quality of Life: Most patients see a dramatic reduction in shortness of breath and can return to activities like walking, gardening, and traveling.

  • Organ Protection: By improving systemic blood flow, the LVAD helps protect the kidneys and liver from damage caused by chronic congestion.

  • Advanced Technology: Newer "fully levitated" centrifugal pumps have significantly reduced the risk of stroke and mechanical pump malfunctions.

  • Bridge to Transplant: Successfully keeps patients in peak physical condition so they are ready when a donor heart becomes available.

ECMO Cannulation
ECMO Cannulation

ECMO (Extracorporeal Membrane Oxygenation) Cannulation is a critical surgical or percutaneous procedure where large-bore tubes (cannulas) are inserted into major blood vessels to connect a patient to an ECMO machine. This "heart-lung" bypass technology acts as a temporary life-support system by taking over the work of the heart and/or lungs, allowing these organs to rest and heal. Advances in portable platforms and AI-driven monitoring have expanded the use of this therapy from the ICU to emergency field transport.

  • Severe ARDS: When the lungs are so damaged (e.g., from pneumonia) that a ventilator can no longer maintain oxygen levels.

  • Cardiogenic Shock: When the heart is unable to pump enough blood to support the body’s vital organs, often after a massive heart attack.

  • Bridge to Transplant: To keep patients alive and stable while they wait for a donor heart or lung.

  • E-CPR (Extracorporeal CPR): Used during active cardiac arrest in specialized trauma centers to restore circulation when traditional CPR fails.

  • Post-Surgical Recovery: When a patient’s heart or lungs are "stunned" and unable to function independently after complex cardiac surgery.

  • Veno-Venous (VV) ECMO (Lung Support): Blood is drained from a large vein, oxygenated by the machine, and returned to the venous system. It supports the lungs only.

  • Veno-Arterial (VA) ECMO (Heart & Lung Support): Blood is drained from a vein and returned to an artery, bypassing both the heart and lungs to provide full circulatory support.

  • Veno-Arterio-Venous (VAV) ECMO: A hybrid configuration used when a patient needs both the cardiac support of VA and additional oxygenation for the lungs.

  • Dual-Lumen Cannulation: Using a single, specialized tube inserted in the neck that both drains and returns blood, allowing for earlier patient movement.

  • Distal Perfusion Cannula: In leg-based VA ECMO, a smaller third cannula is often added to ensure blood flow reaches the lower leg and prevent limb injury.

  • Preparation: The procedure is done in an emergency setting or OR; the patient is heavily sedated and given blood thinners (Heparin) to prevent clots in the machine.

  • Percutaneous Access: Using the "Seldinger Technique" where needles and wires guide the cannulas through the skin into the femoral (groin) or jugular (neck) vessels.

  • Surgical Cut-down: If vessels are too small or damaged, a surgeon makes an incision to directly see and enter the artery or vein.

  • Imaging Guidance: Real-time Ultrasound and Transesophageal Echo (TEE) are used to ensure the cannula tips are perfectly positioned near the heart.

  • Connection: Once the tubes are secured, they are connected to the "primed" ECMO circuit, and the machine gradually takes over organ function.

  • Emergency Nature: As an emergency life-support measure, formal preparation time is often zero; the medical team acts immediately once the decision is made.

  • Hemodynamic Stabilization: Medications (vasopressors) are used to keep blood pressure high enough to allow for safe cannula insertion.

  • Rapid Blood Cross-matching: The procedure involves moving large volumes of blood outside the body, so blood products must be ready.

  • Anticoagulation Baseline: Checking the patient's clotting status to calibrate the blood-thinning medication required for the ECMO circuit.

  • Consent: If the patient is unconscious, emergency consent is obtained from the next of kin.

  • Point-of-Care Ultrasound (POCUS): To check the size and health of the femoral and jugular vessels for the largest possible cannula fit.

  • Arterial Blood Gas (ABG): To confirm that oxygen levels are critically low despite maximum ventilator support.

  • Echocardiogram: To evaluate right and left heart function, which determines whether VV or VA ECMO is needed.

  • Chest X-ray: To assess the severity of lung "white-out" or damage before the procedure begins.

  • Coagulation Profile: Testing PT/INR and platelet counts to assess the risk of bleeding during the invasive insertion.

  • ICU Monitoring: Patients are usually kept in a medically induced coma initially, though modern protocols emphasize "Awake ECMO" where possible to keep muscles strong.

  • Decannulation: Once the heart or lungs show signs of healing (verified by "trialing off" the machine), the cannulas are surgically removed.

  • Physical Rehabilitation: Because patients are bedbound for days or weeks, intensive physical therapy is required to regain the ability to walk.

  • Long-term Follow-up: Survivors may experience "Post-ICU Syndrome," requiring respiratory therapy and psychological support.

  • Organ Monitoring: Regular checks on kidney and liver function are necessary, as these organs can be stressed during the period of support.

  • The "Ultimate" Life Support: Provides a critical window of time—days to weeks—for the heart and lungs to heal from otherwise fatal injuries.

  • Restores Oxygen Levels: Immediately corrects life-threatening hypoxia that would otherwise lead to brain death.

  • Reduces Ventilator Injury: Allows doctors to turn down the pressure on ventilators, preventing further scarring of the lungs (barotrauma).

  • High Survival Rates: Modern survival rates for neonatal respiratory failure on ECMO are as high as 75%.

  • Bridge to Permanent Solutions: Acts as a vital safety net for patients waiting for a heart transplant or a long-term LVAD pump.

External Beam Radiation Therapy

Surgery for bone and soft tissue tumors (primarily sarcomas) is a highly specialized field where the goal is to remove the cancer completely while preserving as much physical function and appearance as possible. Because these tumors often grow near major nerves, blood vessels, and joints, the surgery requires meticulous planning. The standard of care involves using 3D-printed models and computer-assisted navigation to achieve precise "clear margins" while sparing the limb.

  • Primary Bone Cancer: For malignancies such as osteosarcoma, Ewing sarcoma, or chondrosarcoma.

  • Soft Tissue Sarcoma: When a cancerous mass is identified in the muscle, fat, nerves, or connective tissues (e.g., liposarcoma or synovial sarcoma).

  • Benign but Aggressive Tumors: For non-cancerous growths like Giant Cell Tumors (GCT) that can destroy local bone if not removed.

  • Metastatic Bone Disease: When cancer from another organ (like the lung or breast) has spread to a bone and threatens to cause a fracture.

  • Recurrent Tumors: When a previously treated tumor returns in the same anatomical compartment.

The "margin" is the area of healthy tissue removed along with the tumor. Surgeons use specific classifications to define how much tissue to take:

  • Intralesional (Curettage): The tumor is scraped out from the inside. This is generally used only for benign (non-cancerous) bone tumors.

  • Marginal Excision: The tumor is removed exactly at its edge (pseudocapsule). This is often used for benign soft tissue tumors like lipomas.

  • Wide Excision: The tumor is removed with a continuous "cuff" of healthy tissue surrounding it. This is the standard of care for malignant tumors (sarcomas) to ensure no microscopic cells are left behind.

  • Radical Resection: Removal of the entire anatomical compartment (the whole bone or muscle group) containing the tumor.

Once a tumor is removed, the resulting gap must be rebuilt to restore strength and mobility:

  • Biological Reconstruction: Uses the body's own ability to heal.
    Allograft: Uses donated bone from a bone bank to act as a scaffold.
    Autograft: Uses the patient's own bone, such as the fibula (calf bone), often moved with its blood vessels intact.

  • Mechanical Reconstruction: Uses artificial megaprostheses (large metal implants) to replace joints or long sections of bone. These allow for immediate weight-bearing.

  • Distraction Osteogenesis: Using devices like the Ilizarov fixator to slowly "grow" new bone to fill a gap.

Because children's bones are still growing, surgery requires unique solutions to prevent leg-length discrepancies:

  • Expandable Prostheses: Metal implants that can be lengthened non-invasively using magnets as the child grows to keep the legs equal in length.

  • Rotationplasty: A specialized procedure where the middle of the leg is removed, and the lower leg is rotated 180° and reattached to the thigh. The ankle then functions as a knee joint.

  • Growth Plate Sparing: Advanced 3D navigation allows surgeons to remove tumors while saving the natural growth plates whenever possible.

[Image showing an expandable "growing" prosthesis for a pediatric patient]

  • Anesthesia: Performed under general anesthesia. Advanced nerve blocks are often used to provide long-term pain relief to the limb.

  • Computer-Assisted Navigation: Surgeons use "GPS for surgery" to follow a pre-planned 3D map, ensuring they cut exactly where the cancer ends and healthy bone begins.

  • Multidisciplinary Collaboration: If the tumor involves major blood vessels or leaves a large skin defect, vascular and plastic surgeons work simultaneously to perform bypasses or skin flaps.

  • 3D-Printed Cutting Guides: Custom-made templates are placed on the bone during surgery to guide the saw blade with sub-millimeter precision.

  • Intraoperative Imaging: Using O-arm or C-arm technology to verify the placement of implants and the completeness of the resection before the patient leaves the OR.

  • Tumor Board Review: Your case is reviewed by a team of radiologists, pathologists, and oncologists to determine the best sequence of treatment.

  • 3D Virtual Planning: Surgeons use MRI/CT scans to create a virtual 3D model of your limb to practice the surgery before the actual procedure.

  • Physical Therapy Baseline: Establishing a baseline for your limb's strength and range of motion to guide your post-operative recovery.

  • Nutritional Optimization: Ensuring high protein intake to support the extensive bone and tissue healing required.

  • "Pre-hab" Exercise: Strengthening the healthy limbs to prepare for the period of restricted weight-bearing on the operated side.

  • High-Resolution MRI: The most critical test for visualizing the tumor's relationship to muscles, nerves, and blood vessels.

  • Systemic CT Scan: To rule out "skip lesions" or spread to the lungs, which is common with certain sarcomas.

  • PET-CT Scan: To identify any other areas of metabolic activity that might indicate the cancer has moved elsewhere.

  • Core Needle Biopsy: To confirm the exact grade and type of the sarcoma, which dictates how wide the surgical margins must be.

  • Angiography: To map out the blood supply of the limb, especially if a vascularized bone graft (autograft) is planned.

  • Hospital Stay: Typically 5 to 10 days depending on the complexity of the reconstruction and the level of pain management needed.

  • Rehabilitation: This is the most critical phase. Physical therapy usually begins within 24–48 hours and can continue for 6 to 12 months.

  • Weight-Bearing Rules: Depending on the type of bone graft or prosthesis, you may need to use crutches or a walker for 3 to 6 months while the bone heals.

  • Mechanical Wear: Over many years, metal megaprostheses can wear out or loosen, potentially requiring a revision surgery.

  • Infection Monitoring: Large implants and pre-operative chemotherapy can increase the risk of infection, requiring long-term monitoring.

  • Limb Salvage Success: Over 90% of sarcoma patients can have their limbs saved rather than amputated, with no loss in survival rates.

  • Precise Margin Control: Advanced 3D navigation has significantly lowered the risk of local recurrence by ensuring no microscopic cells are missed.

  • Functional Recovery: Modern megaprostheses and biological grafts allow many patients to return to walking, swimming, and an active lifestyle.

  • Growth Management: Expandable technology ensures that children can reach their full height without the need for multiple major open surgeries.

  • Integrated Care: When surgery is combined with modern immunotherapy and targeted radiation, the long-term cure rates for sarcomas are higher than ever before.

Internal Radiation (Brachytherapy)

Internal radiation, also known as brachytherapy, is a specialized cancer treatment where radioactive material is placed directly inside or very close to a tumor. This allows doctors to deliver a much higher, more concentrated dose of radiation to the cancer cells while significantly reducing the exposure to nearby healthy organs. Real-time Image-Guided Brachytherapy (IGBT) using MRI has become a primary standard for achieving this level of precision.

  • Cervical or Uterine Cancer: Often used after external radiation to provide a "boost" dose directly to the cervix or vaginal cuff.

  • Prostate Cancer: For localized disease, either as a standalone treatment using permanent seeds or as a high-dose temporary boost.

  • Breast Cancer: Following a lumpectomy, to provide Accelerated Partial Breast Irradiation (APBI) in a shorter timeframe than traditional radiation.

  • Skin Cancer: For certain non-melanoma skin cancers on the face or nose where surgery might cause significant scarring.

  • Head and Neck Cancer: For tumors of the tongue, lip, or floor of the mouth that require a localized, intense dose.

  • HDR (High-Dose Rate): A high-strength radioactive source is pulsed into the body through a catheter for about 10 to 20 minutes and then completely removed.

  • LDR (Low-Dose Rate): Radioactive "seeds" are permanently or temporarily implanted, releasing radiation slowly over several days or months.

  • PDR (Pulsed-Dose Rate): A hybrid approach where radiation is delivered in short pulses every hour, typically over one or more days in a hospital setting.

  • Permanent Seed Implants: Common in prostate cancer; tiny seeds (the size of a grain of rice) are left in the body and become inactive over time.

  • Temporary Brachytherapy: The radioactive source (such as ribbons or wires) is removed from the body once the treatment session or hospital stay is complete.

  • Anesthesia: Depending on the site, the procedure is performed under local, spinal, or general anesthesia (common for gynecologic or prostate cases).

  • Applicator Placement: Doctors use catheters, needles, or specialized applicators (such as tandem and ovoid) to create a pathway to the tumor.

  • Image Guidance: Real-time ultrasound, CT, or MRI is used to ensure the applicators are positioned with sub-millimeter accuracy.

  • Afterloading: A computerized machine (the afterloader) sends the radioactive source into the applicators for the precise duration calculated by the physics team.

  • Source Retraction: Once the treatment is finished, the source is safely retracted back into the shielded machine, leaving no radiation in the patient (for HDR).

  • Imaging Workup: A high-resolution MRI or CT scan to measure the exact volume of the tumor and its proximity to organs like the bladder or rectum.

  • Bowel Preparation: Following a liquid diet or using an enema if the treatment area is near the pelvis to ensure clear imaging.

  • Fasting (NPO): Adhering to strict fasting protocols if the procedure requires general or spinal anesthesia.

  • Medication Review: Stopping blood thinners or anti-inflammatory drugs several days before the needle or catheter insertion.

  • Baseline Symptom Check: Documenting current urinary or bowel habits to monitor for any changes following the procedure.

  • Pelvic or Transrectal Ultrasound: To map the anatomy and determine the number of needles or seeds required for the specific site.

  • Cardiac/Respiratory Clearance: A chest X-ray and EKG to ensure the heart and lungs are healthy enough for anesthesia.

  • Coagulation Profile (PT/INR): To ensure the blood clots normally before any needles are inserted into the tissue.

  • Urinalysis: To rule out any active urinary tract infections before performing prostate or gynecologic brachytherapy.

  • Kidney Function (Creatinine): Assessed especially if contrast dye will be used during the planning CT scan.

  • Radiation Safety: For HDR, you are not radioactive and can be around others immediately. For permanent seeds, you may need to avoid close contact with children or pregnant women for a few weeks.

  • Localized Soreness: Expect mild swelling, bruising, or tenderness at the insertion site for 2 to 5 days.

  • Urinary/Bowel Changes: Temporary urgency or frequency may occur if the treatment area was located near the bladder or rectum.

  • Tissue Health: For gynecologic cases, using a vaginal dilator or prescribed creams may be recommended to prevent narrowing (stenosis) and maintain health.

  • Activity Resumption: Most patients return to their normal daily routines within a few days once the initial soreness fades.

  • Maximized Dose: Delivers a "lethal" dose to the tumor that is significantly higher than what can be safely achieved with external beams alone.

  • Extreme Precision: Because the source is inside the tumor, the radiation dose drops off rapidly, sparing healthy tissues just millimeters away.

  • Shorter Treatment Times: Some HDR protocols allow a full course of radiation to be completed in just 1 to 5 days instead of several weeks.

  • Organ Preservation: Provides an alternative to major surgery for certain cancers, preserving the function of the breast, prostate, or tongue.

  • Adaptive Planning: Modern 3D/4D planning allows doctors to adjust the dose in real-time based on the exact shape of the tumor on the day of treatment.

Palliative Radiation

Palliative Radiation Therapy is the use of high-energy X-rays to shrink tumors that are causing pain, pressure, or functional blockages in patients with advanced or metastatic cancer. Unlike curative radiation, the goal is not to eliminate the cancer entirely, but to improve quality of life and relieve distressing symptoms. It is recognized as a critical component of "supportive oncology," providing rapid relief for patients with high-burden disease.

  • Bone Pain: To relieve deep, aching pain caused by metastases and to strengthen weakened bones to prevent fractures.

  • Spinal Cord Compression: A medical emergency where a tumor presses on the spinal cord; radiation is used to prevent permanent paralysis.

  • Neurological Symptoms: To reduce headaches, seizures, or balance issues caused by tumors that have spread to the brain.

  • Obstruction Relief: To shrink masses that are making it difficult for a patient to breathe (airway) or swallow (esophagus).

  • Hemostasis (Bleeding Control): To stop persistent bleeding from tumors in the lung, bladder, stomach, or cervix.

  • Superior Vena Cava (SVC) Syndrome: To relieve facial swelling and breathing distress caused by a tumor pressing on the main vein to the heart.

  • Hypofractionation: Doctors use fewer, larger doses of radiation compared to curative treatment to minimize hospital visits.

  • Short Courses: A full course may last only 1 to 10 days (e.g., a single high-dose fraction for bone pain or a 5-day course).

  • Session Length: Each treatment visit takes about 10–15 minutes, with the actual radiation delivery lasting only 2 minutes.

  • Targeted Delivery: Treatment is localized specifically to the "problem spot" (e.g., a specific vertebrae or the hip) rather than the whole organ.

  • Convenience: Modern protocols prioritize "Rapid Access" clinics where simulation and the first treatment can often happen on the same day.

  • Symptom Mapping: The Radiation Oncologist identifies the specific site causing the most distress through a physical exam and imaging.

  • Simulation: A quick CT scan is performed to mark the exact area. Simple planning (3D-CRT) is often used to get treatment started as fast as possible.

  • Positioning: The patient is placed comfortably on the treatment table; specialized cushions are used to ensure they can remain still despite pain.

  • Beam Delivery: The Linear Accelerator (LINAC) rotates around the patient to deliver the dose precisely to the tumor mass.

  • Monitoring: The clinical team monitors the patient's pain levels daily to adjust medications if a temporary "pain flare" occurs.

  • Pain Management: Ensuring the patient has adequate pain medication to lie flat on the treatment table for the duration of the session.

  • Imaging Review: Coordinating with the oncology team to ensure the most recent PET-CT or MRI is used to define the treatment field.

  • Fasting (Site Dependent): For abdominal or pelvic radiation, brief fasting or a specific bladder protocol may be requested to improve accuracy.

  • Mobility Assessment: Determining if the patient requires a stretcher or specialized transport to reach the radiation bunker safely.

  • Goals of Care: Confirming that the patient and family understand the intent of the treatment is comfort rather than cure.

  • Diagnostic CT or MRI: To determine the exact dimensions of the tumor causing the obstruction or pain.

  • Plain X-rays: Often used for bone metastases to check the "Mirels' Score" (the risk of the bone breaking).

  • Blood Counts (CBC): To ensure platelets are high enough if the goal is to stop active bleeding.

  • Neurological Exam: For brain or spinal treatments, to establish a baseline of strength and sensation.

  • Steroid Protocol: Patients with brain or spinal tumors are often started on medications to reduce swelling before radiation begins.

  • Speed of Relief: Pain relief usually begins within 1 to 2 weeks after completing the treatment, though some feel better sooner.

  • Pain Flare: Occasionally, bone pain may temporarily worsen for 24–48 hours after the first dose; this is managed with a short boost of medication.

  • Fatigue: The most common side effect; patients are encouraged to rest and prioritize activities that bring them the most joy.

  • Skin Care: The treated area may look like a mild sunburn; it is important to keep the skin moisturized with oncologist-approved creams.

  • Re-treatment: If pain returns months later, the same area can sometimes be safely re-radiated if the initial dose was kept low.

  • High Success Rates: Provides significant pain relief for 70–80% of patients with bone metastases.

  • Emergency Intervention: Acts as a non-surgical way to decompress the spinal cord and preserve the ability to walk.

  • Brain Preservation: For brain metastases, Stereotactic Radiosurgery (SRS) can treat specific spots in a single day, sparing the rest of the brain from side effects.

  • Non-Invasive Control: Offers a way to stop internal bleeding or open an airway without the risks of major surgery in a frail patient.

  • Holistic Quality of Life: By reducing pain and symptoms, it allows patients to spend more meaningful, high-quality time with their families.

CyberKnife (Radiosurgery)

CyberKnife is a non-invasive, robotic radiosurgery system used to treat both cancerous and non-cancerous tumors throughout the body with extreme precision. Despite its name, it involves no scalpels or incisions; instead, it uses a robotic arm to deliver high-dose radiation beams from thousands of unique angles.

  • Diagnosis of malignant or benign tumors in the brain, spine, or body organs.

  • Seeking a non-surgical alternative for acoustic neuromas or meningiomas.

  • Cancers of the lung, prostate, liver, pancreas, or kidney.

  • Chronic facial pain due to Trigeminal Neuralgia.

  • Arteriovenous malformations (AVMs) or certain heart arrhythmias.

  • True Robotic Precision: The only system featuring a linear accelerator mounted on a robotic arm for sub-millimeter accuracy.

  • Real-Time Tracking: Uses AI-driven imaging to track tumor movement from breathing and automatically adjusts the beam.

  • Frameless Treatment: Completely frameless approach that eliminates the need for rigid head or body frames.

  • Sparing Healthy Tissue: High-precision targeting designed to protect the surrounding healthy organs and tissue.

  • Treatment Flexibility: Delivers both Stereotactic Radiosurgery (SRS) and Stereotactic Body Radiation Therapy (SBRT).

  • Brain and Spine: Treatment for malignant and benign tumors, including acoustic neuromas.

  • Body Organs: Specialized protocols for lung, prostate, liver, pancreas, and kidney cancers.

  • Functional Disorders: Effective for Trigeminal Neuralgia (facial pain) and AVMs.

  • Heart Conditions: Used in specific clinical settings to treat certain heart arrhythmias.

  • Versatile Application: Capable of treating complex tumors located anywhere in the body.

  • Outpatient Procedure: Each session lasts between thirty and ninety minutes with no hospital stay required.

  • Treatment Sessions: Typically requires only one to five sessions compared to dozens for traditional radiation.

  • No Anesthesia: The procedure is painless and does not require general anesthesia.

  • Immediate Return: Patients can usually return to their normal daily activities immediately after treatment.

  • Comfortable Setting: Patients lie comfortably during the session while the robotic arm moves around them.

  • General Effects: Patients may experience temporary fatigue, nausea, or localized skin irritation.

  • Brain Treatment: Potential for brain swelling or tissue changes (necrosis) in rare cases.

  • Prostate Treatment: Possible temporary urinary urgency or minor changes in bowel habits.

  • Location Dependent: Specific side effects vary based on the exact area of the body being treated.

  • Tolerance: The procedure is generally well-tolerated by most patients.

  • Eliminates the need for invasive surgery and the associated recovery time.

  • Provides a life-saving option for tumors that are otherwise considered inoperable.

  • Minimizes radiation exposure to healthy tissues and critical organs.

  • Offers a highly flexible treatment schedule with significantly fewer hospital visits.

  • Maintains patient quality of life by allowing normal activities throughout the treatment course.

Medanta Hospital, Ranchi

Dr Anil Bhan
Dr Anil Bhan
Cardiac Surgeon
Medanta - The Medicity, Gurugram
45+years experience
Dr Arun Garg
Dr Arun Garg
Neurologist
Medanta - The Medicity, Gurugram
41+years experience
Dr Arvind Kumar
Dr Arvind Kumar
Lung Transplant Surgeon
Medanta - The Medicity, Gurugram
44+years experience
Dr Ashok Kumar Vaid
Dr Ashok Kumar Vaid
Hemato-Oncologist, Medical Oncologist
Medanta - The Medicity, Gurugram
42+years experience
Dr Ashok Rajgopal
Dr Ashok Rajgopal
Orthopedic Surgeon, Joint Replacement Surgeon
Medanta - The Medicity, Gurugram
50+years experience
Dr Deepak Sarin
Dr Deepak Sarin
Head & Neck Onco-Surgeon
Medanta - The Medicity, Gurugram
32+years experience
Dr Harsh Vardhan Puri
Lung Transplant Surgeon, Thoracic Surgeon, Thoracic Onco-Surgeon
Medanta - The Medicity, Gurugram
20+years experience
Dr Manish Vaish
Dr Manish Vaish
Spine Surgeon, Neurosurgeon
Medanta Super Specialty Hospital, Noida
30+years experience
Dr Manoj Kumar Singhal
Nephrologist, Kidney Transplant Surgeon
Medanta Super Specialty Hospital, Noida
39+years experience
Dr Naresh Trehan
Dr Naresh Trehan
Cardiac Surgeon
Medanta - The Medicity, Gurugram
57+years experience
Dr Narmada Prasad Gupta
Urologist
Medanta - The Medicity, Gurugram
56+years experience
Dr Praveen Chandra
Dr Praveen Chandra
Interventional Cardiologist
Medanta - The Medicity, Gurugram
37+years experience
Dr Rajeev Agarwal
Dr Rajeev Agarwal
Surgical Oncologist
Medanta - The Medicity, Gurugram
47+years experience
Dr Sanjay Gogoi
Dr Sanjay Gogoi
Urologist, Kidney Transplant Surgeon, Uro-Oncologist
Medanta - The Medicity, Gurugram
36+years experience
Dr Sudhir Dubey
Dr Sudhir Dubey
Neurosurgeon
Medanta - The Medicity, Gurugram
31+years experience
Dr Sudipto Pakrasi
Dr Sudipto Pakrasi
Glaucoma Specialist, Cornea Specialist, Cataract Surgeon
Medanta - The Medicity, Gurugram
44+years experience
Dr Tarun Grover
Dr Tarun Grover
Vascular Surgeon
Medanta - The Medicity, Gurugram
31+years experience
Dr Tejinder Kataria
Dr Tejinder Kataria
Radiation Oncologist
Medanta - The Medicity, Gurugram
42+years experience

May we help you?

Enter digits only (6-15 digits). We'll add your country code.